Loading ...
Loading ...
Loading ...
6
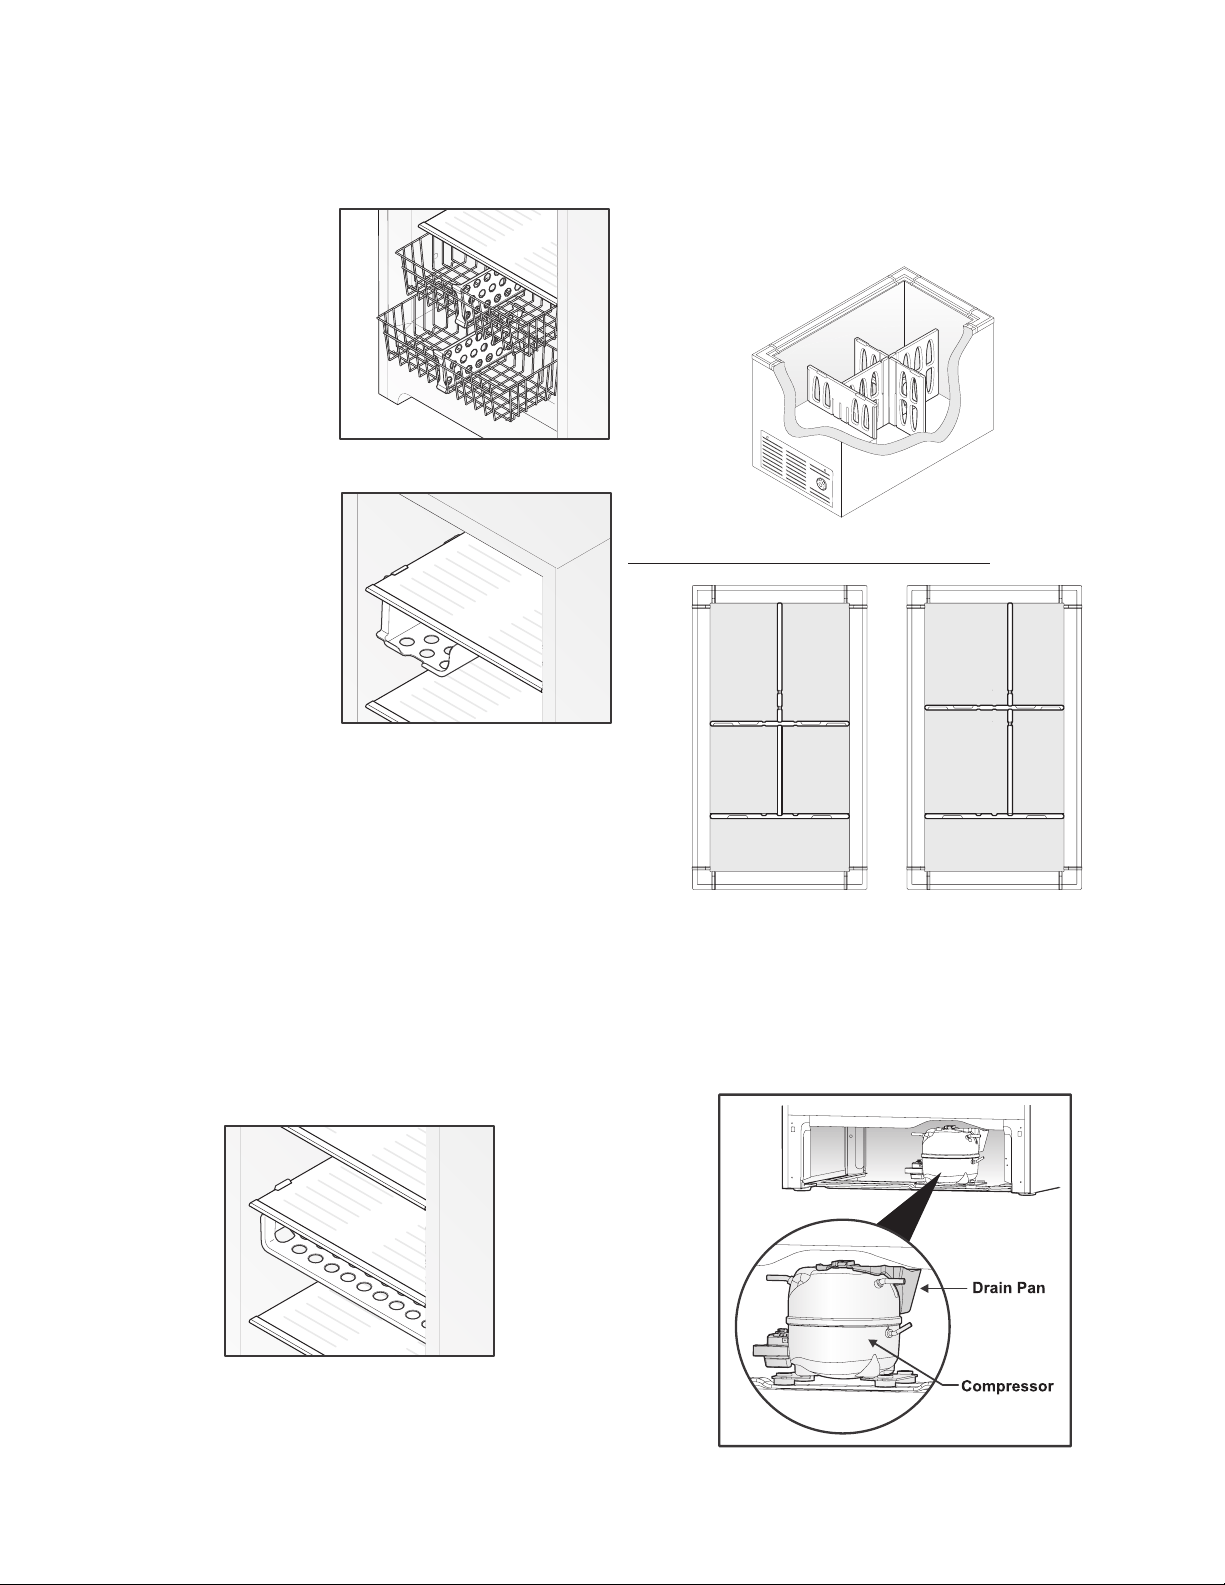
Drop Front (Some Upright Models)
The drop front, located at the bottom of the freezer, provides a
separate compartment for small irregular shaped items. Lift the
front up and out to remove.
Basket Divider (Some Upright Models)
Small Item Shelf
(Some Upright Models)
Use this shelf to store several
of your single-serving
microwavable dinners or other
small items that you want to
keep in an easy-to-reach spot.
Pizza Shelf (Some Upright Models)
Here is the place to store up to four extra-large boxes of frozen pizza
without ever having to dig them out from beneath a pile of other
stored goods. To change the location of the pizza shelf: support
the bottom center of the shelf with one hand and use your other
hand to gently ease each support tab outward until they have all
dropped between the edge of the shelf and the liner wall. It may
help to slide the supporting shelf slightly to the side opposite that
in which you are removing the tabs in order to get a larger gap
between the edge of the supporting shelf and the liner wall.
Chest Divider (Some Chest Models)
Use these clever dividers to custom-arrange a variety of different-
sized storage bins in the bottom of your chest freezer. Use the
peel-n-stick labels found in your literature packet to help remind
you which items are stored where. If you have an item that isn’t
already covered by one of the pre-printed labels then use one of
the blank labels and a permanent marking pen to make your own
custom label. Labels can be peeled off when no longer needed
and replaced by new and different ones.
Examples of Chest Divider Configurations:
Compressor Mounted Drain Pan (Most Upright Frost
Free Models)
Most upright frost free freezers are equipped with a compressor
mounted drain pan that collects condensate during each defrost
cycle. This compressor mounted drain pan takes advantage of the
heat generated by the compressor to evaporate condensate water
so there is no need to empty the pan during each defrost cycle.
Next, locate the pizza shelf beneath the shelf nearest your desired
location and snap each tab upwards between the wire or glass
shelf and liner until the tab has snapped into place and is resting
on top of the supporting shelf. Repeat for each tab until all four are
firmly in place and then load with desired items.
Use these handy dividers to
keep the various items stored
in your baskets more
organized. To change the
location of the divider simply
slide your basket out, lift up on
each end of the divider until it is
disengaged from the basket,
place divider in the desired
location (make sure it is
between two vertical wires) and
press down firmly on each end
until it snaps into place.
Loading ...
Loading ...
Loading ...