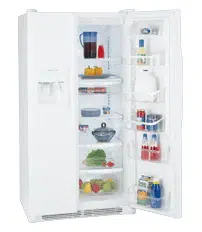
If your refrigerator will not fit through an entrance area, you can reduce its size by removing the doors. Check first by measuring the entrance.
1. Disconnect electrical supply.
2. Open both doors, then remove toe grille.
3. Close doors.
To Remove Refrigerator Door:
1. Remove top hinge cover screw on refrigerator door and remove cover.
2. Trace around hinge with soft lead pencil. This will make it easier to realign doors when they are replaced.
3. Remove top hinge and lift refrigerator door off bottom hinge pin. Set door aside.
4. Remove bottom hinge, if necessary.
5. Reverse this procedure to reinstall refrigerator door.
To Remove Freezer Door:
1. Disconnect water line coming from lower hinge of freezer door at connection located under front of freezer: Press outer ring against face of fitting, then pull to remove tube.
2. Remove top hinge cover screw on freezer door and remove cover.
3. Disconnect wiring harness connector plug at top hinge: place your thumbs on flat sides of each connector and bend both parts back and forth, then with firm grasp, pull both pieces apart.
4. Trace around hinge with soft lead pencil. This will make it easier to realign doors when they are replaced.
5. Remove top hinge, allowing wiring harness to pull through hinge and lift freezer door off of bottom hinge pin. Lay door down flat to avoid kinking water line.
6. Remove bottom hinge, if necessary.
7. Reverse this procedure to reinstall freezer door.
When both doors have been reinstalled, connect water line by inserting tube and push until mark touches face of fitting, replace toe grille and plug-in electrical power cord. Turn both temperature controls to center position. Adjust settings as necessary
Door Removal Instructions - Style 2
To prepare for removing the doors:
1. Make sure the electrical power cord is unplugged from the wall outlet.
2. Open both doors and remove the toe grille (as explained in the Installation Instructions that came with your appliance).
3 Remove any food from the door shelves.
4 Close the doors.
To remove the refrigerator top hinge cover:
1 Remove the three screws from each cover over the top door hinges.
2 Lift hinge cover straight up and off.
To remove the refrigerator door:
1. Trace lightly around the door’s top hinge with a pencil. This makes reinstallation easier.
2. Remove the two screws from the top hinge. Lift the door off of the bottom hinge and set it aside.
3 Remove the two bottom hinge screws and hinge if necessary.
To reinstall the refrigerator door, reverse the above steps.
To remove the freezer top hinge cover:
1. Remove the two screws from each cover over the top door hinges.
2. Lift hinge cover straight up and off.
To remove the freezer top hinge cover:
1. Remove the two screws from each cover over the top door hinges.
2. Lift hinge cover straight up and off.
To remove the freezer door:
1. Detach the multi-wire cable connector located above the top hinge. Grasp both sides of the connector firmly and pull apart.
2. Trace lightly around the hinge with a pencil. This makes reinstallation easier
3. Detach the water tube from the connector located below the freezer door. The connector releases when you press its outer sleeve inward.
4. Remove the screws from the top hinge and pull the multi-wire cable through it. Lift the door off of the bottom hinge.
5. Remove the two bottom hinge screws and hinge if necessary
6. Lay the door on its side to avoid damage to the water tube extending from the bottom hinge.
To reinstall the freezer door, reverse the above steps.
Handle Installation
1. Remove handles from carton and any other protective packaging.
2. Position freezer handle end caps over upper and lower pre-installed shoulder bolts (A) that are fastened into door, ensuring the holes for the set screws are facing towards the refrigerator door.
3. While holding handle firmly against door, fasten upper and lower Allen set screws (B) with supplied Allen wrench.
4. Repeat steps 2 and 3 to install refrigerator handle. Ensure the holes for the set screws are facing towards the freezer door.
Ensure Handle Set Screws are Facing Each Other with Doors Closed
Connecting Water Supply
Before Installing The Water Supply Line, You Will Need:
• Basic Tools: adjustable wrench, flat-blade screwdriver, and PhillipsTM screwdriver
• Access to a household cold water line with water pressure between 30 and 100 psi.
• A water supply line made of ¼ inch (6.4mm) OD, copper or stainless steel tubing. To determine the length of tubing needed, measure the distance from the ice maker inlet valve at the back of the refrigerator to your cold water pipe. Then add approximately 7 feet (2.1 meters), so the refrigerator can be moved out for cleaning (as shown).
• A shutoff valve to connect the water supply line to your household water system. DO NOT use a self-piercing type shutoff valve.
• Do not re-use compression fitting or use thread seal tape.
• A compression nut and ferrule (sleeve) for connecting a copper water supply line to the ice maker inlet valve.
To Connect Water Supply Line To Ice Maker Inlet Valve
1. Disconnect refrigerator from electric power source.
2. Place end of water supply line into sink or bucket. Turn ON water supply and flush supply line until water is clear. Turn OFF water supply at shutoff valve.
3. Remove plastic cap from water valve inlet and discard cap.
4. If you use copper tubing - Slide brass compression nut, then ferrule (sleeve) onto water supply line. Push water supply line into water valve inlet as far as it will go (¼ inch/6.4 mm). Slide ferrule (sleeve) into valve inlet and finger tighten compression nut onto valve. Tighten another half turn with a wrench; DO NOT over tighten. See Figure 1.
If you use braided flexible stainless steel tubing - The nut is already assembled on the tubing. Slide nut onto valve inlet and finger tighten nut onto valve. Tighten another half-turn with a wrench; DO NOT over-tighten. See Figure 2.
5. With steel clamp and screw, secure water supply line (copper tubing only) to rear panel of refrigerator as shown.
6. Coil excess water supply line (copper tubing only), about 2½ turns, behind refrigerator as shown and arrange coils so they do not vibrate or wear against any other surface.
7. Turn ON water supply at shutoff valve and tighten any connections that leak.
8 Reconnect refrigerator to electrical power source.
9. To turn ice maker on, lower wire signal arm.
Controls
Allowing Cooling Time Before Use
To ensure safe food storage, allow your refrigerator to operate with the doors closed for at least 8 to 12 hours before placing food inside. During this cooling period, you do not need to adjust the controls, which are preset at the factory.
Setting Cooling Temperatures
Your refrigerator comes with a state-of-the-art electronic digital control system. The system’s control panel is located at the top of the refrigerator compartment.
The two digital displays on the left half of the control panel indicate the current settings of your freezer and refrigerator compartments. Should you desire to see what the current accurate temperature is, place a separate thermometer inside the freezer or refrigerator compartment in the desired location.
TEMPERATURE ADJUSTMENT
To adjust the temperature to a higher or lower setting, press the Up (∧) or Down (∨) button closest to the display. The first time you press the button, the display shows current setting you entered. Each press of the button after that changes the setting by one
IF TEMPERATURE DISPLAYS FLASH...
If ever you see “OP” or “SH” flashing, it may indicate that the control system has detected a performance problem. Call your service representative, who can interpret the flashing message.
To maintain temperatures, a fan circulates air in the refrigerator and freezer compartments. For good circulation, do not block cold air vents with food items.
ALARMS
Power Fail
In the event of a power failure, the ‘power fail’ alarm will sound three times. The ‘power fail’ alarm is an audible alarm only and does not display in the control panel.
High Temperature
When a warm refrigerator is first powered on, the ‘power fail’ alarm will sound and the current set points will be displayed for a few seconds. After 20 minutes the ‘high temp’ alarm will sound if the freezer temperature is above 26°F or if the refrigerator temperature is above 55°F (or both are above).
If the unit is above the temperatures mentioned in the paragraph above, the affected compartment temperature display (refrigerator, freezer or both) on the control panel will display ‘HI’ and an alarm will sound. To disable the alarm press any key on the control panel. After which the control panel will then show the display temperature. The unit will continue to monitor the product temperatures for ‘high temp’ condition every 20 minutes. If the ‘high temp’ condition persists, the alarm will sound again and can be reset again. Contact a customer service representative if the high temp alarm continues.
The audible portion of the alarm will silence itself once the product temperature is below 26°F for the freezer temperature and 55°F for the refrigerator temperature. The control panel will still show ‘HI’ until it is acknowledged by the user by pressing any key on the control panel. After which the control panel will then show the display temperature.
Turning the Cooling system on and off
You can disable the cooling system in your refrigerator by pressing the On/Off button located on the left side of the temperature control panel. To ensure that you do not accidentally turn off the cooling system, the button does not work unless you press and hold it for three seconds. Once you disable the cooling system, all refrigeration to the freezer and refrigerator compartments stops. To turn the cooling system back on, you must again press and hold the On/Off button for three more seconds. Controls will display OF°F/OF°F when turned off.
Storage Features
Glass Shelf Adjustment
Refrigerator shelves are easily adjusted to suit individual needs. Before adjusting the shelves, remove all food. Shelves are supported at the back of the refrigerator.
To adjust shelves:
1. Lift front edge up.
2. Pull shelf out.
Replace the shelf by inserting the hooks at rear of the shelf into the wall bracket. Lower the shelf into the desired slots and lock into position.
Door storage
Door bins and shelves are provided for convenient storage of jars, bottles, and cans. Frequently used items can be quickly selected.
Some models have door bins that can accommodate gallon-sized plastic drink containers and economy-sized jars and containers. Some bins are adjustable for maximum storage capacity.
The dairy compartment, which is warmer than the general food storage section, is intended for short-term storage of cheese, spreads, or butter.
Fresh Drawers with Humidity Control (some models)
The fresh drawers, located under the bottom refrigerator shelf, are designed for storing fruits,vegetables, and other fresh produce. The fresh drawers feature humidity control which allows you to adjust the humidity within the drawer. This can extend the life of fresh vegetables that keep best in high humidity. Wash items in clear water and remove excess water before placing them in the crispers. Items with strong odors or high moisture content should be wrapped before storing.
Crispers
Crispers allow you the flexibility to store any manner of items including fruits, vegetables, nuts, etc. Crispers do not feature humidity controls.
Deli Drawer (some models)
Some models are equipped with a Deli Drawer for storage of luncheon meats, spreads, cheeses and other deli items. This drawer does not have a separate temperature control.
Automatic Ice & Water Dispenser
Priming the Water Supply System
Your refrigerator’s water supply system includes several tubing lines, an advanced water filter, a distribution valve bank, and a reserve tank (some models) to ensure ample supply to the ice and water dispenser at all times. This system needs to be completely filled with water when first connected to an external supply line
To prime the water supply system:
1. Begin by pressing and holding a drinking glass against the water dispenser paddle.
2. Keep the glass in this position until water comes out of the dispenser. It may take about 1½ minutes.
3. Continue dispensing water for about four minutes to flush the system and plumbing connections of any impurities (stopping to empty the glass as necessary).
Ice Maker Operation & Care
The ice maker, ice bin, and dispenser feeding mechanism are located in the top of the freezer compartment. After the refrigerator is installed properly and has cooled for several hours, the ice maker can produce ice within 24 hours. It can completely fill an ice bin in about two days.
Ice Production: What to Expect
How Much Ice Will a Side Mounted Ice Maker Produce in 24 Hours?
A side-mounted ice maker will produce 4 to 4.5 pounds of ice every 24 hours, depending on usage conditions. Ice is produced at a rate of 8 cubes every 75 to 90 minutes.
Using the Ice Maker after Installation
Before making ice for the first time, be sure to prime the water supply system. Air in new plumbing lines can result in two or three empty ice maker cycles. Furthermore, if the system is not flushed, the first ice cubes may be discolored or have an odd flavor.
Turning the SIDE MOUNTED Ice Maker On and Off
To begin ice production, lower the wire signal arm to the DOWN or ON position. The ice maker turns off automatically when the ice container becomes full. To stop the ice maker, raise the wire signal arm until it clicks and locks in the UP or OFF position.
Ice Maker/Dispenser Tips
• Ice cubes stored too long may develop an odd flavor. Empty the ice container as explained below.
• Occasionally shake the ice container to keep ice separated.
• If your refrigerator is not connected to a water supply or the water supply is turned off, turn Off the ice maker.
• If you need a large quantity of ice at one time, it is best to get cubes directly from the ice container.
• The following sounds are normal when the ice maker is operating:
- Motor running
- Ice dropping into ice container
- Water valve opening or closing
- Ice loosening from tray
- Running water
• When dispensing ice, you will hear a snapping or clicking sound when the ice chute opens and closes.
• Turn Off the ice maker when cleaning the freezer and during vacations.
- If you turn Off the ice maker for a long period of time, you should also turn off the water supply valve.
Cleaning the Ice Maker
Clean the ice maker and ice bin at regular intervals, particularly before you take a vacation or move.
To clean the ice maker:
1. Turn Off the ice maker.
2. Remove the ice bin by lifting up and out.
3. Empty and carefully clean the ice bin with mild detergent. Rinse with clear water. Do not use harsh or abrasive cleaners.
4. Allow the ice bin to dry completely before replacing in the freezer.
5. Remove ice chips and clean the ice bin shelf and the freezer door chute.
6. Replace the ice bin. Turn On the ice maker to resume ice production.
Remove and empty the ice storage bin if:
• An extended power failure (one hour or longer) causes ice cubes in the ice storage bin to melt and freeze together, jamming the dispenser mechanism.
• You do not use the ice dispenser frequently. Ice cubes will freeze together in the bin, jamming the dispenser mechanism.
Remove the ice storage bin and shake to loosen the cubes or clean as explained above.
Changing the Filter
Locating the Filter
Your refrigerator is equipped with a water filtering system. The water filter system filters all dispensed drinking water, as well as the water used to produce ice.
Water Filter
The water filter is located at the top right side of the refrigerator compartment.
Replacing the Water Filter
In general, you should change the water filter every six months to ensure the highest possible water quality. Water Filter Status on the user interface prompts you to replace the filter after a standard amount of water (200 gallons/757 liters for PureSource UltraTM and PureSource 3TM)has flowed through the system.
If your refrigerator has not been used for a period of time (during moving for example), change the filter before reinstalling the refrigerator
Ordering Replacement Filters
To order your replacement filters, please visit our online store at the page, by calling toll-free at 877-808-4195, or by visiting the dealer where you purchased your refrigerator. Frigidaire recommends that you order extra filters when you first install your refrigerator, and that you replace your filters at least once every six months.
Here are the product numbers to request when ordering:
PureSource UltraTM Water Filter Part# ULTRAWF
PureSource 3TM Water Filter Part #WF3CB
More about your Advanced Water Filter
Do not use with water that is microbiologically unsafe or of unknown quality without adequate disinfection before or after the system. Systems certified for cyst reduction may be used on disinfected waters that may contain filterable cysts.
Test & certification results:
• Rated Capacity - 200 gallons/757 liters for PureSource UltraTM and PureSource 3TM ice and water filter
• Rated service flow - .50 gallons per minute
• Operating Temp.: Min. 33°F, Max. 100°F
• Maximum Rated Pressure - 100 pounds per square inch
• Recommended Minimum Operating Pressure: 30 pounds per square inch
To replace your PureSource 3TM water filter:
It is not necessary to turn the water supply off to change the filter. Be ready to wipe up any small amounts of water released during the filter replacement.
1. Turn Off the ice maker.
2. Remove the filter by pushing on the end/face of the filter.
3. Slide the old water filter cartridge straight out of the housing and discard it.
4. Unpackage the new filter cartridge. Using the alignment guide, slide it gently into the filter housing until it stops against the snap-in connector at the back of the housing.
5. Push firmly until the cartridge snaps into place (you should hear a click as the cartridge engages the snap-in connector).
6. Press a drinking glass against the water dispenser while checking for any leaks at the filter housing. Any spurts and sputters that occur as the system purges air out of the dispenser system are normal.
7. After filling one glass of water, continue flushing the system for about four minutes.
8. Turn On the ice maker.
9. Press and hold the Water Filter button on the Ice & Water Dispenser control panel for three seconds. When the display changes from “Red” to “Green,” the status has been reset.
Normal Operating Sounds and Sights
Understanding the Sounds you may Hear
Your new, high-efficiency refrigerator may introduce unfamiliar sounds. These sounds normally indicate your refrigerator is operating correctly. Some surfaces on floors, walls, and kitchen cabinets may make these sounds more noticeable.
Following is a list of major components in your refrigerator and the sounds they can cause:
A. Evaporator Refrigerant through the evaporator may create a boiling or gurgling sound.
B. Evaporator fan You may hear air being forced through the refrigerator by the evaporator fan.
C. Defrost heater During defrost cycles, water dripping onto the defrost heater may cause a hissing or sizzling sound. After defrosting, a popping sound may occur.
D. Automatic ice maker When ice has been produced, you will hear ice cubes falling into the ice bin.
E. Automatic defrost control These parts can produce a snapping or clicking sound when turning the cooling system on and off.
F. Condenser fan You may hear air being forced through the condenser.
G. Compressor Modern, high-efficiency compressors run much faster than in the past. The compressor may have a high-pitched hum or pulsating sound.
H.Water valve Makes a buzzing sound each time it opens to fill the ice maker.
I.Drain pan (not removable) You may hear water dripping into the drain pan during the defrost cycle.
J.Condenser May create minimal sounds from forced air.
K.Motorized damper May produce a light humming during operation.
L.Ice chute When dispensing ice, you will hear a snapping or clicking sound when the solenoid opens and closes the ice chute.
Care and Cleaning
Protecting your investment
Keeping your refrigerator clean maintains appearance and prevents odor build-up. Wipe up any spills immediately and clean the freezer and refrigerator compartments at least twice a year. When cleaning, take the following precautions:
• Never use CHLORIDE or cleaners with bleach to clean stainless steel.
• Do not wash any removable parts in a dishwasher.
• Always unplug the electrical power cord from the wall outlet before cleaning.
• Remove adhesive labels by hand. Do not use razor blades or other sharp instruments which can scratch the appliance surface.
• Do not remove the serial plate.
Do not use abrasive cleaners such as window sprays, scouring cleansers, brushes, flammable fluids, cleaning waxes, concentrated detergents, bleaches or cleansers containing petroleum products on plastic parts, interior doors, gaskets or cabinet liners. Do not use paper towels, metallic scouring pads, or other abrasive cleaning materials or strong alkaline solutions.
Care & Cleaning Tips
Part
What To Use
Tips and Precautions
Interior & Door Liners
• Soap and water
• Baking soda and water
Use two tablespoons of baking soda in one quart of warm water. Be sure to wring excess water out of a sponge or cloth before cleaning around controls, light bulb or any electrical part.
Door Gaskets
• Soap and water
Wipe gaskets with a clean soft cloth
Drawers & Bins
• Soap and water
Use a soft cloth to clean drawer runners and tracks.
Glass Shelves
• Soap and water
• Glass cleaner
• Mild liquid sprays
Allow glass to warm to room temperature before immersing in warm water
Toe Grille
• Soap and water
• Mild liquid sprays
• Vacuum attachment
Vacuum dust from front of toe grille. Remove toe grille (see Installation Instructions). Vacuum backside, wipe with sudsy cloth or sponge. Rinse and dry.
Exterior & Handles
• Soap and water
• Non Abrasive Glass Cleaner
Do not use commercial household cleaners containing ammonia, bleach or alcohol to clean handles. Use a soft cloth to clean smooth handles. DO NOT use a dry cloth to clean smooth doors.
Exterior & Handles (Stainless Steel Models Only)
• Soap and water
• Stainless Steel Cleaners
Never use CHLORIDE or cleaners with bleach to clean stainless steel. Clean stainless steel front and handles with non-abrasive soapy water and a dishcloth. Rinse with clean water and a soft cloth. Use a non-abrasive stainless steel cleaner. These cleaners can be purchased at most home improvement or major department stores. Always follow manufacturer’s instructions. Do not use household cleaners containing ammonia or bleach. NOTE: Always clean, wipe and dry with the grain to prevent scratching. Wash the rest of the cabinet with warm water and mild liquid detergent. Rinse well, and wipe dry with a clean soft cloth.
Replacing LED Bulbs
• Unplug refrigerator
• Wear gloves
• Remove light cover
• Replace old LED bulb
• Replace light cover
• Plug in the refrigerator
CAUTION: Wear gloves when replacing LED bulbs to avoid getting cut. Use same wattage when replacing LED bulb.
Before you Call
CONCERN
CAUSE
SOLUTION
AUTOMATIC ICE MAKER
Ice maker is not making any ice.
• Ice maker wire signal arm is in the "up" or OFF position.
• Ice maker has small cube caught in mechanism.
• Saddle valve on cold water pipe is clogged or restricted by foreign material.
• Move wire signal arm to the "down" or ON position (side mounted).
• Remove small cube from ice maker. The ice and water filter cartridge may be clogged. Replace filter cartridge.
• Turn off household water line valve. Remove valve. Ensure that valve is not a self-piercing saddle valve. Clean valve. Replace valve if necessary.
Ice maker is not making enough ice.
• Ice maker is producing less ice than you expect.
• Check to see if water dispenser is dispensing slower than normal.
• Freezer control is set too warm.
• Side mounted ice maker should produce 4 to 4.5 pounds (approximately 4 quarts) of ice every 24 hours.
• If it is, replace the ice and water filter cartridge.
• Set freezer control to colder setting to improve performance of the ice maker. Allow 24 hours for temperature to stabilize.
Ice maker will not stop making ice.
• Ice maker wire signal arm is being held down by some item in the freezer.
• Move item and release wire signal arm. Remove any ice cubes that are frozen together over the wire signal arm.
Ice cubes are freezing together.
• Ice cubes are not being used frequently enough.
• Ice cubes are hollow (partially frozen cubes with water inside).
• Freezer control is set too warm.
• Remove ice container and discard ice from container. Ice maker will produce fresh supply.
• The ice and water filter cartridge may be clogged. Replace filter cartridge.
• Set freezer control to colder setting. Allow 24 hours for temperature to stabilize.
DISPENSER (Ice & Water)
Dispenser will not dispense ice.
• Dispenser lock out is engaged.
• There is no ice in the bin to be dispensed.
• The refrigerator doors are not completely closed.
• Dispenser paddle has been pressed too long and the dispenser motor has overheated.
• Press and hold control lock for three seconds.
• See the "Ice maker is not making any ice" section above.
• Be sure the refrigerator doors are completely closed.
• The motor overload protector will reset in about three minutes and then ice can be dispensed.
Ice dispenser is jammed.
• Ice has melted and frozen around auger due to infrequent use, temperature fluctuations, and/or power outages.
• Ice cubes are jammed between ice maker and back of ice container.
• Remove ice container, thaw, and empty the contents. Clean container, wipe dry, and replace in proper position. When new ice is made, dispenser should operate.
• Remove ice cubes that are jamming the dispenser.
DISPENSER (Ice & Water) (Continued)
Dispenser will not dispense water.
• Dispenser lock out is engaged.
• Water filter not seated properly.
• Water filter is clogged.
• Household water line valve is not open.
• Press and hold control lock for three seconds.
• Remove and reinstall the water filter. Be sure to push the filter firmly so that you hear it lock solidly into position.
• Replace filter cartridge. Be sure to remove protective caps and push the filter firmly so that you hear it lock solidly into position.
• Open household water line valve. See CONCERN column AUTOMATIC ICE MAKER.
Water has an odd taste and/ or odor.
• Water has not been dispensed for an extended period of time.
• Unit not properly connected to cold water line.
• Draw and discard 10-12 glasses of water to freshen the supply.
• Connect unit to cold water line that supplies water to the kitchen faucet.
Water pressure is extremely low.
• Cut-off and cut-on pressures are too low (well systems only).
• Reverse osmosis system is in regenerative phase.
• Have someone turn up the cut-off and cut-on pressure on the water pump system (well systems only).
• It is normal for a reverse osmosis system to be below 20 psi during the regenerative phase.
Water not cold enough.
• As warmer tap water goes through the filter and enters the water tank the chilled water is pushed through to the dispenser. Once the chilled water is used up it will take several hours to bring the freshly replaced water to a cooler temperature.
• Some models are designed without a water tank, these water dispensing systms are not designed to chill water.
• Add ice to cup or container before dispensing water.
• Add ice to cup or container before dispensing water
OPENING/CLOSING OF DOORS/DRAWERS
Door(s) will not close.
• Door was closed too hard, causing other door to open slightly.
• Refrigerator is not level. It rocks on the floor when moved slightly.
• Refrigerator is touching a wall or cabinet.
• Close both doors gently.
• Ensure floor is level and solid, and can adequately support the refrigerator. Contact a carpenter to correct a sagging or sloping floor.
• Ensure floor is level and solid, and can adequately support the refrigerator. Contact a carpenter to correct a sagging or sloping floor.
Drawers are difficult to move.
• Food is touching shelf on top of drawer.
• Track that drawers slide on is dirty.
• Remove top layer of items in drawer.
• Ensure drawer is properly installed on track.
• Clean drawer, rollers, and track. See Care & Cleaning.
RUNNING OF REFRIGERATOR
Compressor does not run.
• Freezer control is set to "OF" or "0".
• Refrigerator is in defrost cycle.
• Plug at electrical outlet is disconnected.
• House fuse blown or tripped circuit breaker.
• Power outage.
• Set freezer control.
• This is normal for a fully automatic defrost refrigerator. The defrost cycle occurs periodically, lasting about 30 minutes.
• Ensure plug is tightly pushed into outlet.
• Check/replace fuse with a 15 amp time-delay fuse. Reset circuit breaker.
• Check house lights. Call local electric company.
Refrigerator runs too much or too long.
• Room or outside weather is hot.
• Doors are opened too frequently or too long.
• Refrigerator/freezer door may be slightly open.
• Freezer control is set too cold.
• Refrigerator/freezer gasket is dirty, worn, cracked, or poorly fitted.
• Condenser is dirty.
• It's normal for the refrigerator to work longer under these conditions.
• Warm air entering the refrigerator causes it to run more. Open doors less often.
• Ensure refrigerator is level. Keep food and contains from blocking door. See PROBLEM column OPENING/CLOSING OF DOORS/DRAWERS.
• Set Refrigerator control to warmer setting until refrigerator temperature is satisfactory. Allow 24 hours for temperature to stabilize.
• Clean or change gasket. Leaks in door seal will cause refrigerator to run longer in order to maintain desired temperatures.
• Clean condenser. See Care & Cleaning.
Compressor goes off and on frequently.
• Thermostat keeps the refrigerator at a constant temperature.
• This is normal. Refrigerator goes on and off to keep temperature constant.
DIGITAL TEMPERATURE DISPLAY
Digital temperature displays are flashing.
• Electronic control system has detected a performance problem.
• Call your Frigidaire service representative, who can interpret any messages or number codes flashing on the digital displays.
WATER/MOISTURE/FROST INSIDE REFRIGERATOR
Moisture collects on inside of refrigerator walls.
• Weather is hot and humid.
• Door is slightly open.
• The rate of frost buildup and internal sweating increases.
• See PROBLEM column OPENING/CLOSING OF DOORS/DRAWERS.
Water collects on bottom side of drawer cover.
• Vegetables contain and give off moisture.
• It is not unusual to have moisture on the bottom side of the cover.
• Move humidity control (some models) to lower setting.
Water collects in bottom of drawer.
• Washed vegetables and fruit drain while in the drawer.
• Dry items before putting them in the drawer. Water collecting in bottom of drawer is normal.
WATER/MOISTURE/FROST OUTSIDE REFRIGERATOR
Moisture collects on outside of refrigerator or between doors.
• Weather is humid.
• Door is slightly open, causing cold air from inside refrigerator to meet warm air from outside.
• This is normal in humid weather. When humidity is lower, the moisture should disappear.
• See PROBLEM column OPENING/CLOSING OF DOORS/DRAWERS.