Loading ...
Loading ...
Loading ...
11
Reversibility Kit Instructions
If your model came with a Reversibility kit, please use the Brand
Badge Placement template and the following instructions to install
the Brand Badge on the opposite side of the freezer door.
Parts Included:
Brand badge removal tool
Brand badge template (on last page of User Instructions)
Door handle hole plug
Tools Needed:
Scissors
Masking tape
Freezer Door
1. Using the removal tool (provided), remove the brand badge
from the freezer door by lifting up the right-hand side and
peeling the badge away from the door from right to left.
NOTE: To avoid scratching the door, do not use a sharp or
metallic object to pry the brand badge from the door.
2. Rub a small amount of liquid dish soap over any adhesive
residue with your fingers. Rinse the door with warm water and
dry with a soft cloth.
3. Cut the template along the dotted lines that match the shape
of the brand badge.
4. Align the edges of the template with the side and top of the
freezer door and tape the template to the door.
NOTE: When the template is correctly aligned, the hole in the
door, where the handle was, will be within the cutout of the
template, as shown.
5. Using the cutout as a guide, press the brand badge onto the
freezer door making sure that the hole is completely covered.
6. Slowly remove the template.
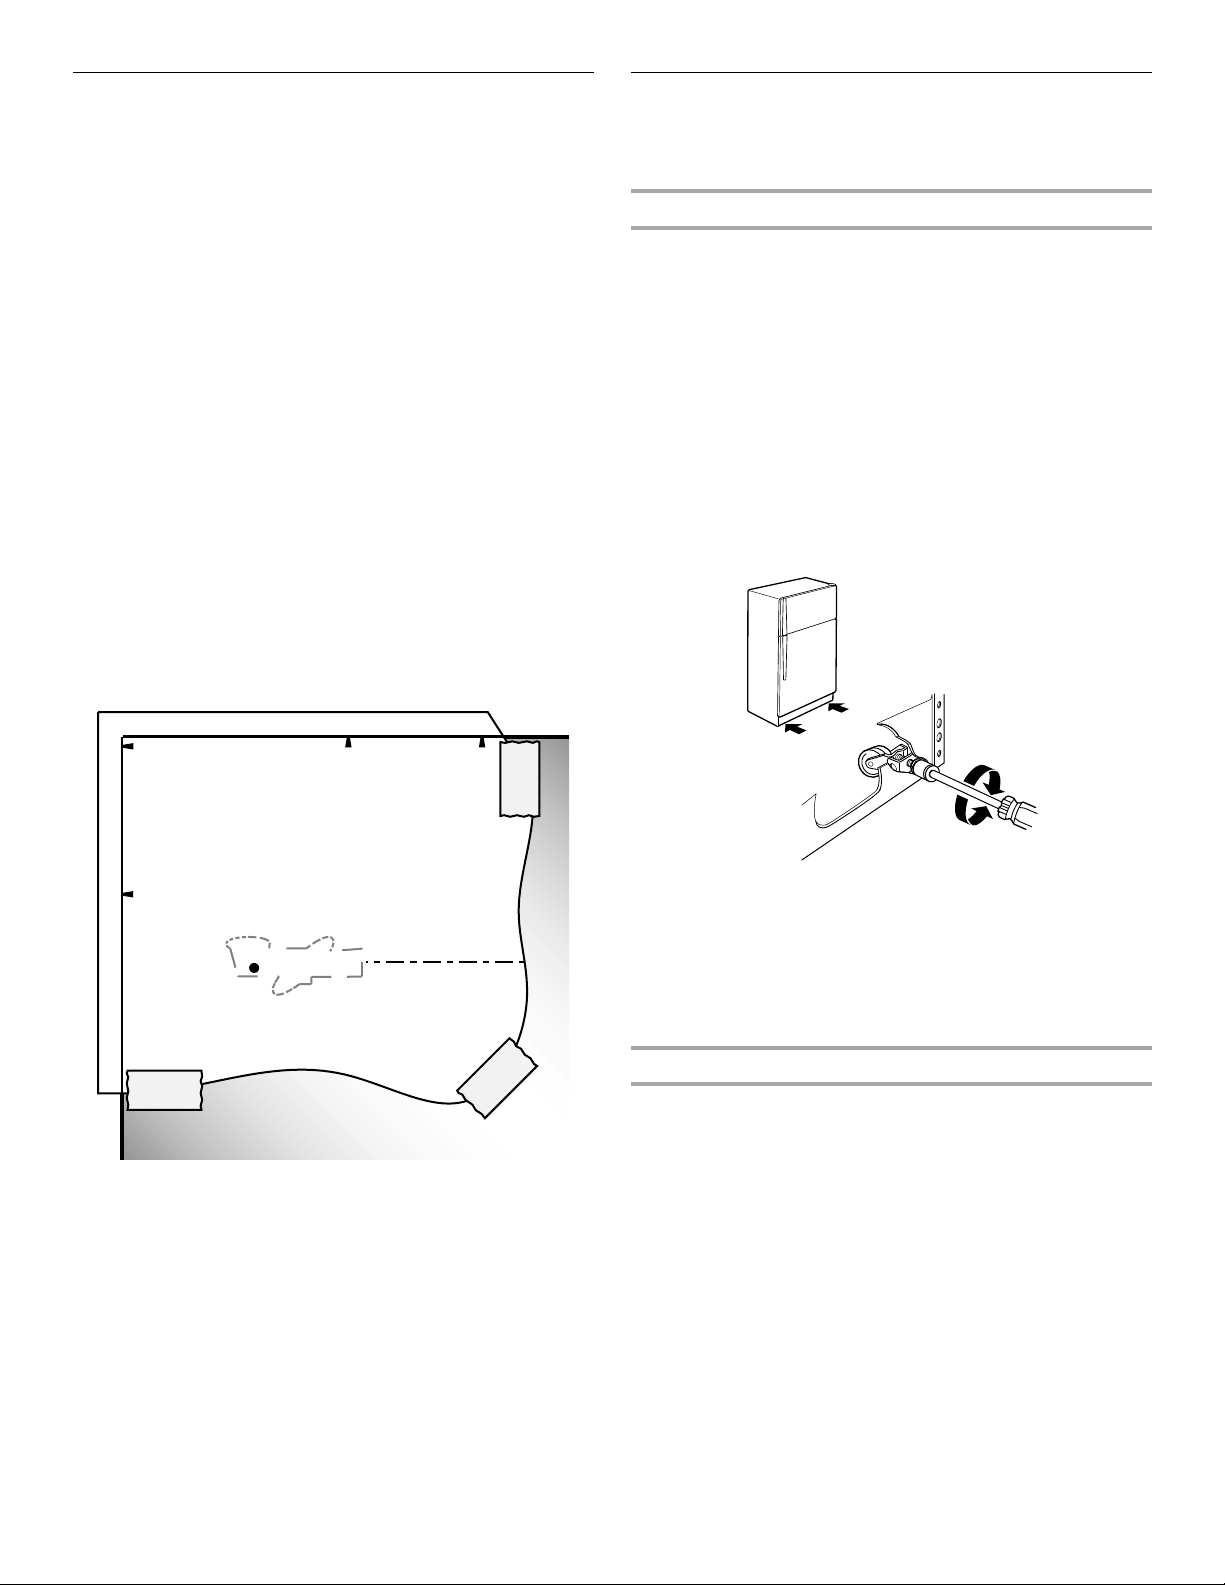
Adjust the Doors
IMPORTANT: To comply with American Disabilities Act (ADA)
guidelines, fully retract the rollers into the cabinet to lower the
refrigerator.
Door Closing
Your refrigerator has two front adjustable rollers – one on the right
and one on the left. If your refrigerator seems unsteady or you
want the doors to close easier, adjust the refrigerator's tilt using
the following instructions:
1. Remove the base grille. See the Base Grille graphic in
“Refrigerator Doors.” The two leveling screws are part of the
front roller assemblies, which are at the base of the refrigerator
on either side.
2. Use a socket driver to adjust the leveling screws. Turn the
leveling screw to the right to raise that side of the refrigerator
or turn the leveling screw to the left to lower that side. It may
take several turns of the leveling screws to adjust the tilt of the
refrigerator.
NOTE: Having someone push against the top of the
refrigerator takes some weight off the leveling screws and
rollers which makes it easier to adjust.
3. Open both doors again to make sure they close as easily as
you like and that they stay closed. If not, tilt the refrigerator
slightly more to the rear by turning both leveling screws to the
right. It may take several more turns.
NOTE: To keep the refrigerator level, you should turn both
leveling screws the same amount.
4. Replace the base grille.
Door Aligning
If the space between your doors looks uneven, you can adjust it
using the following instructions:
1. Depending on your model, remove the top hinge cover.
Loosen the top hinge screws using a ⁵⁄₁₆" socket or wrench.
2. Have someone hold the door in place or put a spacer between
the doors while you tighten the top hinge screws.
3. Replace the top hinge cover, if removed in Step 1.
Loading ...
Loading ...
Loading ...