Loading ...
Loading ...
Loading ...
9
Installing the hood
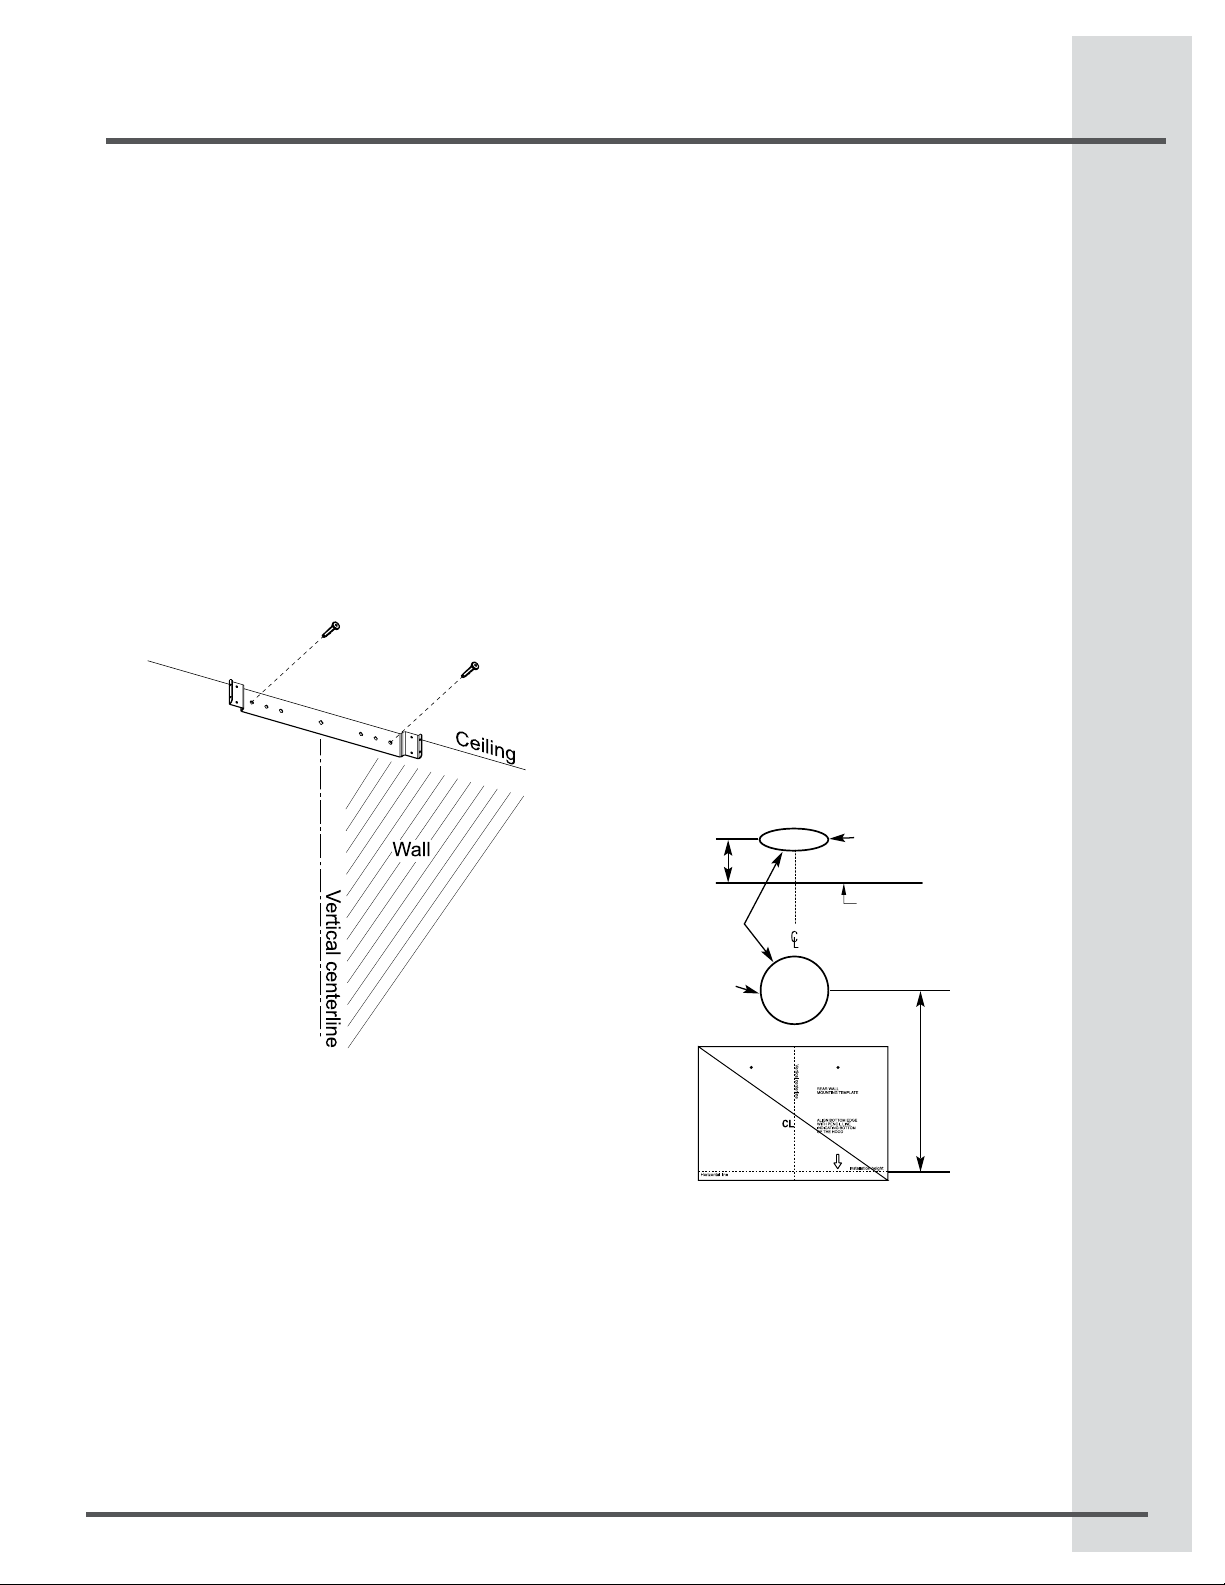
Mounting the duct cover bracket
The duct bracket should be installed against the
back wall and ush with the ceiling. This bracket will
hold the telescopic duct cover in place at the top
Secure the bracket to the wall:
Align the marked centerline on the bracket with
the centerline on the wall.
Mark 2 screw hole locations in the wall.
Drill 5/16” pilot holes in the marked locations.
Install wall fastener anchors.
Drive wood screws, by hand, into the fastener to
allow anchors to expand. Remove the screws.
Secure the bracket to the wall with wood screws
and/or fasteners.
•
•
•
•
•
•
Ceiling ducting
If the duct will vent straight up to the ceiling:
Use level to draw a line straight up, from the
centerline on the template to the ceiling.
Measure at least 4 -3/4 ” from the back wall to
the circle center of an 8-½” hole on the ceiling.
Wall ducting
If ductwork will vent to rear:
Use a level to draw a line straight up from the
centerline on the template.
Measure at least 23 - 3/4” (the measure might
vary depending on the elbow used) above the
pencil line that indicates the bottom installation
height, to the circle center of an 8-½” diameter
duct hole (Hole may be elongated for duct elbow).
House wiring location
The junction box is located on the top left side of
the hood.
Wiring should enter the back wall at least 20”
above the bottom of the installation height, and
within 5-7/8” and 4-7/8”of the left side of the
centerline.
•
•
•
•
•
•
4-3/4” circle
center to wall
FOR CEILING DUCT VENTING
Ceiling
FOR
WALL
VENT
DUCT
8-1/2” dia hole
Circle center at
23 3/4” above
the marked bot-
tom pencil line
Horizontal straight
pencil line
Loading ...
Loading ...
Loading ...