Owner's Manual
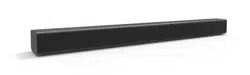
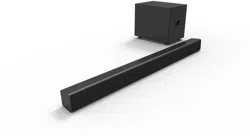
Soundbar
FWSB426F
Manual del Propietario
INSTRUCCIONES SIMPLIFICADAS INCLUIDOS EN ESPAÑOL.
ES
Manuel du Propriétaire
FR
Need help? Please Call Toll Free 1 866 212 0436 or visit our Web Site above:
To obtain a more detailed Electronic Copy of this
Manual or much further contents, go to
Para obtener una Copia Electronica detallada de este Manual o
mucho mayor contenido, visite
ES
¿
Necesita ayuda?
Llame por favor sin costo al 1 866 212 0436 ó visite nuestro
Sitio Web en:
ES
Besoin d’aide? Appelez notre numéro gratuit à 1 866 212 0436 ou visitez notre
Site Web à l’adresse:
FR
FR
Pour obtenir une Copie Electronique plus detaillee de ce Manuel ou
pour aller encore plus loin, visitez
sanyo-av.com
PRECAUTIONS
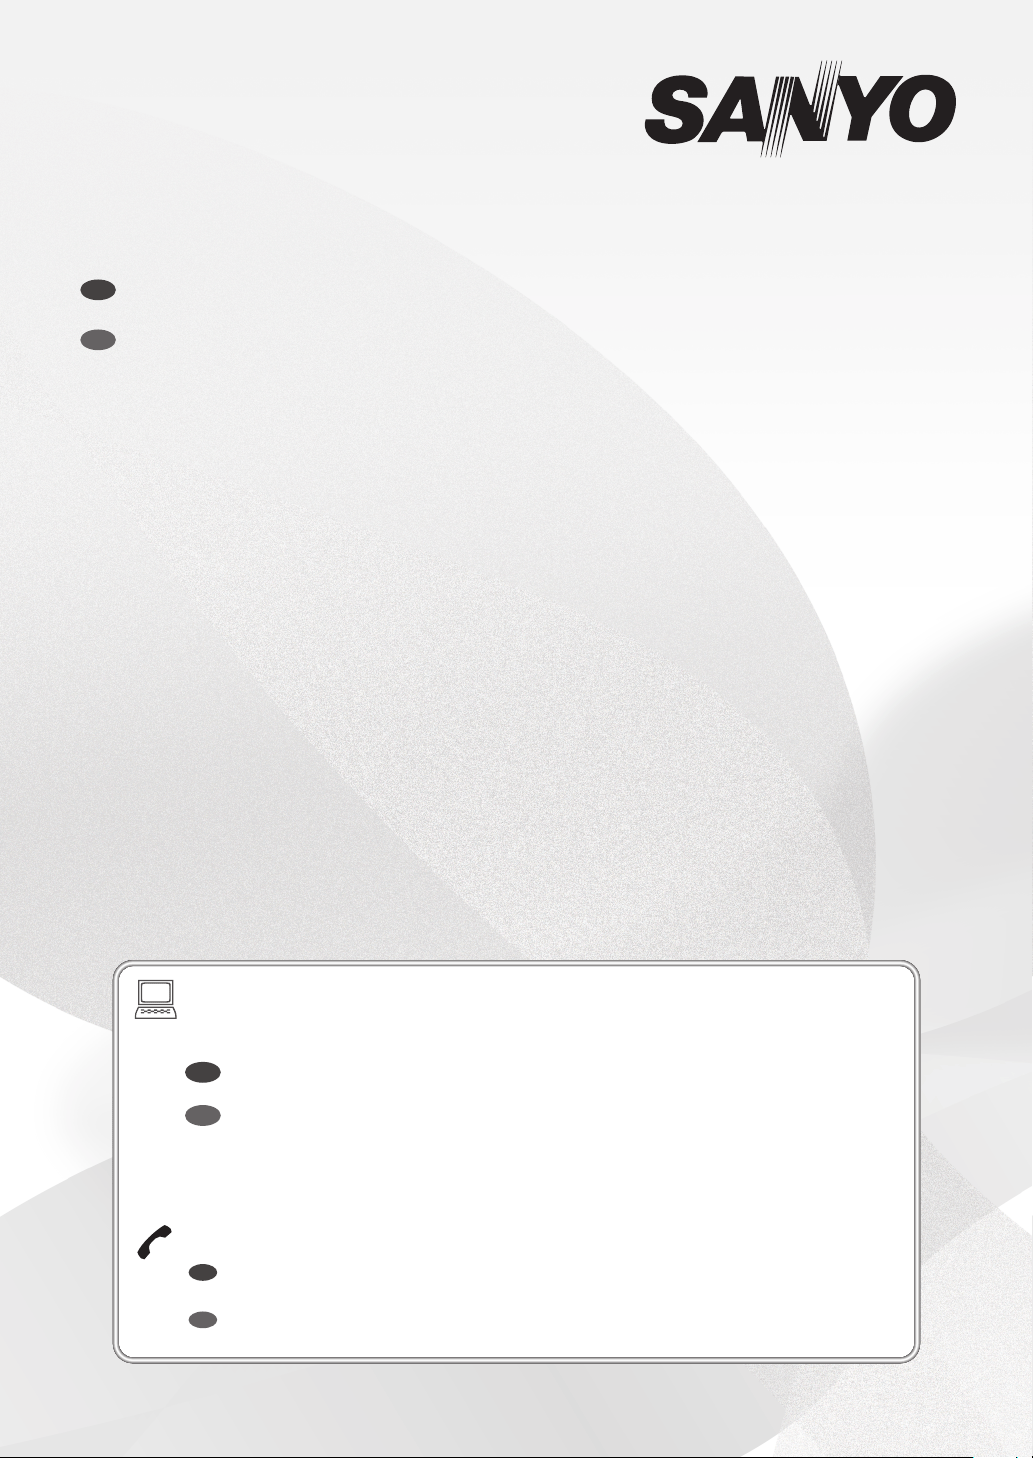
Supplied Accessories
( AAA x 2 )(NC302UH)
• •
•
• •
Setup ManualSetup Manual
Remote Control
Batteries (AAA, 1.5V x 2)
Digital Audio
Optical cable
Line-In cable
Contents
PRECAUTIONS
IMPORTANT SAFETY INSTRUCTIONS ................................... 3
ABOUT SOUNDBAR
Soundbar ................................................................................... 6
Top / Front panels of Soundbar ............................................. 6
Back Connectors on Soundbar .............................................. 6
Subwoofer ................................................................................. 7
Rear of Subwoofer ................................................................ 7
Remote Control ........................................................................ 8
Installing the Batteries for the Remote Control .................... 8
Operating with the Remote Control ...................................... 8
CONNECTIONS
USING YOUR SOUNDBAR
Turning On the Soundbar ...................................................... 11
Adjust the Volume ................................................................. 12
Experiencing the Surround Sound ....................................... 13
Choosing Preset Sound ......................................................... 14
Night Mode ............................................................................. 14
MAKING MORE USE WITH YOUR SOUNDBAR
Using a Bluetooth compatible Device .................................. 15
Pairing a Bluetooth compatible Device with this Unit ......... 15
Playing back a music file through Bluetooth ....................... 15
Playing back a music file through USB Memory Stick ....... 17
Preparing for USB Memory Stick playback ......................... 17
Playing back a music file ..................................................... 17
USEFUL TIPS
Resetting to the Factory Default mode ................................ 18
Upgrading the Software ........................................................ 18
Preparing for the Software Upgrade ................................... 18
Upgrading the Software ...................................................... 18
Auto Standby Function .......................................................... 19
Installing the Soundbar on a Wall ........................................ 19
INFORMATION
Troubleshooting Guide .......................................................... 20
Specifications .......................................................................... 21
LIMITED WARRANTY ............................................................. 22
Español .................................................................................... 23
GARANTIA LIMITADA ............................................................ 24
– 2 –EN
Register Online at sanyo-av.com/support/ today to get the most benefits from your purchase.
Registering your model with SANYO makes you eligible for all of the valuable benefits such as Software Upgrades and
important product notifications.
Register Online at
sanyo-av.com/support/
The Model and Serial Numbers of this Unit may be found on the cabinet Model No.:
You should Record and Retain those Letters / Numbers for future reference. Serial No.:
WARNING: TO REDUCE THE RISK OF FIRE OR ELECTRIC SHOCK, DO NOT EXPOSE THIS APPARATUS TO RAIN OR
MOISTURE.
APPARATUS SHALL NOT BE EXPOSED TO DRIPPING OR SPLASHING AND NO OBJECTS FILLED WITH
LIQUIDS, SUCH AS VASES, SHALL BE PLACED ON THE APPARATUS.
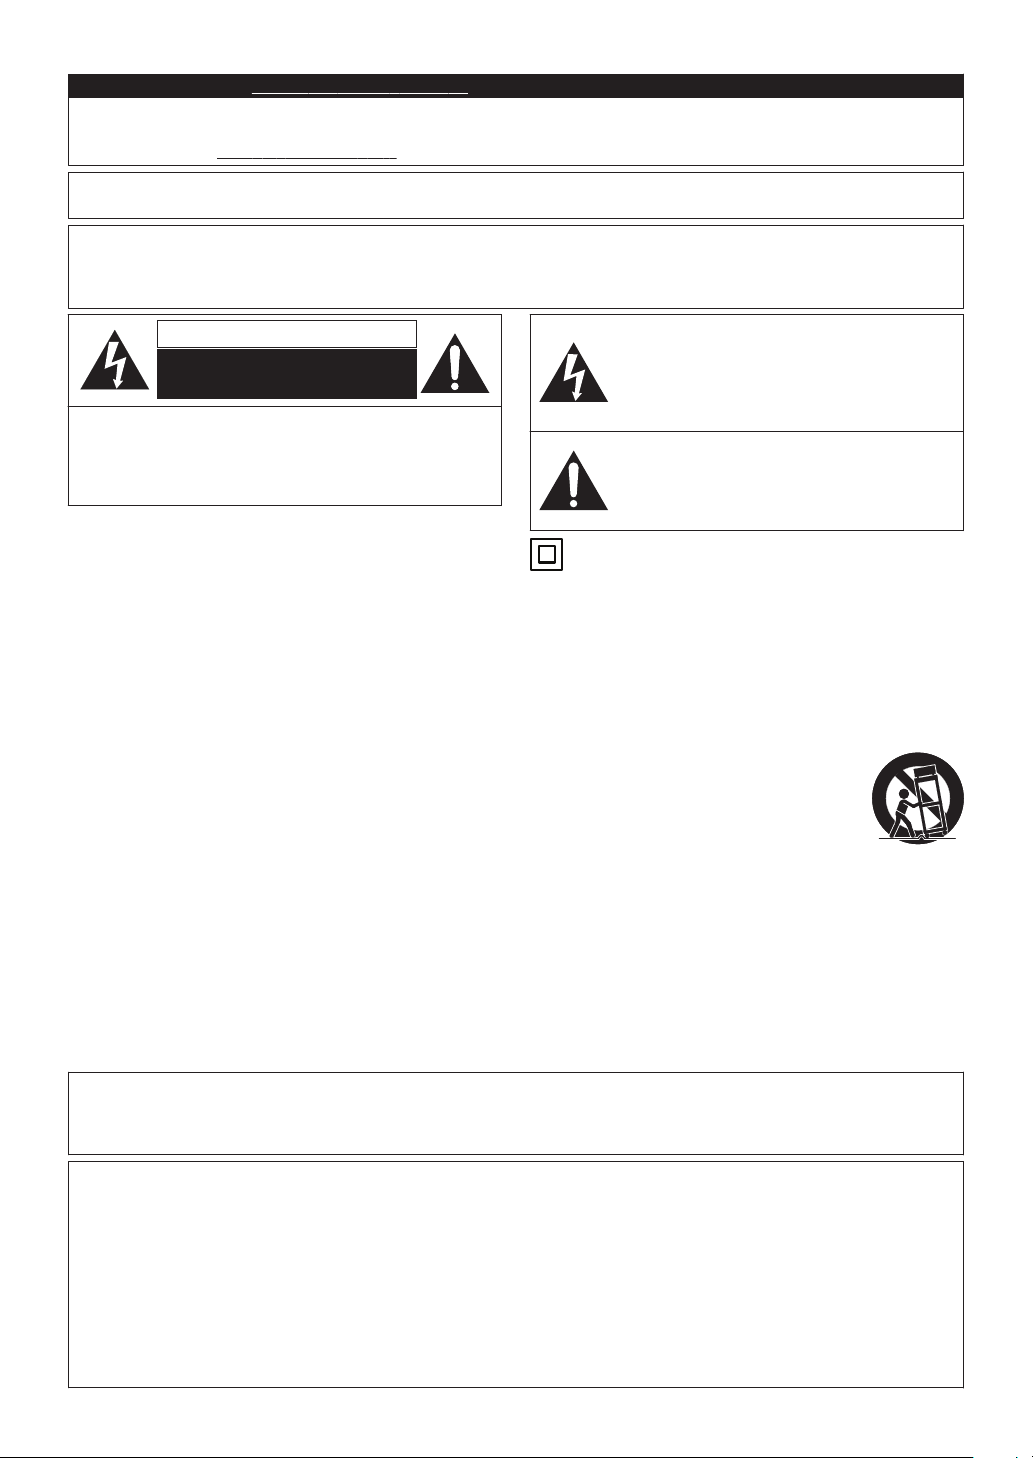
CAUTION
RISK OF ELECTRIC SHOCK
DO NOT OPEN
CAUTION:
TO REDUCE THE RISK OF ELECTRIC SHOCK, DO NOT
REMOVE COVER (OR BACK). NO USER SERVICEABLE
PARTS INSIDE. REFER SERVICING TO QUALIFIED SERVICE
PERSONNEL.
The important note and rating are located on the rear or bottom
of the cabinet.
The lightning flash with arrowhead symbol,
within an equilateral triangle, is intended to alert
the user to the presence of uninsulated
“dangerous voltage” within the product’s
enclosure that may be of sufficient magnitude to
constitute a risk of electric shock to persons.
The exclamation point within an equilateral
triangle is intended to alert the user to the
presence of important operating and
maintenance (servicing) instructions in the
literature accompanying the appliance.
The symbol for CLASS ll (Double Insulation)
IMPORTANT SAFETY INSTRUCTIONS
1. Read these instructions.
2. Keep these instructions.
3. Heed all warnings.
4. Follow all instructions.
5. Do not use this apparatus near water.
6. Clean only with dry cloth.
7. Do not block any ventilation openings. Install in
accordance with the manufacturer’s instructions.
8. Do not install near any heat sources such as
radiators, heat registers, stoves, or other apparatus
(including amplifiers) that produce heat.
9. Do not defeat the safety purpose of the polarized
or grounding-type plug. A polarized plug has two
blades with one wider than the other. A grounding
type plug has two blades and a third grounding
prong. The wide blade or the third prong are
provided for your safety. If the provided plug does
not fit into your outlet, consult an electrician for
replacement of the obsolete outlet.
10. Protect the power cord from being walked on or
pinched particularly at plugs, convenience
receptacles, and the point where they exit from the
apparatus.
11. Only use attachments / accessories specified by
the manufacturer.
12. Use only with the cart, stand, tripod,
bracket, or table specified by the
manufacturer, or sold with the
apparatus.
When a cart is used, use caution when
moving the cart / apparatus
combination to avoid injury from tip-over.
13. Unplug this apparatus during lightning storms or
when unused for long periods of time.
14. Refer all servicing to qualified service personnel.
Servicing is required when the apparatus has been
damaged in any way, such as power-supply cord or
plug is damaged, liquid has been spilled or objects
have fallen into the apparatus, the apparatus has
been exposed to rain or moisture, does not operate
normally, or has been dropped.
FCC WARNING
This equipment may generate or use radio frequency energy. Changes or modifications to this equipment may cause harmful
interference unless the modifications are expressly approved in the manual. The user could lose the authority to operate this
equipment if an unauthorized change or modification is made.
RADIO-TV INTERFERENCE
This equipment has been tested and found to comply with the limits for a Class B digital device, pursuant to Part 15 of the
FCC Rules. These limits are designed to provide reasonable protection against harmful interference in a residential installation.
This equipment generates, uses, and can radiate radio frequency energy and, if not installed and used in accordance with the
instructions, may cause harmful interference to radio communications. However, there is no guarantee that interference will
not occur in a particular installation. If this equipment does cause harmful interference to radio or television reception, which
can be determined by turning the equipment off and on, the user is encouraged to try to correct the interference by one or
more of the following measures:
1) Reorient or relocate the receiving antenna.
2) Increase the separation between the equipment and receiver.
3) Connect the equipment into an outlet on a circuit different from that to which the receiver is connected.
4) Consult the dealer or an experienced radio / TV technician for help.
– 3 –EN
Continued on next page.
Disconnect the AC Power cord to shut Off the Unit when Trouble is found or not in Use. The AC Power cord shall
remain readily operable and available.
CAN ICES-3 (B)/NMB-3(B)
●
This device complies with Industry Canada’s licence-exempt RSSs.
Operation is subject to the following two conditions: (1) this device may not cause interference, and (2) this device must
accept any interference, including interference that may cause undesired operation of the device.
●
This equipment complies with IC radiation exposure limits set forth for an uncontrolled environment and meets RSS-102 of
the IC radio frequency (RF) Exposure rules. This equipment has very low levels of RF energy that is deemed to comply
without maximum permissive exposure evaluation (MPE).
CAUTION: Danger of explosion if battery is incorrectly replaced. Replace only with the same or equivalent type.
WARNING: Batteries (Battery pack or battery installed) shall not be exposed to excessive heat such as sunshine, fire or the
like.
Do not place the unit on the furniture that is capable of being tilted by a child and an adult leaning, pulling, standing or climbing
on it. A falling unit can cause serious injury or even death.
This apparatus should not be placed in a built-in installation such as a bookcase or rack unless proper ventilation is provided.
Make sure to leave a space of 3.9 inches (10cm) or more around this apparatus.
Never use a gas duster on this unit.
The gas trapped inside of this unit may cause ignition and explosion.
This transmitter must not be co-located or operated in conjunction with any other antenna or transmitter.
Mounting Soundbar on a Wall
●
The recommended screw (sold separately) allows the mounting of the Soundbar on the Wall.
●
Funai is not liable for any accident, damage or injury due to any improper installation, lack of strength of installation or
improper use.
●
Drill screw holes into the wall. Depending on the wall material, use Molly Anchor inserts to make sure the screws will not
fall out. Although the Soundbar weighs approximately 5.3 lb/2.4 kg, it is recommended that the wall be able to support 15.
9 lb/ 7.2 kg (three times the weight of the Soundbar) for extra safety. Recommended measurements are as follows: Wall
thickness of 2”/5 cm or more, Screw diameter of 5/32”/4 mm and, Screw length of 1-3/16”/30 mm or more.
●
Screw and Molly Anchor are sold separately and are not supplied.
Funai is not liable for these types kinds of accidents or injury noted below.
●
Install two screws on a sturdy vertical wall.
●
If installed onto a ceiling or slanted wall, the Soundbar and screws may fall which could result in a severe injury.
●
Do not use screws that are longer or shorter than their specified length. If screws too long or short are used this may cause
the Soundbar to fall.
●
Do not fasten Screw’s and Molly Anchor’s with excessive force, this may damage the Wall causing the Soundbar to fall,
leading to an injury.
●
Do not mount the Soundbar onto screws while the Soundbar is Plugged In or turned On. It may result in an electrical shock
injury.
When Installing the Soundbar on a Wall, allow this much space.
Top: 4”/10 cm Left and right sides: 4”/10 cm
Bottom: 4”/10 cm Space between Mounting Screw and Wall: 9/64”- 5/32”/3.5 - 4mm
To Avoid the Hazards of Electrical Shock and Fire
●
Do not handle the AC Power cord with wet hands.
●
Do not pull on the AC Power cord when disconnecting it
from an AC outlet. Grasp it by the plug.
●
Do not put your fingers or objects into the unit.
Location and Handling
●
Do not install the unit in direct sunlight, near strong
magnetic fields, or in a place subject to dust or strong
vibration.
●
Avoid a place with drastic temperature changes.
●
Install the unit in a horizontal and stable position. Do not
place anything directly on top or bottom of the unit.
Depending on your external devices, noise or disturbance of
the picture and / or sound may be generated if the unit is
placed too close to them. In this case, please ensure enough
space between the external devices and the unit.
●
Depending on the environment, the temperature of this unit
may increase slightly. This is not a malfunction.
●
Be sure to Unplug the AC Power cord from the AC outlet
before Removing the Unit.
Dew Condensation Warning
●
Dew condensation may form inside the unit in the following
conditions. If so, do not use this unit at least for a few hours
until its inside gets dry.
–
The unit is moved from a cold place to a warm place.
–
Under conditions of high humidity.
–
After heating a cold room.
Note about Recycling
●
This unit’s packaging materials are
recyclable and can be reused. Please
dispose of any materials in accordance with
your local recycling regulations.
●
Batteries should never be thrown away or
incinerated but disposed of in accordance
with your local regulations concerning chemical wastes.
●
For product recycling information, please visit - sanyo-
av.com
– 4 –EN

TRADEMARK INFORMATION
The Bluetooth® word mark and
logos are registered trademarks
owned by Bluetooth SIG, Inc. and
any use of such marks by Funai
Electric Co., Ltd. is under license.
Other trademarks and trade names
are those of their respective
owners.
Manufactured under license from
Dolby Laboratories. Dolby, Dolby
Audio, and the double-D symbol are
trademarks of Dolby Laboratories.
MAINTENANCE
Servicing
●
Please refer to relevant topics on the “Troubleshooting
Guide” on page 20. If you cannot find any solution there,
our service center is pleased to assist you.
●
Even if this unit becomes inoperative, Do Not open the
cabinet to repair it by yourself. There are No user-
serviceable parts inside.
Turn Off the unit, unplug the AC Power cord and then call
our support center mentioned on the front page.
Before calling, please check Model and Serial number on the
unit.
Cleaning the Cabinet
●
Wipe the front panel and other exterior surfaces of the unit
with a soft cloth.
●
Never use a solvent, thinner, benzene or alcohol to clean the
unit. Do not spray insecticide liquid near the unit.
Such chemicals may discolor the surface or damage the
unit.
SANYO is a registered trademark of SANYO Electric Co., Ltd.
and is used by Funai Electric Co., Ltd. and Funai Corporation,
Inc. under license from SANYO Electric Co., Ltd.
Any liability related to SANYO products, including design and
quality, is the sole responsibility of Funai Electric Co., Ltd. and
Funai Corporation, Inc.
Please contact Funai Corporation, Inc. for any questions or
claims related to SANYO products:
sanyo-av.com
© 2016 Funai Electric Co., Ltd.
All rights reserved. No part of this manual may be reproduced,
copied, transmitted, disseminated or transcribed, in any form
or for any purpose without the express prior written consent
of Funai. Furthermore, any unauthorized commercial
distribution of this Manual or any revision hereto is strictly
prohibited.
Information in this document is subject to change without
notice. Funai reserves the right to change the content herein
without the obligation to notify any person or organization of
such changes.
– 5 –EN
ABOUT SOUNDBAR
Soundbar
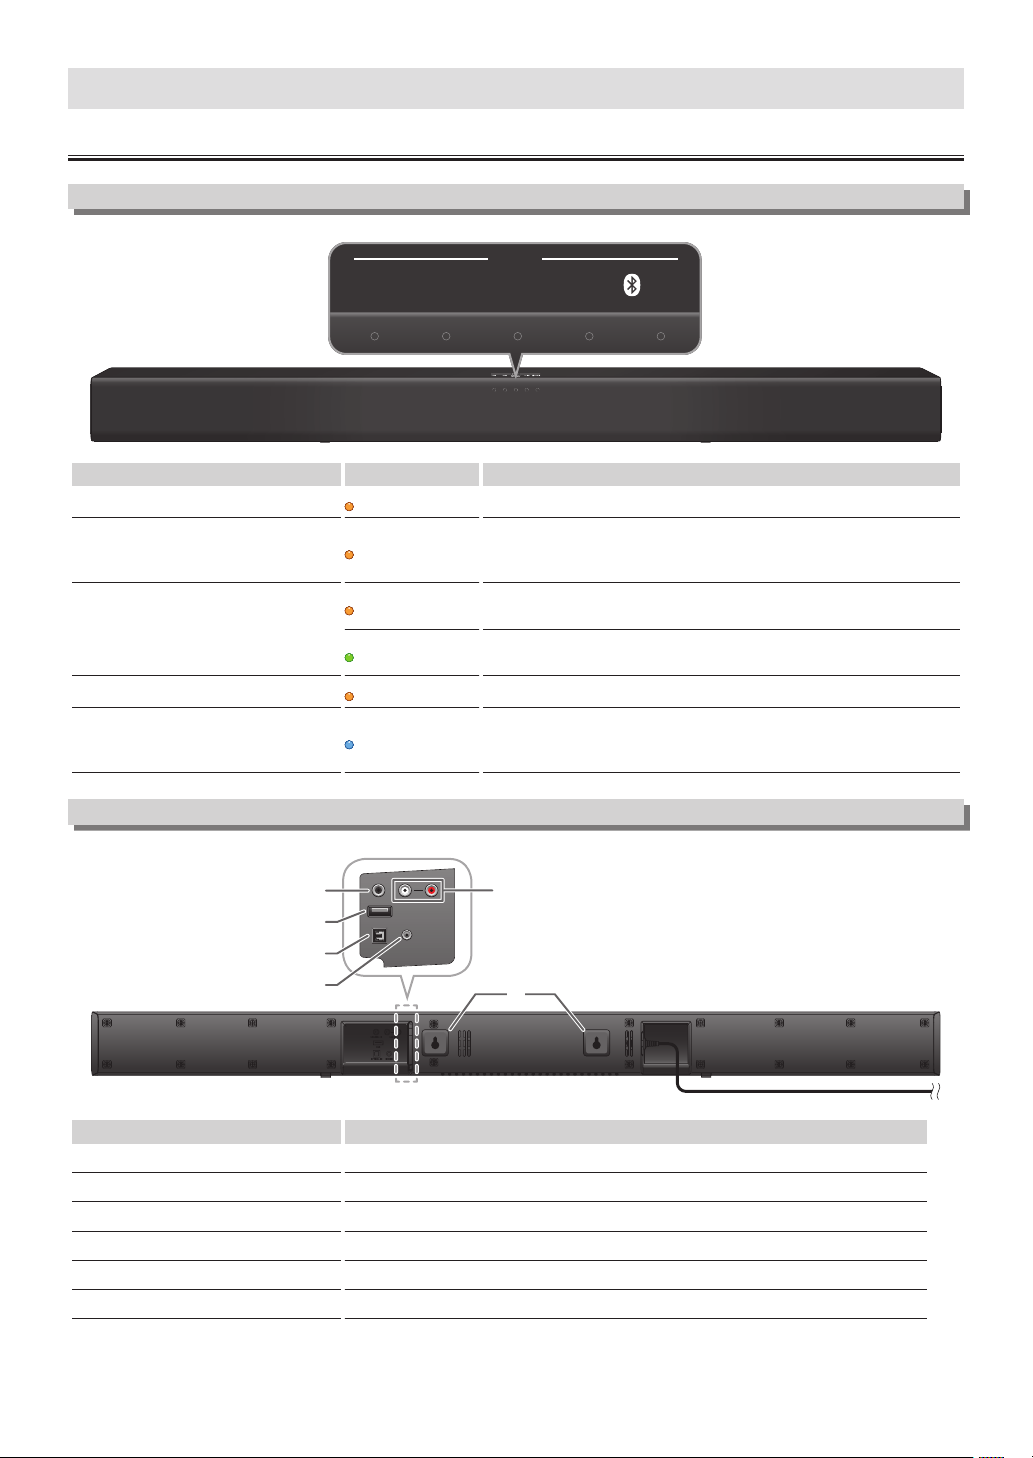
Top / Front panels of Soundbar
LINE USB
INPUT
AUX PAIR
OPTICAL/
COAXIAL
INPUT source LED color Description
LINE INPUT
orange
Lights up when you switch to Line-In source (3.5mm jack).
USB INPUT
orange
Lights up when you switch to USB Input source.
Blinks when recognition of USB Memory Stick is in process, pausing
of playback or recognition error. See page 17 for detail.
OPTICAL/COAXIAL INPUT
orange
Lights up when you switch to Optical Input source.
Blinks when unsupported optical signals are input.
green
Lights up when you switch to Coaxial Input source.
Blinks when unsupported coaxial signals are input.
AUX(iliary) INPUT
orange
Lights up when you switch to Analog Input source.
A PAIR(ing) INPUT (Bluetooth)
blue
Lights up when you switch to Bluetooth Mode and Bluetooth
compatible Devices are paired.
Blinks when Bluetooth pairing is activated and pairing failed.
Back Connectors on Soundbar
B
C
D
E
F
A
Connectors
Description
A Wall mount hooks
Install on a wall if desired.
B COAXIAL IN(put)
Connect to a Coaxial Digital Audio output on the TV or a Digital device.
C USB IN(put)
Insert a USB Memory Stick.
D OPTICAL IN(put)
Connect to an Optical Digital Audio output on the TV or a Digital device.
E LINE IN(put)
Connect to a TV or an MP3 player.
F AUX(iliary) IN(put)
Connect to an Analog Audio output on the TV or an Analog device.
– 6 –EN

Subwoofer
Rear of Subwoofer
B
A
Items Description
A LED indicator
Lights up when the Subwoofer is connected correctly.
Blinks if the Soundbar is Off or in Standby mode, or the Subwoofer cannot be
connected to the Soundbar.
B CONNECT button
Usually the Subwoofer is connected to the Soundbar automatically when the Unit
is turned On.
Use this button if the Soundbar is not connected the Subwoofer by accident.
NOTE(S)
●
CONNECT button is not a Power-On button. Do not press except to Reconnect to the Soundbar. Refer to “if the
Soundbar is not Connecting to the Subwoofer:” on page 11.
●
The feet of the Subwoofer cannot be removed. Do not apply force to them.
●
Do not touch the speaker part of the Subwoofer or put Metallic/Magnetic objects close to it. Doing so may cause a
malfunction.
– 7 –EN
Remote Control
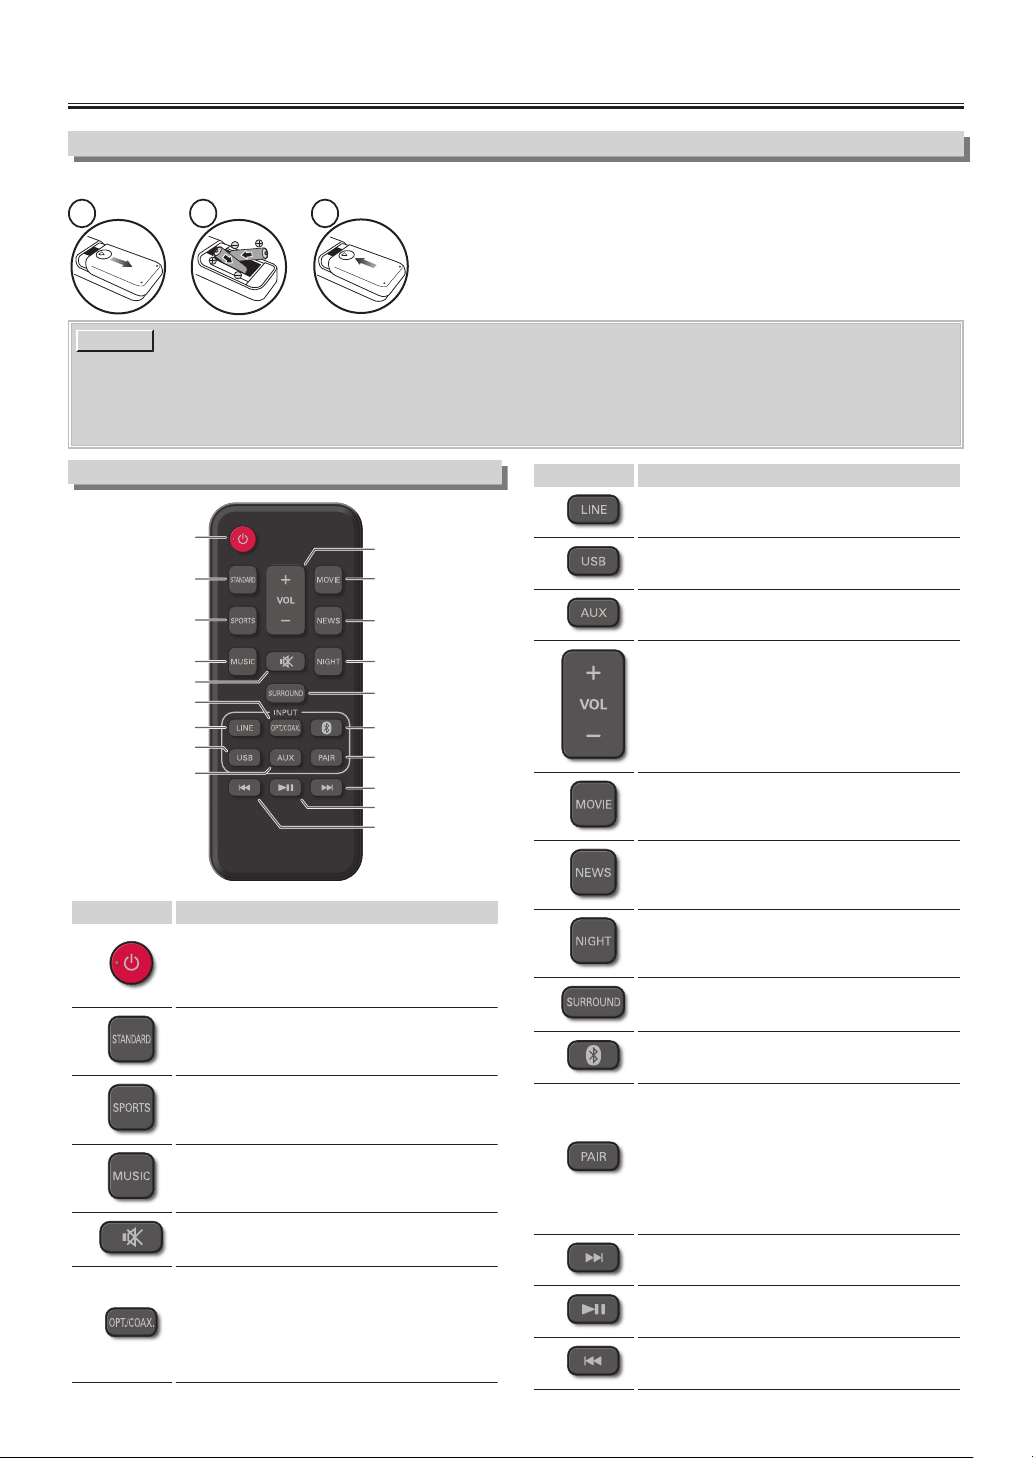
Installing the Batteries for the Remote Control
Install 2 AAA (1.5V) batteries matching the polarity indicated inside battery compartment of the Remote Control.
●
The maximum operable ranges from the Unit are as follows.
–
Line of sight: approx. 23 feet (7m)
–
Either side of the center: approx. 16 feet (5m) within 30°
–
Above: approx. 16 feet (5m) within 15°
–
Below: approx. 10 feet (3m) within 30°
NOTE(S)
●
Do not mix alkaline, standard (carbon-zinc), or rechargeable (ni-cad, ni-mh, Li-ion, etc) batteries.
●
Do not mix old and new batteries.
●
Always remove batteries from the Remote Control if they are dead or if the Remote Control is not to be used for an
extended period of time. This will prevent battery acid from leaking into the battery compartment.
1 2 3
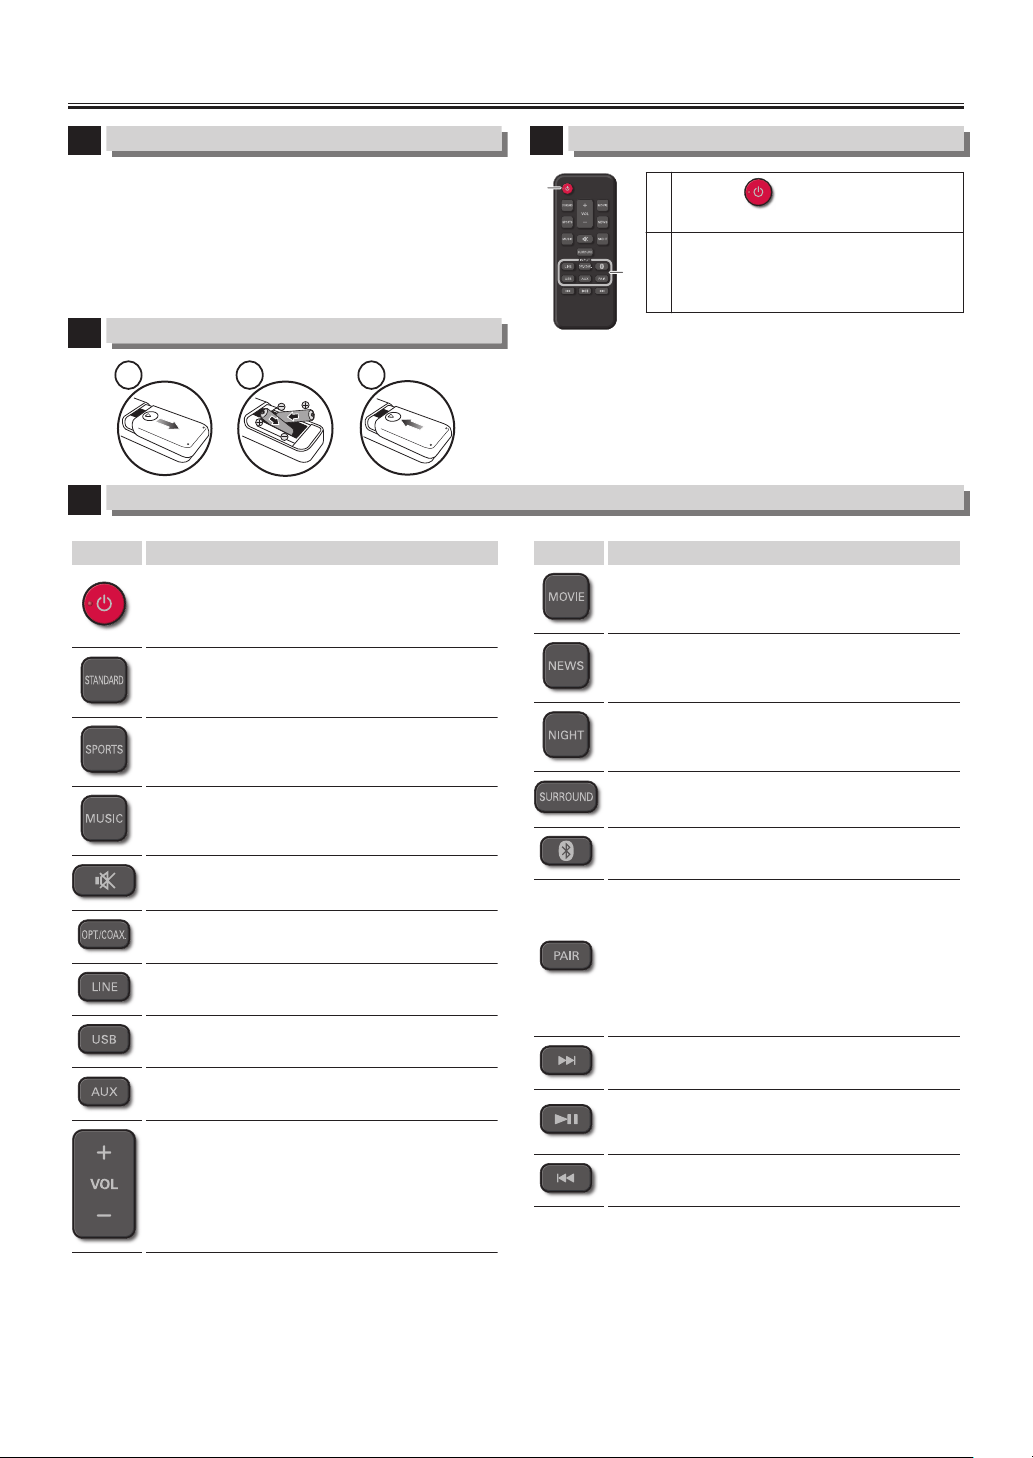
Operating with the Remote Control
A
B
C
D
K
J
L
M
N
E
F
G
H
O
P
Q
R
S
I
Buttons Description
A
B(POWER/Standby) Press to Turn On the
Unit, or to switch the Unit into Standby mode.
(To completely Turn Off the Unit, you must
unplug the AC Power cord.)
B
Press to switch to the Standard preset sound.
C
Press to switch to the preset sound for Sports
scene.
D
Press to switch to the preset sound for Music.
E
Press to Mute the Sound and press again to
Unmute the Sound.
F
Press to select Optical or Coaxial Input of the
connected device to this Soundbar.
If this button is pressed while Optical or
Coaxial is selected, the Current Input Source
will be switched back and forth between the
two Sources.
Buttons Description
G
Press to select Line Input of a connected
device to this Soundbar.
H
Press to select USB Input of a connected
device to this Soundbar.
I
Press to select Auxiliary Input of a connected
device to this Soundbar.
J
Press to adjust Volume Up / Down on the
Soundbar.
K
Press to switch to the preset sound for a
Movie.
L
Press to switch to the preset sound for News
scene.
M
Press to turn Night Mode On/Off.
N
Press to turn Surround On/Off.
O
Press to select Bluetooth signal of a
connected device to this Soundbar.
P
Press to disconnect the currently connected
Bluetooth compatible Device and start pairing
mode to establish a new connection to
another Bluetooth compatible Device.
If no Bluetooth compatible Device is
connected within 2 minutes, press this button
to restart pairing mode. Pairing mode can only
be started when Bluetooth is selected.
Q
Press to Skip Forwards in a music file.
(Bluetooth Mode and USB Mode only)
R
Press to Play or Pause a music file.
(Bluetooth Mode and USB Mode only)
S
Press to Play or Pause a music file.
(Bluetooth Mode and USB Mode only)
– 8 –EN

CONNECTIONS
Supplied Cables used in this Connection are as follows:
●
Digital Audio Optical Cable × 1
●
Line-In cable × 1
1
Connect to a device
Connect to TV
HEADPHONE
AUDIO OUT
or
DIGITAL AUDIO
OUT (COAXIAL)
DIGITAL AUDIO
OUT (OPTICAL)
Most modern digital TV's do not have Red and White Coaxial Analog Audio Outputs, but do have Red and White Coaxial
Analog Audio Inputs. If you plan to use Red and White Analog Coaxial Cables to Connect your TV to this Soundbar, please
ensure that your TV does indeed have Red and White Coaxial Analog Audio OUT. Refer to your TV's User Manual for details.
To Connect Soundbar directly to other devices (Blu-ray player, Game System, etc.), see your Device's User Manual.
LINE
COAX
OPTICAL
AUX
Digital Audio Optical cable
Digital Audio Coaxial cable
Rear of Soundbar
Rear of TV
Line-In cable
supplied
(not supplied)
supplied
or
or
Good
Good
Good
Better
Better
Better
Best
Best
Best
Connect Audio from other Device
Rear of Soundbar
R
AUDIO OUT
L
DIGITAL AUDIO
OUT (OPTICAL)
HEADPHONE
LINE
OPTICAL
AUX
Line-In cable
(not supplied)
Audio cable
Digital Audio Optical cable
supplied
supplied
e.g.) MP3 player
e.g.) Blu-ray player
e.g.) Video game
NOTE(S)
●
Make sure the Soundbar is Turned Off when Connecting Cables.
●
Check whether all Connection Cables are properly connected.
●
If you Connect from the Headphone Output on the Device’s Source to the Line-Input on the Soundbar, make sure
the Volume from the Headphone Output on the Device’s Source is set to an appropriate mid-level sound. Setting it
too Low will produce weak output from the Soundbar or setting it too High could cause distortion.
●
If a Line / Optical / AUX Connection fails when connected to a TV, check the Audio settings on the devices.
– 9 –EN
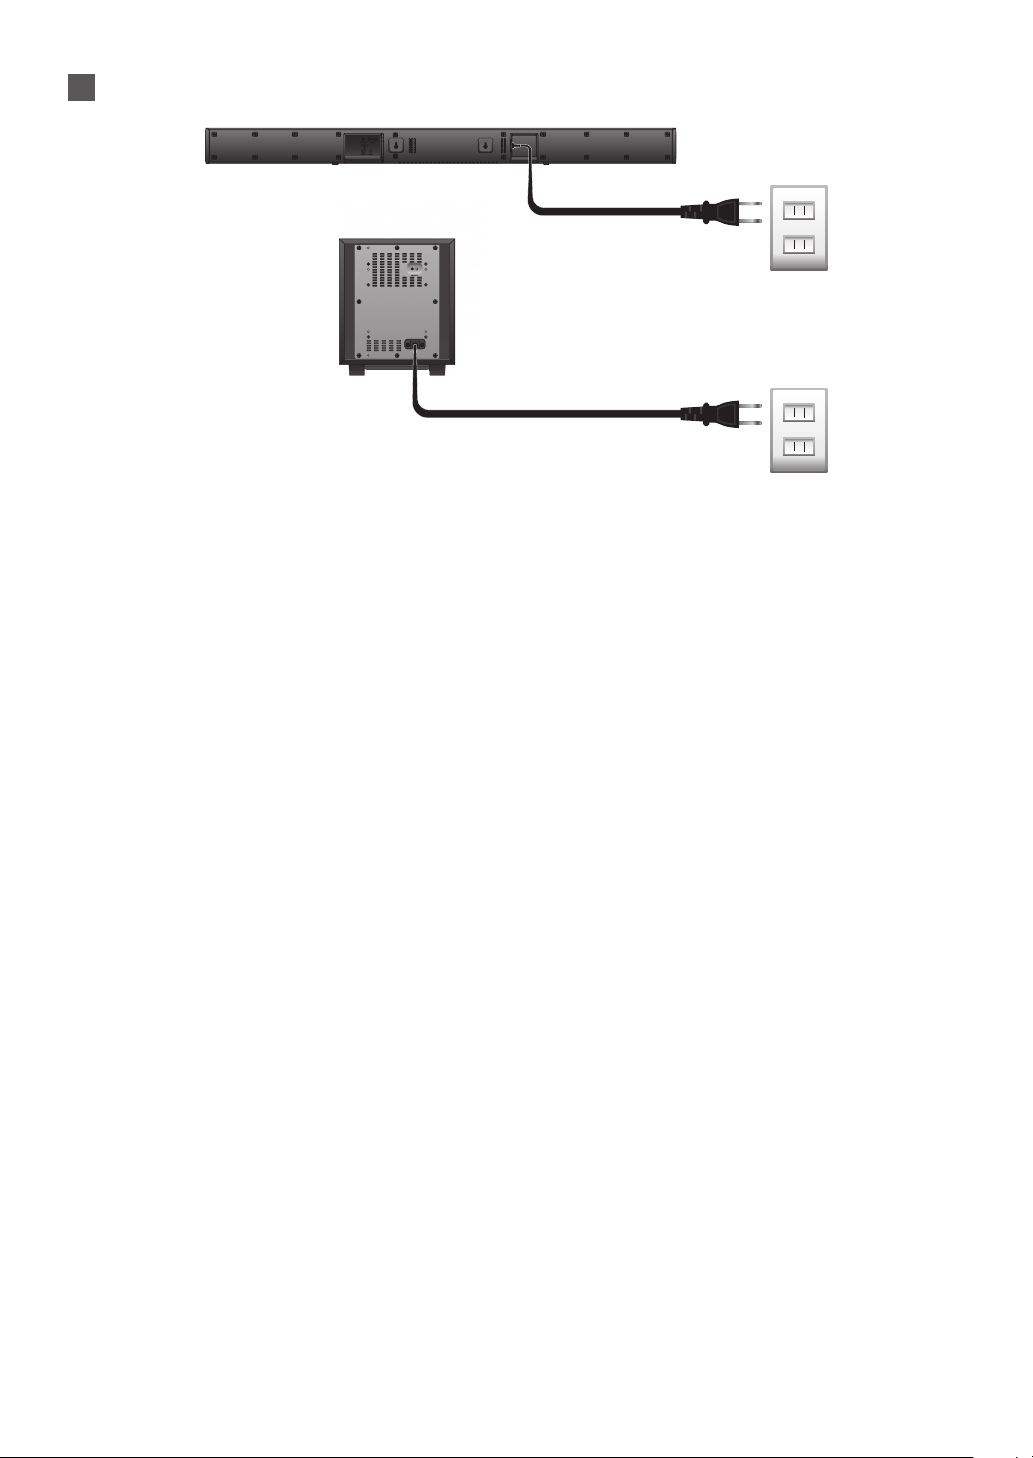
2
Connect AC Power cords from Soundbar and Wireless Subwoofer to an electric outlet.
Rear of Soundbar
Rear of Subwoofer
– 10 –EN
USING YOUR SOUNDBAR
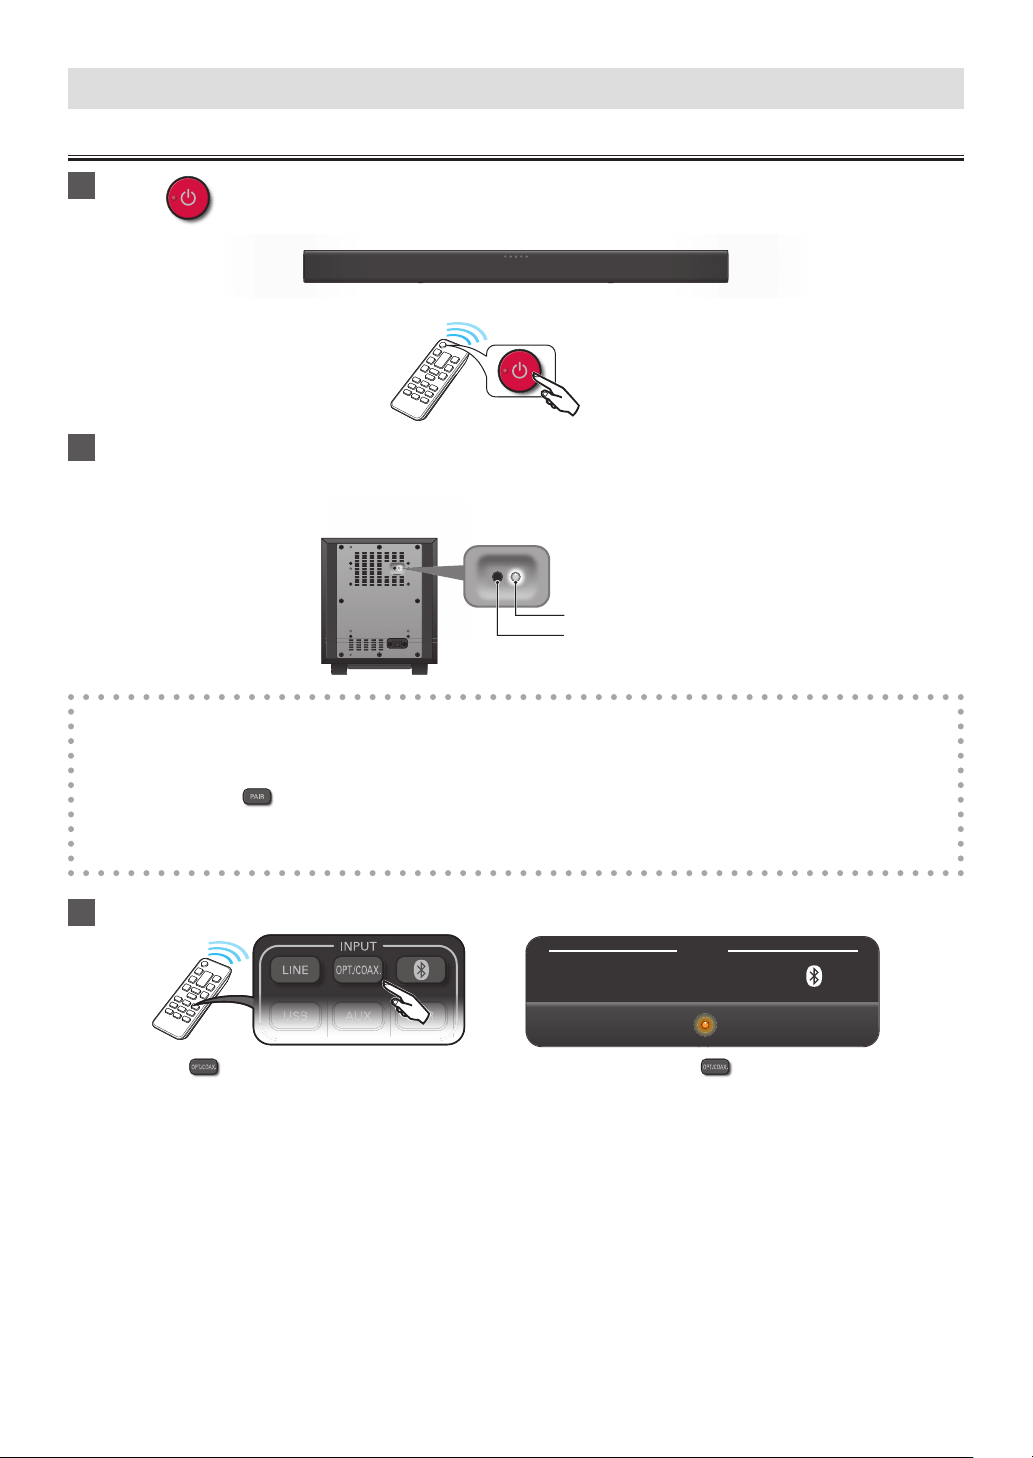
Turning On the Soundbar
1
Press on the Remote Control.
2
Check that the LED indicator on the rear of the Subwoofer steadily lights up.
●
The LED lights up if the Subwoofer is properly connected to the Soundbar.
Rear of Subwoofer
LED
CONNECT button
If the Soundbar is not Connecting to the Subwoofer:
1. Make sure the Subwoofer is connected to an AC outlet.
2. Press and Hold the CONNECT button on the Rear of the Subwoofer until the Red LED starts blinking rapidly.
3. Using the Remote Control, switch the Soundbar Input to AUX by pressing the AUX button.
4.
Press and Hold the
PAIR button on the Remote Control until the AUX and BLUETOOTH LEDs on the Soundbar
blink together.
●
The Soundbar is now attempting to Pair with the Subwoofer. The Red LED on the Rear of the Subwoofer will steadily
light up after the pairing success.
3
Select Input source.
LINE USB
INPUT
AUX PAIR
OPTICAL/
COAXIAL
e.g.) When was pressed the OPTICAL INPUT (Orange LED) was selected. If the was pressed again the COAXIAL
INPUT (Green LED) was selected.
●
One of the INPUT indicators will light up when you switch to your Connected Source.
●
For Bluetooth connections, refer to “Playing back a music file through Bluetooth” on page 15.
– 11 –EN

Adjust the Volume
1
To increase or decrease the Volume, press VOL +/- on the Remote Control.
Volume levels LED lighting patterns LED behavior
0 - 5
(6 levels)
AUX PAIR
LINE USB OPTICAL/
COAXIAL
LI
N
E
US
B
O
C
Lights up for 3 seconds
(default: level 13)
6 - 11
(6 levels)
AUX PAIR
LINE USB OPTICAL/
COAXIAL
O
PTI
CAL
CO
AX
IAL
LIN
E
US
B
O
C
12 - 17
(6 levels)
AUX PAIR
LINE USB OPTICAL/
COAXIAL
LIN
E
AU
X
L/
L
O
PTICA
L
CO
AXIA
L
US
B
O
C
18 - 23
(6 levels)
AUX PAIR
LINE USB OPTICAL/
COAXIAL
LIN
E
O
C
US
B
O
C
PAIR
AU
X
L/
L
O
PTICA
L
CO
AXIA
L
24 - 29
(6 levels)
AUX PAIR
LINE USB OPTICAL/
COAXIAL
LIN
E
O
C
US
B
O
C
PAIR
L/
L
AU
X
O
PTICA
L
CO
AXIA
L
●
When pressing VOL+/-, the Indicator(s) will show the current Volume. Pressing VOL+/- while the current Volume is
shown will increase/decrease the Volume.
●
Pressing and holding VOL+ or VOL- will increase or decrease the Volume and the Indicator(s) will blink. When the Volume
has reached the maximum or minimum, the Indicator(s) will stop blinking.
2
To Mute the Sound, press on the Remote Control.
Volume levels
LED lighting patterns LED behavior
Mute
AUX PAIR
LINE USB OPTICAL/
COAXIAL
LIN
E
PAIR
US
B
O
C
AU
X
L/
L
O
PTI
CAL
CO
AX
IAL
The 3 LEDs in the middle blink continuously.
●
To Restore the Sound, press again or press VOL +/-.
NOTE(S)
●
The Volume might be influenced by MP3 or Bluethooth player. If the Volume is too low, adjust the Volume on the
Connected device.
●
If the Volume level is Set Above 18 when the Soundbar is turned Off, the Volume will automatically be Reset to 18
when the Soundbar is turned back On.
– 12 –EN
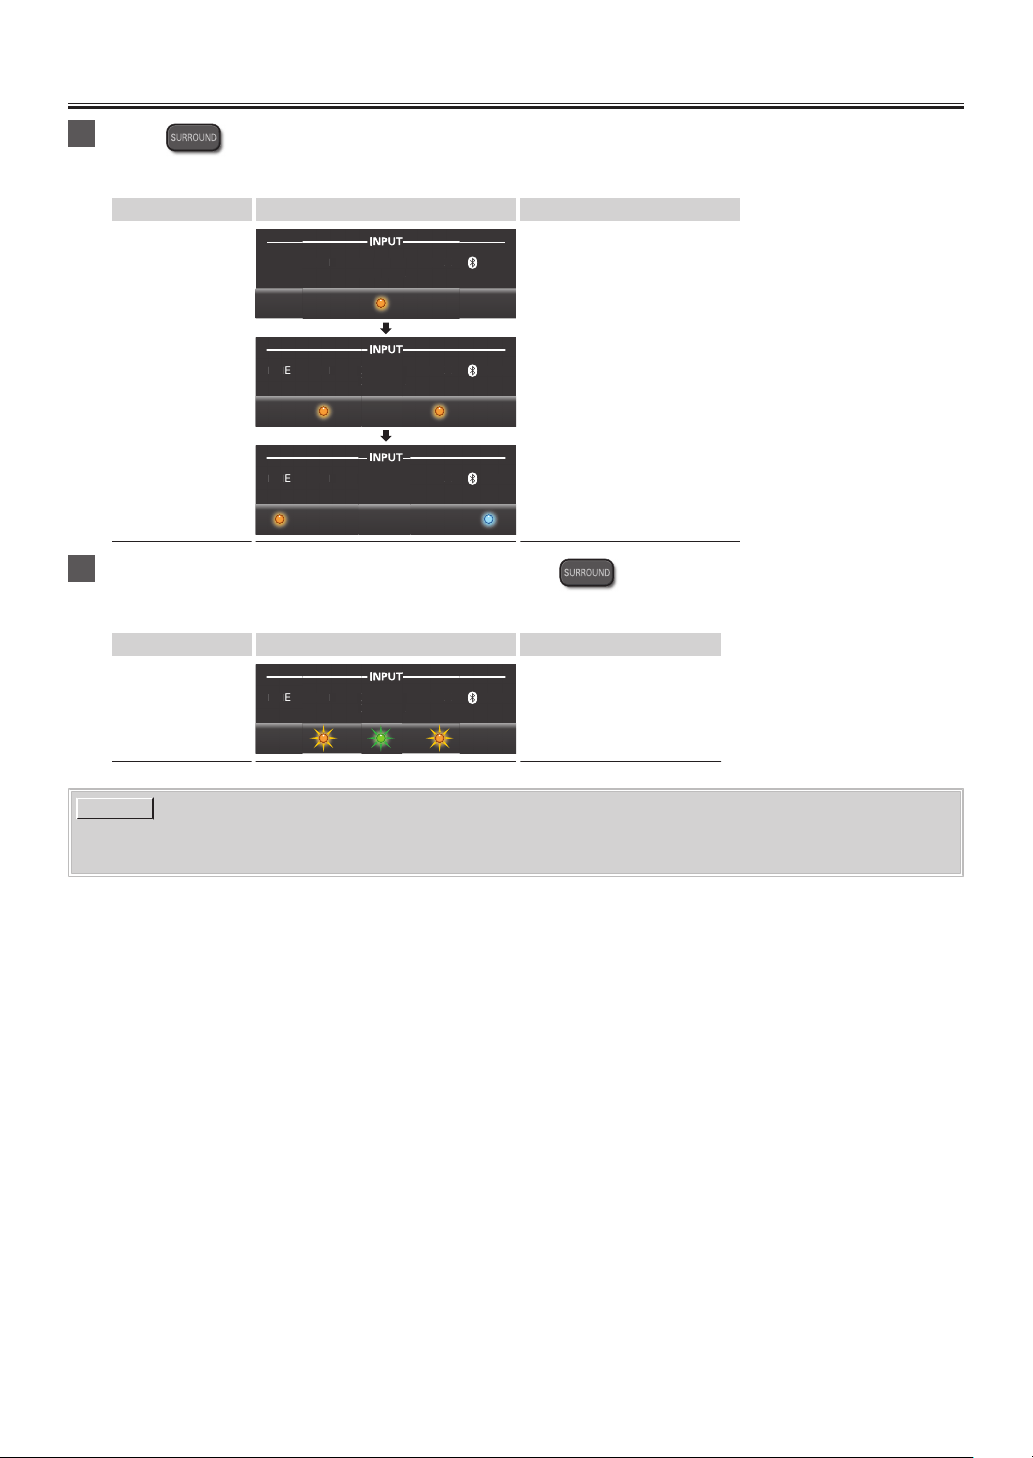
Experiencing the Surround Sound
1
Press on the Remote Control to activate the Surround sound.
●
The LEDs blink in a spread manner, from the center (OPTICAL/COAXIAL) to both sides.
Surround status LED lighting patterns Sound effects
ON
AUX PAIR
LINE USB OPTICAL/
COAXIAL
LI
N
E
US
B
O
C
AU
X
PAIR
AUX PAIR
LINE USB OPTICAL/
COAXIAL
LIN
E
US
B
O
C
AU
X
PAIR
L/
L
O
PTI
CAL
CO
AX
IAL
AUX PAIR
LINE USB OPTICAL/
COAXIAL
AU
X
US
B OPTICAL
/
CO
AXIAL
Outputs high realistic sounds.
2
If you want to set Surround sound to Off, press
on the Remote Control once again.
●
The 3 LEDs in the middle (USB, OPTICAL/COAXIAL, AUX) blink twice.
Surround status
LED lighting patterns Sound effects
OFF
AUX PAIR
LINE USB OPTICAL/
COAXIAL
LIN
E
PAIR
US
B
O
C
AU
X
L/
L
O
PTI
CAL
CO
AX
IAL
Outputs the original sound.
NOTE(S)
●
The Default setting is Off.
●
This Setting will remain while the Soundbar is in Standby mode.
– 13 –EN
Choosing Preset Sound
1
Press either , , , , or on the Remote Control to select the desired
preset sound suitable for the Audio that is playing.
2
The LED in the center (OPTICAL/COAXIAL) blinks yellow once.
3
When the preset sound setting is set, LED indicators go back to the current Input.
NOTE(S)
●
Select any Preset Sound according to your preference, regardless of categories.
●
The default Preset Sound is MOVIE.
●
This setting will remain while the Soundbar is in Standby mode.
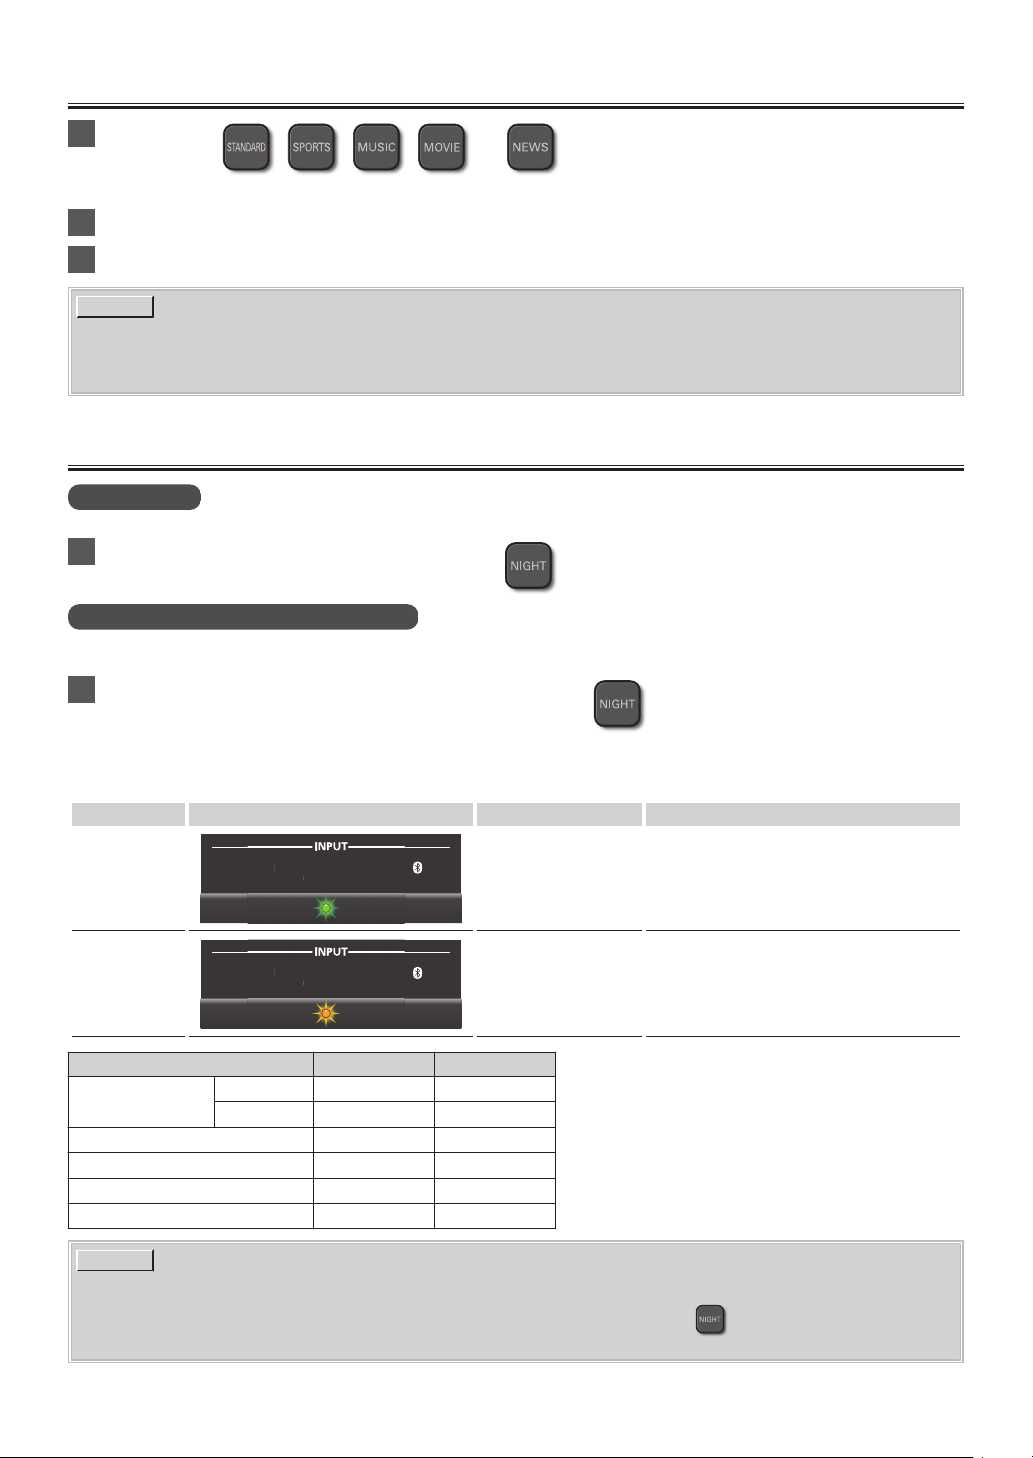
Night Mode
Night Mode 1
Turns down the Volume on the Subwoofer. It is useful late at night.
1
To switch the unit to Night Mode 1, press
.
Night Mode 2* (Dynamic Range Control)
Adjusts for clarity even when the Volume is Low, by compressing the range of the lowest sound level and the highest sound
level.
1
To switch the unit to Night Mode 2, press and hold
.
*
This function is only effective for Dolby Digital sounds.
*
This function is only available when the Soundbar is connected via Optical or Coaxial.
Mode
LED lighting patterns LED behavior Sound effects
Night Mode 1
AUX PAIR
LINE USB OPTICAL/
COAXIAL
AU
X
US
B OPTICAL
/
CO
AXIAL
On : Flashes 4 times
Off : Flashes twice
On : Lowers the Volume of the Subwoofer.
Off : Outputs the Sound at the same Volume
as the original.
Night Mode 2
AUX PAIR
LINE USB OPTICAL/
COAXIAL
AU
X
US
B OPTICAL
/
CO
AXIAL
On : Flashes 4 times
Off : Flashes twice
On : Turns down loud sounds and turns up
Off : Outputs the Sound at the same Volume
as the original.
Input Source Night Mode 1 Night Mode 2
OPTICAL/COAXIAL
Dolby Digital
p p
PCM
p
-
LINE
p
-
AUX
p
-
USB
p
-
BLUETOOTH
p
-
NOTE(S)
●
The Default setting of both Night Modes is Off.
●
These Settings will remain while the Soundbar is in Standby mode, so again use
to turn the mode from current
mode to the next mode.
– 14 –EN
MAKING MORE USE WITH YOUR SOUNDBAR
Using a Bluetooth compatible Device
Pairing a Bluetooth compatible Device with this Unit
1
Press BLUETOOTH on the Remote Control to switch the Soundbar to Bluetooth
Mode.
2
Turn your Bluetooth compatible Device On and activate the Bluetooth setting.
(See the User Manual of the Bluetooth compatible Device on how to enable Bluetooth.)
3
On your Bluetooth compatible Device search for and select “SANYO_FWSB426F” to pair (or
register) your Soundbar with your Bluetooth compatible device.
●
If a Passcode is requested, enter “0000”.
●
If the Soundbar name does not appear on the Bluetooth compatible device, press
PAIR on the Remote Control.
4
When the Pairing is complete, your Bluetooth compatible Device may show “Connected”
on the display.
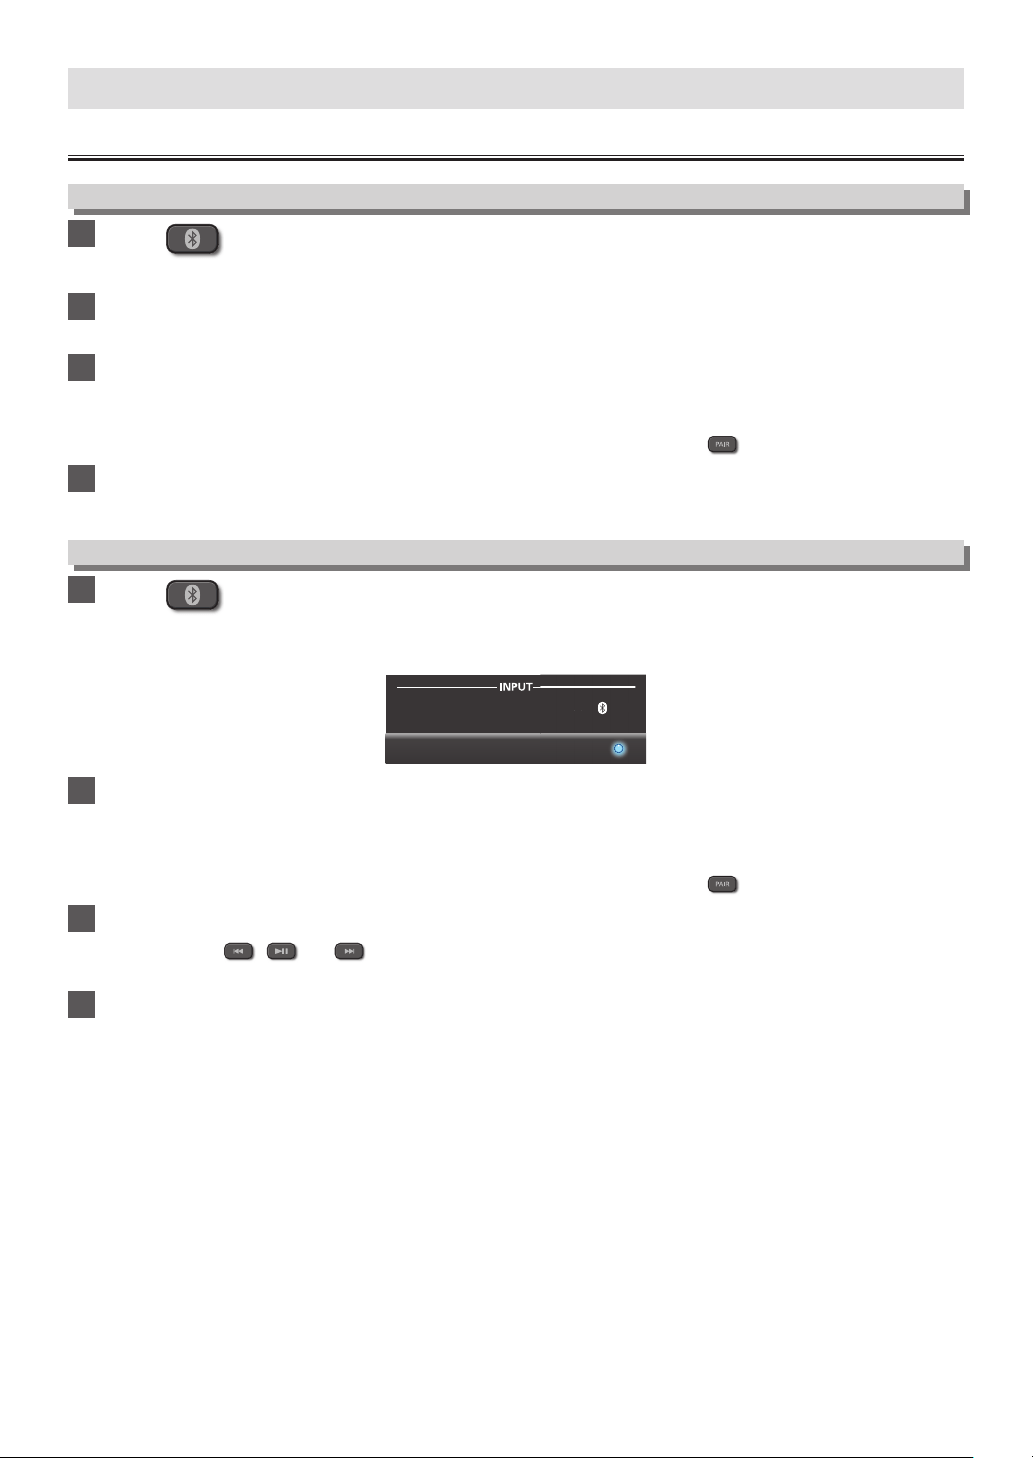
Playing back a music file through Bluetooth
1
Press
BLUETOOTH on the Remote Control to switch the Soundbar to Bluetooth
Mode.
●
The A PAIR (Bluetooth) indicator will light up.
AUX PAIR
LINE USB OPTICAL/
COAXIAL
AU
X
PAIR
2
Turn your Bluetooth compatible Device On and activate the Bluetooth setting.
(See the User Manual of the Bluetooth compatible Device on how to enable Bluetooth.)
●
If you have already paired your Bluetooth compatible Device and the device’s Bluetooth is On then the Soundbar should
connect to it automatically.
●
If the Soundbar name does not appear on the Bluetooth compatible device, press PAIR on the Remote Control.
3
Playback a music file on the connected Bluetooth compatible Device.
●
You may use,
, and on the Soundbar’s Remote Control once the Bluetooth compatible Device is properly
connected to this Soundbar.
4
To Exit Bluetooth Mode, press one of the other INPUT Source buttons on the Remote
Control.
– 15 –EN
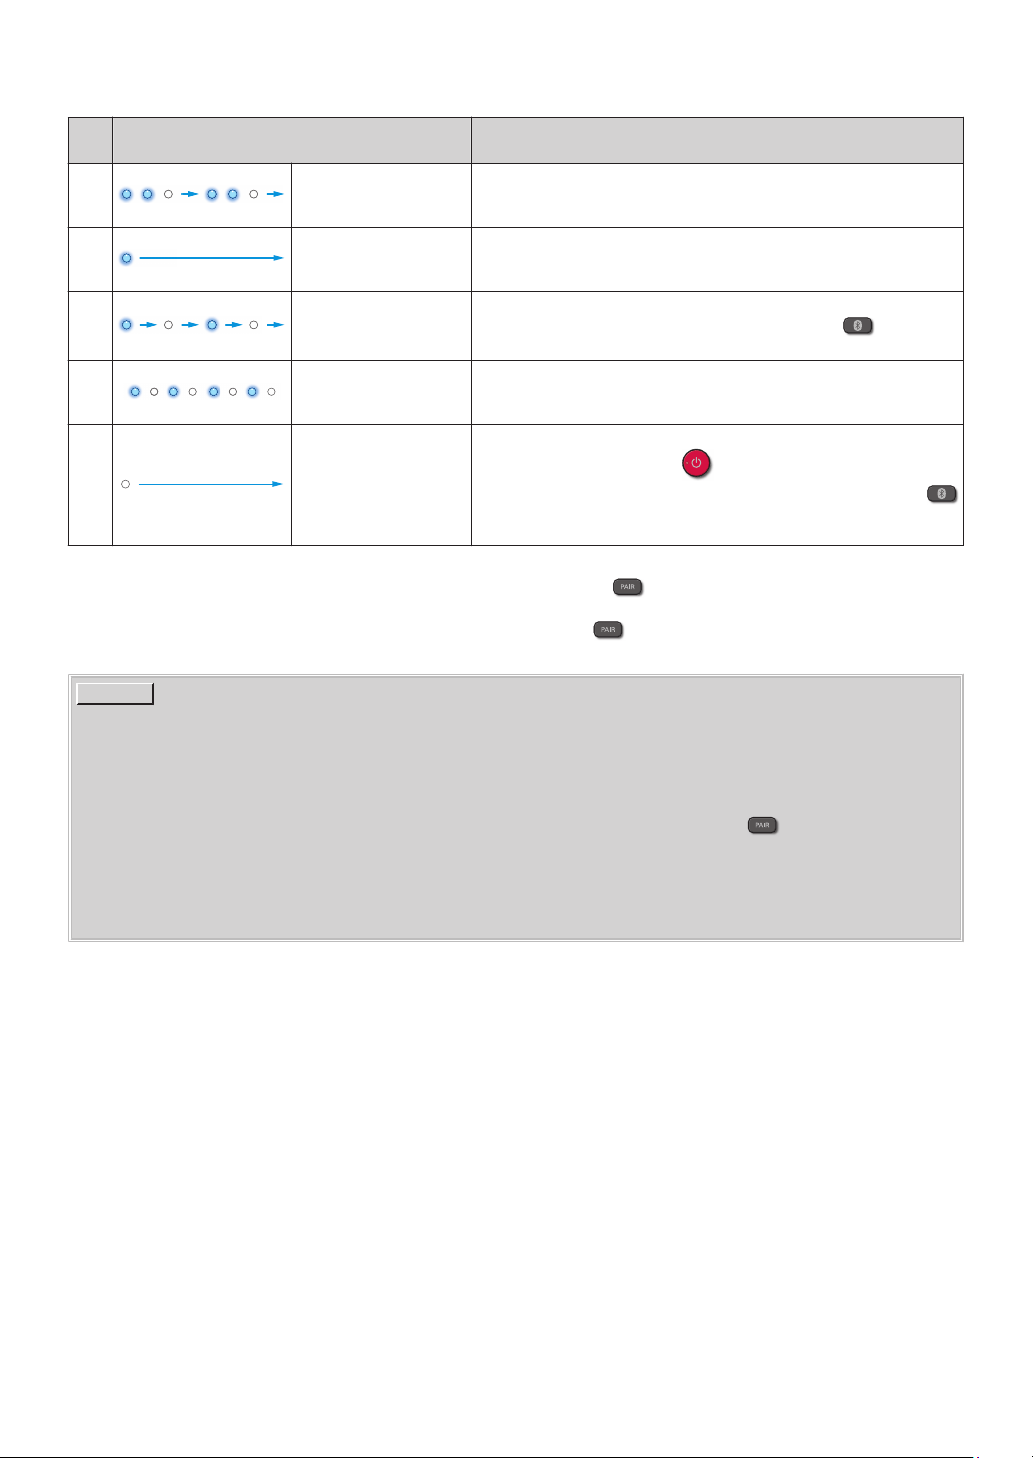
The following chart describes behavior of the A PAIR indicator and To-Do’s for playback, according to each behavior sequence
of the A PAIR indicator.
A PAIR indicator behavior
(The arrow indicates the passage of time.)
The current status of Bluetooth and the procedures to complete
Bluetooth connection for Bluetooth playback.
1
Blinks twice N
Light off N Repeats
Waiting for a new Bluetooth compatible Device to connect (Status:
Pairing). On the Bluetooth compatible Device to connect, select the
Soundbar’s name
(*1)
, then connect.
2 Remains lit
A Bluetooth compatible Device is connected.
Music can be played from the connected Bluetooth compatible
Device
(*2)
.
3 Blinks slowly
No Bluetooth compatible Device is connected. To reconnect with the
last connected Bluetooth compatible Device, press
BLUETOOTH
(*2)
.
4 Blinks rapidly
Trying to connect with the last connected Bluetooth compatible
Device. Enable Bluetooth on the last connected Bluetooth compatible
Device and wait a moment
(*2)
.
5 Remains unlit
Either another audio input is selected or the Soundbar is in Standby.
If all indicators are Off, press to turn On the Soundbar. When all
indicators except the blue LED are lighting up or blinking, press
BLUETOOTH. The (Bluetooth) indicator will start blinking or light up.
Follow 1-4 in this chart.
*1
This Soundbar’s name is "SANYO_FWSB426F". If this Soundbar has already been registered to a Bluetooth compatible
Device and the connection fails, delete it (or deactivate it), then press PAIR and select this Sound bar’s name to
connect.
*2
To play music from a different Bluetooth compatible Device, press PAIR, then select this Soundbar’s name on
the Bluetooth compatible Device to connect
(*1)
.
NOTE(S)
●
If reconnecting the Bluetooth compatible device to the Soundbar fails, delete the registered profile of this Soundbar
from the Bluetooth compatible device, then perform pairing again.
This unit can store up to 9 device profiles.
●
The music streaming may be interrupted by obstacles between the device and Soundbar, such as wall, metallic
casing that covers the device, or other devices nearby that operate in the same frequency.
●
If you want to connect your Soundbar with another Bluetooth compatible device, press
PAIR to disconnect the
current connection.
●
Depending on your Bluetooth compatible device, different behaviors may appear. See your Bluetooth compatible
device’s User Manual for details.
●
The operational range between the Soundbar and a Bluetooth compatible device is approximately 30 feet (10m), if
there is no interference or obstacles.
– 16 –EN
Playing back a music file through USB Memory Stick
You can enjoy playback of music files which are stored on a USB Memory Stick on this Unit.
Preparing for USB Memory Stick playback
You require the following equipment:
–
A FAT(FAT16)/FAT32 formatted USB Memory Stick
–
A music file which has extension of “WAV”
NOTE(S)
●
WAV files stored in the root directory, or in a folder in the root directory, can be played.
●
Playback is in Alphabetical/Numerical order (Folder/File) names. Files in the same folder will be played
continuously.
●
Playable format is: up to 96KHz/24bit, Stereo, LPCM.
●
Only FAT(FAT16)/FAT32 formatted portable memory is supported.
●
When a music file is playing back, do not remove a USB Memory Stick.
This may cause the corruption of the music file or damage to the USB Memory Stick.
●
If you cannot play music file after the USB Memory Stick is inserted, retry the procedure or please contact Call Center
for further assistance.
●
Some music files stored on some USB Memory Sticks with this unit may not play back.
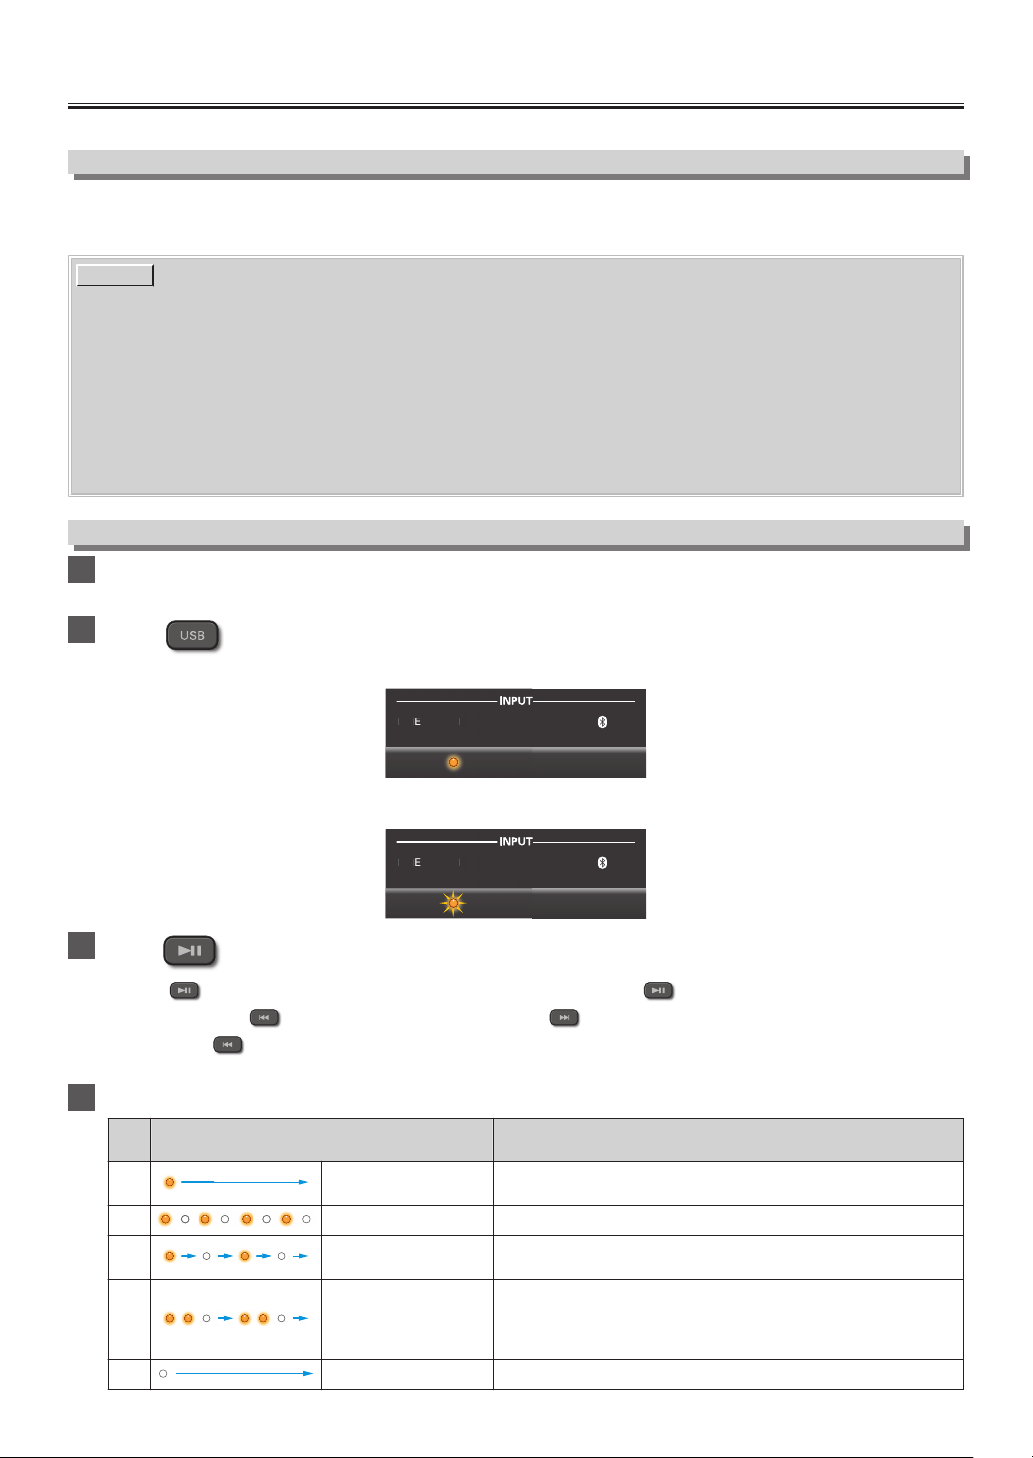
Playing back a music file
1
Connect your USB Memory Stick with a music file to the USB terminal on the rear of the
Soundbar.
2
Press
on the Remote Control to switch the Soundbar to USB Mode.
●
When the Soundbar connects the USB Memory Stick, the USB indicator will blink rapidly while loading.
AUX PAIR
LINE USB OPTICAL/
COAXIAL
LIN
E
US
B OPTI
CAL
CO
AX
IAL
If the Soundbar successfully completed loading the USB Memory Stick and the music files, the USB indicator will blink
slowly.
AUX PAIR
LINE USB OPTICAL/
COAXIAL
LIN
E
US
B OPTI
CAL
CO
AX
IAL
3
Press on the Remote Control to play a music file on the connected USB Memory Stick.
●
Press
if you want to Pause playback. To go back to playback, press again.
●
You can also use to Skip Backward in a music file and to Skip Forward in a music file.
●
If you press
twice, the music file will go back to the previous music file. Press it repeatedly to go to the previous
music files. The music files will move backward one at a time.
4
To Exit USB Mode, press one of the other INPUT source buttons on the Remote Control.
USB indicator behavior
(The arrow indicates the passage of time.)
The current status of the USB device
1 Remains lit No USB device is connected or during playback.
2 Blinks rapidly USB device recognition is in process.
3 Blinks slowly Playback has been Stopped.
4
Blinks twice N Light
off N Repeats
A USB device is connected; no playable file is found or an
unrecognizable USB device. Make sure that the USB Memory
Stick has been formatted (FAT(FAT16)/FAT32) or supported music
files (“.WAV”) are stored correctly.
5 Remains unlit USB Input is not selected or the Soundbar is in Standby.
– 17 –EN

USEFUL TIPS
Resetting to the Factory Default mode
You can Delete the Bluetooth profiles that are stored On the Unit by resetting to the Factory Default mode.
1
Press to turn the Soundbar On.
2
Press to select the LINE input.
3
Press
5 times within 3 seconds.
●
After completing Reset, the Soundbar will be Shut Down and go into Standby mode.
NOTE(S)
●
In order to reset Volume, Sound preset, INPUT source, SURROUND, and Night Mode, unplug the AC Power cord
and wait at least 20 seconds, then plug it back in and turn the Soundbar On.
Upgrading the Software
SANYO continuously tries to improve its products and we strongly recommend that you Upgrade the Soundbar Software when
Upgrades are available. New Software can be downloaded from our website at http://sanyo-av.com/support/download.php
using the Model Number from your Soundbar to find information.
Preparing for the Software Upgrade
You require the following equipment:
–
A PC with web browsing capability
–
An archive utility that supports the ZIP-format (e.g. WinZip
for Windows or StuffIt for Mac OS)
–
A Blank empty clean FAT(FAT16)/FAT32 formatted USB
Memory Stick
NOTE(S)
●
Only FAT(FAT16)/FAT32 formatted portable memory
is supported.
●
Use only Software Upgrades that can be found on the
Sanyo web site.
CAUTION(S)
During Software Upgrade is running, DO NOT do the
following:
●
Unplugging the Soundbar’s AC Power cord.
●
Pressing any buttons.
●
Removing the USB Memory Stick from the Soundbar.
Upgrading the Software
Find information and Software related to your Soundbar and
Download the Latest Software Upgrade file to your PC.
1
On your PC, open a web browser and go
to http://sanyo-av.com/support/
download.php
2
Enter the Model Number in the “Type the
Model Number...” field.
3
Click the desired Software to be Downloaded.
●
Download to your PC and then Decompress the ZIP-
file.
4
Copy the Upgrade file to the Empty root
directory on the clean formatted USB
Memory Stick.
5
Unplug the Soundbar’s AC Power cord
from the AC outlet.
6
Connect your USB Memory Stick with the
Upgrade file to the USB terminal on the
rear of the Soundbar.
7
Plug the AC Power cord into the AC outlet,
then Press .
8
Press
on the Remote Control to
switch to USB Mode.
●
Wait until loading completes. (The USB indicator
slowly blinks.)
9
Press each button in the following order
within 3 seconds.
●
Software Upgrade will start.
●
The indicators show the Upgrade progress.
●
All indicators will go unlit if Upgrade is completed
successfully.
●
If Indicators keep lighting or blinking after 10 minutes
have passed, the Upgrade has failed. Unplug the AC
Power cord, remove the USB Memory Stick from the
Soundbar, confirm that the correct Upgrade file is
saved to the USB Memory Stick, then retry from step
6
on.
10
Press .
– 18 –EN
Auto Standby Function
●
This Soundbar will automatically go into Standby mode for Energy Saving if no Audio Signal has been
input for more than 20 minutes.
●
In order to use the Soundbar again while it is in Standby mode, press
on the Remote Control.
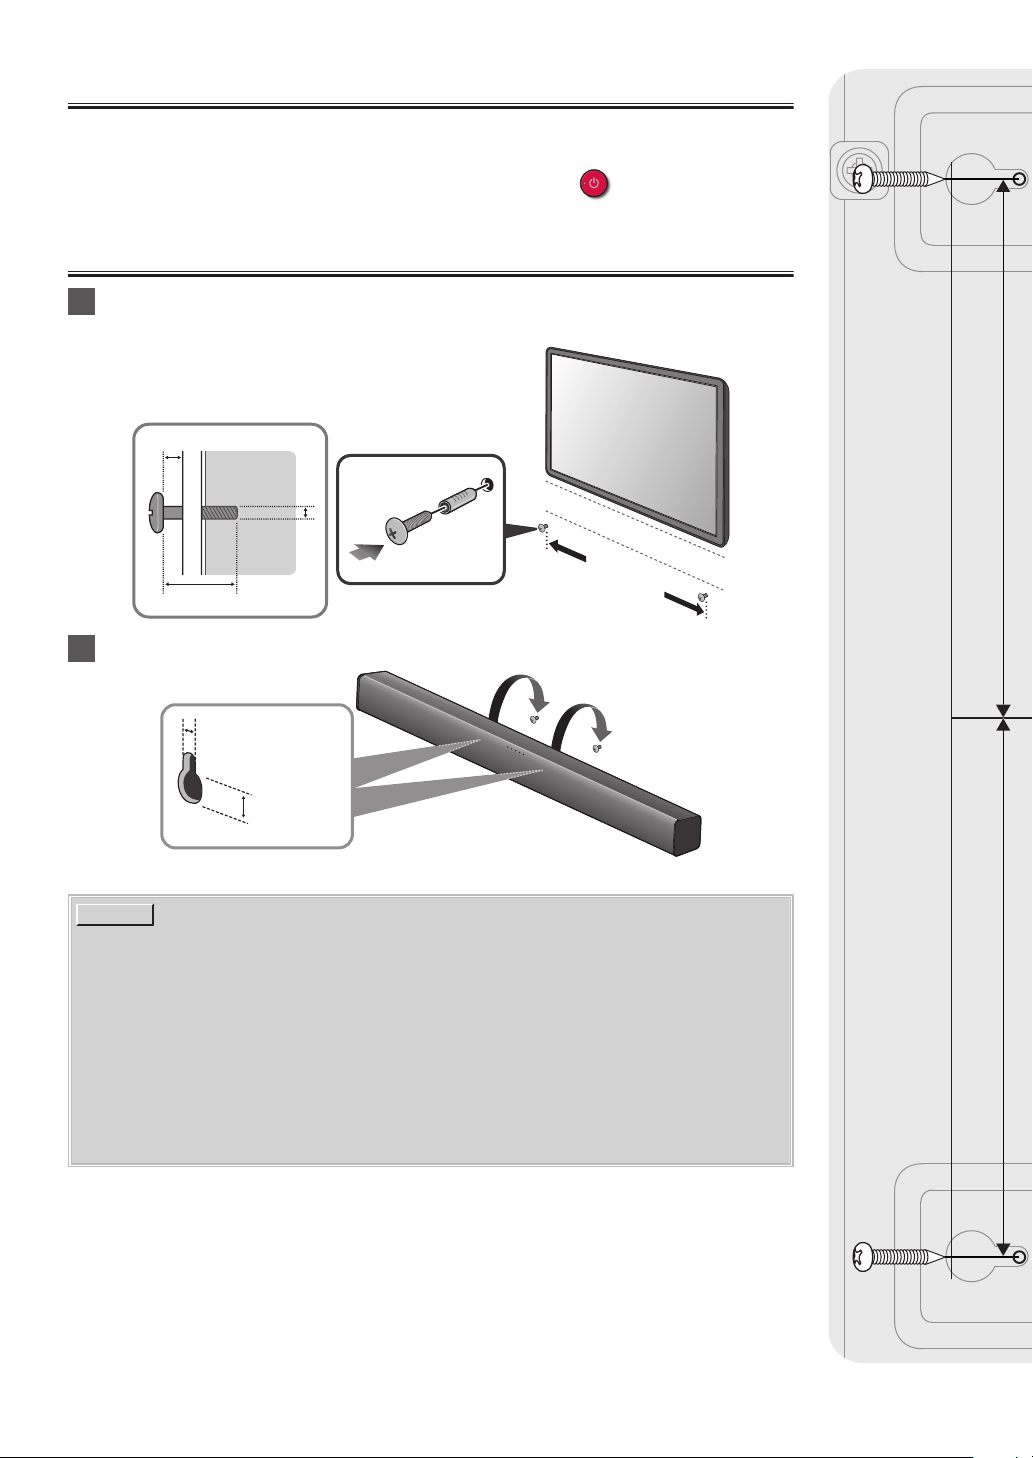
Installing the Soundbar on a Wall
1
Purchase the screws (x 2) by length/diameter below,
now make screw holes on the vertical interior Wall.
9/64"~5/32"/3.5~4mm
>1-3/16"/30mm
5/32"/4mm
5/32"/4mm
7-1/2"/190mm
Molly Anchor
2
Hang the Soundbar over the screws.
~3/16"/5 mm
~3/8"/9 mm
●
There is also Wall Mounting Template in the Setup Manual.
NOTE(S)
Funai is not liable for these types of accidents or injury noted below.
●
Do not mount the Soundbar onto the Wall while your Soundbar is plugged in or Turned On.
It may result in an electrical shock injury.
●
Install the screws on a sturdy vertical Wall. If installed onto a Ceiling or slanted Wall, the
Soundbar may fall which could result in a severe injury.
●
Make sure that the Wall where you are mounting the Soundbar is appropriate. Some mounts
are not designed to be mounted to Walls with steel studs or cinder block construction. If you
are unsure, contact a professional installer.
●
Do not fasten the screws using excessive force. This may damage the product or cause the
product to fall, leading to an injury.
●
Never allow children to climb on or play on the Soundbar.
3-3/4" (95mm)3-3/4" (95mm)
Center line
Wall Mounting Template
– 19 –EN

INFORMATION
Troubleshooting Guide
If the Unit does not perform properly when operated as instructed in this Owner’s Manual, refer to the following.
Problem Corrective action
No Power (no LED lights will be seen)
– Check if the AC Power cords are properly connected.
– Unplug AC Power cords from Soundbar and Subwoofer, wait for 20 seconds. Then Plug in the
Subwoofer followed by the Soundbar, immediately turn the Soundbar On using the Remote
Control.
No Sound
– Make sure the TV, other Devices and Soundbar are all Turned On.
– Make sure Unit is Connected to an Audio Output on your Device.
– Press INPUT source buttons on your Soundbar Remote Control to select the correct Audio Input.
–
Confirm that the Soundbar is not Muted. Press the VOL +/- or button(s) on the Remote Control
to unmute the Sound. (See “Adjust the Volume” on page 12 )
– For Optical Audio connection, select another Audio signal on the connected external device.
(This product supports Dolby Digital and LPCM)
– Depending on the usage and usage environment, chatter sound and distorted sound may be
generated. To reduce such sounds, lower the volume.
If Input is Optical Sound make sure that the Optical Cable Connector is completely inserted into
the Terminal (Click Sound is heard when properly inserted).
Distorted sound
– Adjust the Sound Settings on your Connected device.
– Adjust the Headphone Volume on some TV’s if you connect this Unit to the Headphone jack on
your TV using the Supplied 3.5mm Line-In cable.
– Decrease the volume on the Connected Bluetooth compatible Device.
No Sound from Subwoofer
– Check if LED indicator on the Rear of Subwoofer is lit.
– If the Red LED indicator does not light up, unplug the AC Power cords of the Soundbar and
Subwoofer, wait 1 minute, then plug their AC Power cords back in and perform Pairing with the
Subwoofer again.
–
To perform Pairing with the Subwoofer again, see the instructions in the under
2
in
“Turning On the Soundbar” on page 11.
– Certain Sound Sources may not contain enough Bass Sound to activate the Subwoofer, try playing
Audio with more Bass.
– Night Mode 1 or 2 may be On. See “Night Mode” on page 14.
Low Sound or Low Bass Sound from
Subwoofer
– Night Mode 1 or 2 may be On. See “Night Mode” on page 14.
Abnormal noise is generated. – Be sure the Cable(s) are plugged in all the way.
No reaction to the Remote Control.
– Confirm that the Soundbar AC Power cord is plugged into a Power outlet.
– Check the Batteries in Remote Control and make sure they are properly Inserted using + or -
symbols.
– Aim Remote at the Center of this unit.
– Use a Digital or Phone Camera pointing the Remote Control at the Camera Lens and press any
Remote button. If Remote IR LED(s) flash on Camera Display, then the Remote is Transmitting a
Signal. Some Phone Cameras have IR filter(s) in their Lens, therefore you will not see the IR LED(s)
flash.
– If the Remote Control does not work and all LEDs on the Soundbar stay lit for over 30 seconds,
there is a failure in the electrical system. Unplug the AC Power cord and contact the Service
Center.
An external Device cannot connect with
the Soundbar via Bluetooth.
– Confirm that the external Device is compatible with the audio signals supported by the Soundbar.
– Confirm that Bluetooth is Enabled on the external Device. See the User Manual on the external
Device on how to enable Bluetooth.
– If reconnecting the Bluetooth compatible Device to the Soundbar fails, delete the registered profile
of this Soundbar from the Bluetooth compatible Device, then perform pairing again.
This unit can store up to 9 device profiles.
– Another Bluetooth compatible Device is already connected to the Soundbar. Disconnect the
connected Device, then try again.
Poor sound quality from the connected
Bluetooth compatible Device.
– The Bluetooth reception may be poor. Confirm that there is no obstacle between the Bluetooth
compatible Device and the Soundbar. If this does not improve the sound quality, move the
Bluetooth compatible Device closer to the Soundbar.
Unstable connection between the
Bluetooth compatible Device and the
Soundbar.
– The Bluetooth reception may be poor. Confirm that there is no obstacle between the Bluetooth
compatible Device and the Soundbar. If this does not improve the Sound quality, move the
Bluetooth compatible Device closer to the Soundbar.
– 20 –EN

Specifications
Power requirements Power requirements
Output power 80W (Front L/R speaker: 40W, Subwoofer: 40W)
Dimensions
(width x height x depth)
Soundbar: 39.3 x 3.1 x 3.1 inches (999 x 77 x 77 mm)
Subwoofer: 8.5 x 10.1 x 11.9 inches (217 x 257 x 303 mm)
Weight
Soundbar: 5.29 lbs. (2.40kg)
Subwoofer: 8.38 lbs. (3.80kg)
Bluetooth
Bluetooth profile: A2DP, AVRCP
Bluetooth version: 4.1
Optical / Coaxial Input
Dolby Digital
Linear PCM (LPCM) 96kHz/24bit Max
USB WAV file (LPCM format)
●
Designs and Specifications are subject to change without notice.
●
If there is a Discrepancy between Languages, the default Language will be English.
– 21 –EN

LIMITED WARRANTY
NINETY (90) DAY LABOR / ONE (1) YEAR PARTS
WARRANTY COVERAGE:
This warranty obligation is limited to the terms as set forth below.
WHO IS COVERED:
This product warranty is issued to the original purchaser or the
person receiving the product as a gift against defects in materials
and workmanship as based on the date of original purchase
(“Warranty Period”) from an Authorized Dealer. The original
sales receipt showing the product name and the purchase date
from an authorized retailer is considered such proof.
WHAT IS COVERED:
This warranty covers new products if a defect in material or
workmanship occurs and a valid claim is received within the
Warranty Period. At its option, the company will either (1) repair
the product at no charge, using new or refurbished replacement
parts, or (2) exchange the product with a new or refurbished
product at company’s option. Replacement products or parts
provided under this warranty are covered against defects in
materials and workmanship from the date of the replacement or
repair for ninety (90) days or for the remaining portion of the
original product’s warranty, whichever provides longer coverage
for you. When a product or part is exchanged, any replacement
item becomes your property and the replaced item becomes
company property. When a refund is given, your product
becomes company property.
Note: Any product sold and identified as refurbished or renewed
carries a ninety (90) day limited warranty.
Replacement product can only be sent if all warranty
requirements are met. Failure to follow all requirements can
result in delay.
WHAT IS NOT COVERED - EXCLUSIONS AND LIMITATIONS:
This Limited Warranty applies only to new company
manufactured products that can be identified by the trademark,
trade name, or logo affixed to it. This Limited Warranty does not
apply to any hardware product or any software, even if packaged
or sold with the product, as manufacturers, suppliers, or
publishers may provide a separate warranty for their own
products packaged with the bundled product.
The company is not liable for any damage to or loss of any
programs, data, or other information stored on any media
contained within the product, or other additional product or part
not covered by this warranty. Recovery or reinstallation of
programs, data or other information is not covered under this
Limited Warranty.
This warranty does not apply (a) to damage caused by accident,
abuse, misuse, neglect, misapplication, or non-supplied product,
(b) to damage caused by service performed by anyone other than
company approved Authorized Service Location, (c) to a product
or a part that has been modified without written company
permission, or (d) if any serial number has been removed or
defaced, or (e) product, accessories or consumables sold “AS IS”
without warranty of any kind by including refurbished product
sold “AS IS” by some retailers.
This Limited Warranty does not cover:
●
Shipping costs for returning defective product.
●
Labor charges for installation or setup of the product,
adjustment of customer controls on the product, and
installation or repair of antenna/signal source systems
outside of the product.
●
Product repair and/or part replacement because of improper
installation or maintenance, connections to improper
voltage supply, power line surge, lightning damage, retained
images or screen markings resulting from viewing fixed
stationary content for extended periods, product cosmetic
appearance items due to normal wear and tear,
unauthorized repair or other cause not within the control of
the company.
●
Damage or claims for products not being available for use,
or for lost data or lost software.
●
Damage from mishandled shipments or transit accidents
when returning product.
●
A product that requires modification or adaptation to enable
it to operate in any country other than the country for which
it was designed, manufactured, approved and/or authorized,
or repair of products damaged by these modifications.
●
A product used for commercial or institutional purposes
(including but not limited to rental purposes).
●
Product lost in shipment and no signature verification
receipt can be provided.
●
Failure to operate per Owner’s Manual.
TO OBTAIN ASSISTANCE…
Contact the Customer Care Center at:
sanyo-av.com
1 866 212 0436
REPAIR OR REPLACEMENT AS PROVIDED UNDER THIS
WARRANTY IS THE EXCLUSIVE REMEDY FOR THE CONSUMER,
WITH THE ISSUING COMPANY NOT LIABLE FOR ANY
INCIDENTAL OR CONSEQUENTIAL DAMAGES FOR BREACH OF
ANY EXPRESS OR IMPLIED WARRANTY ON THIS PRODUCT.
EXCEPT TO THE EXTENT PROHIBITED BY APPLICABLE LAW,
ANY IMPLIED WARRANTY OF MERCHANTABILITY OR FITNESS
FOR A PARTICULAR PURPOSE ON THIS PRODUCT IS LIMITED
IN DURATION TO THE DURATION OF THIS WARRANTY.
Some states do not allow the exclusions or limitation of
incidental or consequential damages, or allow limitations on how
long an implied warranty lasts, so the above limitations or
exclusions may not apply to you.
This warranty gives you specific legal rights. You may have other rights which vary from state/province to state/province.
FUNAI CORPORATION, Inc. 19900 Van Ness Avenue, Torrance, CA 90501
– 22 –EN
Español
1
Conexiones
Para conectar a una TV, consulte “CONNECTIONS
(CONEXIONES)” en la página 9 y verifique las terminales de
la TV, después conecte su Soundbar a la TV, y conecte el cable
de energía CA. Para reproducir audio a través de un dispositivo
Bluetooth, consulte “Playing back a music file through
Bluetooth (Reproducir audio a través de Bluetooth)” en la
página 15 y conecte el dispositivo Bluetooth a su Soundbar.
2
Instalación de las Pilas en el Control Remoto
1 2 3
3
Reproducción
A
Presione para encender su
Soundbar.
B
Presione el botón de fuente INPUT
(Entrada) y confirme que se enciendan
las luces del indicador de fuente INPUT
correctas.
A
B
4
Control remoto
Botón Description
Presione para encender la unidad, o para cambiar
la unidad en modo de Espera.
(Para apagar completamente la unidad, debe
desconectar el cable de energía CA.)
Presione para cambiar el sonido preestablecido
Estándar.
Presione para cambiar el sonido preestablecido
para Deportes.
Presione para cambiar el sonido preestablecido
para Música.
Presione para silenciar el sonido y recuperar el
sonido.
Presione para seleccionar Óptico de los
dispositivos conectados a este Soundbar.
Presione para seleccionar Línea de los dispositivos
conectados a este Soundbar.
Presione para seleccionar la entrada USB del
dispositivo conectado a este Soundbar.
Presione para seleccionar AUX de los dispositivos
conectados a este Soundbar.
Presione para subir / bajar el volumen para
Soundbar.
Botón Description
Presione para cambiar el sonido preestablecido
para Películas.
Presione para cambiar el sonido preestablecido
para Noticias.
Presione para cambiar el sonido preestablecido
Modo nocturno.
Presione para ajustar el Sonido Envolvente.
Presione para seleccionar Bluetooth de los
dispositivos conectados a este Soundbar.
Presione para desconectar el dispositivo Bluetooth
conectado actualmente y comenzar el modo de
conexión para establecer una nueva conexión a
otro dispositivo Bluetooth. Si no se conecta un
dispositivo Bluetooth dentro de 2 minutos,
presione este botón para reiniciar el modo de
conexión. El modo de conexión sólo puede iniciar
cuando se selecciona Bluetooth.
Presione para saltar hacia adelante para un archivo
de música. (Sólo modo Bluetooth o modo USB)
Presione para reproducir o poner pausa para un
archivo de música. (Sólo modo Bluetooth o modo
USB)
Presione para saltar hacia atrás para un archivo de
música. (Sólo modo Bluetooth o modo USB)
– 23 – ES

GARANTIA LIMITADA
NOVENTA (90) DÍAS EN MANO DE OBRA / UNA (1) AÑO EN PARTES
COBERTURA DE GARANTÍA:
La obligación de ésta garantía se limita a los términos
establecidos a continuación.
QUIÉNES ESTÁN CUBIERTOS:
La compañía le garantiza el producto al comprador original o a
la persona que lo recibe como regalo contra defectos en los
materiales y en la mano de obra, a partir de la fecha de la compra
original ("período de garantía") en el distribuidor autorizado. El
recibo de ventas, donde aparecen el nombre del producto y la
fecha de la compra en un distribuidor autorizado, se considerará
comprobante de esta fecha.
LO QUE ESTÁ CUBIERTO:
Esta garantía cubre productos nuevos si se produce algún
defecto en el material o la mano de obra y la compañía recibe un
reclamo válido dentro del período de garantía. A su propia
discreción, ésta (1) reparará el producto sin costo, usando piezas
de repuesto nuevas o reacondicionadas; (2) intercambiar el
producto con un producto nuevo o reacondicionado a opción de
la compañía. La compañía garantiza productos o piezas de
repuesto proporcionados bajo esta garantía contra defectos en
los materiales y en la mano de obra durante noventa (90) días o
por el resto de la garantía del producto original, lo que le
proporcione más cobertura. Cuando se cambia un producto o
una pieza, el artículo que usted recibe pasa a ser de su propiedad
y el que le entrega a la compañía pasa a ser propiedad de ésta
última. Cuando se proporcione un reembolso, su producto pasa
a ser propiedad de la compañía. Nota: Cualquier producto que se
venda y que esté identificado como reacondicionado o renovado
tiene una garantía limitada de noventa (90) días.
El producto de reemplazo sólo se puede enviar si se cumplen
todos los requisitos de la garantía. El incumplimiento de tales
requisitos puede ocasionar un retardo.
LO QUE NO SE CUBRE: EXCLUSIONES Y LIMITACIONES:
La garantía limitada aplica sólo a los productos nuevos
fabricados por o para la compañía que se pueden identificar por
la marca registrada, el nombre comercial o por tener el logotipo
correspondiente. Esta garantía limitada no se aplica a ningún
producto de hardware ni de software que no sea de la compañía,
incluso si viene empacado con el producto o si se vende junto
con éste. Los fabricantes, proveedores o editores que no sean de
la compañía pueden proporcionar una garantía por separado
para sus propios productos empacados con el producto.
La compañía no es responsable por ningún daño o pérdida de
programas, datos u otra información almacenados en algún
medio contenido en el producto, ni por ningún otro producto o
pieza que no esté cubierta por esta garantía. La recuperación o
la reinstalación de programas, datos u otra información no está
cubierta por esta garantía limitada.
Esta garantía no aplica (a) a daños causados por accidente,
abuso, mal uso, negligencia, mala aplicación o por productos no
provistos por la compañía; (b) a daño provocado por servicio
realizado por cualquier persona ó establecimiento de servicio no
autorizado por la compañía; (c) a productos o piezas que se
hayan modificado sin la autorización por escrito de la compañía;
(d) si se ha retirado o desfigurado el número de serie; y tampoco
se aplica la garantía a (e) productos, accesorios o insumos
vendidos TAL COMO ESTÁN sin garantía de ningún tipo, lo que
incluye productos vendidos TAL COMO ESTÁN por algunos
distribuidores.
Esta garantía limitada no cubre:
●
Costos de embarque para retorno de producto defectuoso.
●
Los costos de mano de obra por la instalación o
configuración del producto, el ajuste de controles del cliente
en el producto y la instalación o reparación de sistemas de
antena o fuente de señal externos al producto.
●
La reparación del producto o el reemplazo de piezas debido
a instalación o mantenimiento inadecuada, a conexiones
hechas a un suministro de voltaje inadecuado, sobrevoltaje
de la línea de alimentación, daño causado por relámpagos,
imágenes retenidas o marcas en la pantalla producto de la
visualización de contenido fijo durante períodos
prolongados, reparaciones cosméticas debido al desgaste
normal, reparaciones no autorizadas u otras causas que no
se encuentren bajo el control de la compañía.
●
Daños o reclamos por productos que no están disponibles
para su uso, por datos perdidos o por pérdida de software.
●
Daños debido a mala manipuración en el transporte o
accidentes de envío al devolver el producto.
●
Un producto que requiera modificación o adaptación para
permitir su funcionamiento en algún país que no sea el país
para el que se diseñó, fabricó, aprobó y/o autorizó o la
reparación de productos dañados por estas modificaciones.
●
Un producto que se use para propósitos comerciales o
institucionales (lo que incluye, entre otros, los de alquiler).
●
La pérdida del producto en el envío y cuando no se pueda
proporcionar una firma que verifique el recibo.
●
No operar según el Manual del propietario.
PARA OBTENER AYUDA…
Comuníquese con el Centro de Atención al Cliente al:
sanyo-av.com
1 866 212 0436
LA REPARACIÓN O EL REEMPLAZO, SEGÚN LO DISPONE ESTA
GARANTÍA, ES LA SOLUCIÓN EXCLUSIVA PARA EL CLIENTE. LA
COMPAÑÍANO SERÁ RESPONSABLE DE LOS DAÑOS
INCIDENTALES O INDIRECTOS QUE INFRINJAN ALGUNA
GARANTÍA EXPRESA O IMPLÍCITA SOBRE ESTE PRODUCTO.
CON EXCEPCIÓN DE LO QUE PROHÍBA LA LEY VIGENTE, TODA
GARANTÍA IMPLÍCITA DE COMERCIABILIDAD Y ADECUACIÓN
PARA UN PROPÓSITO PARTICULAR EN ESTE PRODUCTO ESTÁ
LIMITADA EN DURACIÓN A LO QUE ESPECIFIQUE ESTA
GARANTÍA.
Algunos estados no permiten las exclusiones ni la limitación de
los daños incidentales o indirectos, ni permiten limitaciones
sobre la duración de la garantía implícita, de modo que las
limitaciones o exclusiones anteriores pueden no aplicarse a
usted.
Esta garantía le otorga derechos legales específicos. Usted puede tener otros derechos que varían entre los diferentes estados
y provincias.
FUNAI CORPORATION, Inc. 19900 Van Ness Avenue, Torrance, CA 90501
XHB01UH
★★★★★
– 24 – ES