Loading ...
Loading ...
Loading ...
5
OPERATING INSTRUCTIONS
DEFROSTING THE APPLIANCE
This refrigerator is equipped with a “Push Button”
defrost system. To activate the defrost cycle, push
the red defrost button located on the center of
the thermostat dial. The defrost cycle is initiated
immediately.
When defrosting is complete, the red button will
release and the refrigerator will resume normal
operating conditions.
Note: If the red defrost button is pressed
accidentally, it is not possible to manually deactivate
the defrost cycle. The defrost cycle must be allowed
to run its course.
Defrosting the refrigerator should take place
whenever ice build-up inside the freezer
compartment reaches 6 mm (1/4”) thick. Defrosting
may take a few hours, depending on the amount of
accumulated ice and ambient indoor temperature.
To speed up the defrosting process, remove all
frozen foods from the freezer section and leave the
door open for a short period of time.
Monitor the refrigerator closely during the defrosting
process to avoid water spilling and causing damage
to fl ooring or counter tops.
Important: Remember to close the refrigerator
door before the defrost cycle terminates and
normal operating conditions resume. The drip tray
should be in position directly below the freezer
compartment to catch condensed water during
defrosting.
Note: Never use sharp or pointed instruments to
remove ice from the freezer compartment. The
freezer compartment contains refrigerated gas
lines and if accidentally pierced it will render the
refrigerator inoperable and void the manufacturers
warranty. Do not allow the refrigerator to continue
operation if the freezer compartment is pierced.
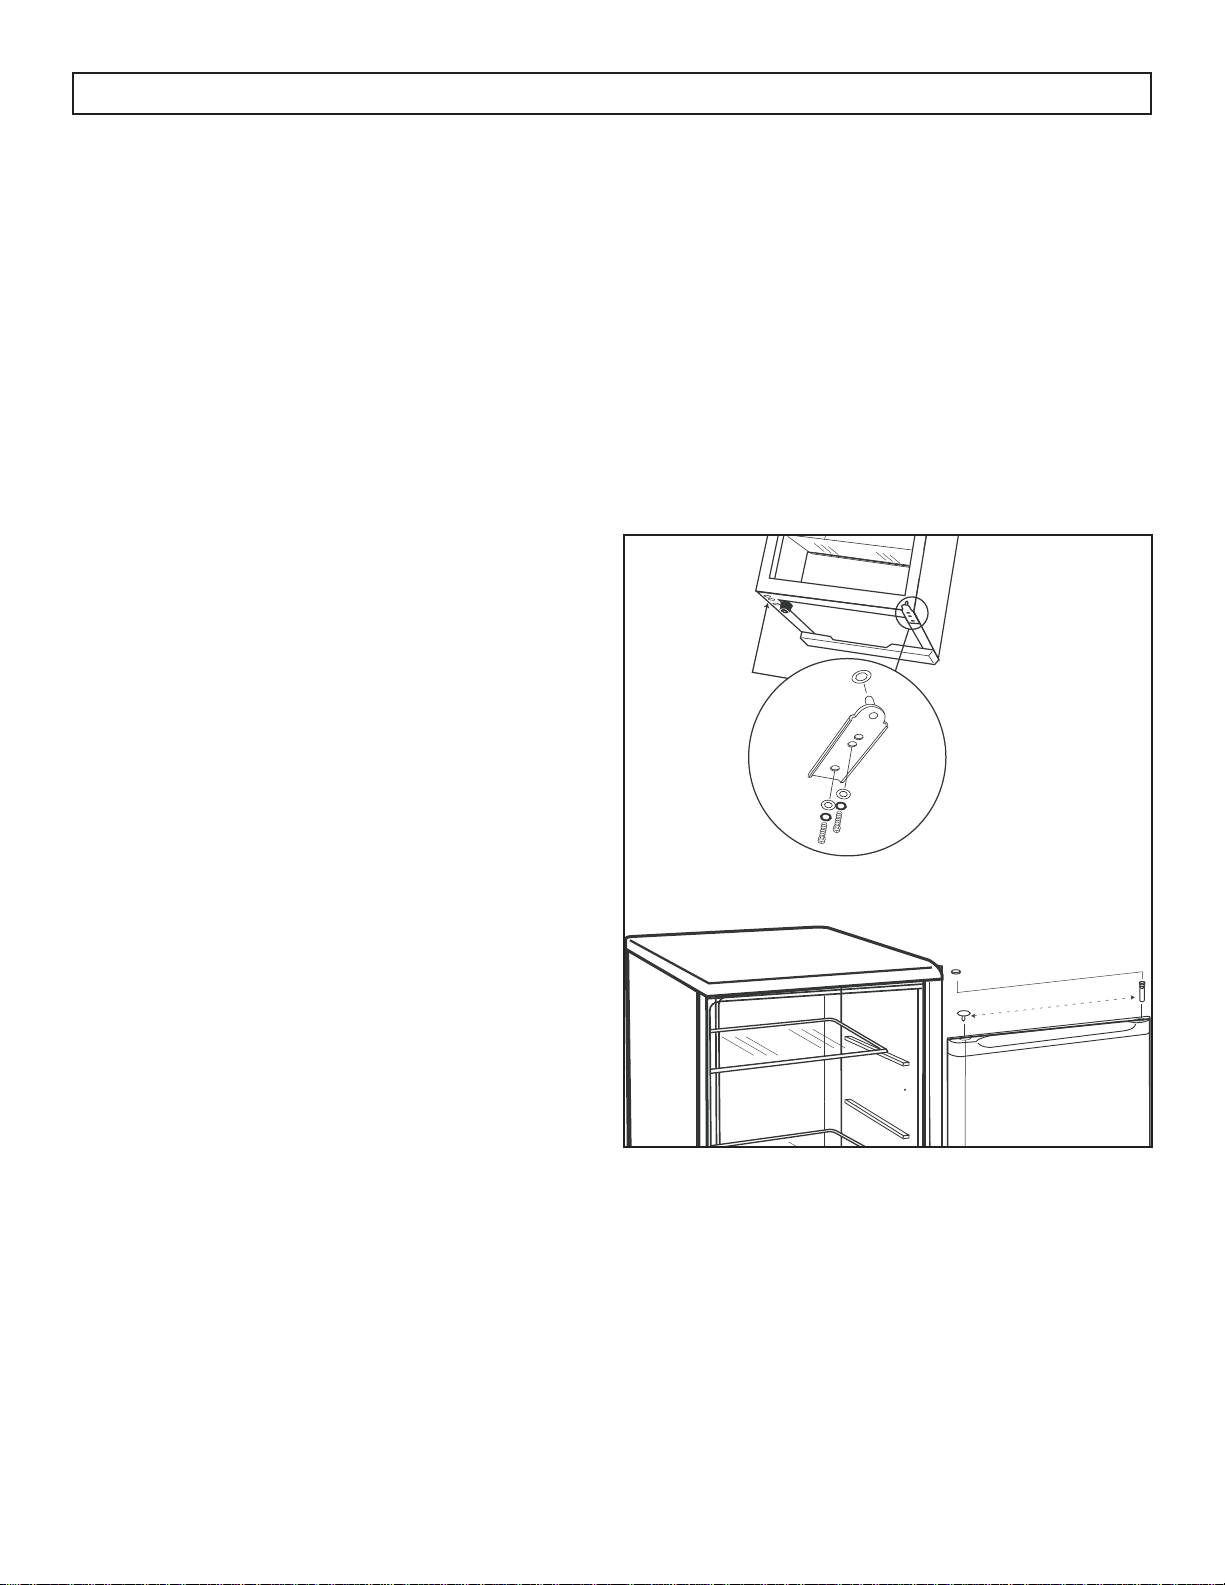
DOOR REVERSAL INSTRUCTIONS
If the appliance is placed on its back or side for any
length of time during this process, it must be allowed
to remain upright for 6 hours before plugging it in
to avoid damage to the internal components.
To change the direction of the door swing, follow
the instructions below.
Note: The upper hinge pin must be unscrewed from
the worktop and screwed into the hole on the other
side of the worktop before replacing the door on the
chassis.
Loading ...
Loading ...
Loading ...