Loading ...
Loading ...
Loading ...
8
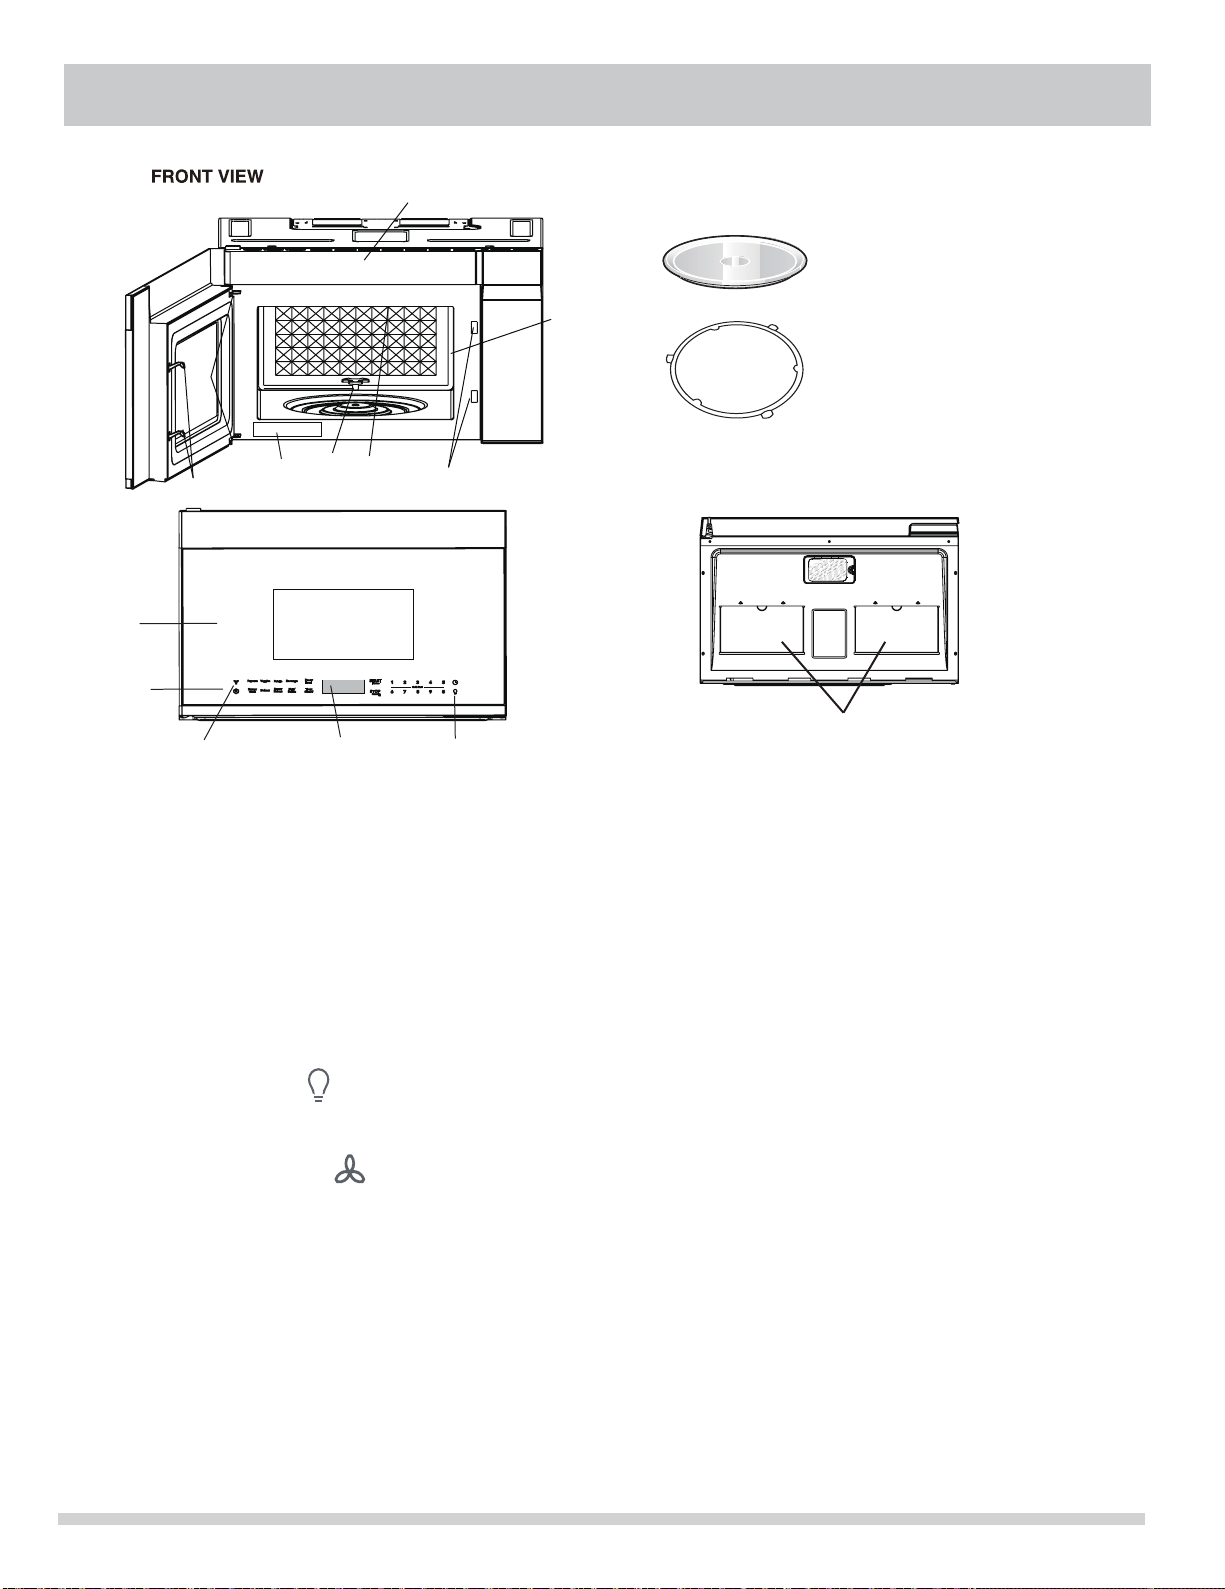
PART NAMES
E
1 Microwave oven door with see-through window
2 Door hinges
3 Waveguide cover:
DO NOT REMOVE.
4 Turntable motor shaft
5 Microwave oven light
It will light when microwave oven is operating or
door is open.
6 Safety door latches
The microwave oven will not operate unless the
door is securely closed.
7 Light hi lo pad
sser P light once for high, twice for low,
three times for light off.
for
10 Time display: Digital display, 99 minutes, 99
seconds
11 Ventilation openings
12 Removable turntable glass
Position glass tray on turntable motor shaft
13 Removable turntable support
Install the turntable support on the microwave
oven bottom, centering the turntable support
Vent hi/lo/off pad
Press Ffan once for
coupling.
around the turntable coupling. Then place the
turntable glass tray unto the turntable motor
coupling.
14 Rating label (model and serial number)
12
13
2
3
4
5
6
6
11
8 710
1
9
Grease filter
(Rear of microwave oven)
(Front of microwave oven)
BOTTOM VIEW
8
9 Auto-Touch control panel
14
high, twice
low, three times for
off.
Loading ...
Loading ...
Loading ...