
www.lg.com
19MB35D
22MB35D
24MB35D
ENGLISH
OWNER’S MANUAL
IPS LED MONITOR
(LED LCD MONITOR)
Please read this manual carefully before operating
your set and retain it for future reference.
IPS LED(LED LCD) MONITOR MODEL

2
ENG
ENGLISH
TABLE OF CONTENTS
CONTENTS
3 ASSEMBLINGANDPREPAR-
ING
3 Unpacking
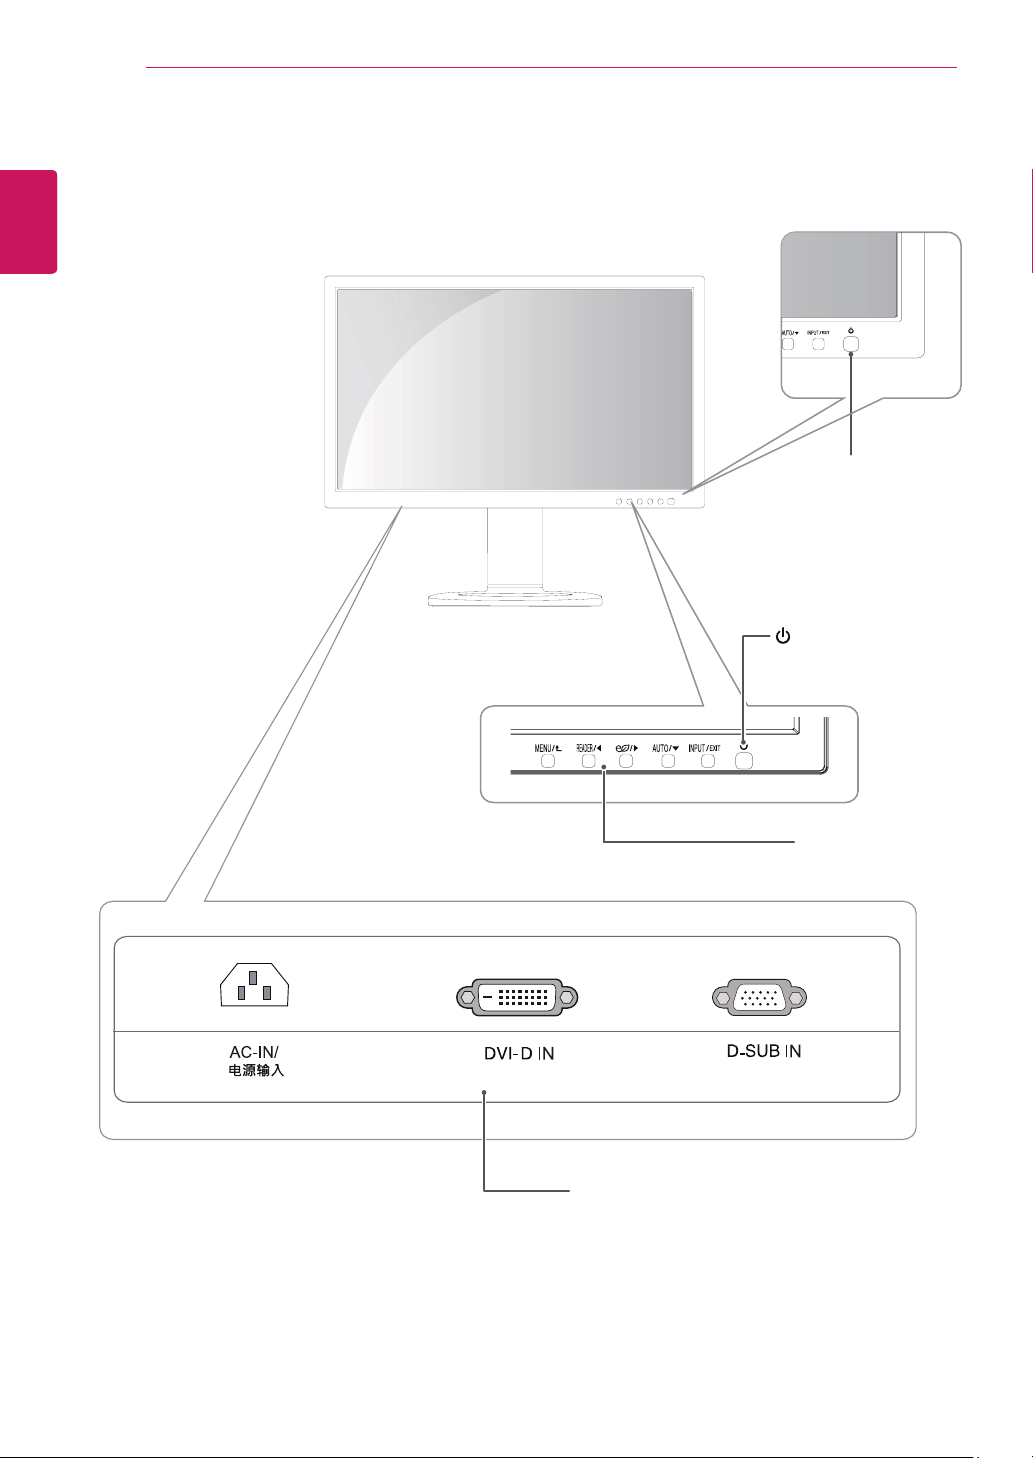
4 Partsandbuttons
5 SettinguptheMonitorset
5 - AttachingtheStandBase
5 - DetachingtheStandBase
6 - Mountingonatable
7 - UsingtheKensingtonlockingdevice
8 - Mountingonawall
9 USINGTHEMONITORSET
9 ConnectingtoaPC
9 - D-SUBconnection
9 - DVI-Dconnection
11 CUSTOMIZINGSETTINGS
12 CustomizingSettings
12 - MenuSettings
13 -Picture
14 -Color
15 -Display
16 -Others
17 READERSetting
18 SUPERENERGYSAVING
19 TROUBLESHOOTING
21 SPECIFICATIONS
21 19MB35D
22 22MB35D
23 24MB35D
24 PresetModes(Resolution)
24 Indicator
25 PROPERPOSTURE
25 ProperpostureforusingtheMonitorset.
3
ENG
ENGLISH
ASSEMBLING AND PREPARING
ASSEMBLINGANDPREPARING
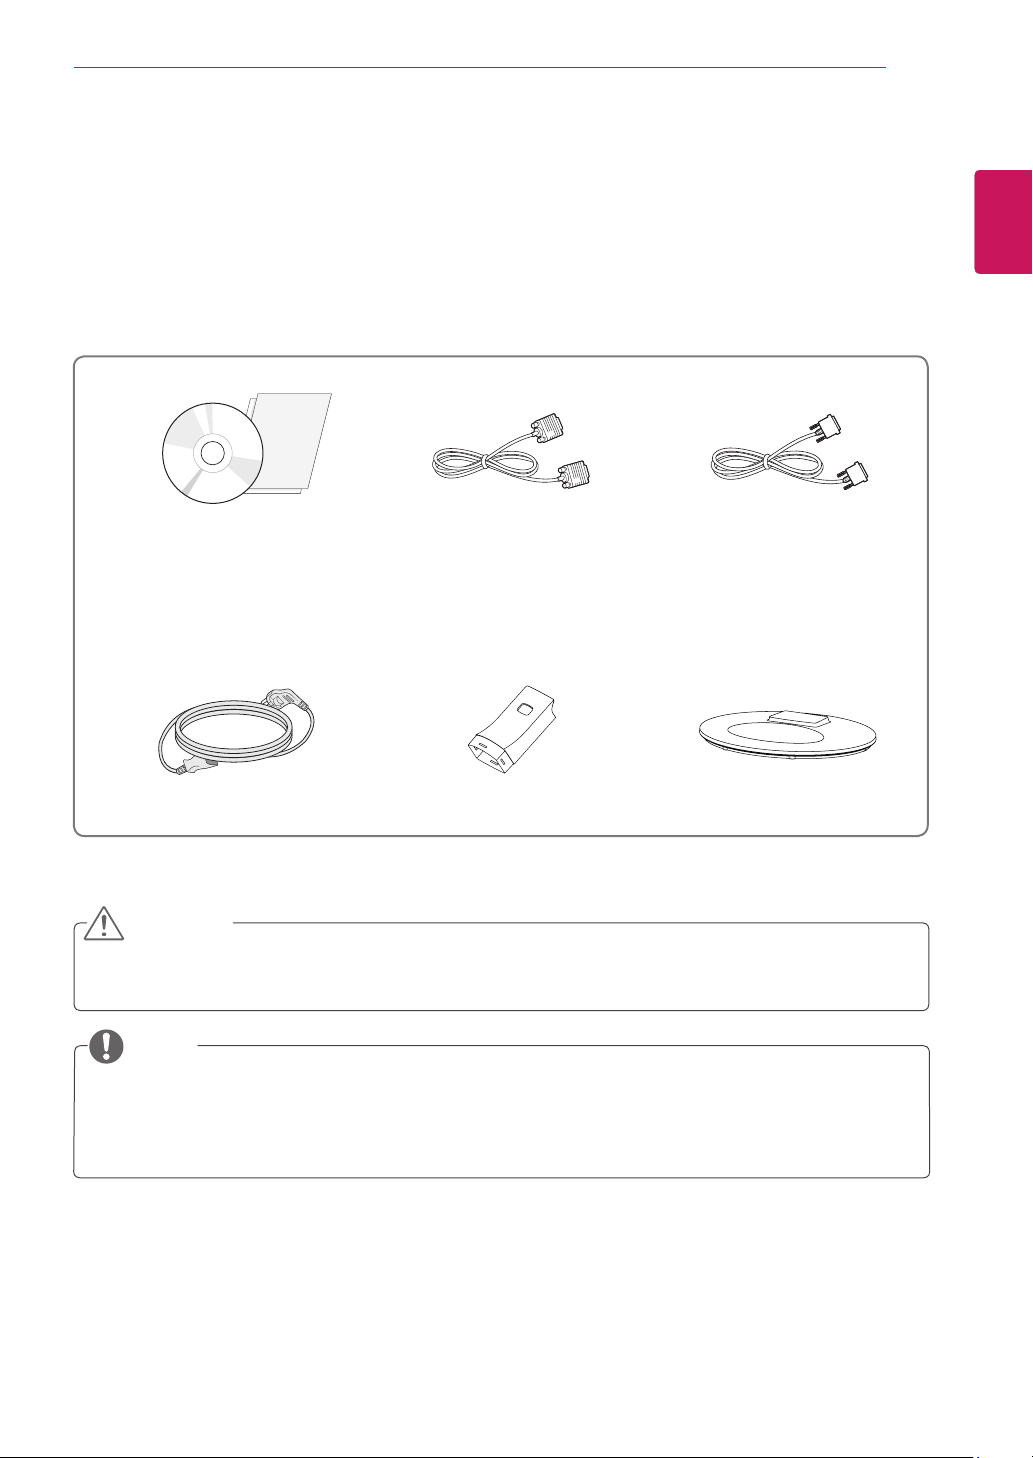
Unpacking
Checkyourproductboxforthefollowingitems.Ifthereareanymissingaccessories,contactthelocal
dealerwhereyoupurchasedyourproduct.Theillustrationsinthismanualmaydifferfromtheactualproduct
andaccessories.
Donotuseanyunapprovedaccessoriestoensurethesafetyandproductlifespan.
Anydamagesorinjuriesbyusingunapprovedaccessoriesarenotcoveredbythewarranty.
Theaccessoriessuppliedwithyourproductmayvarydependingonthemodel.
Productspecificationsorcontentsinthismanualmaybechangedwithoutpriornoticeduetoupgrade
ofproductfunctions.
CAUTION
NOTE
CD(Owner'sManual)/
Card
D-SUBCable
(Thiscableisnotincludedinall
countries.)
PowerCord
DVI-DCable
(Thiscableisnotincludedinall
countries.)
StandBody
StandBase
5
ENG
ENGLISH
ASSEMBLING AND PREPARING
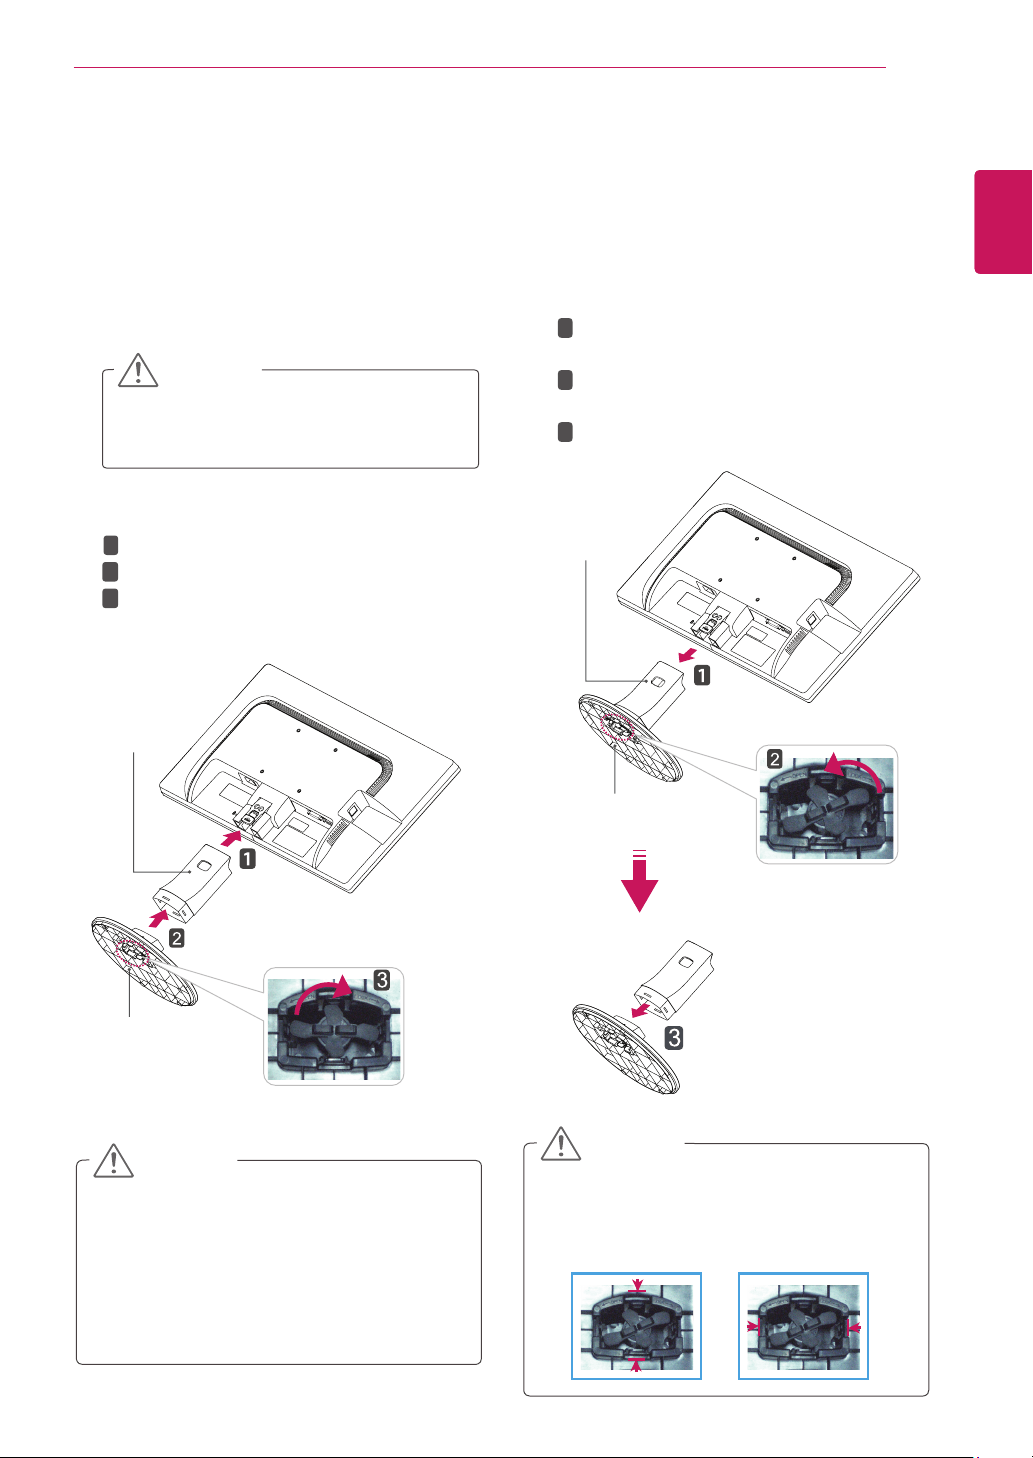
Attachthe
StandBody
tothemonitorset.
Attachthe
StandBase
.
Tiedownthebaselocktoperpendicularity
direction.
SettinguptheMonitorset
AttachingtheStandBase
1
PlacetheMonitorsetwiththescreenside
downonaflatandcushionedsurface.
Layafoammatorsoftprotectivecloth
onthesurfacetoprotectthescreenfrom
damage.
CAUTION
2
StandBase
StandBody
1
2
3
DetachingtheStandBase
1
PlacetheMonitorsetwiththescreenside
downonaflatandcushionedsurface.
StandBase
StandBody
PushingthePUSHbutton,Takethe
Stand
Body
fromthemonitorset.
Changeyourlockontheproductasit
followsandturnitinthearrowdirection.
Pulloutthe
StandBase
.
1
2
3
2
Ifyoucan'treleasethestandbaseeventhe
lockingknobisatareleaseposition,Please
pushtheindicatedknobdownandretryit.
CAUTION
Thisillustrationdepictsthegeneralmodelof
connection.Yourmonitormaydifferfromthe
itemsshowninthepicture.
Donotcarrytheproductupsidedownholding
onlythestandbase.Theproductmayfall
andgetdamagedorinjureyourfoot.
CAUTION
6
ENG
ENGLISH
ASSEMBLING AND PREPARING
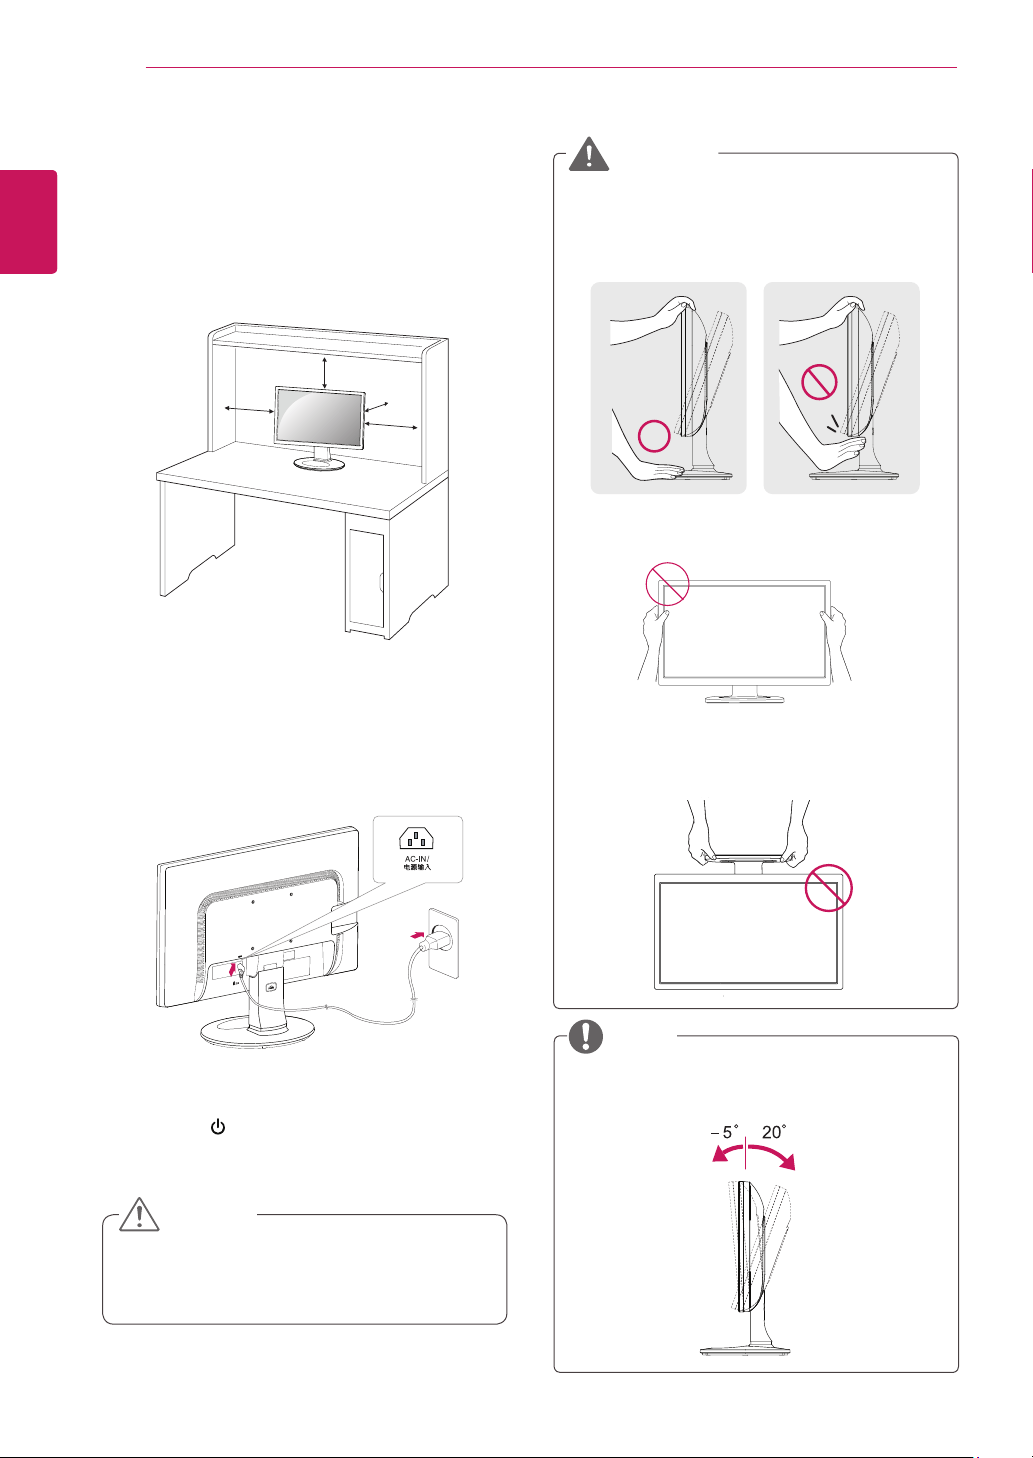
Mountingonatable
1
Liftthemonitorandplaceitonthetableinan
uprightposition.
Installatleast
10cm
awayfromthewallto
ensuresufficientventilation.
2
3
Pressthe (Power)buttononthefrontofthe
monitortoturnonthemonitor.
10 cm
10 cm
10 cm
10 cm
Unplugthepowercordpriortomovingor
installingthemonitor.Thereisriskofelectric
shock.
CAUTION
ConnectthePowercordtothemonitor,then
plugthepowercordintothewalloutlet.
Whenyouadjusttheangle,donotholdthe
bottomoftheMonitorsetframeasshownon
thefollowingillustration,asmayinjureyour
fingers.
Donottouchorpressthescreenwhen
adjustingtheangleofthemonitor.
Donotholdthissetlikebelowpicture.Monitor
screencandetachfromstandbaseandinjure
yourbody.
WARNING
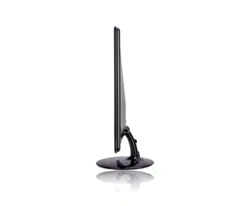
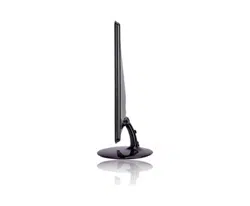
Tiltfrom+20to-5degreesupordowntoadjust
theangleoftheMonitorsettosuityourview.
NOTE
Front Rear
7
ENG
ENGLISH
ASSEMBLING AND PREPARING
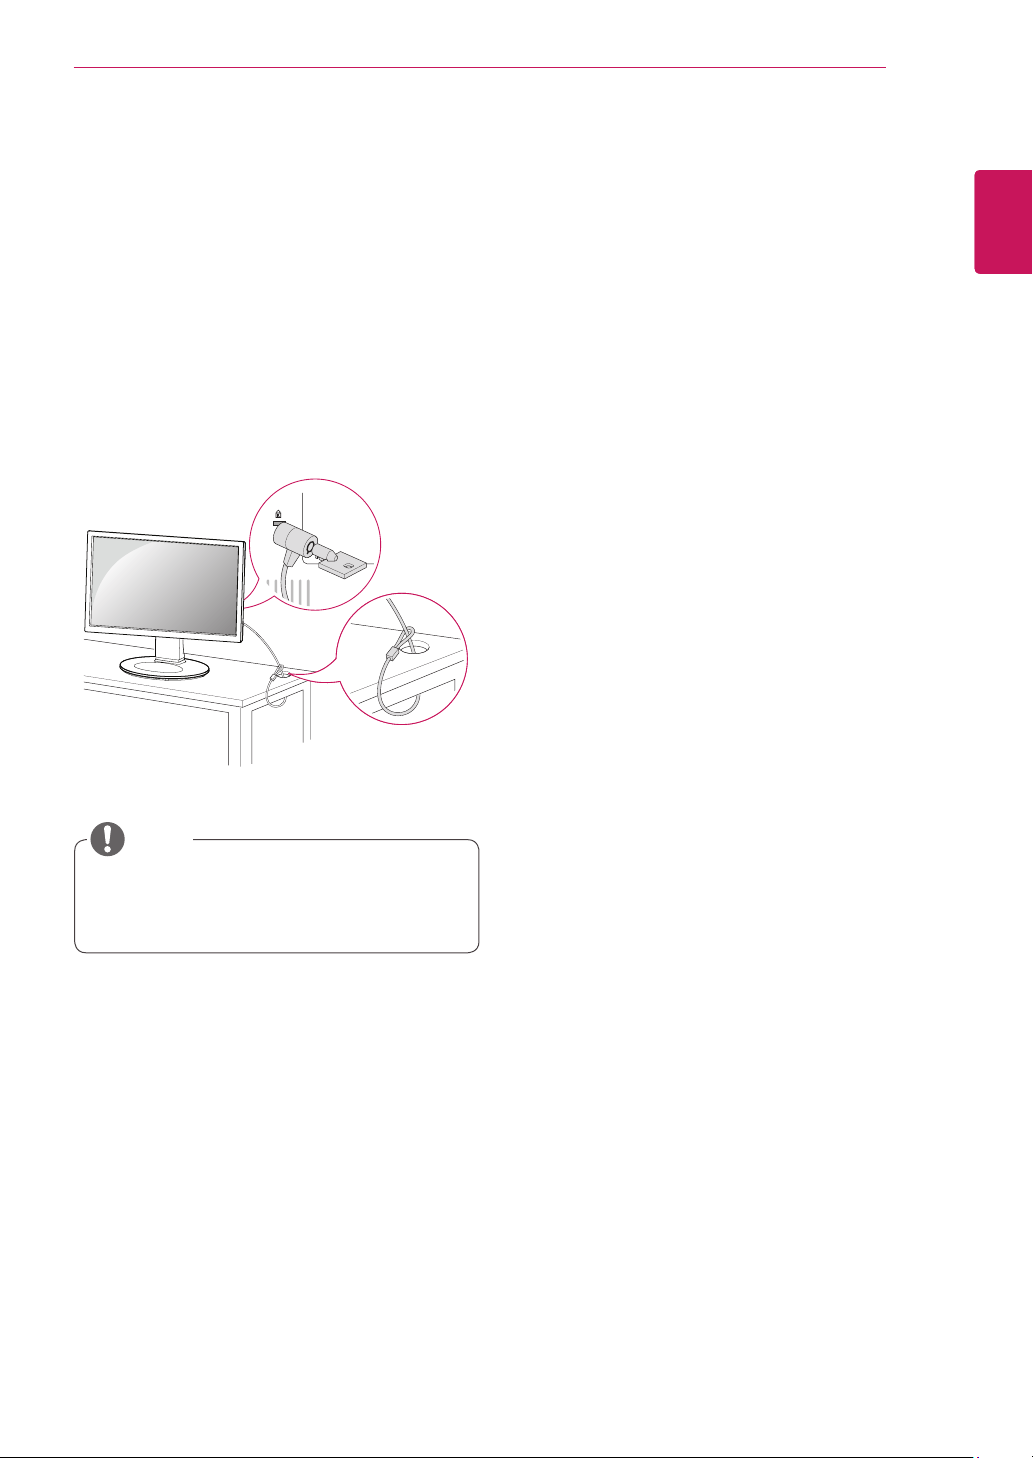
Using the Kensington locking
device
TheconnectorfortheKensingtonlockislocated
ontherearofthemonitor.
Formoreinformationoninstallationandusage,
refertotheKensingtonlockusermanualorvisit
thewebsiteathttp://www.kensington.com.
ConnectthemonitortothetablewiththeKensing-
tonlockcable.
UsingtheKensingtonlockisoptional.The
accessoriescanbepurchasedatyourlocal
electronicsstore.
NOTE
8
ENG
ENGLISH
ASSEMBLING AND PREPARING
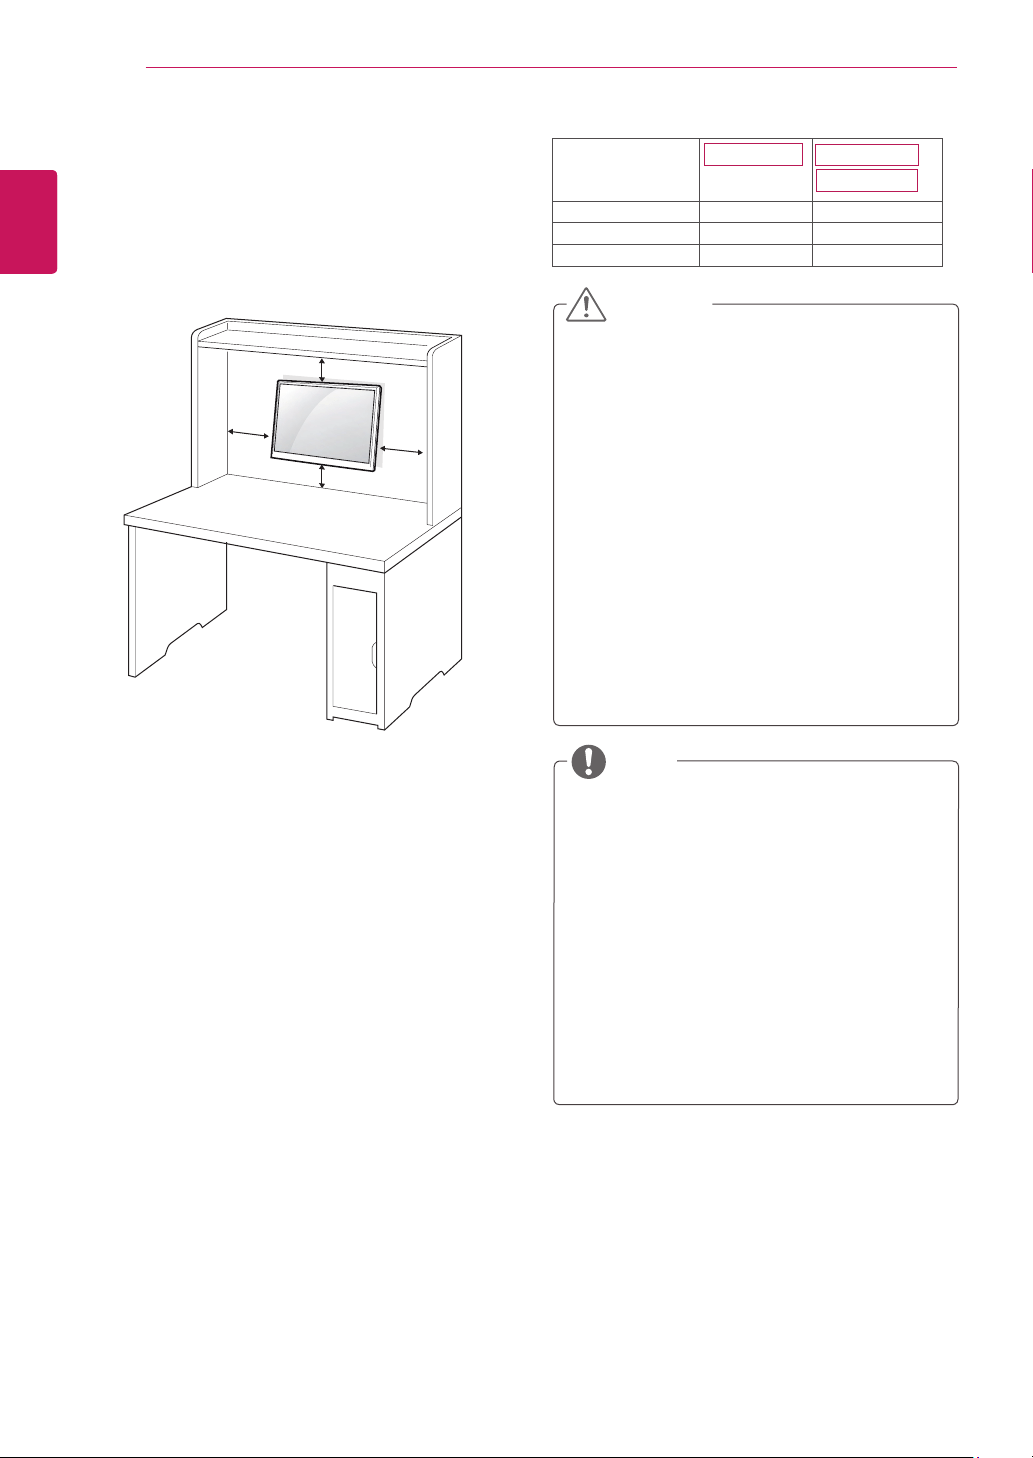
Mountingonawall
Forproperventilation,allowaclearanceof10cm
oneachsideandfromthewall.Detailed
instructionsareavailablefromyourdealer,seethe
optionalTiltWallMountingBracketInstallationand
SetupGuide.
IfyouintendtomounttheMonitorsettoawall,
attachWallmountinginterface(optionalparts)to
thebackoftheset.
WhenyouinstalltheMonitorsetusingawall
mountinginterface(optionalparts),attachit
carefullysoitwillnotdrop.
1
Please,Usethescrewandwallmountinterface
inaccordancewithVESAStandards.
2
Ifyouusescrewlongerthanstandard,the
monitormightbedamagedinternally.
3
Ifyouuseimproperscrew,theproductmightbe
damagedanddropfrommountedposition.In
thiscase,LGElectronicsisnotresponsiblefor
it.
4
VESAcompatible.
5
PleaseuseVESAstandardasbelow.
784.8mm(30.9inch)andunder
*WallMountPadThickness:2.6mm
*Screw:Φ4.0mmxPitch0.7mmx
Length10mm
787.4mm(31.0inch)andabove
*PleaseuseVESAstandardwallmountpad
andscrews.
10 cm
10 cm
10 cm
10 cm
Disconnectthepowercordfirst,andthen
moveorinstalltheMonitorset.Otherwise
electricshockmayoccur.
IfyouinstalltheMonitorsetonaceilingor
slantedwall,itmayfallandresultinsevere
injury.
UseonlyanauthorizedLGwallmount
andcontactthelocaldealerorqualified
personnel.
Donotovertightenthescrewsasthismay
causedamagetotheMonitorsetandvoid
yourwarranty.
Useonlyscrewsandwallmountsthat
meettheVESAstandard.Anydamages
orinjuriesbymisuseorusinganimproper
accessoryarenotcoveredbythewarranty.
UsethescrewsthatarelistedontheVESA
standardscrewspecifications.
Thewallmountkitwillincludeaninstallation
manualandnecessaryparts.
Thewallmountbracketisoptional.Youcan
obtainadditionalaccessoriesfromyourlocal
dealer.
Thelengthofscrewsmaydifferdepending
onthewallmount.Besuretousetheproper
length.
Formoreinformation,refertothe
instructionssuppliedwiththewallmount.
CAUTION
NOTE
Model
19MB35D
VESA(AxB)
75x75 100x100
Standardscrew
M4 M4
Numberofscrews
4 4
24MB35D
22MB35D
9
ENG
ENGLISH
USING THE MONITOR SET
USINGTHEMONITORSET
ConnectingtoaPC
YourMonitorsetsupportsPlug&Play*.
*Plug&Play:APCrecognizesaconnected
devicethatusersconnecttoaPCandturn
on,withoutdeviceconfigurationoruser
intervention.
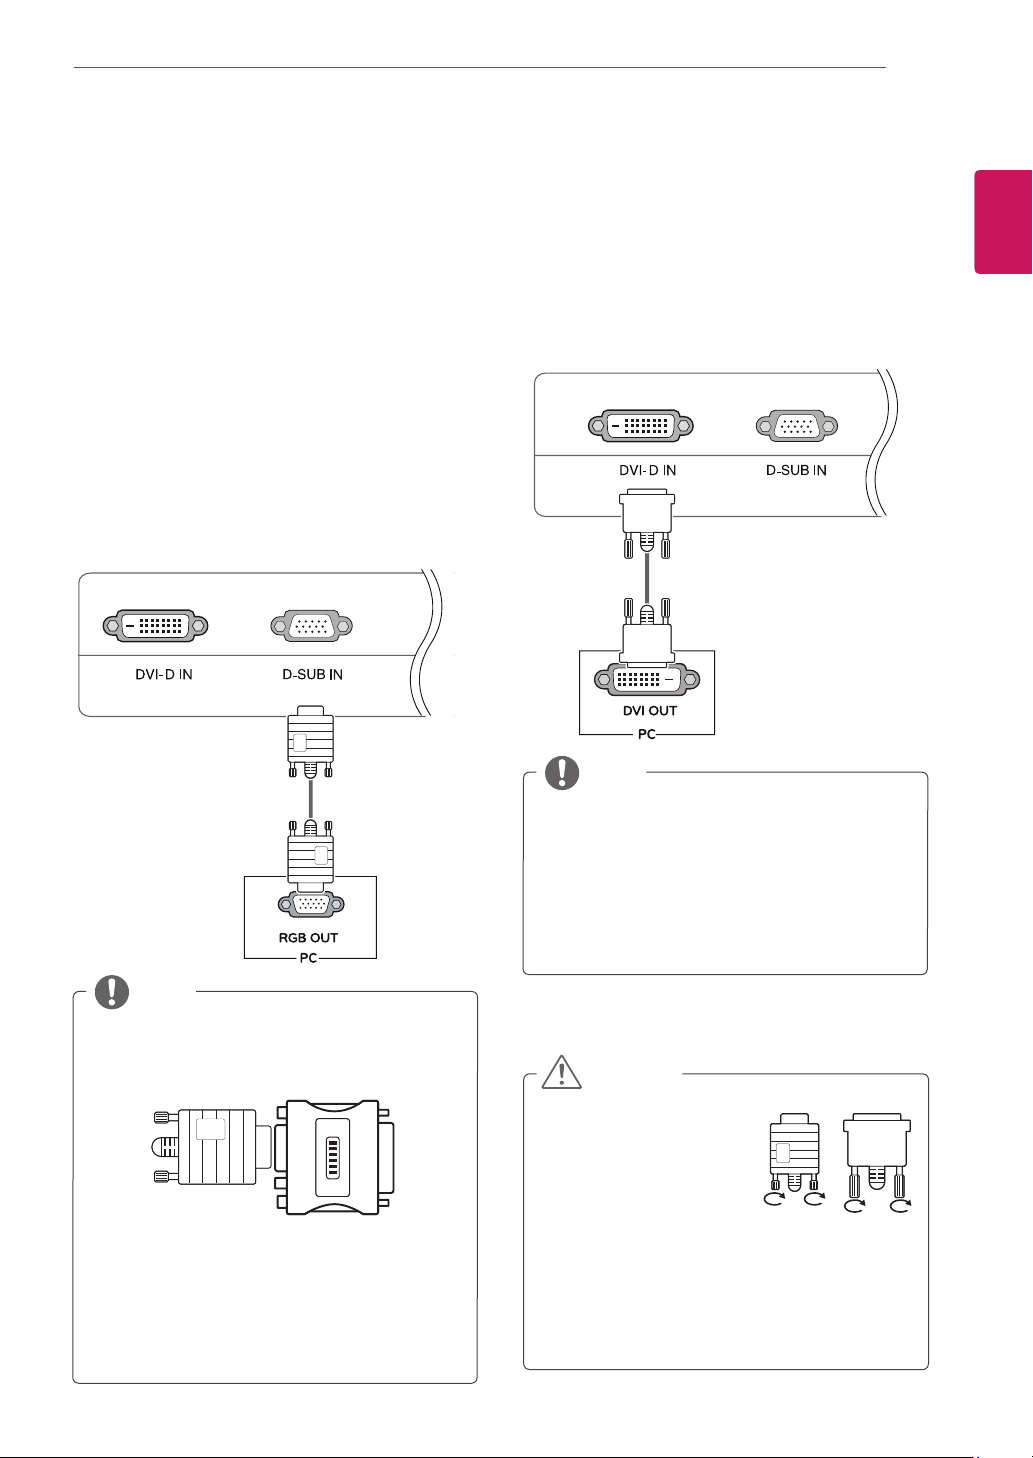
D-SUBconnection
TransmitsanalogvideofromyourPCtothe
Monitorset.ConnectthePCandtheMonitorset
withthesuppliedD-sub15pinsignalcableas
showninthefollowingillustrations.
Macadapter
ForAppleMacintoshuse,aseparateplug
adapterisneededtochangethe15pin
highdensity(3row)D-SUBVGAconnector
onthesuppliedcabletoa15pin2row
connector.
WhenusingaD-Subsignalinputcable
connectorforMacintosh
NOTE
DVI-Dconnection
TransmitsadigitalvideosignalfromyourPCto
theMonitorset.ConnectthePCandtheMonitor
setwithaDVIcableasshowninthefollowing
illustrations.
WhenyouwanttousetwoPCinourMonitor,
pleaseconnectthesignalcable(D-SUB/
DVI-D)respectivelyinMonitorset.
IfyouturntheMonitorsetonwhileitiscold,
thescreenmayflicker.Thisisnormal.
Somered,green,orbluespotsmayappear
onthescreen.Thisisnormal.
NOTE
Connectthesignal
inputcableandtighten
itbyturningthescrews
clockwise.
Donotpressthescreen
withyourfingerforalongtimeasthismay
resultintemporarydistortiononthescreen.
Avoiddisplayingafixedimageonthe
screenforalongperiodoftimetoprevent
imageburn.Useascreensaverifpossible.
CAUTION
10
ENG
ENGLISH
USING THE MONITOR SET
"SelfImageSetting"Function.
Thisfunctionprovidestheuserwithoptimal
displaysettings.Whentheuserconnects
themonitorforthefirsttime,thisfunction
automaticallyadjuststhedisplaytooptimal
settingsforindividualinputsignals.(Only
supportedinAnalogMode)
‘AUTO’Function.
Whenyouencounterproblemssuchas
blurryscreen,blurredletters,screenflicker
ortiltedscreenwhileusingthedeviceor
afterchangingscreenresolution,pressthe
AUTOfunctionbuttontoimproveresolution.
(OnlysupportedinAnalogMode)
NOTE
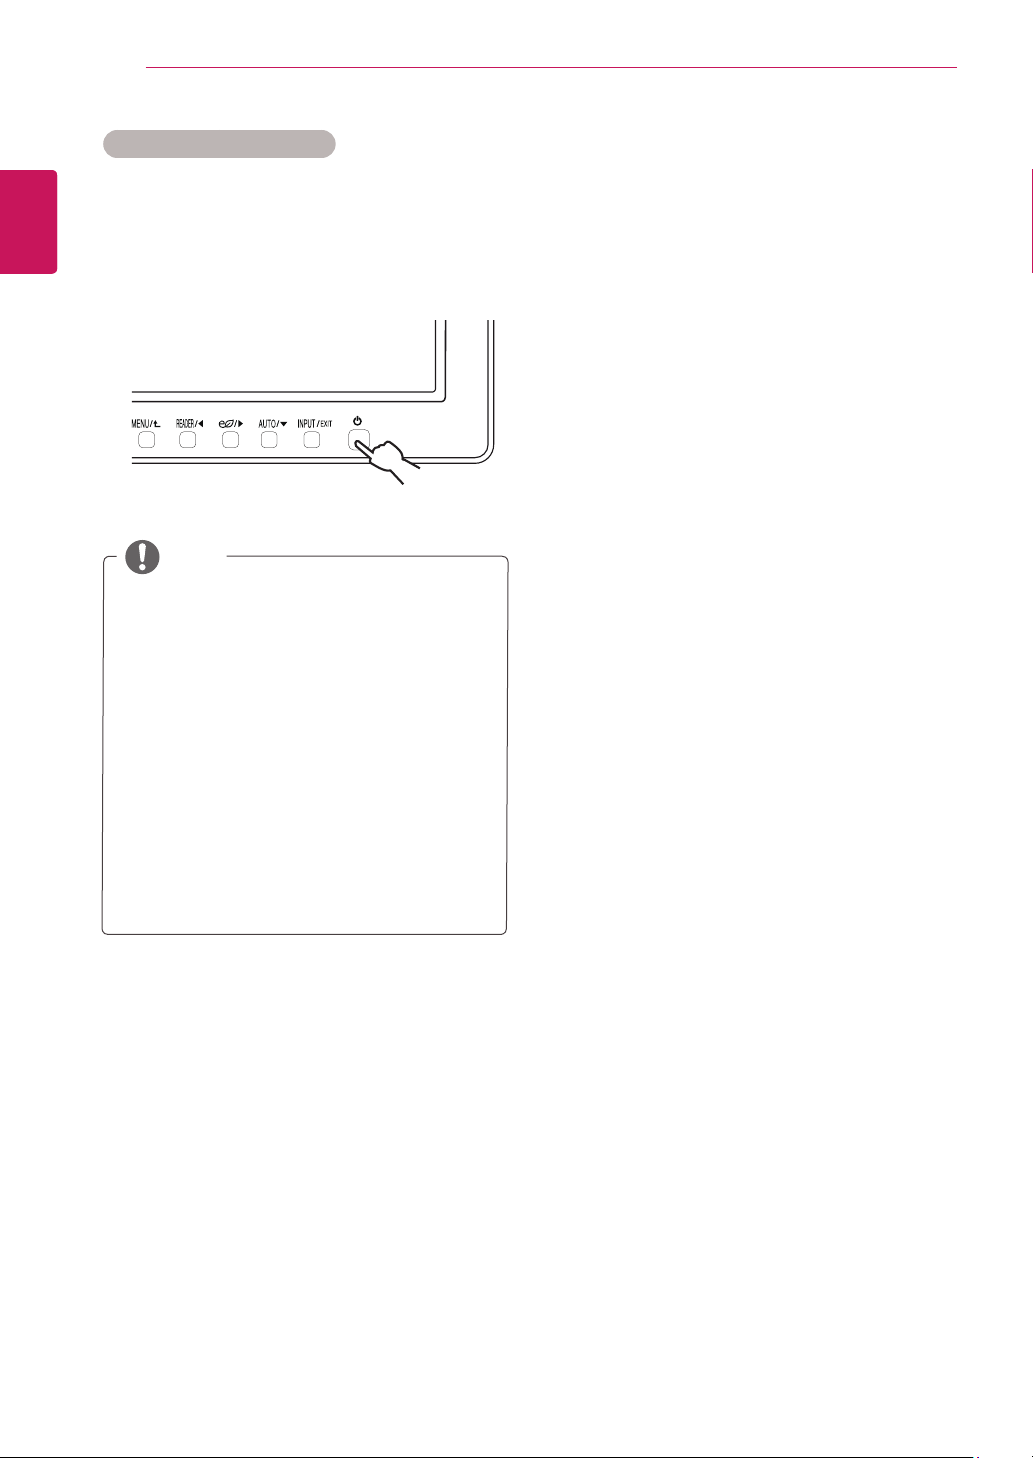
SelfImageSettingFunction
Pressthepowerbuttononthebottompanelto
turnthepoweron.Whenmonitorpoweristurned
on,the"
SelfImageSetting
"Functionisexecuted
automatically.(OnlysupportedinAnalogMode)
11
ENG
ENGLISH
CUSTOMIZING SETTINGS
CUSTOMIZINGSETTINGS
1
PressthedesiredbuttononthebottomoftheMonitorset.
2
ChangethevalueofthemenuitembypressingthebuttonsonthebottomoftheMonitorset.
Toreturntotheuppermenuorsetothermenuitems,usetheuparrow( )button.
3
Select
EXIT
toleavetheOSDmenu.
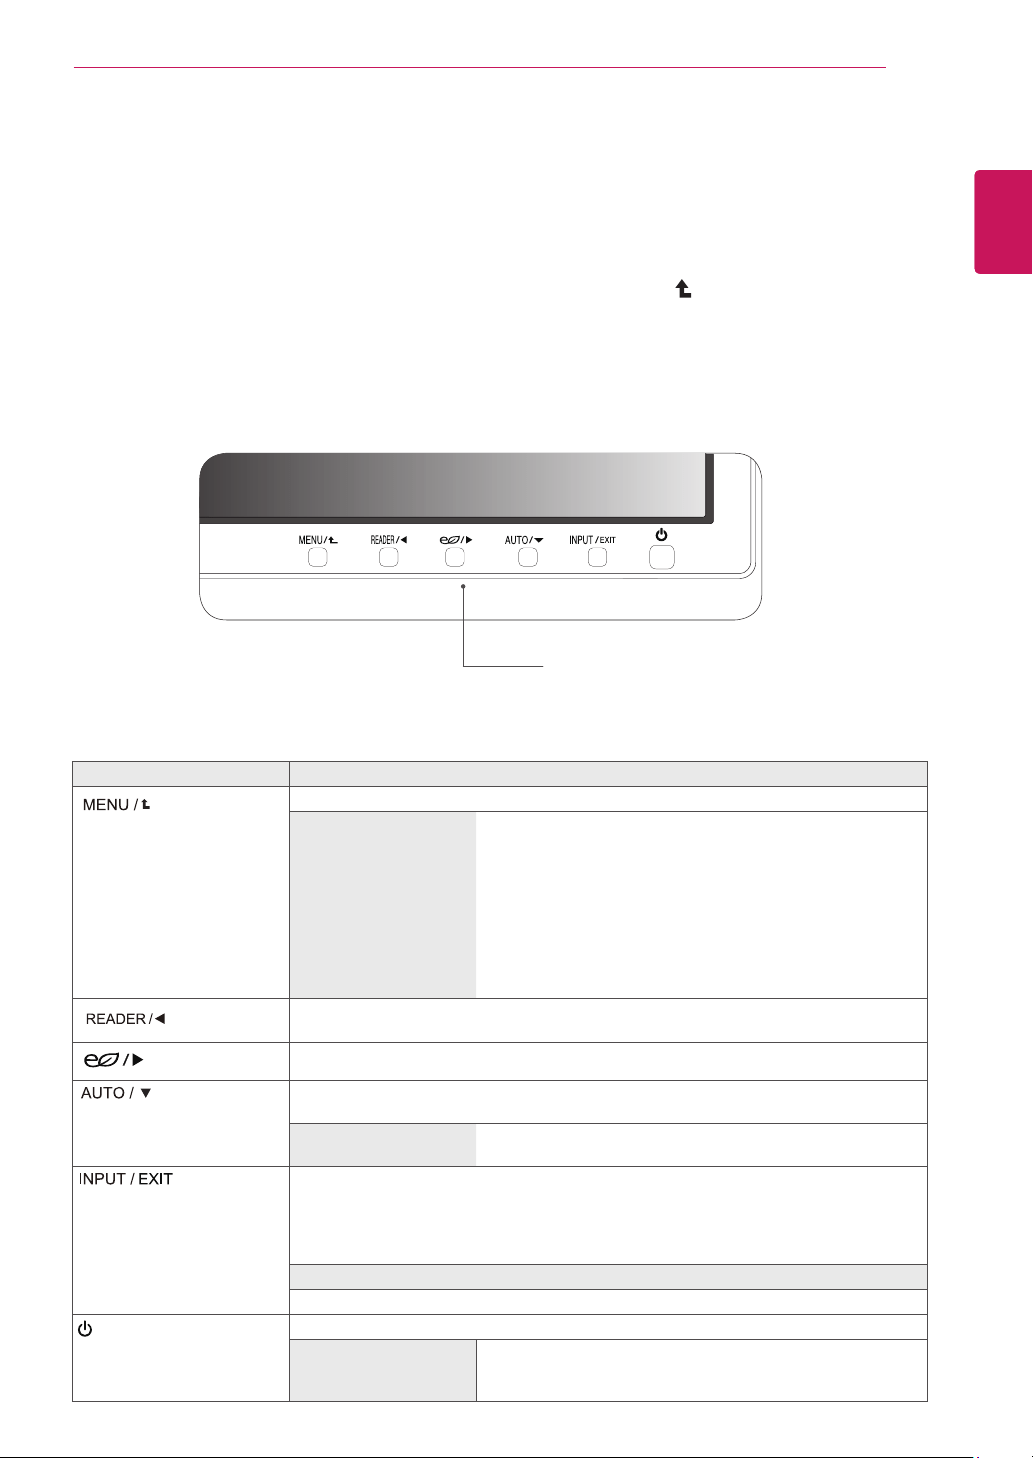
MonitorsetButtons
Button Description
Accessesthemainmenus.(Seep.12)
OSDLocked/OSD
Unlocked
Thisfunctionallowyoutolockthecurrentcontrolsettings,so
thattheycannotbeinadvertentlychanged.
PressandholdtheMENUbuttonforseveralseconds.Then
OSDof“OSDLock”willappear.Afterthat,usercanselect
lockorunlockbypressingleft/rightbutton.
Ifuserselectsthe“Lock”iconbypressingthe“OK”button,
themessage“OSDLocked”willappear.Otherwise,“OSD
Unlocked”willappear.Afterselectingthe“Lock”,Ifyouwant
tochangetoUnlock,youcanpushthe“MENU”buttonfor
severalseconds.Themessage“OSDUnlocked”willappear.
UsethisbuttontoenterReaderModemenu.Itsfunctionworkstodisplayscreenas
paper-likepictureforEyecomfort.Ifyouwanttomoreinformation.(Seep.17)
UsethisbuttontoenterSUPERENERGYSAVINGmenu.(Seep.18)
Whenadjustingyourdisplaysettings,alwayspresstheAUTObuttonontheMONITOR
SETUPOSD.(OnlysupportedinAnalogMode)
Thebestdisplaymode
19MB35D:1280x1024
22MB35D/24MB35D:1920x1080
Youcanchoosetheinputsignal.
• Whentwoinputsignalsareconnected,youcanselecttheinputsignal(D-SUB/DVI)
youwant.
• Whenonlyonesignalisconnected,itisautomaticallydetected.Thedefaultsettingis
D-SUB.
EXIT
ExittheOSD(OnScreenDisplay).
(PowerButton)
Turnsthepoweronoroff.
PowerIndicator
Thepowerindicatorstayswhiteifthedisplayisrunning
properly(OnMode).IfthedisplayisinSleepMode,thepower
indicatorblinkswhite.

12
ENG
ENGLISH
CUSTOMIZING SETTINGS
CustomizingSettings
MenuSettings
1
Press
MENU
buttononthebottomoftheMonitorset
todisplaythe
Menu
OSD.
2
Settheoptionsbypressingthe◄or►or▼
buttons.
3
Selectthe"
NextMenu
"buttontoenterthemore
optionsettings.
4
Select
EXIT
toleavetheOSDmenu.
Toreturntotheuppermenuorsetothermenuitems,
usetheuparrow( )button.
Eachoptionisexplainedbelow.
Menu>NextMenu Analog Digital Description
Picture
Sharpness ● ●
Toadjusttheclearnessofthescreen
Color Gamma
● ●
Tocustomizethecolorofthescreen
ColorTemp
SixColor(Onlyfor
19MB35D/
24MB35D)
ColorReset(Onlyfor
19MB35D/
24MB35D)
Display Horizontal
●
Toadjustthepositionofthescreen
Vertical
Clock
●
Toimprovetheclarityandstabilityofthescreen
Phase
Others Language
● ●
Tocustomizethescreenstatusforauser'soperating
environment
PowerIndicator
OffTimeSetting ● ●
Analog:
D-SUB(Analogsignal)input.
Digital:
DVI-D(Digitalsignal)input.
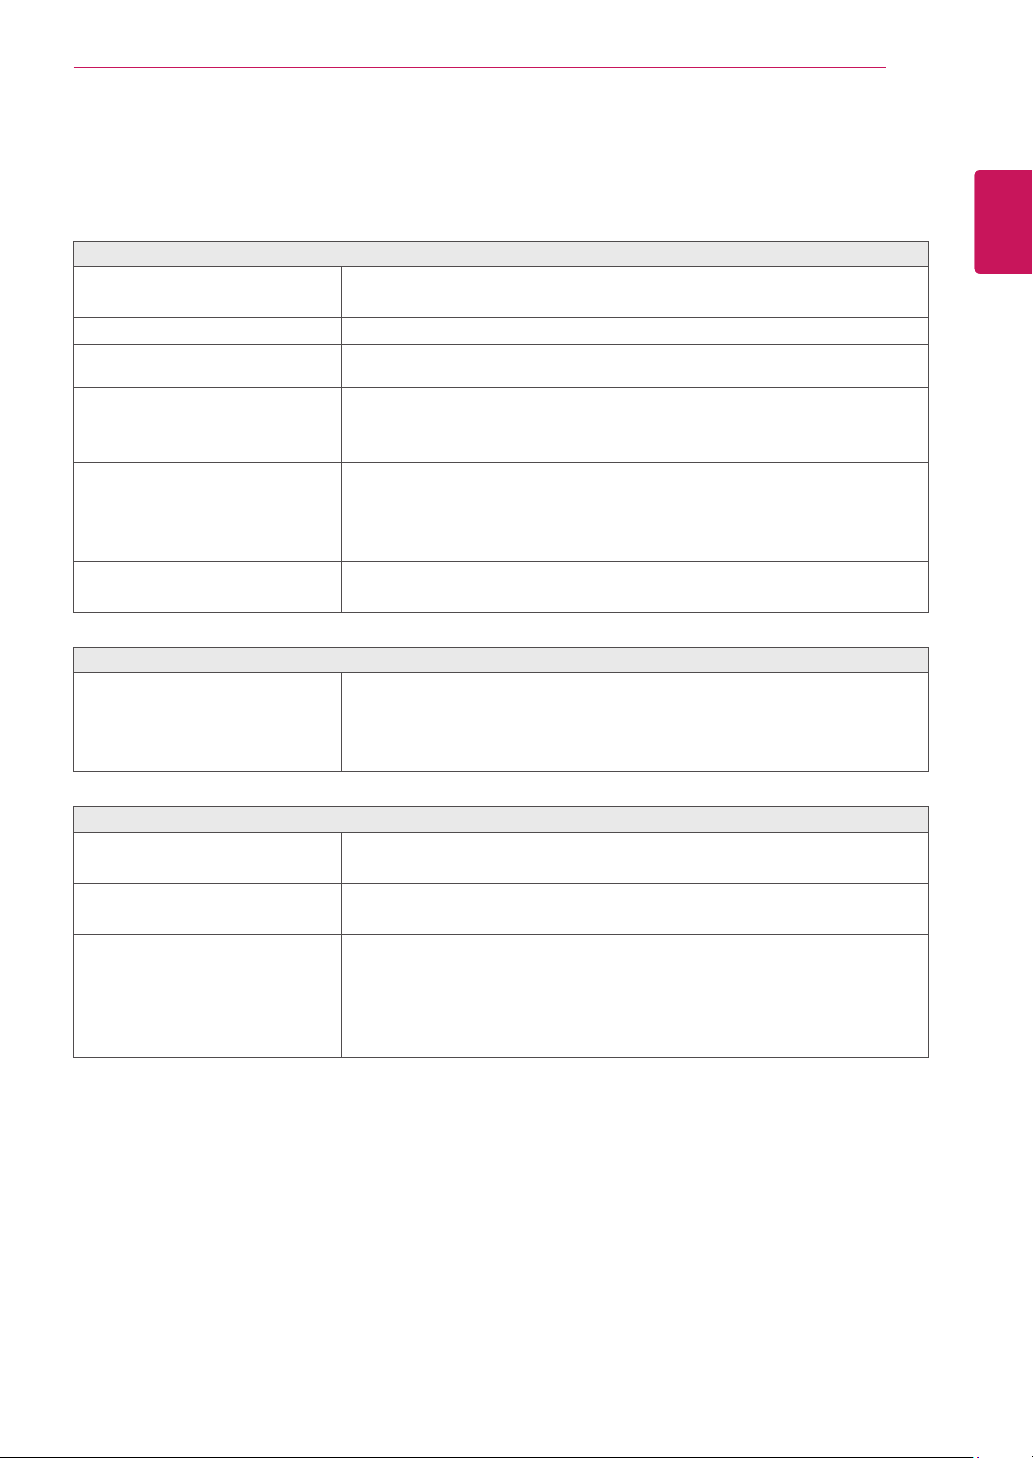
Menu
Analog
Digital Description
Brightness
●
●
Toadjustthebrightnessofthescreen.
Contrast ● ●
Toadjustthecontrastofthescreen
Response
Time
(Onlyfor
19MB35D/
24MB35D)
● ●
Youcansetaresponsetimefordisplayedpicturesbasedonthespeedofthescreen.
Foranormalenvironment,itisrecommendedthatyouuse'Off'.Forafast-moving
picture,itisrecommendedthatyouuse'High'.
Wide/Original
(Onlyfor
22MB35D/
24MB35D)
●
●
Wide
Switchtofullscreenmodeaccordingtoinputimagesignal.
Original
Changetheinputimagesignalratiotooriginal.
*ThisfunctionworksonlyifinputresolutionislowerthanMonitorsetratio(16:9).
Reset
●
●
Restoreallfactorydefaultsettings.Pressthe◄,►buttonstoresetimmediately.
13
ENG
ENGLISH
CUSTOMIZING SETTINGS
Picture
1
Press
MENU
buttononthebottomoftheMonitorset
todisplaythe
Menu
OSD.
2
Selectthe"
NextMenu
"buttontoenterthemore
optionsettings.
3
Enterto
Picture
bypressingthe▼button.
4
Settheoptionsbypressingthe◄or►or▼
buttons.
5
Select
EXIT
toleavetheOSDmenu.
Toreturntotheuppermenuorsetothermenuitems,
usetheuparrow( )button.
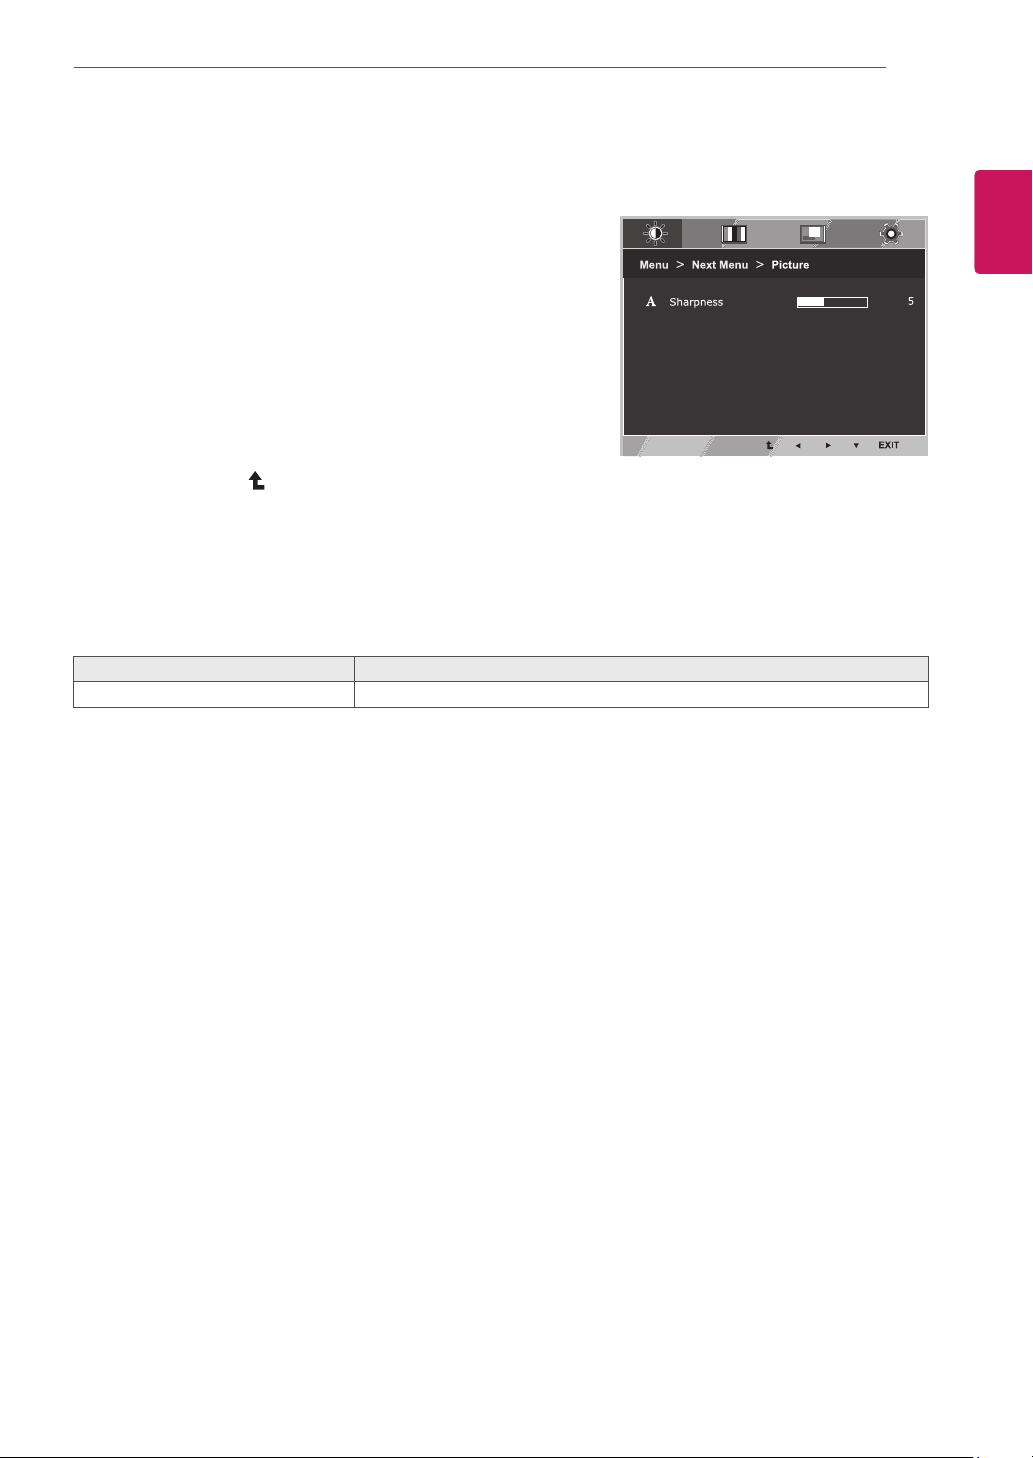
Eachoptionisexplainedbelow.
Menu>NextMenu>Picture Description
Sharpness
Toadjusttheclearnessofthescreen.
14
ENG
ENGLISH
CUSTOMIZING SETTINGS
Color
1
Press
MENU
buttononthebottomoftheMonitorset
todisplaythe
Menu
OSD.
2
Selectthe"
NextMenu
"buttontoenterthemore
optionsettings.
3
Select
Color
bypressingthe►button.
4
Enterto
Color
bypressingthe▼button.
5
Settheoptionsbypressingthe◄or►or▼
buttons.
6
Select
EXIT
toleavetheOSDmenu.
Toreturntotheuppermenuorsetothermenuitems,
usetheuparrow( )button.
Eachoptionisexplainedbelow.
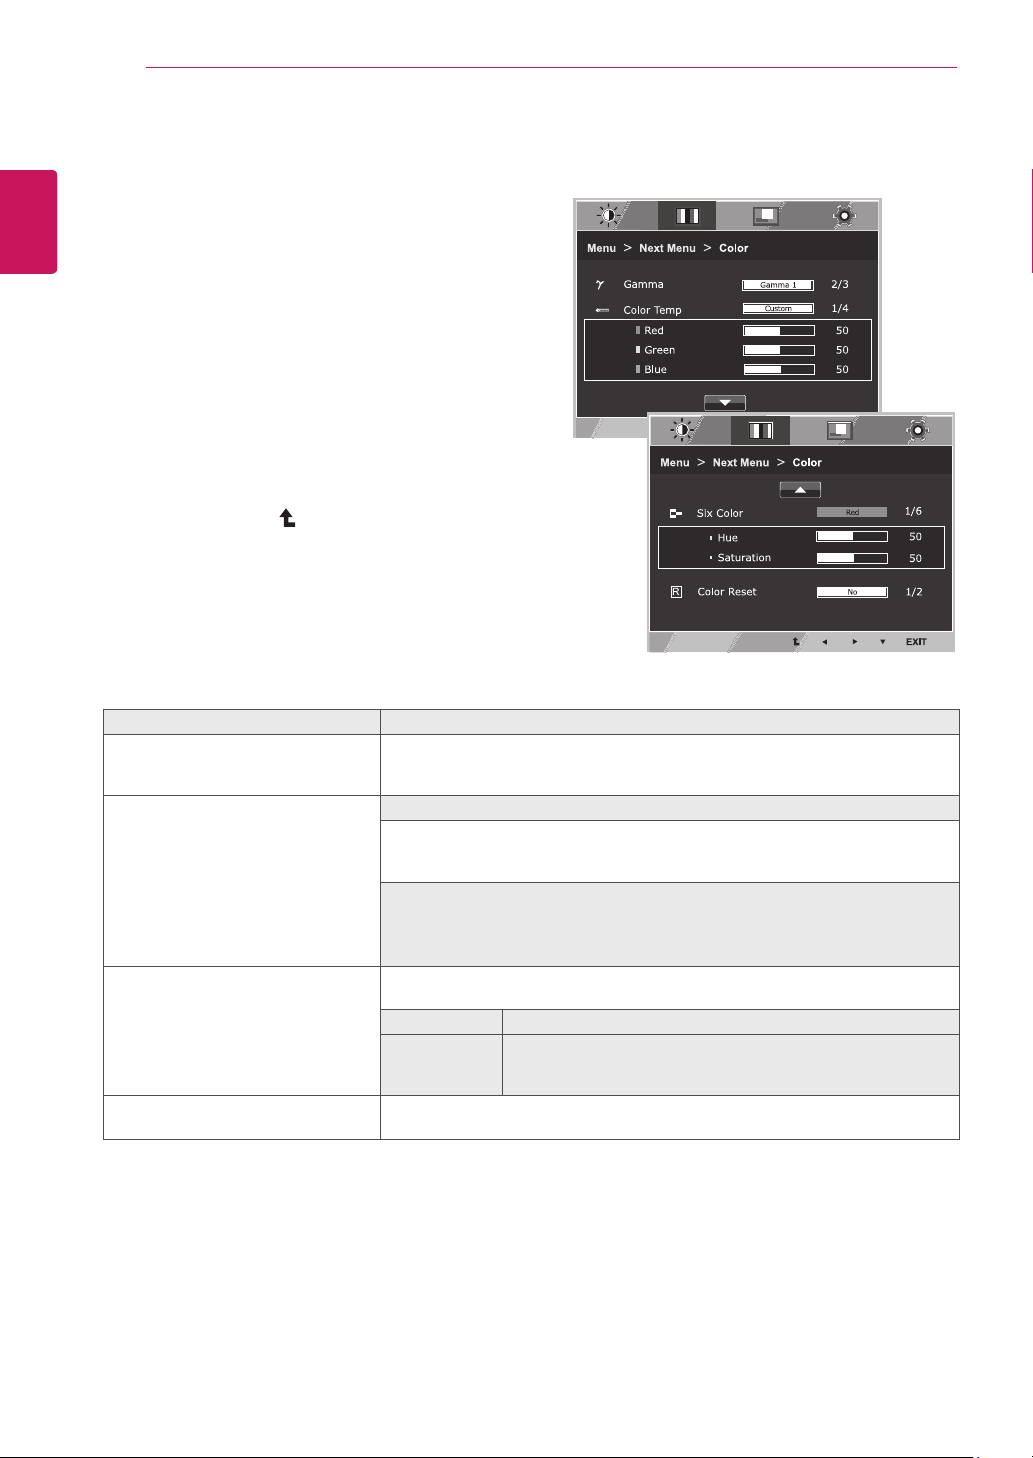
Menu>NextMenu>Color Description
Gamma Setyourowngammavalue.:Gamma0,Gamma1,Gamma2onthemonitor,
highgammavaluesdisplaywhitishimagesandlowgammavaluesdisplay
blackishimages.
ColorTemp Custom
•Red:
Setyourownredcolorlevels.
•Green:
Setyourowngreencolorlevels.
•Blue:
Setyourownbluecolorlevels.
Selectthescreencolor.
Warm:
Setthescreentowarmcolortemperature(morered).
Medium:
Setthescreentomediumcolortemperature.
Cool:
Setthescreentocoolcolortemperature(moreblue).
SixColor
(Onlyfor19MB35D/24MB35D)
Setsandstoresthehueandsaturationforsixcolors(Red/Green/Blue/Cyan/
Magenta/Yellow)tosatisfythecolorrequirementsofauser.
Hue Adjuststhescreenhue.
Saturation Adjuststhecolorsharpnessonthescreen.Lowervaluesmake
thecolorsharpnessweakerandcolorslighterwhilehigher
valuesmakethecolorsharpnessstrongerandcolorsdark.
ColorReset
(Onlyfor19MB35D/24MB35D)
Resetsthecolorsettingstothefactorydefaultsettingsforthecurrentinput
device.
15
ENG
ENGLISH
CUSTOMIZING SETTINGS
Display
1
Press
MENU
buttononthebottomoftheMonitorset
todisplaythe
Menu
OSD.
2
Selectthe"
NextMenu
"buttontoenterthemore
optionsettings.
3
Select
Display
bypressingthe►button.
4
Enterto
Display
bypressingthe▼button.
5
Settheoptionsbypressingthe◄or►or▼
buttons.
6
Select
EXIT
toleavetheOSDmenu.
Toreturntotheuppermenuorsetothermenuitems,
usetheuparrow( )button.
Eachoptionisexplainedbelow.
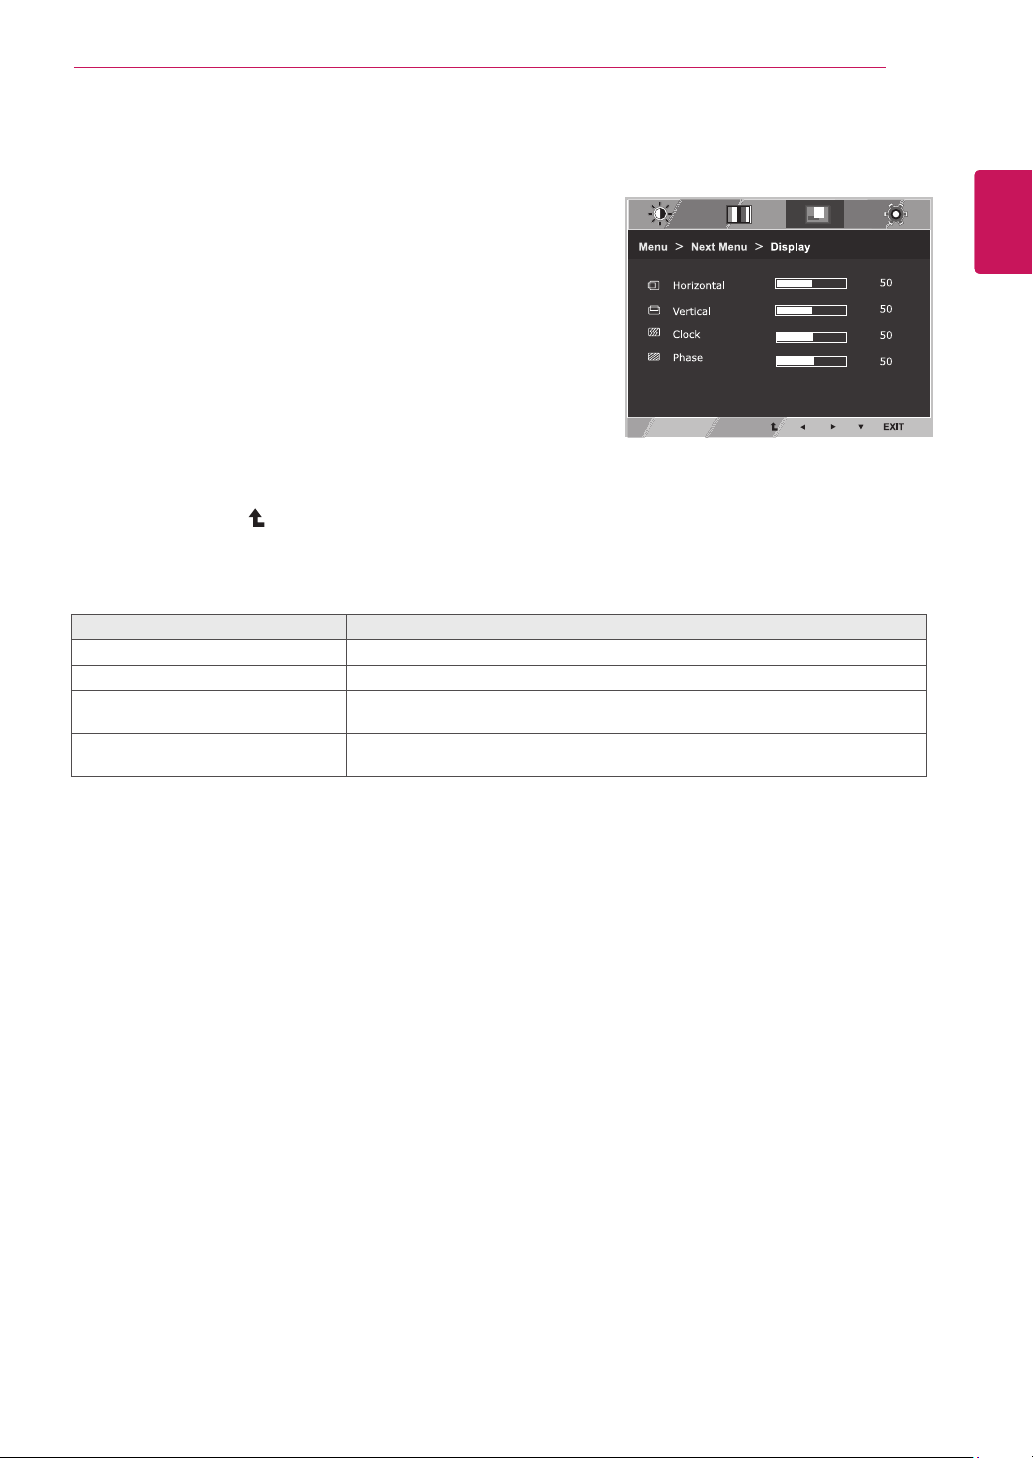
Menu>NextMenu>Display Description
Horizontal
Tomoveimageleftandright.
Vertical
Tomoveimageupanddown.
Clock
Tominimizeanyverticalbarsorstripesvisibleonthescreenbackground.The
horizontalscreensizewillalsochange.
Phase
Toadjustthefocusofthedisplay.Thisitemallowsyoutoremoveanyhorizontal
noiseandclearorsharpentheimageofcharacters.
16
ENG
ENGLISH
CUSTOMIZING SETTINGS
Others
1
Press
MENU
buttononthebottomoftheMonitorset
todisplaythe
Menu
OSD.
2
Selectthe"
NextMenu
"buttontoenterthemore
optionsettings.
3
Select
Others
bypressingthe►button.
4
Enterto
Others
bypressingthe▼button.
5
Settheoptionsbypressingthe◄or►or▼
buttons.
6
Select
EXIT
toleavetheOSDmenu.
Toreturntotheuppermenuorsetothermenuitems,
usetheuparrow( )button.
Eachoptionisexplainedbelow.
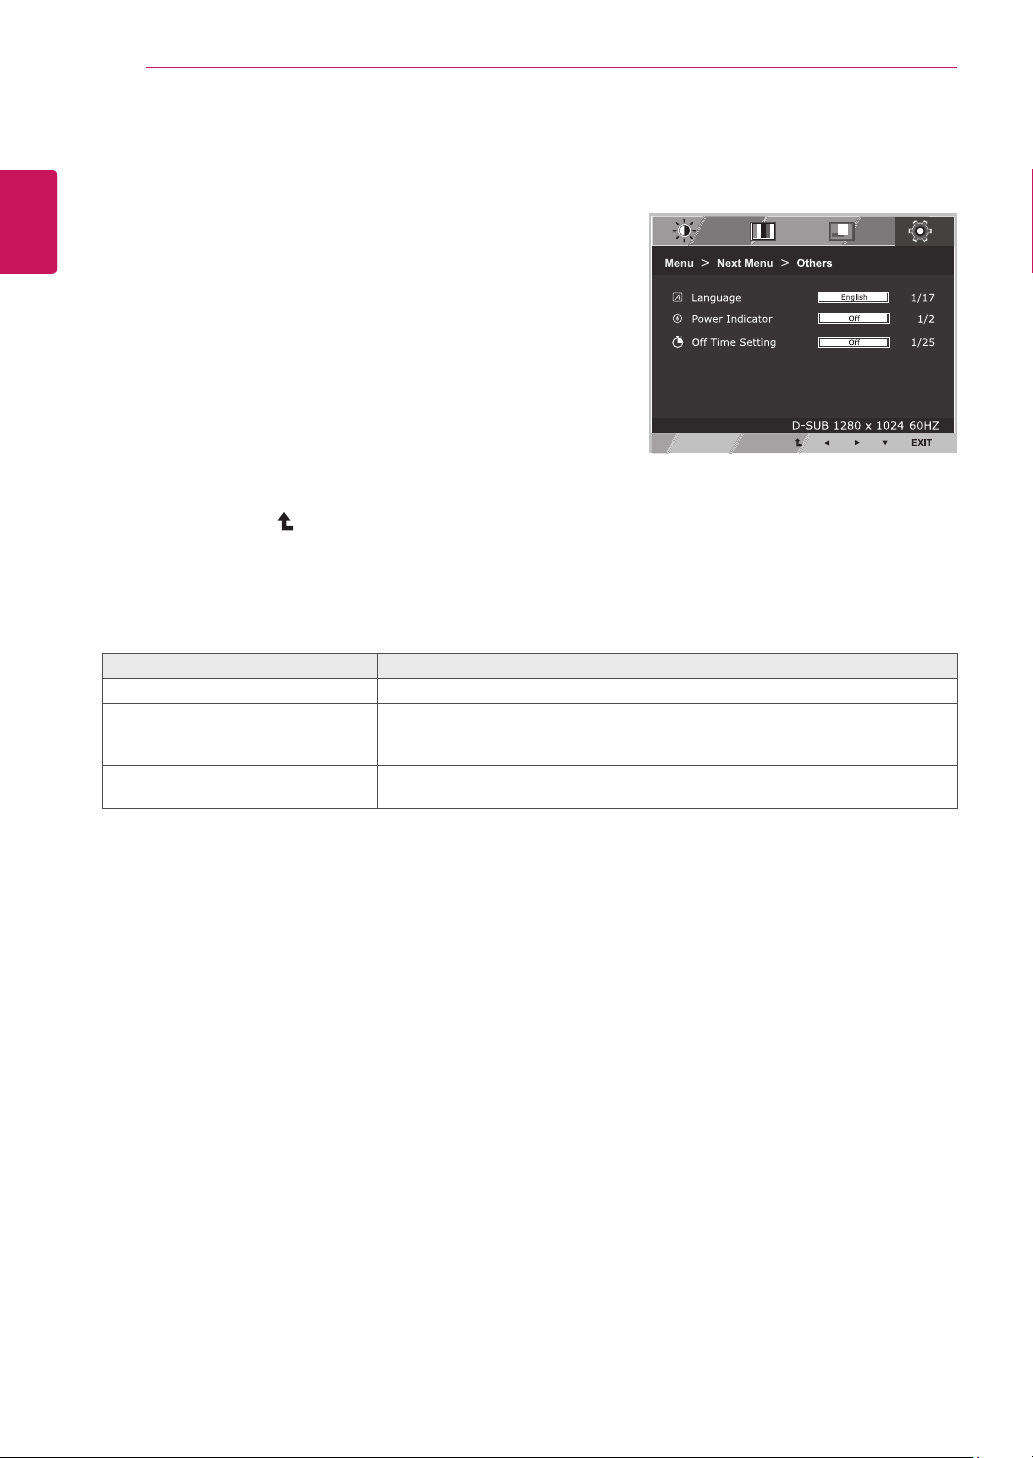
Menu>NextMenu>Others Description
Language
Tochoosethelanguageinwhichthecontrolnamesaredisplayed.
PowerIndicator
Usethisfunctiontosetthepowerindicatoronthebottomsideofthemonitorto
OnorOff.IfyousetOff,itwillgooff.
IfyousetOnatanytime,thepowerindicatorwillautomaticallybeturnedon.
OffTimeSetting
Themonitorsetwillswitchtopoweroffmodeafterthetimetobechosenbyuser
(1~24hours)
17
ENG
ENGLISH
CUSTOMIZING SETTINGS
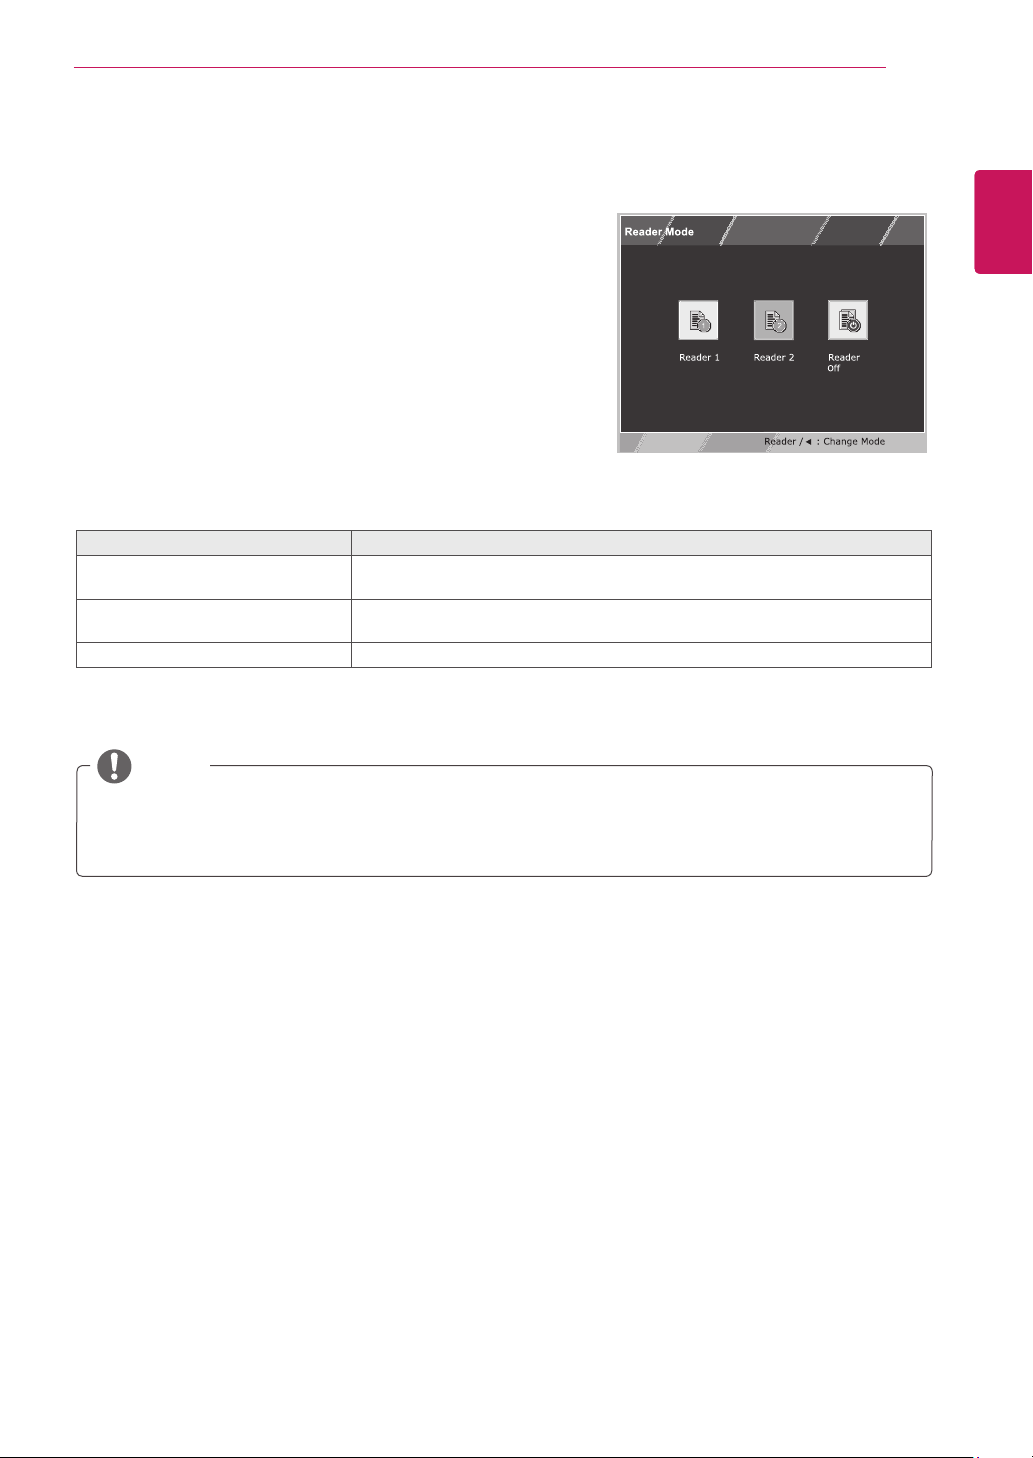
READERSetting
1
Press
READER
buttononthebottomoftheMonitor
settodisplaythe
ReaderMode
OSD.
2
Settheoptionsbypressingthe◄buttons.
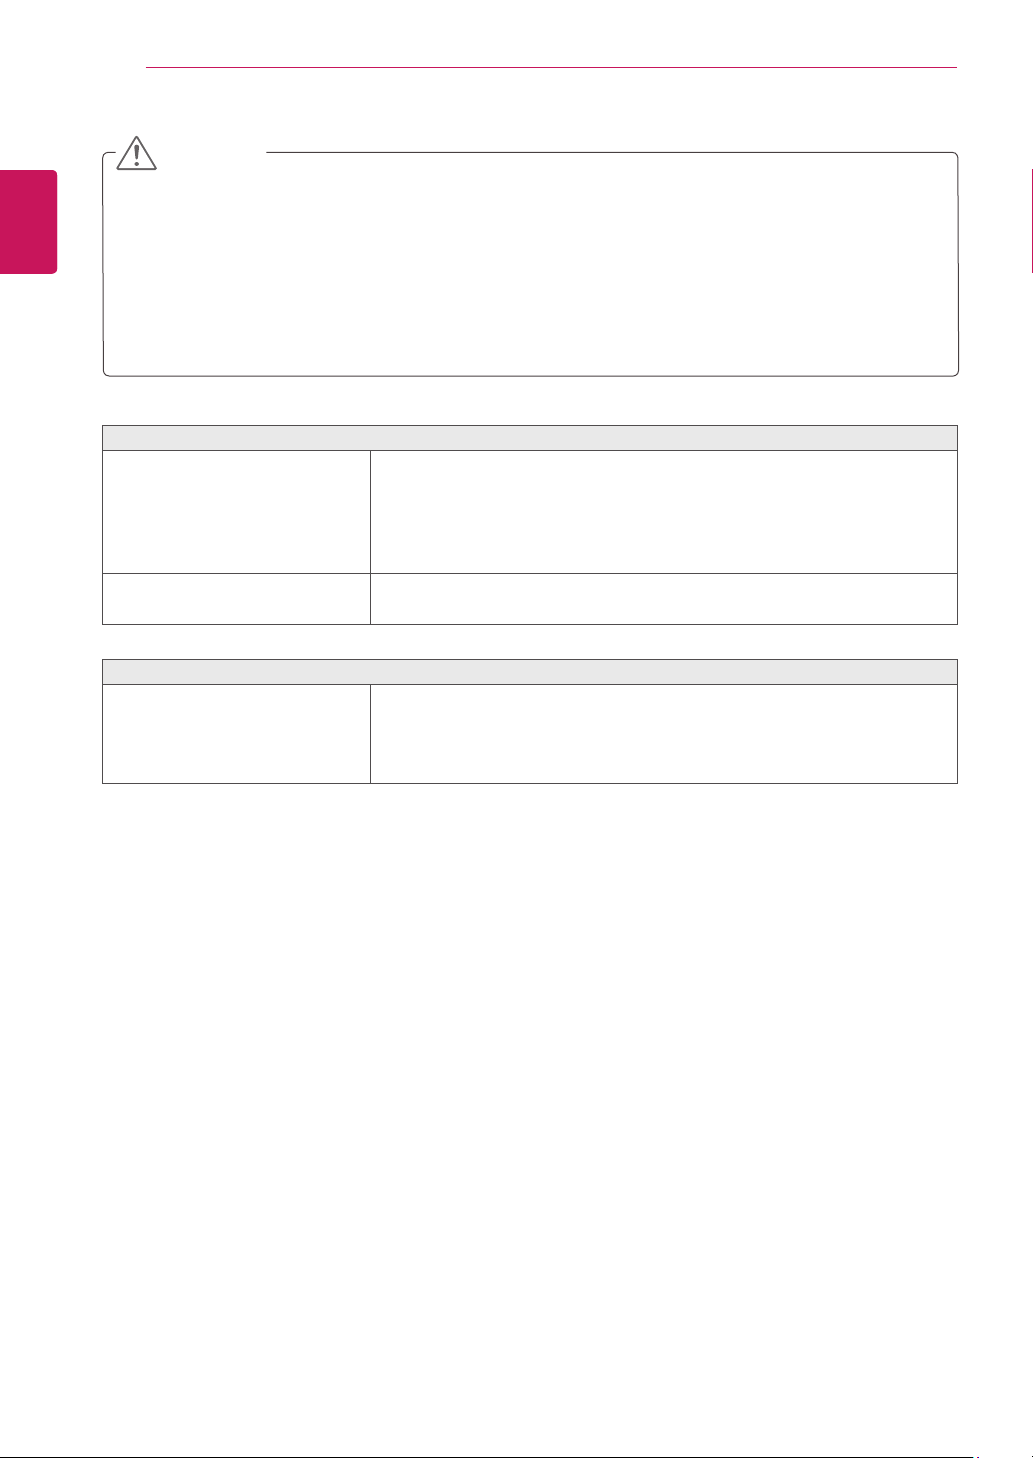
ReaderMode Description
Reader1 Itisamodethatthescreenisadjustedtothebestforthenewspaper.Ifyou
wantscreenmorebright,youcancontrolbrightnessinMenuOSD.
Reader2 Itisamodethatthescreenisadjustedtothebestforthecartoon.Ifyouwant
screenmorebright,youcancontrolbrightnessinMenuOSD.
ReaderOff Itisamodethatreadermodeisoff.
Eachoptionisexplainedbelow.
NOTE
IfoptionofReaderModeisReader1orReader2,PictureModewillautomaticallybeCustomand
SuperEnergySavingwillautomaticallybeOff.
18
ENG
ENGLISH
CUSTOMIZING SETTINGS
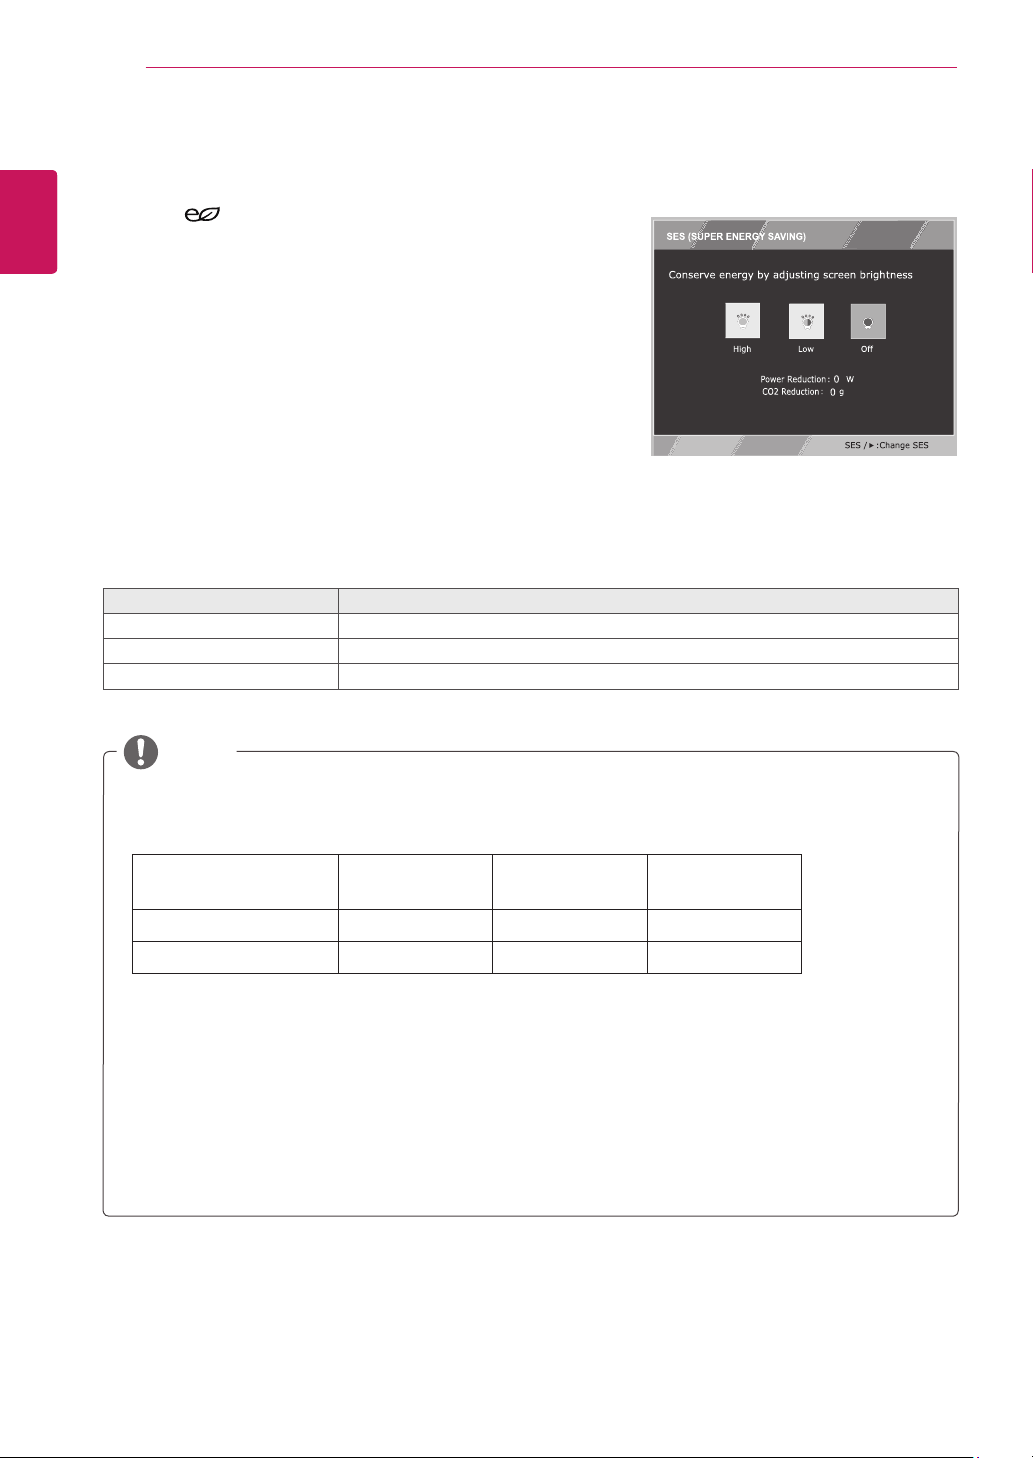
TOTALPOWERREDUCTION
:Howmuchpowerissavedwhileusingthemonitor.
TOTALCO2REDUCTION
:ChangetheTOTALPOWERREDUCTIONtoCO2.
SAVINGDATA(W/h)
482mm
(19inch)
546mm
(21.5inch)
604mm
(23.8inch)
SUPERSAVING(High) 3W/h 4W/h 4W/h
SUPERSAVING(Low) 1W/h 2W/h 2W/h
SavingDatadependsonthePanel.So,thosevaluesshouldbedifferentfromeachpanelandpanel
vendor.IfoptionofSuperEnergySavingisHighorLow,monitorluminancebecomehigherorlower
dependonsource.
LGcalculatedthesevaluesbyusing
“broadcastvideosignal”
(includingbroadcastvideo:IEC62087)
SUPERSAVINGreferstohowmuchpowercanbesavedusingtheSUPERENERGYSAVING
function.
IfoptionofSuperEnergySavingisHighorLow,PictureModewillautomaticallybeCustomand
ReaderModewillautomaticallybeReaderOff.
NOTE
SUPERENERGYSAVING
1
Press
buttononthebottomoftheMonitorsetto
displaythe
SUPERENERGYSAVING
OSD.
2
Settheoptionsbypressingthe►buttons.
Eachoptionisexplainedbelow.
SUPERENERGYSAVING Description
High
EnablesSUPERENERGYSAVINGyoucansaveenergywiththisenergy-highefficientfunction.
Low
EnablesSUPERENERGYSAVINGyoucansaveenergywiththisenergy-lowefficientfunction.
Off DisablesSUPERENERGYSAVING.
19
ENG
ENGLISH
TROUBLESHOOTING
TROUBLESHOOTING
Checkthefollowingbeforecallingforservice.
Noimageappears
Isthepowercordofthedisplay
connected?
Checkandseeifthepowercordisconnectedproperlytothepower
outlet.
Isthepowerindicatorlighton?
PressthePowerbutton.
Isthepoweronandthepower
indicatorWhite?
Adjustthebrightnessandthecontrast.
Isthepowerindicatorflickering?
Ifthedisplayisinpowersavingmode,trymovingthemouseor
pressinganykeyonthekeyboardtobringupthescreen.
TrytoturnonthePC.
Doyouseean"OUTOFRANGE"
messageonthescreen?
ThismessageappearswhenthesignalfromthePC(videocard)is
outofhorizontalorverticalfrequencyrangeofthedisplay.Seethe
'Specifications'sectionofthismanualandconfigureyourdisplay
again.
Doyouseea"NOSIGNAL"
messageonthescreen?
Whenthemonitorison"No-Signal"in5minutes,themonitorgoesto
DPMmode.
Doyouseea"OSDLOCKED"messageonthescreen?
Doyousee“OSDLOCKED”when
youpushMENUbutton?
Youcansecurethecurrentcontrolsettings,sothattheycannotbe
inadvertentlychanged.YoucanunlocktheOSDcontrolsatanytime
bypushingtheMENUbuttonforseveralseconds:themessage“OSD
UNLOCKED”willappear.
Displayimageisincorrect
DisplayPositionisincorrect.
Pressthe
AUTO
buttontoautomaticallyadjustyourdisplayimageto
theidealsetting.
Onthescreenbackground,vertical
barsorstripesarevisible.
Pressthe
AUTO
buttontoautomaticallyadjustyourdisplayimageto
theidealsetting.
Anyhorizontalnoiseappearingin
anyimageorcharactersarenot
clearlyportrayed.
Pressthe
AUTO
buttontoautomaticallyadjustyourdisplayimageto
theidealsetting.
Check
ControlPanel►Display►Settings
andadjustthedisplay
totherecommendedresolutionoradjustthedisplayimagetotheideal
setting.Setthecolorsettinghigherthan24bits(truecolor).
20
ENG
ENGLISH
TROUBLESHOOTING
Displayimageisincorrect
Thescreencolorismonoor
abnormal.
Checkifthesignalcableisproperlyconnectedanduseascrewdriver
tofastenifnecessary.
Makesurethevideocardisproperlyinsertedintheslot.
Setthecolorsettinghigherthan24bits(truecolor)at
ControlPanel
►
Settings
.
Thescreenblinks.
Checkifthescreenissettointerlacemodeandifyes,changeittothe
recommendresolution.
Doyouseean"Unrecognizedmonitor,Plug&Play(VESADDC)monitorfound"message?
Haveyouinstalledthedisplay
driver?
BesuretoinstallthedisplaydriverfromthedisplaydriverCD(or
diskette)thatcomeswithyourdisplay.Or,youcanalsodownloadthe
driverfromourwebsite:http://www.lg.com.
MakesuretocheckifthevideocardsupportsPlug&Playfunction.
Check
ControlPanel►Display►Settings
andseeifthefrequencyortheresolutionwere
changed.Ifyes,readjustthevideocardtotherecommendresolution.
Iftherecommendedresolution(optimalresolution)isnotselected,lettersmaybeblurredandthe
screenmaybedimmed,truncatedorbiased.Makesuretoselecttherecommendresolution.
ThesettingmethodcandifferbycomputerandO/S(OperationSystem),andresolutionmentioned
abovemaynotbesupportedbythevideocardperformance.Inthiscase,pleaseasktothecomputer
orthevideocardmanufacturer.
CAUTION

21
ENG
ENGLISH
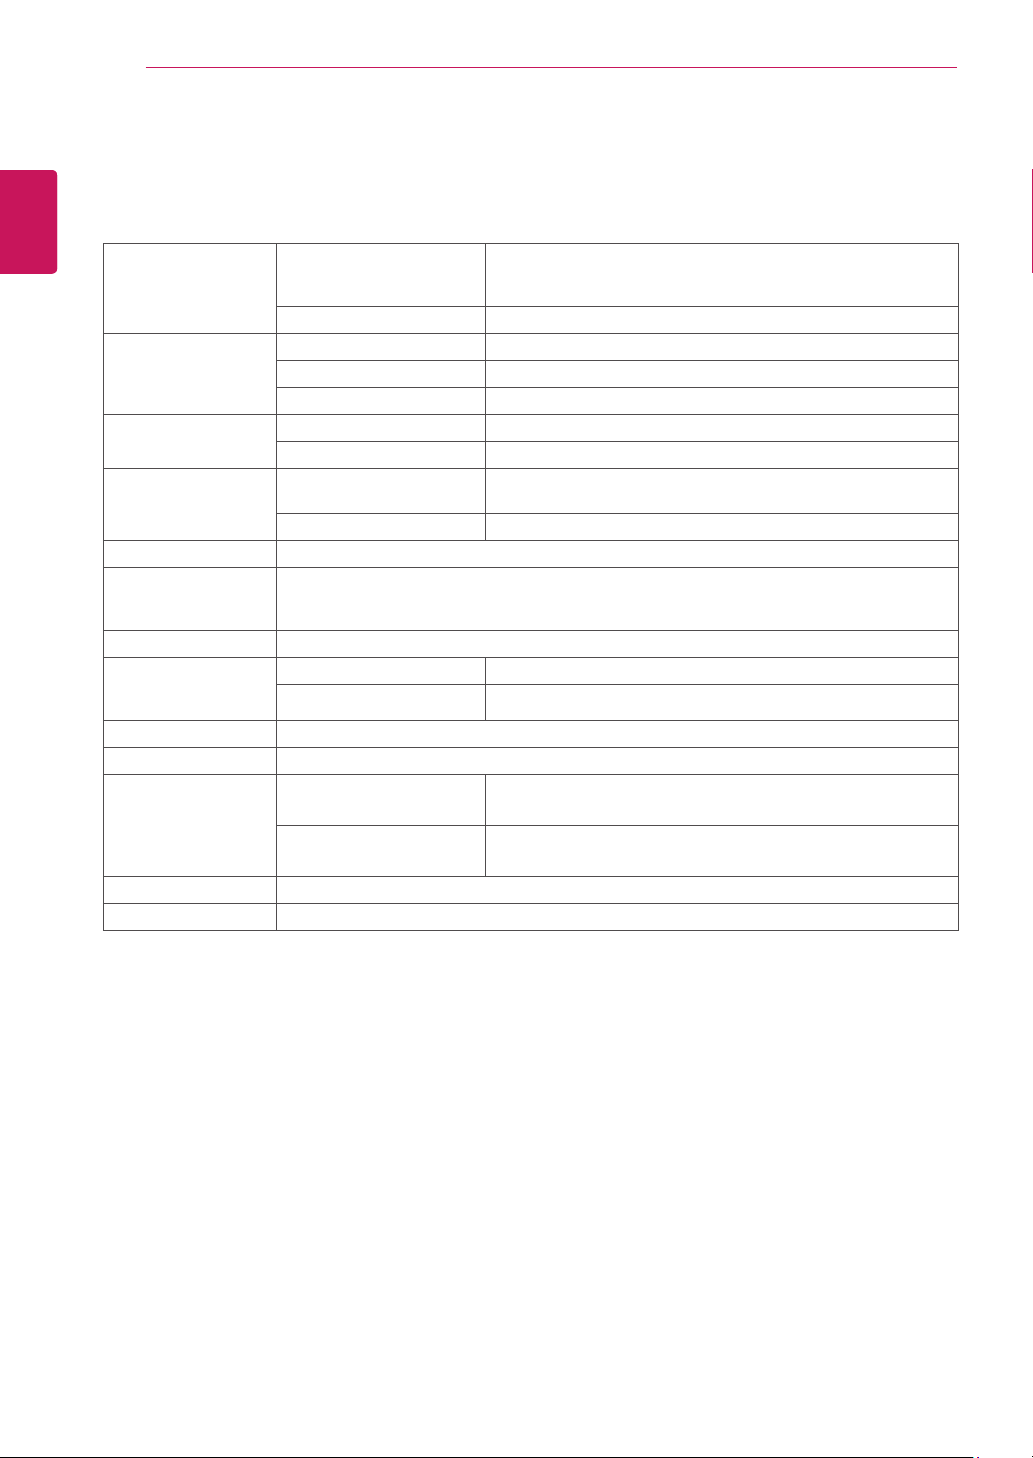
SPECIFICATIONS
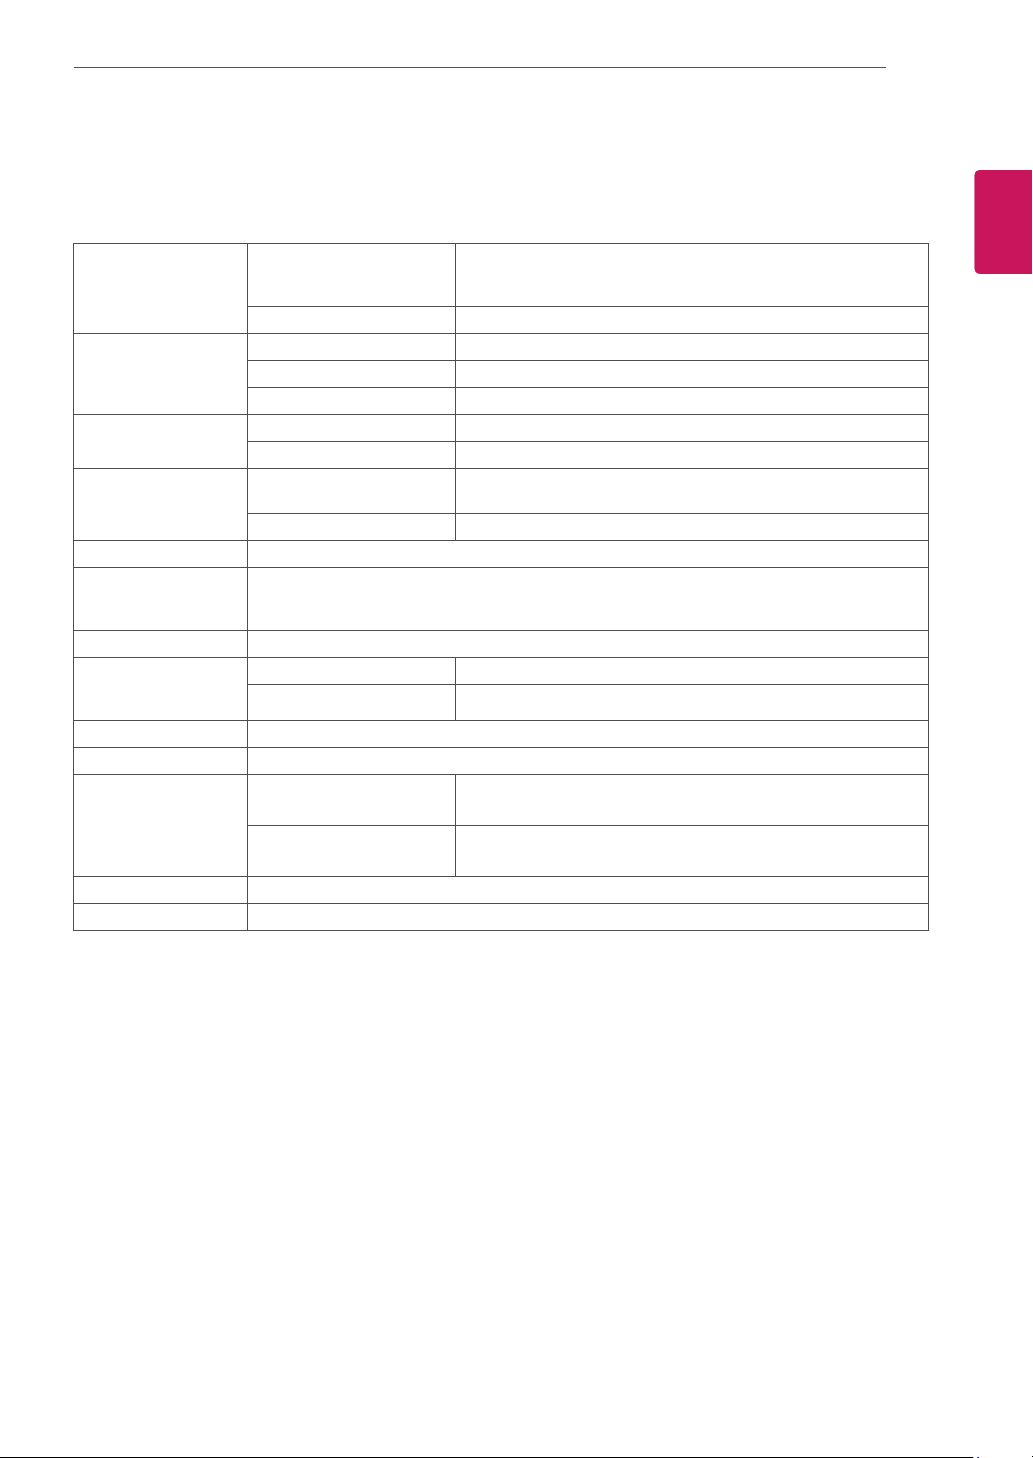
SPECIFICATIONS
Display ScreenType
48.2cm(19inch)FlatPanelActivematrix-TFTLCDAnti-
Glarecoating
Visiblediagonalsize:48.2cm
PixelPitch
0.294mmx0.294mm(PixelPitch)
SyncInput HorizontalFrequency
30kHzto83kHz(Automatic)
VerticalFrequency
56Hzto75Hz(D-SUB,DVI-D)
InputForm
SeparateSync.Digital
VideoInput SignalInput
15pinD-SUBConnector/DVI-DConnector(Digital)
InputForm
RGBAnalog(0.7Vp-p/75ohm),Digital
Resolution Max
D-SUB(Analog):1280x1024@60Hz
DVI(Digital):1280x1024@60Hz
Recommend
VESA1280x1024@60Hz
Plug&Play
DDC2B(Analog,Digital)
Power
Consumption
OnMode:15W(ENERGYSTAR®standard)*
SleepMode≤0.3W
OffMode≤0.3W
PowerInput
AC100-240V~50/60Hz0.8A
Dimensions
(WidthxHeightx
Depth)
WithStand
40.9cmx42.5cmx21.0cm
WithoutStand
40.9cmx33.8cmx5.8cm
Weight
2.8kg
TiltRange
-5°to20°
Environmental
conditions
OperatingTemperature
OperatingHumidity
10°Cto35°C
10%to80%
StorageTemperature
StorageHumidity
-20°Cto60°C
5%to90%non-Condensing
StandBase
Attached(),Detached(O)
Powercord
Wall-outlettype
Productspecificationsshownabovemaybechangedwithoutpriornoticeduetoupgradeofproduct
functions.
*Thepowerconsumptionlevelcanbedifferentbyoperatingconditionandmonitorsetting.
*TheOnmodepowerconsumptionismeasuredwithENERGYSTAR®teststandard.
*ENERGYSTAR®isaUSregisteredmarkoftheUnitedStatesEnvironmentalProtectionAgency.
19MB35D
22
ENG
ENGLISH
SPECIFICATIONS
SPECIFICATIONS
22MB35D
Display ScreenType 54.6cm(21.5inch)FlatPanelActivematrix-TFTLCDAnti-
Glarecoating
Visiblediagonalsize:54.6cm
PixelPitch 0.248mmx0.248mm(PixelPitch)
SyncInput HorizontalFrequency 30kHzto83kHz(Automatic)
VerticalFrequency 56Hzto75Hz(D-SUB,DVI-D)
InputForm SeparateSync.Digital
VideoInput SignalInput 15pinD-SUBConnector/DVI-DConnector(Digital)
InputForm RGBAnalog(0.7Vp-p/75ohm),Digital
Resolution Max D-SUB(Analog):1920x1080@60Hz
DVI(Digital):1920x1080@60Hz
Recommend VESA1920x1080@60Hz
Plug&Play DDC2B(Analog,Digital)
Power
Consumption
OnMode:20W(ENERGYSTAR®standard)*
SleepMode≤0.3W
OffMode≤0.3W
PowerInput AC100-240V~50/60Hz1.0A
Dimensions
(WidthxHeightx
Depth)
WithStand 50.9cmx39.8cmx21.0cm
WithoutStand 50.9cmx30.4cmx6.2cm
Weight 3.1kg
TiltRange -5°to20°
Environmental
conditions
OperatingTemperature
OperatingHumidity
10°Cto35°C
10%to80%
StorageTemperature
StorageHumidity
-20°Cto60°C
5%to90%non-Condensing
StandBase Attached(),Detached(O)
Powercord Wall-outlettype
Productspecificationsshownabovemaybechangedwithoutpriornoticeduetoupgradeofproduct
functions.
*Thepowerconsumptionlevelcanbedifferentbyoperatingconditionandmonitorsetting.
*TheOnmodepowerconsumptionismeasuredwithENERGYSTAR®teststandard.
*ENERGYSTAR®isaUSregisteredmarkoftheUnitedStatesEnvironmentalProtectionAgency.
23
ENG
ENGLISH
SPECIFICATIONS
SPECIFICATIONS
24MB35D
Display ScreenType 60.4cm(23.8inch)FlatPanelActivematrix-TFTLCDAnti-
Glarecoating
Visiblediagonalsize:60.4cm
PixelPitch 0.2745mmx0.2745mm(PixelPitch)
SyncInput HorizontalFrequency 30kHzto83kHz(Automatic)
VerticalFrequency 56Hzto75Hz(D-SUB,DVI-D)
InputForm SeparateSync.Digital
VideoInput SignalInput 15pinD-SUBConnector/DVI-DConnector(Digital)
InputForm RGBAnalog(0.7Vp-p/75ohm),Digital
Resolution Max D-SUB(Analog):1920x1080@60Hz
DVI(Digital):1920x1080@60Hz
Recommend VESA1920x1080@60Hz
Plug&Play DDC2B(Analog,Digital)
Power
Consumption
OnMode:23W(ENERGYSTAR®standard)*
SleepMode≤0.3W
OffMode≤0.3W
PowerInput AC100-240V~50/60Hz1.2A
Dimensions
(WidthxHeightx
Depth)
WithStand 56.9cmx43.3cmx21.0cm
WithoutStand 56.9cmx34.2cmx6.3cm
Weight 3.9kg
TiltRange -5°to20°
Environmental
conditions
OperatingTemperature
OperatingHumidity
10°Cto35°C
10%to80%
StorageTemperature
StorageHumidity
-20°Cto60°C
5%to90%non-Condensing
StandBase Attached(),Detached(O)
Powercord Wall-outlettype
Productspecificationsshownabovemaybechangedwithoutpriornoticeduetoupgradeofproduct
functions.
*Thepowerconsumptionlevelcanbedifferentbyoperatingconditionandmonitorsetting.
*TheOnmodepowerconsumptionismeasuredwithENERGYSTAR®teststandard.
*ENERGYSTAR®isaUSregisteredmarkoftheUnitedStatesEnvironmentalProtectionAgency.
24
ENG
ENGLISH
SPECIFICATIONS
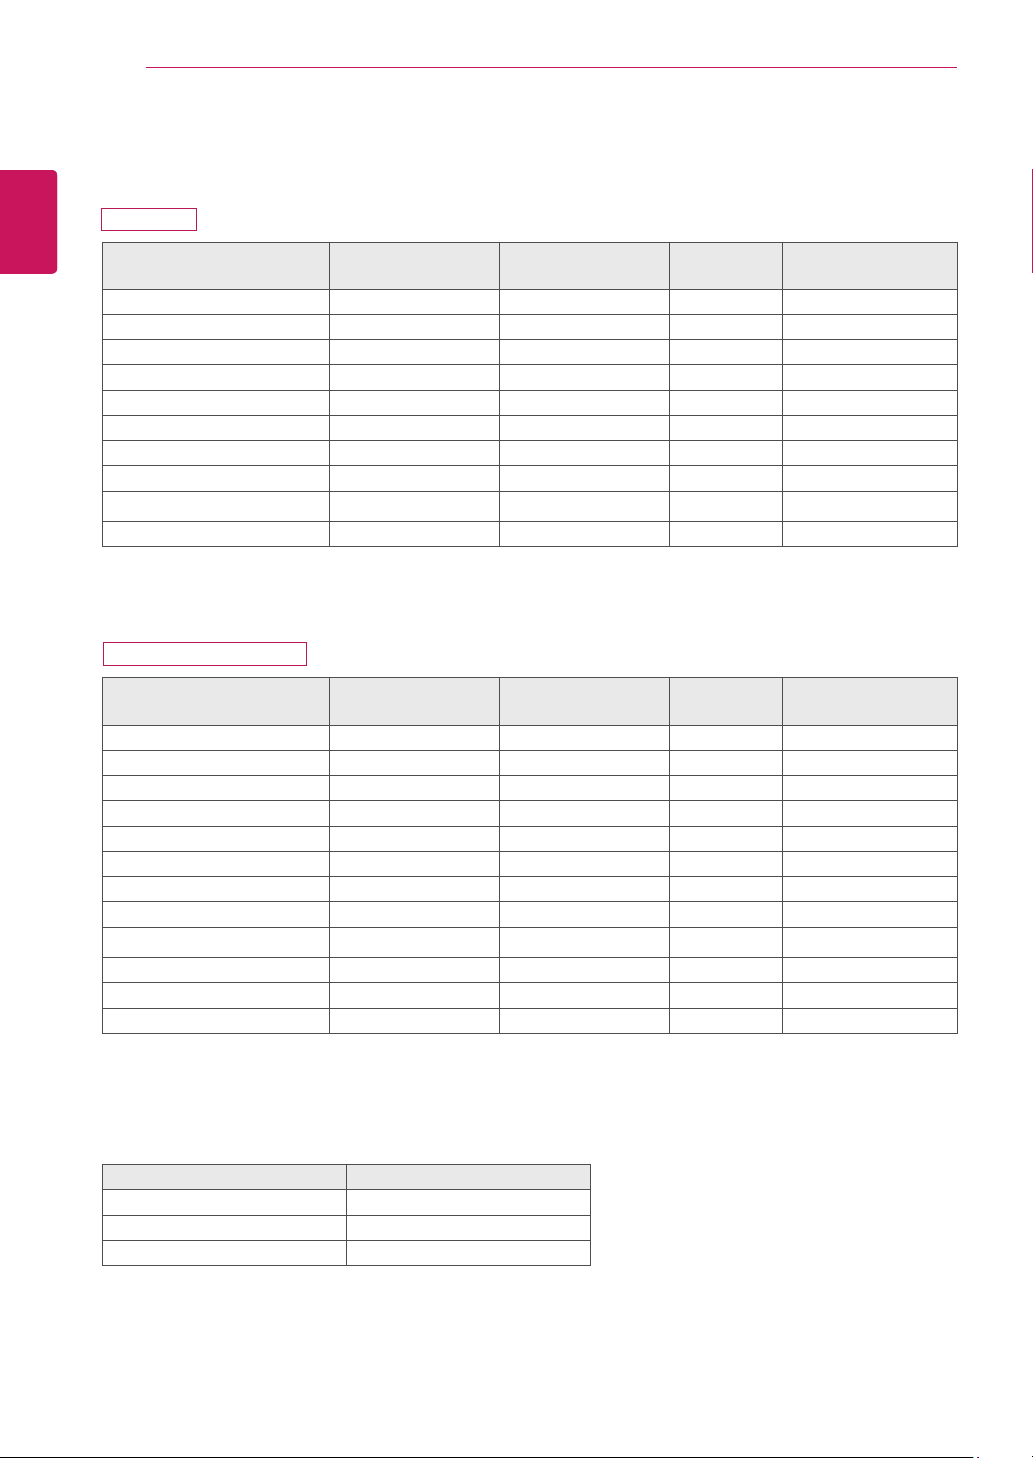
PresetModes(Resolution)
DisplayModes(Resolution)
Horizontal
Frequency(kHz)
Vertical
Frequency(Hz)
Polarity(H/V)
720x400 31.468 70 -/+
640x480 31.469 60 -/-
640x480 37.500 75 -/-
800x600 37.879 60 +/+
800x600 46.875 75 +/+
1024x768 48.363 60 -/-
1024x768 60.023 75
+/+
1152x864 67.500 75 +/+
1280x1024 63.981 60 +/+
1280x1024 79.976 75 +/+
RecommendMode
DisplayModes(Resolution)
Horizontal
Frequency(kHz)
Vertical
Frequency(Hz)
Polarity(H/V)
720x400 31.468 70 -/+
640x480 31.469 60 -/-
640x480 37.500 75 -/-
800x600 37.879 60 +/+
800x600 46.875 75 +/+
1024x768 48.363 60 -/-
1024x768 60.023 75 +/+
1152x864 67.500 75 +/+
1280x1024 63.981 60 +/+
1280x1024 79.976 75 +/+
1680x1050 65.290 60 -/+
1920x1080 67.500 60 +/+ RecommendMode
Indicator
Mode LEDColor
OnMode White
SleepMode BlinkingWhite
OffMode Off
19MB35D
22MB35D/24MB35D
25
ENG
ENGLISH
PROPER POSTURE
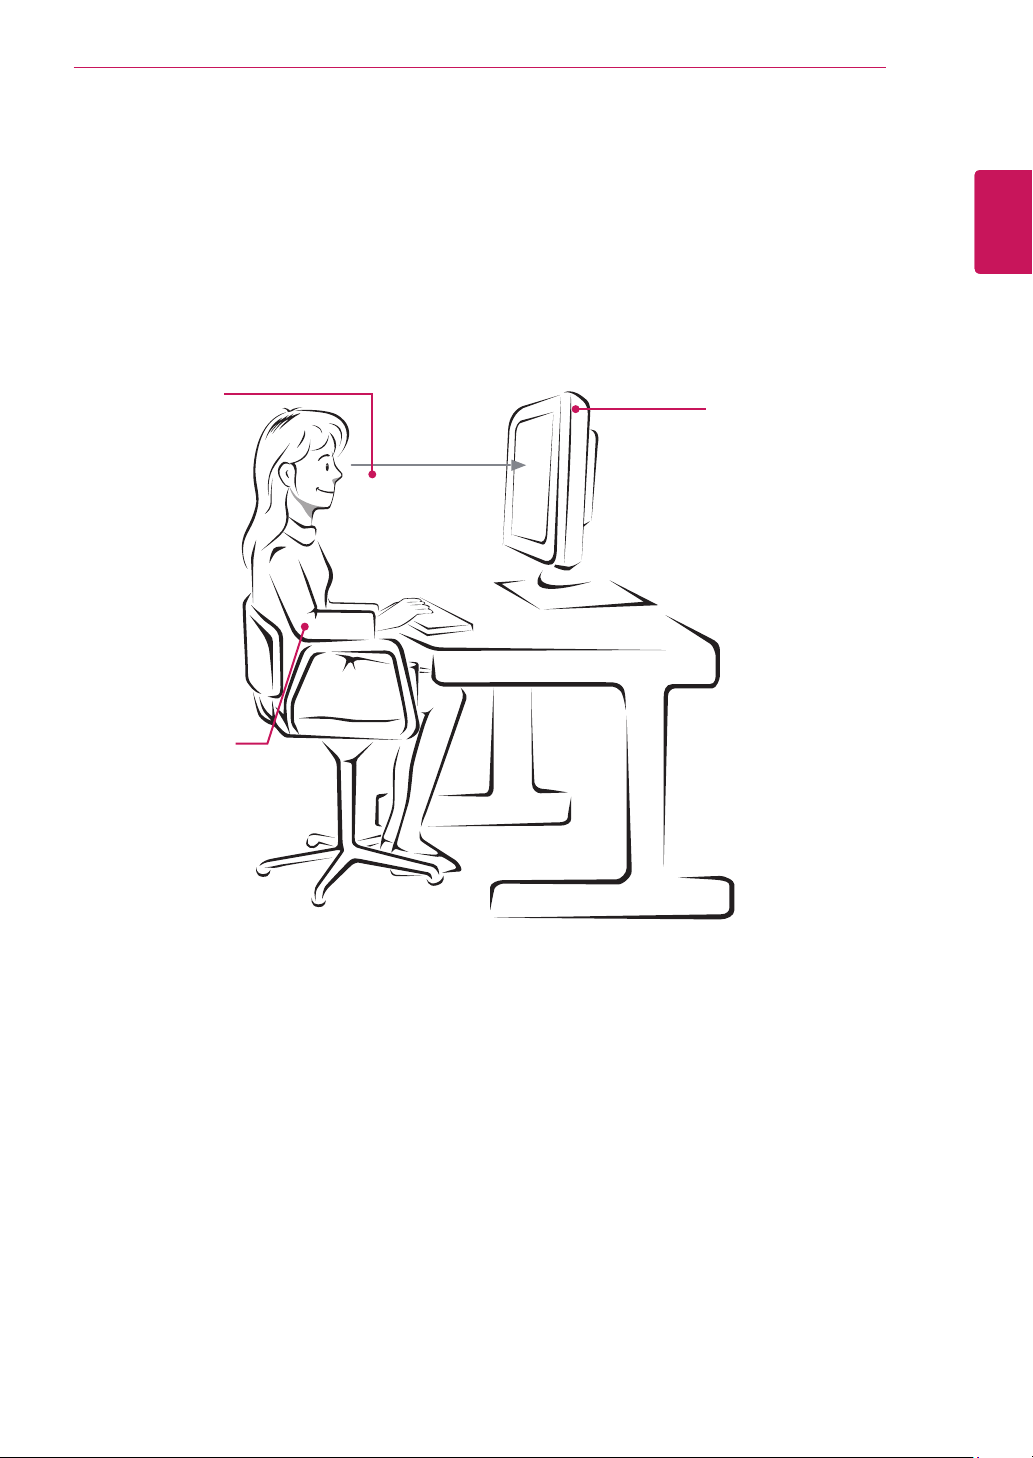
ProperpostureforusingtheMonitorset.
PROPERPOSTURE
Adjustthe
Monitorsetand
yourpostureto
allowyoutoview
imagesatthe
optimalviewing
angle.
Placeyourhands
gentlyonthe
keyboard,keeping
yourarmsbentat
theelbowsand
horizontallyoutright.
Adjustthelocationofthe
Monitorsettoavoidit
reflectinglight.

Make sure to read the Safety Precautions before
using the product.
Keep the Owner’s Manual (CD) in an accessible
place for future reference.
The model and serial number of the SET is
located on the back and one side of the SET.
Record it below should you ever need service.
As an ENERGY STAR Partner LGE
U. S. A.,Inc. has determined that this
product meets the ENERGY STAR
guidelines for energy efficiency.
ENERGY STAR is a set of power-saving
guidelines issued by the U.S.Environmental
Protection Agency(EPA).
MODEL
SERIAL
*above information is only for USA FCC Regulatory
Declaration of Conformity
Trade Name: LG
Model : 19MB35DE, 22MB35DE,
24MB35DE
Responsible Party: LG Electronics Inc.
Address : 1000 Sylvan Ave. Englewood Cliffs
NJ 07632 U.S.A
TEL: 201-266-2534