Loading ...
Loading ...
Loading ...
19
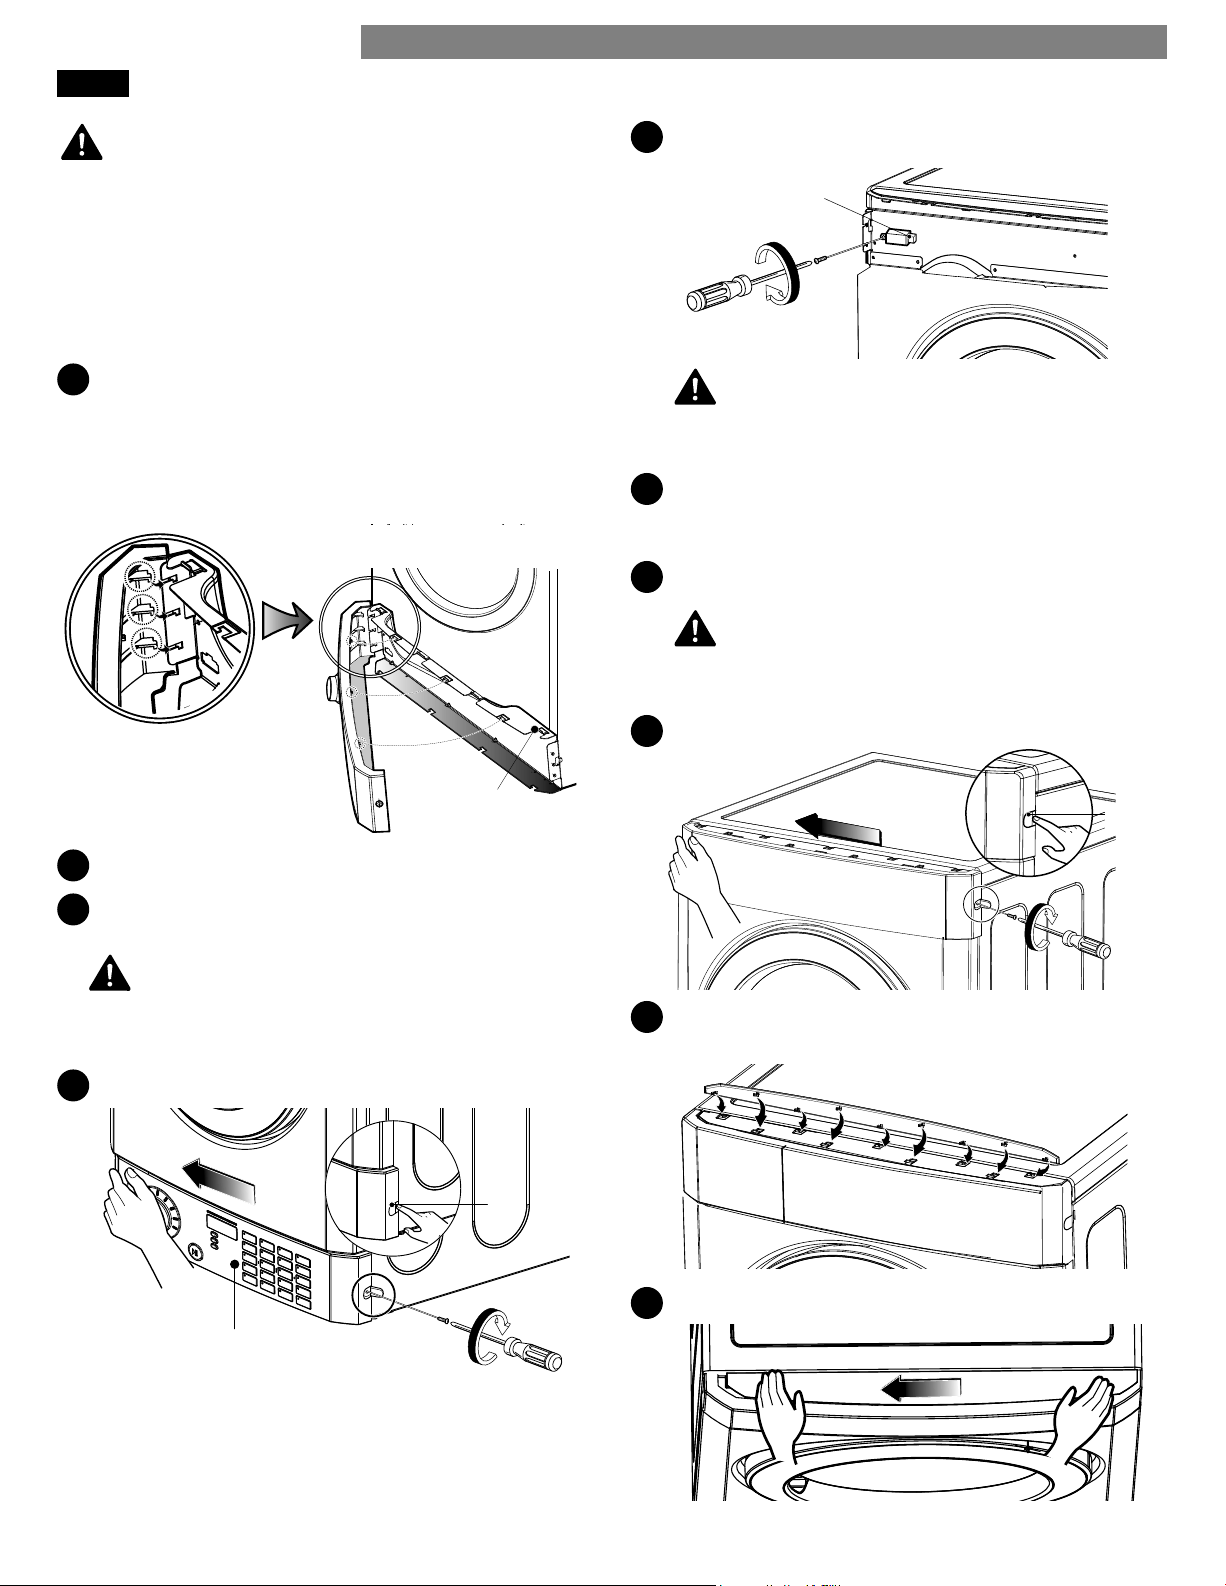
MOVING THE CONTROL PANEL (continued)
Assemble (continued)
2
Align the hooks on the left side of the control panel
with the holes on the left side of the frame.
Keep the bottom of the control panel (A) on top of
the bottom frame (B).
Swing the control panel toward the frame, making
sure to align the three clips on the top of the control
panel with the three holes on the top of the frame.
A
B
Frame
3
Slide the control panel to the left until it clicks.
4
Insert and tighten the screw removed during the control
panel disassembly.
5
Close the cap.
Control Panel
Cap
p
q
r
6
Attach the safety cover.
Safety Cover
7
Install the lower cover at the top of the dryer, where
the control panel was removed. Slide the cover left
until it clicks.
8
Insert and tighten the screw removed during the
lower panel disassembly.
9
Close the cap.
Cap
t
u
v
10
Align the hooks on the top plate with the holes in
the frame.
11
Slide the plate to the left until it clicks into place.
WARNING:
• Disconnect power before servicing.
• Replace all parts and panels before operating.
• Be careful of the sharp edge on the frame to avoid
injury.
• Failure to follow these instructions can result in death
or electric shock.
WARNING:
• If the screw is not tightened properly, the control
panel could come off .
WARNING:
• The safety cover must be installed to avoid electric
shock hazard.
WARNING:
• If the screw is not tightened properly, the cover
could come off .
INSTALLATION INSTRUCTIONS
Loading ...
Loading ...
Loading ...