Loading ...
Loading ...
Loading ...
33
PLEASE PHONE US TO REGISTER YOUR APPLIANCE AND ACTIVATE YOUR PARTS GUARANTEE ON 08448 24 24 24
CARE AND CLEANING
COOKER FINISH CLEANING METHOD
Vitreous Enamel
Door inner panels, pan supports, burner caps,
roasting dish, grill pan, main oven base, inside
of grill compartment.
Cloth wrung out in warm soapy water. Stubborn stains can be
removed with a cream paste, liquid cleaner or by rubbing with
fine steel wool soap pads.
Check that the cleaning agent is approved by the Vitreous
Enamel Association.
Paint
Side panels.
Wash with a cloth wrung out in warm soapy water only.
DO NOT USE ABRASIVES.
Aluminium
Hotplate burner bodies, lid rear trim.
Similar to paint cleaning above. Use a nylon brush to remove any
cleaning materials, water or dirt from the hotplate burner bodies.
Glass
As for enamel cleaning. Polish with a clean dry cloth or kitchen
roll.
Chromium Plating
Oven shelves, grill pan grid, grill pan handle ,
grill pan handle support.
Wipe with a cloth wrung out in warm soapy water. A fine steel
wool soap pad e.g. Brillo, Ajax, or a chrome or stainless steel
cleaner may be used.
Plastic
Control knobs.
Wipe with a cloth wrung out in warm soapy water.
Stainless Steel
Hotplate, control panel.
Wipe with a cloth wrung out in warm soapy water. Polish with a
clean dry cloth or kitchen towel. For stubborn stains, use a
proprietary stainless steel cleaner and follow the instructions on
the container.
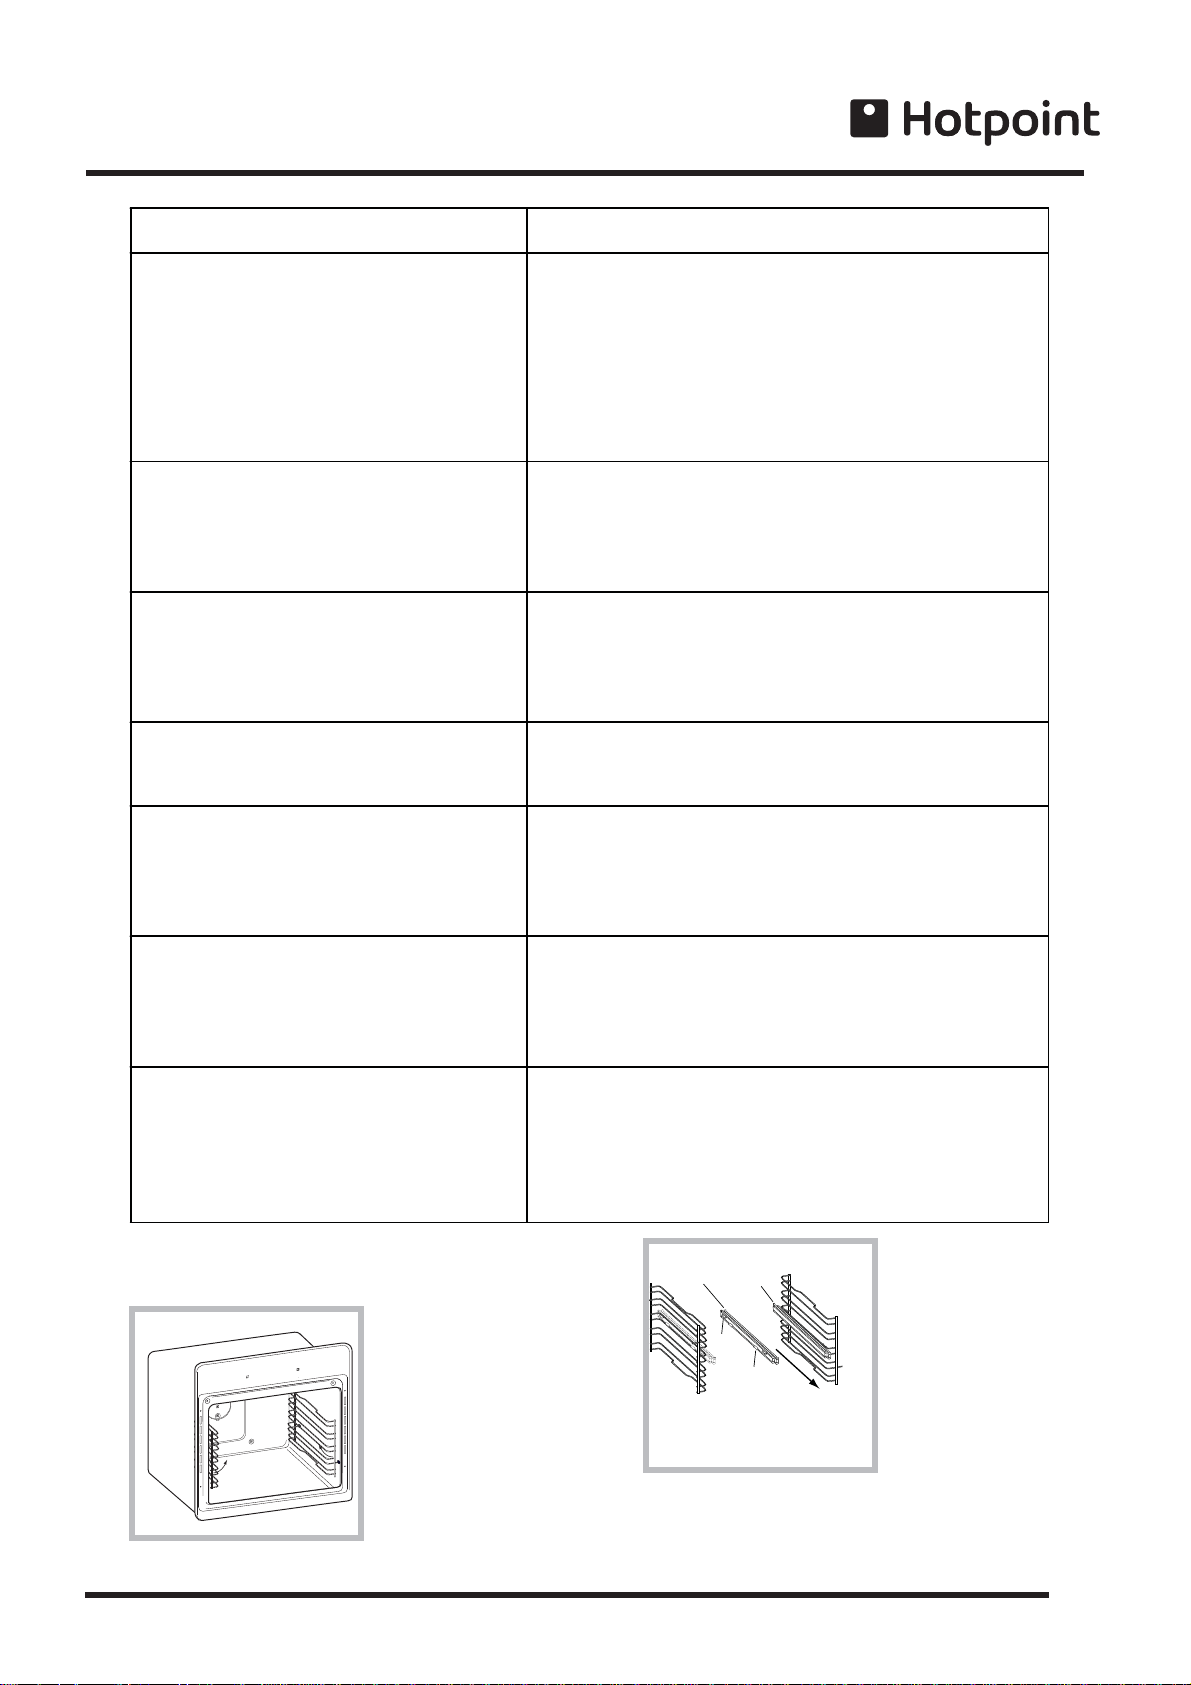
Assembling the sliding rack kit
To assemble the sliding racks:
1. Remove the two
frames, lifting them away
from the holes A (see
gure).
2. Choose which shelf
to use with the sliding
rack. Paying attention
to the direction in which
the sliding rack is to be
extracted, position joint
B and then joint C on the
frame.
3. Secure the two frames
with the guide rails
using the holes provided
on the oven walls.
! Do not place the sliding racks in position 5.
B
C
Left
guide rail
Right guide
rail
Direction
of extraction
A
A
*
*Only on certain models
Loading ...
Loading ...
Loading ...