Loading ...
Loading ...
Loading ...
10
O
F
F
/
O
N
O
P
E
R
A
T
IO
N
T
E
M
P
/
T
I
M
E
R
C
O
O
L
F
A
N
H
IG
H
M
ED
L
O
W
M
O
D
E
F
A
N
S
P
E
E
D
S
E
T
T
IM
E
R
S
E
T
/
C
A
N
C
E
L
h
r
°F
ECONOMY
W
i
r
e
l
e
s
s
R
e
m
o
t
e
C
o
n
t
r
o
l
A
I
R
S
W
I
N
G
AIR CONDITIONER INSTALLATION
INSTALACIÓN DEL ACONDICIONADOR DE AIRE
AIR CONDITIONER INSTALLATION
INSTALACIÓN DEL ACONDICIONADOR DE AIRE
INSERT THE
INSERTE EL FILTRO
10
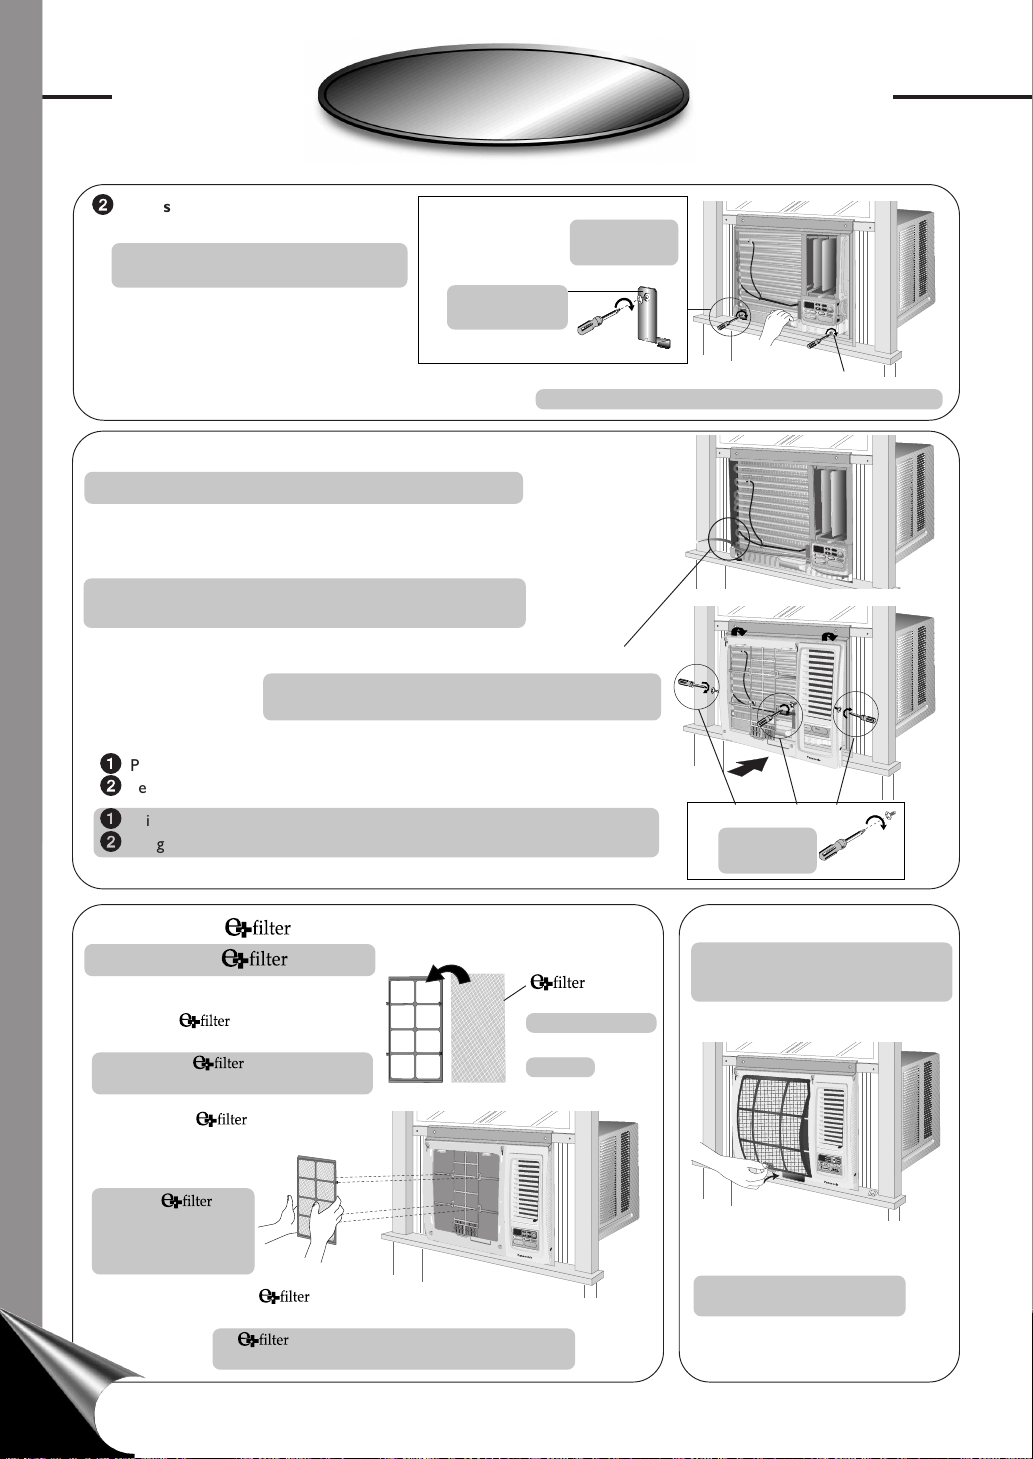
INSTALLATION OF THE FRONT GRILLE
INSTALACIÓN DE LA REJILLA FRONTAL
Depending upon the location of the AC outlet, route the AC
cord to either the left or right side while installing the front
grille.
Dependiendo de la ubicación de la toma de CA, dirija el cable
hacia la derecha o izquierda mientras instala la rejilla frontal.
1
Place the front grille on the cabinet first.
2
Secure the front grille to the main chassis using the screws provided.
1
Primero, ponga la rejilla frontal en la caja.
2
Asegure la rejilla frontal a el chasis haciendo uso de los tornillos provistos.
To frame
Al marco
INSERT THE AIR FILTER
INSERTE EL FILTRO DE
AIRE
A
IR
S
W
IN
G
OFF/ON
O
P
E
R
A
T
I
O
N
T
E
M
P
/
T
I
M
E
R
COOL
FAN
HIGH
MED
LOW
M
O
D
E
F
A
N
S
P
E
E
D
S
E
T
T
I
M
E
R
S
E
T
/
C
A
N
C
E
L
h
r
F
E
C
ON
OM
Y
W
i
r
e
l
e
s
s
R
e
m
o
t
e
C
o
n
t
r
o
l
Clockwise
En el sentido
del reloj
Attach the (part no. CZ-SF6P)
to the frame.
Adjuntar el
filtro (serie no.
CZ-SF6P) a el marco.
Slot in the
and the frame (part no.
CZ-SFW6P) to the
front grille.
El ranura
filtro
y el marco (serie no.
CZ-SFW6P) a la rejilla
frontal.
The and the frame can be obtained
separately from your nearest servicenter.
El
filtro y el marco puede ser obtenido en
su servicentro más cercano por separado.
Attach the air filter to
the intake grille.
Adjuntar el filtro de aire a la
rejilla frontal.
(part no. CZ-SF6P)
(serie no. CZ-SF6P)
C
O
O
L
M
O
D
E
O
F
F
/
O
N
O
P
E
R
A
T
I
O
N
T
E
M
P
/
T
I
M
E
R
S
E
T
T
I
M
E
R
h
r
¡
F
F
A
N
S
P
E
E
D
A
I
R
S
W
I
N
G
S
E
T
/
C
A
N
C
E
L
F
A
N
H
I
G
H
M
E
D
L
O
W
E
C
O
N
O
M
Y
W
i
r
e
l
e
s
s
R
e
m
o
t
e
C
o
n
t
r
o
l
2
Reinstall the chassis locking
brackets and retighten the screws
Reinstale los soportes que cierran
el chasis y apriete bien los tornillos
Clockwise
En el sentido
del reloj
10
Chassis locking
bracket
Sopartes que
cierran el chasis
Fix the chassis grounding screw to the original position.
Fije el tornillo de puesta a tierra del chasis en su posición original.
C
O
O
L
M
O
D
E
O
F
F
/
O
N
O
P
E
R
A
T
I
O
N
T
E
M
P
/
T
I
M
E
R
S
E
T
T
I
M
E
R
h
r
¡
F
F
A
N
S
P
E
E
D
A
IR
S
W
IN
G
S
E
T
/
C
A
N
C
E
L
F
A
N
H
I
G
H
M
E
D
L
O
W
E
C
O
N
O
M
Y
W
i
r
e
l
e
s
s
Remote
Control
This figure shows the AC cord routed to the left side.
Esta figura muestra el cable de CA dirijida hacia la
izquierda.
Loading ...
Loading ...
Loading ...