Loading ...
Loading ...
Rev.052114-JA 3 www.elitescreens.com
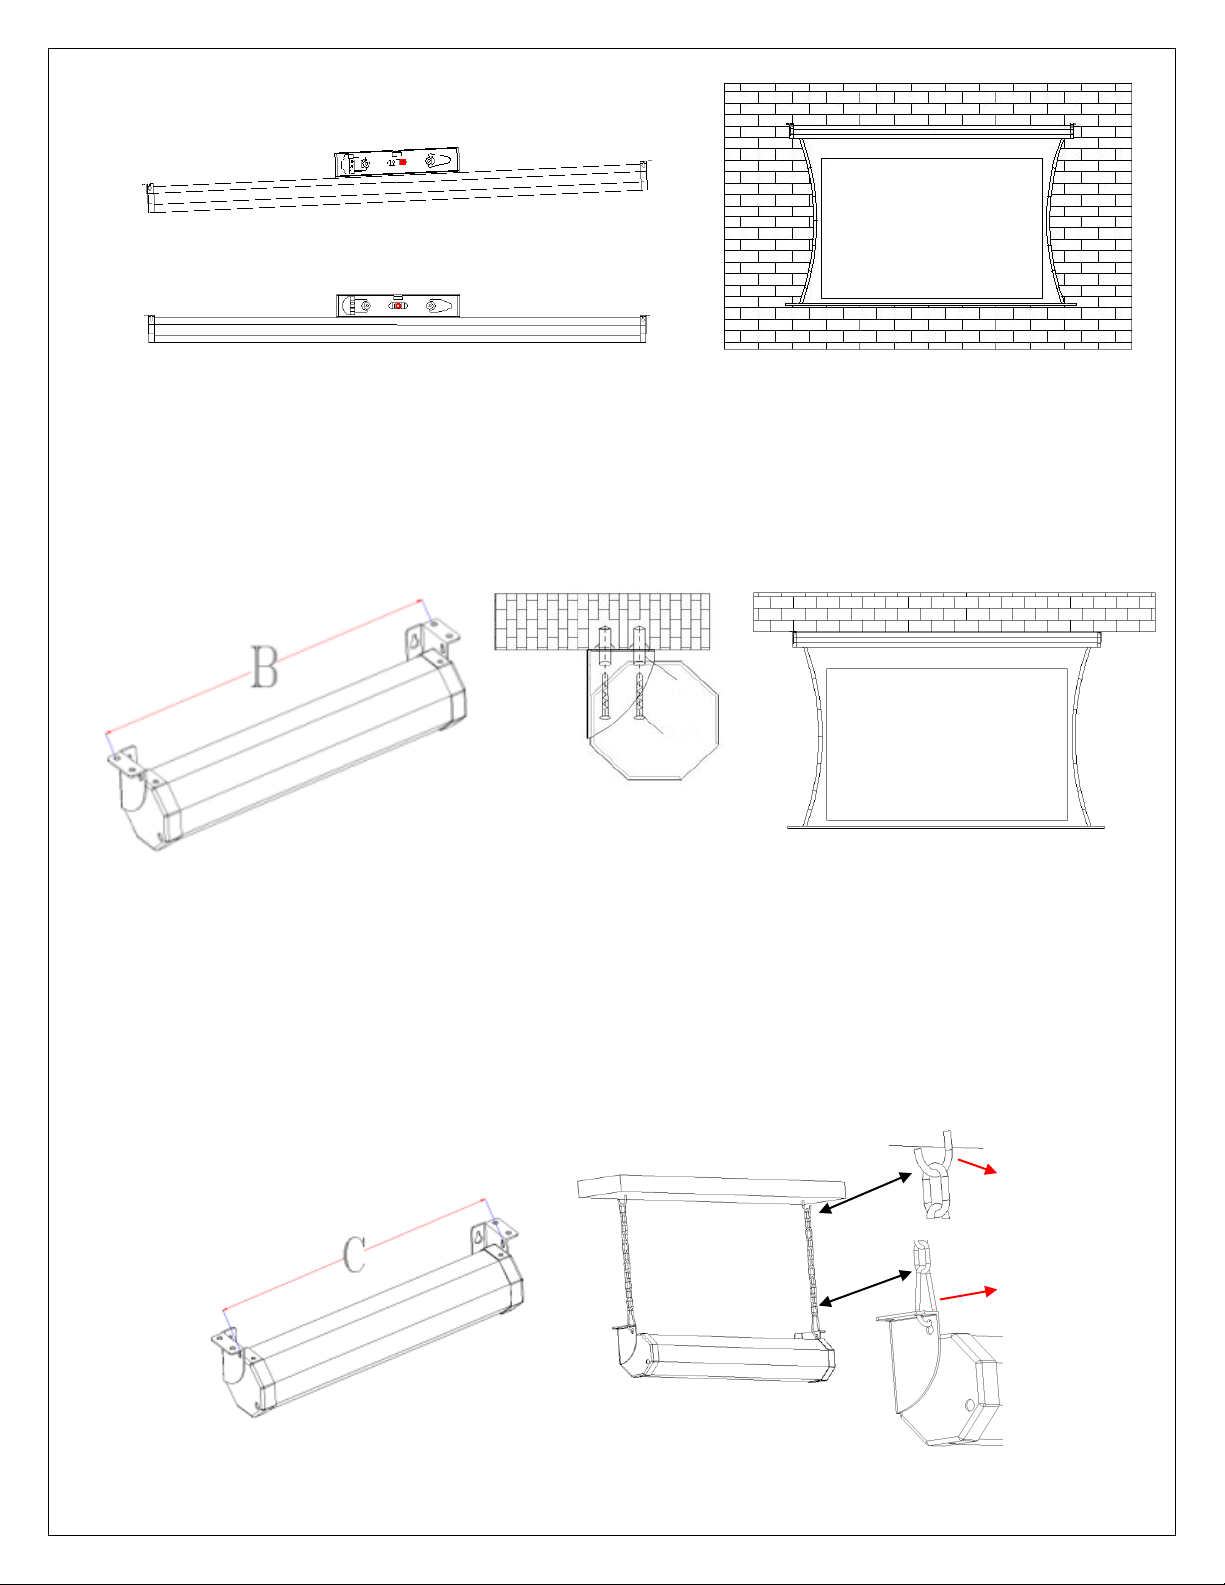
B. Ceiling Mount (flushed):
1. Measure distance B (shown in Fig. 4) between the holes on the top of both end caps with a
measuring tape. Mark and then drill the four screw holes on the ceiling.
2. Insert wall anchors into the four drilled holes on the ceiling and then insert the screws through the
end cap holes into the anchors and ensure that you tighten the screws without stripping the anchors
(see Fig. 5).
3. After hanging the screen on to the affixed screws, use the provided bubble leveler to ensure for a
levelled installation (see Fig. 6).
C. Ceiling Mount (suspended):
Hardware required (not included): screw hook, snap link, chain
1. Measure distance C (shown in Fig. 7) between the holes on the top of both end caps with a
measuring tape. Mark and then drill the screw holes on the ceiling.
2. Insert wall anchors into the drilled holes on the ceiling and then insert the screws through the
chain’s support into the anchors and ensure that you tighten the screws without stripping the
anchors (see Fig. 8).
3. Attach the chains to the support that was screwed into the ceiling. Attach the end caps of the screen
to the snap link that are at the bottom of the chains for sustainability (see Fig. 8).
4. After hanging the screen on to the affixed screws, use the provided bubble leveler to ensure for a
levelled installation.
Fig.3
Fig.4
Fig.5
Fig.6
Fig.7
Screw hook
Snap link
Fig.8
2. If the bubble is in the center, the screen is balanced.
1. If the bubble runs to the right side, the screen is not balanced.
Loading ...
Loading ...