Loading ...
Loading ...
Loading ...
Using Your Dishwasher Using Your Dishwasher
Page 10
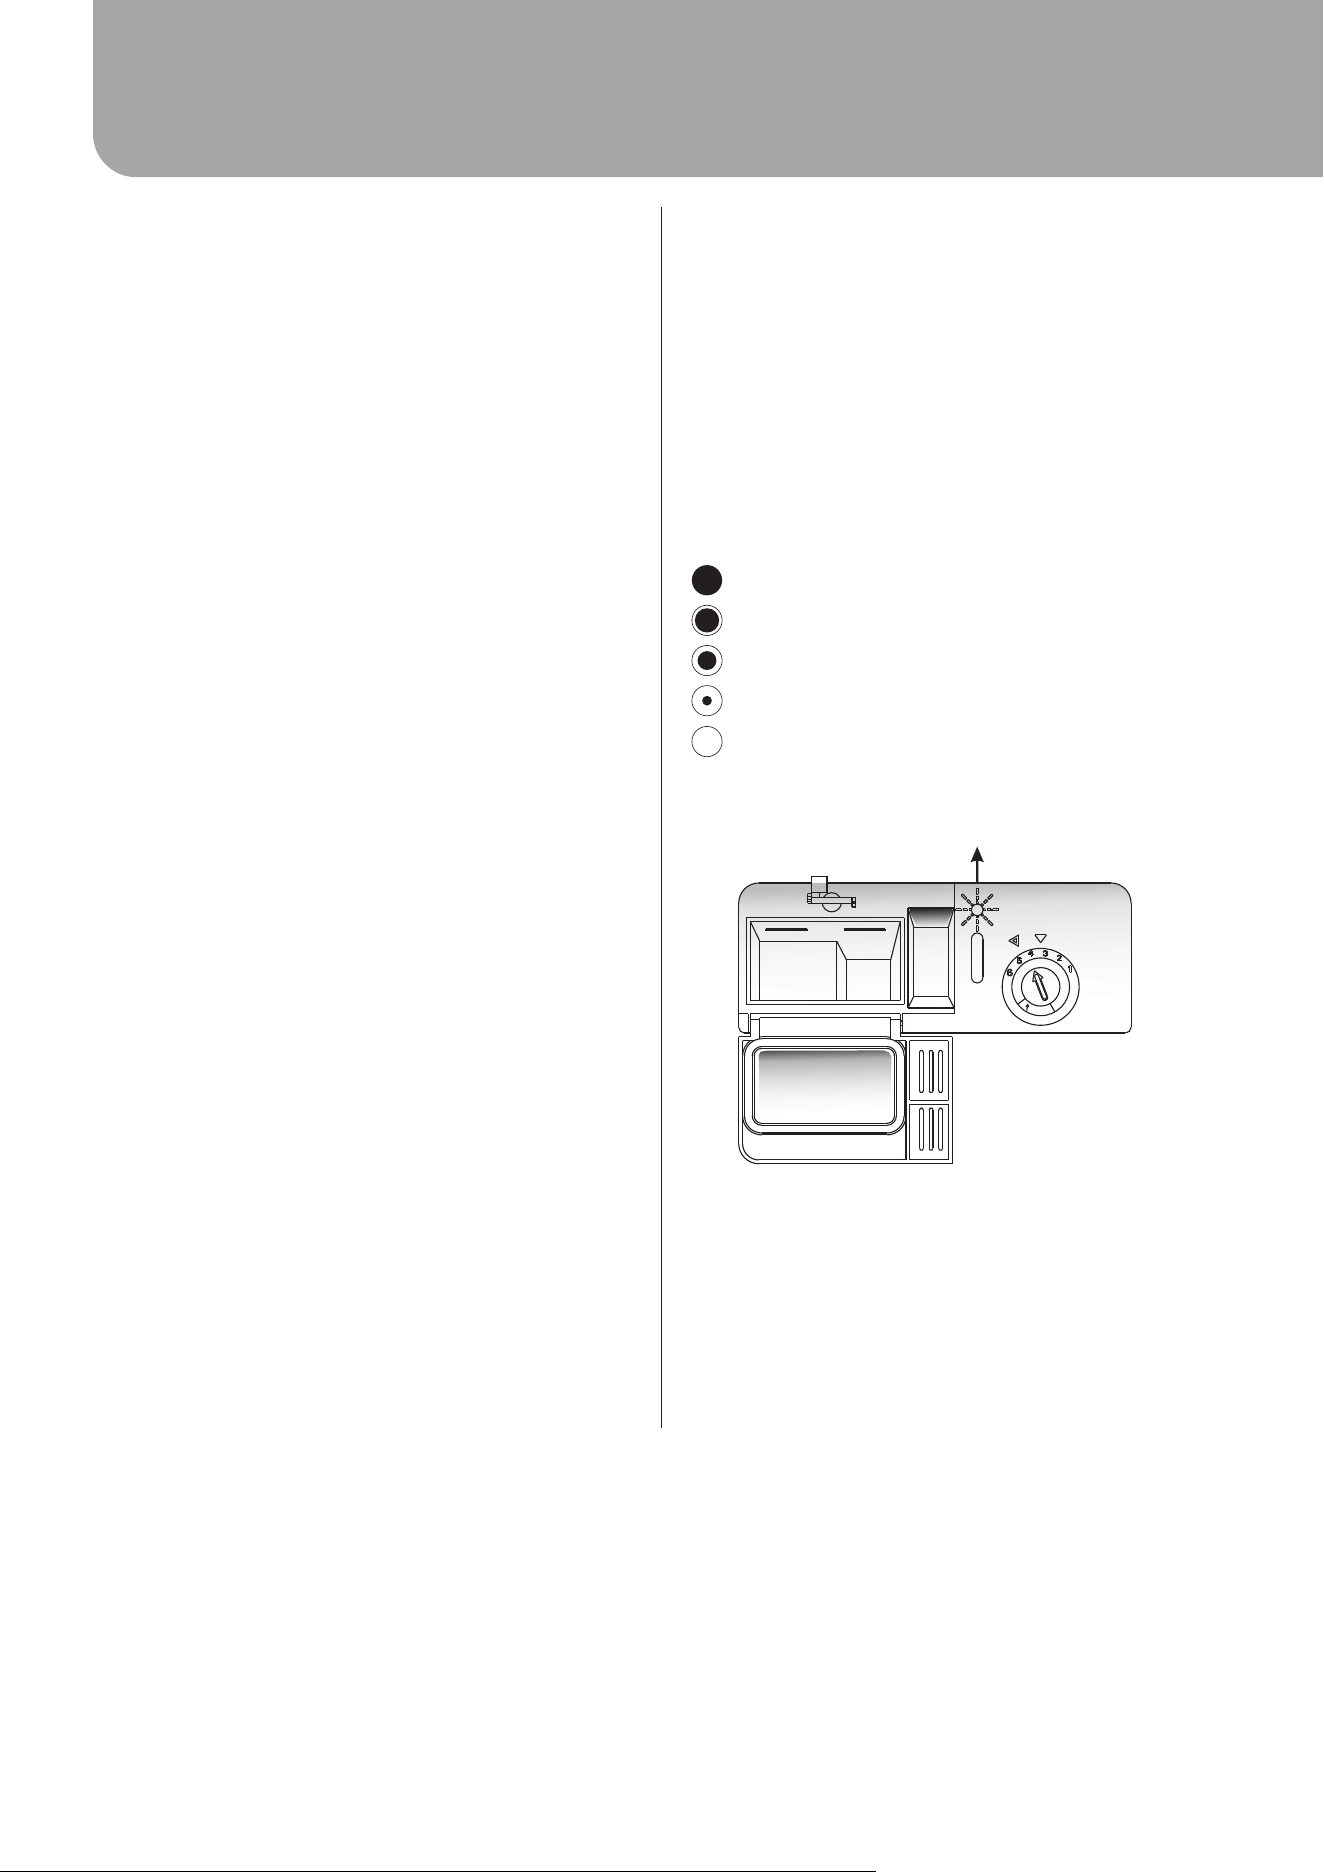
As the rinse aid diminishes, the size of the black dot
on the rinse aid level indicator changes, as illustrated
below.
BEFORE STARTING THE DISHWASHER
The following things should be checked before
starting the dishwasher.
1. That the dishwasher is level and fixed properly.
2. That the inlet valve is open .
3. That there is no leakage at the connections of the
conducts.
4. The wires are tightly connected and the power is
switched on.
5. That the inlet and drain hoses are not knotted or
kinked.
6. All packing materials should be taken out of the
dishwasher.
PRIOR TO USING FOR THE FIRST TIME
Before using your dishwasher for the first time:
Fill the Rinse Aid Dispenser
The rinse aid is released during the final rinse to
prevent water from forming droplets on your dishes,
which can leave spots and streaks. It also improves
drying by allowing water to roll off the dishes. Your
dishwasher is designed to use liquid rinse aids. The
rinse aid dispenser is located inside the door next to
the detergent dispenser. To fill the dispenser, open the
cap and pour the rinse aid into the dispenser until the
level indicator turns completely black. The volume of
the rinse aid container is about 110ml.
Function of the Rinse Aid
Rinse aid is automatically added during the last rinse,
ensuring thorough rinsing, and spot and streak free
drying.
WARNING!
Only use branded rinse aid for dishwasher. Never fill
the rinse aid dispenser with any other substances
(e.g. Dishwasher cleaning agent, liquid detergent).
This would damage the appliance.
Full
3/4 Full
1/2 Full
1/4 Full (Should refill to eliminate spotting)
Empty
C (Rinse-Aid indicator)
MIN
M
A
X
When to refill the Rinse Aid Dispenser
If there is no rinse-aid warning light in the control
panel, you can judge the amount of rinse-aid by the
color of the optical level indicator "C" located next to
the cap. When the rinse-aid container is full, the whole
indicator will be dark. As the rinse-aid diminishes, the
size of the dark dot decreases. You should never let
the rinse aid get below 1/4 full.
Page 19
STARTING A WASHING PROGRAM
Wash Cycle Table
NOTE: Star ( ) means the need to fill rinse into the Rinse Aid Dispenser.
10
Detergent
pre/main
Cycle Selection
Information
Program
Running
time
(Hrs/Mins)
Water
(L)
2:30
Energy
(Kwh)
1.0
Rinse
Aid
3-in-1
5/20g
5/20g
3in1
For normally soiled loads,
such as pots, plates,glasses
and lightly soiled pans.
standard daily cycle.
Pre-wash(50°C)
Pre-wash
Wash (65°C)
Rinse
Rinse
Rinse (55°C)
Drying
Pre-wash(50°C)
Wash (50°C)
Rinse
Rinse (65°C)
Drying
Wash (40°C)
Rinse
Rinse (45°C)
15g.
/
Pre-wash(50°C)
wash(50°C)
rinse(70°C)
drying
2:30
2:00
30
1:20
0.95
1.2
0.4
0.65
18
13
5/20g
Pre-wash
Pre-wash
Wash (55 )
Rinse (55 )
Drying
°C
°C
2:00 0.65 13.3
7
10
Description
of Cycle
Pre-wash
Wash (40°C)
Rinse
Rinse (60°C)
Drying
/
8
3
0.01
Pre-wash
Heavy
Normal
(AS/NZS 2007. 1 )
Intensive
Rinse
Rapid
Soak
For the heaviest soiled loads,
such as pots,pans,casserole
dishes and dishes that have
been sitting with dried food
on them for a while.
For heavy soiled loads,
such as pots, plates,
glasses and lightly soiled
pans. standard daily cycle.
For normal soiled loads,
such as plates, glasses,
bowls and lightly soiled
pans.
For dishes that need to be
rinsed and dried only.
A shorter wash for lightly
soiled loads that do not
need drying.
To rinse dishes that you
plan to wash later that day.
NOTE:
* AS/NZS 2007.1: This program is the test cycle.
The information for comparability test in accordance with AS/NZS 2007.1, as follows:
Capacity: 8 setting
Ÿ
Position Upper basket: In position 1 (Page 15)
Ÿ
Rinse aid setting: 3
Ÿ
Open the door slightly 50mm to assist in drying of the dishes after every wash
Ÿ
Loading ...
Loading ...
Loading ...