Loading ...
Loading ...
Loading ...
49-60785 Rev. 1 11
CAUTION
Avoid contact with the moving
parts of the ejector mechanism, or with the
heating element (located on the bottom of the
icemaker) that releases the cubes. Do not place
fingers or hands on the automatic ice making
mechanism while the freezer is plugged in.
ATTENTION
Évitez tout contact avec les
SLqFHVPRELOHVGXPpFDQLVPHG¶pMHFWLRQRX
l’élément chauffant (situé dans le bas de la
PDFKLQHjJODoRQVTXLOLEqUHOHVFXEHV1HSODFH]
pas les doigts ou les mains sur le mécanisme de
production de glace automatique lorsque le
réfrigérateur est branché dans la prise électrique.
PRECAUCIÓN
Evite el contacto con las
partes en movimiento del mecanismo expulsor o
con el elemento de calefacción (ubicado en la parte
inferior de la máquina de hielos) que expulsa los
cubos. No coloque los dedos ni las manos en el
mecanismo de la máquina de hielos automática
mientras el freezer se encuentre enchufado.
A newly-installed freezer may take 12–24
hours to begin making ice.
The icemaker will produce seven cubes per
cycle—approximately 15 cycles in a 24-hour
period, depending on freezer compartment
temperature, room temperature, number of
door openings and other use conditions.
If the freezer is operated before the water
connection is made to the icemaker, set the
power switch to OFF.
When the freezer has been connected to the
water supply, set the power switch to
ON
.
Throw away the first full bucket of ice to allow
the water line to clear.
Be sure nothing interferes with the sweep of
the feeler arm.
When the bin fills to the level of the feeler
arm, the icemaker will stop producing ice.
It is normal for several cubes to be joined
together.
If ice is not used frequently, old ice cubes will
become cloudy, taste stale and shrink.
NOTE: Icemaker works best between 40 and
120 PSI (275-827 kPa) home water pressure.
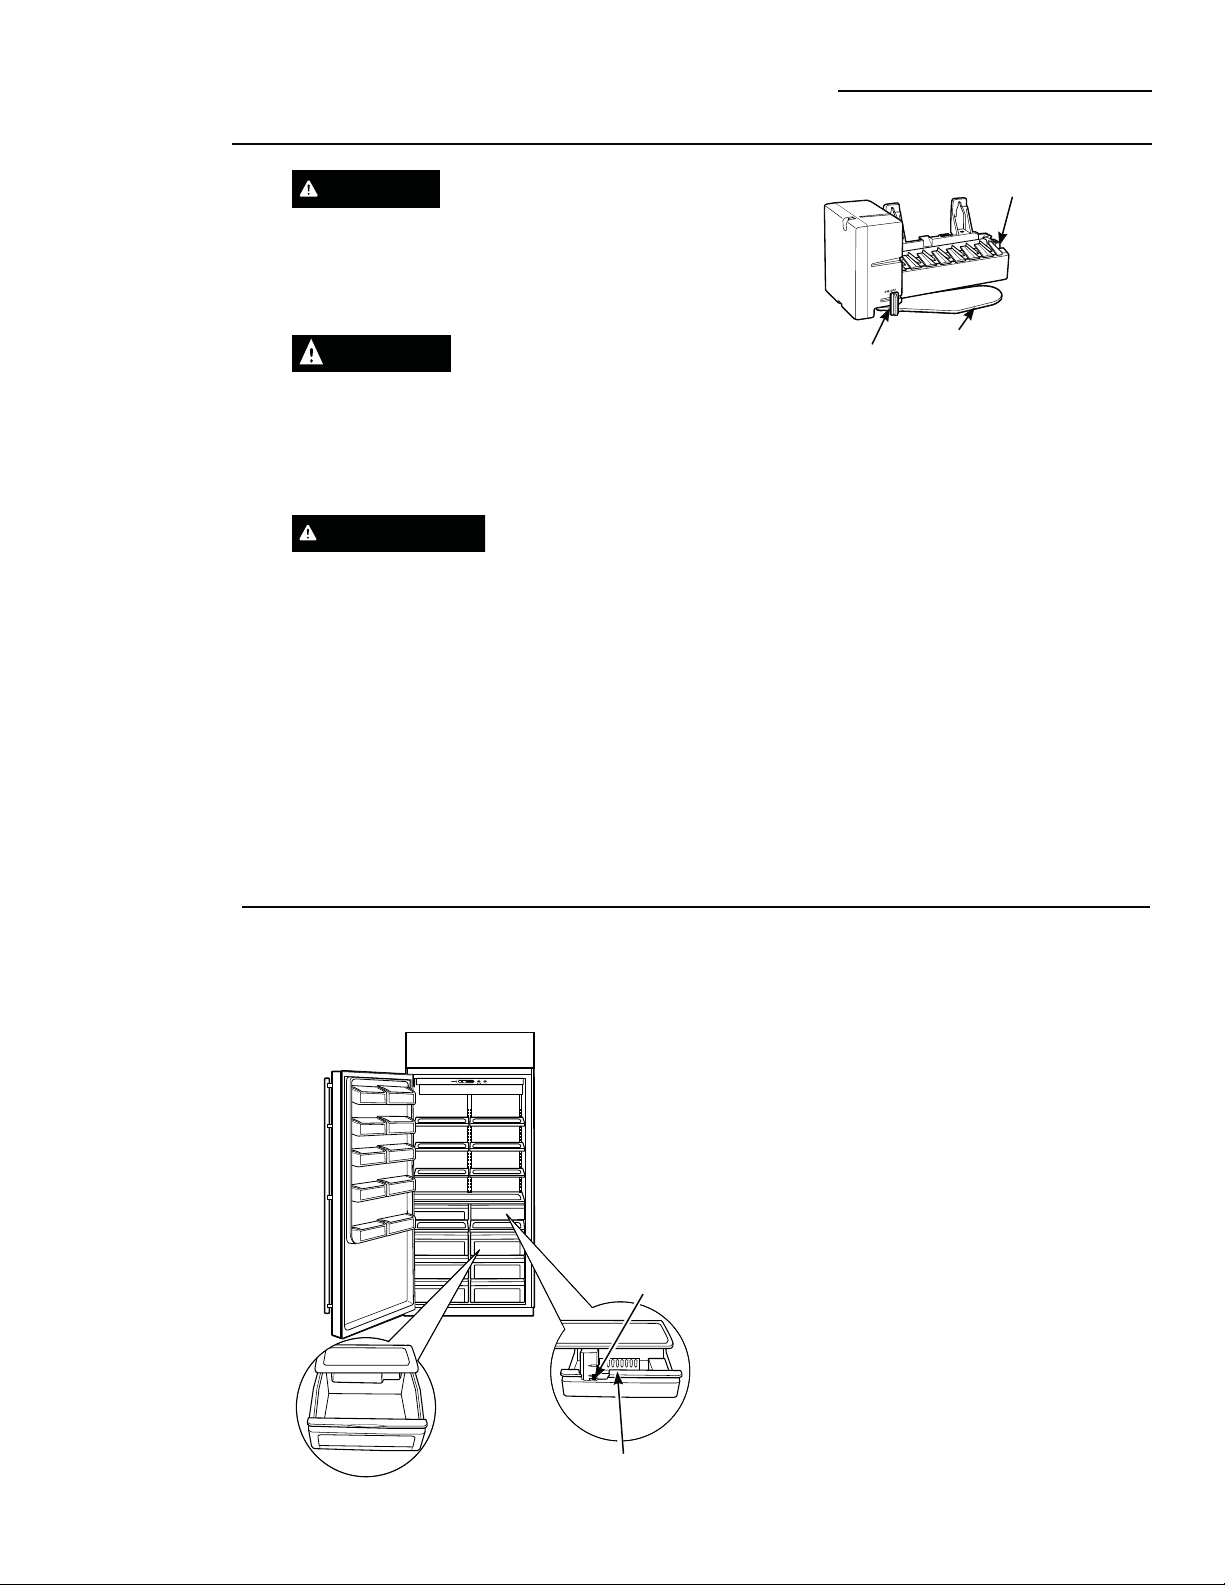
Automatic Icemaker (freezer models)
36” All-Refrigerator and All-Freezer Units
Automatic
icemaker
(freezer
models)
Accessing
the icemaker
and ice
storage bin
(freezer
models)
The icemaker is located behind the first drawer
on the right of the freezer. The ice bin is the
second drawer.
To remove the ice bin:
Open the access door to reach the icemaker. Set
the icemaker power switch to the OFF position.
With the access door closed, support the storage
bin at the bottom while slightly lifting. Pull bin
straight out. See Drawer Removal section.
To replace the ice bin:
Slide the bin back until the tab on the bin locks
into the slot on the shelf. After replacing the ice
bin, open the access door to reach the icemaker.
Set the icemaker power switch to the ON
position.
Feeler Arm
Icemaker
Power
Switch
Icemaker
Ice bin
ON/OFF switch
Loading ...
Loading ...
Loading ...