Loading ...
Loading ...
Loading ...
www.oster.com
www.oster.com
HOW TO:
INTRODUCTION
Before using your new appliance, wash the inside of the pan
with warm, soapy water and dry. When washing the skillet,
make sure the temperature controller is removed.
The OSTER® Electric Skillet is now ready for use.
USING THE OSTER® ELECTRIC SKILLET
1. Push the temperature controller rmly into its socket found at
the side of the appliance. Plug into a standard 120 Volt AC
outlet.
2. Set the temperature you want by turning the knob on the
temperature controller. The indicator light will come on. Set
the temperature of your choice opposite the indicator light.
When the light goes o, the chosen cooking temperature has
been reached. During cooking, the light will blink on and o
indicating the temperature is being maintained. Guidance in
the choice of temperatures is supplied later in this book.
3. It is recommended that you not cook with the Electric Skillet
standing on temperature sensitive surfaces.
4. For simmering, set the temperature controller to SIMMER. Set
the dial to this point each time SIMMER is specied in a recipe.
5. To remove the temperature controller, rst unplug from the
wall outlet, then gently remove the controller from the socket.
6. No preheating is needed when using the product.
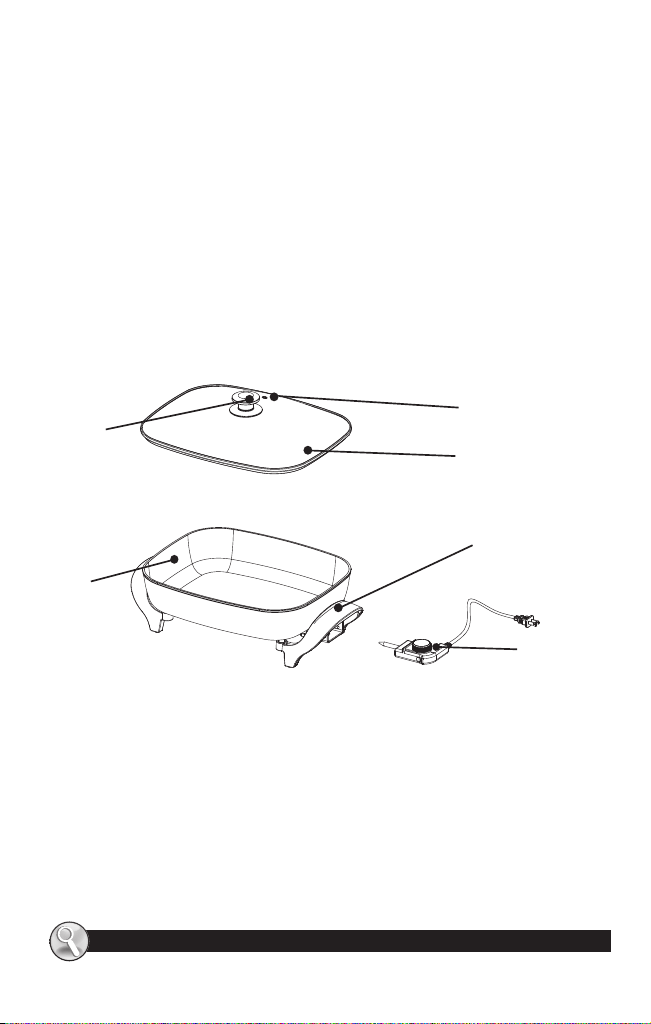
PARTS IDENTIFICATION
KNOW YOUR ELECTRIC SKILLET
4
Congratulations on your purchase of a Titanium Infused
DuraCeramic™ appliance!
This appliance features a Titanium Infused DuraCeramic™ non-stick
natural ceramic coating which is 4X more durable than other
non-stick coatings. This means there’s no aking or peeling o to
worry about. Furthermore, the ultra-durable ceramic coating cooks
faster than other non-stick coatings, saving time and energy. The
natural Titanium Infused DuraCeramic™ non-stick coating also oers
greater health and benets as it’s free of PTFE and PFOA. 4X More
Durable – Titanium Infused DuraCeramic™!
1. Lid Handle
2. Steam Vent
3. Glass Lid
5
2
1
4. Handle
5. Temperature Controller
6. Skillet Pan
3
4
6
5
Loading ...
Loading ...
Loading ...