Loading ...
Loading ...
Loading ...
6
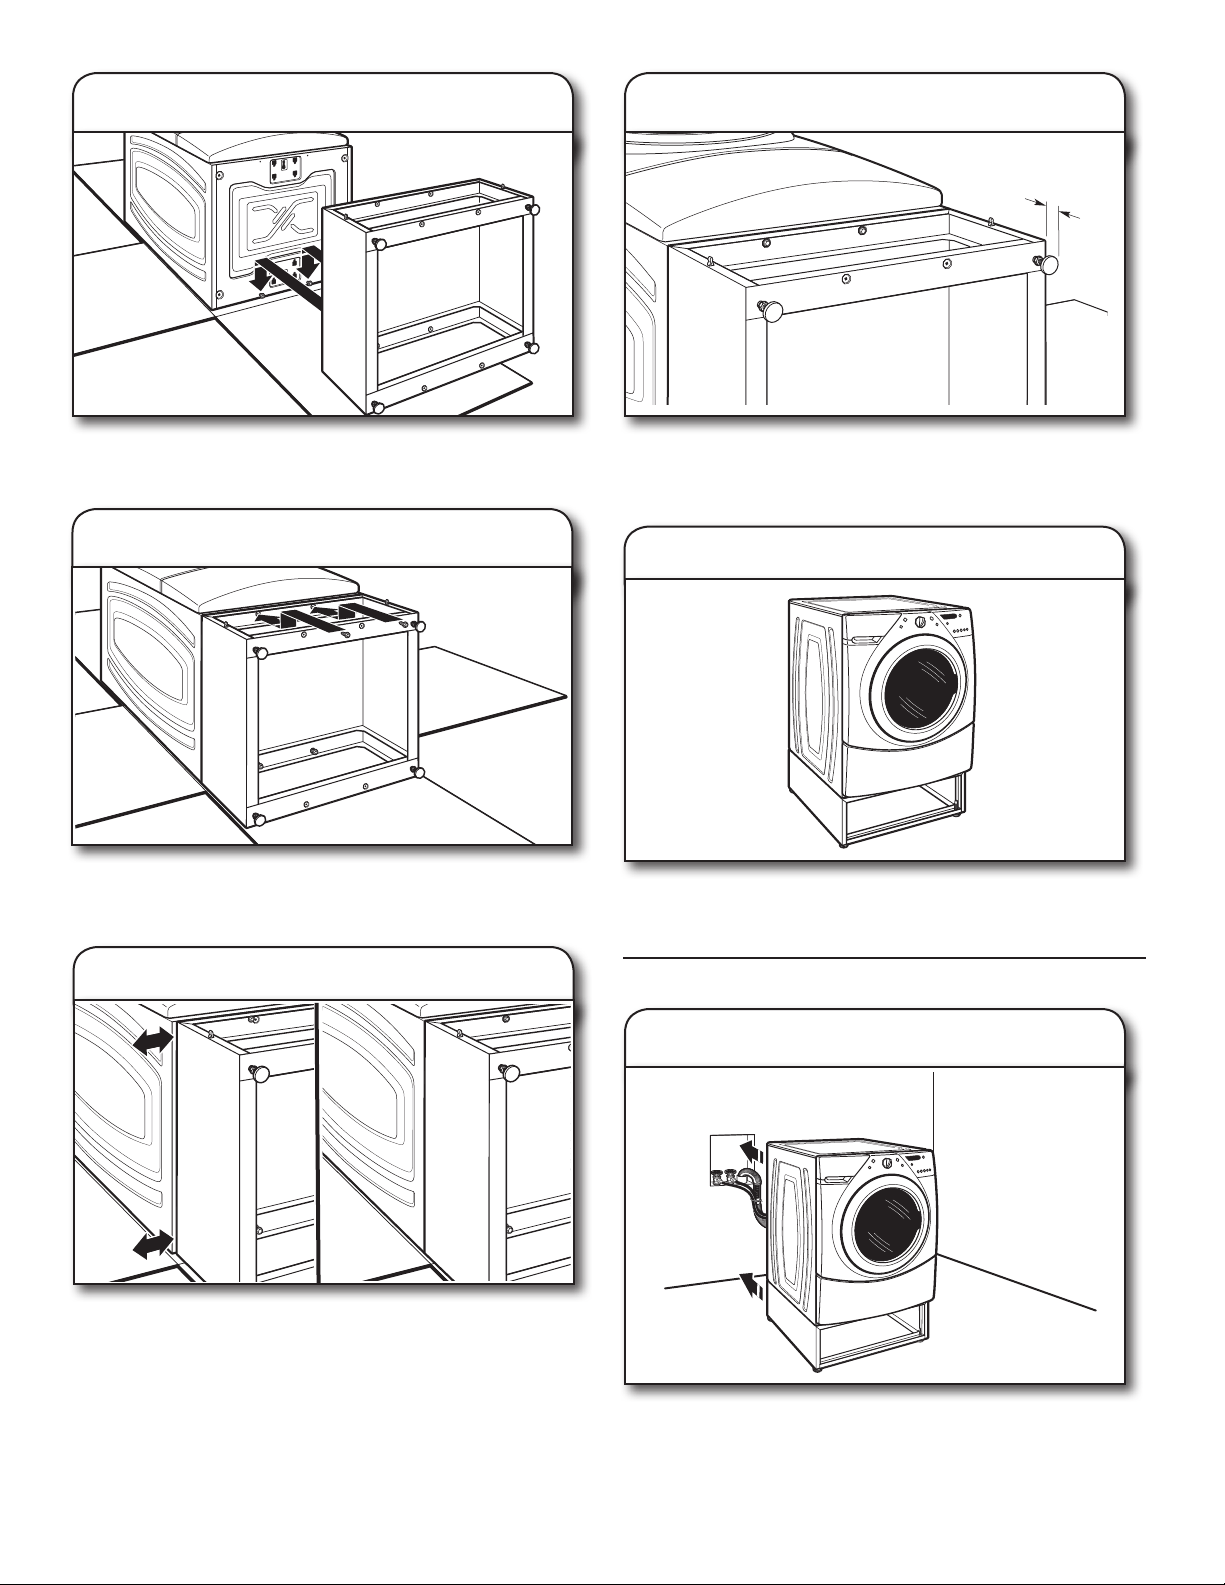
9. Stand the washer/dryer upright
10. Move close to nal location
Tip the washer/dryer back to its upright position. Remove any
remaining packaging material. Dispose of/recycle all packaging
material.
COMPLETE THE INSTALLATION
Follow the installation instructions that came with your model
to nish installing or reinstalling your washer/dryer (i.e., hoses,
vents, etc.).
NOTE: Be sure to remove the transport bolts from the back of
the washer.
6. Secure the pedestal
Position the pedestal toward the front of the washer/dryer and
install the two remaining hex-head sheet metal screws. Do not
tighten completely.
Align the sides of the pedestal so that they are even with the
sides of the washer/dryer. Reach inside the pedestal opening
and securely tighten all four pedestal screws.
7. Align sides of pedestal
5. Attach the pedestal
Move the pedestal against the washer/dryer bottom. Slide the
pedestal’s keyhole slots over the lower two partially installed
screws.
1"
(25 mm)
8. Prepare pedestal feet
The pedestal arrives with the feet tight against the bottom of
the unit. Using a 1/4" hex head ratchet or open-end wrench,
lower the feet approximatey 1" (25 mm) away from the bottom
of the pedestal.
Loading ...
Loading ...
Loading ...