Loading ...
Complete TiVo Mini VOX setup
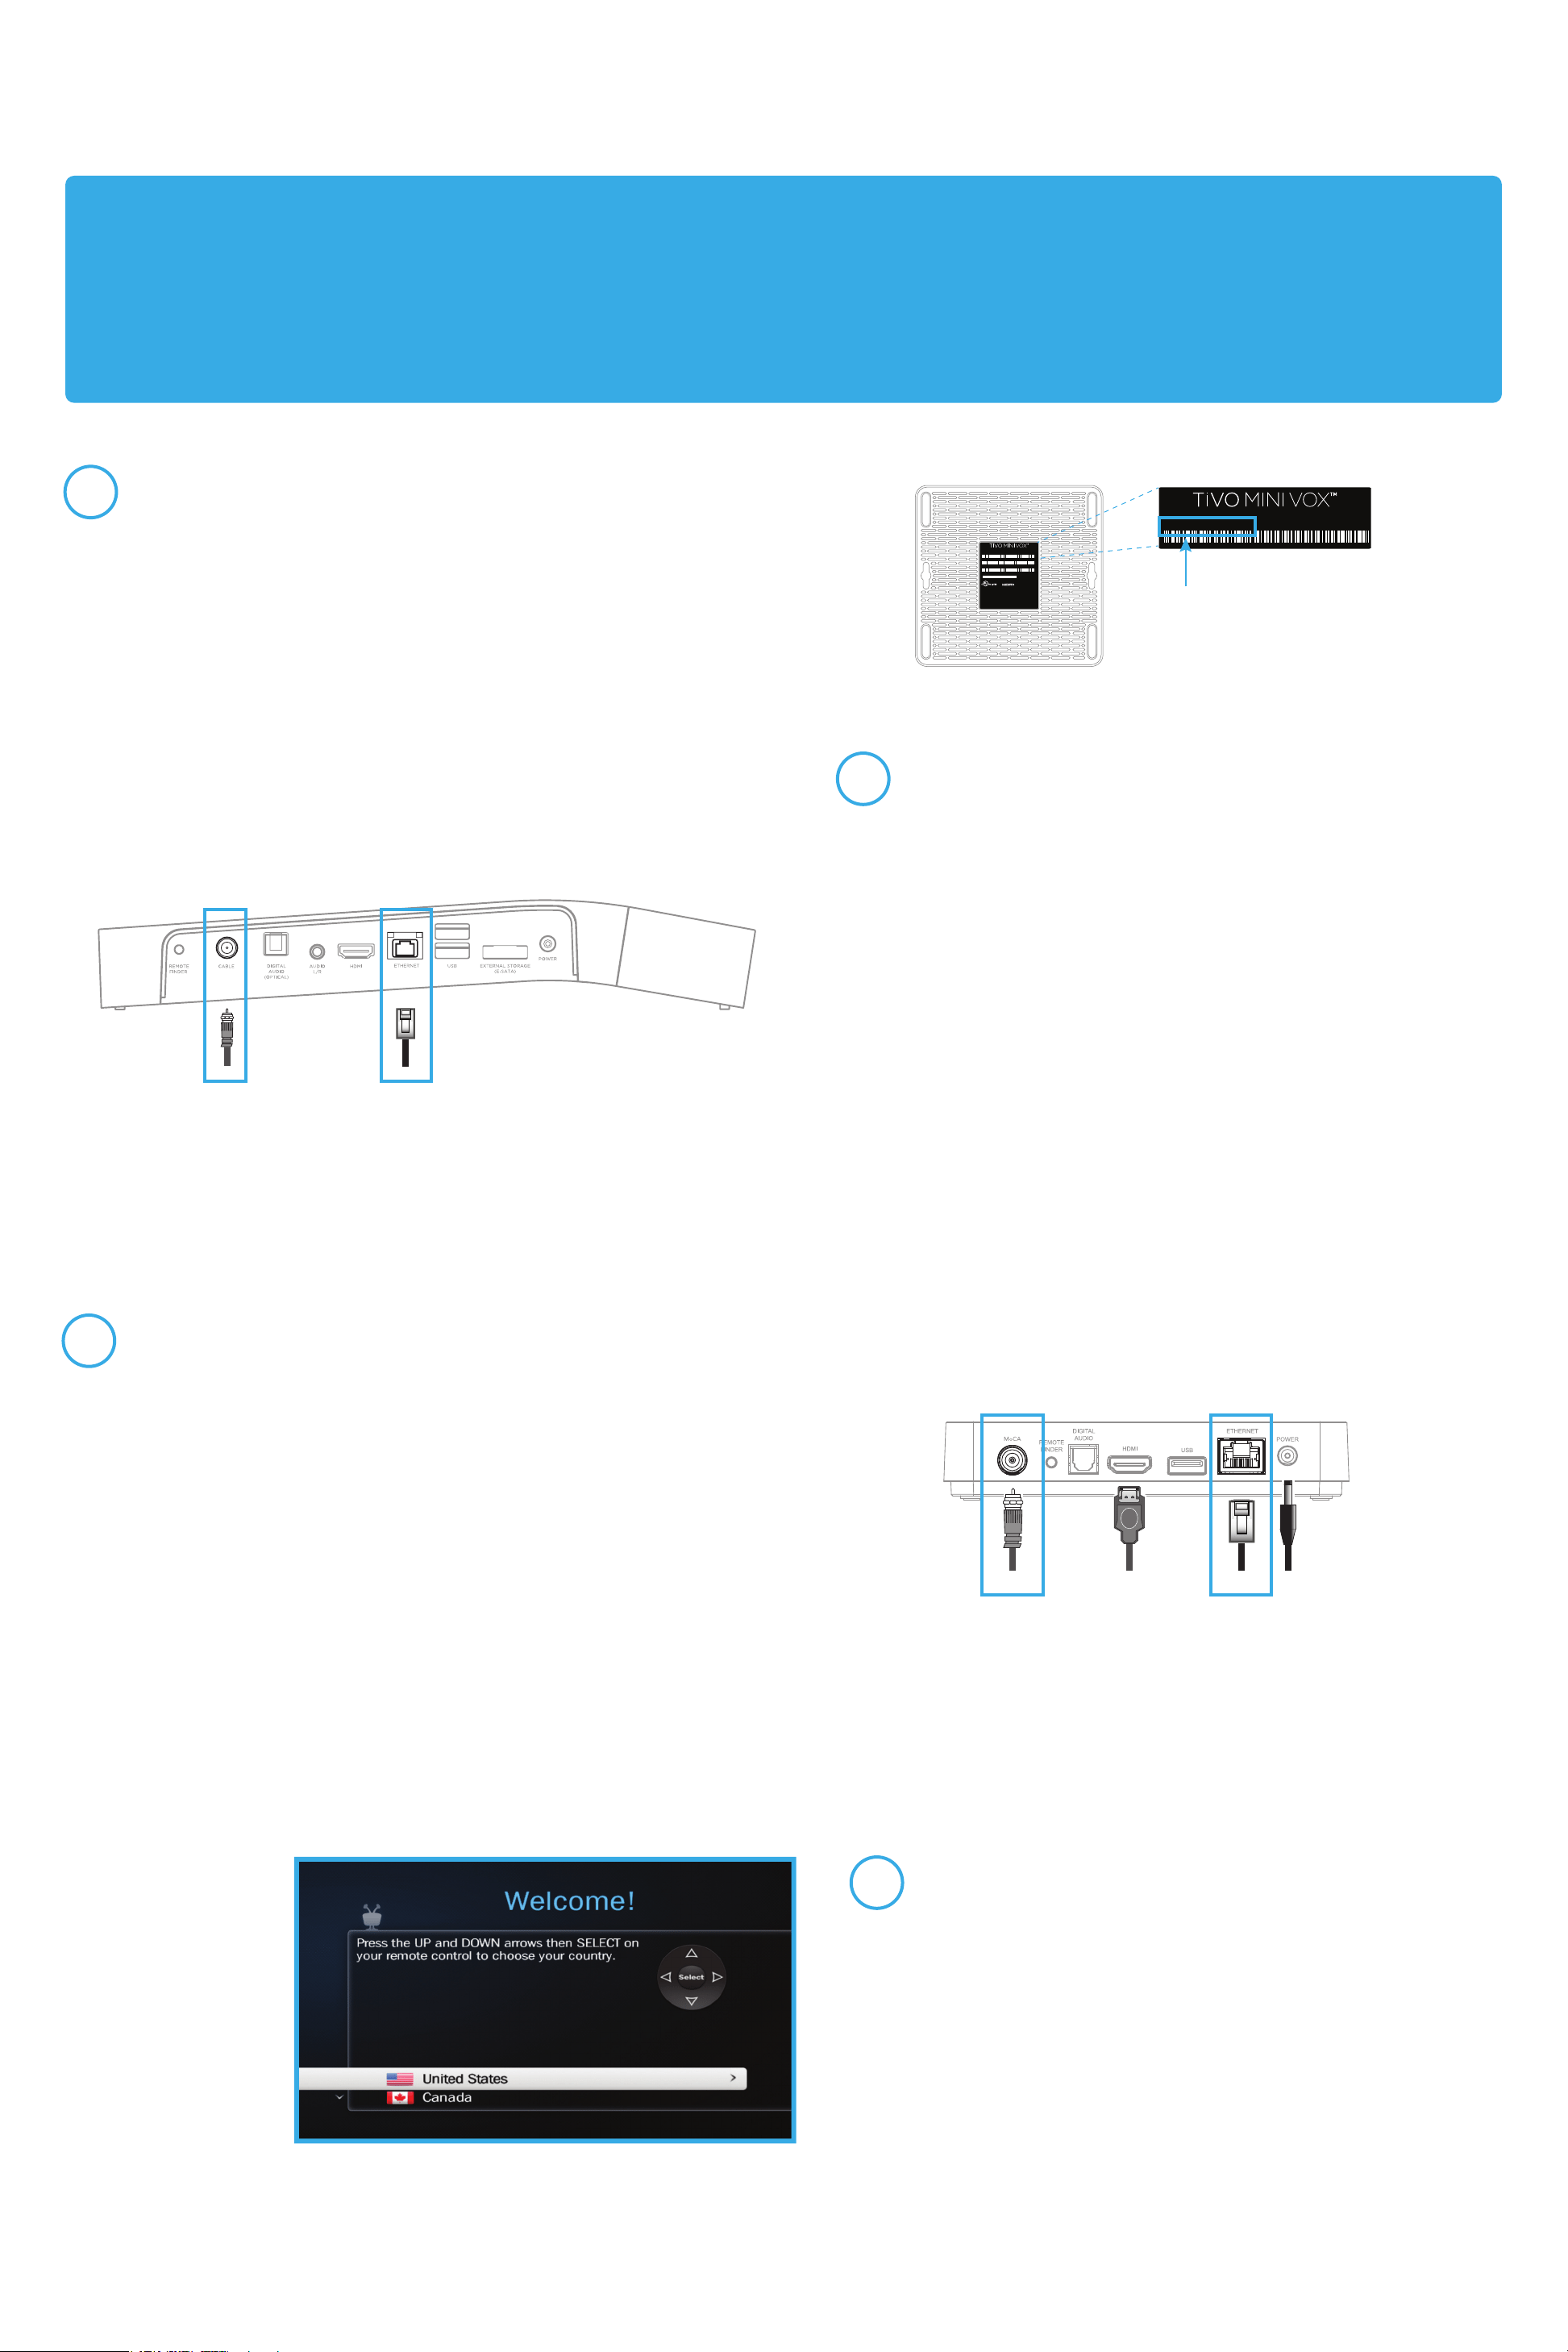
Turn on your TV to see the Welcome screen.
When you see the Welcome screen, you’re ready to begin Guided
Setup. Just follow the on-screen instructions.
Note: If you don’t see the Welcome screen, use the Input, Source,
or TV/Video button on your TV remote or TV to select the correct
audio/video input source for your TV.
TiVo Service Number
MADE IN CHINA
TSN: XXX-XXXX-XXXX-XXXX
This device complies with Part 15 of the FCC Rules. Operation is
subject to the following two conditions: (1) This device may not cause
harmful interference, and (2) this device must accept any interference
received, including interference that may cause undesired operation.
Patented. U.S. Patent no’s at www.tivo.com/patents
FCC ID: ACQ-IP900
I.T.E. XXXXXX
®
HDMI and the HDMI logo are trademarks or registered
trademarks of HDMI Licensing LLC in the United States
and other countries.
MODEL: TCDA95000
SLBL-00281-000A3
4
3
2
1
Connect your TiVo Mini VOX
Connect your TiVo Mini VOX to your home network and TV, and plug it in.
1. Connect your TiVo Mini VOX to your home network using a wired
connection. A wireless connection is not supported.
Ethernet network: Connect your TiVo Mini VOX to an open port on your
router or to an Ethernet jack in your wall using an Ethernet cable.
OR
MoCA network: If you already have MoCA enabled in your home,
simply connect the coaxial cable coming from the wall to the MoCA port
on the back of the TiVo Mini VOX. Visit tivo.com/moca to learn more.
2. Connect an HDMI
®
cable from the back of the TiVo Mini VOX to the
back of your TV.
3. Plug in the power cord.
To power outlet
TiVo Mini VOX
To MoCA
network
-- OR --
To Ethernet
network
To TV
1. Verify your TiVo DVR is connected to your home network using
a wired connection. A wireless connection is not supported.
Ethernet network: Your TiVo DVR is connected to an open port
on your router or to an Ethernet jack in your wall using an
Ethernet cable.
OR
MoCA network: Your TiVo DVR is connected to a coaxial cable
coming from the wall. You must have MoCA enabled in your
home to use this option.
Don’t have MoCA yet? No problem! Visit tivo.com/moca to see
how easy it is to get started.
2. From your DVR’s Network Settings screen, make a test
connection to the TiVo service.
Check your TiVo DVR’s network connection
TiVo BOLT Series DVR
To MoCA
network
-- OR --
To Ethernet
network
MADE IN CHINA
SKU: RA9500
TSN: XXX-XXXX-XXXX-XXXX
MAC 1: XXXXXXXXXXXX
MAC 2: XXXXXXXXXXXX
This device complies with Part 15 of the FCC Rules. Operation is
subject to the following two conditions: (1) This device may not cause
harmful interference, and (2) this device must accept any interference
received, including interference that may cause undesired operation.
DD-MMM-YY
Patented. U.S. Patent no’s at www.tivo.com/patents
FCC ID: ACQ-IP900
I.T.E. XXXXXX
®
HDMI and the HDMI logo are trademarks or registered
trademarks of HDMI Licensing LLC in the United States
and other countries.
MODEL: TCDA95000
SLBL-00281-000A3
To activate your TiVo Mini VOX, go to tivo.com/activate or call TiVo Customer
Support at 1-877-367-8486. You’ll need your TiVo Service Number (TSN);
you can find it on the bottom of the device.
Once you have activated your service, wait 15 minutes before moving on to
Step 2.
Activate your TiVo Mini VOX
Set up your TiVo Mini VOX in 4 easy steps.
IMPORTANT!
The TiVo Mini VOX requires a connection to a 4- or 6-tuner TiVo DVR (the TiVo BOLT
™
series, TiVo Roamio
™
series, TiVo Premiere 4 or
XL4/Elite) via an Ethernet or MoCA
®
network. Please verify that you have a compatible DVR before installing your TiVo Mini VOX.
Voice remote Included. Voice control requires a connection to a TiVo BOLT series or TiVo Roamio series DVR.
Learn more at tivo.com/voicecontrol.
Need some help? Visit tivo.com/howto