Loading ...
Loading ...
Loading ...
777777777777
Base Grille
You must remove the base grille to access the condenser coils
for cleaning.
To Remove the Base Grille:
1. Open the wine cellar door.
2. Using a Phillips screwdriver, remove the two screws from
the base grille.
3. Remove the two screws holding the mechanical switch to
the grille.
4. Remove the base grille.
To Replace the Base Grille:
1. Open the wine cellar door.
2. Reattach the mechanical switch using the two sensor screws.
3. Replace the two base grill screws. Tighten the screws.
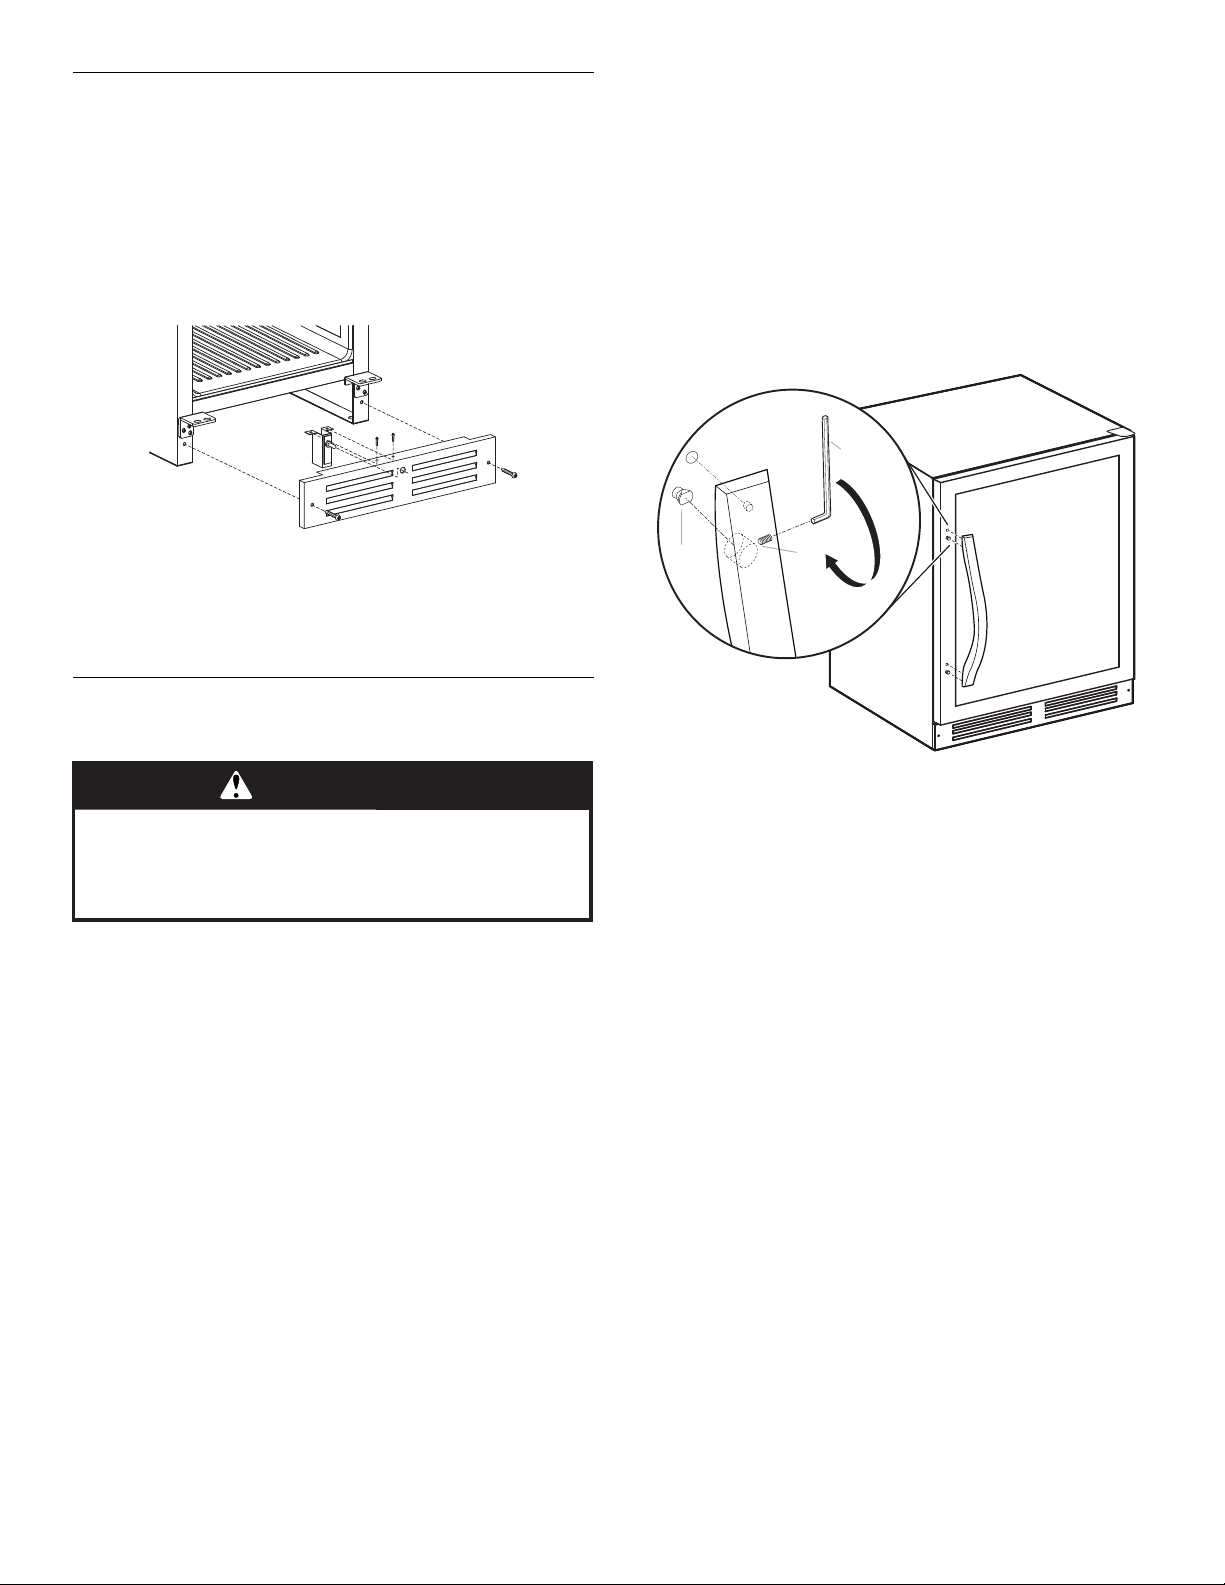
Handle Assembly
NOTE: Only for models WUW55X15DS & WUW55X24DS.
Helpful Tip: Put cardboard under wine cellar until it is installed in
cabinet opening. The cardboard will help avoid damage to floor
covering during installation.
NOTES:
■ To ease installation, using two or more people, place wine
cellar on its back.
■ To avoid scratching the front panel, place a soft cloth or
towel against the panel while installing the door handle.
■ Setscrews are preinstalled in the handle.
1. Remove the door handle and hardware bag containing the
hex key from the bubble pouch.
2. Place the handle on the mounting studs. The setscrews
should face down when installed correctly. If the handle is
installed upside down, proper installation will not be possible.
3. Push the door handle tightly against the door.
4. Insert the short end of the hex key into the setscrew and
tighten ¹⁄₄ turn past snug. Setscrew will not be recessed into
the handle.
5. Repeat Step 4 for other setscrew.
6. Keep the hex key with the Installation Instructions
NOTE: The handle installation procedure should take less
than 5 minutes.
WARNING
Excessive Weight Hazard
Use two or more people to move and install wine cellar.
Failure to do so can result in back or other injury.
A. Mounting stud
B. Door handle
C. Setscrew
D. Hex key
A
B
C
D
Loading ...
Loading ...
Loading ...