LSC27990TT
24 HOURS A DAY, 7 DAYS A WEEK FOR LG CUSTOMER SERVICE
para el Servicio LG (Atencin al Cliente) 24 horas al da, 7 das a la semana
2
Entry
Important safety instructions
Identification of parts
Where to install
Door removal
Install the freezer and refrigerator compartment doors
Water supply installation
Water connection instruction guide
Height adjustment
External Equipment Connections
Setup
Adjusting the temperatures and functions
Temperature
Dispenser
Menu
Shelf
Humidity control in the vegetable compartment
OptiFresh temperature bin
OptiFresh
Location of foods
Storing foods
How to remove and replace parts
General information
Cleaning
Troubleshooting
Warranty
Zip code
Table of Contents
Introduction
Installation
Operation
Suggestion on
food storage
Care and
maintenance
3
3
4
5
6
7
7
8
11
12
13
13
16
37
14
15
37
38
38
39
40
41
44
44
45
50
151
Entry
The model and serial numbers are found on the inner case or back of refrigerator
compartment of this unit. These numbers are unique to this unit and not
available to others. You should record requested information here and retain
this guide as a permanent record of your purchase. Staple your receipt here.
Date of purchase
Dealer
Dealer address
Dealer phone
Model
Serial
Before use, this refrigerator must be properly installed and located in accordance with
the installation instructions in this manual.
Never unplug your refrigerator by pulling on the power cord. Always grip the plug firmly
and pull it straight out from the outlet.
When moving your appliance away from the wall, be careful not to roll over the power
cord or to damage it in any way. Do not crush or damage the water line.
After your refrigerator is in operation, do not touch the cold surfaces in the freezer
compartment, particularly when your hands are damp or wet. Skin could adhere to
these extremely cold surfaces.
Unplug the power cord from the power outlet for cleaning or other requirements. Never
touch it with wet hands because you can get an electric shock or be injured.
Never damage, bend, kink, pull out, or twist the power cord because damage to the
power cord can cause product failure, fire, or electric shock. If you have doubts the
appliance is properly grounded, consult a qualified electrician.
Never place glass products in the freezer because they may be broken from expansion
when their contents are frozen.
Never put your hands within the ice storage bin of the automatic icemaker. You can be
injured by the operation of the automatic icemaker.
The appliance is not intended for use by young children without supervision.
Young children should be supervised to ensure that they do not play with the appliance.
Never allow anyone to climb, sit, stand, or hang on the door. These actions may
damage the refrigerator and even tip it over, causing severe personal injury.
Before you move your refrigerator into its final location, it is
important to make sure you have the proper electrical connection.
A 115 Volt, 60 Hz., AC only, 15 or 20 amp, fused and grounded
single-outlet circuit is required. Use an outlet that cannot be turned
off by a switch. Do not use an extension cord.
The refrigerator-freezer should be so positioned that the supply
plug is accessible for quick disconnection in the event of an
emergency.
If the supply cord is damaged, it must be replaced by the manufacturer or its service
agent or a similarly qualified person in order to avoid any hazard.
Do not modify or extend the Power Cord length.
It may cause electric shock or fire.
Introduction
3
Important safety instructions
Recommended
grounding
method
Accessibility of
supply plug
Supply cord
replacement
Warning
4
DANGER: Risk of child entrapment.
Before you throw away your old refrigerator or freezer take off the doors but leave the
shelves in place so that children may not easily climb inside.
The appliance is not intended for use by young children without supervision.
Young children should be supervised to ensure that they do not play with the appliance.
Don’t store or use gasoline or other flammable vapor and liquids in the vicinity of this or
any other appliance.
In the event of an electric short circuit, grounding (earthing) reduces the risk of electric
shock by providing an escape wire for the electric current.
In order to prevent possible electric shock, this appliance must be grounded.
Improper use of the grounding plug can result in an electric shock. Consult a qualified
electrician or service person if the grounding instructions are not completely
understood, or if you have doubts on whether the appliance is properly grounded.
Child entrapment
warning
Don’t store
Grounding
Introduction
•
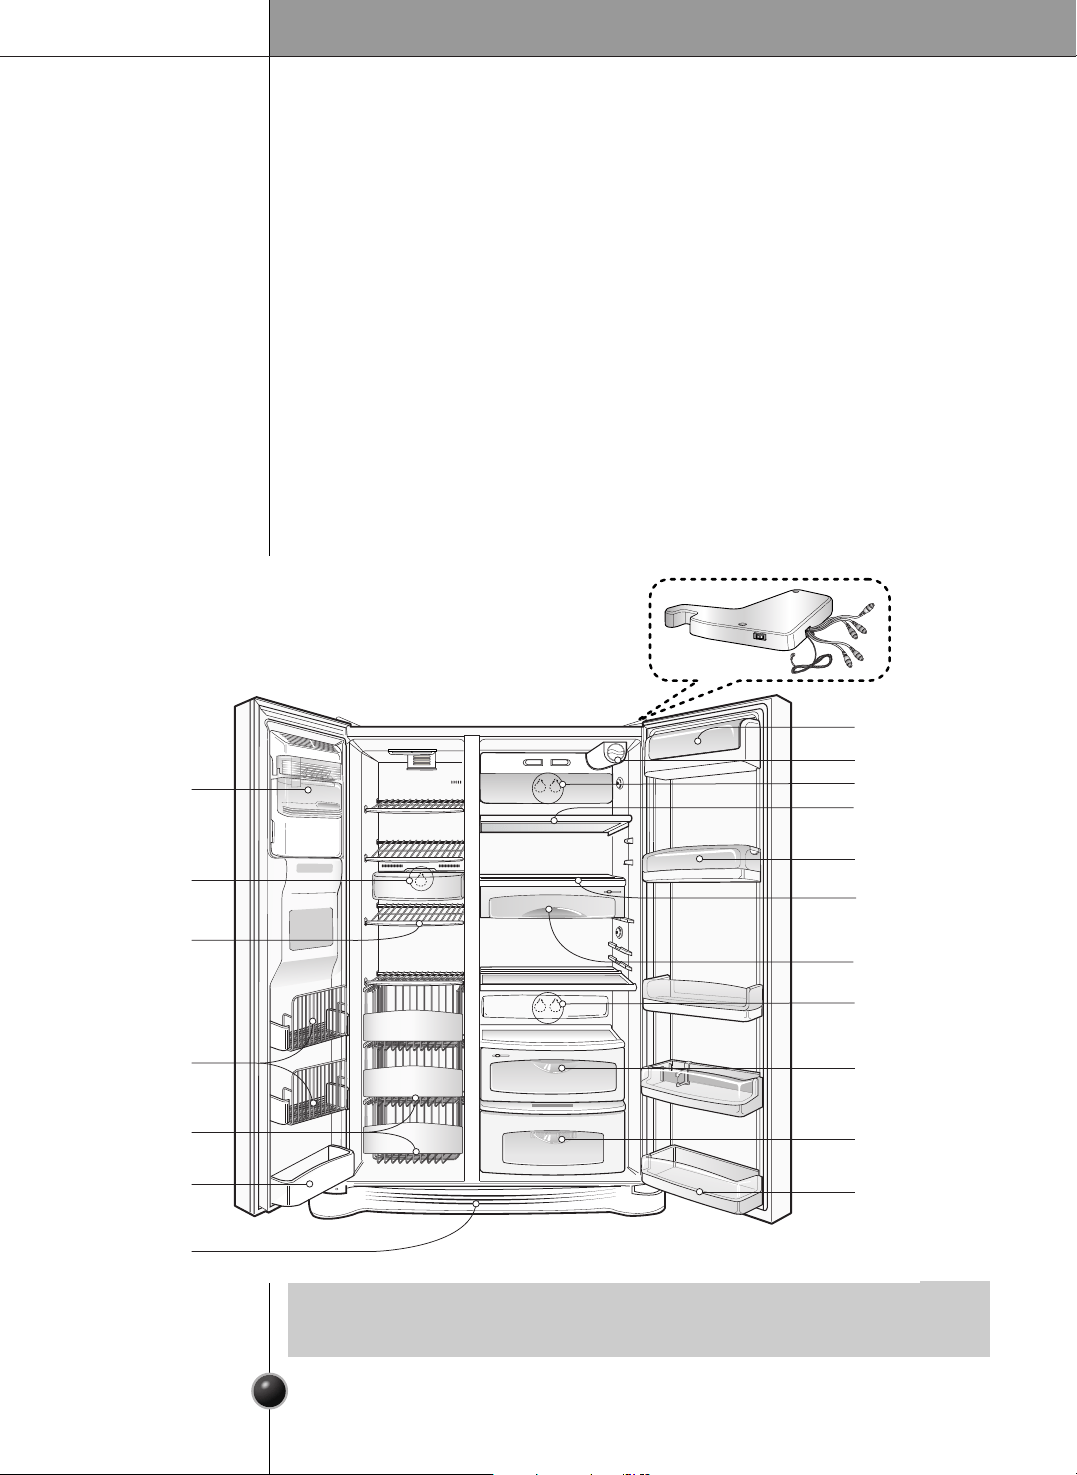
Parts, features, and options vary by model. Your model may not include every option.
NOTE
Freezer
Compartment
Refrigerator
Compartment
Dairy Corner
Water Filter
Lamp
Lamp
Automatic
Icemaker
Shelf
Door Rack
Drawer
Door Rack
Lower Cover
Shelf
Shelf
Snack Drawer
Lamp
Vegetable Drawer
Door Rack
Door Rack
OptiFresh Room
Model LSC27990TT
Identification of parts
Installation
5
Strong
and even floor
A proper
distance from
adjacent items
Where water
supply can be
easily connected
in a dry place
Where it is free
from heat
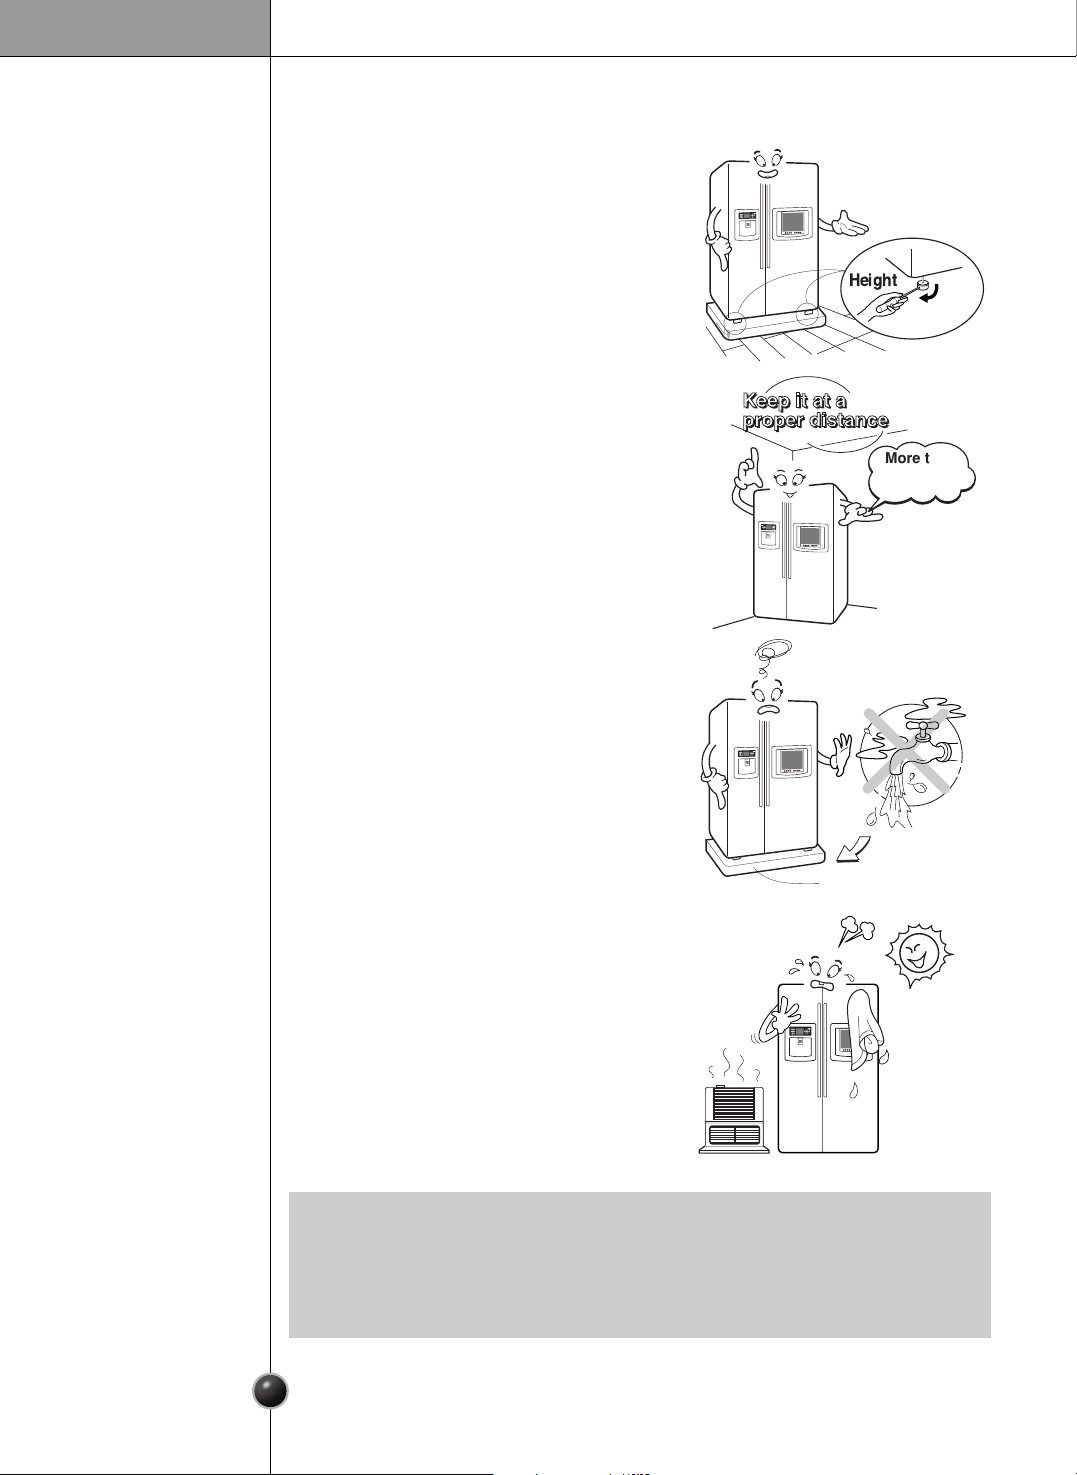
To ensure proper air circulation around the
fridge -freezer, please maintain sufficient
space on both the sides as well as top and
maintain at least 2 inches (5 cm) from the
rear wall.
Select a place where a water supply can be
easily connected between the automatic ice
maker and dispenser.
Installing the refrigerator in a wet or damp
area may cause rust and may be an electrical
hazard.
If this refrigerator is installed where the
ambient temperature is high, the freezing
capacity is deteriorated and the cost of
electricity used increases.
0AECDJ
More than
2"(5 cm)
to back
Where to install
Unstable installation may cause vibration and
noise. If the floor to install the refrigerator on
is not even, make the refrigerator level by
rotating the height adjusting screw.
•
Install the refrigerator at a place where the ambient temperature is 5˚C ~ 43˚C
(41˚F
~
110˚F).
Ambient temperature outside this range may cause product malfunction. Also, the
tube between the dispenser and automatic ice maker may freeze.
NOTE
Bottom Pad
Door removal
Electric Shock Hazard
Disconnect electrical supply to refrigerator before installing.
Failure to do so could result in death or serious injury.
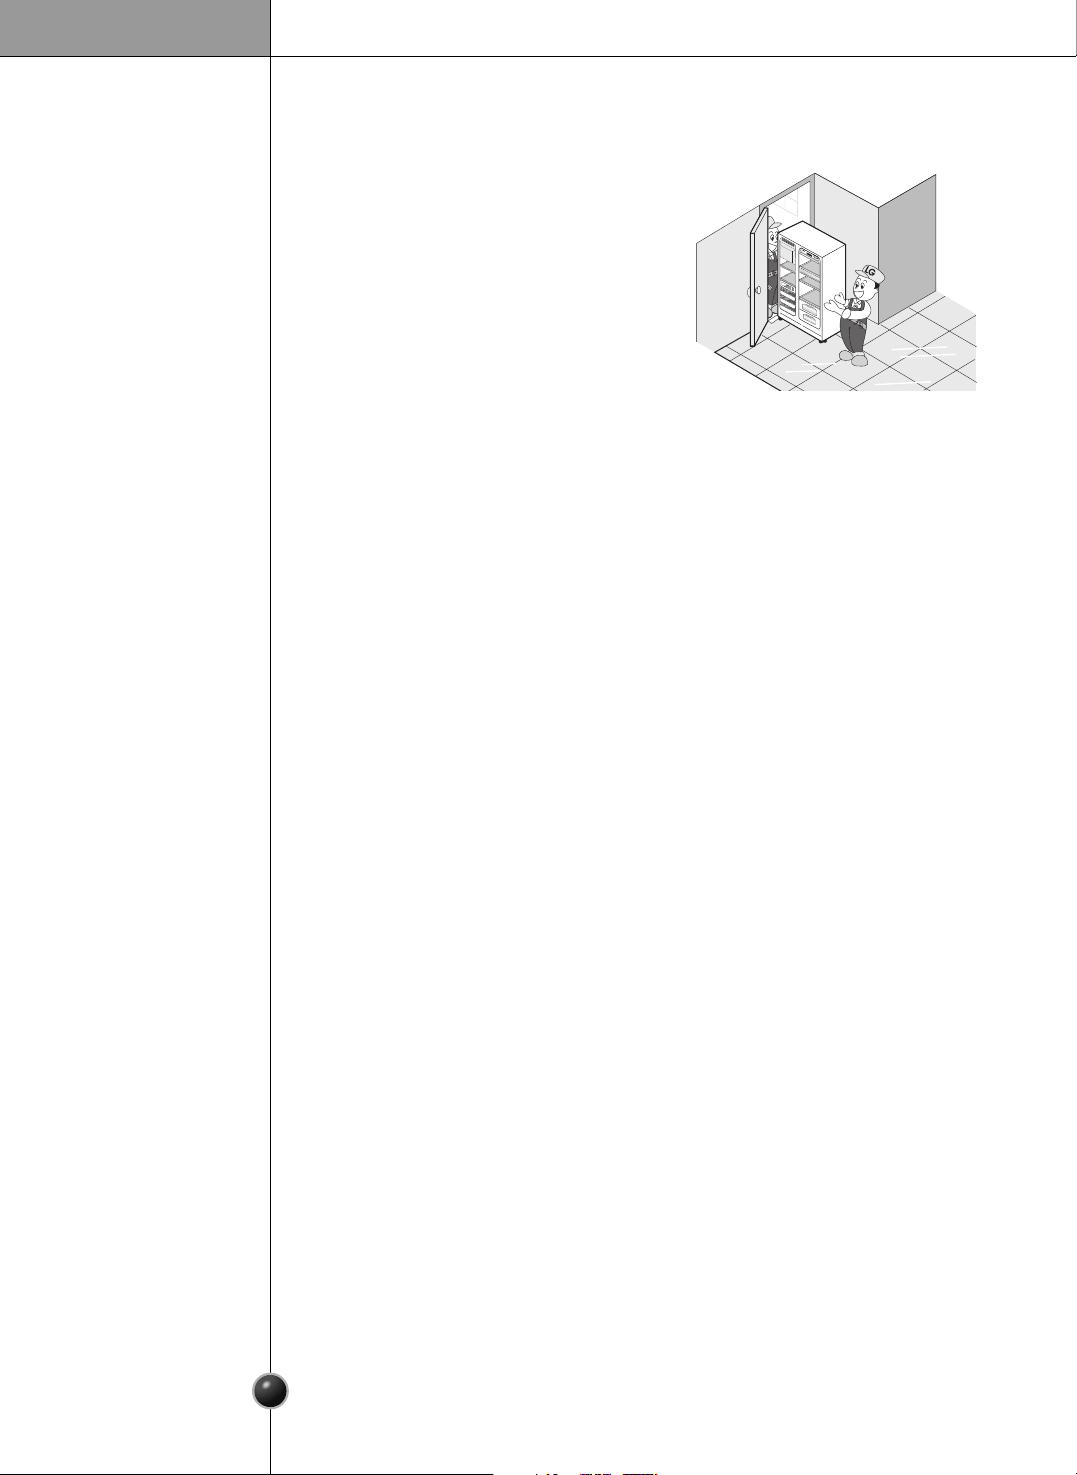
If your entrance door is too narrow for the
refrigerator to pass through, remove the refrigerator
door and pass the refrigerator laterally.
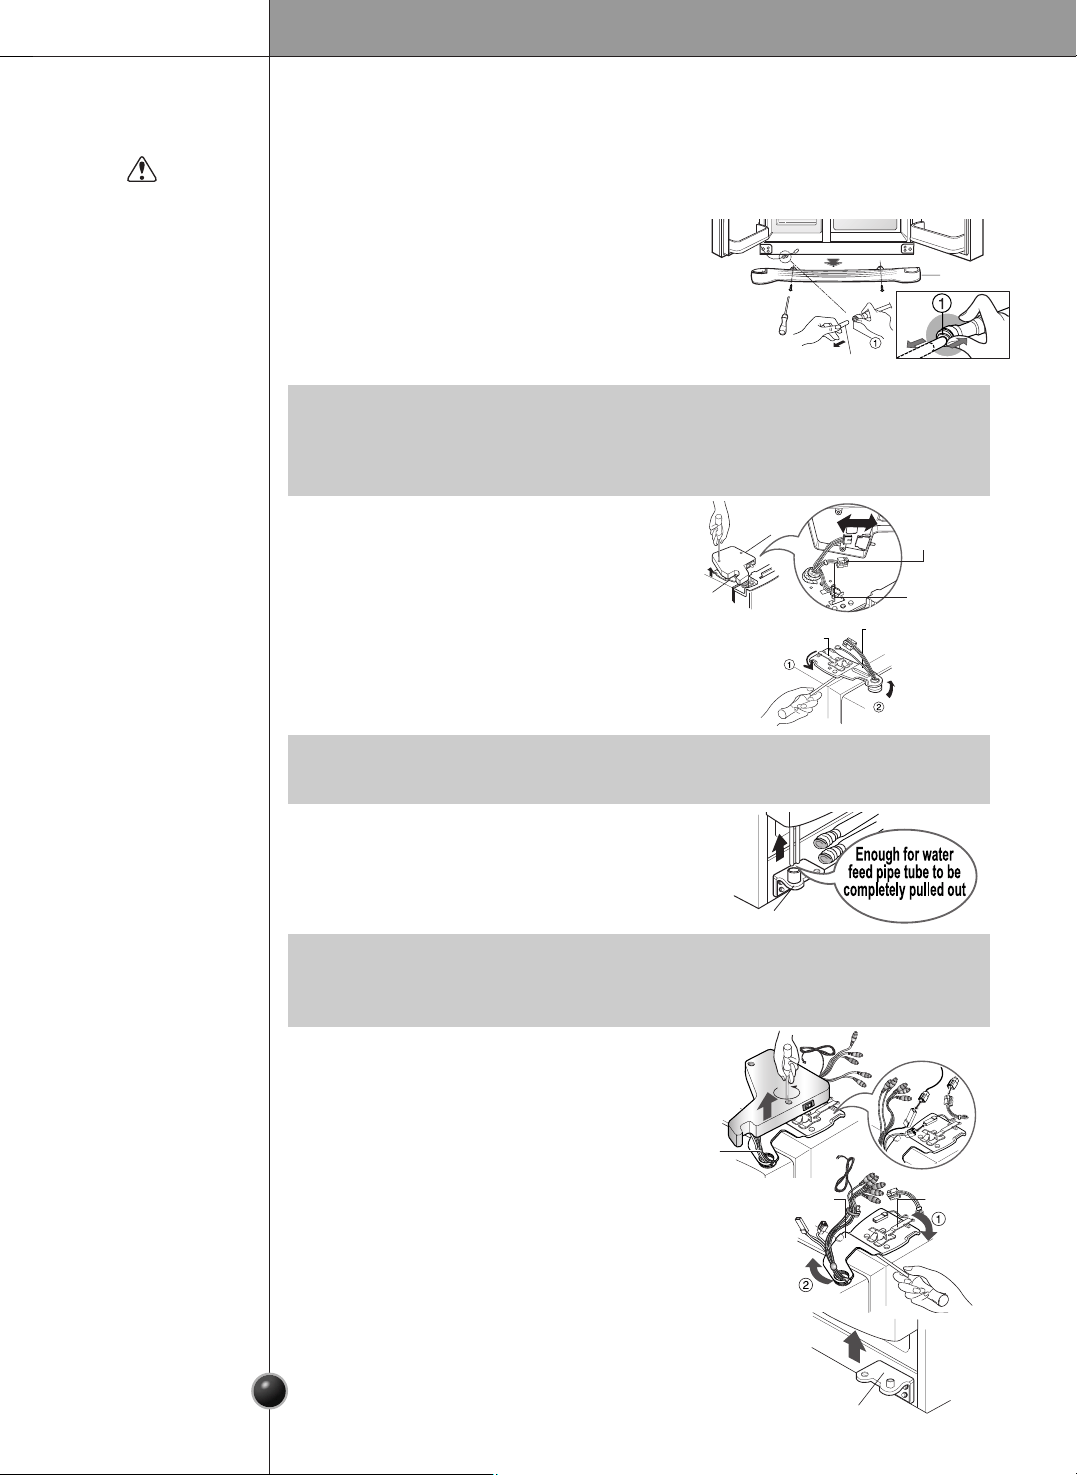
Remove the lower cover by lifting upward, and then pull
up the water feed tube while pressing the release ring
shown in the figure to the right.
Remove lower
cover and
water feed tube
Warning
Remove the
freezer
compartment
door
Remove the
refrigerator
door
Installation
6
1) Remove the hinge cover by loosening the
screws. Disconnect all connections except
the ground line.
2) Remove the keeper by rotating it counter
clockwise
and then lifting the upper
hinge up
.
3) Remove the freezer compartment door by
lifting it upward. This time, the door should
be lifted enough for the water feed tube to
be completely pulled out.
1) Loosen the hinge cover screws and remove
the cover. Remove connection wire, if any,
except for the ground line.
2) Remove keeper by rotating it clockwise (
)
and then remove the upper hinge by lifting
it up (
).
3) Remove the refrigerator compartment door
by lifting it up.
•
If a tube end is deformed or abraded, trim the part away.
Disconnecting the tube under the door causes about
1
/
2
gallon (2 liters) water to flow
out. Please put up a big container to prevent it.
NOTE
•
When removing the upper hinge, be careful that the door does not fall forward .
NOTE
•
After removing the door, take it into the kitchen where you are installing the refrigerator.
Lay it down on a blanket and be careful to avoid damaging the water feed tube.
NOTE
Lower Cover
Lower hinge
Lower Hinge
Keeper
Water Feed Tube
Connection
Wires
Connection
Wires
Hinge
Cover
Upper Hinge
Upper Hinge
Keeper
Upper Hinge
Ground Line
7
Installation
Install the freezer and refrigerator
compartment doors
Water supply installation
Pass the refrigerator laterally through the access
door as shown in the right figure.
Automatic icemaker operation needs water pressure of 21~121 psi (1.5~8.5
kgf/cm
2
) (That is, an instant paper cup (6 oz. or 180 cc) will be fully filled within
3 seconds.)
If water pressure is less than 21 psi (1.5 kgf/cm
2
). It is necessary to purchase a
separate pressure pump for normal automatic icemaking and cool water feed.
Keep the total length of the feed water pipe tube within 26’ (8 m). Be careful for the
tube to avoid being kinked. If the tube is longer than 26’ (8 m), the pressure may
drop to an unacceptable level.
Install the water supply line where it will not be affected by heat.
Connect to potable water supply only.
Mount them in the reverse sequence of removal after they pass through the access
door.
Pass the
refrigerator
Before
installation
Warning
This appliance contains fluids (refrigerant and lubricant) and is made of parts and
materials which are reusable and/or recyclable.
All the important materials should be sent to the collection center of waste material
and can be reused after rework (recycling). For recycling, please contact the local
agency.
Disposal of the
old appliance
1
2
3
4
5
Max
F
R
Z
T
EMP
REF
T
E
M
P
Min
5
4
3
2
1
M
a
x
8
Water connection instruction guide
Read all directions carefully before you begin.
Connecting
the refrigerator
to a water source
Connect to potable water supply only.
Warning
•
If operating the refrigerator before installing the water connection, turn the icemaker
to the OFF position to prevent operation without water.
•
All installations must be in accordance with local plumbing code requirements.
•
Use copper tubing and check for leaks.
•
Install copper tubing only in areas where temperatures will remain above freezing.
•
It may take up to 24 hours for your icemaker to begin producing ice.
IMPORTANT
The icemaker water valve contains a flow washer which is used as a water
pressure regulator.
The icemaker needs to be connected to a cold water line with water pressure
21 psi (lb/inch
2
)
Cold water supply
Standard screwdriver
7
/
16
-inch and
1
/
2
-inch open-end wrenches or two adjustable wrenches
1
/
4
-inch nut driver
1
/
4
-inch drill bit
Hand drill or electric drill (properly grounded)
Tools required
•
Your refrigerator dealer has a kit available with a 1/4-inch saddle-type shut-off valve,
a union, and copper tubing. Before purchasing, make sure a saddle-type valve
complies with your local plumbing codes. Do not use a piercing-type or 3/16-inch
saddle valve which reduces water flow and clogs more easily.
NOTE
Installation
9
1. Unplug the refrigerator or disconnect power.
2. Turn OFF the main water supply. Turn on the nearest faucet to relieve the
pressure on the line. It may help to open an outside faucet to allow the water to
drain from the line in the house.
3. Find a
1
/
2
-inch vertical COLD water pipe near the refrigerator.
Connect
the tubing to
water line
•
Horizontal pipe will work, but the following precaution must be taken: Drill on the top of
the pipe, not the bottom. This will help keep water away from the drill. This also keeps
normal sediment from collecting in the valve.
NOTE
4. To determine the length of copper tubing you will need, measure from the
connection on the lower left rear of the refrigerator to the water pipe. Add 7
feet (2.1m) to allow for moving refrigerator for cleaning. Use
1
/
4
-inch O.D.
(outside diameter) copper tubing. Be sure both ends of copper tubing are cut
square.
5. Using a drill, drill a
1
/
4
-inch hole in the cold water pipe you have selected.
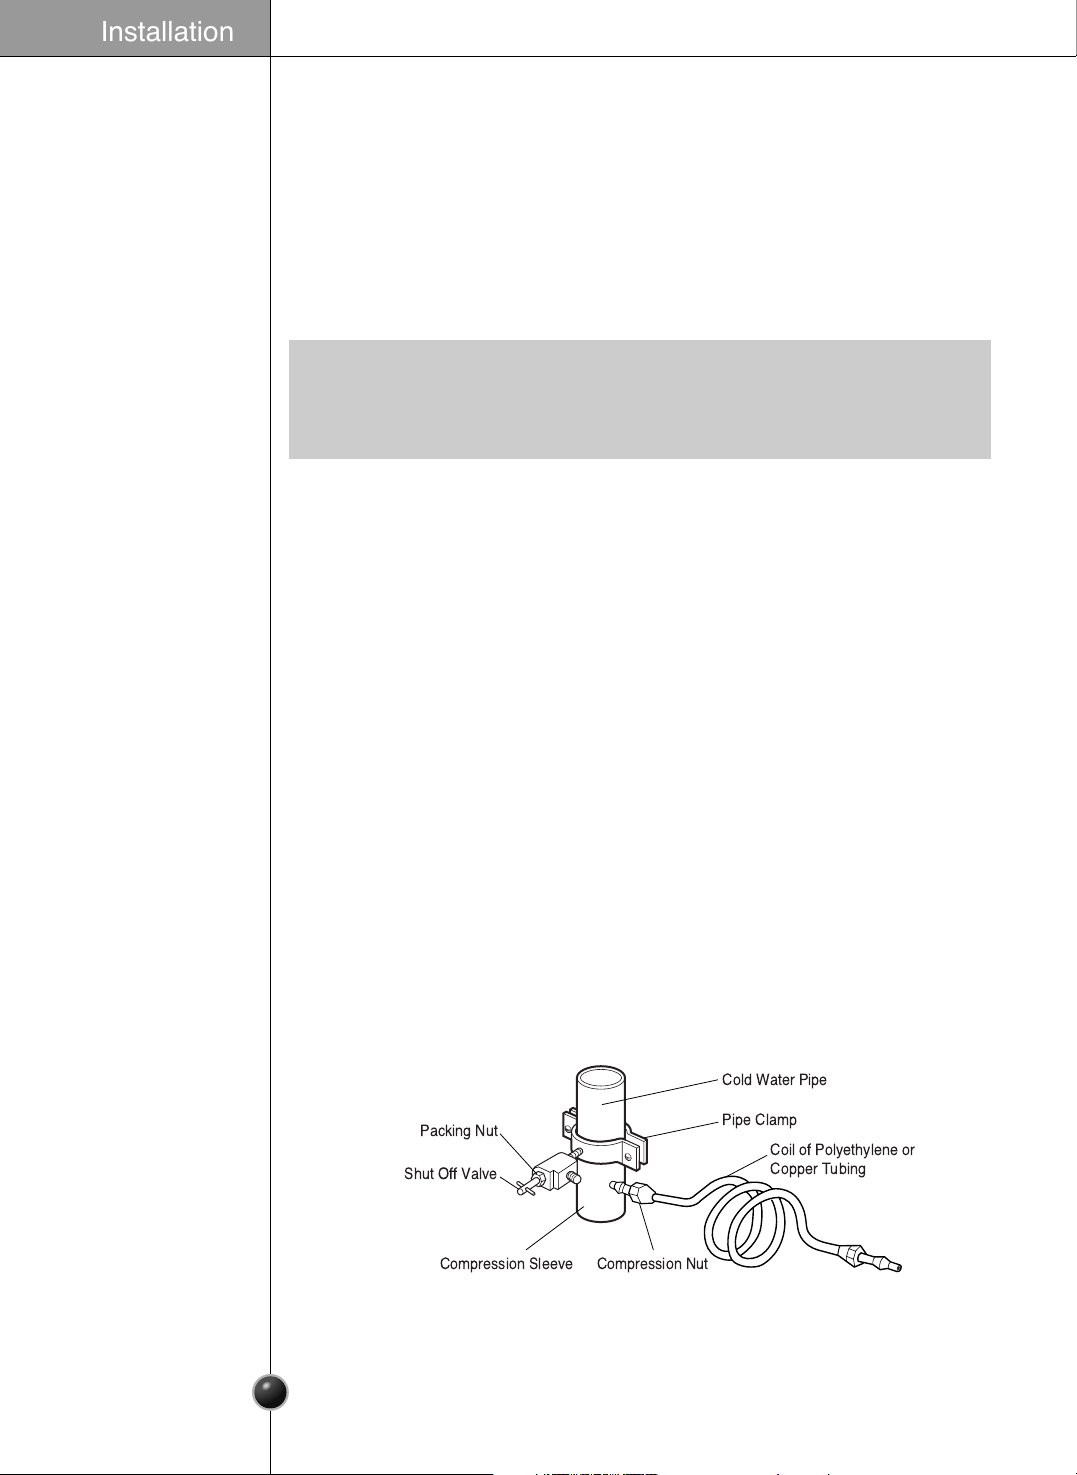
6. Fasten shut-off valve to cold water pipe with pipe clamp. Be sure the outlet
end is solidly in the
1
/
4
" drilled hole in the water pipe and the washer is under
the pipe clamp. Tighten the packing nut. Tighten the pipe clamp screws
carefully and evenly so the washer makes a watertight seal. Do not
overtighten or you may crush the copper tubing, especially if soft (coiled)
copper tubing is used. Now you are ready to connect the copper tubing.
7. Slip the compression sleeve and the compression nut onto the copper tubing
as shown. Insert the end of the tubing into the outlet end squarely as far as it
will go. Tighten the compression nut onto the outlet end with a wrench. A flare
nut wrench works best, but an open end wrench will suffice. Do not
overtighten.
8. Place the free end of the tubing into a container or sink, and turn on the main
water supply. Flush out the tubing until the water is clear. Turn off the shutoff
valve on the water pipe. Coil the copper tubing as shown below.
Cold Water Pipe
Pipe Clamp
Coil of Polyethylene or
Copper Tubing
Compression NutCompression Sleeve
Shut Off Valve
Packing Nut
Installation

10
Before making the connection to the refrigerator, be sure the refrigerator
power cord is not plugged into the wall outlet.
• If your refrigerator does not have a water filter, we recommend installing
one. If your water supply has sand or particles, that could clog the screen of
the refrigerator’s water valve. Install the filter in the water line near the
refrigerator.
1. Remove the plastic flexible cap from the water valve.
2. Place the compression nut and ferrule (sleeve) onto the end of the tubing as
shown.
3. Insert the end of the copper tubing into the connection as far as possible. While
holding the tubing, tighten the fitting.
Connect the tubing to
the refrigerator
Tighten any connections that leak.
Plug In the Refrigerator
Arrange the coil of copper tubing behind the refrigerator so it does not vibrate
against the back of the refrigerator or against the wall. Push the refrigerator
back to the wall.
Start the lcemaker
Set the icemaker switch to the ON position The icemaker will not begin to
operate until it reaches its operating temperature of 15 °F (-9 °C). It will then
begin operation automatically.
Turn the water on at
the shutoff valve
Tubing Clamp
1/4
"
Compression
Nut
Ferrule
(sleeve)
Refrigerator Connection
1/4
"
Tubing
Installation
11
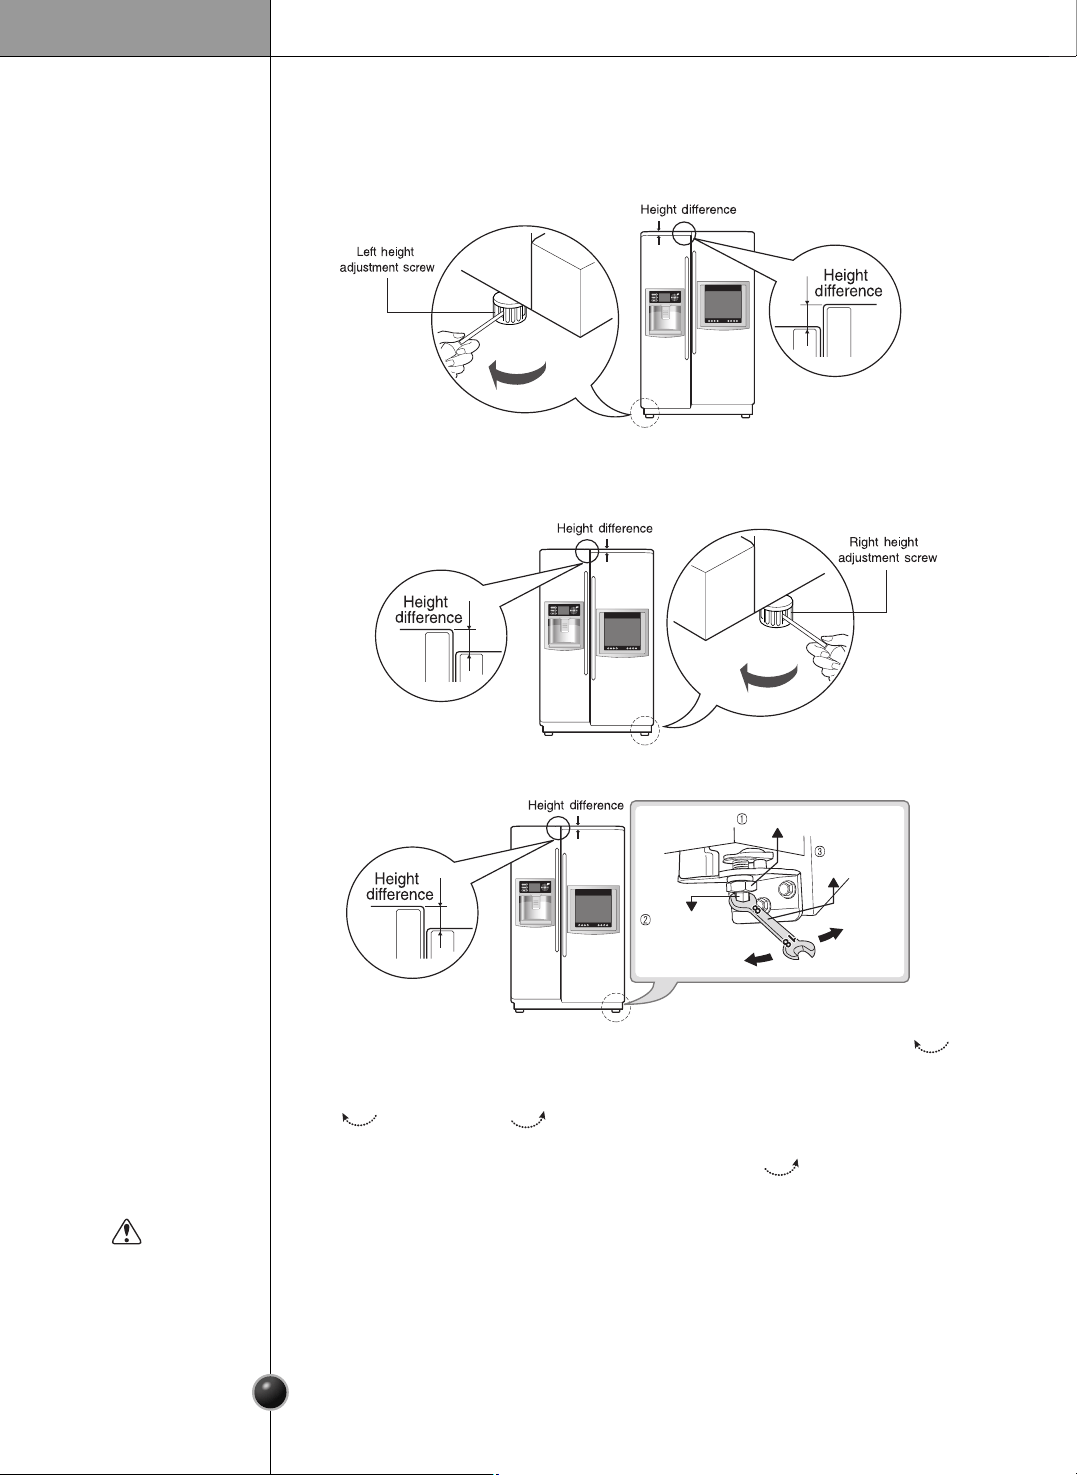
Height adjustment
Level them by inserting a flat (
-
type) driver into the groove of the left height adjusting
screw and rotating it clockwise ().
Level them by inserting a flat (
-
type) driver into the groove of the right height
adjusting screw and rotating it clockwise ().
If the freezer
compartment door
is lower than the
refrigerator
compartment door
If the freezer
compartment door
is higher than the
refrigerator
compartment door
- first method
Installation
The refrigerator door will close smoothly by raising the front side by adjusting the
height adjusting screw. If the door does not close properly because it is improperly
adjusted, the performance of the refrigerator will be affected.
After leveling the
door height
Do not force too hard to level the height. The hinge pin can be pulled out.
(Adjustable range of height is a maximum of 2" (5 cm))
Adjust the level when the refrigerator door is lower than the freezer door during the
use of the refrigerator.
1. Using the wide side of the tool for adjustment ➂, turn the keeper nut ➁ ( )
clockwise to loosen the Keeper nut.
2. Using the narrow side of the tool for adjustment, turn the adjustment hinge pin
➁ ( ) clockwise or ( ) counterclockwise to level the refrigerator and
freezer door.
3. After setting the level of the door, turn the keeper nut( ) counterclockwise to
tighten.
If the freezer
compartment door
is higher than the
refrigerator
compartment door
- second method
Keeper nut
Adjustment
hinge pin
Tool for
adjustment
Up
Down
CAUTION
In a poor signal area to improve picture quality, purchase
and install a signal amplifier.
If the antenna is not installed properly, contact your dealer
for assistance.
Turn the end of the cable to the clockwise direction to be
connected to the connector located at the top of the
refrigerator.
Incorrect connection may cause a bad quality.
12
Installation
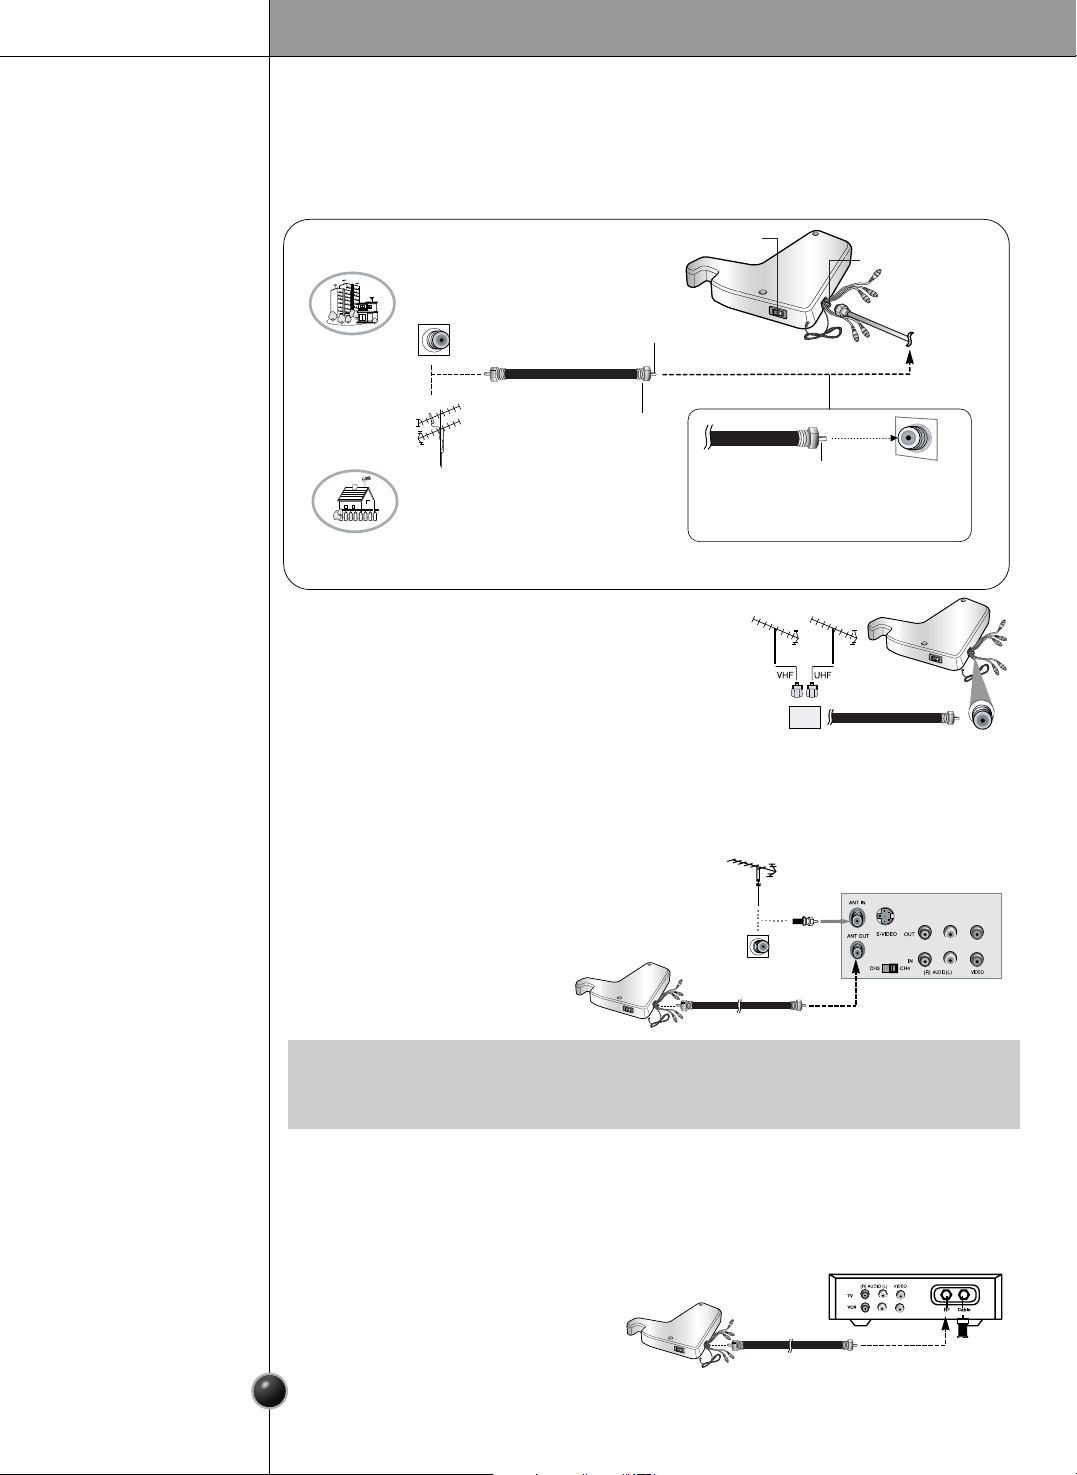
Antenna Connection
External Equipment Connections
Typical
Antennas
Direct
Connection
VCR
Connection Panel
Cable Box Connection Panel
Connection
1. Connect the audio/video out sockets of the
VCR to audio/video in sockets of the set.
2. Press the INPUT button to select Component.
3. Press the PLAY button on the VCR.
The VCR playback picture
appears on the screen.
Connection
1. Use the
INPUT
button on the
remote control to select TV.
2. Tune to cable service provided
channels using the cable box.
- After subscribing to a local cable TV service and installing a converter, you can
watch cable TV programming.
- For further cable TV information, contact a local cable service provider.
Connecting
a VCR / DVD
Cable TV
Connections
• If you have a mono VCR, connect the audio cable from the VCR to the AUDIO
L/MONO socket of the set.
NOTE
wall antenna
socket
VHF antenna
UHF antenna
outdoor
antenna
Single-family Dwellings /Houses
(Connect to wall jack for outdoor antenna)
Be careful not to bend the bronze wire
when connecting the antenna.
Bronze Wire
Main Power
Antenna jack
Bronze Wire
RF coaxial wire (75 ohm)
Turn clockwise to tighten.
Multi-family Dwellings/Apartments
(Connect to wall antenna socket)
Antenna or Cable Service without a Cable Box Connections
For optimum picture quality, adjust antenna direction if needed.
13
Operation
Setup
Adjusting the temperatures and functions
When your refrigerator is first installed, allow it to stabilize at normal operating
temperatures 2~3 hours prior to filling it with fresh or frozen foods.
If operation is interrupted, wait 5 minutes before restarting.
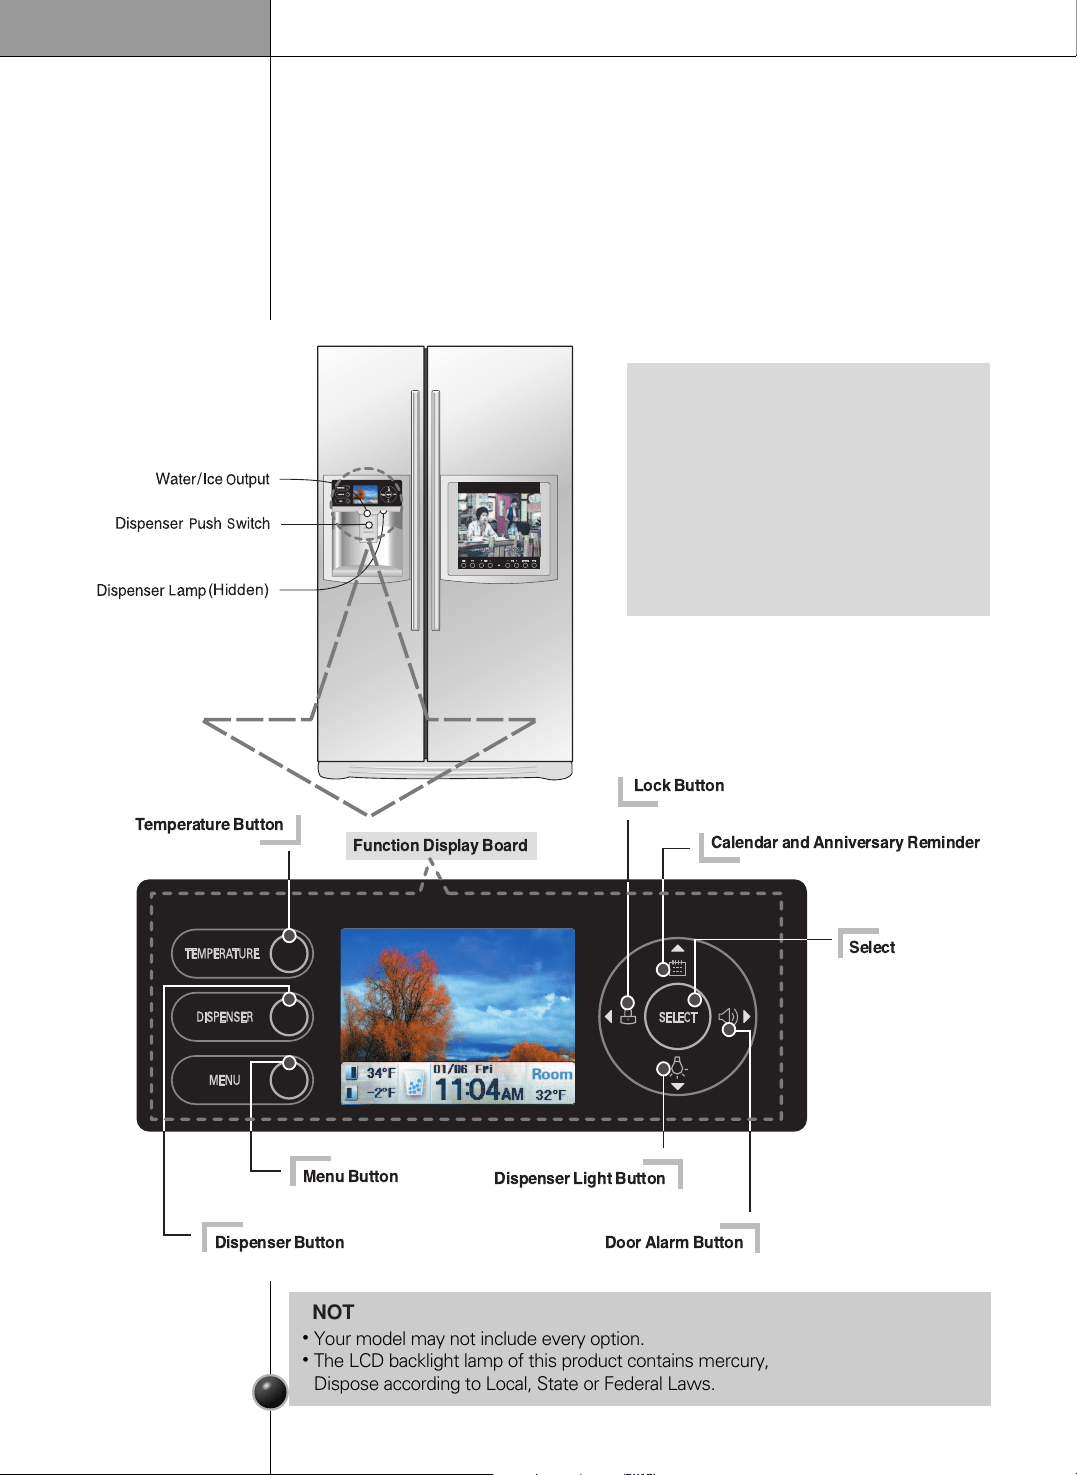
(Hidden)
Menu Button
Dispenser Light Button
Door Alarm Button
Dispenser Button
Temperature Button
Calendar and Anniversary Reminder
Lock Button
Function Display Board
Select
•
Your model may not include every option.
•
The LCD backlight lamp of this product contains mercury,
Dispose according to Local, State or Federal Laws.
NOTE
About defective pixels
This LCD display contains hundreds of
thousands of individual pixels. LCD displays
typically contain a small number of pixels that do
not function normally. Your display has been
inspected and is in compliance with
manufacturer’s specifications, indicating that any
pixel defects do not affect the operation or use
of your display. On a display of this size, 4 or
fewer defective pixels are considered to be
normal and are not grounds for exchange or
refund.
Operation
14
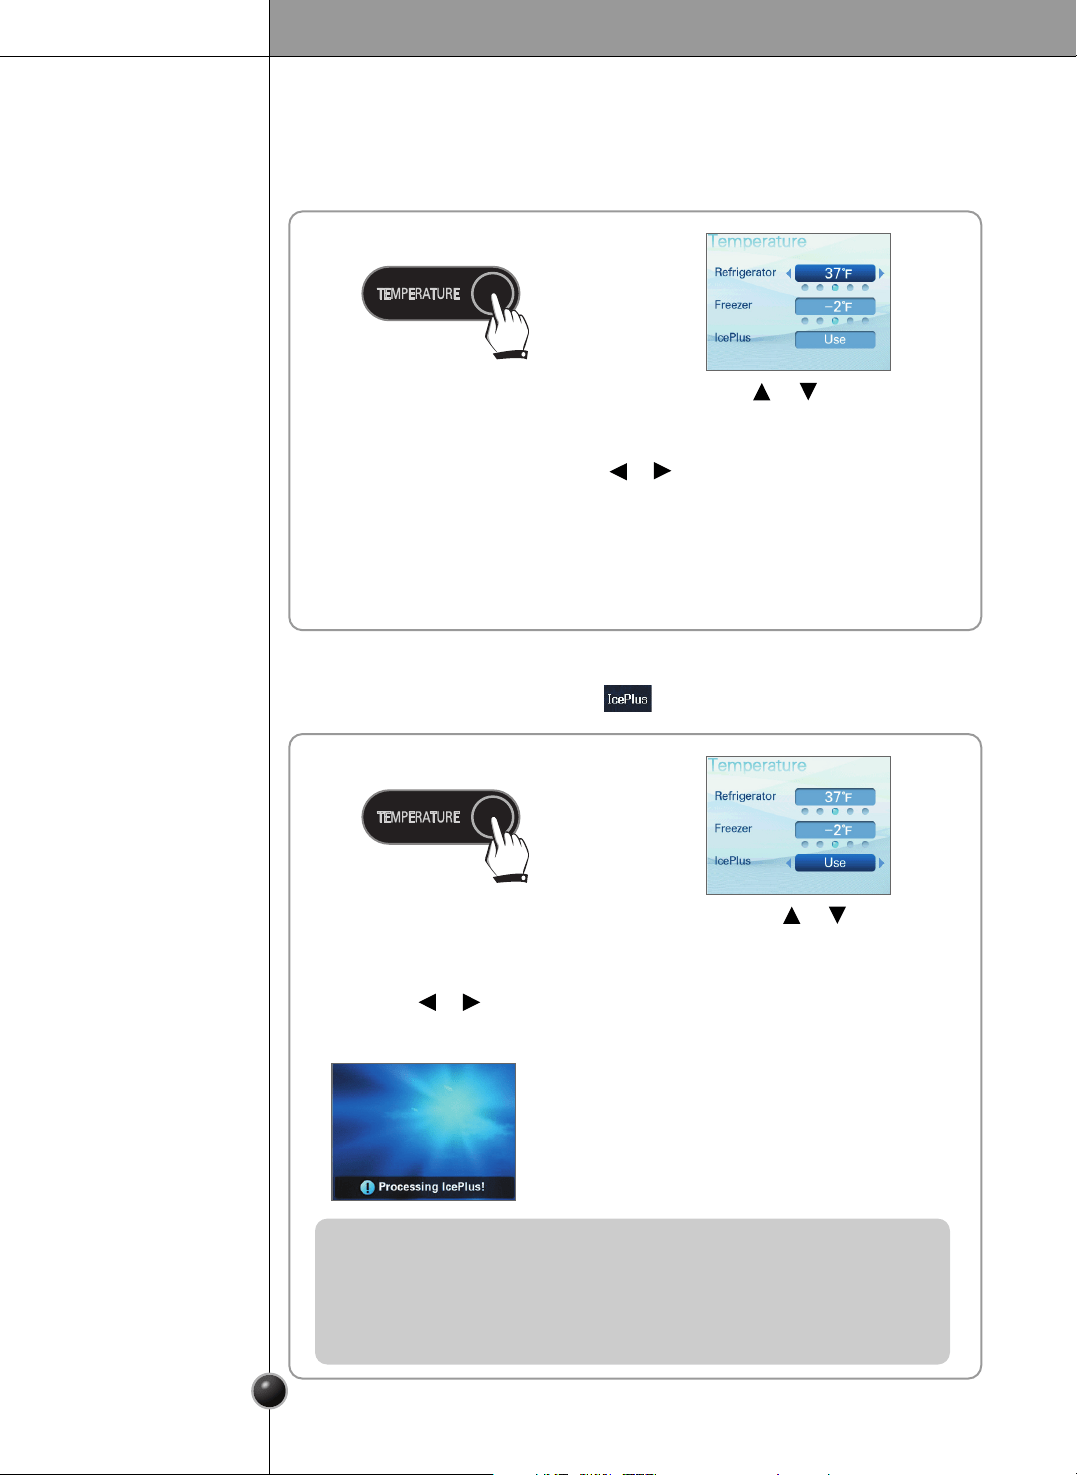
Temperature
- You can adjust the freezer and refrigerator temperature.
1 2
Press the TEMPERATURE button.
Using the or button, select
the desired refrigerator.
3
Select the temperature using the or button.
Refrigerator temperature options: 46, 41, 37, 34, or 32˚F
Freezer temperature options: 7, 1, -2, -5, or -8˚F
4
Press the SELECT button.
5
Return to the standby screen.
Refrigerator/Freezer
12
Press the TEMPERATURE button.
Press the or button
to select IcePlus.
- For quick freezing.
- The standby screen is shown during IcePlus operation.
3
Press the or button to select Use.
[ Use ] <--> [ Not in Use ]
4
Press the SELECT button.
5 6
Return to the standby screen.
IcePlus
- The indicated set temperature is not the actual temperature within the
refrigerator but the target temperature. The actual internal temperature can
differ, especially if the door is opened and warm food was recently stored.
- Initially the refrigeration is weak. Adjust the temperature as mentioned
above after using the refrigerator for at least 2 to 3 days.
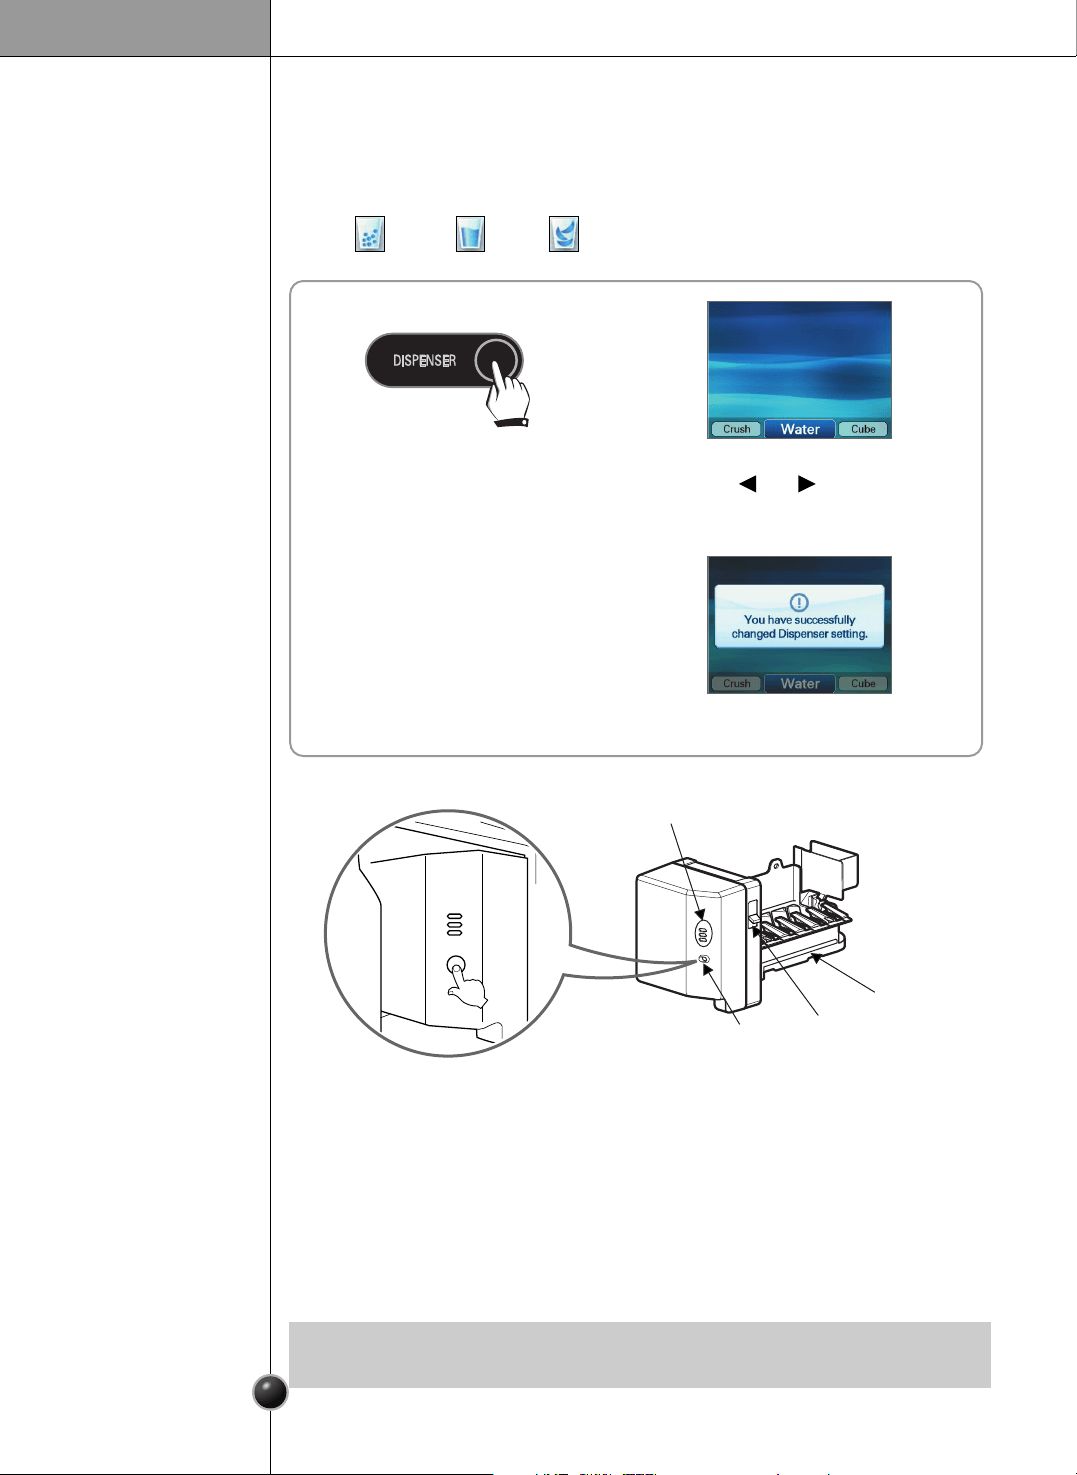
- You can select from Crush, Water or Cube options.
- When the dispenser is in use, the active option is indicated in the standby screen.
- Crush , Water , Cube .
15
Operation
Dispenser
Crush/Water/Cube
12
Press the DISPENSER button.
Select the desired option using
the and buttons.
[ Crush ] <--> [ Water ] <--> [ Cube ]
4
3
Press the SELECT button.
5
Return to the standby screen.
The automatic icemaker can automatically make 6 cubes at a time, 70~120 pieces
per day. This quantity may vary by circumstance, including ambient temperature,
door opening, freezer load. etc.
Icemaking stops when the ice storage bin is full.
If you don't want to use the automatic icemaker, turn the icemaker switch to OFF.
If you want to use automatic icemaker again, change the switch to ON.
The water amount will vary depending on the water amount selection button.
Setting, as well as the water pressure of the connected water line.
Automatic
icemaker
•
It is normal that a noise is produced when ice drops into the ice storage bin.
NOTE
Water Amount
Indicator Light
Power
Switch
Water Amount
Selection Button
Feeler Arm
16
Operation
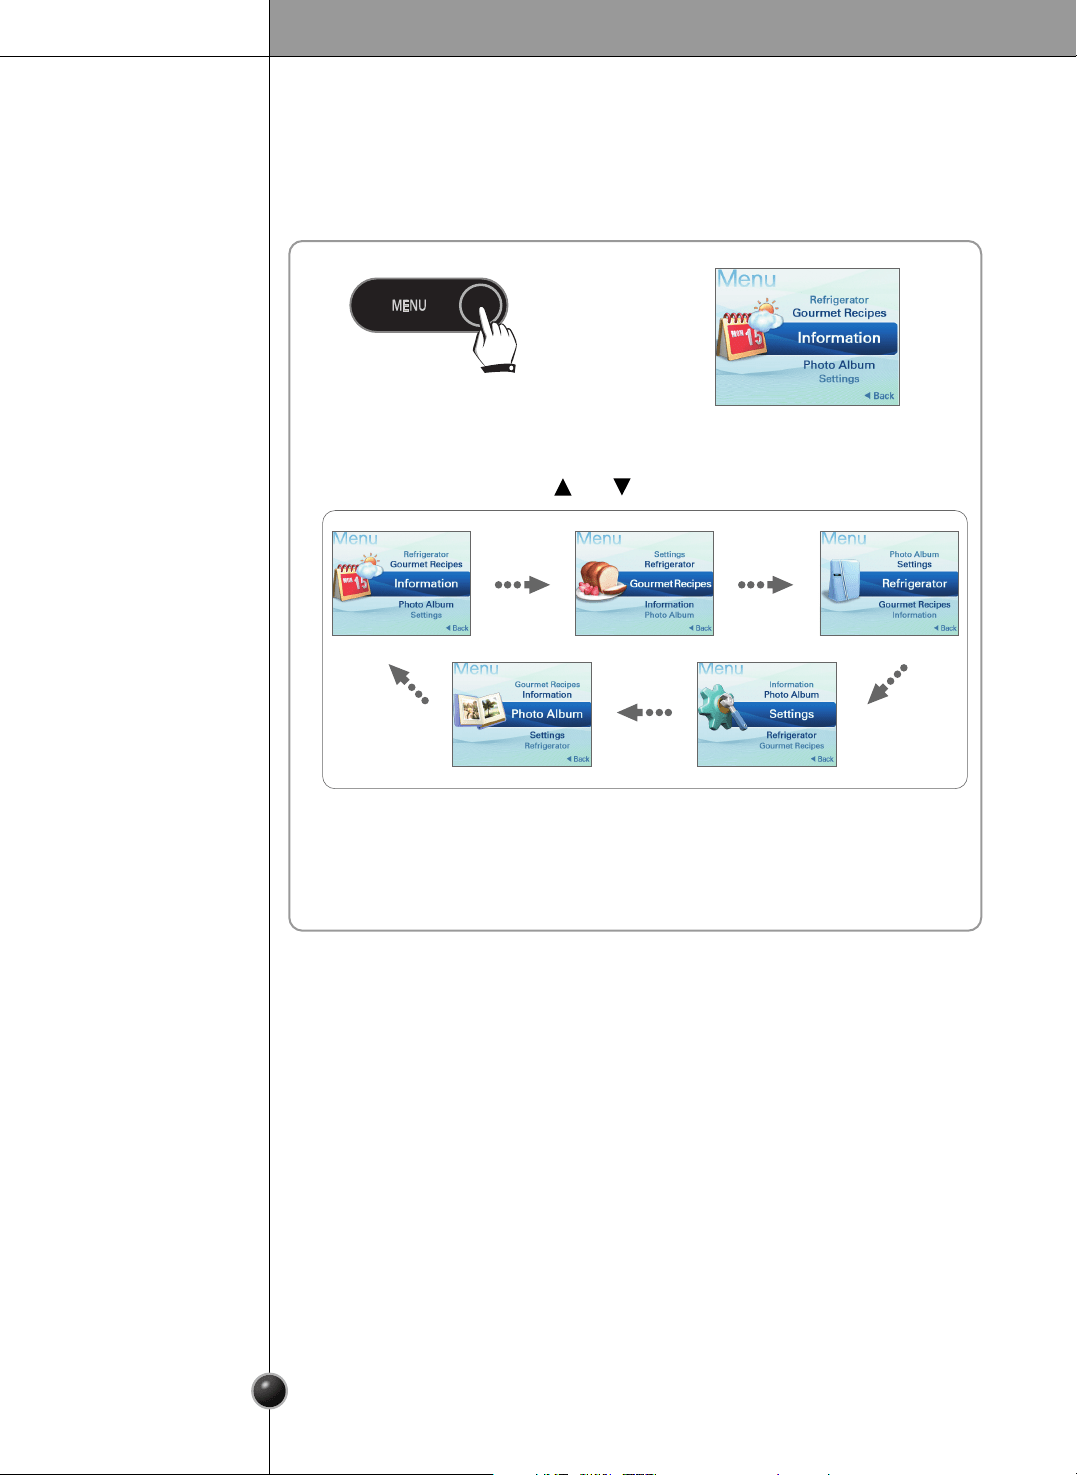
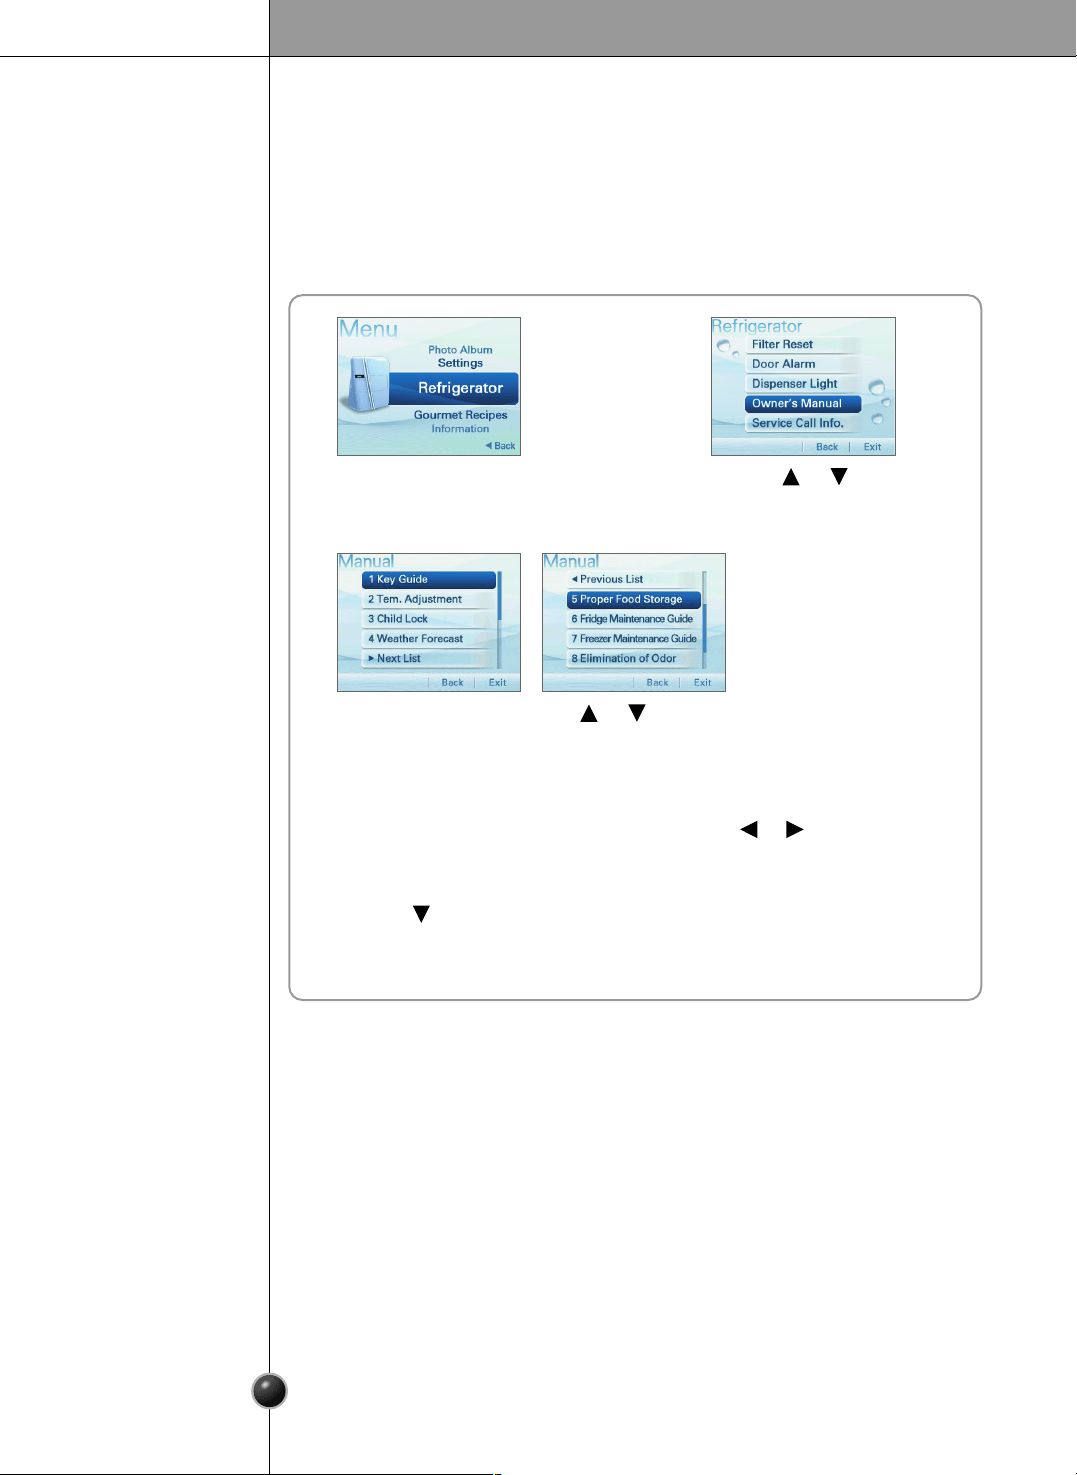
Menu
You can select from Information, Gourmet Recipes, Refrigerator, Settings, and
Photo Album function.
1
Press the MENU button.
2
4
Press the SELECT button.
5
You will see the detail menu.
3
Select the menu using the and buttons.
17
Operation
Press the or button to
select On.
Press the or button
to select On/Off.
Select the desired region
using the or button.
Press the or button to
select Weather Forecast.
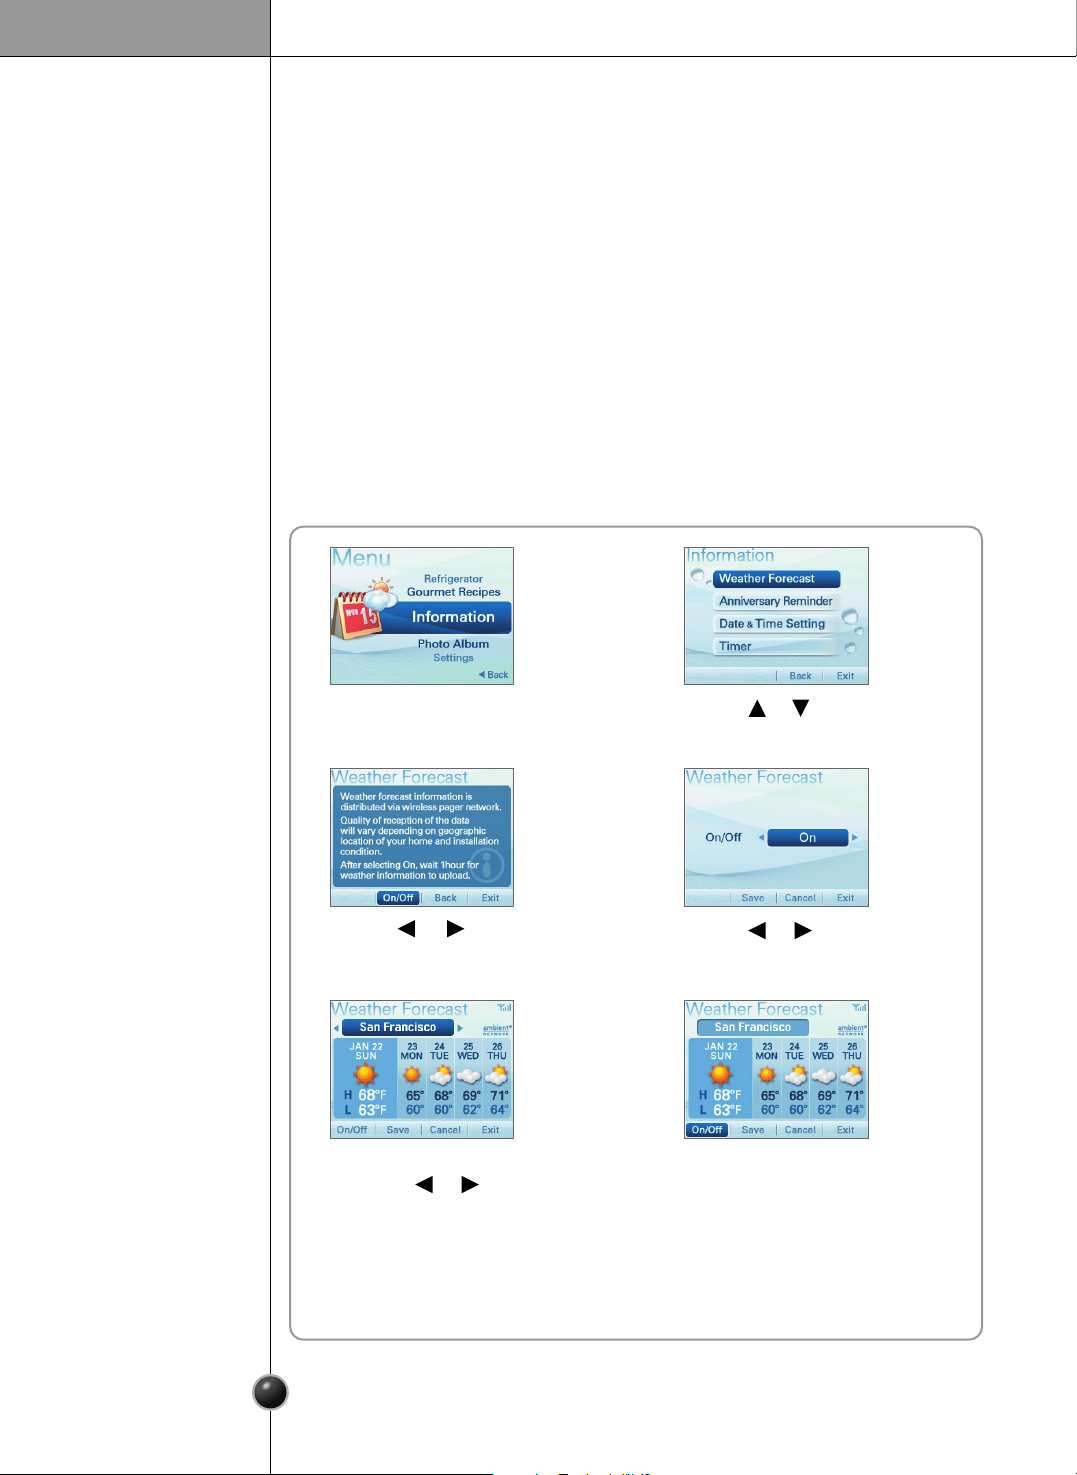
You can select from Weather Forecast, Anniversary Reminder,
Date and Time Setting, or Timer function.
Information
- Receives and displays the weather and temperature for 5 days, including the
current day.
- Reception of weather forecast information received and displayed on the screen
is subject to vary depending on your region and location of refrigerator.
- Thereby LG does not guarantee and will not be held responsible for accuracy of
the weather information.
- Check your zip code in this manual pages 151 or
www.ambientdevices.com/cat/device/coverage.html
- Weather forecast information is only available in U.S.A
❐ Weather Forecast
1 2
3 4
56
7
Return to the Information menu.

18
Operation
Select the menu using
the or button.
Select the advance time
using the or button.
Select the month using the or button.
Press the button and then select the date using the or button.
Press the or button to
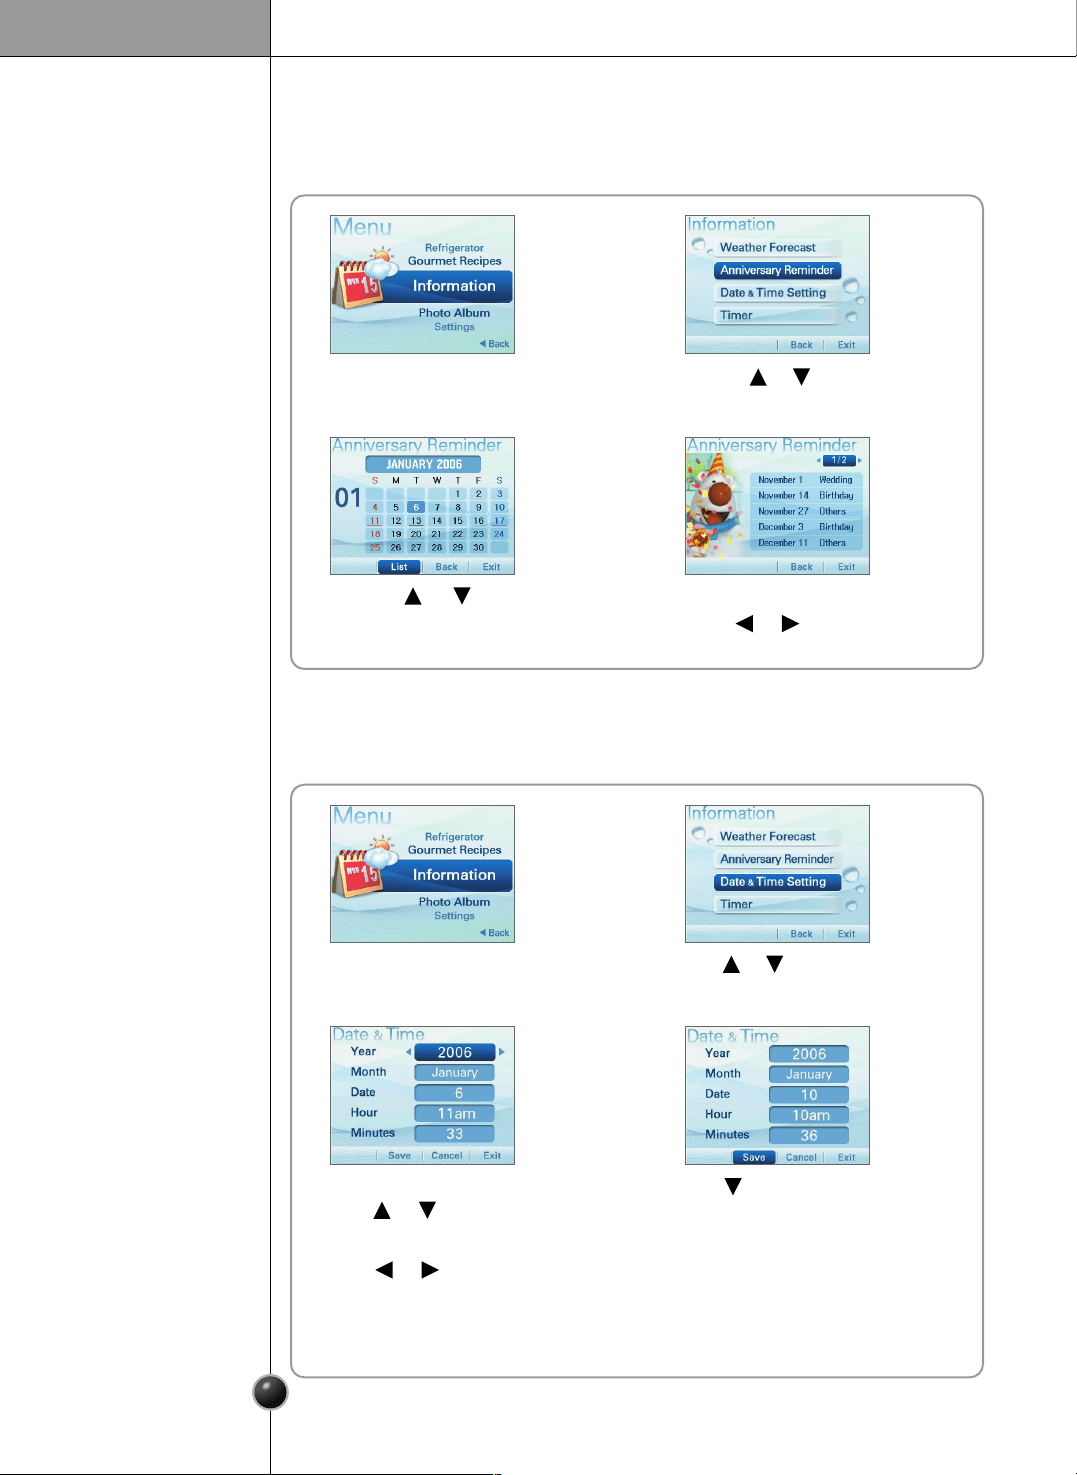
select Anniversary Reminder.
- Register the anniversary date.
- Select the Anniversary reminder using the button.
❐ Anniversary Reminder
< To set a new date >
1 2
3
4
6
Return to the Information menu.
Press the button
to select Save.
5
The anniversary reminder alarm goes off
The alarm will go off at the set date
and time, and the anniversary will be
displayed in the screen.
19
Operation
You can check the detail menu using
the or button.
Press the or button
to select List.
Press the or button to
select Anniversary Reminder.
< To view the anniversary list >
1
2
3 4
Press the button to select Save.
Select the menu using
the or button.
Select the value using
the or button.
Press the or button to select
Data & Time Setting.
To set the date and time.
❐ Data & Time Setting
1 2
3 4
5
Return to the Information menu.

20
Operation
To set the alarm.
❐ Timer
Press the button
to select Save.
Select the time using
the or button.
Press the or button
to select Timer.
1 2
3 4
5
Return to the Information menu.
- The alarm will go off at the set time, and
the timer image will be displayed in the
screen.
21
Operation
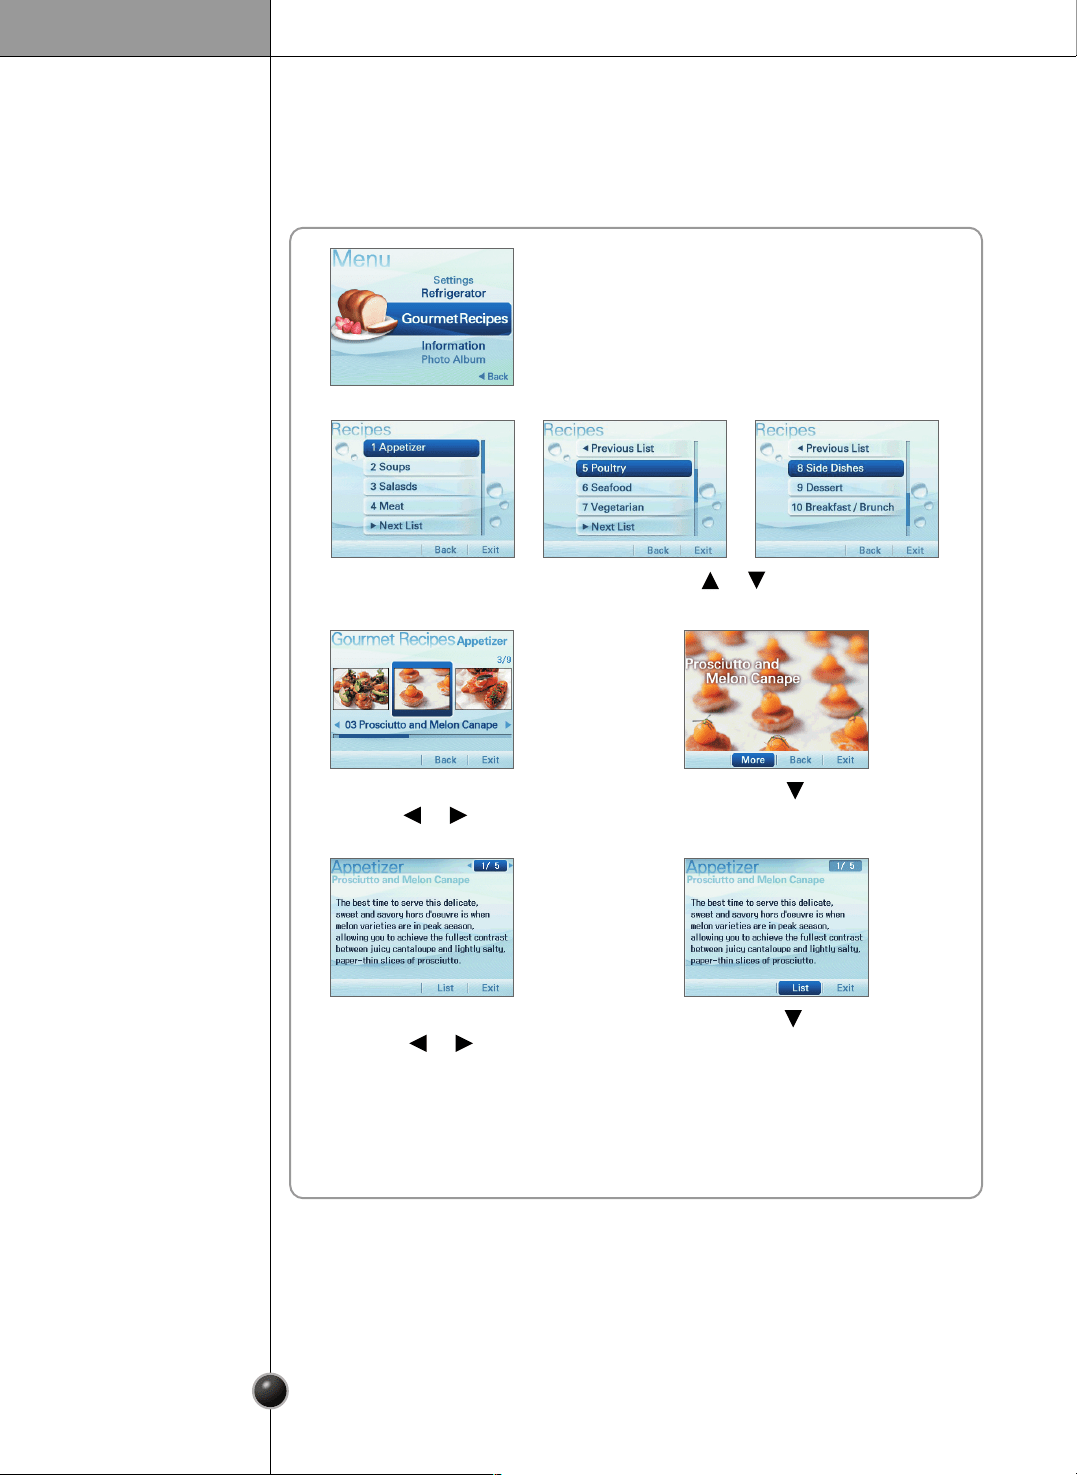
Select the recipe after selecting the menu category of dish.
Gourmet Recipes
1
2
Select the menu category using the or button.
Press the button
to select More.
You can select the dish
using the or button.
3 4
Press the button
to select List.
You can select the detail menu
using the or button.
56
7
Return to the Gourmet Recipes menu.
Operation
22
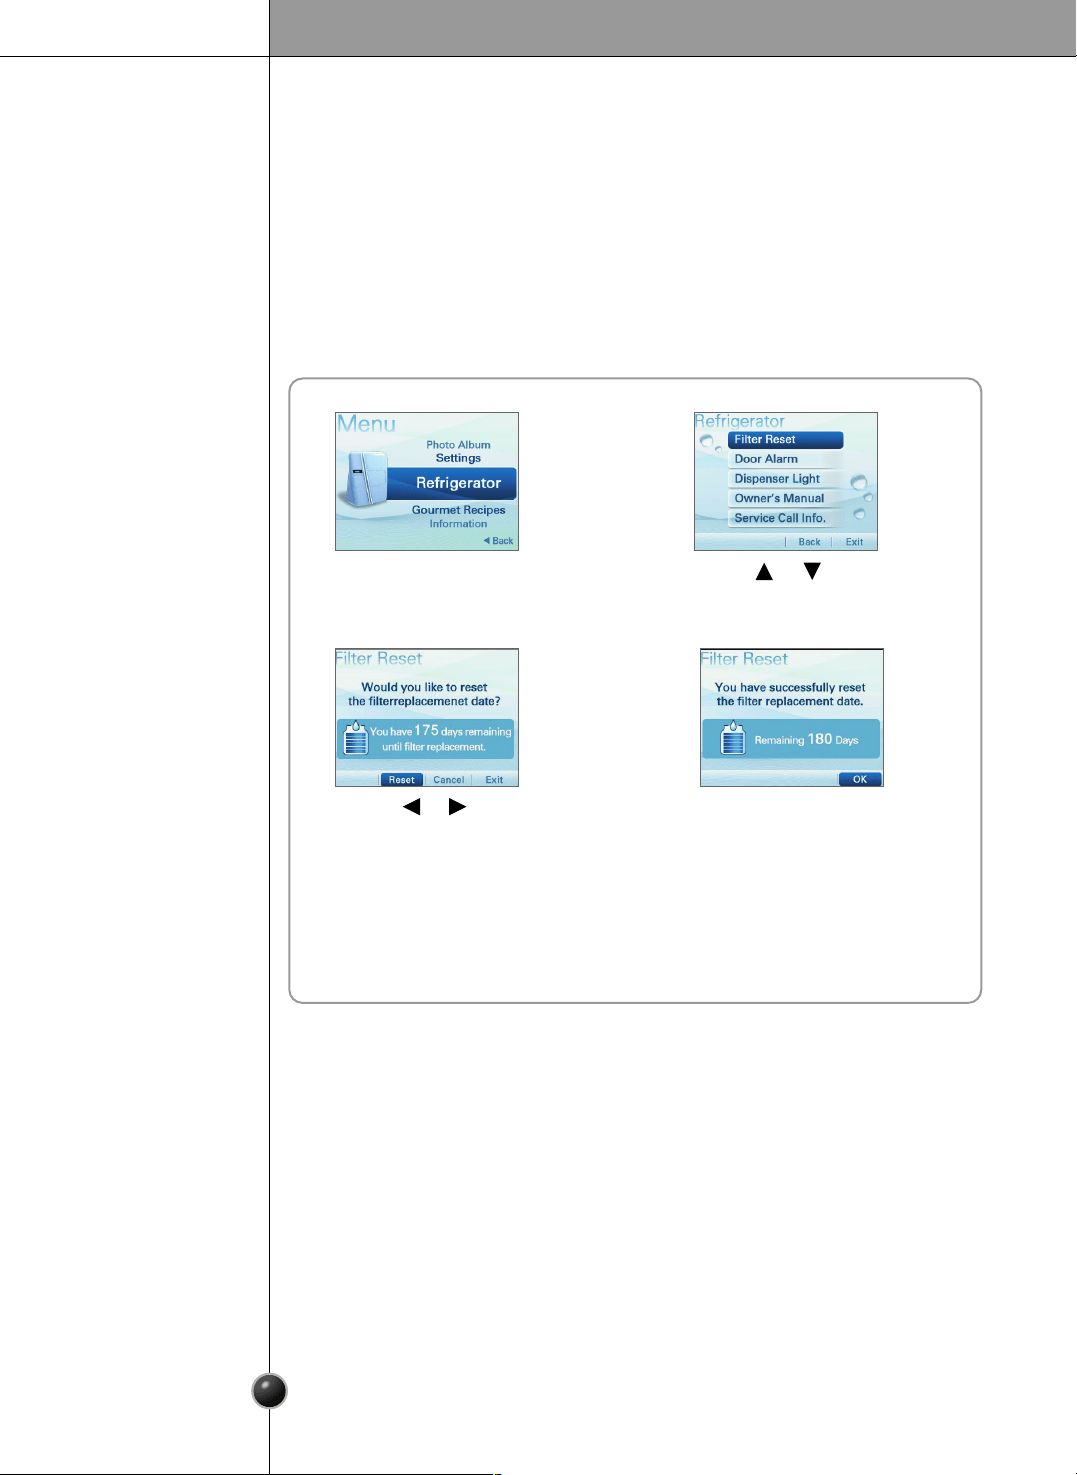
You can select from Filter reset, Door alarm, Dispenser light, Manual, and Service Call
functions.
< When the filter exchange date is still not due. >
Reminds you when to replace the filter.
1
Refrigerator
2
❐ Filter Reset
Press the or button
to select Filter Reset.
4
Press the SELECT button.
3
Press the or button to
select Reset.
5
Return to Refrigerator menu.

23
Operation
1 2
Press the or button
to select Filter Reset.
4
Press the SELECT button.
3
Press the or button
to select Reset.
5
Return to Refrigerator menu.
< When the filter exchange date is overdue. >
- You will see a message notifying you how long it will be before you need
to change the filter.
Return to the
standby screen.
- If you choose to cancel filter exchange setting.
Press the or button
to select Later.
You will see the filter exchange
sign in the standby screen.
Press
the SELECT button.
Press the or
button to select Reset.
Press
the SELECT button.
24
Operation
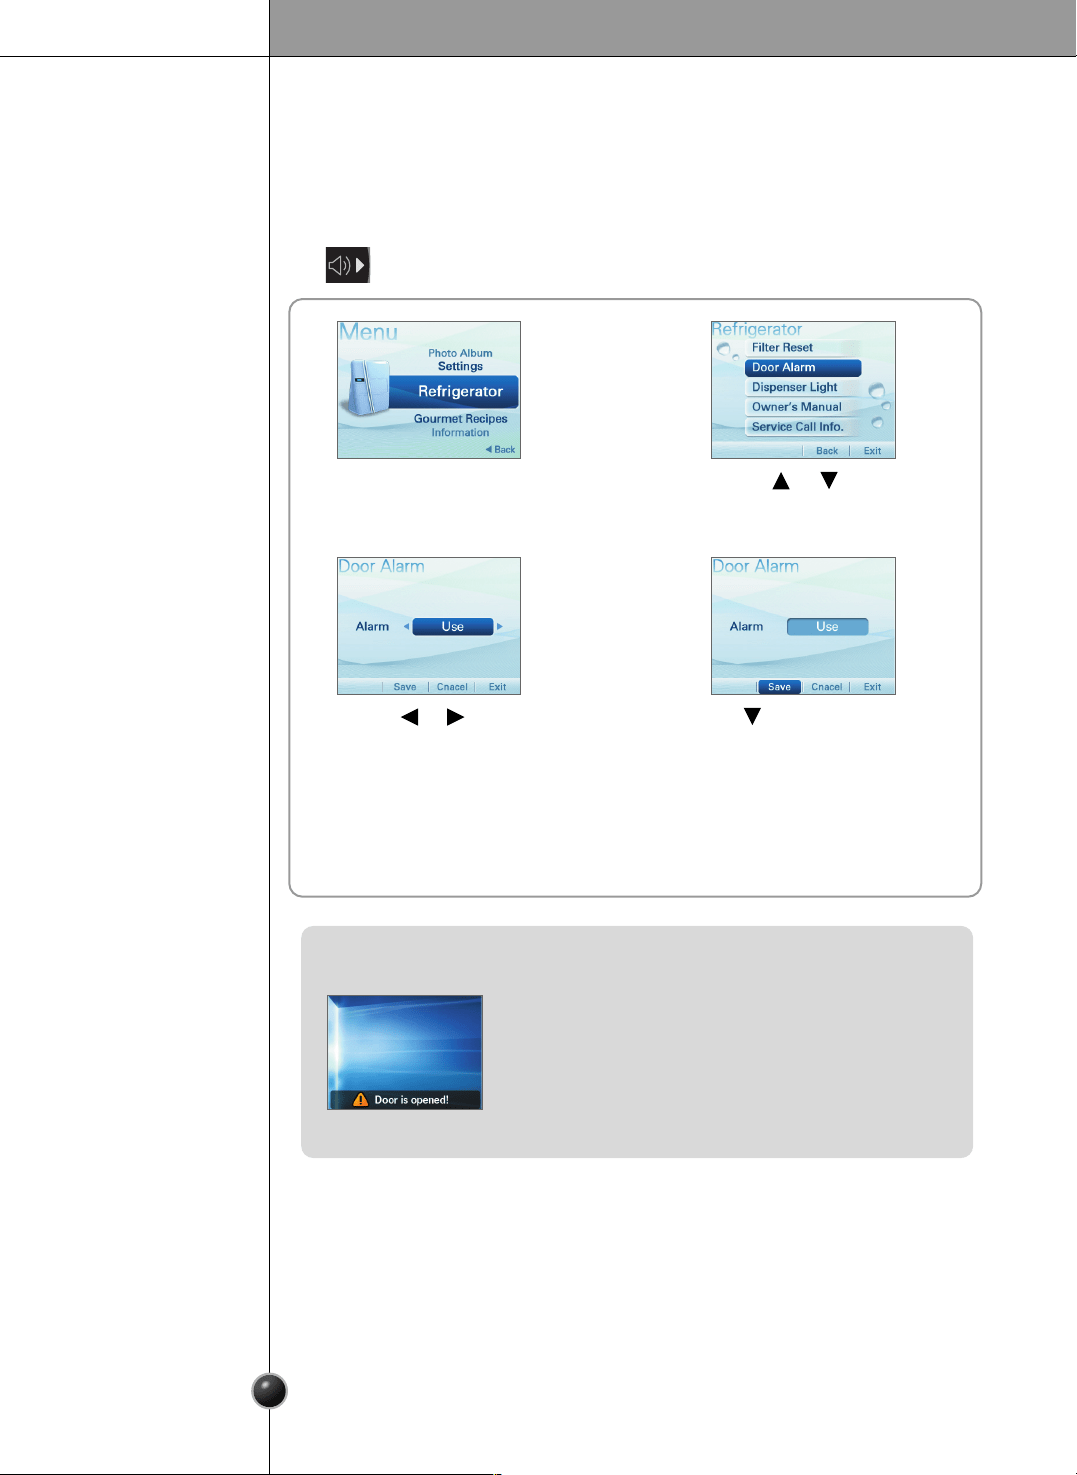
This is the function of notifying you every 30 seconds that the refrigerator door is
open for more than 1 minute.
- You can turn the door alarm on or off.
❐ Door Alarm
1 2
Press the or button to
select Door Alarm.
4
Press the button to select Save.
3
Press the or button
to select Use or Not in Use.
5
Return to the Refrigerator menu.
- You will see the door alarm message.
- When using the Door Alarm
This notifies you every 30 seconds that the
refrigerator door is open for more than 1 minute.
- When not using the Door Alarm
The alarm will not go off even when the refrigerator
door is open.
25
Operation
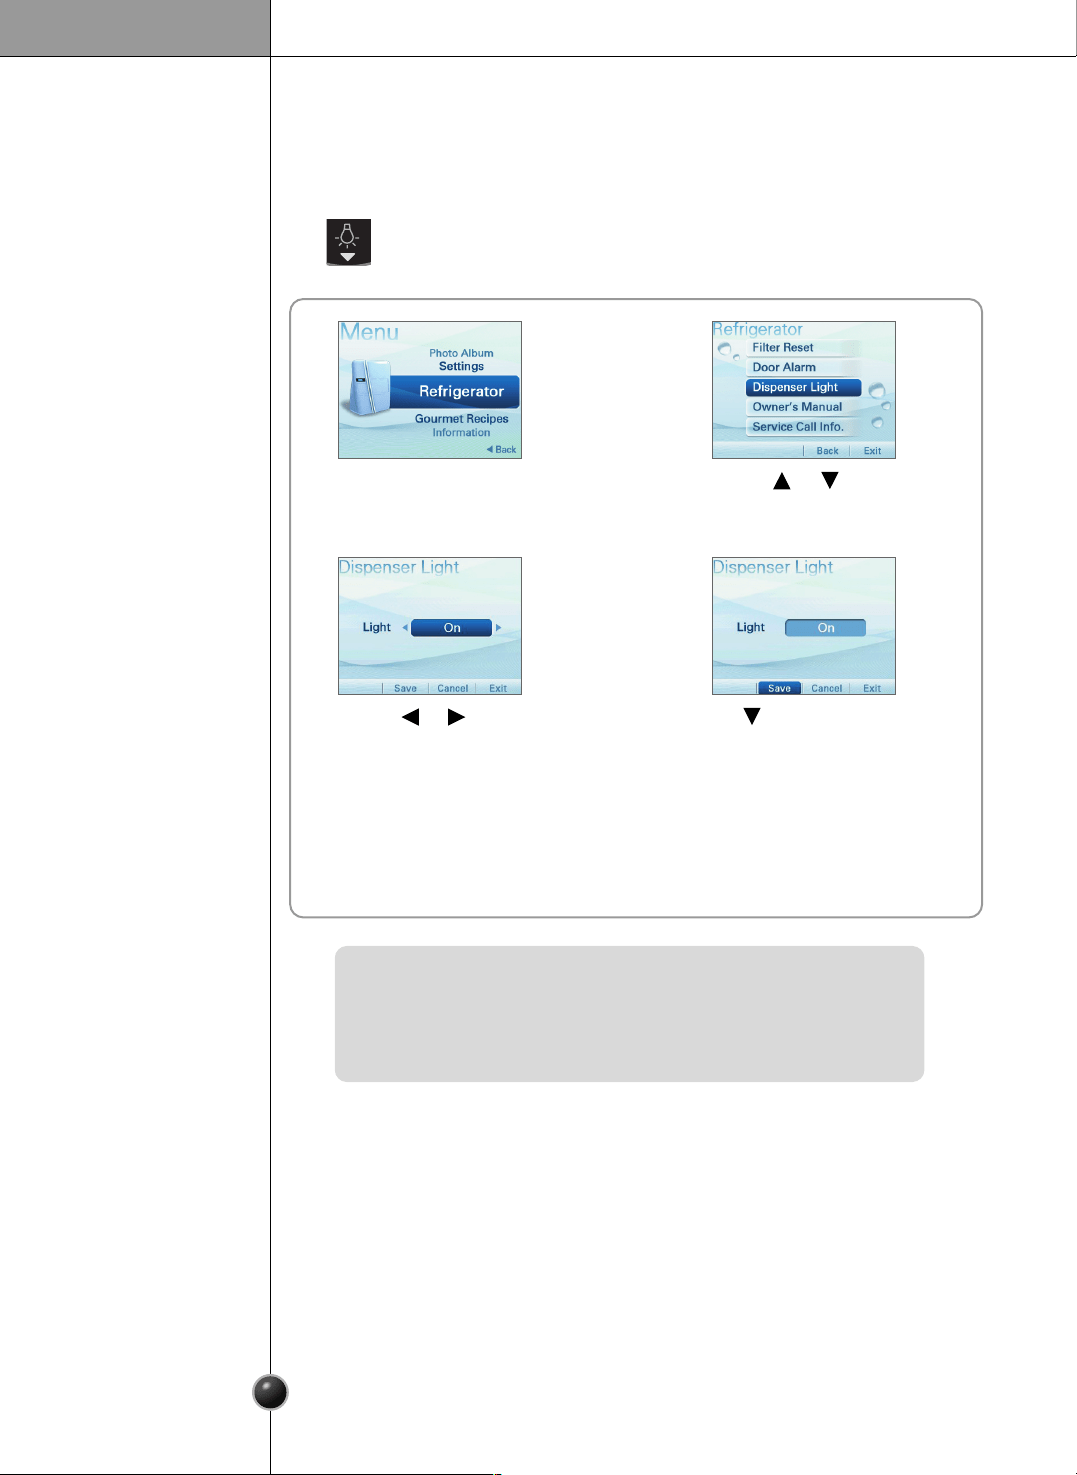
This function controls the LED lamp located on the dispenser.
- Press this icon turn the dispenser light on or off.
❐ Dispenser Light
- When On is selected, the dispenser light is always on.
- When Off is selected, the dispenser light is turned on only when the
dispenser lever is pressed.
1 2
Press the or button to
select Dispenser Light.
4
Press the button to select Save.
3
Press the or button
to select On.
[ On ] <--> [ Off ]
5
Return to the Refrigerator menu.
26
Operation
You can select from Key Guide, Tem. Adjustment, Child Lock, Weather Forecast,
Proper Food Storage, Fridge Maintenance Guide, Freezer Maintenance Guide or
Elimination of Odor function.
❐ Owner’s Manual
1 2
Press the or button
to select Owner’s Manual .
7
Return to Refrigerator menu.
3
4
Press the SELECT button.
6
Press the button to select List.
5
Select the detail menu using
the or button.
Select the menu using the or button.
27
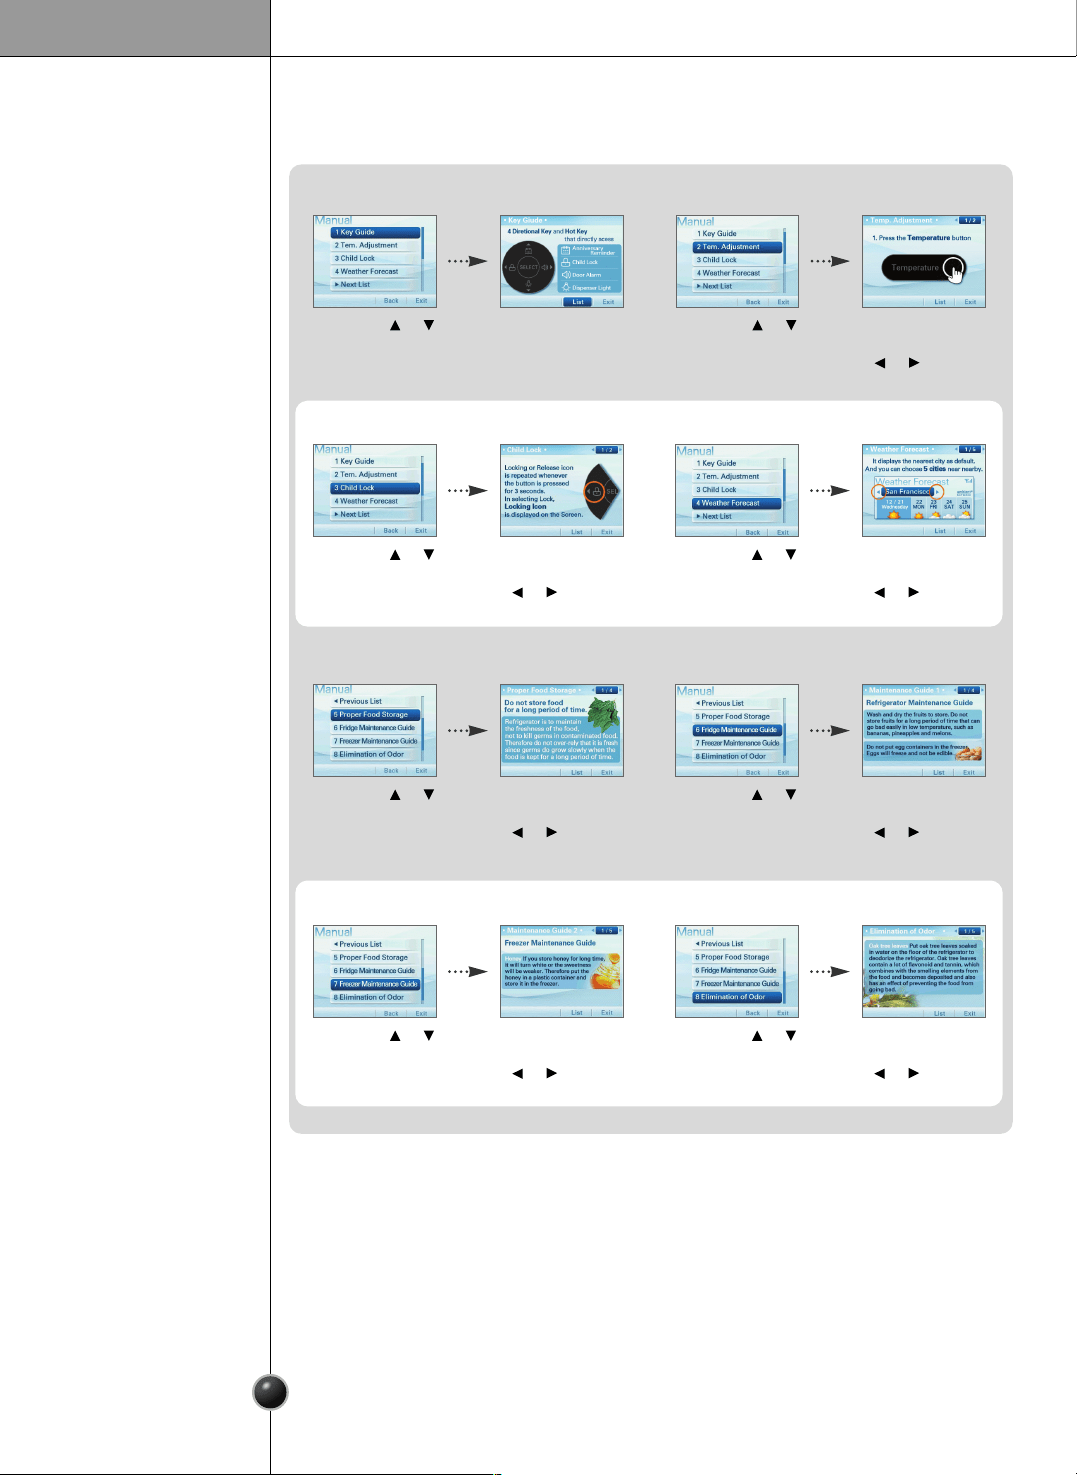
Operation
1. Key Guide
Press the or
button to select
Key Guide.
You will see the detail
menu.
2. Tem. Adjustment
Press the or
button to select
Tem. Adjustment.
You can check the
detail menu using the
or button.
3. Child Lock
Press the or
button to select
Child Lock.
You can check the
detail menu using the
or button.
4. Weather Forecast
Press the or
button to select
Weather Forecast.
You can check the
detail menu using the
or button.
5. Proper Food Storage
Press the or
button to select
Proper Food Storage.
You can check the
detail menu using the
or button.
6. Fridge Maintenance Guide
Press the or
button to select
Fridge Maintenance
Guide.
You can check the
detail menu using the
or button.
7. Freezer Maintenance Guide
Press the or
button to select
Freezer Maintenance
Guide.
You can check the
detail menu using the
or button.
8. Elimination of Oder
Press the or
button to select
Elimination of Odor.
You can check the
detail menu using the
or button.
28
Operation
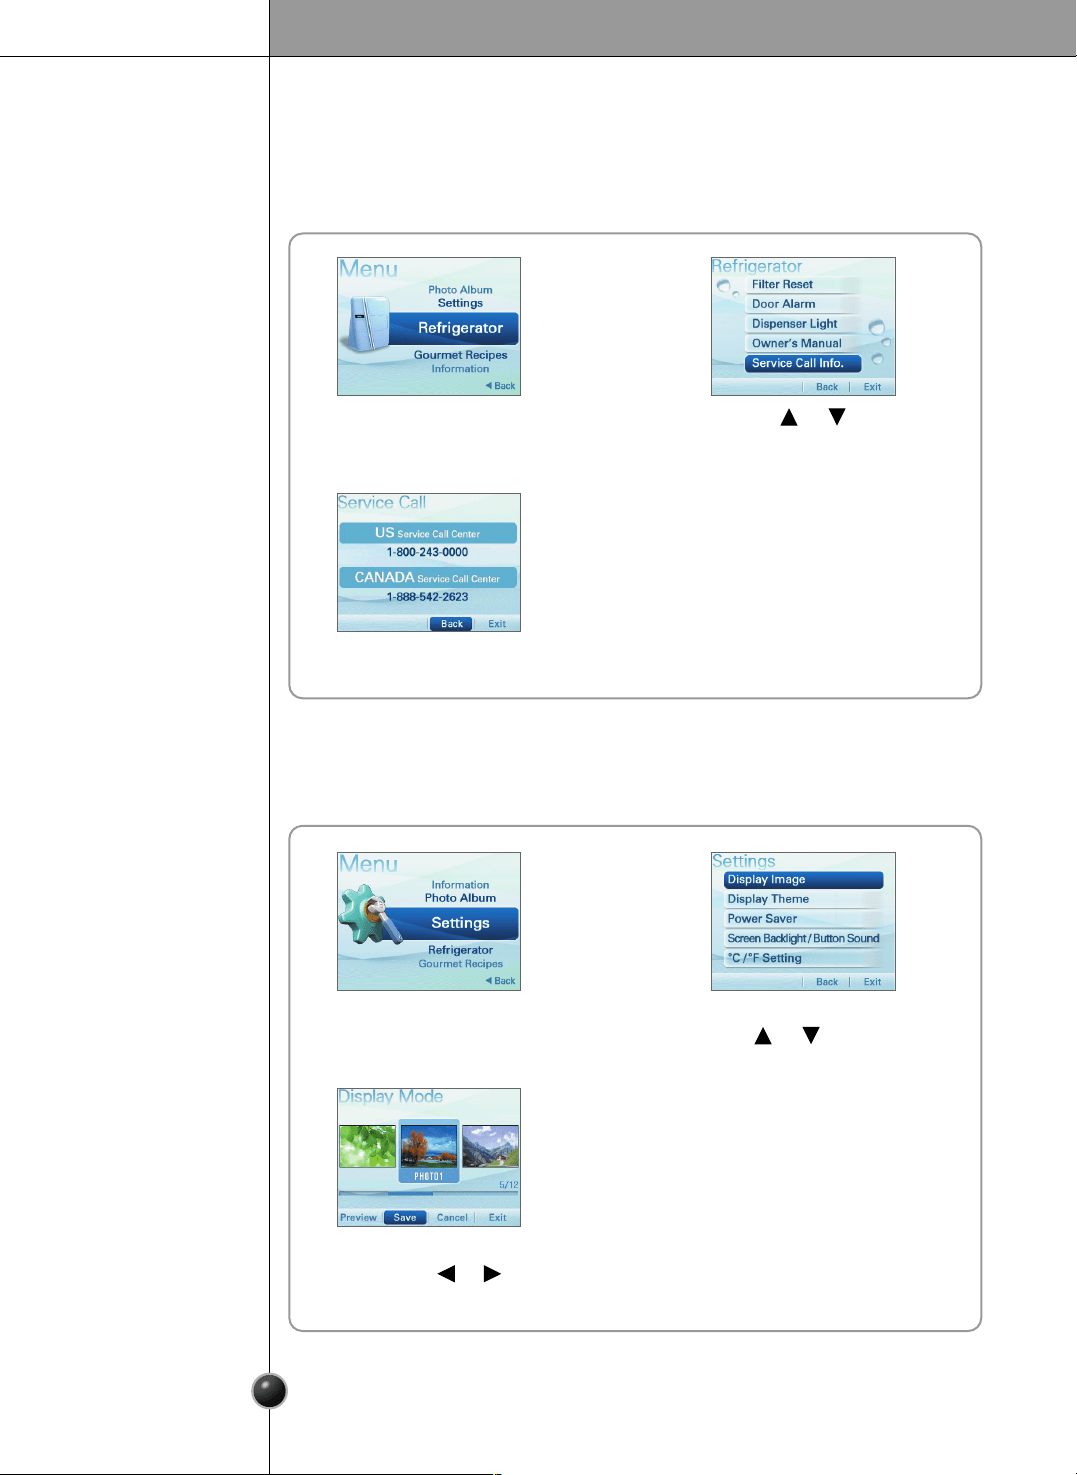
You can select from Display Image, Display Theme, Power Saver,
Screen Backlight/Button Sound, or ˚C/˚F Setting function.
Settings
1 2
Select the menu using
the or button.
3
Select and Save the menu you
want using the or button.
4
Return to the Settings
list menu.
This shows the number to call for service in the US or Canada.
❐ Service Call Info.
1 2
Press the or button
to select Service Call Info.
3
You will see the detail menu.
29
Operation
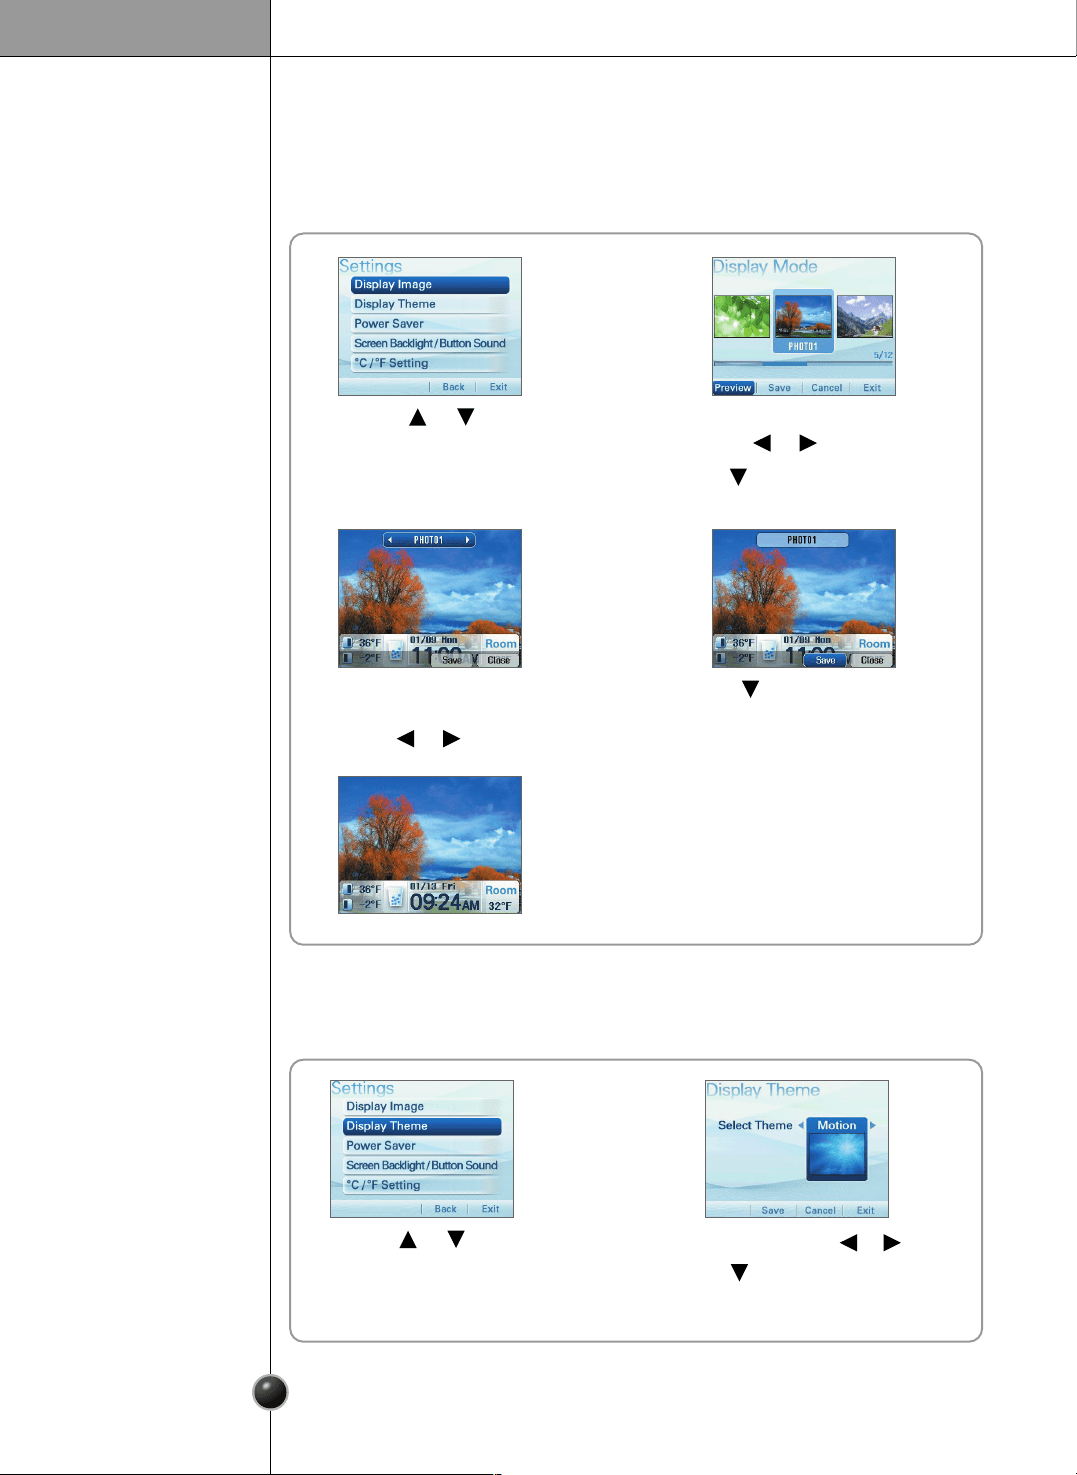
You can select the standby screen setting.
❐ Display Image
1 2
Select the desired photo using
the or button.
Press the button to select Preview.
Press the or button
to select Display Image.
3 4
Press the button to select Save.You can preview other
standby screens using
the or button.
5
You can select the screen theme setting.
1 2
❐ Display Theme
Select the menu using the or button.
Press the button to select Save.
[ Character ] <--> [ Motion ]
Press the or button to
select the Display Theme.
30
Operation
1 2
Press the or button to select Use.
Press the or button
to select Power Saver.
3
4
The Power Saver turns the display off at the preset time.
Select the desired time using the or button.
[ 1min ] <--> [ 3min ] <--> [ 5min ]
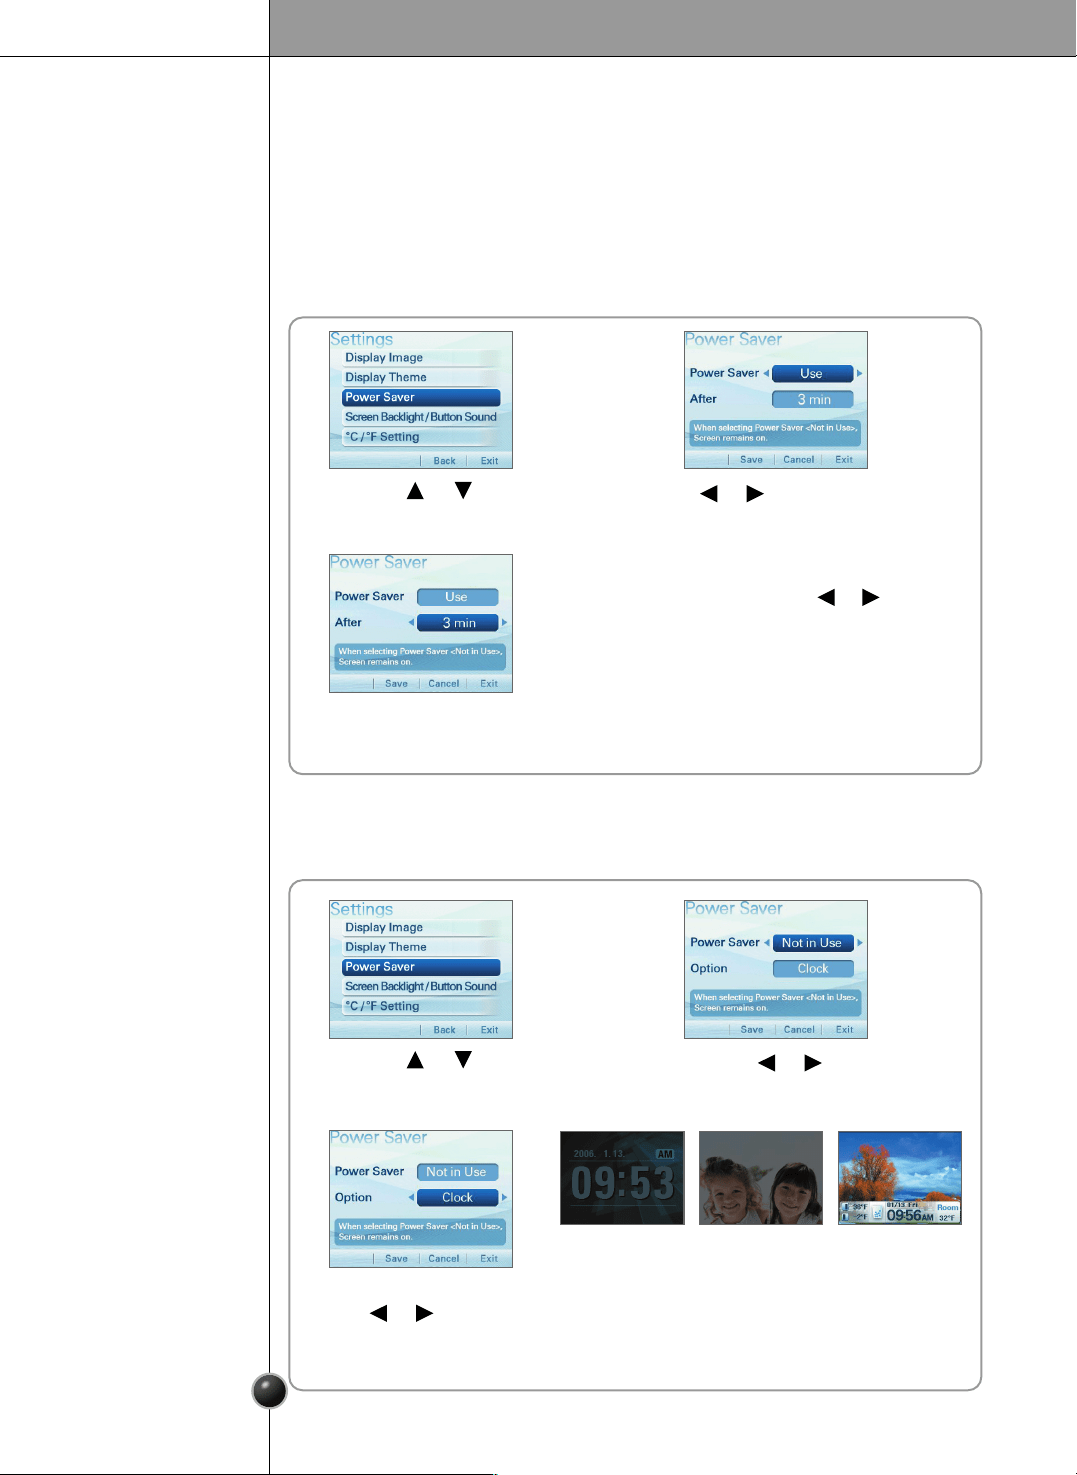
You can select the Power Saver function.
- When selecting [Use of Power Saver], the LCD screen backlight turns off after
eclipse of designated time.
- When selecting [Not in Use of Power Saver], the LCD screen is converted to
Screen Protector after a minute.
❐ Power Saver
1 2
Press the or button
to select Not in Use.
Press the or button
to select Power Saver.
3
Select the menu using
the or button.
• When you select the Photo, the pictures saved
in the photo album will be shown in slideshow.
• When selecting Not in Use, the current standby
screen is saved as Screen Saver.
[ Clock ] [ Photo ] [ Not in Use ]
< When Power Saver function is selected >
< When Power Saver function is not selected >
31
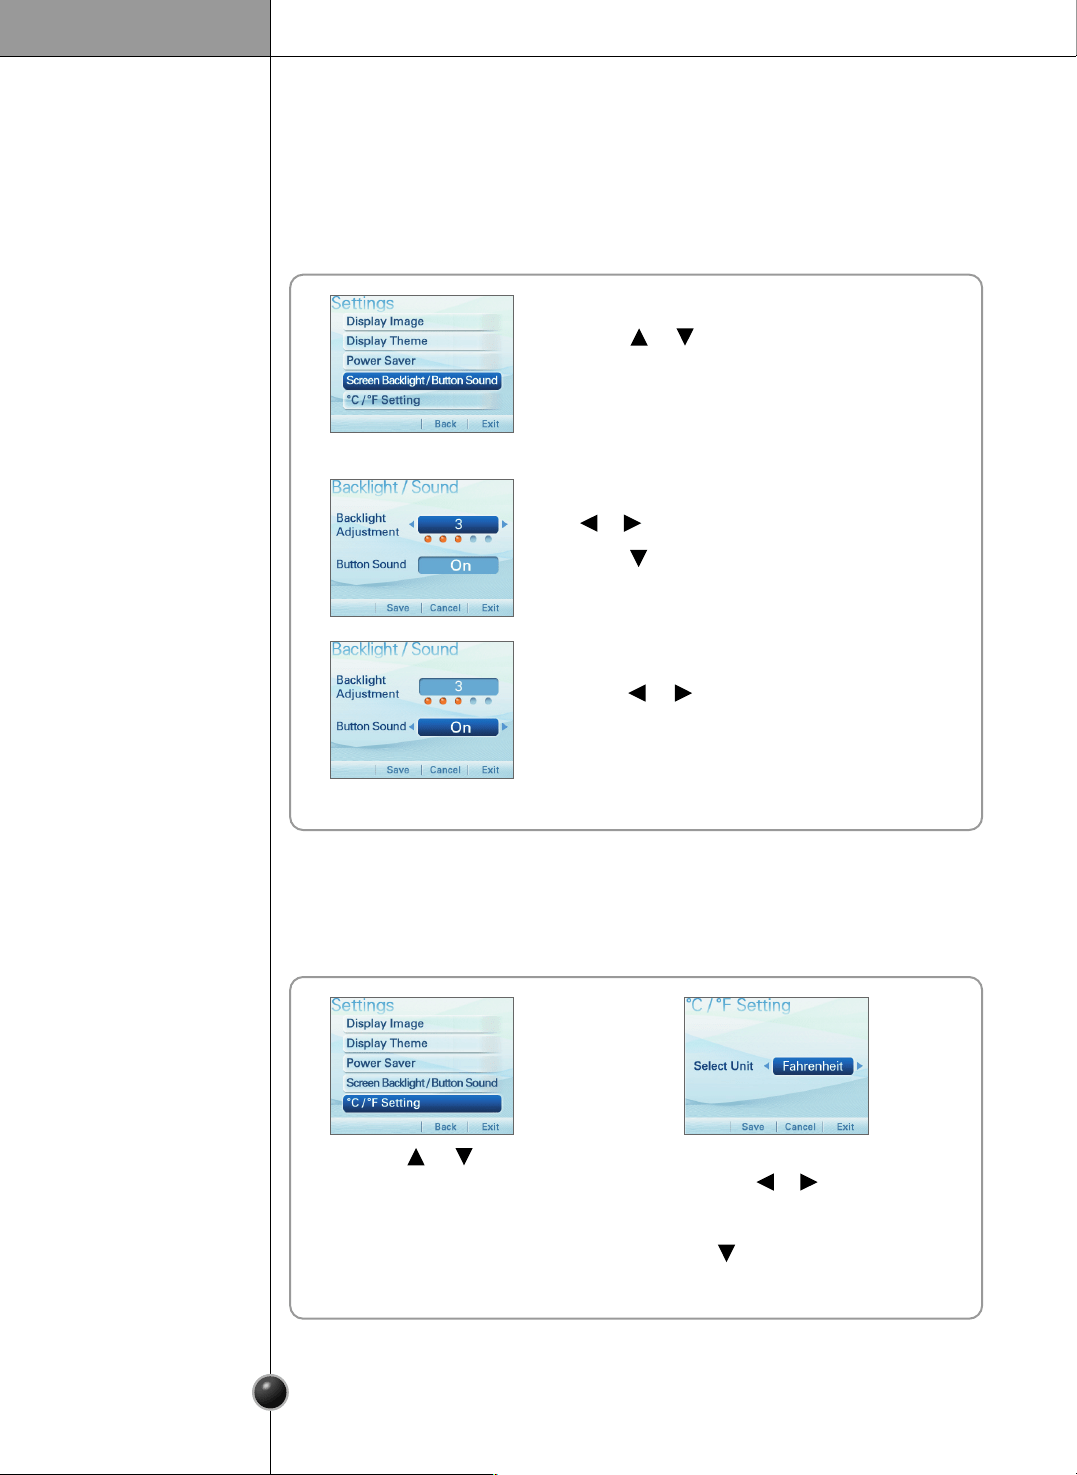
Operation
Select the brightness value using
the or button.
Press the button to select Save.
[ 1 <--> 2 <--> 3 <--> 4 <--> 5 ]
1 2
❐ ˚C/˚F Setting
Select the menu you want
using the or button.
[ Centigrade] <--> [ Fahrenheit ]
Press the button to select Save.
Press the or button
to select ˚C/˚F Setting.
- You can adjust the screen brightness.
- When selecting the button sound, you can turn the button sound on or off.
1
❐ Screen Backlight/Button Sound
Press the or button to select
Screen Backlight/Button Sound.
2
Select and Save the menu you want
using the or button.
[ On ] <--> [ Off ]
32
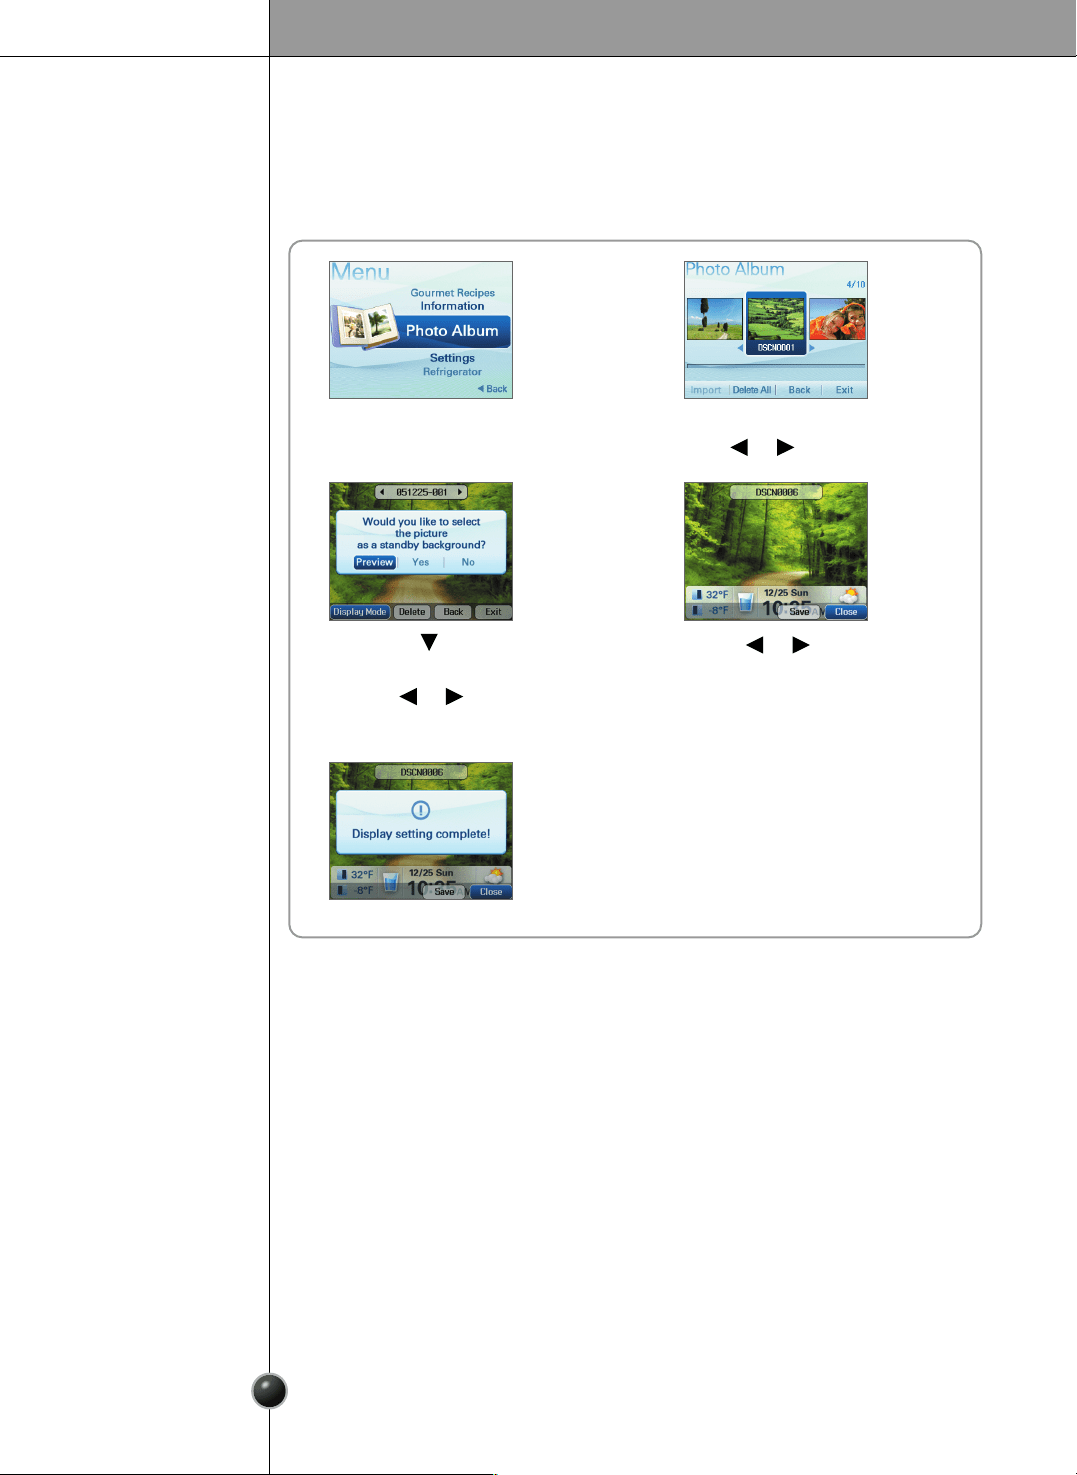
Operation
1 2
Select the desired photo using
the or button.
3 4
Press the or button to
select Save.
Press the button
to select Display Image.
Press the or button
to select Preview.
5 6
Return to the standby screen.
You can register a photo or setup the standby screen.
Photo Album
< When setting to the standby screen >
33
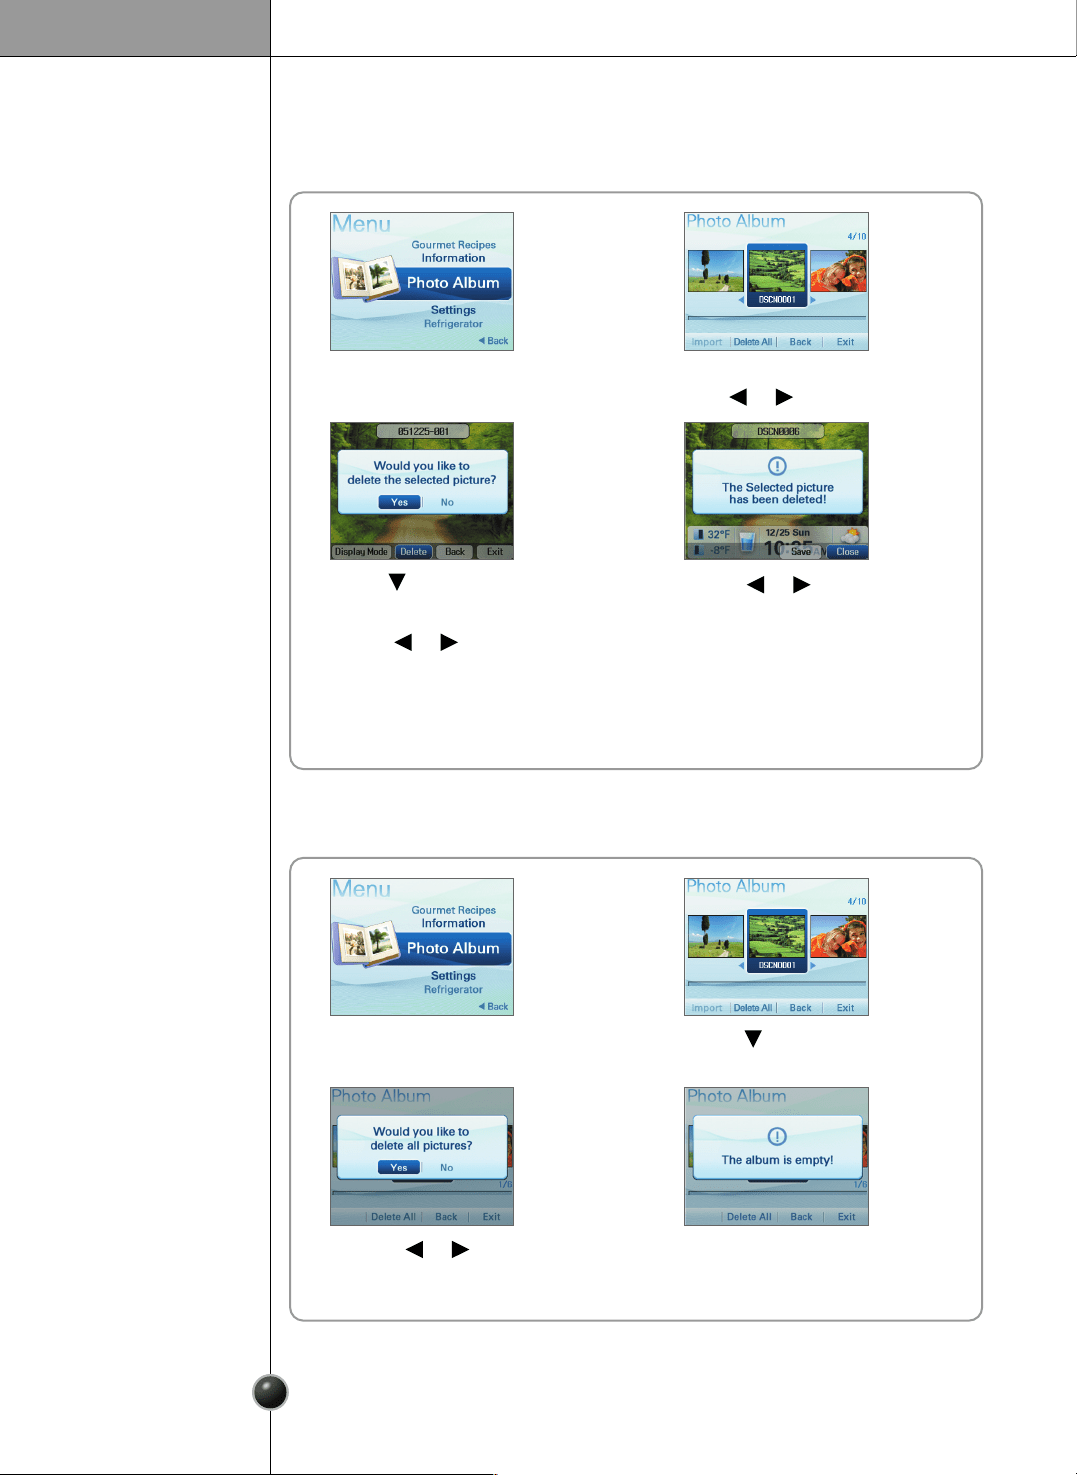
Operation
1 2
Select the desired photo using
the or button.
3 4
Press the or button to
select Save.
Press the button to select
Delete.
Press the or button to
select Yes.
5
Return to the standby screen.
< When deleting >
1 2
Press the button to select
Delete All.
3
4
Return to the standby screen.
Press the or button
to select Yes.
< When deleting all>
34
Operation
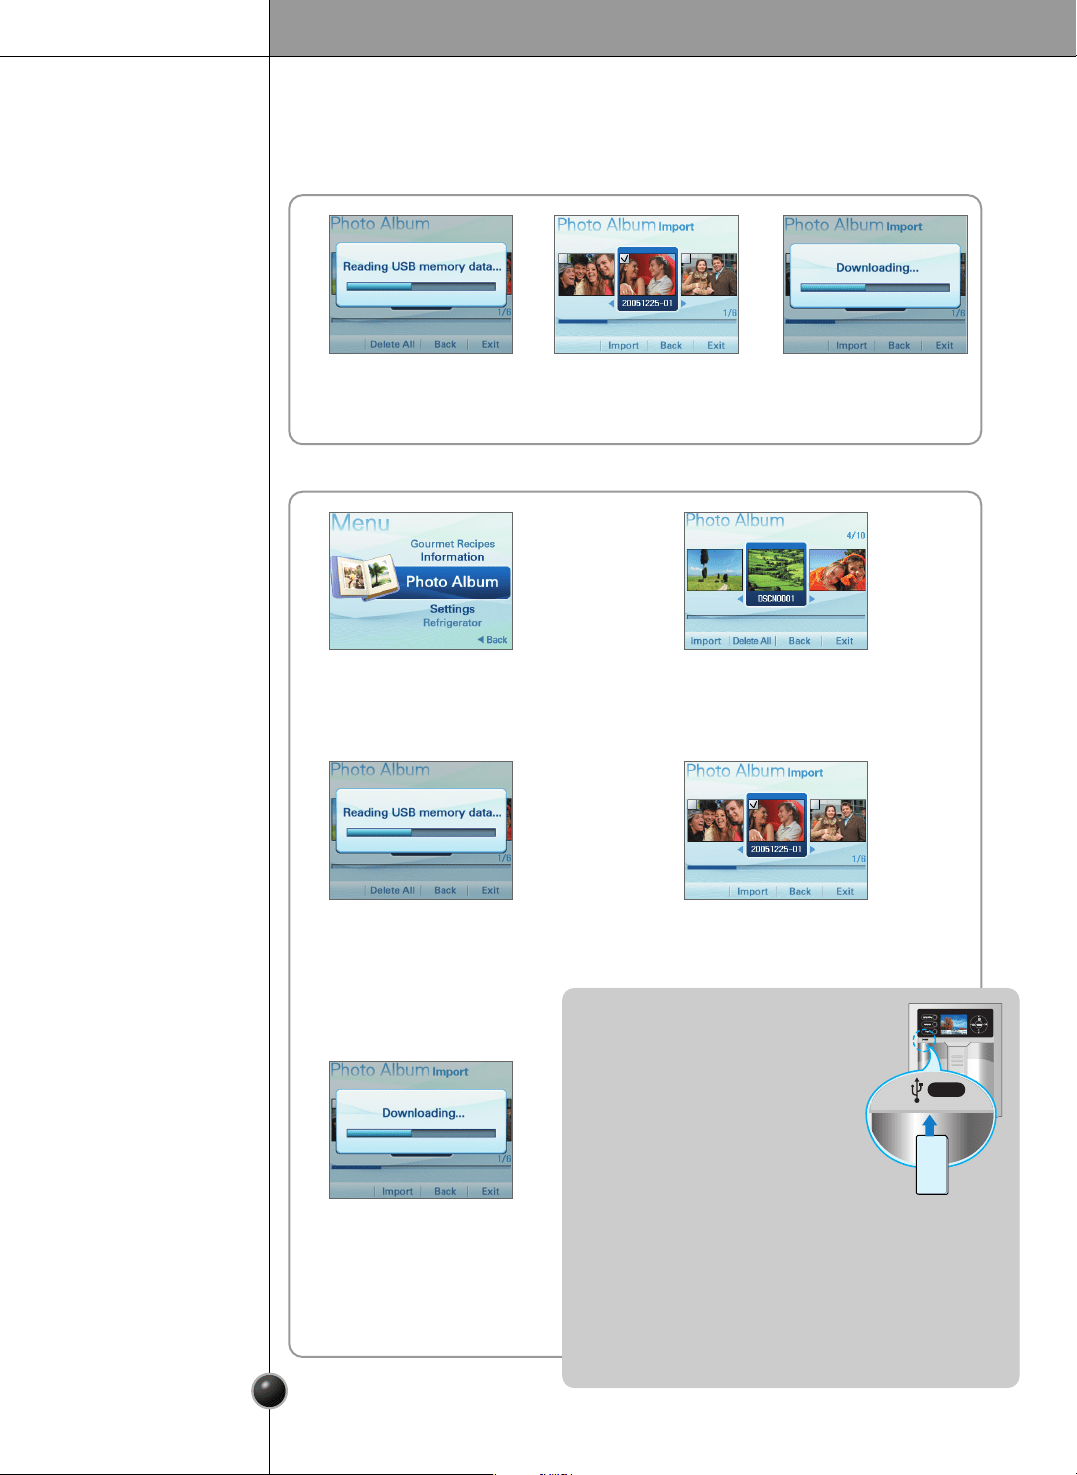
< When registering the photo >
1 2 3
When you connect the USB Memory Stick to the USB port, it reads the
photo data and adds the album list.
1 2
When selecting Photo Album and then
connecting the USB Memory Stick, Import
item is activated.
3 4
After setting up desired photo from
data read, select Import.
When selecting Import, it reads
data from the USB Memory
Stick. The Pop-up screen
appears to inform progress
process during reading.
5
After Import Check popup
screen appears, you can
check photo from the photo
album list.
< When using USB Memory Stick >
- Position of USB Memory Stick for refrigerator.
- If desiring to use the USB Memory Stick,
firstly select the photo album item and
then insert the USB Memory Stick.
- It takes several seconds if reading
photo from the USB Memory Stick.
- Use the product where photo is saved in
the USB. If any photo are not saved, firstly save photo in the
USB Memory Stick.
- The Avatar Display applied to this refrigerator
uses O/S(Window CE), which recognition depends on the
kinds of USB Memory Stick. When the USB which was
recognized before, is not recognized currently, make it
authorization again after powering off.
USB
USB
USB MEMORY STICK

Operation
35
Lock can be used to disable the buttons and prevent tamperng with the settings.
- Select Lock using the buttons.
- Lock or unlock buttons and dispenser by pressing down the button for 3seconds.
- When lock is selected, the dispenser and buttons will be locked and will not operate.
- When lock is selected, the lock icon will appear on the screen.
Lock
< To set the Lock >
< To cancel the Lock >
Pressing the Refrigerator
button when the Lock is
set will display this
message.
When you see this message, press
the Lock button for 3 seconds.
1 2
4
Return to the standby screen.
You will see this message.
3
When you see this message, press
the Lock button for 3 seconds.
1 2
4
Return to the standby screen.
You will see this message.
3
36
Operation
Throw away the ice (about 20 pieces) and water (about 7 glasses) first made after
refrigerator installation.
This is also necessary when the refrigerator has not been used for a long time.
Keep children away from the dispenser.
Children may play with or damage the controls.
Be careful that food does not block the ice passage.
If foods are placed at the entrance of ice passage, the
dispenser may malfunction. The passage may also
become blocked with frost if only crushed ice is used.
Remove the frost that accumulates.
Storing cans or other items in the ice bin may damage
the icemaker or the container may burst.
Never use thin crystal glass or crockery to collect ice.
Such glasses or containers may be broken, and glass fragments could be in the ice.
Put ice first into a glass before filling water or other beverages.
Water may be splashed if ice is added to existing liquid in a glass.
Keep your hands out of the ice door and passage.
You might break something or injure yourself.
Never remove the ice maker cover.
Shake the ice bin occasionally to level the ice in it.
Sometimes the ice piles up near the icemaker, causing the icemaker to misinterpret the
bin level and stop producing ice.
If you find ice or water dispensed unexpectedly, contact an Authorized Service
Center. (Call 1-800-243-0000 24/7 and select the option to locate an authorized
servicer.)
Never use too narrow or deep glass.
Ice may be jammed in the ice passage and, thus, the refrigerator may fail.
Keep the glass at a proper distance from ice outlet.
A glass too close to the outlet may prevent ice from coming out.
Cautions
Other functions
Diagnostic (failure detection) function
The diagnostic function automatically detects failure when failure is found in product
during the use of refrigerator.
If your refrigerator fails, do not turn off the power. Call 1-800-243-0000 24/7 and select
the option to locate an authorized servicer or call our support line for assistance.
Turning off the appliance will make it more difficult for the service technician to
determine the problem.
Water is cooled while stored in the water tank in freezer door, and then sent to the
dispenser.
Ice is made in the automatic icemaker and sent to the dispenser.
How ice/cold
water is supplied
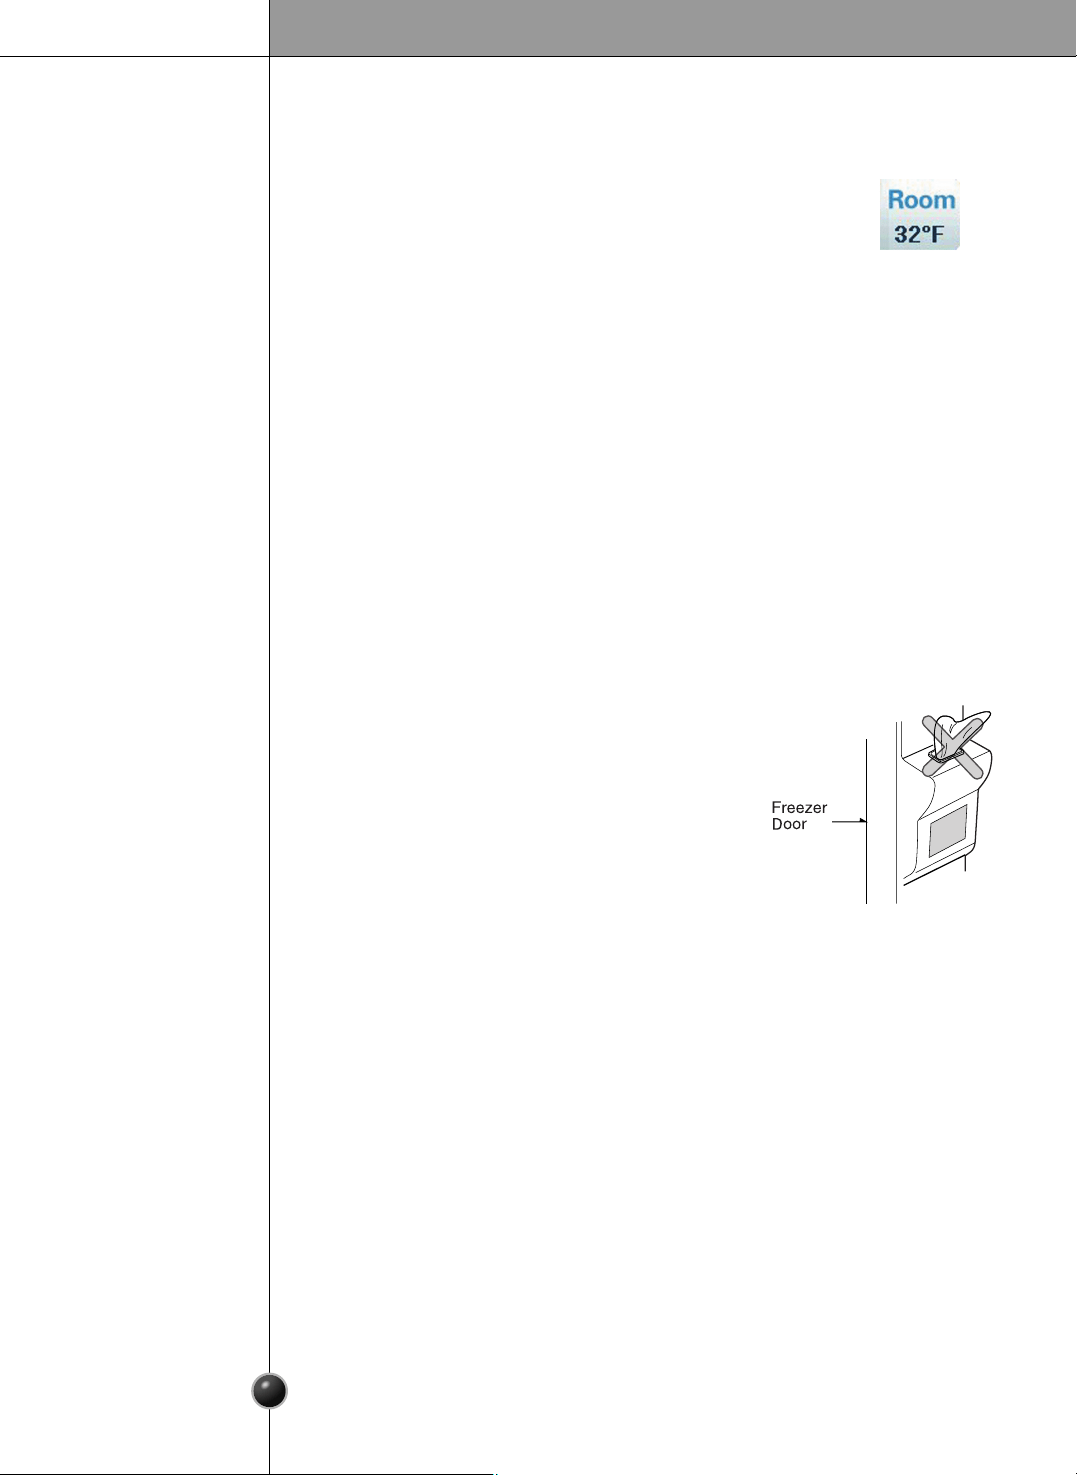
Ambient Temperature Display Window.
Temperature is displayed only between 16°F ~ 120°F (-9°C ~ 49°C).
Temperature less than 15°F (-9°C) is indicated with LO and
temperature more than 121°F (49°C) is indicated with HI.

Operation
37
1
3
2
1
2
3
Shelf
The refrigerator compartment shelves are adjustable so you can locate them according
to your needs.
Slide Shelf
Pull the shelf ahead and take off it while
lifting both front and rear part.
Fixed Shelf, Folding Shelf
Lightly lift up the front part of shelf to pull it
ahead and then take off it while lifting the
rear part of shelf.
Shelf height
adjustment
•
Make sure the shelf is horizontal. If not, it may drop.
NOTE
Slide-Under
Shelf
You can store taller items such as
a gallon container or bottles by
simply pushing in front half of
shelf underneath back half of
shelf. Pull toward you to return to
a full shelf.
Humidity control in the vegetable compartment
The humidity can be controlled by adjusting the humidity control switch to the left
or right when storing vegetables or fruits.
High
Low
High Low
Humidity Control
High Low
Humidity Control
High humidity
Low humidity
38
Operation
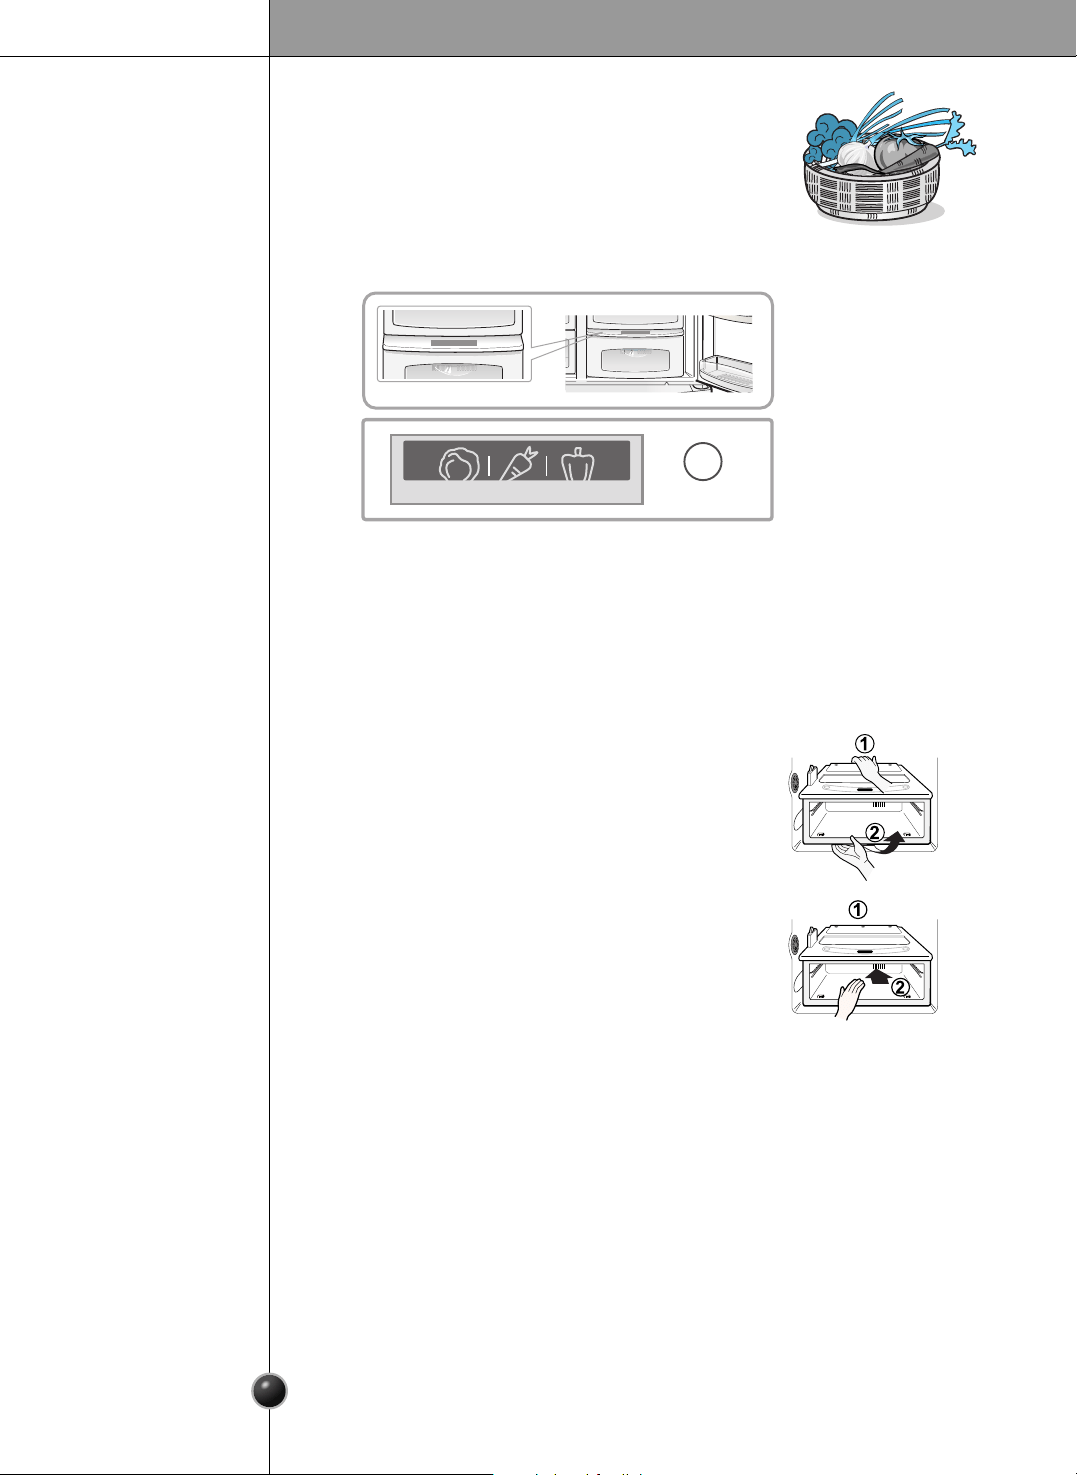
OptiFresh temperature bin
OptiFresh
You can select the optimum temperature to store some
types of foods.
- Vegetables, fruits, cold storage items requiring humidity
maintenance can be stored under optimal condition by pressing the button.
Activate
OptiFresh Crisper
First, remove the vegetable bin.
After holding both ends of the OptiFresh and
pull it outward.
If you open the refrigerator door, an indicator lamp shows the status of the
OptiFresh. The lamp goes off when the door is closed.
Press the button to cycle between ON and OFF.
When removing
OptiFresh
Method to use
Fit the OptiFresh case on to the ledge and gently
slide it in .
If forced, the connecting parts can be damaged.
When installing
OptiFresh
Suggestion on Food Storage
39
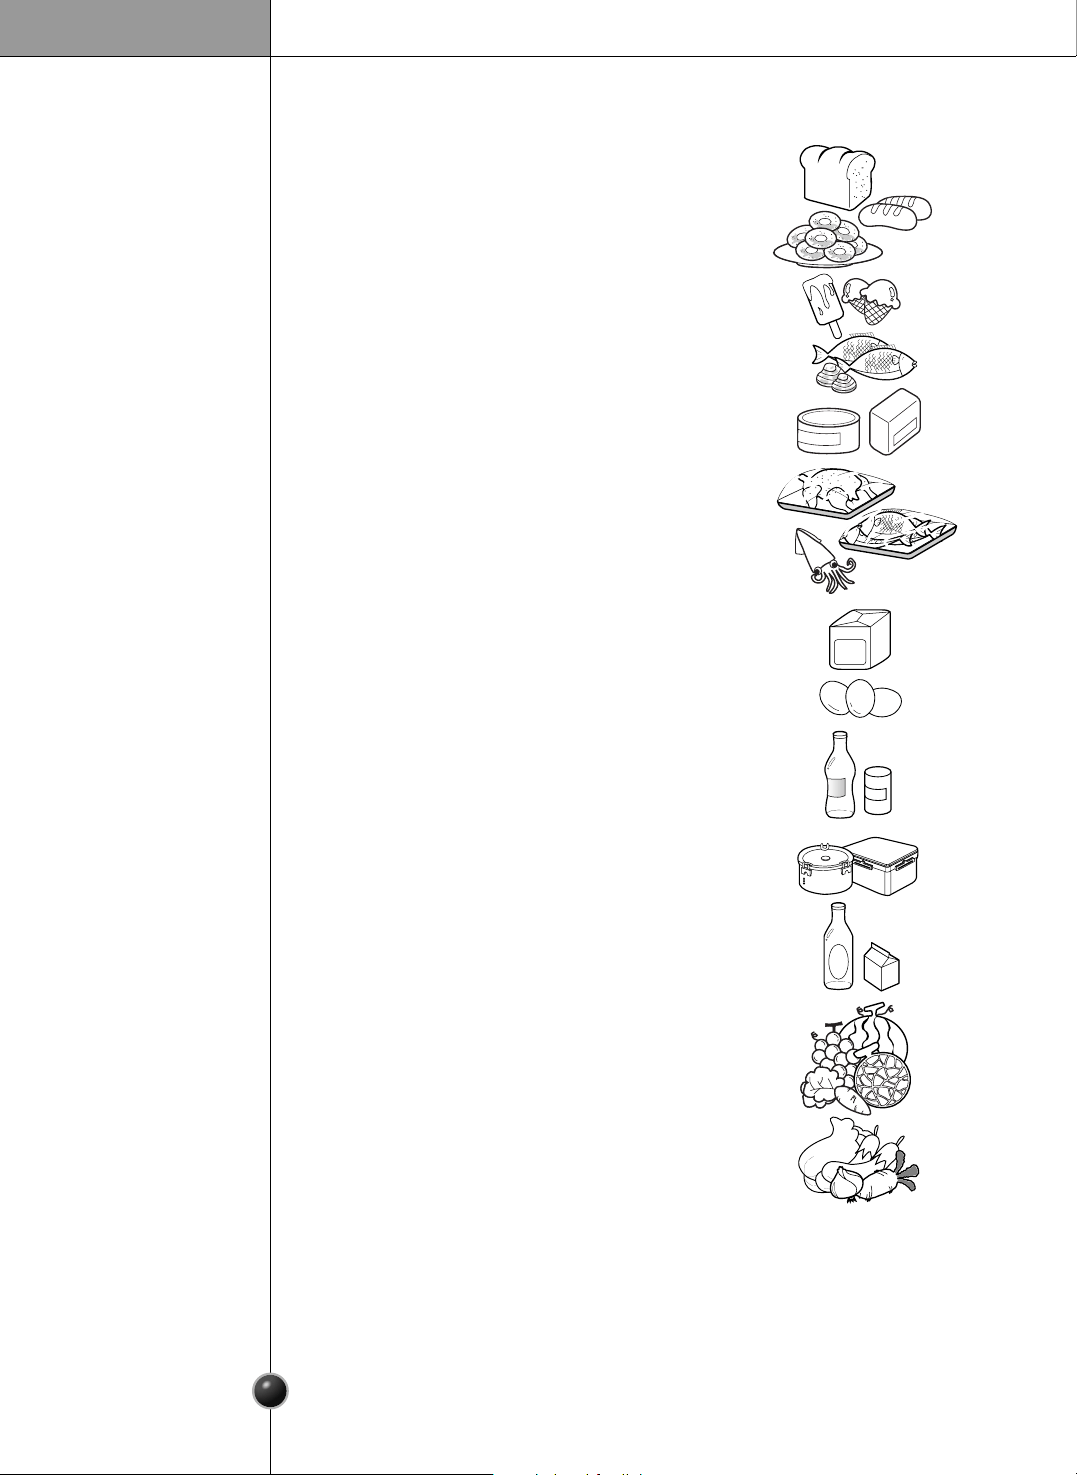
Location of foods
(Refer to Identification of Parts, page 4.)
Store small foods such as bread, snacks, etc.
Store various frozen foods such as meat, fish,
ice cream, frozen snacks, etc.
Store small packed frozen food.
Items stored in the door racks don’t stay
quite as cold as in the rest of the freezer.
Store ice cream and similar items on a
shelf in the freezer instead.
Snack
drawer
Freezer
compartment
shelf
Freezer
compartment
door rack
Freezer
compartment
drawer
Milk product
corner
Refreshment
center
Refrigerator
compartment
shelf
Refrigerator
compartment
door rack
Vegetable drawer
Store meat, fish, chicken, etc. after
wrapping them with thin foil.
Store dry
.
Store milk products such as butter,
cheese, etc.
Store foods of frequent use such as
beverages, etc.
Do not pack the freezer or refrigerator
tightly. Allow a little room for proper air
circulation to aid cooling.
Store small packed food or beverages such
as milk, juice, etc.
Store vegetables or fruits.

40
Suggestion on Food Storage
Storing foods
Store fresh food in the refrigerator compartment. How food is frozen and thawed is an
important factor in maintaining its freshness and flavor.
Do not store food which spoils easily at low temperatures, such as bananas and
melons.
Allow hot food to cool prior to storing, placing hot food in the refrigerator could spoil
other food, and lead to higher energy consumption.
When storing the food, cover it with vinyl wrap or store in a container with a lid. This
prevents moisture from evaporating, and helps food to keep its flavor and nutrition.
Do not block air vents with food. Smooth circulation of chilled air keeps refrigerator
temperatures even.
Do not open the door frequently. Opening the door lets warm air enter the refrigerator,
and cause temperatures to rise.
Never overload the door racks because they may push against by inner racks so that
the door cannot be fully closed.
Do not store bottles in the freezer compartment, they may break when frozen.
Do not refreeze food that has been thawed. This causes loss of flavor and nutrition.
When storing frozen food like ice cream for a long period, place it on the freezer
shelf, not in the door rack.
Do not touch the cold foods or containers, especially made of metal, with wet
hands and place glass products in the freezer compartment.
- Damp skin can freeze and stick to cold surfaces, causing frostbite and other serious
injuries.
Avoid placing moist food in top refrigerator shelves, it could freeze from direct
contact with chilled air.
Always clean food prior to refrigeration. Vegetables and fruits should be washed and
wiped, and packed food should be wiped, to prevent adjacent food from spoiling.
When storing eggs in their storage rack or box, ensure that they are fresh, and always
store them in an upright position to keep them fresh longer.
Freezer
compartment
Refrigerator
compartment
•
If you keep the refrigerator in a hot and humid place, frequent opening of the door or
storing a lot of vegetables in it may cause condensation to form. Wipe the
condensation with a clean cloth or a paper towel.
NOTE
41
Care and Maintenance
How to remove and replace parts
Freezer
compartment
lamp
Freezer
compartment
shelf
Door rack and
support
Ice storage bin
After dispenser
is used
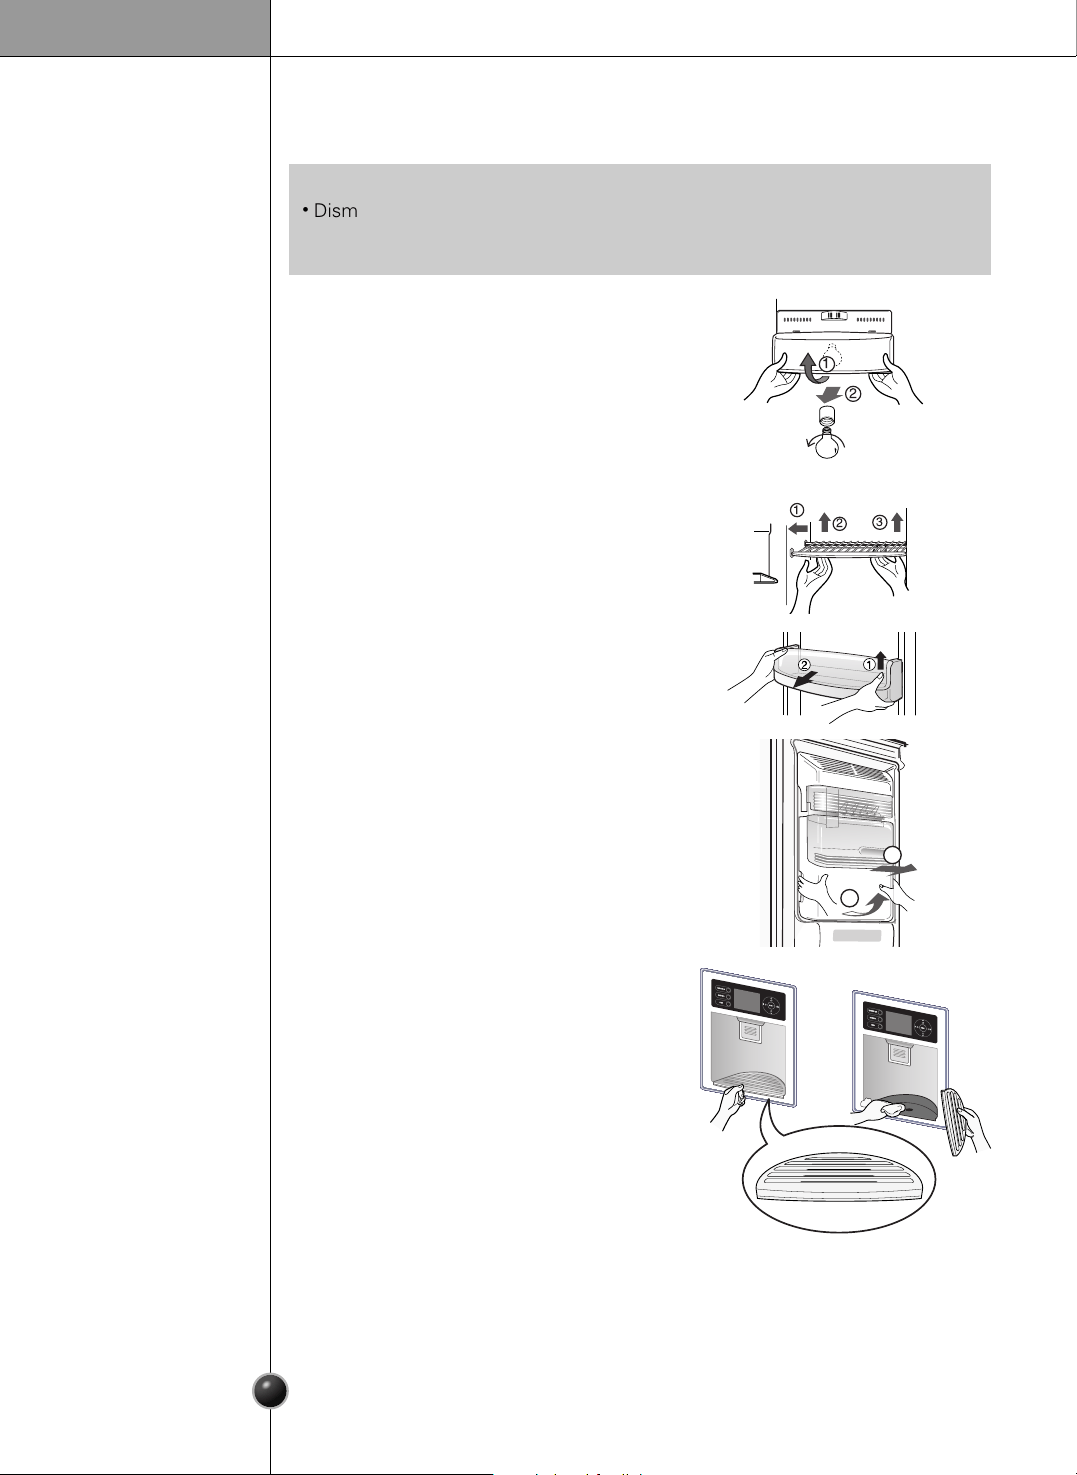
To remove a shelf, push the shelf to the left ,
lift the left part of the shelf a bit , lift the right
part up ➂ , and take it out.
Lift the door rack holding both sides and
pull it out .
Hold the ice storage bin as shown in the right
figure and pull it out while slightly lifting it .
Do not dismantle the ice storage bin unless
it is necessary.
Use both hands to remove the ice bin to avoid
dropping it.
The water collector has no self-draining
function. It should be cleaned regularly.
Remove the cover by pulling the front side of
water collector cover and dry it with a cloth.
2
1
3
2
1
•
Dismantling is done in the reverse sequence of assembly.
Be sure to unplug the power plug before dismantling and assembly.
Never apply severe force to dismantle parts. Parts may be damaged.
NOTE
To remove the lamp cover, separate the shelf
over the lamp cover and pull the lamp cover
forwards ➁ while pressing the bottom side of
the lamp cover upwards ➀. Turn the bulb
counterclockwise.
Use a 40-watt bulb (max.) which
can be purchased
at a service center.
1
2
42
Care and Maintenance
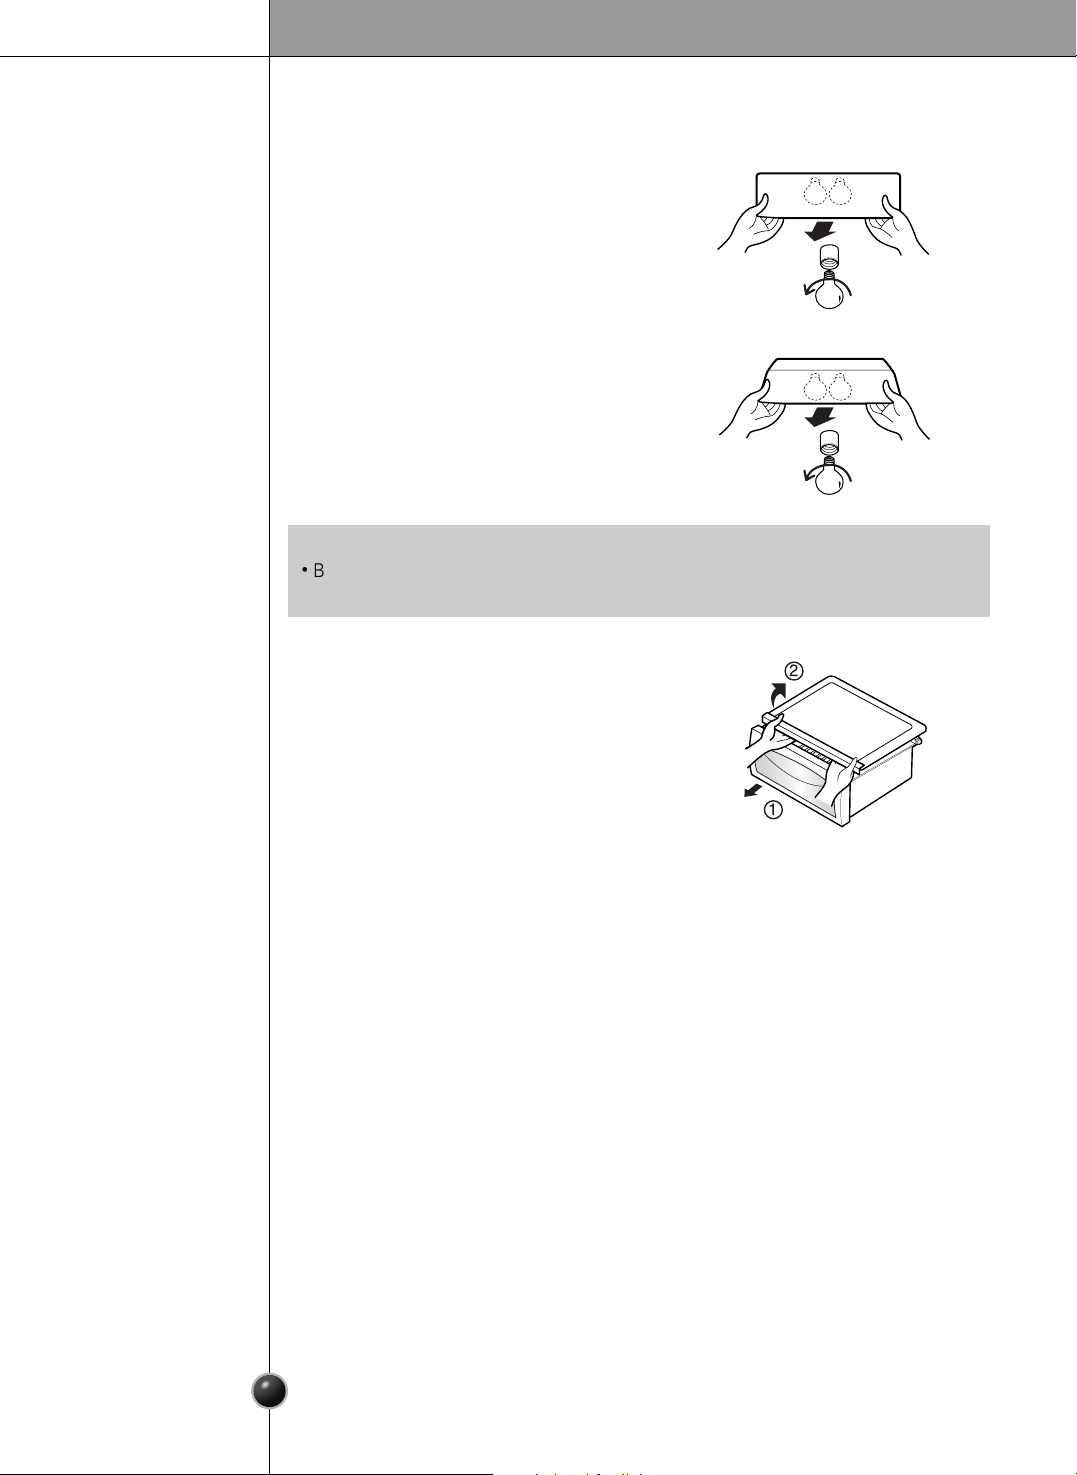
To remove the vegetable compartment
cover, pull out the vegetable compartment
a bit to the front , lift the front part of the
vegetable compartment cover as shown by
, and take it out.
Vegetable
compartment
cover
1
2
•
Be sure to remove the necessary door racks and other parts to allow clearance to
remove the vegetable compartment, snack, drawer, and home bar cover.
NOTE
To remove the lamp cover, pull the lamp
cover forward while pressing the bottom
side of the lamp cover upward. Turn the
bulb counterclockwise.
Use a 40-watt bulb (max.) which
can be
purchased at a service center.
Upper lamp in
refrigerator
compartment
Separate the lamp cover by holding both
lower sides of it and pulling it it forwards.
Turn the bulb counterclockwise.
Use a 40-watt bulb (max.) which
can be
purchased at a service center.
Lower lamp in
refrigerator
compartment
43
Care and Maintenance
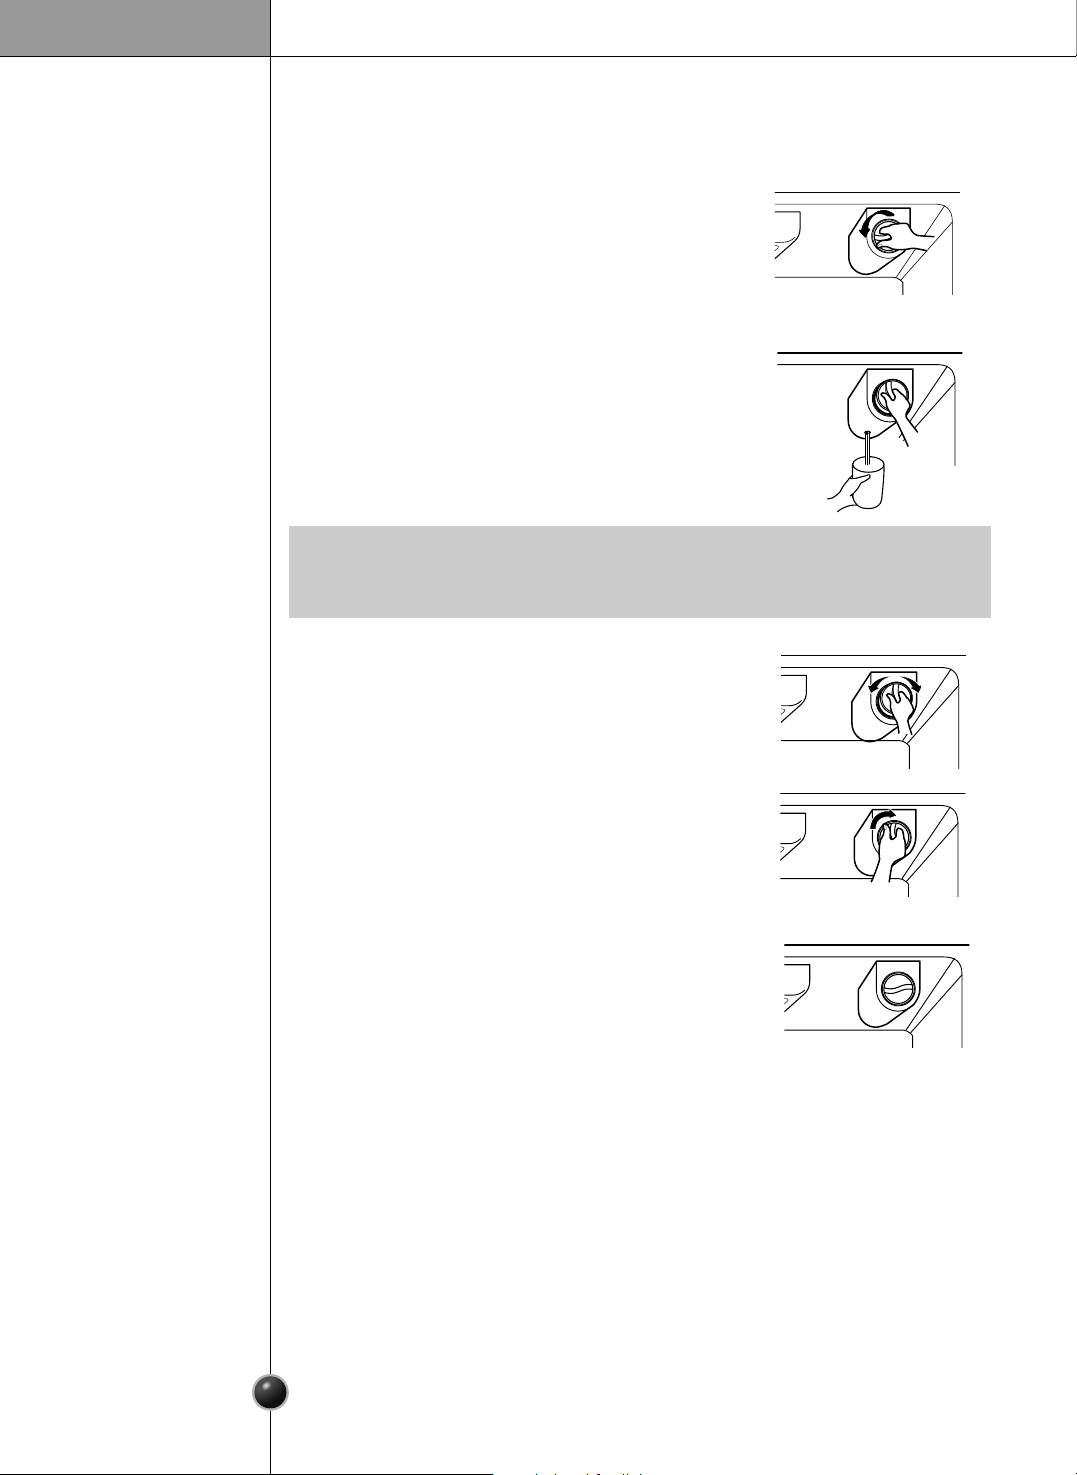
Filter
replacement
•
Replacing filter causes small amount of water (around 1 oz or 25 cc) to flow out.
Please put up a cup under the hole to prevent it.
NOTE
We recommend replacing the filter when the
water filter indicator light turns on or your water
dispenser or ice maker decreases noticeably.
After changing the water filter cartridge, reset the
water filter status display and indicator light by
pressing and holding the BUTTON for 3 seconds.
1) Remove the old cartridge.
Rotate the knob of the cartridge counter clockwise.
When the cartridge is removed, you will feel it click
out of place.
Pull out the cartridge.
3) Flushing the Water System After Replacing Filter.
Dispense water through the water dispenser for 3
minutes to purge the system.
2) Replace with a new cartridge.
Take the new cartridge out of its packaging and remove
protective cover from the o-rings. With cartridge knob in
the vertical position, push the new filter cartridge into
the cover until it stops.
If you can’t turn the filter from side to side, it isn’t fully
inserted. Push it in firmly and twist it into place. You will
hear the snap when it clicks into place. Using its handle,
twist the cartridge clockwise about
1
/
4
turn. You will hear
the snap when it clicks into place.

44
Care and Maintenance
General information
Cleaning
During average length vacations, you will probably find it best to leave the refrigerator
in operation. Place freezable items in freezer for longer life.
When you plan to store the refrigerator, remove all food, disconnect the power cord,
clean the interior thoroughly, and block the doors open to prevent mold and mildew.
Be certain the stored refrigerator does not present a child entrapment danger.
Vacation time
Power failure
If you move
Anti-condensation
pipe
Demo mode setting
Most power failures that are corrected in an hour or two will not affect your
refrigerator temperatures. However, you should minimize the number of door
openings while the power is off.
Unload the refrigerator to relocate it. (This is probably not necessary to pull it out for
cleaning behind it.) Be sure to let the refrigerator warm up to room temperature, and
dry the inside before closing the doors to pack it for moving.
To avoid damaging the height adjusting screws, turn them all the way into the base.
The outside wall of the refrigerator cabinet may sometimes get warm, especially just
after installation. Don’t be alarmed. This is due to the anti-condensation pipe, which
pumps hot refrigerant to prevent sweating on the outer cabinet wall.
After setting the Lock function press the Temperature button and ◀ button simultaneously
for 5 seconds.
When entering the Demo mode, you will see the letters DEMO on the top left side of the
screen with a ding sound.
When canceling the Demo mode, do it as the same procedure as the Lock setup and press
the Temperature and ◀ button simultaneously for 5 seconds.
With a ding sound, you will see the letters DEMO disappear on the top left side of the
screen and the Demo mode will be canceled.
(Demo mode : Demo mode is available for displaying the refrigerator in sales setting or
similar condition. It allows the display, dispenser, light, and fan to operate without running
the compressor. When it set the demonstrations mode, the cooling air doesn’t come out
from refrigerator.)
Regular cleaning is recommended. Wash all compartments with a baking soda
solution or a mild detergent and warm water. Rinse and dry. Be sure to allow the soda
to dissolve completely so it will not act as an abrasive compound.
Please verify that the power cord is not damaged, power plug is not overheated, or
power plug is well inserted into the power consent.
Always remove the power cord from the wall outlet prior to cleaning in the vicinity of
electrical parts (lamps, switches, controls, etc.).
Wipe up excess moisture with a sponge or cloth to prevent water or liquid from
getting into any electrical part and causing an electric shock.
Never use metallic scouring pads, brushes, coarse abrasive cleaners, strong alkaline
solutions, or flammable or toxic cleaning liquids on any surface.
Do not touch frozen surfaces with wet or damp hands, because damp objects will
stick to extremely cold surfaces.
It is important that your refrigerator be kept clean to prevent undesirable odors. Spilled food
should be wiped up immediately, since it may acidify and stain plastic surfaces if allowed to
settle.
aUse a lukewarm solution of mild soap or detergent to clean the durable finish of your
refrigerator. Wipe with a clean damp cloth and then dry.
Exterior
Interior
After cleaning
Warning
Care and Maintenance
Troubleshooting
Before calling for service, review this list. It may save you both time and expense.
This list includes common occurrences that are not the result of defective
workmanship or materials in this appliance.
45
Possible Cause
Refrigerator control is off.
Refrigerator is in defrost cycle.
Plug at wall outlet is disconnected.
Power outage. Check house lights.
Refrigerator is larger than the previous
one you owned.
Room or outside weather is hot.
Refrigerator has recently been
disconnected for a period of time.
Automatic icemaker is operating.
Large amounts of warm or hot food
may have been stored recently.
Doors are opened too frequently or too
long.
Refrigerator or freezer door may be
slightly open.
Refrigerator control is set too cold.
Refrigerator or freezer gasket is dirty,
worn, cracked, or poorly fitted.
Solution
Set refrigerator control.
This is normal for a fully automatic
defrosting refrigerator. The defrost
cycle occurs periodically.
Make sure plug is tightly pushed into
outlet.
Call local electric company.
This is normal. Larger, more efficient
units run longer.
It is normal for the refrigerator to work
longer under these conditions.
It takes a few hours for the refrigerator
refrigerator to come down to room
temperature completely.
Operation of the ice maker causes the
refrigerator to run slightly longer.
Warm food will cause the refrigerator
to run longer until the desired
temperature is reached.
Warm air entering the refrigerator
causes it to run more. Open the door
less often.
Make sure the refrigerator is level.
Keep food and containers from
blocking the door. See problem section
OPENING/CLOSING of doors, page 11.
Adjust the refrigerator control to a
warmer setting until the refrigerator
temperature is satisfactory.
Clean or change gasket. Leaks in the
door seal will cause the refrigerator to
run longer in order to maintain desired
temperatures.
Normal Operations
Refrigerator
Refrigerator
compressor
does not run.
Refrigerator
runs too much
or too long
Occurrence

Care and Maintenance
46
Refrigerator
compressor
does not run.
Occurrence
Temperatures are
too cold
Temperature in the
freezer is too cold
but the Refrigerator
Temperature is
Satisfactory.
Temperature in the
refrigerator
is too warm but
the freezer
temperature is
satisfactory.
Temperatures in
the refrigerator
or freezer are
too warm.
Temperatures
are too warm
Meat stored in
fresh meat
drawer freezes.
Food stored in
drawers freezes.
Possible Cause
Thermostat is keeping the refrigerator
at a constant temperature.
Freezer control is set too cold
Doors are opened too frequently or too
long.
Door is slightly open.
Large amounts of warm or hot food
may have been stored recently.
Refrigerator has recently been
disconnected for a period of time.
Refrigerator control is set too warm.
Refrigerator control is set too warm.
Refrigerator control has some effect on
freezer temperature.
Freezer control is set too warm.
Refrigerator control is set too cold.
Refrigerator control is set too cold.
Meat should be stored at a temperature
just below the freezing point of water (32˚F,
0˚C) for maximum fresh storage time.
Solution
This is normal. The Refrigerator goes on
and off to keep the temperature constant.
Adjust the refrigerator control to a
colder setting.
A refrigerator requires several hours to
cool down completely.
Wait until the refrigerator or freezer
has had a chance to reach its selected
temperature.
Warm air enters the refrigerator/ freezer
whenever the door is opened.
Open the door less often.
Adjust the freezer or refrigerator control
to a colder setting until the freezer or
refrigerator temperature is satisfactory.
Adjust the freezer or refrigerator control
to a colder setting until the freezer or
refrigerator temperature is satisfactory.
It is normal for ice crystals to form due
to the moisture content of meat.
Adjust the refrigerator control to a
warmer setting
Adjust the refrigerator to a warmer setting.
Adjust the freezer control to a warmer
setting until the freezer temperature is
satisfactory.
Close the door completely.
Temperature in the
refrigerator is too
cold and the
freezer
temperature
is satisfactory.
Care and Maintenance
47
Sound and Noise
Occurrence
Louder sound
levels when
Refrigerator is on.
Louder sound
levels when
compressor
comes on.
Moisture collects
on the inside walls
of the refrigerator.
Water/Moisture/Ice
Outside
Refrigerator
Moisture forms
on the outside of
the refrigerator
or between doors.
Vibrating or
rattling noise.
Water/Moisture
/Ice Inside
Refrigerator
Possible Cause
Today’s refrigerators have increased
storage capacity and maintain more
even temperatures.
Refrigerator is touching wall or cabinets.
The weather is hot and humid which
increases the rate of frost buildup
and internal sweating.
Door is slightly open.
Door is opened too often or too long.
Weather is humid.
Door is slightly open,causing cold air
from the inside the refrigerator to meet
warm air from the outside.
Floor is uneven or weak.
Refrigerator rocks on the floor when it is
moved slightly.
Refrigerator operates at higher pressures
during the start of the ON cycle.
Items placed on the top of the refrigerator
are vibrating.
Dishes are vibrating on the shelves in
the refrigerator.
Solution
Close the door completely.
This is normal in humid weather.
When humidity is lower, the moisture
should disappear.
See problem section Opening/Closing of
doors, page 11.
Move refrigerator so that it does not
touch the wall or refrigerator.
This is normal.
It is normal for dishes to vibrate slightly.
Move dishes slightly.
Make sure refrigerator is level and firmly
set on floor.
Be sure floor is level and solid and can
adequately support refrigerator.
Remove items.
It is normal for sound levels to be higher.
This is normal. The sound will level off as
the refrigerator continues to run.
Open the door less often.
Moisture forms
on the dispenser
or refreshment
center
Moisture may be formed in high
temperature and high humidity since
heater turns off if not opening the
doors for a long time.
Wipe the moisture and open the doors
again.
Care and Maintenance
48
Odors in Refrigerator
Occurrence
Door(s) will not
close.
Door(s) will not
close.
Drawers are
difficult to move.
Dispenser
Dispenser will not
dispense ice
Opening/Closing of
Doors/Drawers
Possible Cause
Food is touching shelf on top of the
drawer
Track that drawer slides on is dirty.
Ice storage bin is empty.
Freezer temperature is set too warm.
Household water line valve is not open.
Refrigerator or freezer door is not
closed.
Refrigerator is not level. It rocks on the
floor when it is moved slightly.
Floor is uneven or weak.
Refrigerator rocks on the floor when it
is moved slightly.
Refrigerator is touching wall or cabinets.
Interior needs to be cleaned.
Food with strong odor is in the refrigerator.
Some containers and wrapping materials
produce odors.
Food package is keeping door open.
Door was closed too hard, causing other
door to open slightly.
Solution
Be sure both doors are closed.
Open household water line valve and
allow sufficient time for ice to be made.
When ice is made, dispenser should
operate.
Turn the freezer control to a higher
setting so that ice cubes will be made.
When the first supply of ice is made,
the dispenser should operate.
Clean drawer and track.
Be sure floor is level and can adequately
support refrigerator.
Contact carpenter to correct sagging or
sloping floor.
Move refrigerator.
Keep less food in drawer.
Adjust the height adjusting screw.
Use a different container or brand of
wrapping
materials
.
Move packages that keep door from
closing.
Close both doors gently.
Cover food completely.
Clean interior with sponge, warm water,
and baking soda. Be sure the soda is
completely dissolved so it will not act as
an abrasive compound.
When the first supply of ice is dropped
into the bin, the dispenser should operate.
Care and Maintenance
CUSTOMER ASSISTANCE NUMBERS:
To Prove Warranty Coverage
Retain your sales receipt to prove date of purchase.
A copy of your sales receipt must be submitted at the time warranty service is provided.
To Obtain Product, Customer, or Service Assistance
Call Toll-free for Customer Service
Tel : 1-800-243-0000
To Obtain Nearest Authorized Service Center
Call 1-800-243-0000, push option #1, 24 hours a day, 7 days per week.
Please have your product type (Refrigerator), model number, serial number, and postcode ready.
http://www.lgservice.com
49
Dispenser will
not
dispense
ice.
Ice dispenser
is jammed.
Occurrence
Water has an
odd taste
and/or odor.
Dispenser will
not dispense
water.
Possible Cause
Water has been in the tank for too long.
Unit not properly connected to cold
water line.
This sound is normally made when automatically made ice is dropped into
ice storage bin. Volume may vary according to refrigerator’s location.
This sound is normally made when ice maker is supplied with water after
dropping the automatically made ice.
Please thoroughly read Automatic Icemaker and Dispenser in this manual
on pages 15.
Ice cubes are frozen together.
Ice has melted and frozen around auger
due to infrequent use, temperature
fluctuations, and/or power outrages.
Ice cubes are jammed between the ice
maker arm and back of the bin.
Ice cubes that have been purchased or
made in some other way have been
used in the dispenser.
Household water line valve is not open.
Refrigerator or freezer door is not closed.
Solution
Be sure both doors are closed.
Draw and discard 7 glasses of water
to freshen the supply. Draw and discard
an additional 7 glasses to
completely rinse out tank.
Connect unit to cold water line which
supplies water to kitchen faucet.
Open household water line valve.
Use the dispenser often so that cubes do
not freeze together.
Only the ice cubes made by the ice
maker should be used with the
dispenser.
Remove the ice cubes that are jamming
the dispenser.
Remove ice storage bin, and thaw and the
contents. Clean bin, wipe dry, and replace
in proper position. When new ice is made,
dispenser should operate.
Sound of ice
dropping
Sound of water
supply
Reception of weather forecast information received and displayed on the screen is
subject to vary depending on your region and location of refrigerator.
Check your zip code in this manual pages 151 or
www.ambientdevices.com/cat/device/coverage.html
Weather Forecast
Function is not
operate
Other
LG ELECTRONICS, INC.
LG REFRIGERATOR LIMITED WARRANTY - USA
Your LG Refrigerator will be will repaired or replaced, at LG’s option, if it proves to be defective in material or workmanship
under normal use, during the warranty period (Warranty Period) set forth below, effective from the date ("Date of Purchase")
of original consumer purchase of the product. This warranty is good only to the original purchaser of the product and effective
only when used in the United States, including Alaska, Hawaii, and U.S. Territories.
THIS WARRANTY IS IN LIEU OF ANY OTHER WARRANTY, EXPRESS OR IMPLIED, INCLUDING WITHOUT
LIMITATION, ANY WARRANTY OF MERCHANTABILITY OR FITNESS FOR A PARTICULAR PURPOSE. TO
THE EXTENT ANY IMPLIED WARRANTY IS REQUIRED BY LAW, IT IS LIMITED IN DURATION TO THE
EXPRESS WARRANTY PERIOD ABOVE. NEITHER THE MANUFACTURER NOR ITS U.S. DISTRIBUTOR
SHALL BE LIABLE FOR ANY INCIDENTAL, CONSEQUENTIAL, INDIRECT, SPECIAL, OR PUNITIVE
DAMAGES OF ANY NATURE, INCLUDING WITHOUT LIMITATION, LOST REVENUES OR PROFITS, OR ANY
OTHER DAMAGE WHETHER BASED IN CONTRACT, TORT, OR OTHERWISE. Some states do not allow the
exclusion or limitation of incidental or consequential damages or limitations on how long an implied warranty lasts, so
the above exclusion or limitation may not apply to you. This warranty gives you specific legal rights and you may also
have other rights that vary from state to state.
Reception of weather forecast information received and displayed on the screen is subject to vary depending on
your region and location of refrigerator. Thereby LG does not guarantee and will not be held responsible for
accuracy of the weather information. Weather forecast information is only available in U.S.A
THIS LIMITED WARRANTY DOES NOT APPLY TO:
• Service trips to your home to deliver, pick up, and/or install the product, instruct, or replace house fuses or
correct wiring, or correction of unauthorized repairs.
• Damages or operating problems that result from misuse, abuse, operation outside environmental
specifications or contrary to the requirements of precautions in the Operating Guide, accident, vermin, fire,
flood, improper installation, acts of God, unauthorized modification or alteration, incorrect electrical current or
voltage, or commercial use, or use for other than intended purpose.
• Repairs when your LG refrigerator is used in other than normal, single-family household use.
The cost of repair or replacement under these excluded circumstances shall be borne by the consumer.
CUSTOMER INTERACTIVE CENTER NUMBERS
TO CONTACT LG ELECTRONICS BY MAIL:
LG Customer Interactive Center
P. O. Box 240007
201 James Record Road
Huntsville, Alabama 35824
ATTN: CIC
WARRANTY PERIOD:
REFRIGERATOR/FREEZER
LABOR: One Year from the Date of Purchase.
PARTS: One Year from the Date of Purchase.
SEALED SYSTEM (Compressor, Condenser, and
Evaporator)
LABOR: One Year from the Date of Purchase.
PARTS: Seven years from the Date of Purchase.
Replacement Units and Repair Parts are warranted for the
remaining portion of the original unit’s warranty period.
HOW SERVICE IS HANDLED:
In-Home Service (Except Model GR051):
Please retain dealer’s dated bill of sale or delivery
ticket as evidence of the Date of Purchase for proof of
warranty, and submit a copy of the bill of sale to the
service person at the time warranty service is
provided.
Please call 1-800-243-0000 and choose the
appropriate option to locate your nearest LG
Authorized Service Center. (Phones are answered
24 hours a day, 365 days per year.)
Or visit our website at: http://www.lgservice.com
To obtain Customer Assistance, Product
Information, or Dealer or Authorized Service Center
location:
Call 1-800-243-0000
(24 hours a day, 365 days per
year) and select the appropriate option from the menu.
Or visit our website at: http://www.lgservice.com
P/NO : 3828JD8794F Printed in Korea
LG Twin Tower, 20, Yoido-Dong,
Youngdungpo-Gu, Seoul, 150-721, Korea.
http://www.lge.com
REFRIGERATOR
User’s Guide
Please read this guide thoroughly
before operating and keep it handy for
reference at all times.
REFRIGERATEUR (TV)
Manuel d’utilisation
Prière de lire attentivement le présent manuel
avant d’utiliser le réfrigérateur.
Conserver
à port
ée de main pour pouvoir le
consulter
à tout moment.
FRIGORÍFICO
Guía de usuario
Lea detenidamente estas instrucciones
antes utilizar el frigorífico y guárdelas
como referencia para el futuro.
FRIGORÍFICO
(TV)
Manual do Utilizador
Leia inteiramente este manual antes de colocá-lo
em funcionamento e deixe-o ao alcance
para posteriores consultas a qualquer momento.

2
Contents
Contents 2 - 3
Warning 4 - 5
Safety Instructions 6 - 7
Location and Function of Controls 8 - 9
Controls
Remote Control Button
Installing Batteries
Connection to External Equipment 10 - 12
Antenna/Cable Connection
Cable or VHF/UHF (or VHF only)
Cable and VHF/UHF (or VHF only)
Cable TV Connections
Connecting a DVD
Basic operation 13
On and Off
Channel selection
Volume adjustment
On screen language selection (option)
On Screen Menus 14
Menu selection
Setting up TV stations 15 - 19
Memorizing the Channels with Auto
Add/Delete Channels with Manual
Fine Tuning Adjustment
Favorite Channels Setup
Assigning a station name
Picture Menu 20 - 22
CSM (Color Status Memory)
PSM (Picture Status Memory)
Manual Picture Control
Picture format

3
Contents
ENGLISH
Sound Menu 23 - 26
SSM (Sound Status Memory)
Balance
AVL (Auto Volume Leveler)
Audio Language (in digital mode only)
Stereo/SAP Broadcasts Setup
Time Menu 27 - 30
Clock
On/Off Time
Auto sleep
Time Zone
Daylight saving
Sleep timer
Caption Menu 32
Caption Menu Setup
Lock Menu (option) 33 - 39
Lock Menu Options
Lock Menu Setup
Optional features 40
Information
Troubleshooting Check list 43
Radio Menu 41 - 42
Basic Operation
Radio Station Manual Search
Radio Station Auto Search
Favorite Channel Memory
Stereo Broadcast Setup
Setup Menu 31
Child Lock
4
Warning
This reminder is provided to call the CATV system installer’s attention to Article 820-40 of the National
Electric Code (U.S.A.). The code provides guidelines for proper grounding and, in particular, specifies
that the cable ground shall be connected to the grounding system of the building, as close to the point
of the cable entry as practical.
This equipment has been tested and found to comply with the limits for a Class B digital device,
pursuant to Part 15 of the FCC Rules. These limits are designed to provide protection against harmful
interference in a residential installation. This equipment generates, uses and can radiate radio
frequency energy and, if not installed and used in accordance with the instructions, may cause harmful
interference to radio communications. However, there is no guarantee that interference will not occur
in a particular installation. If this equipment does cause harmful interference to radio or television
reception, which can be determined by turning the equipment off and on, the user is encouraged to try
to correct the interference by one or more of the following measures:
- Reorient or relocate the receiving antenna.
- Increase the separation between the equipment and receiver.
- Connect the equipment into an outlet on a circuit different from that to which the receiver is
connected.
- Consult the dealer or an experienced radio/TV technician for help.
Any changes or modifications not expressly approved by the party responsible for compliance could
void the user’s authority to operate the equipment.
TO PREVENT FIRE OR SHOCK HAZARDS, DO NOT EXPOSE THIS PRODUCT TO RAIN OR
MOISTURE.
WARNING:
TO REDUCE THE RISK OF ELECTRIC SHOCK DO NOT REMOVE COVER (OR BACK). NO USER
SERVICEABLE PARTS INSIDE. REFER TO QUALIFIED SERVICE PERSONNEL.
The lightning flash with arrowhead symbol, within an equilateral triangle, is intended to alert the user
to the presence of uninsulated “dangerous voltage” within the product’s enclosure that may be of
sufficient magnitude to constitute a risk of electric shock to persons.
The exclamation point within an equilateral triangle is intended to alert the user to the presence of
important operating and maintenance (servicing) instructions in the literature accompanying the
appliance.
WARNING:
NOTE TO CABLE/TV INSTALLER:
REGULATORY INFORMATION
RISK OF ELECTRIC
SHOCK DO NOT OPEN
CAUTION

5
Warning
ENGLISH
- If the TV feels cold to the touch, there may be a small “flicker” when it is turned on. This is
normal, there is nothing wrong with TV.
- Some minute dot defects may be visible on the screen, appearing as tiny red, green or blue spots.
However, they have no adverse effect on the monitor's performance.
- Avoid touching the LCD screen or holding your finger(s) against it for long periods of time. Doing so
may produce some temporary distortion effects on the screen.
Note
This LCD display contains hundreds of thousands of individual pixels.
LCD displays typically contain a small number of pixels that do not function normally. Your display has
been inspected and is in compliance with manufacturer’s specifications, indicating that any pixel
defects do not affect the operation or use of your display.
On a display of this size, 10 or less defective pixels are considered to be normal and are not grounds
for exchange or refund.
About defective pixels
The LCD backlight lamp of this product contains mercury, Dispose according to Local, State or Federal
Laws.
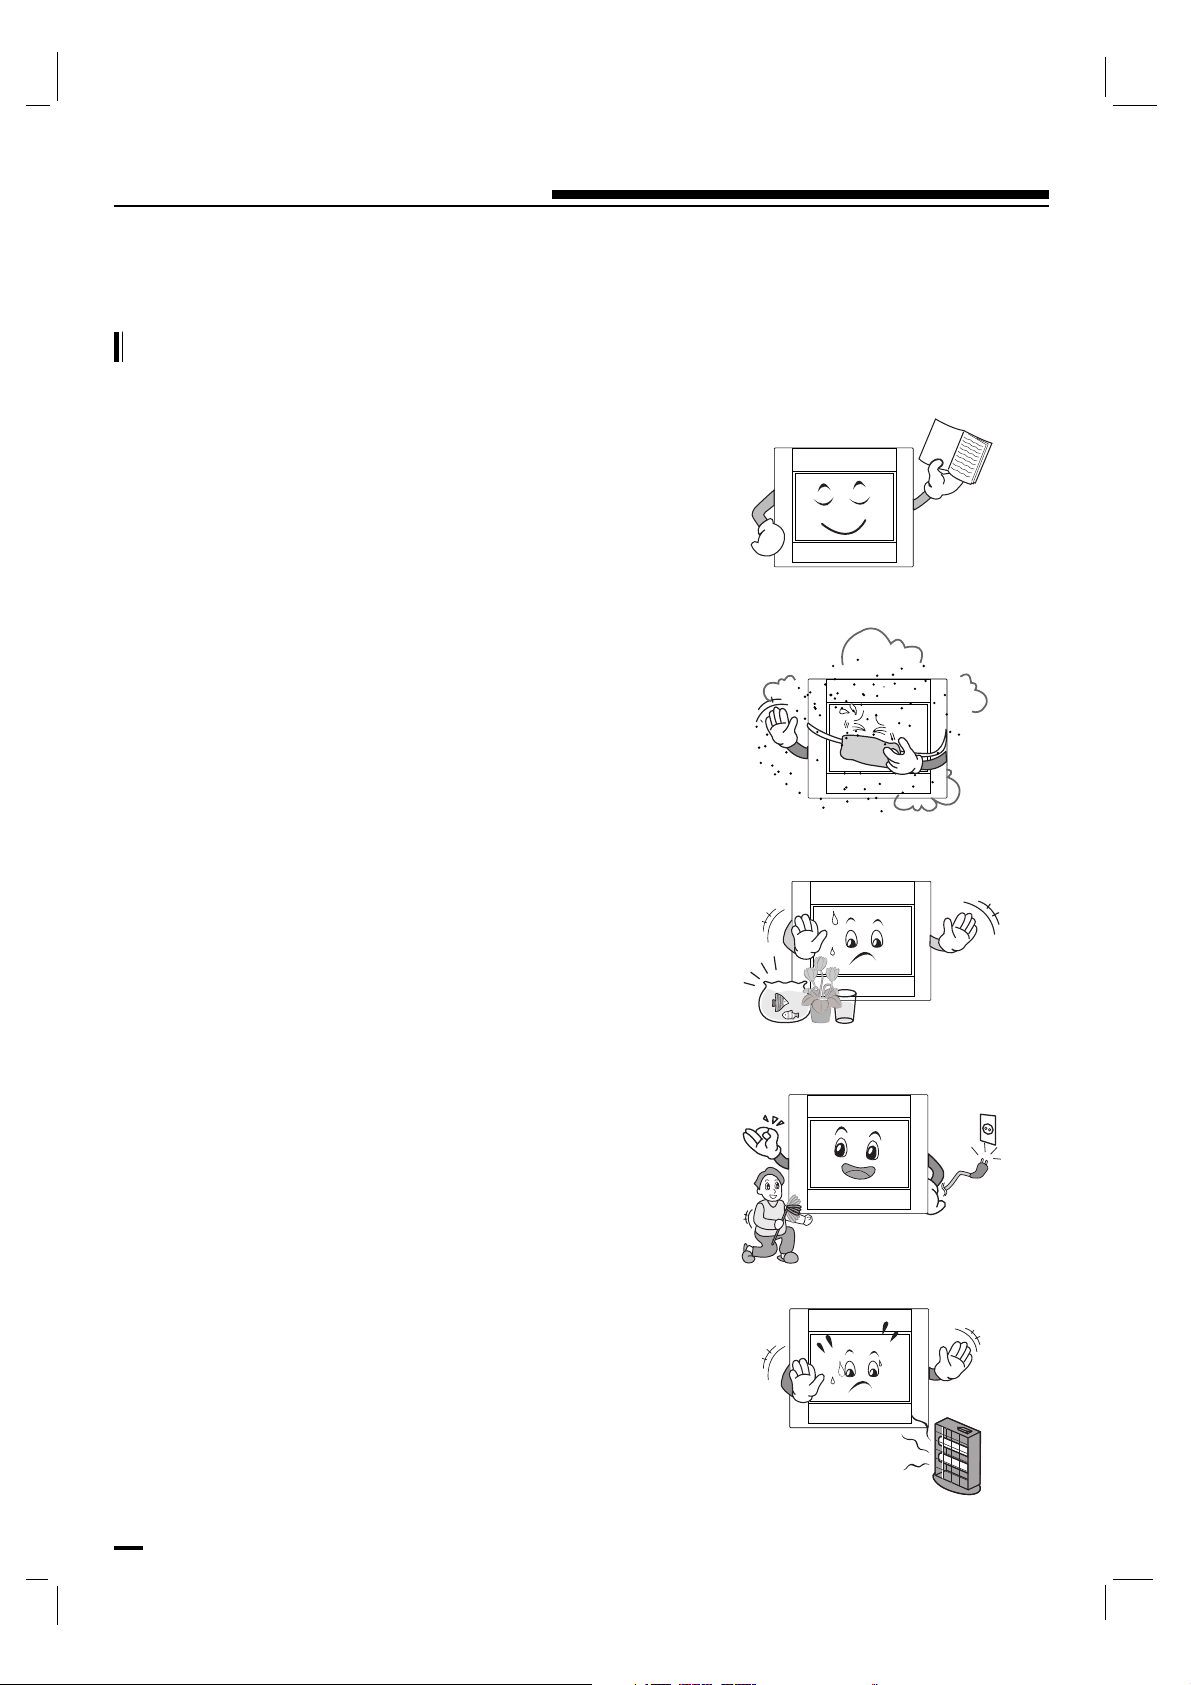
6
Safety Instructions
IMPORTANT SAFETY INSTRUCTIONS
1. Read these instructions.
2. Keep these instructions.
3. Heed all warnings.
4. Follow all instructions.
5. Do not use this apparatus near water.
6. Clean only with dry cloth.
7. Do not block any ventilation openings. Install in accordance
with the manufacturer's instructions.
8. Do not install near any heat sources such as radiators, heat
registers, stoves or other apparatus (including amplifiers)
that produce heat.
9. Do not defeat the safety purpose of the polarized or
grounding-type plug.
A polarized plug has two blades with one wider than the
other.
A grounding type plug has two blades and a third grounding
prong.
The wide blade or the third prong are provided for your
safety.
If the provided plug does not fit into your outlet, consult an
electrician for replacement of the obsolete outlet.
10. Protect the power cord from being walked on or pinched
particularly at plugs, convenience receptacles, and the point
where they exit from the apparatus.
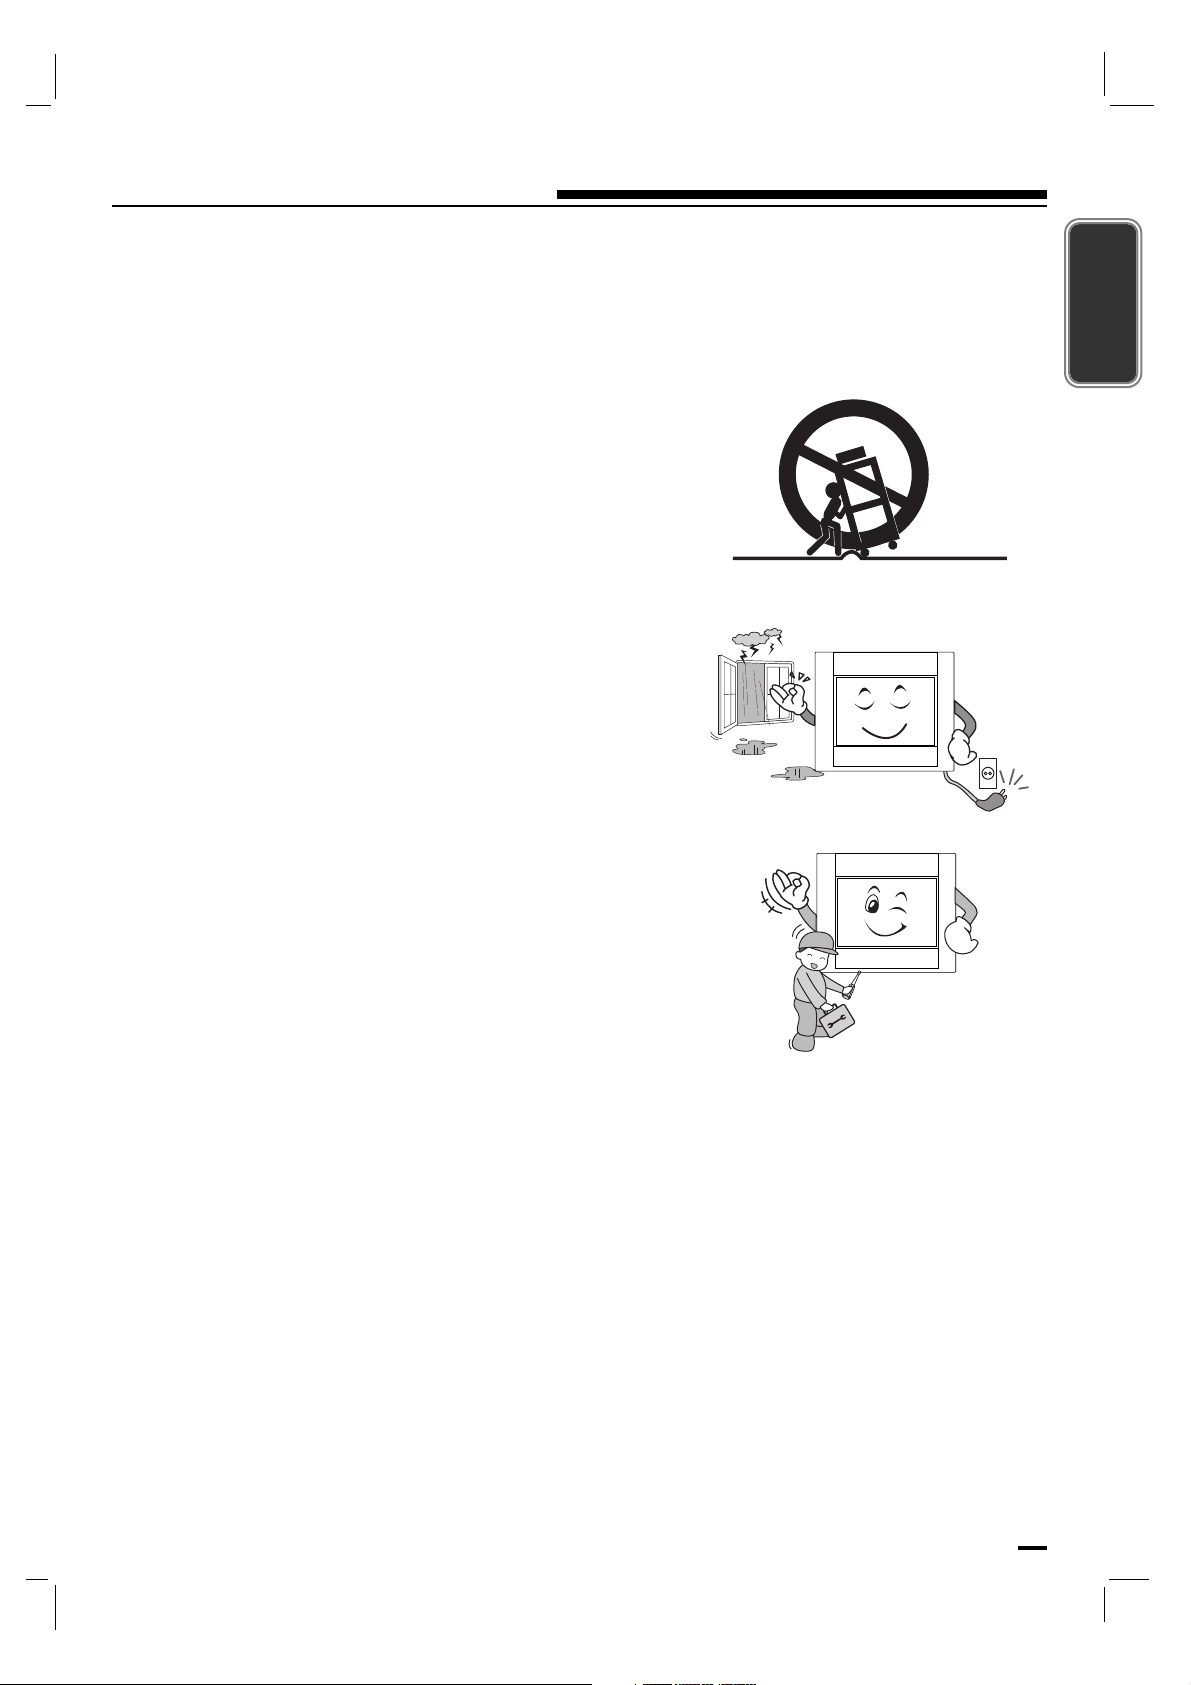
7
Safety Instructions
ENGLISH
11. Only use attachments/accessories specified by the
manufacturer.
12. Use only with the cart, stand, tripod, bracket or table
specified by the manufacturer or sold with the apparatus.
When a cart is used, use caution when moving the
cart/apparatus combination to avoid injury from tip-over.
13. Unplug this apparatus during lightning storms or when
unused for long periods of time.
14. Refer all servicing to qualified service personnel. Servicing
is required when the apparatus has been damaged in any
way, such as power-supply cord or plug is damaged, liquid
has been spilled or objects have fallen into the apparatus,
the apparatus has been exposed to rain or moisture, does
not operate normally or has been dropped.
- The apparatus shall not be exposed to dripping or splashing
and that no objects filled with liquids, such as vases, shall be
placed on the apparatus.
- Minimum distances(e.g. 10cm) around the apparatus for
sufficient ventilation
“WARNING - To reduce the risk of fire or electric shock, do
not expose the apparatus to rain or moisture.”
PORTABLE CART WARNING
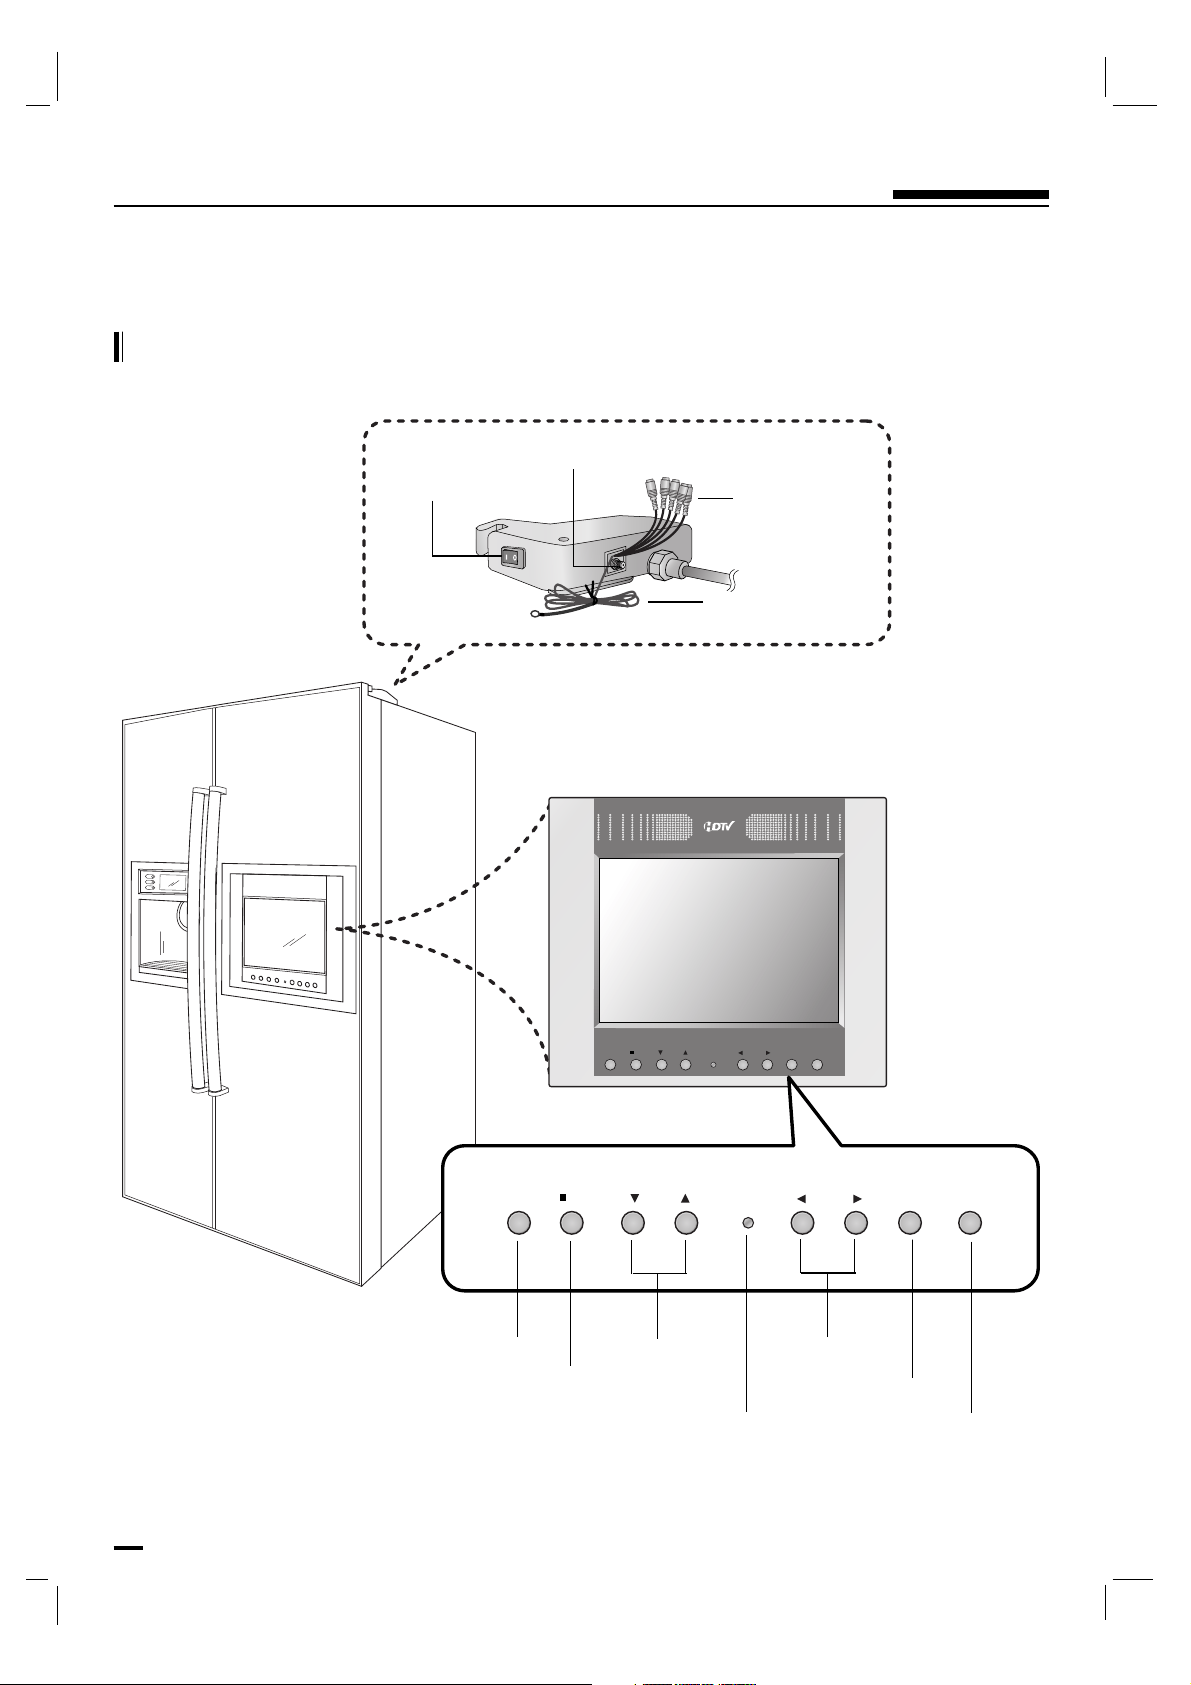
MENU VOL
INPUT
POWER
CH/PROK
MENU VOL
INPUT
POWER
CH/PROK
Controls
8
Location and Function of Controls
MENU
OK
INPUT
Remote Control Sensor
POWER
Power Button
Component
Jack
Radio Antenna
Antenna Jack
CH/PR
VOLUME
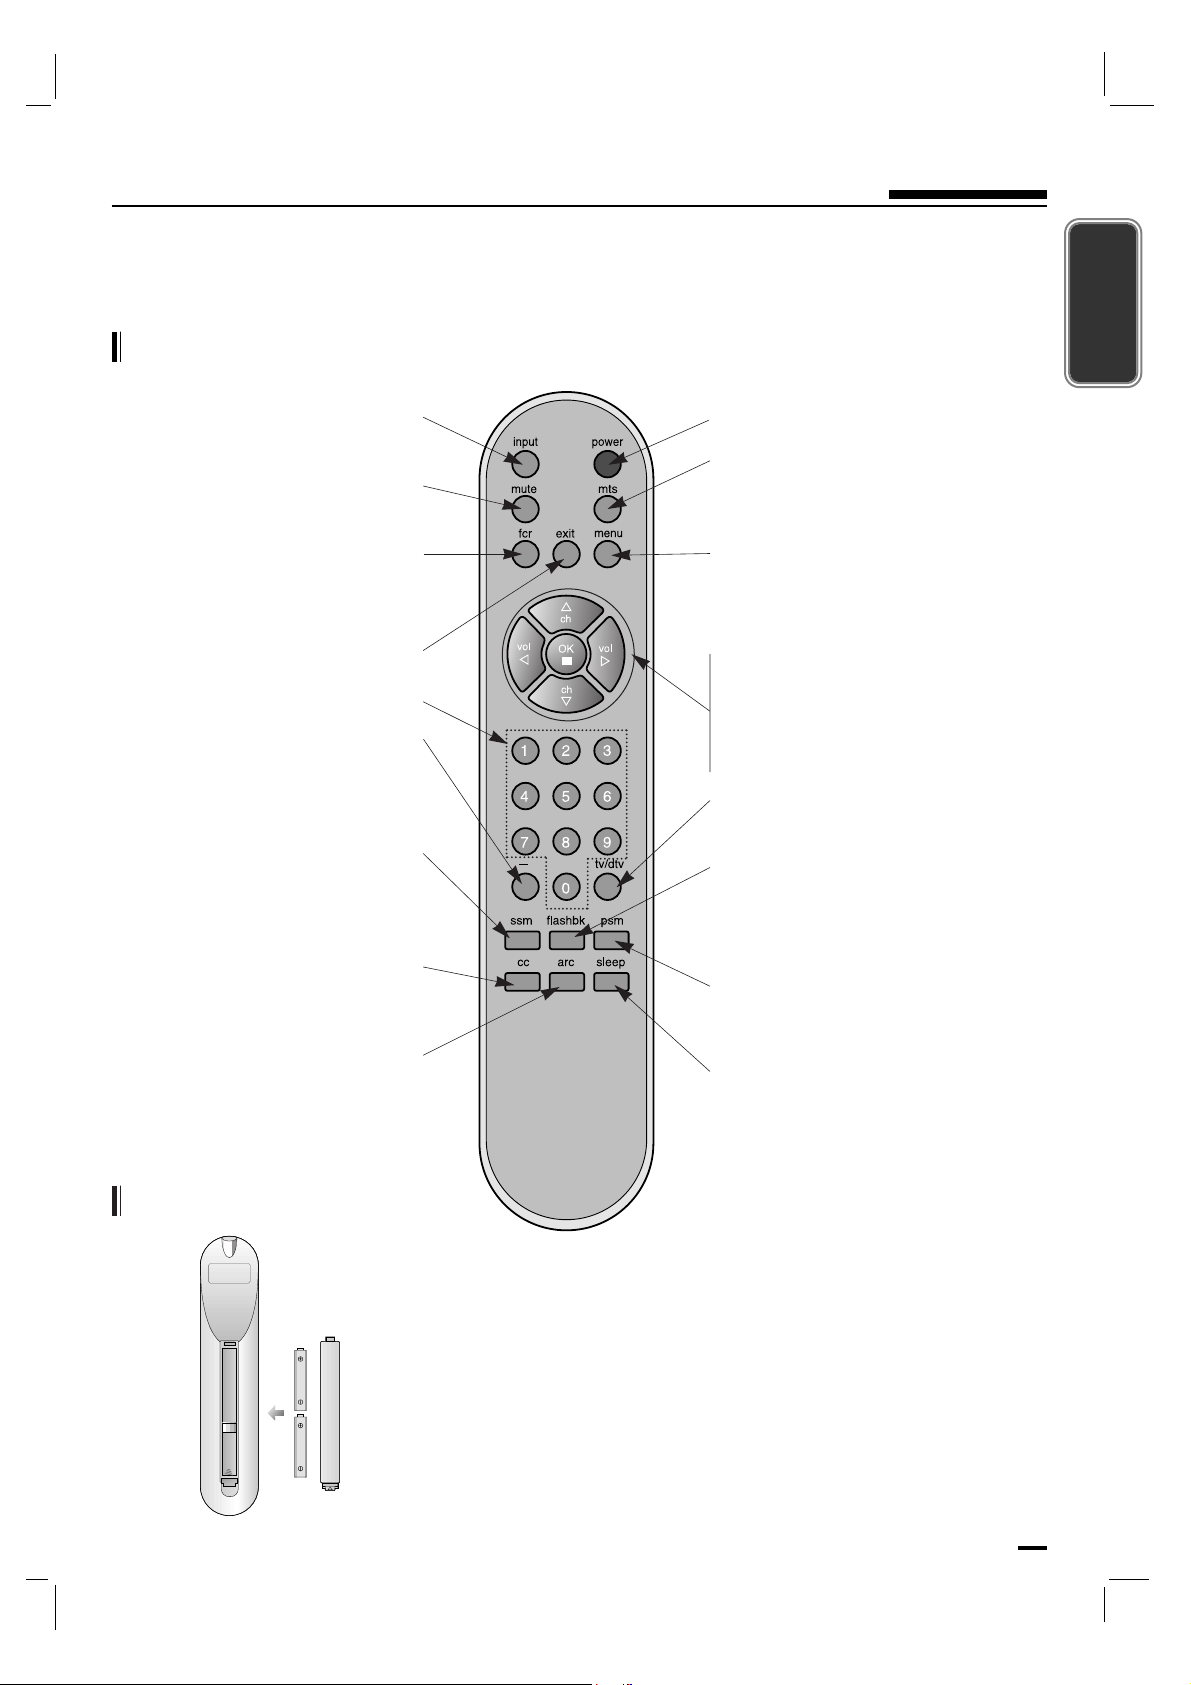
9
Location and Function of Controls
Remote Control Button
ENGLISH
MUTE
Switches the sound on or off.
OK
CHANNEL
D
/
E
VOLUME F
/
G
POWER
MTS
Selects MTS sound.
Mono, Stereo or SAP.
EXIT
MENU
Activates the on-screen menu,
toggles through the menus and
toggles through preset radio stations.
PSM (Picture Status Memory)
Adjusts the picture quality for the
ambient lighting.
TV/DTV
Select TV, DTV mode.
SLEEP
Lets you select the amount of time
before your TV turns itself off
automatically.
FLASHBK
Press the FLASHBK button to return
to the last channel you were
watching.
SSM (Sound Status Memory)
Adjusts the equalizer to a preset
sound appropriate for the
program’s character.
CC
Select a closed caption.
OFF or ON.
ARC
Select your desired picture
format.
INPUT
Selects TV, Component or Radio.
FCR
Scroll through the Favorite.
Channel Recall list.
NUMBER
- (Dash)
Used to enter program number
for multiple program channels
such as 2-1, 2-2 etc.
• Open the battery compartment cover on the back side and insert the
batteries with correct polarity.
• Install two 1.5V batteries of AAA type. Don’t mix used batteries with new
batteries.
Installing Batteries
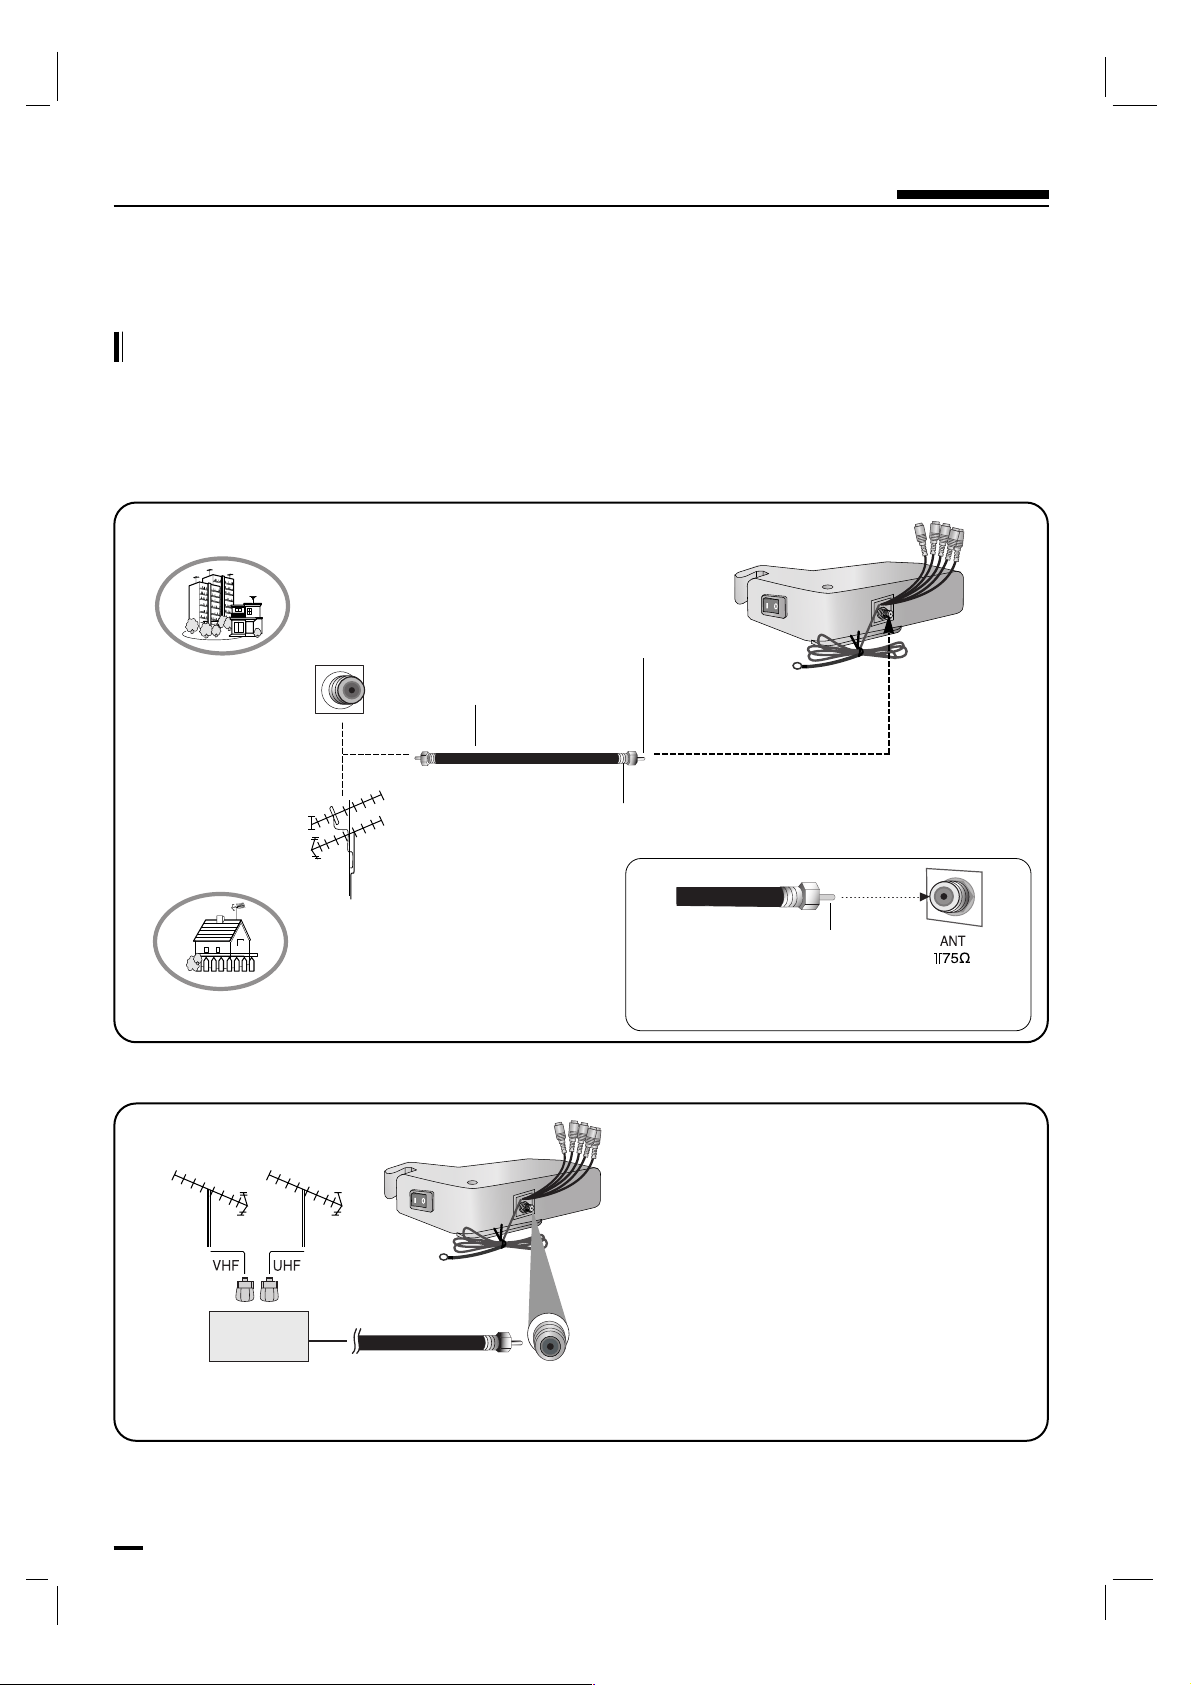
10
Antenna/Cable Connection
Connection to External Equipment
- For optimum picture quality, adjust antenna direction if needed.
- Turn the end of the cable to the clockwise direction to be connected to the connector located at the
top of the refrigerator.
Incorrect connection may cause a bad quality.
• In a poor signal area to improve picture quality, purchase and install a signal amplifier.
• If the antenna is not installed properly, contact your dealer for assistance.
Apartment Buildings
Single Family Home
Outdoor Antenna
Wall Antenna Socket
VHF Antenna
UHF Antenna
75Ω Round Cable
Bronze Wire
Turn clockwise to tighten.
Bronze Wire
Be careful not to bend the bronze wire
when connecting the antenna.
Signal
Amplifier
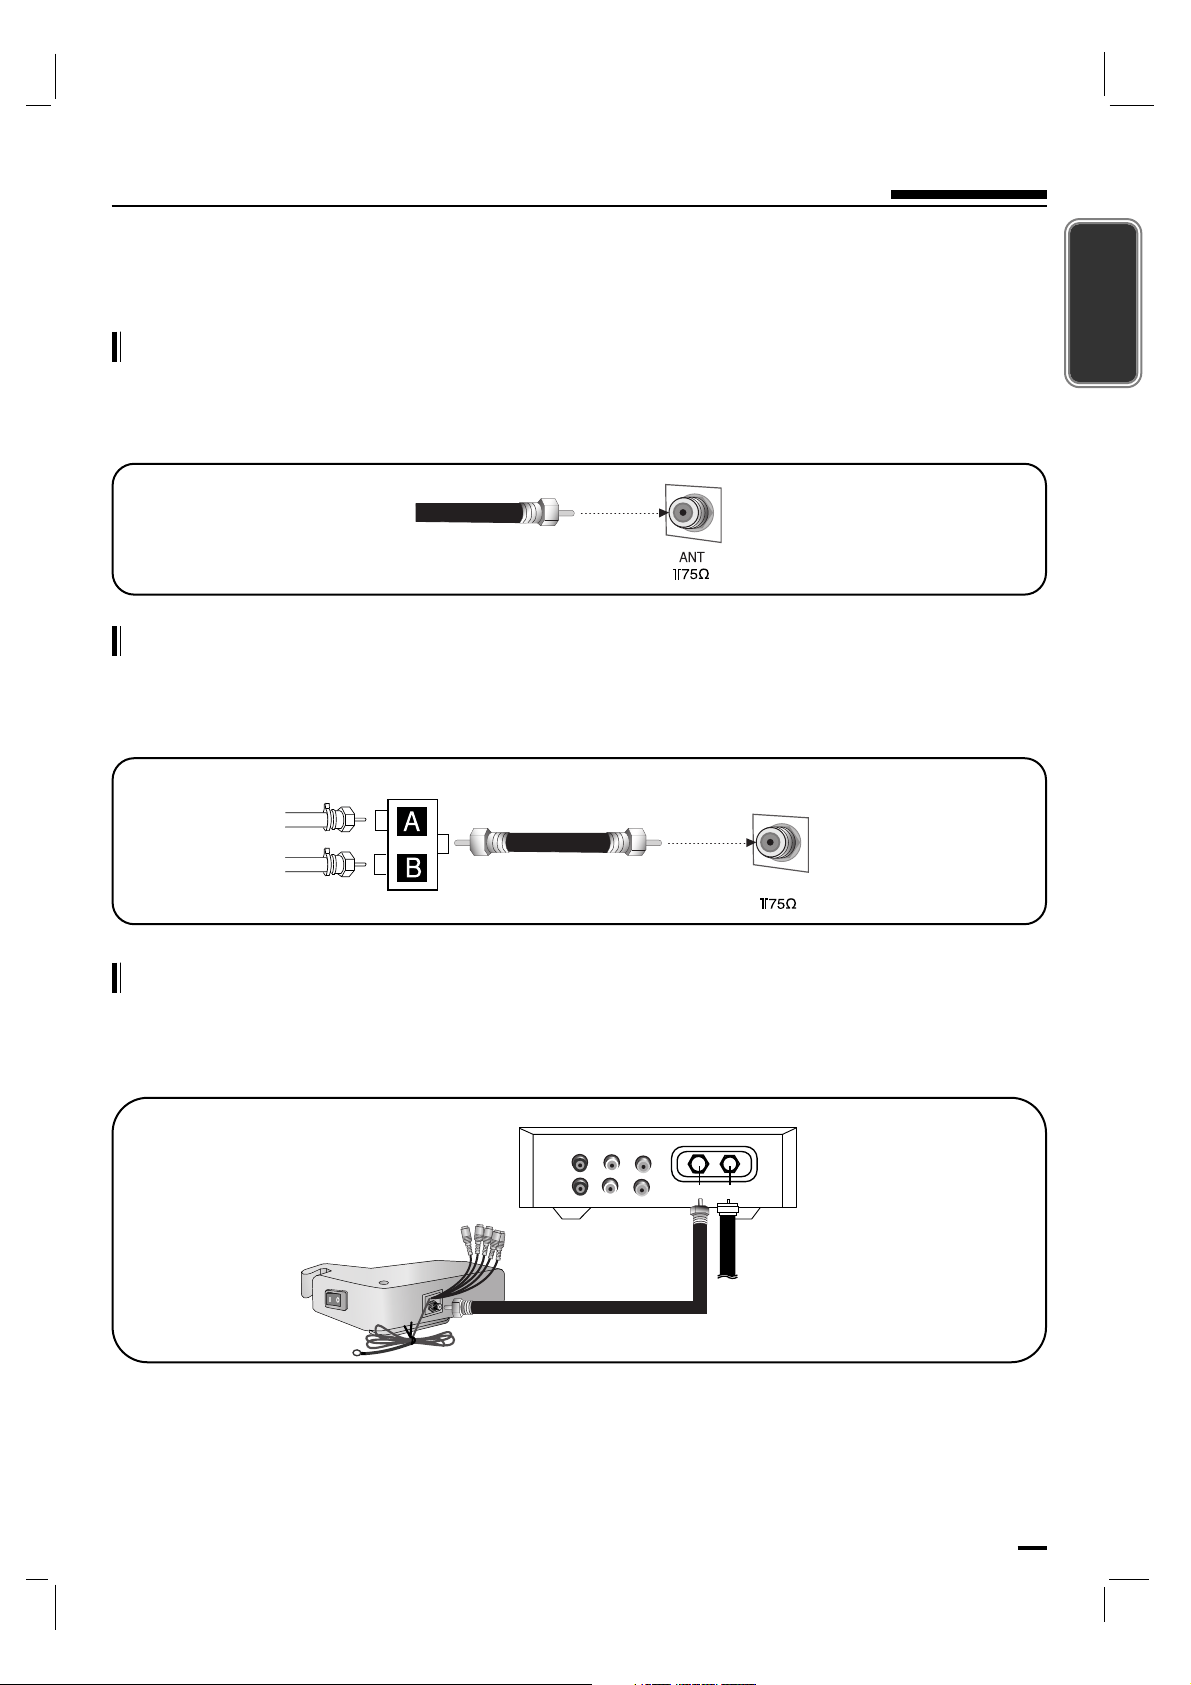
Cable or VHF/UHF (or VHF only)
Connecting a cable system or an external VHF/UHF antenna to the VHF/UHF input will allow you to
enjoy high definition and standard definition digital programming (if available in your area) along with
the standard definition analog programming.
11
ENGLISH
Connection to External Equipment
Cable
Antenna
A/B RF Switch
ANT
Cable and VHF/UHF (or VHF only)
If you want to watch both cable and antenna (over-the-air) programming, you will need to use an
optional A-B RF Switch (not supplied) to switch between the cable and over-the air antenna
programming, as shown.
Rear of TV
Cable TV Connections
Connection
1. Set cable box switch to 3 or 4 and then tune TV to the same channel number.
2. Select VIDEO source input to use Audio/Video In connections.
3. Select channels with the cable box.
- After subscribing to a local cable TV service, you can watch cable TV programming.
- Depending upon the cable provider, a cable box may be necessary.
- For further cable TV information, contact a local cable service provider.
75-ohm coaxial
cable (supplied)
Rear of TV
(R) AUDIO (L) VIDEO
RF Cable
TV
VCR
Cable Box Connection Panel
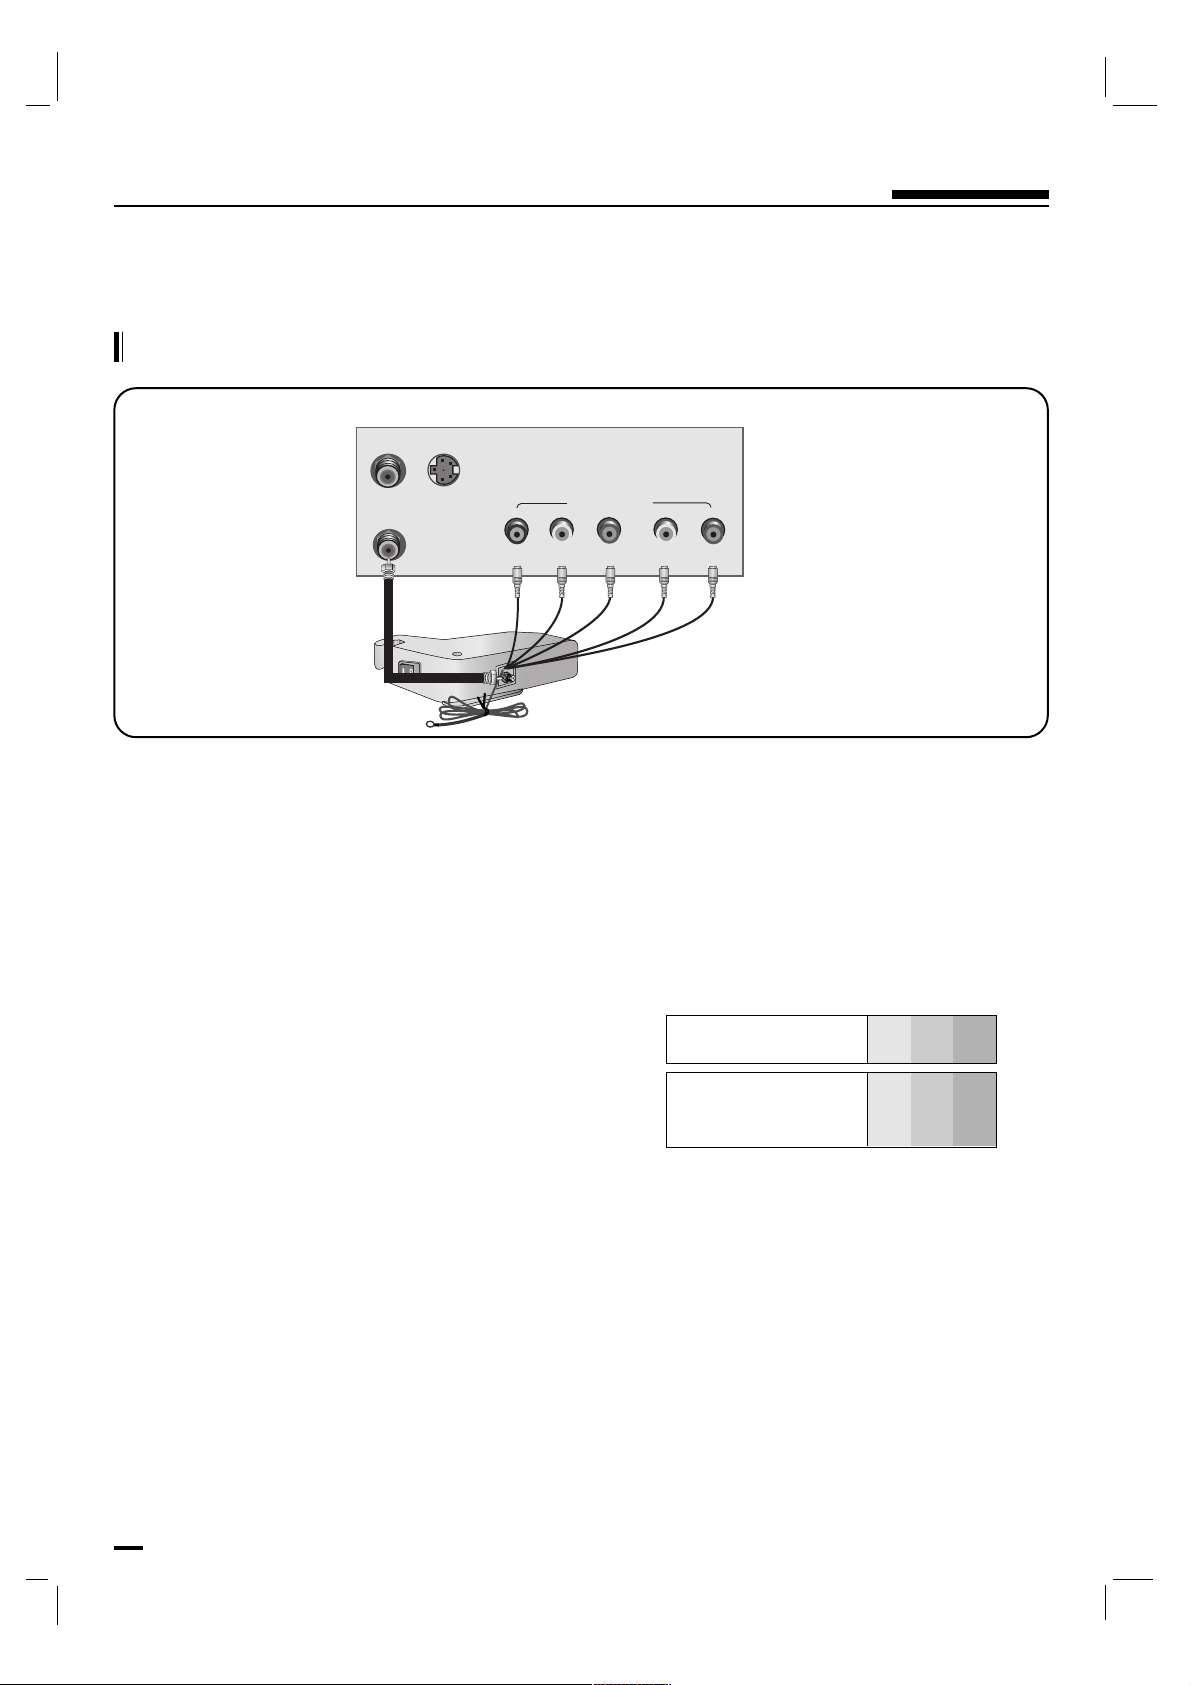
12
Connection to External Equipment
Component ports
of the TV
Y
PB PR
Video output ports
of DVD player
Y
Y
Y
Y
Pb
B-Y
Cb
P
B
Pr
R-Y
Cr
PR
• Component Input ports
To get better picture quality, connect a DVD player to the
component input ports as shown below.
Connecting a DVD
Connection
1. Connect the DVD video outputs to the COMPONENT (Y, P
B, PR) jacks and connect the DVD audio
outputs to the AUDIO jacks.
2. Turn on the DVD player, insert a DVD.
3. Press the INPUT button to select
Component.
4. Press the PLAY button on the DVD.
The DVD playback picture appears on the screen.
5. Refer to the DVD player's manual for operating instructions.
S-VIDEO
ANT IN
ANT OUT
YPB
PR
COMPONENT IN
(L)
(R)
AUDIO
DVD Connection Panel
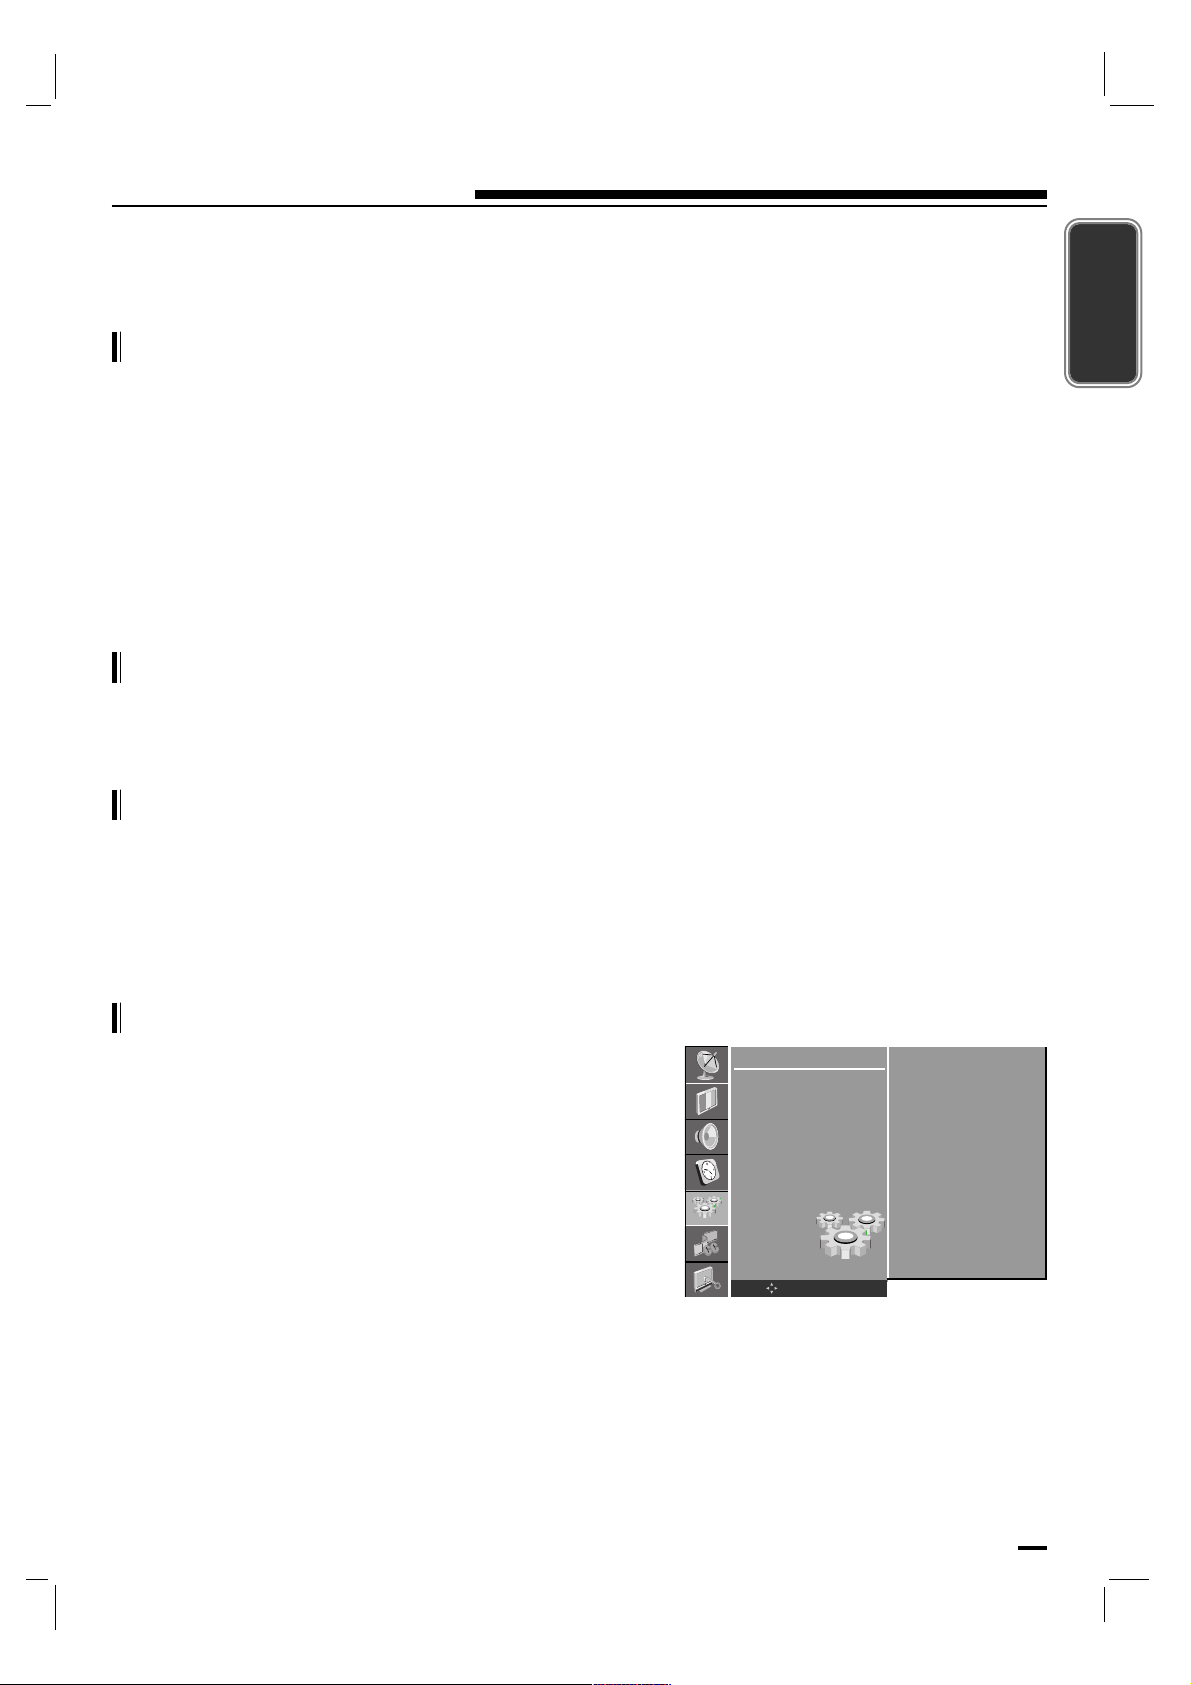
13
Basic operation
ENGLISH
On and Off
1. First, connect antenna cable and power cord correctly.
• In standby mode, press the power, ch D / E or number buttons on the remote control or
CH D / E or POWER on the TV front panel to turn it on.
2. Select the viewing source by pressing INPUT to cycle through the selections.
3. After viewing, press the power button on the remote control or on the TV to put the TV in standby
mode.
Channel selection
You can select a channel number with the D / E or NUMBER buttons.
Volume adjustment
Press the F / G button to adjust the volume.
If you want to switch the sound off, press the MUTE button.
You can cancel it by pressing the MUTE, F / G, SSM or I/II button.
On screen language selection (option)
Press the MENU button and then use D / E button to select
the SETUP menu.
Press the G button and then use D / E button to select
Language.
Press the G button and then use D / E button to select your
desired language.
All the on screen displays will appear in the selected
language.
Repeatedly press the MENU button to return to normal TV
viewing.
SETUP
Language
Input
ARC
Child Lock
OK MENU
English
Français
Español
Português
G
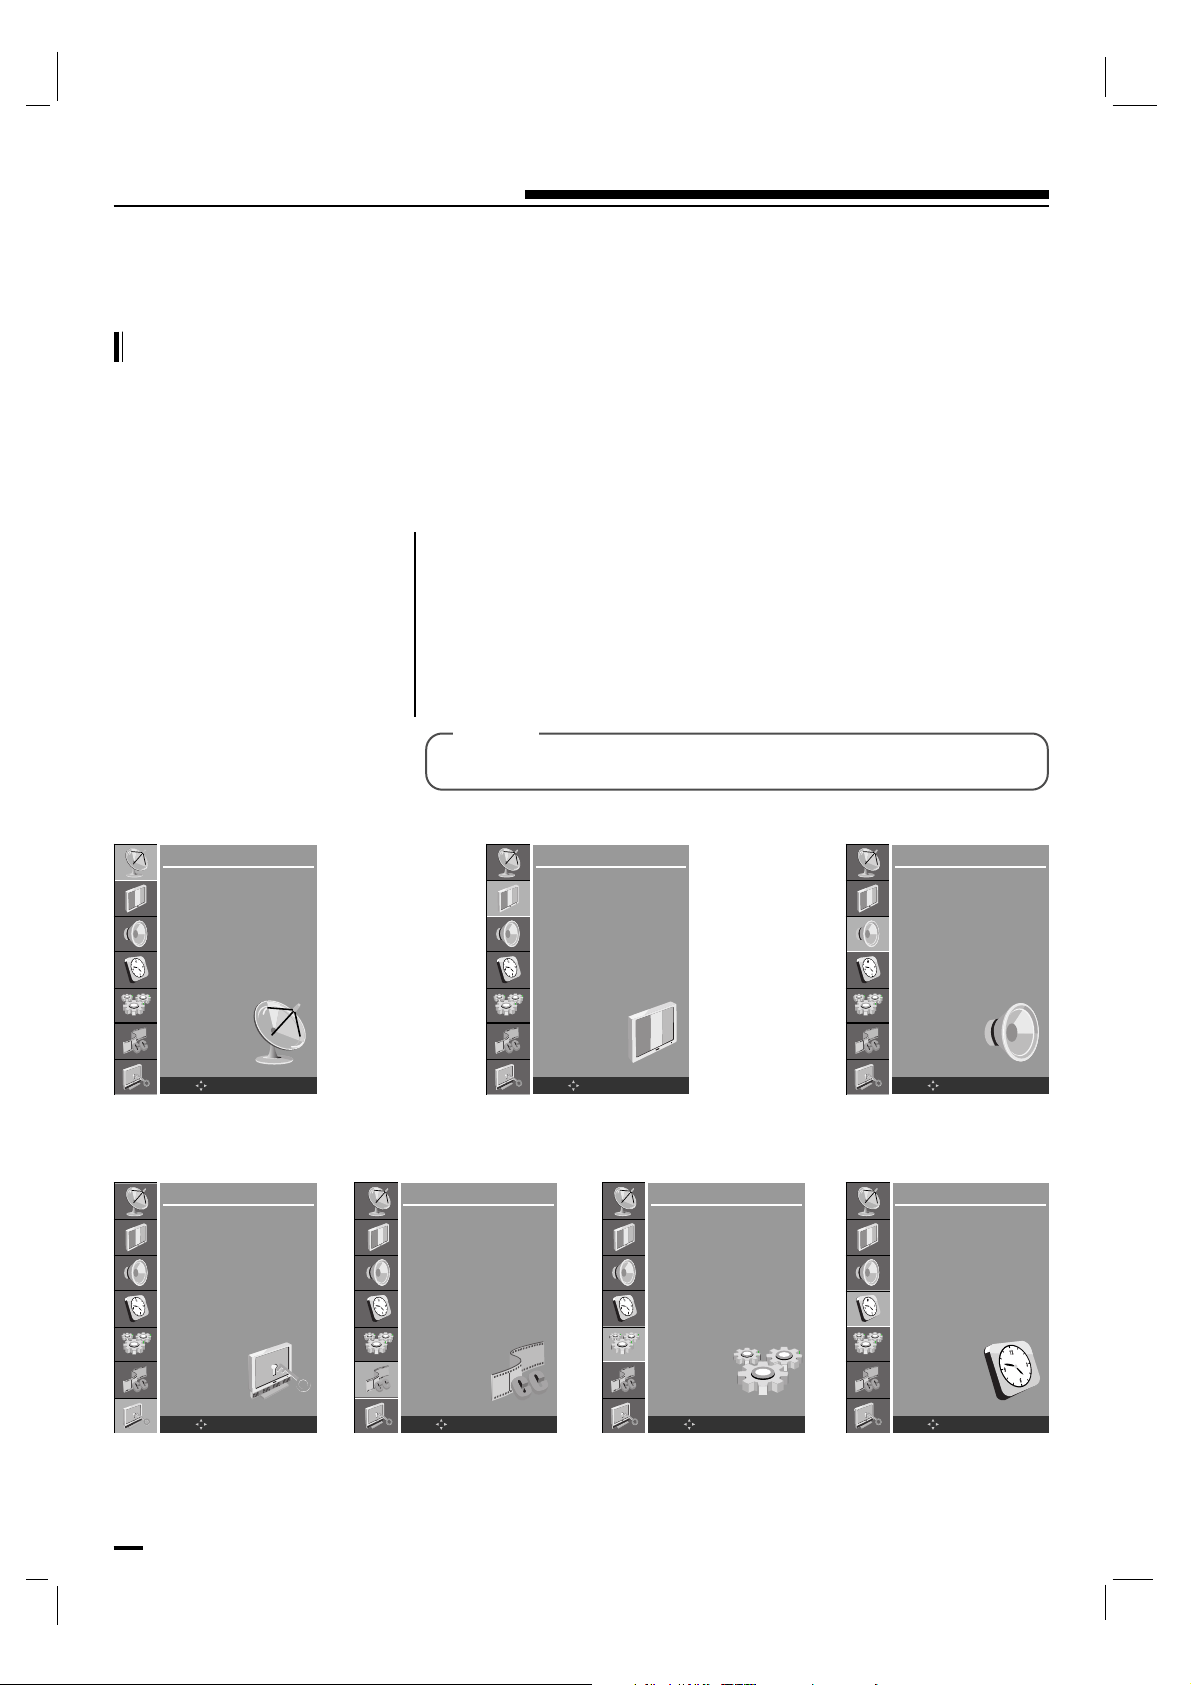
14
On Screen Menus
Menu selection
- The dialogue between you and your set takes place on screen with an operator menu. The buttons
required for the operating steps are also displayed.
Press the MENU button and
then use D / E button to display
each menu.
Press the G button and then use
D / E button to select a menu
item.
[ 1 ]
Press the G button to display the sub menu.
Change the setting of an item in the sub or pull-down menu with F / G
or D / E.
You can move to the higher level menu with F button and to move to
the lower level menu press the G button.
[ 2 ]
STATION
Auto program
Manual
Edit
Name
OK MENU
PICTURE
CSM
PSM
Contrast
Brightness
Color
Sharpness
Tint
OK
MENU
SOUND
SSM
Balance
AVL
Audio Language
OK MENU
LOCK
Lock System
Set Password
Rating
Input Block
OK MENU
CAPTION
Caption Mode
Caption Option
OK MENU
SETUP
Language
Input
ARC
Child Lock
OK MENU
TIME
Clock
Off Time
On Time
Auto Sleep
Time Zone
Daylight saving
OK MENU
[ Note ]
• Menus may vary according to input mode.
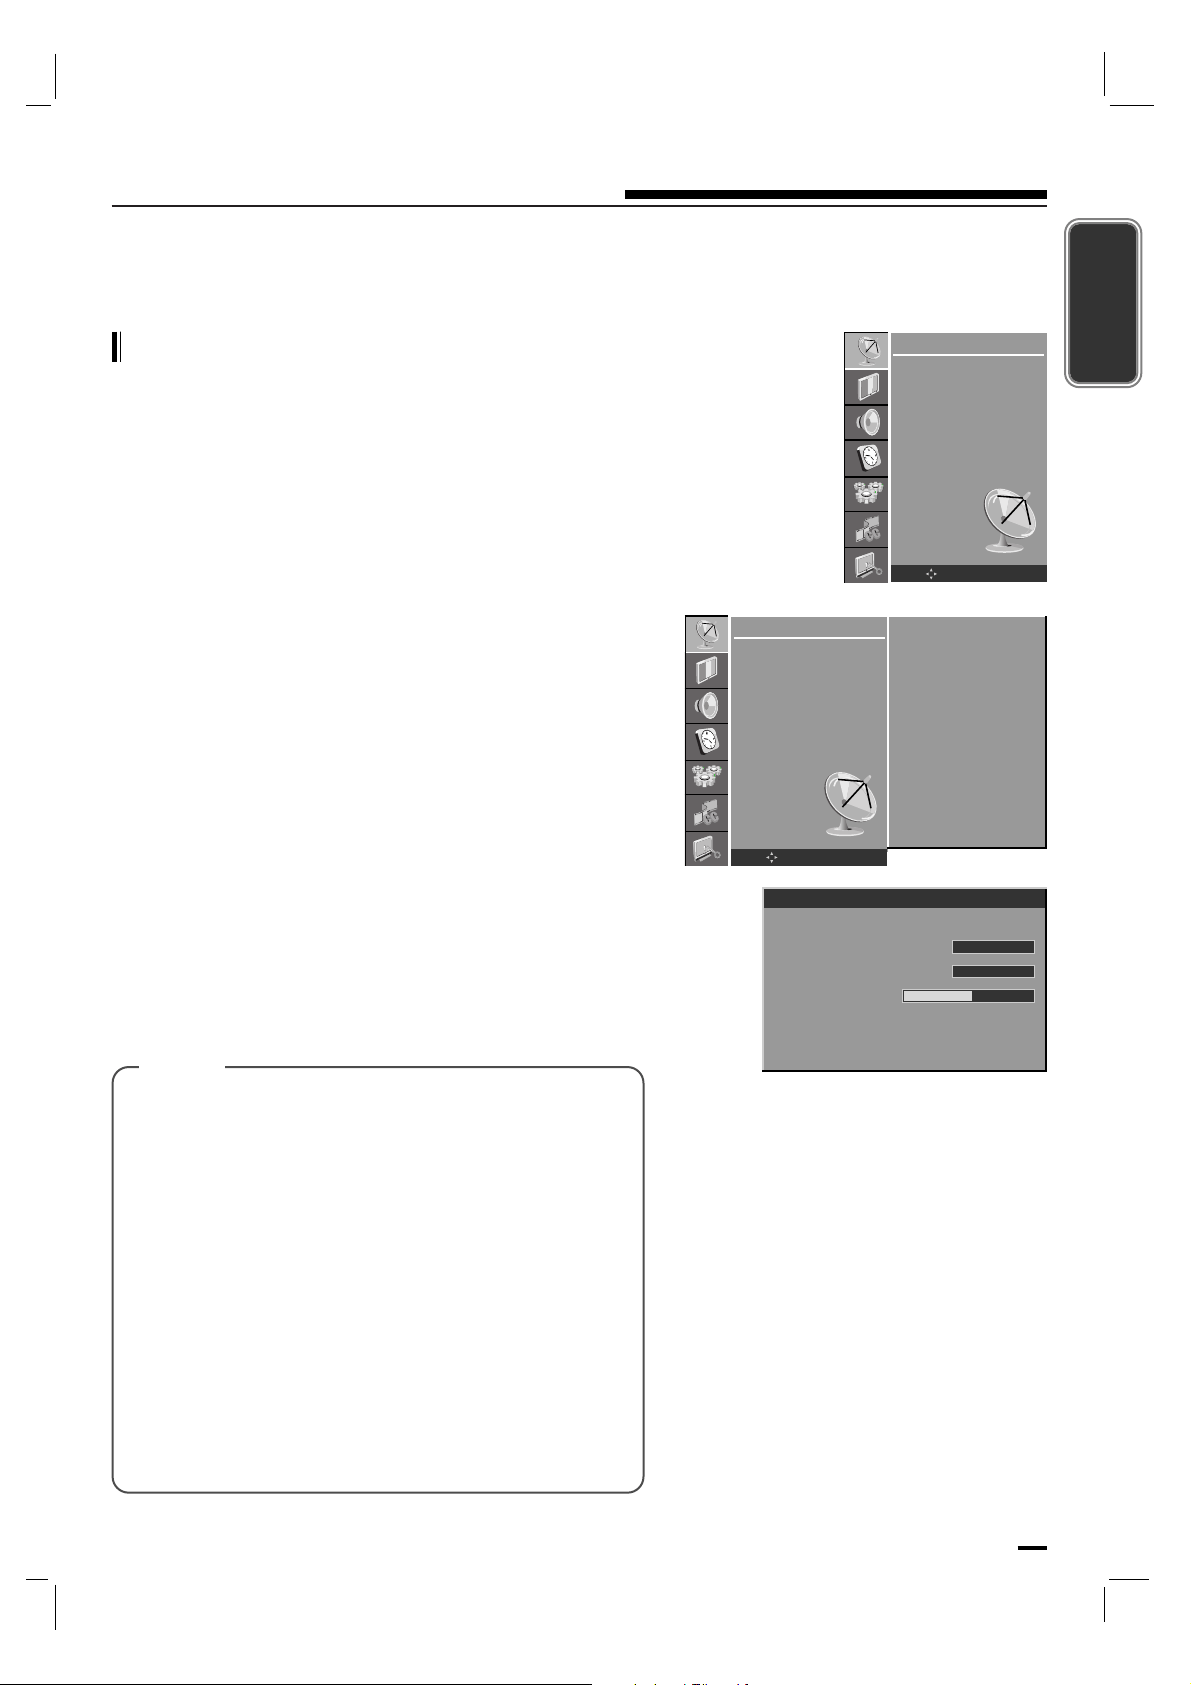
15
ENGLISH
Setting up TV stations
Memorizing the Channels with Auto
- For Auto program to work, the programming source
must be connected to the TV and the TV must be
receiving programming signals either over-the-air or
from a cable-type service provider.
Press the MENU button and then use D / E button to select
the STATION menu.
Press the G button and then use D / E button to select Auto
program
.
Press the G button and then use D / E button to select
Antenna, Cable.
Press the OK button to begin the channel search.
• Wait for auto program to complete the channel search
cycle before choosing a channel. The TV scans for
over-the-air channels and then channels provided by a
cable service.
[ Note ]
STATION
Auto program
Manual
Edit
Name
OK MENU
STATION
Auto program
Manual
Edit
Name
OK MENU
Antenna
Cable
OK To Start
G
Auto Program
DTV Channel 21
Analog Channels Found
12
Digital Channels Found
Progress(%) 40
MENU : DTV Skip
Wait for max. 10 minutes...
5
• When the channel search is complete, use the
DD
/
E
buttons to review the memorized channels.
• If you press the MENU button in Auto program, the
function will stop and only channels programming up to
that time will remain.
• Auto program function can memorize only the channels
which are being received at that time.
• HDTV reception will only display if the digital signal
transmitted through the cable or satellite service
provider is high definition.
Or if the on air broadcast in your area is transmitted in
high definition and you have a high definition antenna
to receive the signal.
The higher the signal strength, the less likely you are to
experience picture degradation.
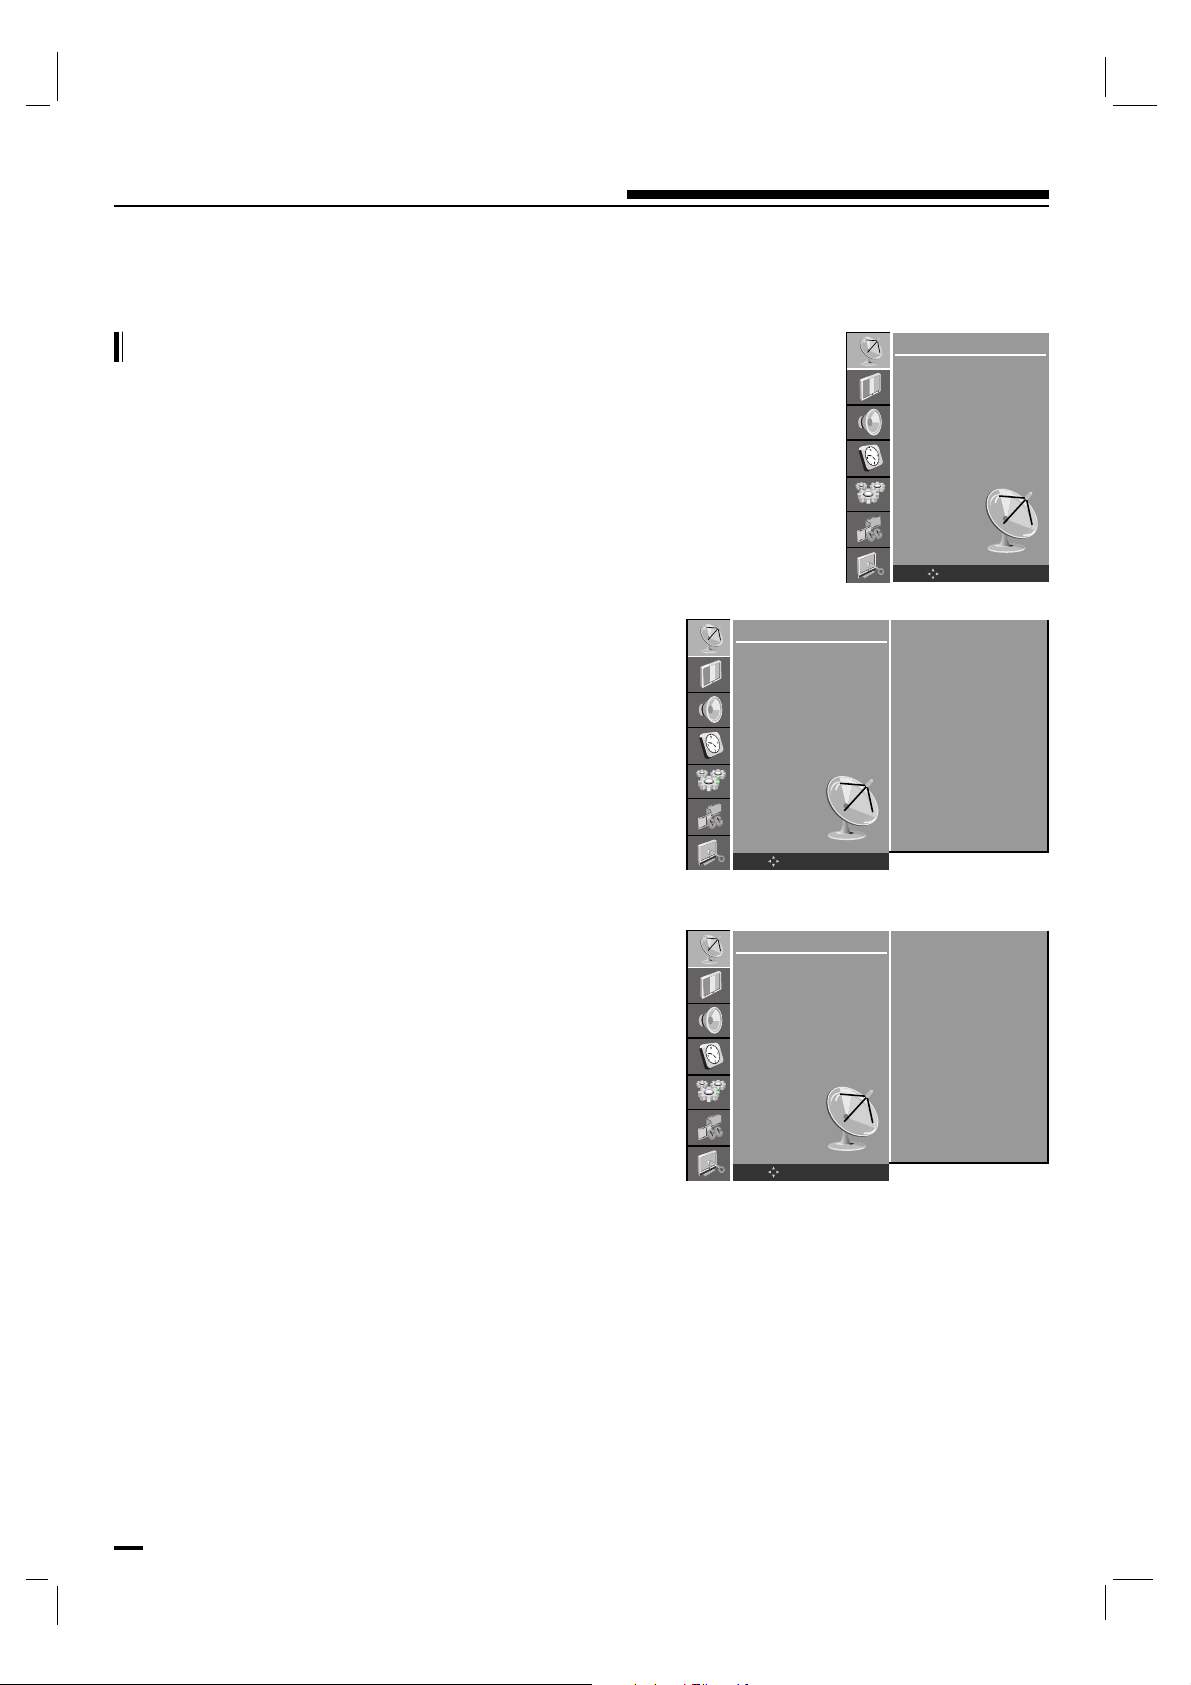
16
Setting up TV stations
Add/Delete Channels with Manual
- You can manually include or erase individual channels.
Press the MENU button and then use D / E button to select
the STATION menu.
Press the G button and then use D / E button to select
Manual.
Press the G button and then use D / E button to select CH.
Press the F / G button to select the program.
Press the D / E button to select Storage.
Press the F / G button to select Memory (add) or Erase
(delete).
Press the OK button to save.
Repeatedly press the MENU button to return to normal TV
viewing.
The current channel is added to Memory or Erased from the
channel list.
STATION
Auto program
Manual
Edit
Name
OK MENU
STATION
Auto program
Manual
Edit
Name
OK MENU
CH : TV 46
Storage : Memory
Fine Tune : 0
STATION
Auto program
Manual
Edit
Name
OK MENU
CH : TV 46
Storage : Memory
Fine Tune : 0
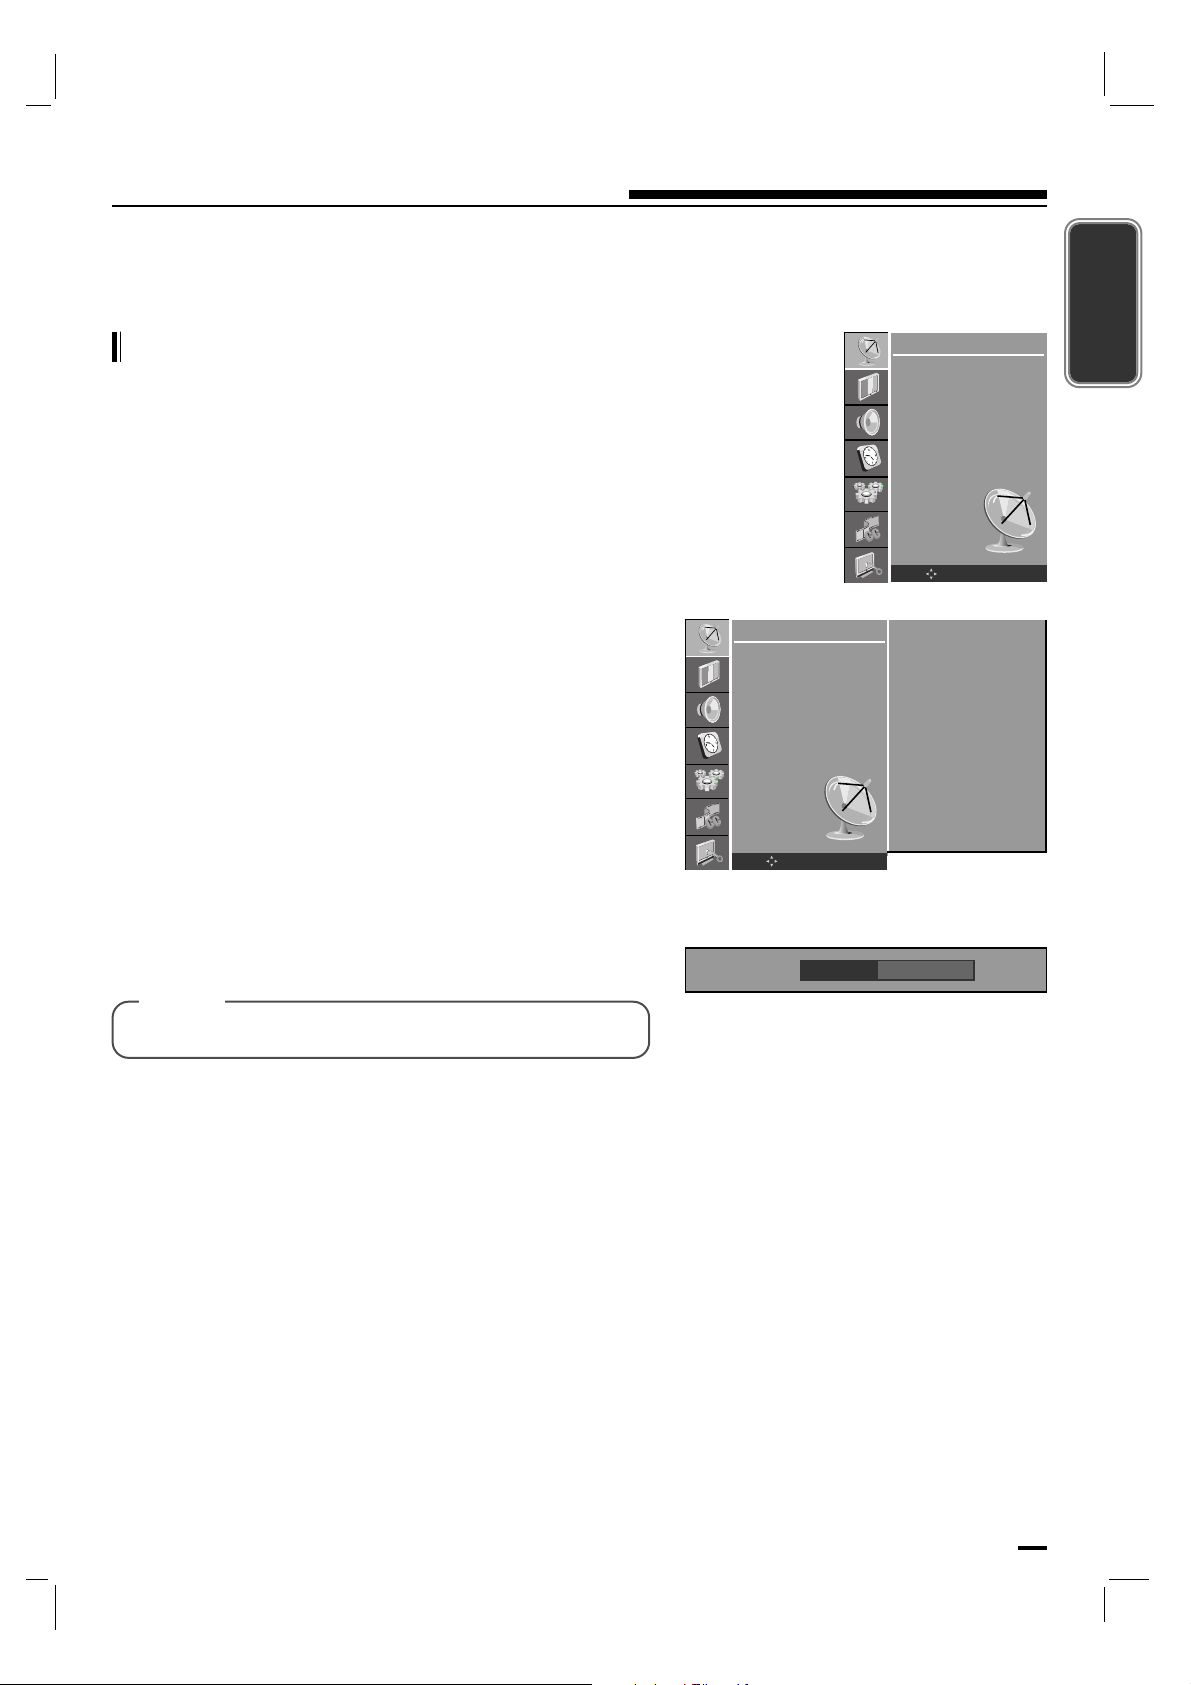
17
Setting up TV stations
ENGLISH
Fine Tuning Adjustment
- This function adjusts the pictures stability and condition
when it is poor.
Press the MENU button and then use D / E button to select
the STATION menu.
Press the G button and then use D / E button to select
Manual.
Press the G button and then use D / E button to select Fine
Tune.
Use the F / G button to adjust the picture to your preference.
Repeatedly press the MENU button to return to normal TV
viewing.
STATION
Auto program
Manual
Edit
Name
OK MENU
STATION
Auto program
Manual
Edit
Name
OK MENU
CH : TV 46
Storage : Memory
Fine Tune : 0
Fine Tune -5
[ Note ]
• It’s not available to use function in DTV mode.
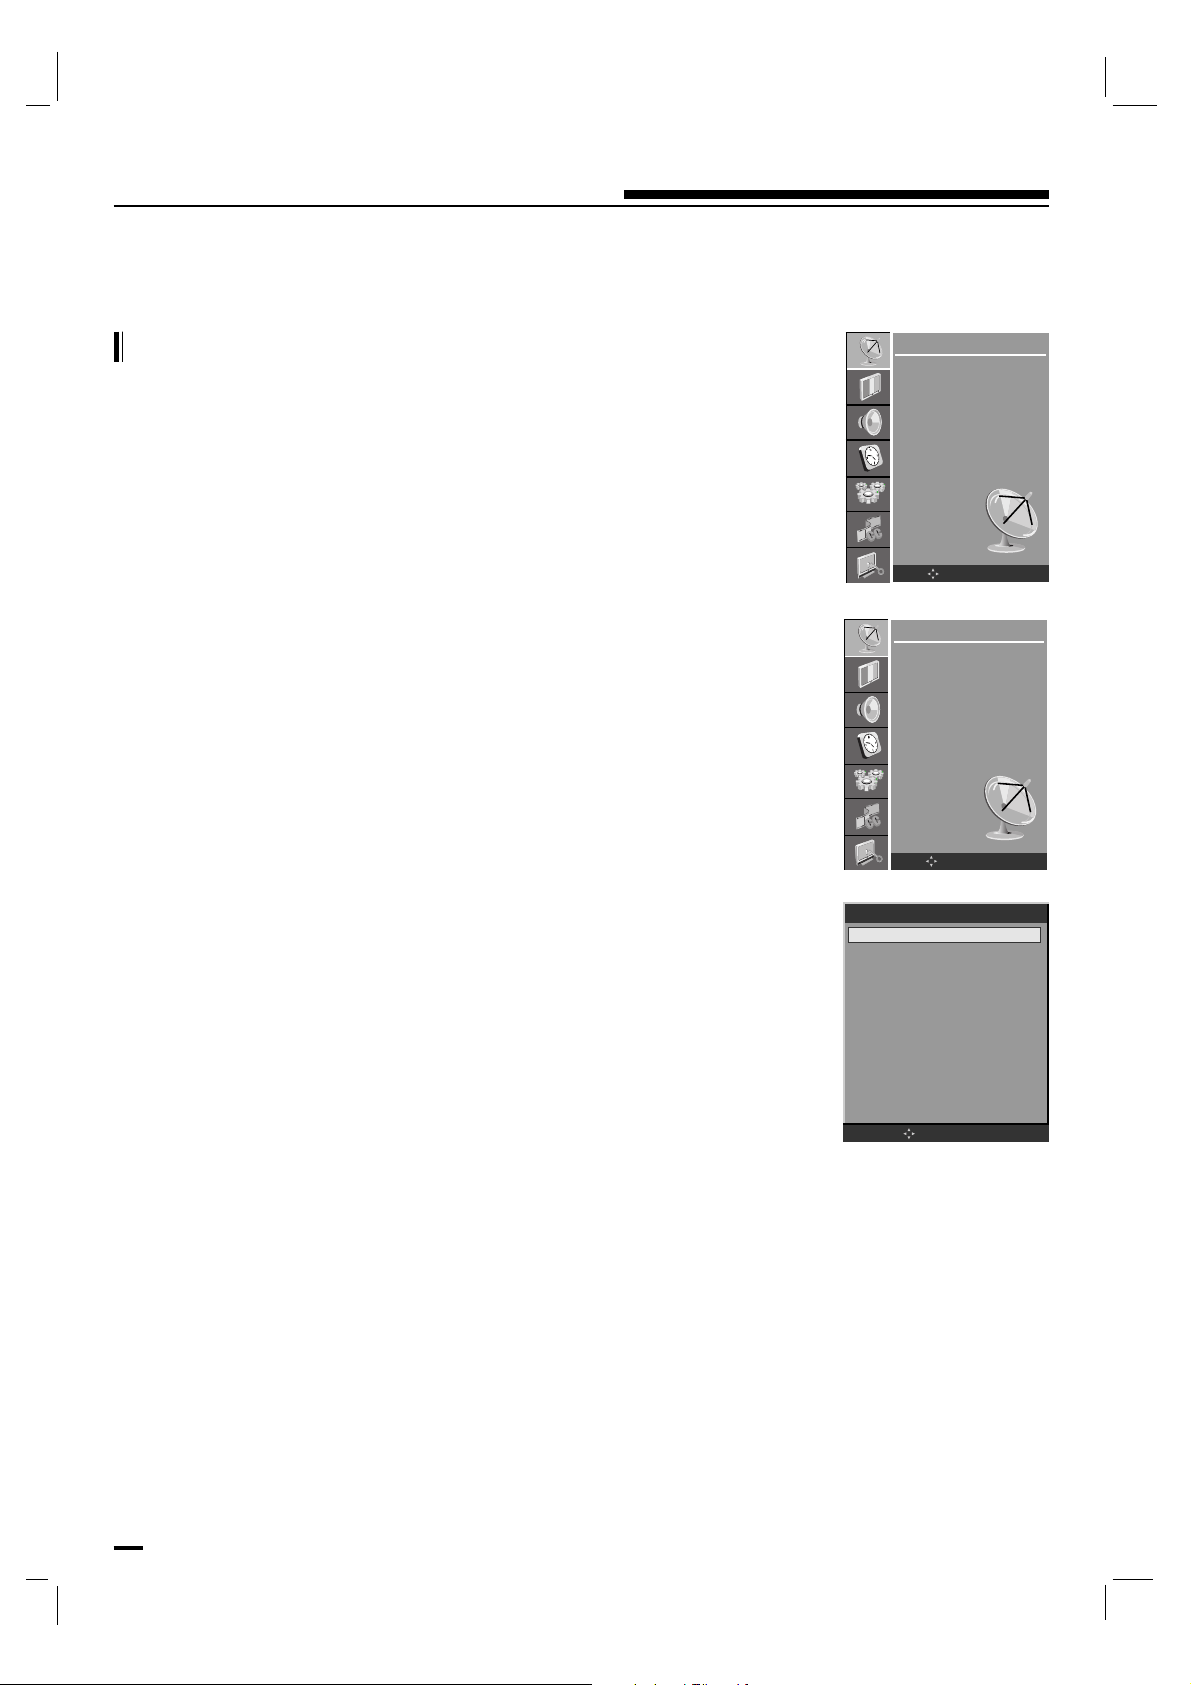
18
Setting up TV stations
Favorite Channels Setup
- Favorite Channel lets you quickly tune in up to 12
channels of your choice without having to wait for the TV
to scan through all the in-between channels.
Press the MENU button and then use D / E button to select
the STATION menu.
Press the G button and then use D / E button to select Edit.
Press the G button and then use D / E button to select the
channel.
Press the F / G button to select the Viewable, Not
Viewable
or FCR Channel.
Press the OK button to save.
Repeatedly press the MENU button to return to normal TV
viewing.
Repeatedly press the FCR button to select stored favorite
channel.
STATION
Auto program
Manual
Edit
Name
OK MENU
STATION
Auto program
Manual
Edit
Name
OK MENU
Channel Edit
OK MENU
DTV 6-1 DTV Viewable
DTV 10-1 DTV Viewable
DTV 11-1 DTV Viewable
TV 13-0 Viewable
TV 14-0 Viewable
TV 15-0 Viewable
TV 16-0 Viewable
TV 17-0 Viewable
TV 18-0 Viewable
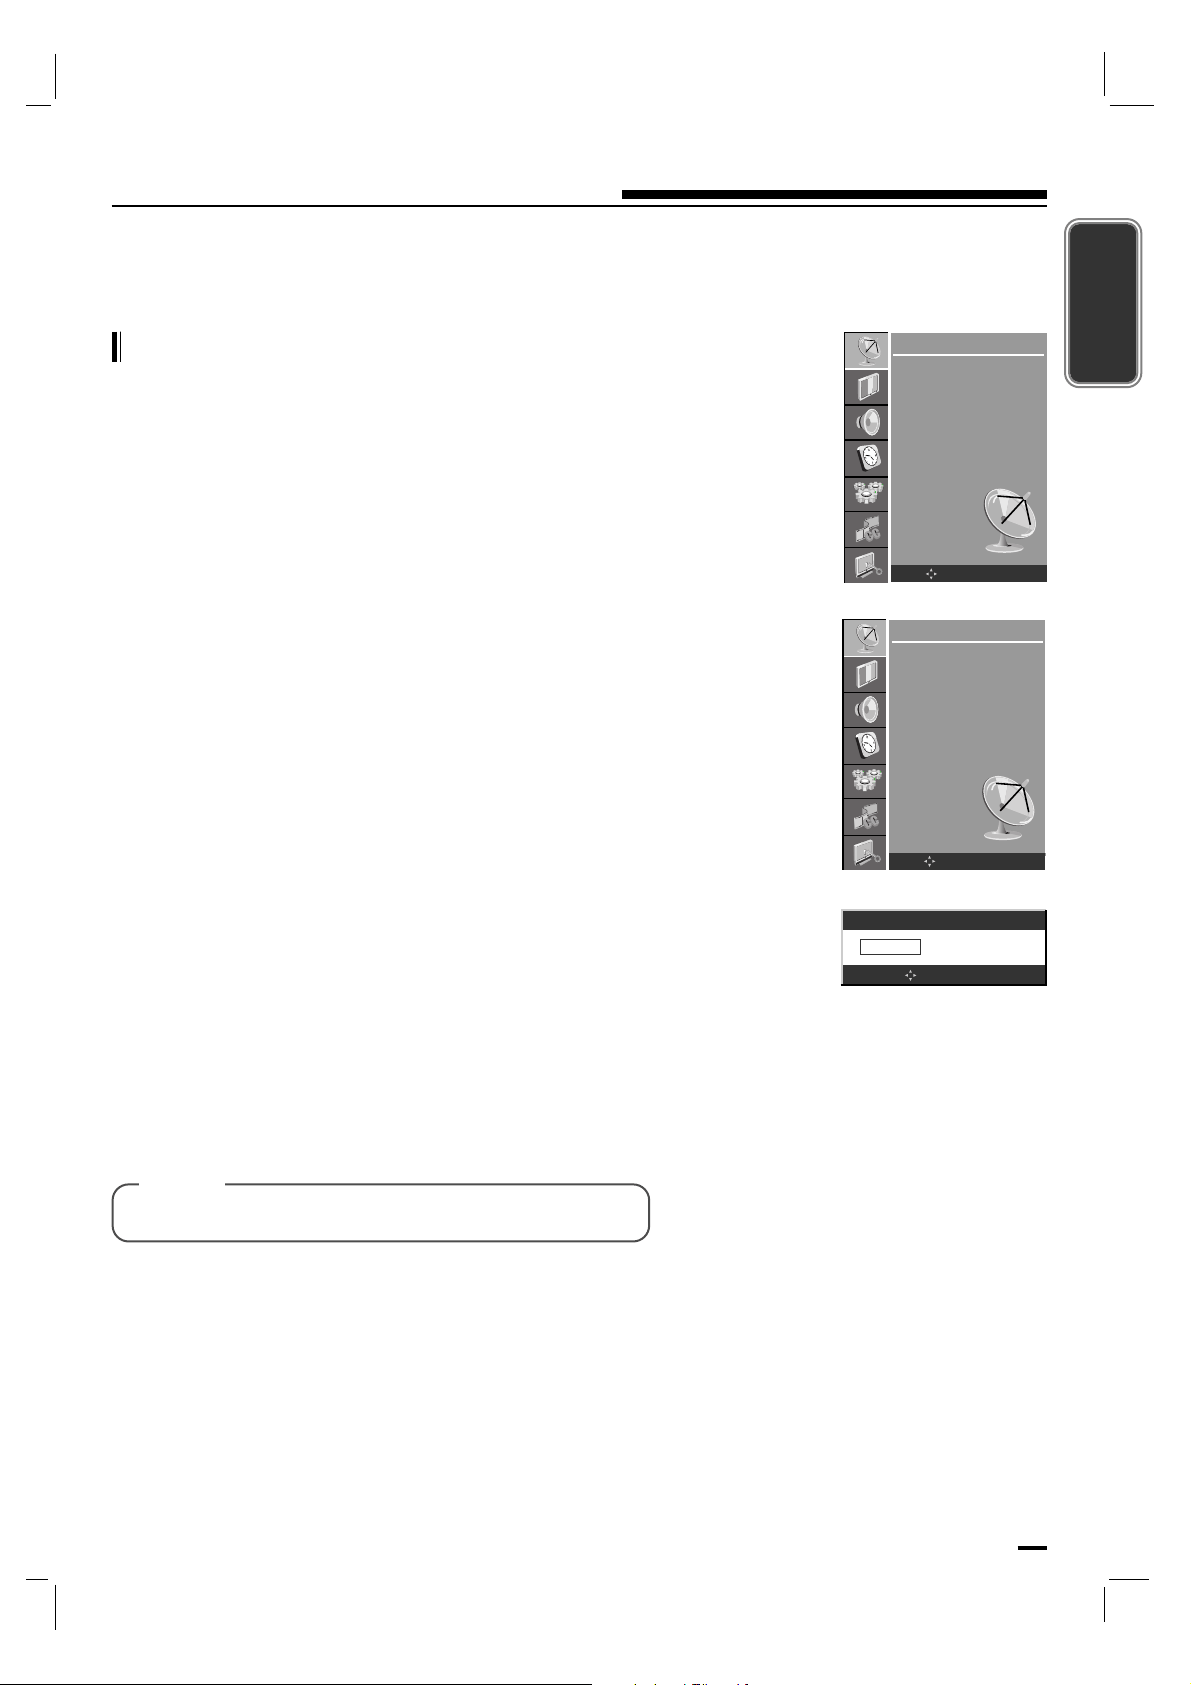
19
Setting up TV stations
ENGLISH
Assigning a station name
- You can assign a station name with seven characters to
each program number.
Press the MENU button and then use D / E button to select
the STATION menu.
Press the G button and then use D / E button to select
Name.
Press the G button and then use D / E button to select the
channel number.
Press the G button and then use D button. You can use a
blank, *, ?, -, the numeric 0 to 9 and the alphabet A to Z.
With the E button you can select in the opposite direction.
Select the position by pressing the F / G button and then
take your choice of the second character and so on.
Press the OK button to save.
Repeatedly press the MENU button to return to normal TV
viewing.
STATION
Auto program
Manual
Edit
Name
OK MENU
STATION
Auto program
Manual
Edit
Name
OK MENU
Channel Name
TV 10-0
- - - - - - -
OK MENU
[ Note ]
• It’s not available to use function in DTV mode.
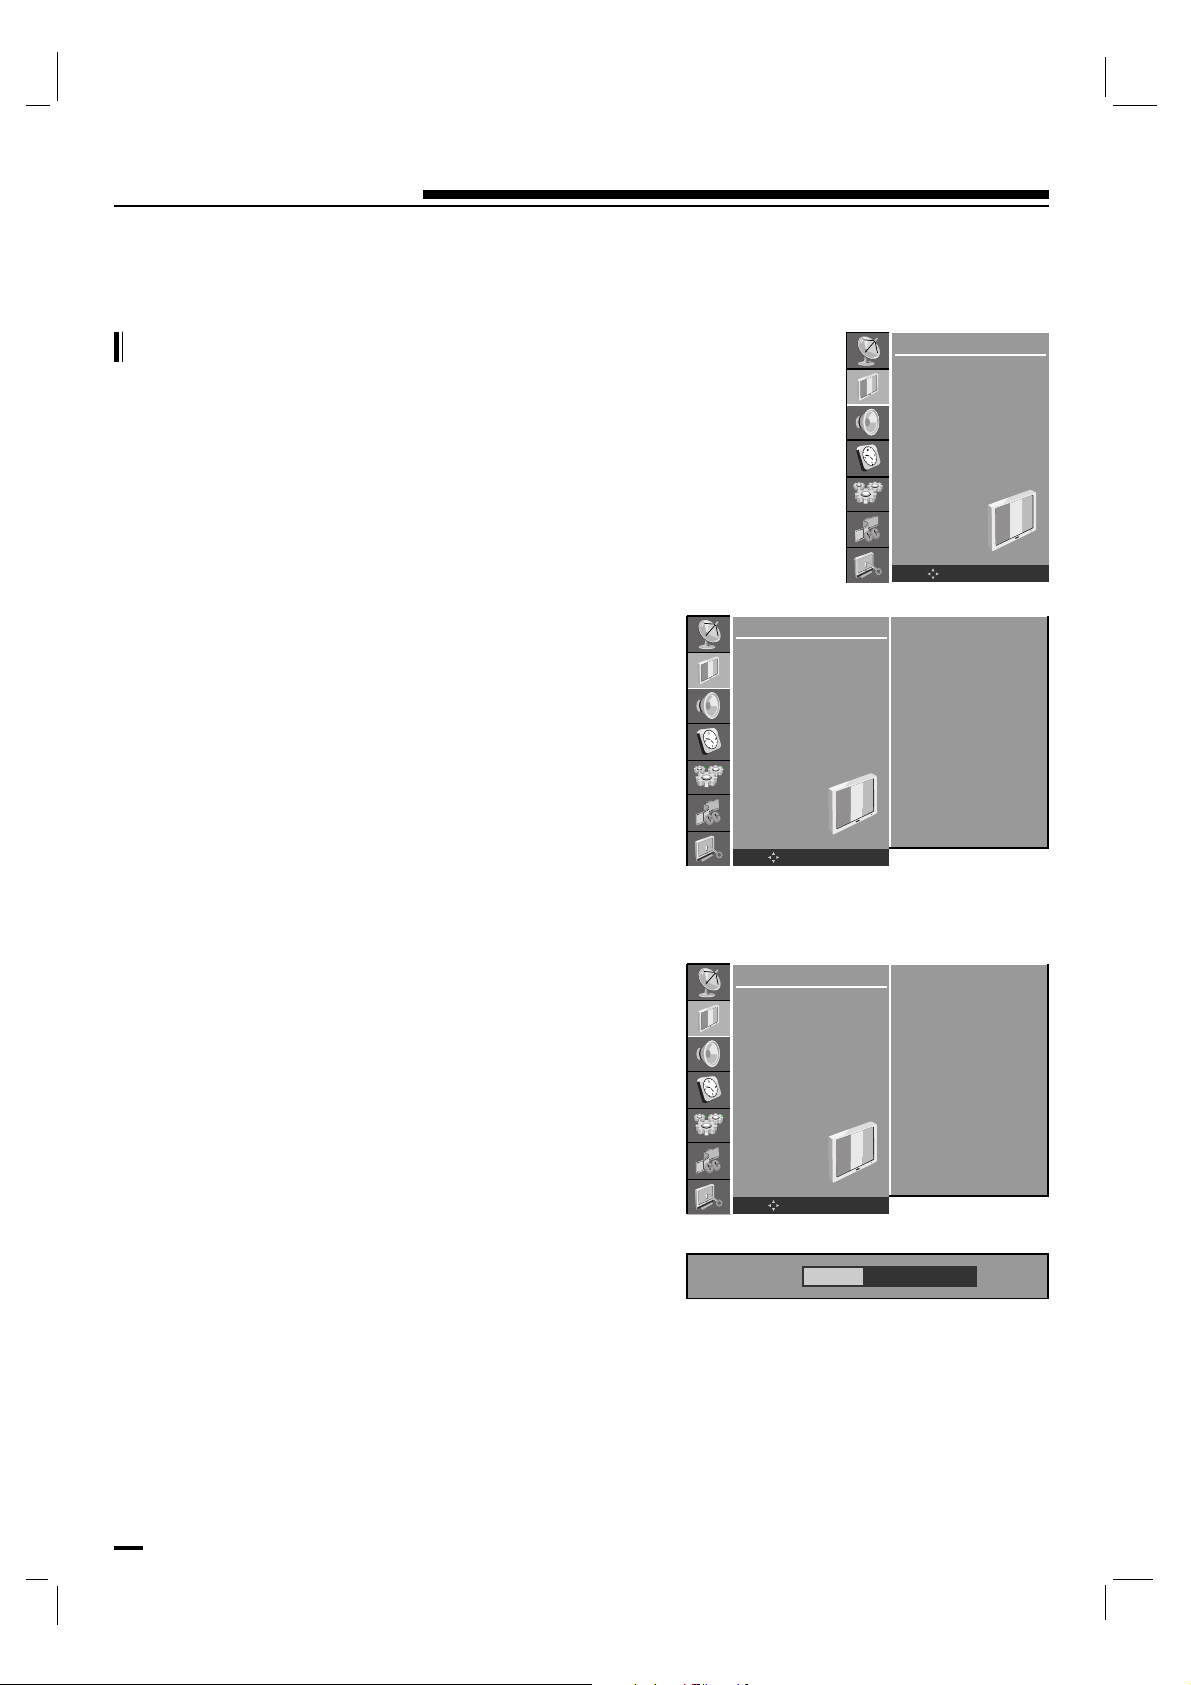
20
Picture Menu
CSM (Color Status Memory)
- To initialize values (reset to default settings), select the
Normal option.
Press the MENU button and then D / E button to select the
PICTURE menu.
Press the G button and then D / E button to select CSM.
Press the G button and then D / E button to select the
desired color temperature.
Repeatedly press the MENU button to return to normal TV
viewing.
You can adjust red, green or blue to any color temperature
you prefer.
Press the MENU button and then use D / E button to select
the PICTURE menu.
Press the G button and then use D / E button to select CSM.
Press the G button and then use D / E button to select User.
Press the G button and then use D / E / F / G button to
make appropriate adjustments.
Repeatedly press the MENU button to return to normal TV
viewing.
PICTURE
CSM
PSM
Contrast
Brightness
Color
Sharpness
Tint
OK MENU
PICTURE
CSM
PSM
Contrast
Brightness
Color
Sharpness
Tint
OK MENU
Cool
Normal
Warm
User >>>
PICTURE
CSM
PSM
Contrast
Brightness
Color
Sharpness
Tint
OK MENU
Cool
Normal
Warm
User >>>
RED 30
G

21
Picture Menu
ENGLISH
PSM (Picture Status Memory)
Press the MENU button and then use D / E button to select
the PICTURE menu.
Press the G button and then use D / E button to select PSM.
Press the G button and then use D / E button to select the
desired picture item.
Repeatedly press the MENU button to return to normal TV
viewing.
You can also recall a desired picture (Dynamic,
Standard, Mild, Game or User) with PSM button on the
remote control.
The picture Dynamic, Standard, Mild and Game are
programmed for good picture reproduction at the factory and
cannot be changed.
PICTURE
CSM
PSM
Contrast
Brightness
Color
Sharpness
Tint
OK MENU
PICTURE
CSM
PSM
Contrast
Brightness
Color
Sharpness
Tint
OK MENU
Dynamic
Standard
Mild
Game
User
G
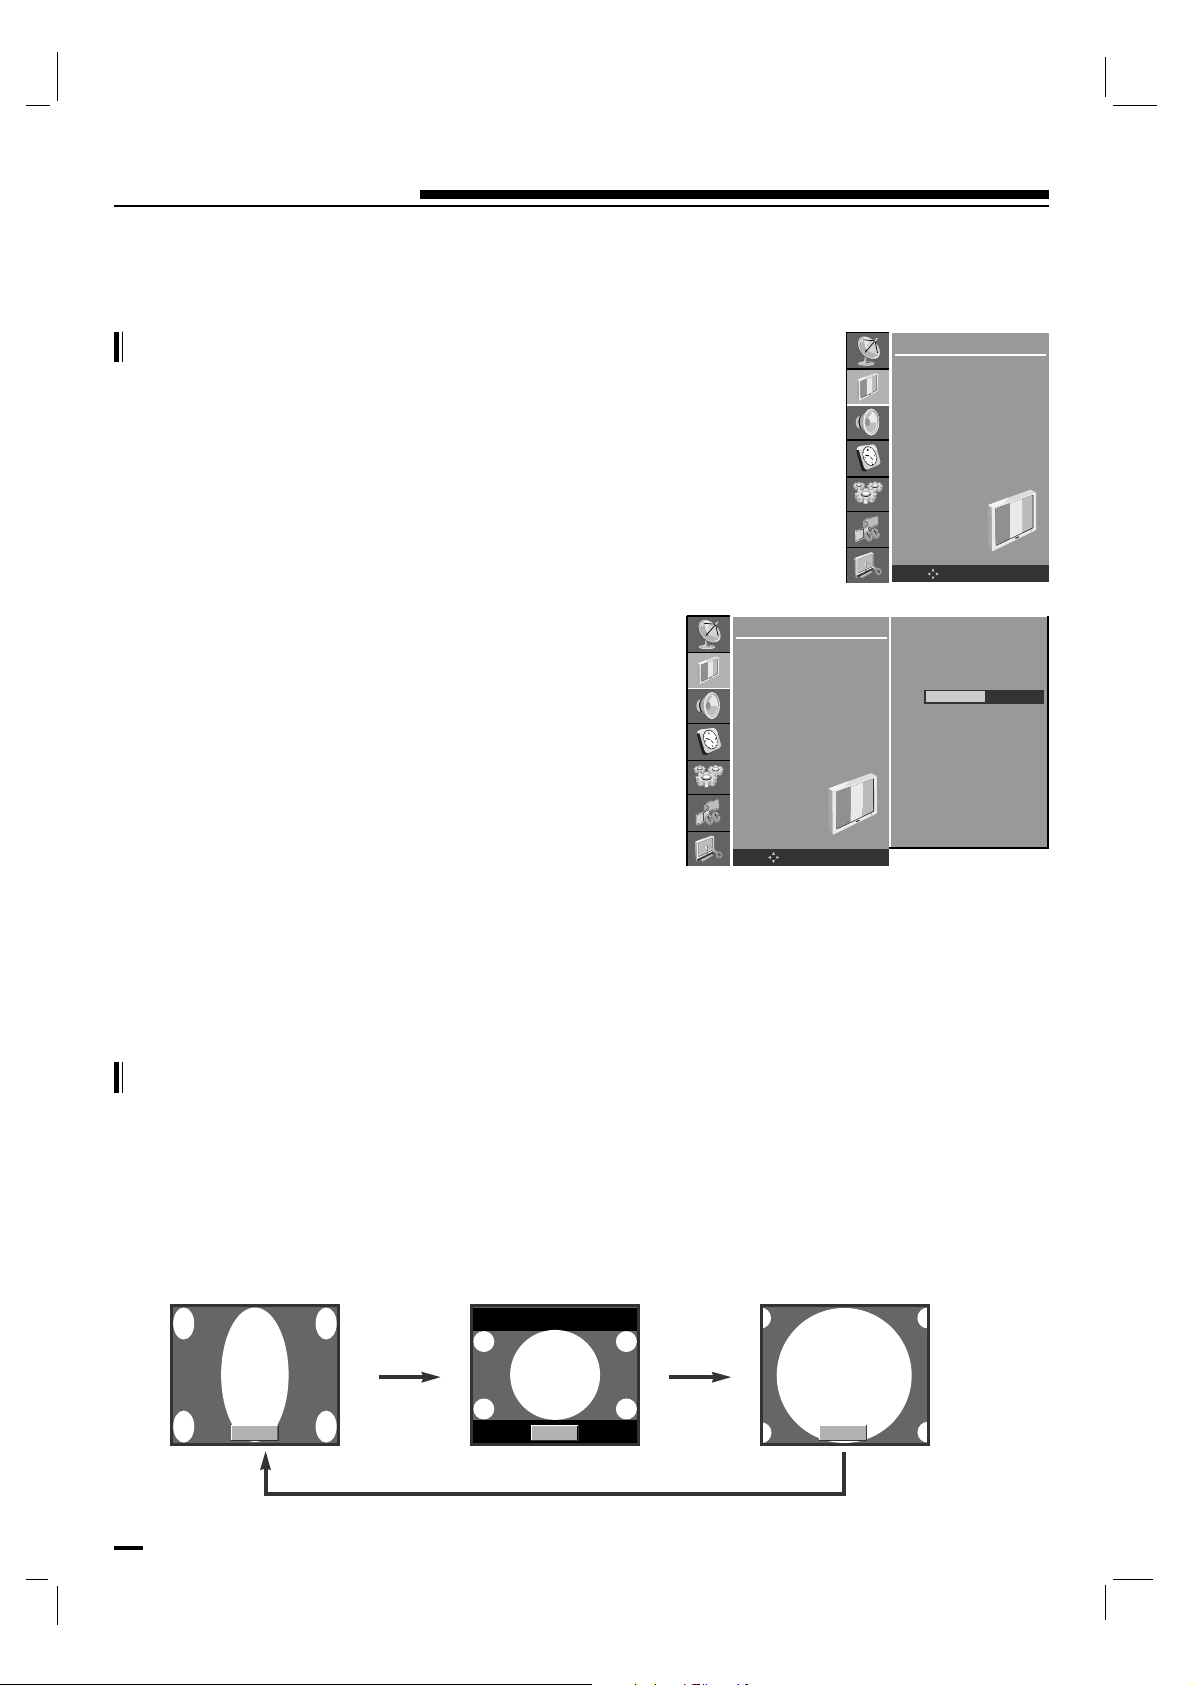
22
Picture Menu
Manual Picture Control
Picture format
Press the MENU button and then use D / E button to select
the PICTURE menu.
Press the G button and then use D / E button to select the
desired picture option.
Press the G button and then use F / G button to make
appropriate adjustments.
You can adjust picture contrast, brightness, color, sharpness
and tint to the levels you prefer.
Repeatedly press the MENU button to return to normal TV
viewing.
PICTURE
CSM
PSM
Contrast
Brightness
Color
Sharpness
Tint
OK MENU
PICTURE
CSM
PSM
Contrast
Brightness
Color
Sharpness
Tint
OK MENU
50
You can watch TV in various picture formats; 16:9, 4:3, H.ZOOM.
Repeatedly press the ARC button to select your desired picture format.
• Each press of ARC button changes the screen display as shown below.
• You can only select 4:3 in TV mode only.
4:3 16:9 H.ZOOM
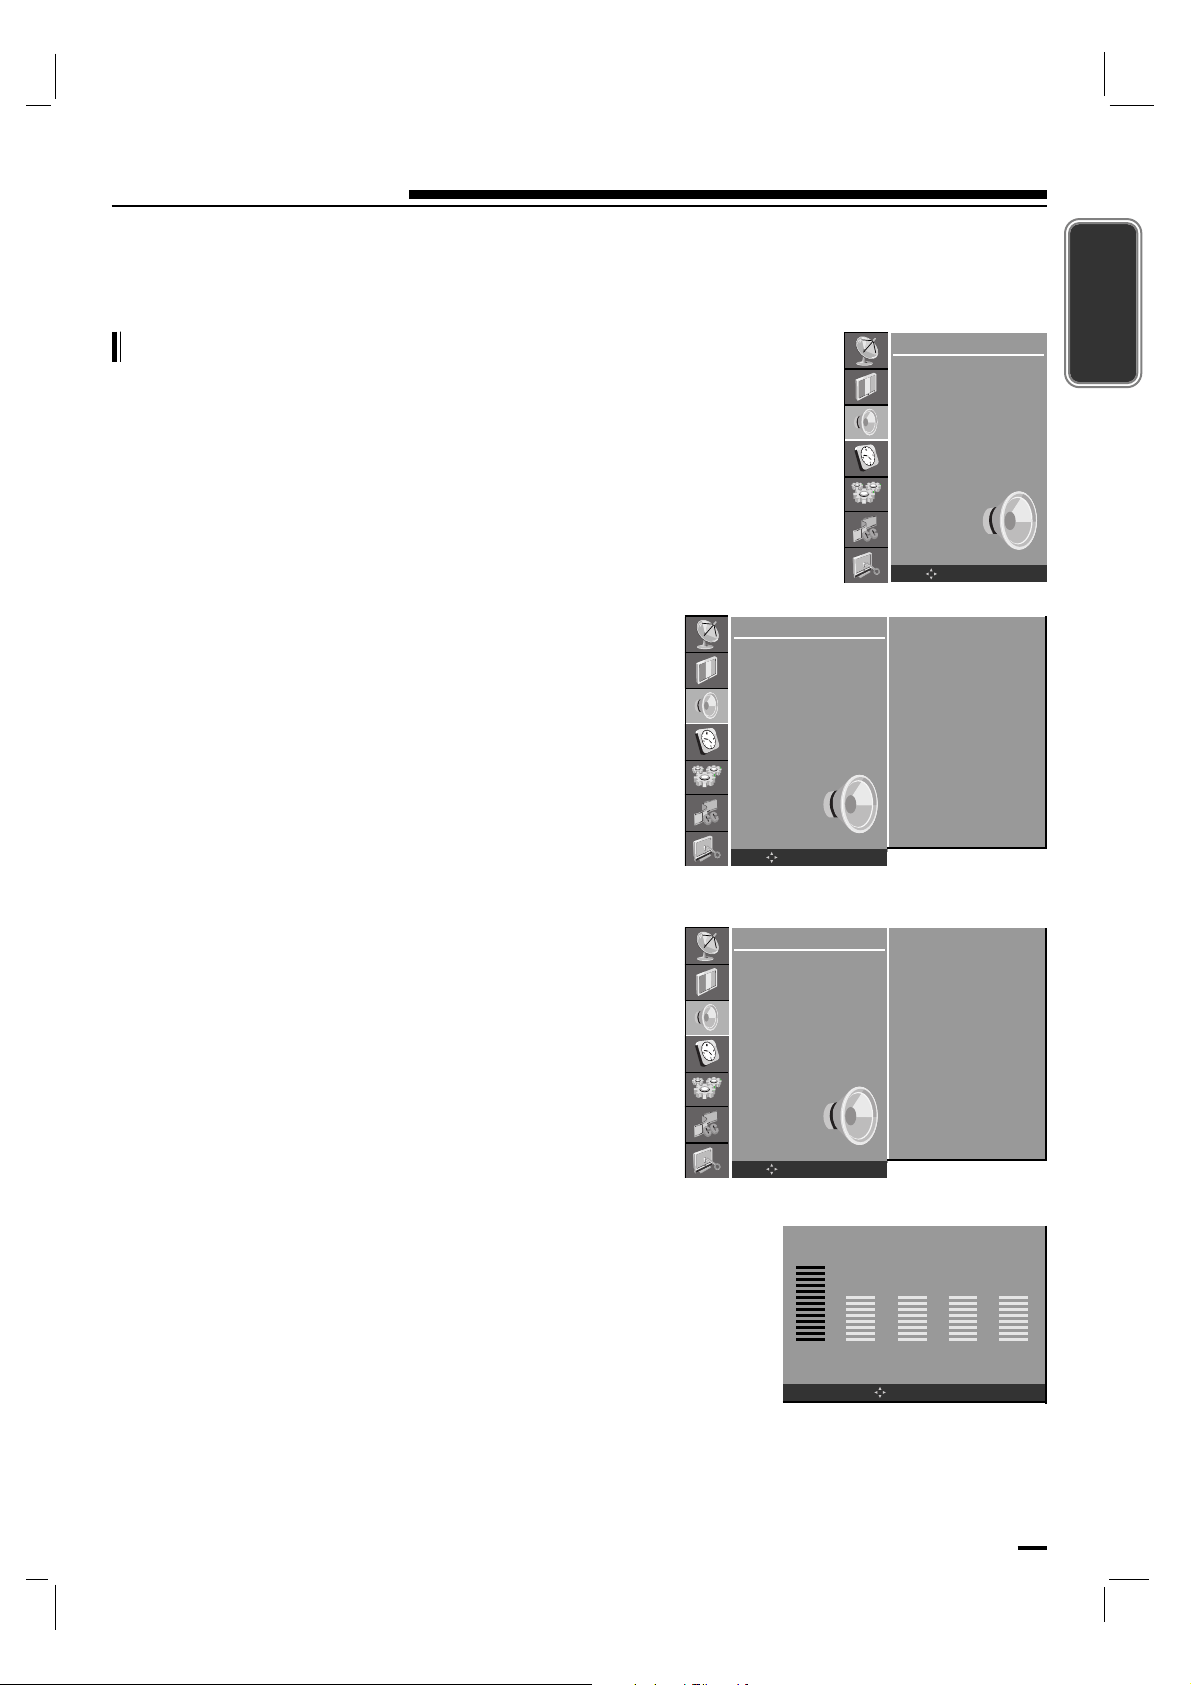
23
ENGLISH
Sound Menu
SSM (Sound Status Memory)
Press the MENU button and then use D / E button to select
the SOUND menu.
Press the G button and then use D / E button to select SSM.
Press the G button and then use D / E button to select the
desired sound item.
Repeatedly press the MENU button to return to normal TV
viewing.
Sound Frequency Adjustment
a. Press the G button in User.
b. Select a sound band by pressing the F / G button.
c. Make appropriate sound level with the D / E button.
d. Press the OK button to store it for the sound User.
You can also recall a desired sound (Flat, Music, Movie,
Speech or User) with SSM button on the remote control.
The sound Flat, Music, Movie and Speech are
programmed for good sound reproduction at the factory and
cannot be changed.
0.1kHz 0.33kHz 1kHz 3.3kHz 10kHz
SOUND
SSM
Balance
AVL
Audio Language
OK MENU
SOUND
SSM
Balance
AVL
Audio Language
OK MENU
OK MENU
Flat
Music
Movie
Speech
User >>>
SOUND
SSM
Balance
AVL
Audio Language
OK MENU
Flat
Music
Movie
Speech
User >>>
G
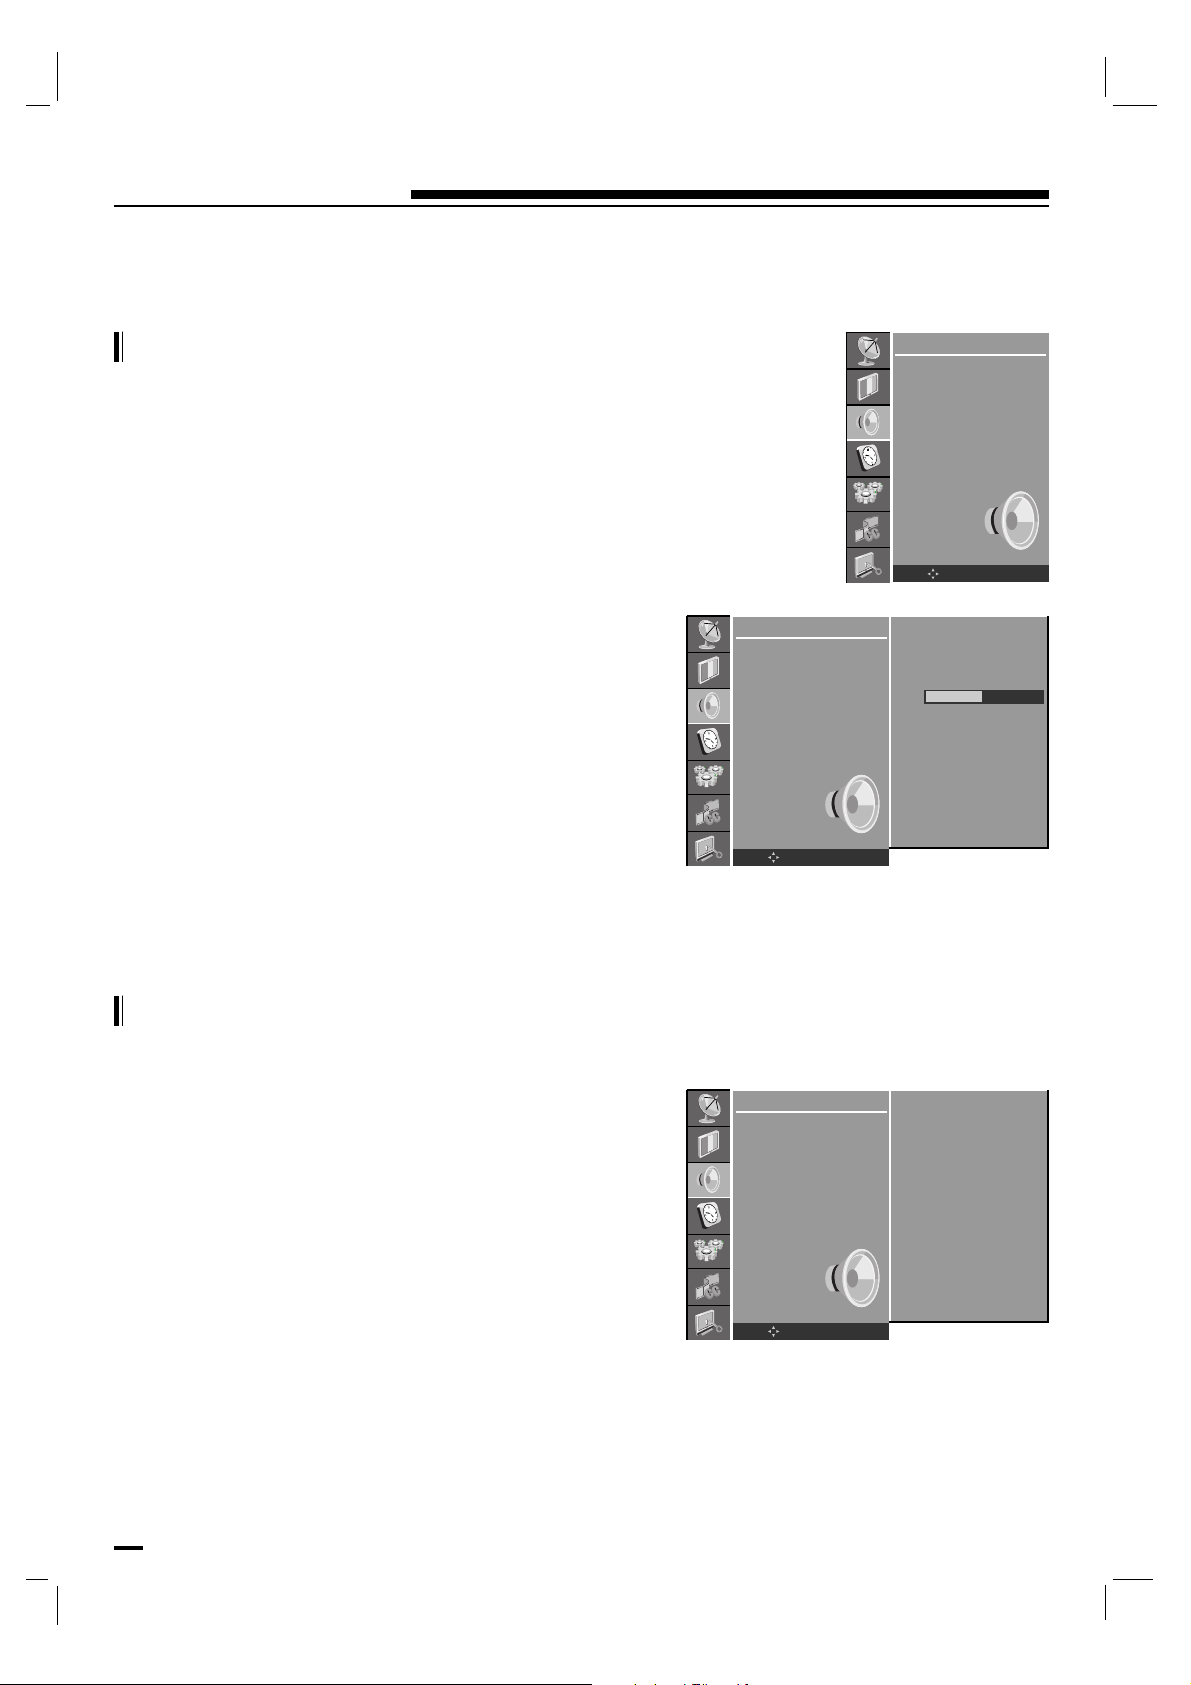
24
Sound Menu
Balance
Press the MENU button and then use D / E button to select
the SOUND menu.
Press the G button and then use D / E button to select the
desired sound item.
Press the G button and then use F / G button to make
appropriate adjustments.
Repeatedly press the MENU button to return to normal TV
viewing.
AVL (Auto Volume Leveler)
Press the MENU button and then use D / E button to select
the SOUND menu.
Press the G button and then use D / E button to select AV L .
Press the G button and then use D / E button to select On
or Off.
Repeatedly press the MENU button to return to normal TV
viewing.
This feature maintains an equal volume level; even if you
change channels.
SOUND
SSM
Balance
AVL
Audio Language
OK MENU
SOUND
SSM
Balance
AVL
Audio Language
OK MENU
0
LR
SOUND
SSM
Balance
AVL
Audio Language
OK MENU
On
Off
G
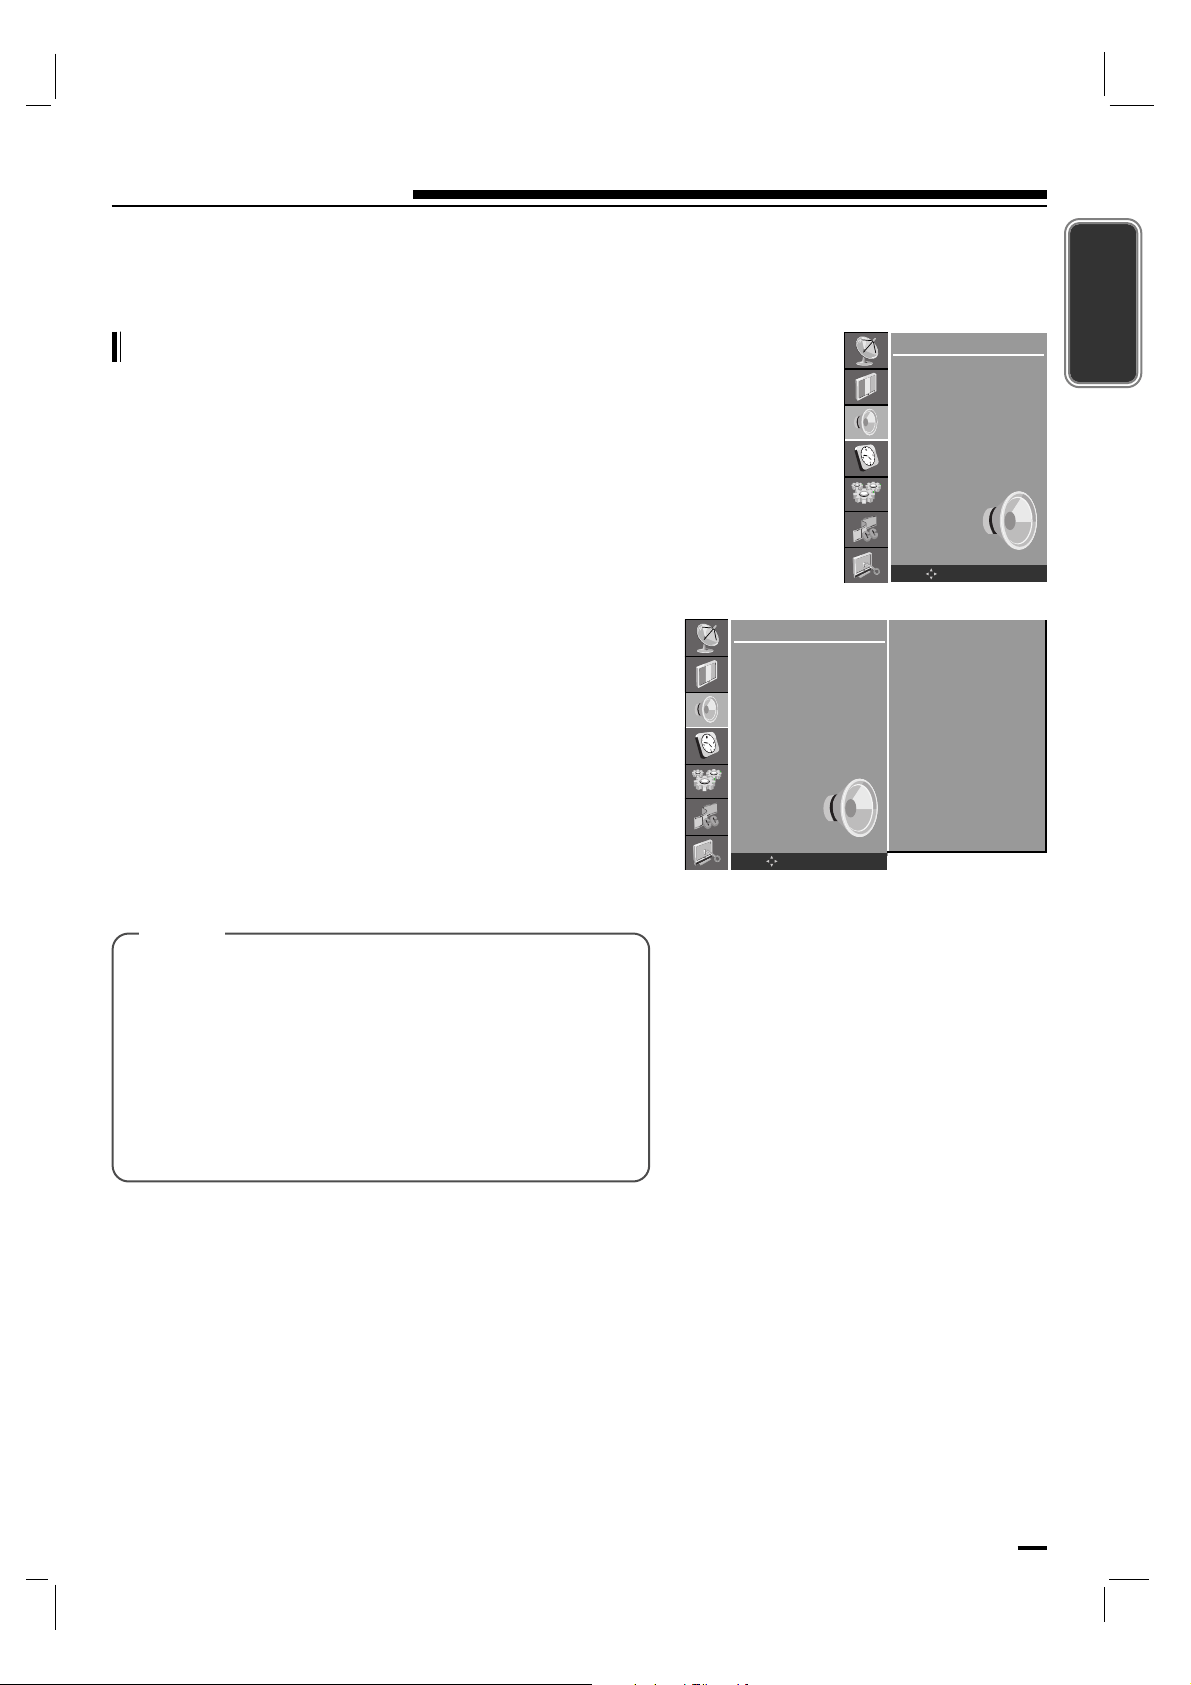
25
Sound Menu
ENGLISH
Audio Language (in digital mode only)
Press the MENU button and then use D / E button to select
the SOUND menu.
Press the G button and then use D / E button to select
Audio Language.
Press the G button and then use D / E button to select
English, French or Spanish.
Repeatedly press the MENU button to return to normal TV
viewing.
SOUND
SSM
Balance
AVL
Audio Language
OK MENU
[ Note ]
SOUND
SSM
Balance
AVL
Audio Language
OK MENU
English
French
Spanish
G
a : This function lets you select your preferred language
for audio.
b : If the audio data in selected language is not
broadcasted, the supported audio will be played.
c : If other languages available on the digital signal,
select them with the mts button.
d : The broadcast supported audio language will be
appear in turn.
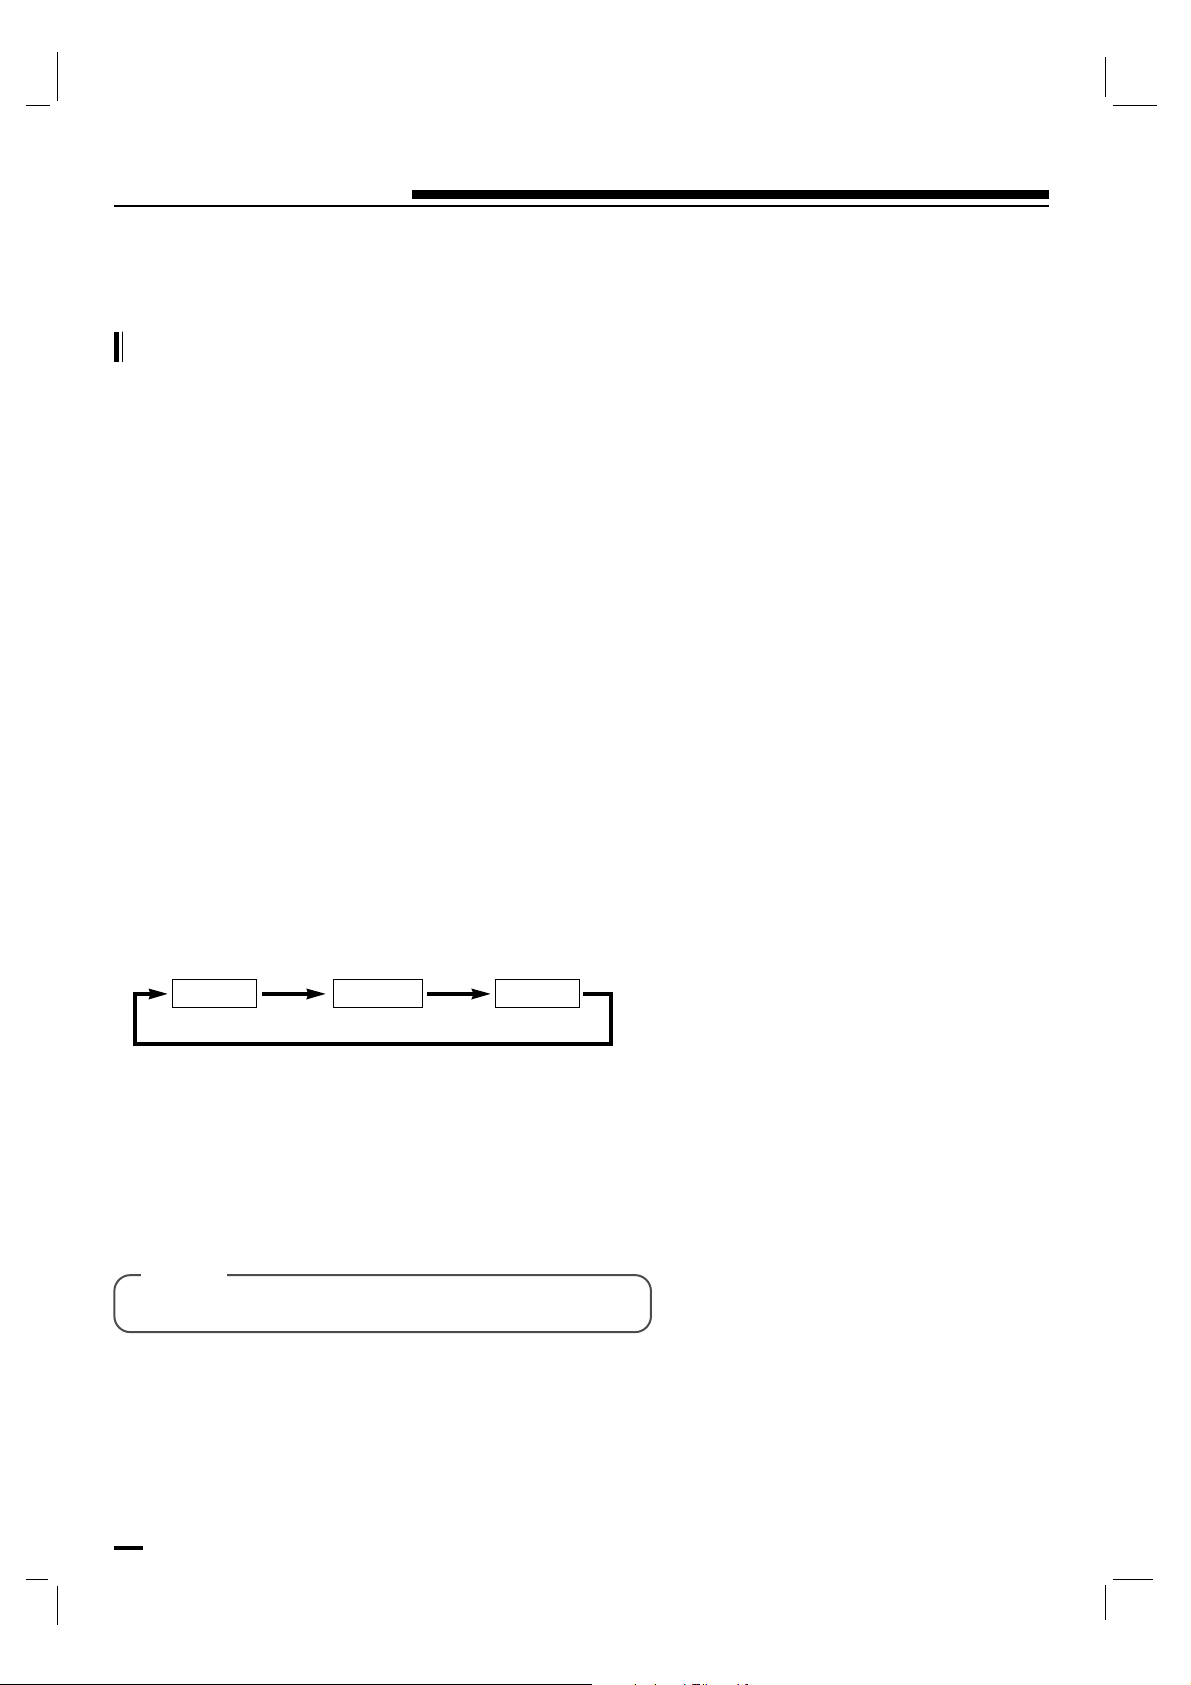
26
Sound Menu
Stereo/SAP Broadcasts Setup
- The TV can receive mts stereo programs and any SAP
(Secondary Audio Program) that accompanies the stereo
program, if the broadcaster transmits an additional sound
signal as well as the original one.
- Mono : The primary language is heard from left and right
speakers. Signal mode is mono.
- Stereo : The primary language is heard from left and right
speakers. Signal mode is stereo.
- SAP : The secondary language is heard from left and right
speakers.
• Press the mts button repeatedly.
- Select mono sound mode if the signal is not clear or in poor
signal reception areas.
- Stereo, SAP mode are available only if included on the
broadcast signal.
SAP Stereo Mono
[ Note ]
• It’s not available to use function in DTV mode.
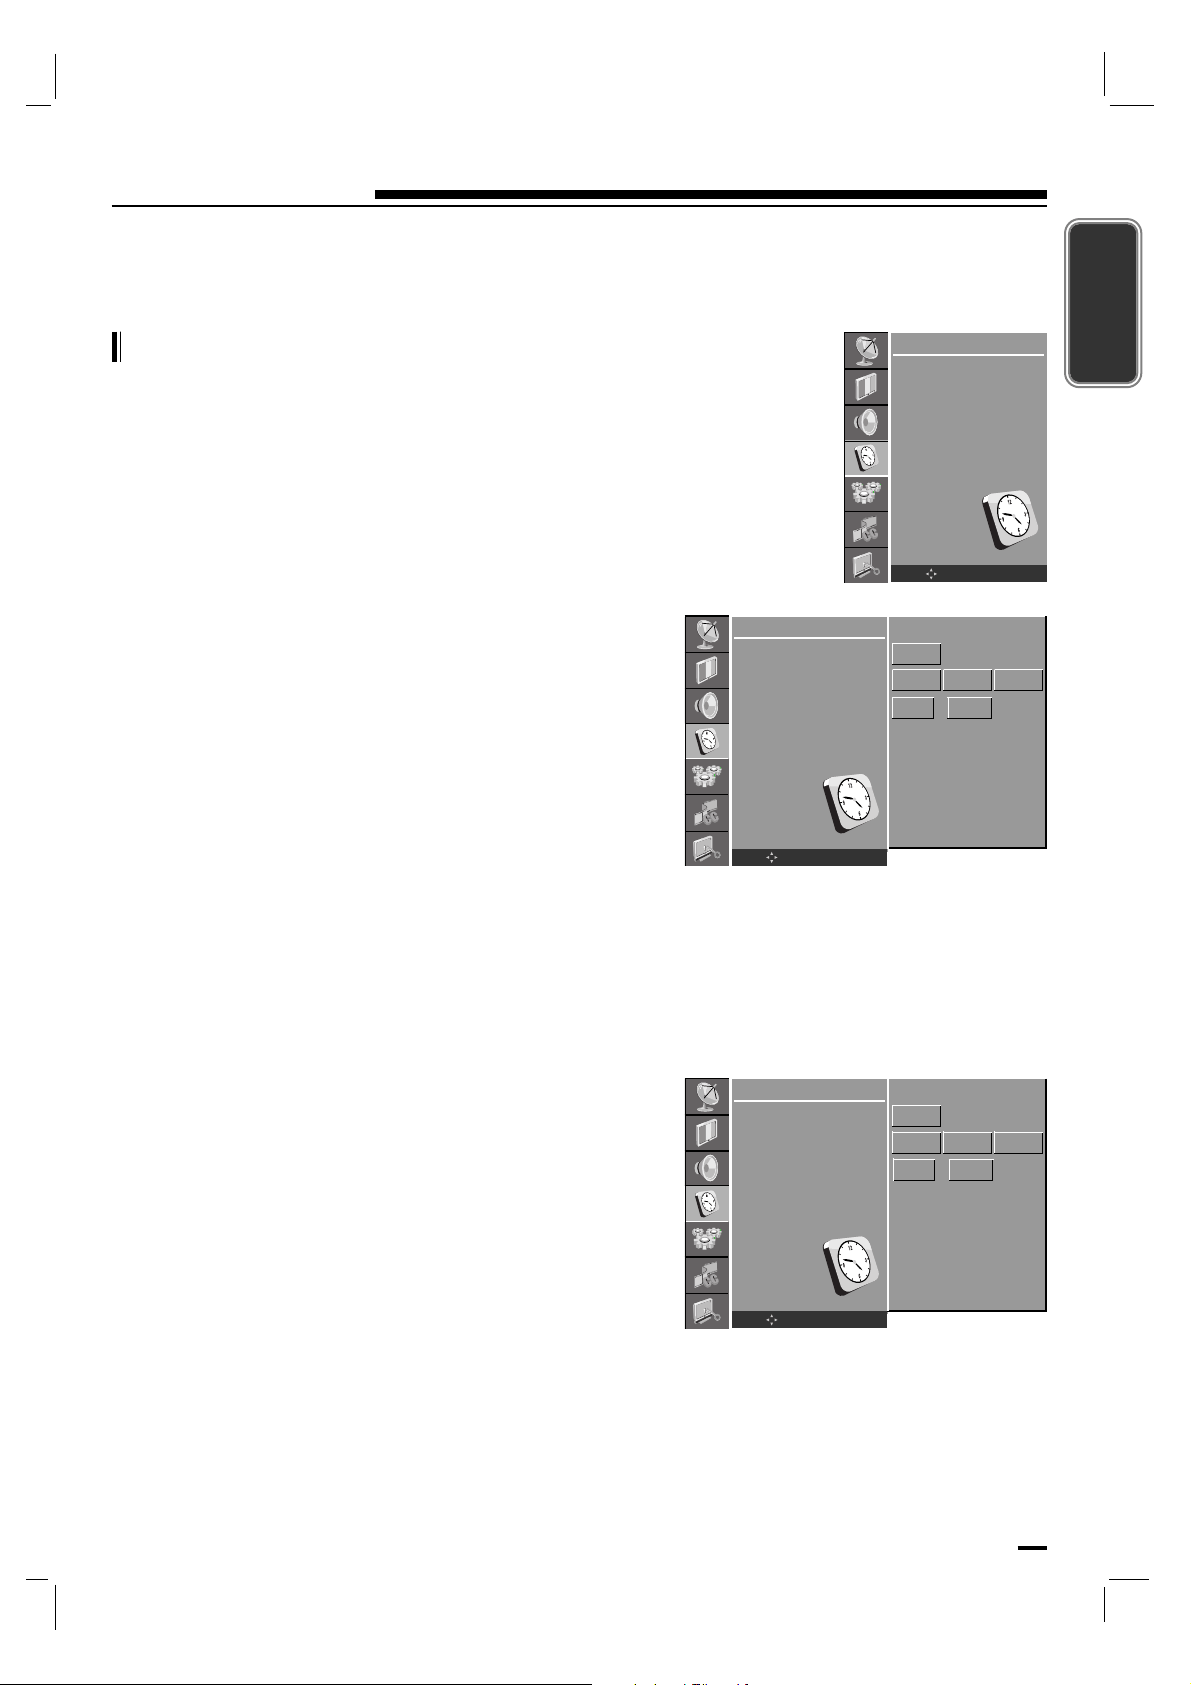
27
Time Menu
ENGLISH
Clock
[ Auto ]
- The time is set automatically from a digital channel
signal.
- The digital channel signal includes information for the
current time provided by the broadcasting station.
- Set the clock manually, if the current time is set
incorrectly by the auto clock function.
Press the MENU button and then D / E button to select the
TIME menu.
Press the G button and then D / E button to select Clock.
Press the G button and then D / E button to select Auto.
Repeatedly press the MENU button to return to normal TV
viewing.
[ Manual ]
- If current time setting is wrong, reset the clock manually.
Press the MENU button and then D / E button to select the
TIME menu.
Press the G button and then D / E button to select Clock.
Press the G button and then D / E button to select Manual.
Press the G button and then D / E button to adjust the Month
/ day / year.
Press the G button and then D / E button to adjust the hour
/ minute.
Repeatedly press the MENU button to return to normal TV
viewing.
TIME
Clock
Off Time
On Time
Auto Sleep
Time Zone
Daylight saving
OK MENU
TIME
Clock
Off Time
On Time
Auto Sleep
Time Zone
Daylight saving
OK MENU
Auto
Aug 7 2006
10 : AM12
TIME
Clock
Off Time
On Time
Auto Sleep
Time Zone
Daylight saving
OK MENU
Manual
Aug 7 2006
10 : 12
AM
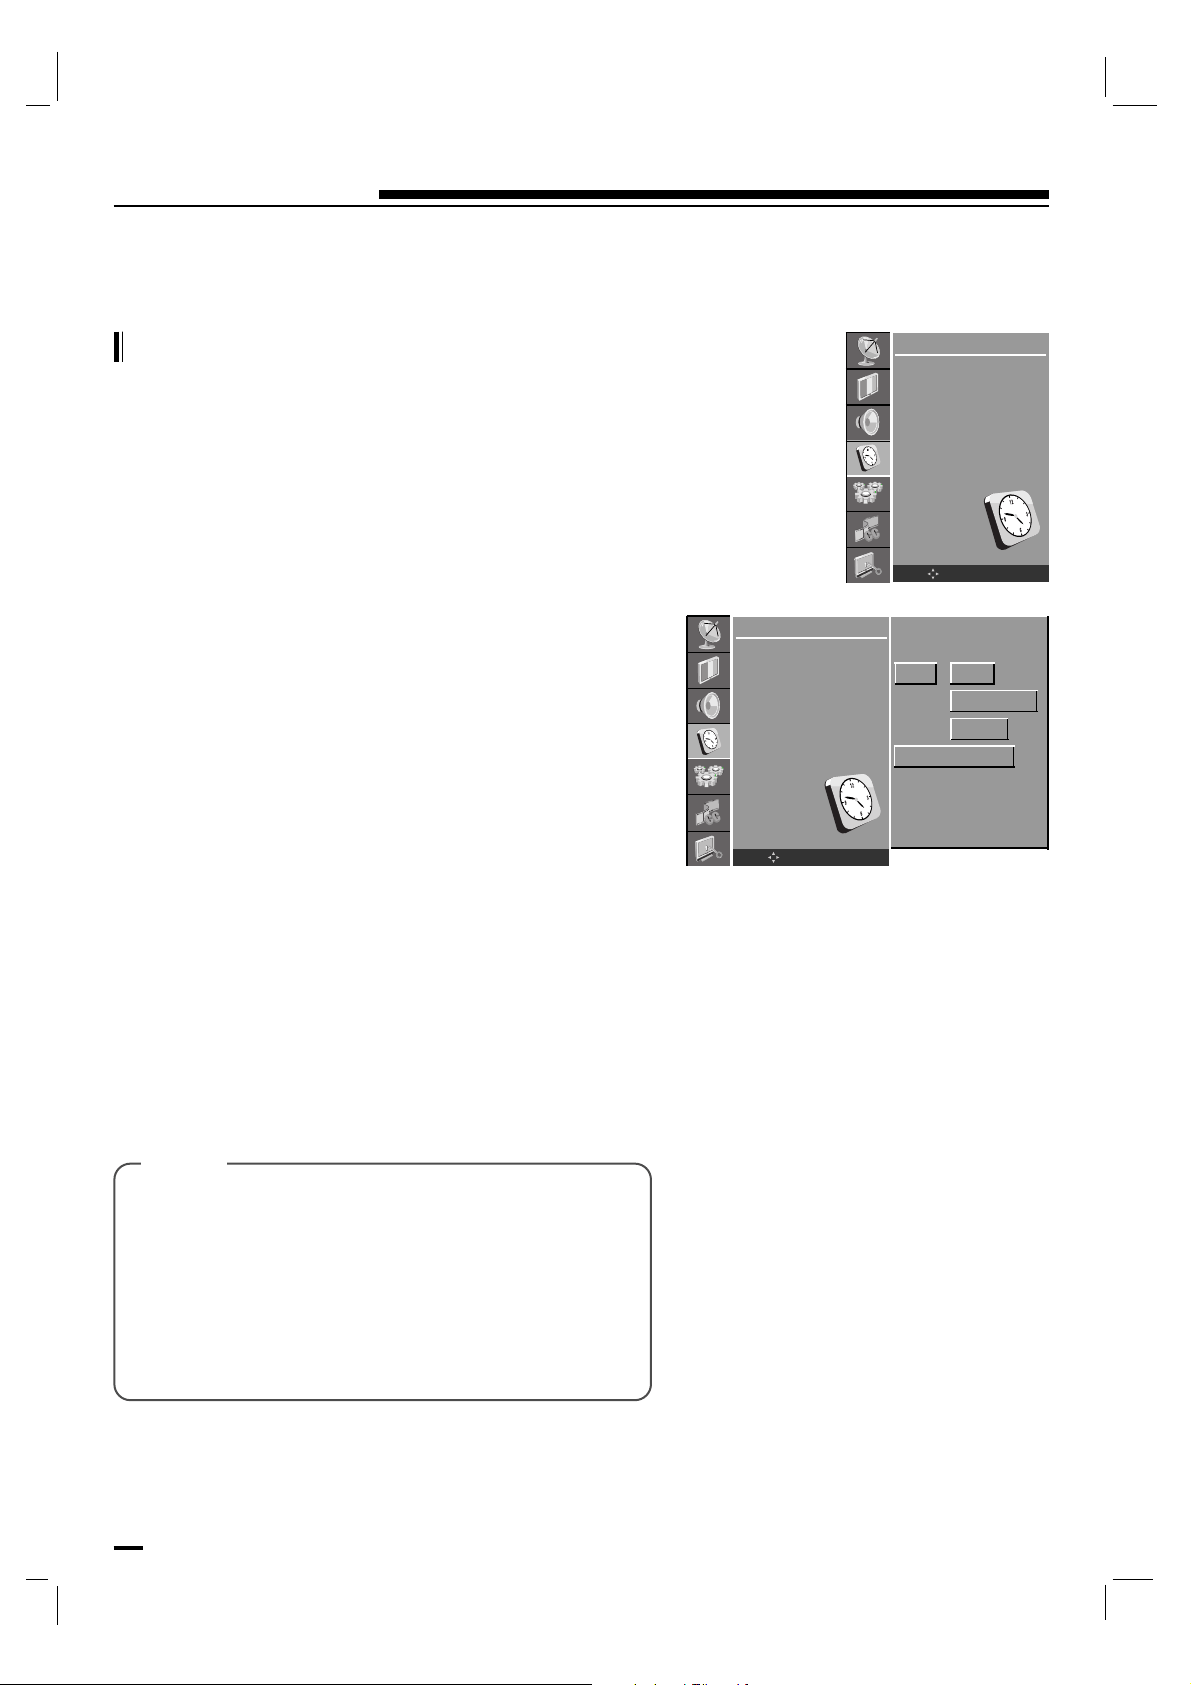
[ Note ]
28
Time Menu
Press the MENU button and then D / E button to select the
TIME menu.
Press the G button and then D / E button to select Off Time
or On Time.
Press the G button and then D / E button to select On.
To cancel Off/On Time function, press the D / E button to
select Off.
Press the G button and then D / E button to adjust the hour
/ minute.
Only On time function; Press the G button and then D / E
button to adjust volume level and channel number.
Repeatedly press the MENU button to return to normal TV
viewing.
TIME
Clock
Off Time
On Time
Auto Sleep
Time Zone
Daylight saving
OK MENU
On/Off Time
- The off timer automatically switches the set to standby at
the preset time.
a. In the event of power interruption (disconnection or
power failure), the clock must be reset.
b. Once the on or off time is set, these functions operate
daily at the preset time.
c. Off Timer function overrides On Timer function if they
are set to the same time.
d. The set must be in standby mode for the On Timer to
work.
TIME
Clock
Off Time
On Time
Auto Sleep
Time Zone
Daylight saving
OK MENU
Off
07 : 10
CH DTV2-1
VOL 12
AM

29
Time Menu
ENGLISH
Press the MENU button and then D / E button to select the
TIME menu.
Press the G button and then D / E button to select Auto
Sleep
.
Press the G button and then D / E button to select On or
Off.
Repeatedly press the MENU button to return to normal TV
viewing.
TIME
Clock
Off Time
On Time
Auto Sleep
Time Zone
Daylight saving
OK MENU
Auto sleep
- If you select On on the Auto Sleep menu, the set will
automatically switch itself to standby mode approximately
ten minutes after a TV station stops broadcasting.
Time Zone
- The Time Zone function don’t need to be available in the Clock Manual function.
- Menus vary according to DTV and TV mode.
- When it confirms the Time Zone, it refers to the site lower port it wishes.
“ http://www.timetemperature.com/tzus/time_zone.shtml ”
Press the MENU button and then D / E button to select the
TIME menu.
Press the G button and then D / E button to select Time
Zone
.
Press the G button and then D / E / F / G button to select
USA or Canada.
Press the D / E button to select your viewing area time zone
: Eastern, Central, Mountain, Pacific, Alaska or
Hawaii.
(Canada area time zone : New F.Land, Atlantic,
Eastern, Central, Mountain, Pacific)
Press the OK button to save.
Repeatedly press the MENU button to return to normal TV
viewing.
TIME
Clock
Off Time
On Time
Auto Sleep
Time Zone
Daylight saving
OK MENU
On
Off
G
TIME
Clock
Off Time
On Time
Auto Sleep
Time Zone
Daylight saving
OK MENU
Eastern
Central
Mountain
Pacific
Alaska
Hawaii
F U S A G

30
Time Menu
Press the MENU button and then D / E button to select the
TIME menu.
Press the G button and then D / E button to select
Daylight saving.
Press the G button and then D / E button to select Auto,
On or Off.
Repeatedly press the MENU button to return to normal TV
viewing.
TIME
Clock
Off Time
On Time
Auto Sleep
Time Zone
Daylight saving
OK MENU
Daylight saving
- If you select On on the Daylight saving menu, observes
Daylight Saving time.
- The Daylight saving function don’t need to be available
in the Clock Manual function.
You don’t have to remember to switch the set off before you
go to sleep. The sleep timer automatically switches the set to
standby after the preset time has elapsed.
Press the SLEEP button to select the number of minutes.
The display ‘Sleep Time - - min’ will appear on the screen,
followed by 10, 20, 30, 60, 90, 120, 180 and 240. The timer
begins to count down from the number of minutes selected.
Sleep timer
TIME
Clock
Off Time
On Time
Auto Sleep
Time Zone
Daylight saving
OK MENU
Auto
On
Off
G
[ Note ]
a. To view the remaining sleep time, press the SLEEP
button once.
b. To cancel the sleep time, repeatedly press the SLEEP
button until the display ‘Sleep Time - - min’ appears.
c. When you switch the set off, the set releases the
preset sleep time.

31
Setup Menu
ENGLISH
Press the MENU button and then D / E button to select the
SETUP menu.
Press the G button and then D / E button to select Child
Lock
.
Press the G button and then D / E button to select On or
Off.
Repeatedly press the MENU button to return to normal TV
viewing.
Child Lock
- The TV can be set so that the remote control handset is
needed to control it. This feature can be used to prevent
unauthorized viewing.
-It’s not available in the front button of the set.
SETUP
Language
Input
ARC
Child Lock
OK MENU
On
Off
G
SETUP
Language
Input
ARC
Child Lock
OK MENU

32
Caption Menu
Press the MENU button and then use D / E button to select
the CAPTION menu.
Press the G button and then use D / E button to select
Caption Mode.
Press the G button and then use F / G button to select your
caption selection.
Your choices are DTV mode : Off, English, Spanish,
French, Service4, Service5
and Service6.
Your choices are TV mode : Off, CC1, CC2, CC3, CC4,
Text 1, Text 2, Text3
and Text4.
Repeatedly press the MENU button to return to normal TV
viewing.
Press the MENU button and then use D / E button to select
the CAPTION menu.
Press the G button and then use D / E button to select
Caption Option.
Press the G button and then D / E button to select the
desired font style item.
Press the F / G button to make appropriate adjustments font
style.
A preview icon is provided at the bottom of the screen, use it
to see the caption language.
Repeatedly press the MENU button to return to normal TV
viewing.
Caption Menu Setup
- Use the CC button repeatedly to select Captions.
- Customize The DTV/CADTV captions that appear on
your screen.
- Caption Option are available in DTV mode only.
CAPTION
Caption Mode
Caption Option
OK MENU
CAPTION
Caption Mode
Caption Option
OK MENU
DTV Service2
CAPTION
Caption Mode
Caption Option
OK MENU
Style User
Size Small
Font Font4
Text Color Yellow
Text Opacity Solid
Bg Color Black
Bg Opacity Solid
Edge Type Raised
Edge Color White
Sample
[ Caption Mode ]
[ Caption Option ]

33
Lock Menu (option)
ENGLISH
Lock Menu Options
Parental Control can be used to block specific channels,
ratings and other viewing sources.
The Parental Control Function (V-Chip) is used to block
program viewing based on the ratings sent by the broadcast
station. The default setting is to allow all programs to be
viewed. Viewing can be blocked by the type of program and
by the categories chosen to be blocked. It is also possible to
block all program viewing for a time period.
To use this function, the following must be set :
1. Ratings and categories to be blocked.
2. Set a password
3. Enable the lock
Rating guidelines are provided by broadcast stations. Most
television programs and television movies can be blocked by
TV Rating and/or Individual Categories. Movies that have
been shown at the theaters or direct-to-video movies use the
Movie Rating System (MPAA) only.
[ V-Chip rating and categories ]
Movie Ratings :
• Unblocked
• G and Above : (general audience)
• PG and Above : (parental guidance suggested)
• PG-13 and Above : (13 years and older)
• R and Above : (Restricted, Children under 17 should be
accompanied by an adult.)
• NC-17 and Above : (18 years and older)
• X : (adult)
- If you set PG-13 and Above : G and PG movies will be available,
PG-13, NC-17 and X will be blocked.
[ For Movies previously shown in theaters : ]

34
Lock Menu (option)
General TV Ratings:
• Unblocked
• TV-G and Above : (general audience)
(individual categories do not apply)
• TV-PG and Above : (parental guidance suggested)
• TV-14 and Above : (14 years and older)
• TV-MA : (mature audience)
Children TV Ratings:
• Unblocked
• TV-Y and Above : (youth)
(individual content categories do not apply)
• TV-Y7 : (youth, 7 years and older)
Content Categories:
• Dialog - sexual dialogue :
(applies to TV-PG and Above, TV-14, Unblocked)
• Language - adult language :
(applies to TV-PG and Above,TV-14 and Above, TV-MA,
Unblocked)
• Sex scenes - sexual situations :
(applies to TV-PG and Above, TV-14 and Above, TV-MA,
Unblocked)
• Violence :
(applies to TV-PG and Above, TV-14 and Above, TV-MA,
Unblocked)
• F Violence - fantasy violence :
(applies to TV-PG and Above, TV-14 and Above, TV-MA,
Unblocked)
[ For Television programs including made-for-
TV movies : ]

35
Lock Menu (option)
ENGLISH
Canadian English language rating system:
• Unblocked
• C and Above : (Children)
• C8+ and Above : (8 years and up)
• G and Above
: (General programming. Suitable for all audiences.)
• PG and Above : (Parental guidance suggested)
• 14+and Above : (Viewers 14 years and older)
• 18+ : (Adult programming)
Canadian French language rating system:
• Unblocked
• G : (General)
• 8 ans+ : (8 years and older)
• 13 ans+ : (13 years and older)
• 16 ans+ : (16 years and older)
• 18 ans+ : (Adults only)
[ For Canadian English/French language
rating system : ]
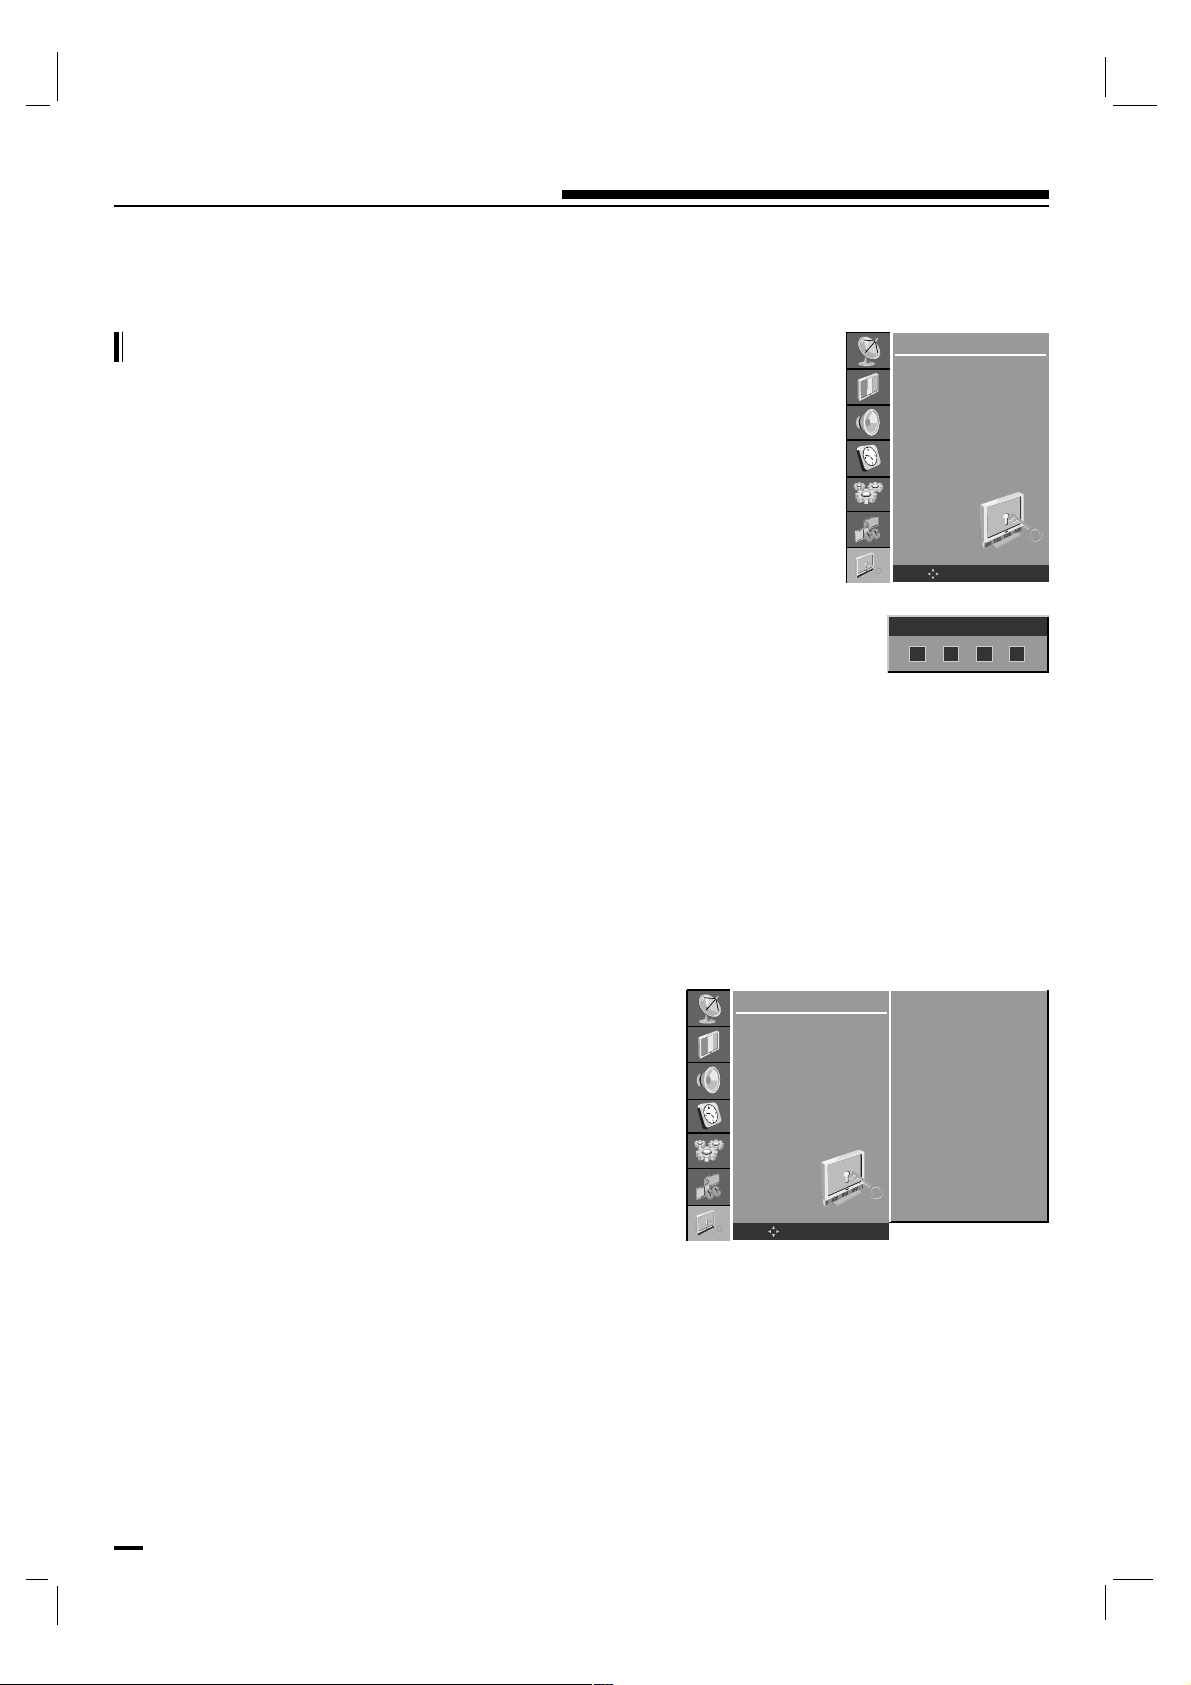
36
Lock Menu (option)
Press the MENU button and then use D / E button to select
the LOCK menu.
Then, press the G button.
• If LOCK is already set, enter the password requested.
• The TV is set with the initial password “0-0-0-0”.
Lock Menu Setup
- Enables or disables the blocking scheme you set up
previously.
Press the D / E button to select Lock System.
Press the G button and then use D / E button to select On
or Off.
Repeatedly press the MENU button to return to normal TV
viewing.
[ Setting Lock on/off ]
LOCK
Lock System
Set Password
Rating
Input Block
OK MENU
LOCK
Lock System
Set Password
Rating
Input Block
OK MENU
On
Off
G
Enter Password

37
Lock Menu (option)
ENGLISH
- Change the password by inputting a new password twice.
Press the D / E button to select Set Password.
Press the G button.
Enter a four digit password.
As soon as the 4 digits are entered, re-enter the same 4 dig-
its on the New Password, Confirm Password.
Press the OK button to save.
- If entering invalid password in Confirm Password,
“ Wrong Password.. ” appears on screen.
Then your changed password has been memorized.
Repeatedly press the MENU button to return to normal TV
viewing.
[ Set password ]
LOCK
Lock System
Set Password
Rating
Input Block
OK MENU
New Password
Confirm Password
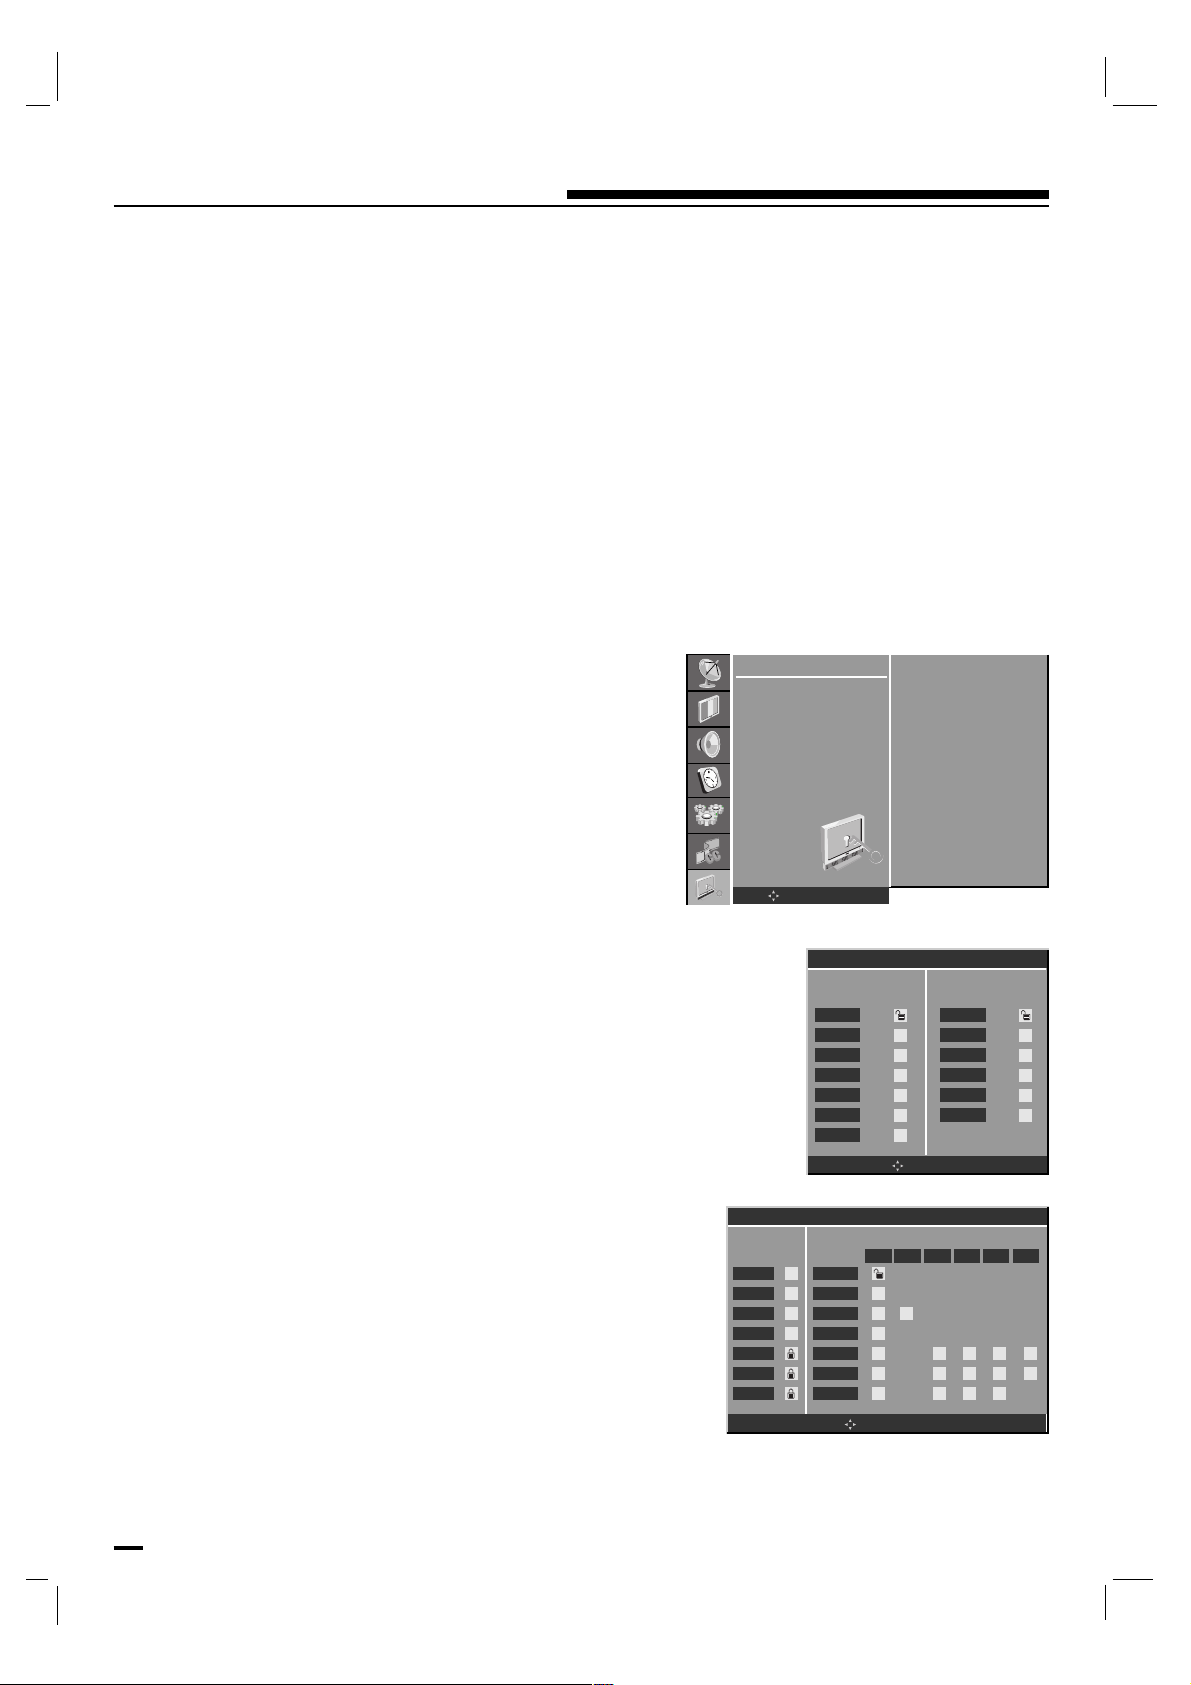
38
Lock Menu (option)
- Selecting canadian/english/french rating system.
Press the D / E button to select Rating.
Press the G button and then use D / E button to select TV
& MPAA
or Canadian.
Press the G button and then use D / E button to select type
of ratings to block.
Press the F / G button to select your rating selection.
Repeatedly press the MENU button to return to normal TV
viewing.
[ Rating ]
OK MENU
Rating Control
MPAA TV RATING
ALL FV L S V D
NONE
G
PG
PG-13
R
NC-17
X
NONE
G
PG
PG-13
R
NC-17
X
OK MENU
Canadian Rating Menu
Canadian French
E
G
8 ans+
13 ans+
16 ans+
18 ans+
Canadian English
E
C
C8+
G
PG
14+
18+
LOCK
Lock System
Set Password
Rating
Input Block
OK MENU
TV & MPAA
Canadian
G
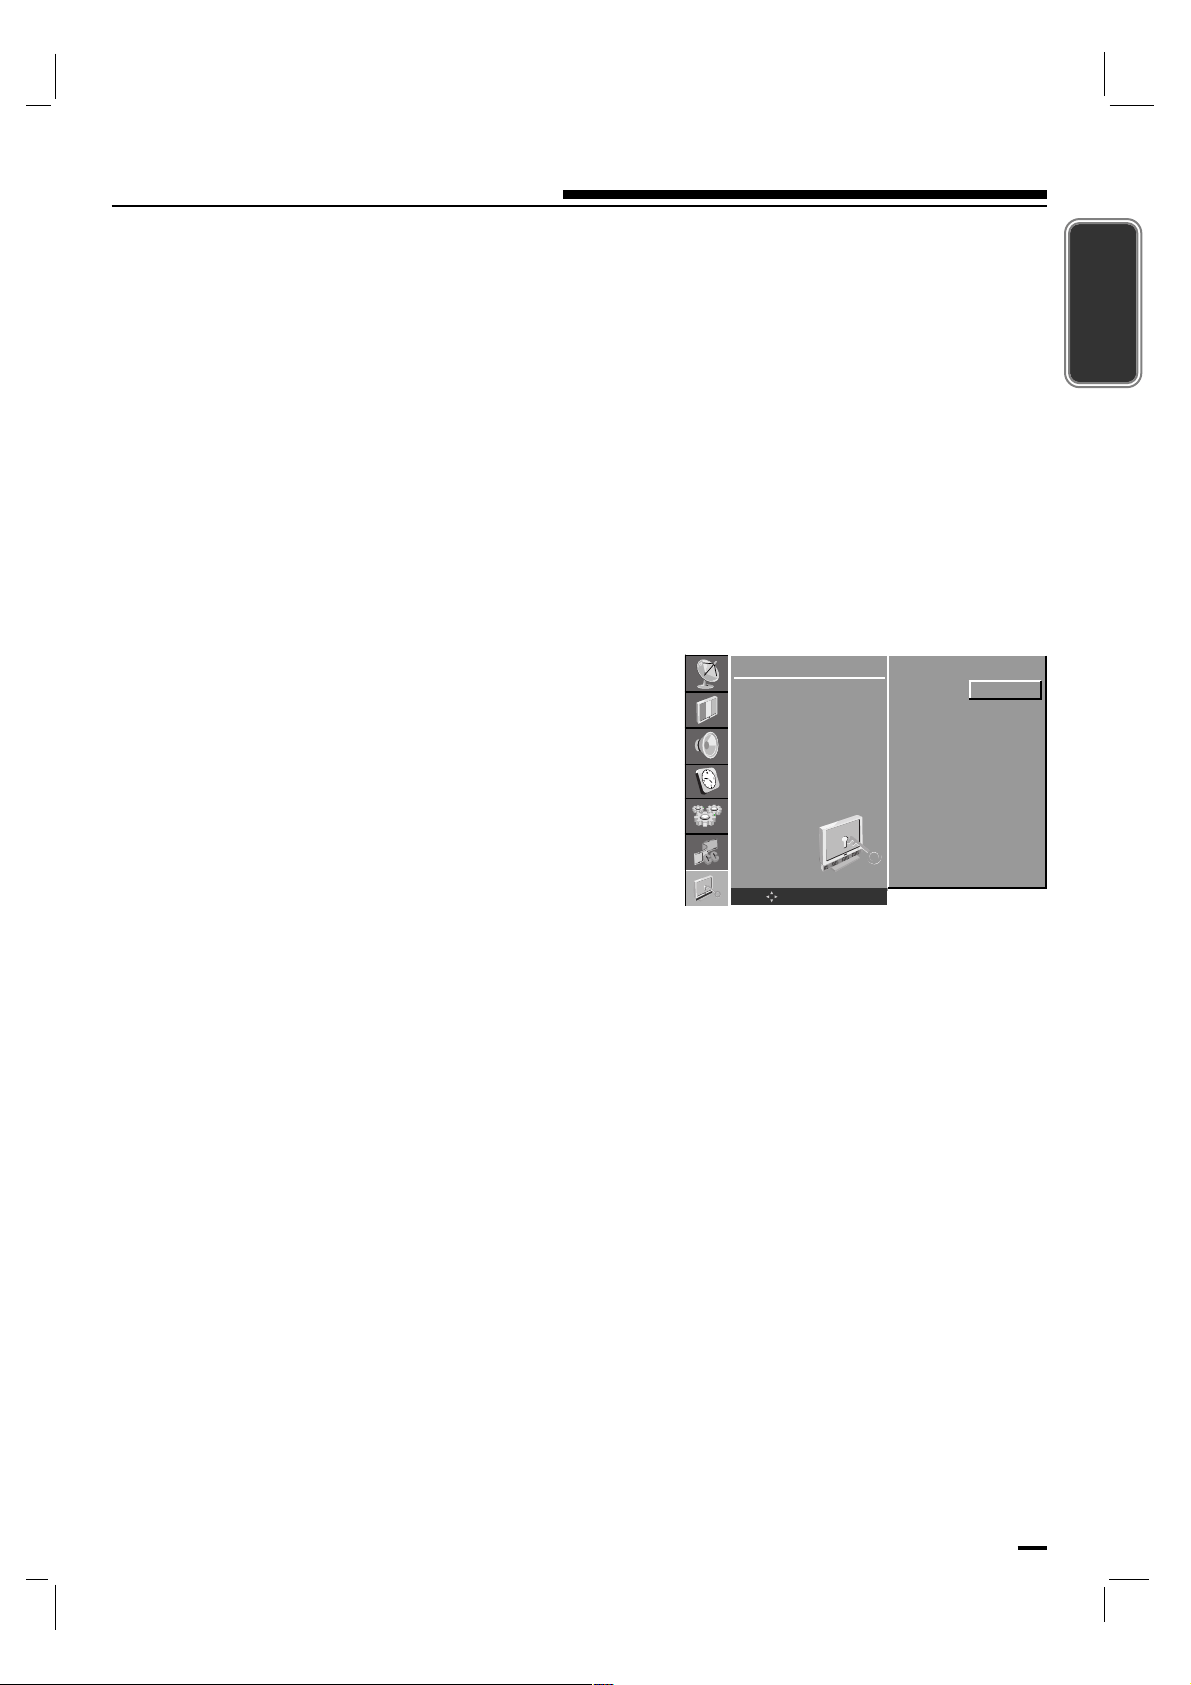
39
Lock Menu (option)
ENGLISH
- Enables you to select a source to block from the external
source devices you have hooked up.
Press the D / E button to select Input Block.
Press the G button to select Component.
Press the F / G button to select Blocked or Unblocked.
Repeatedly press the MENU button to return to normal TV
viewing.
[ Input Block ]
LOCK
Lock System
Set Password
Rating
Input Block
OK MENU
Component
Unblocked
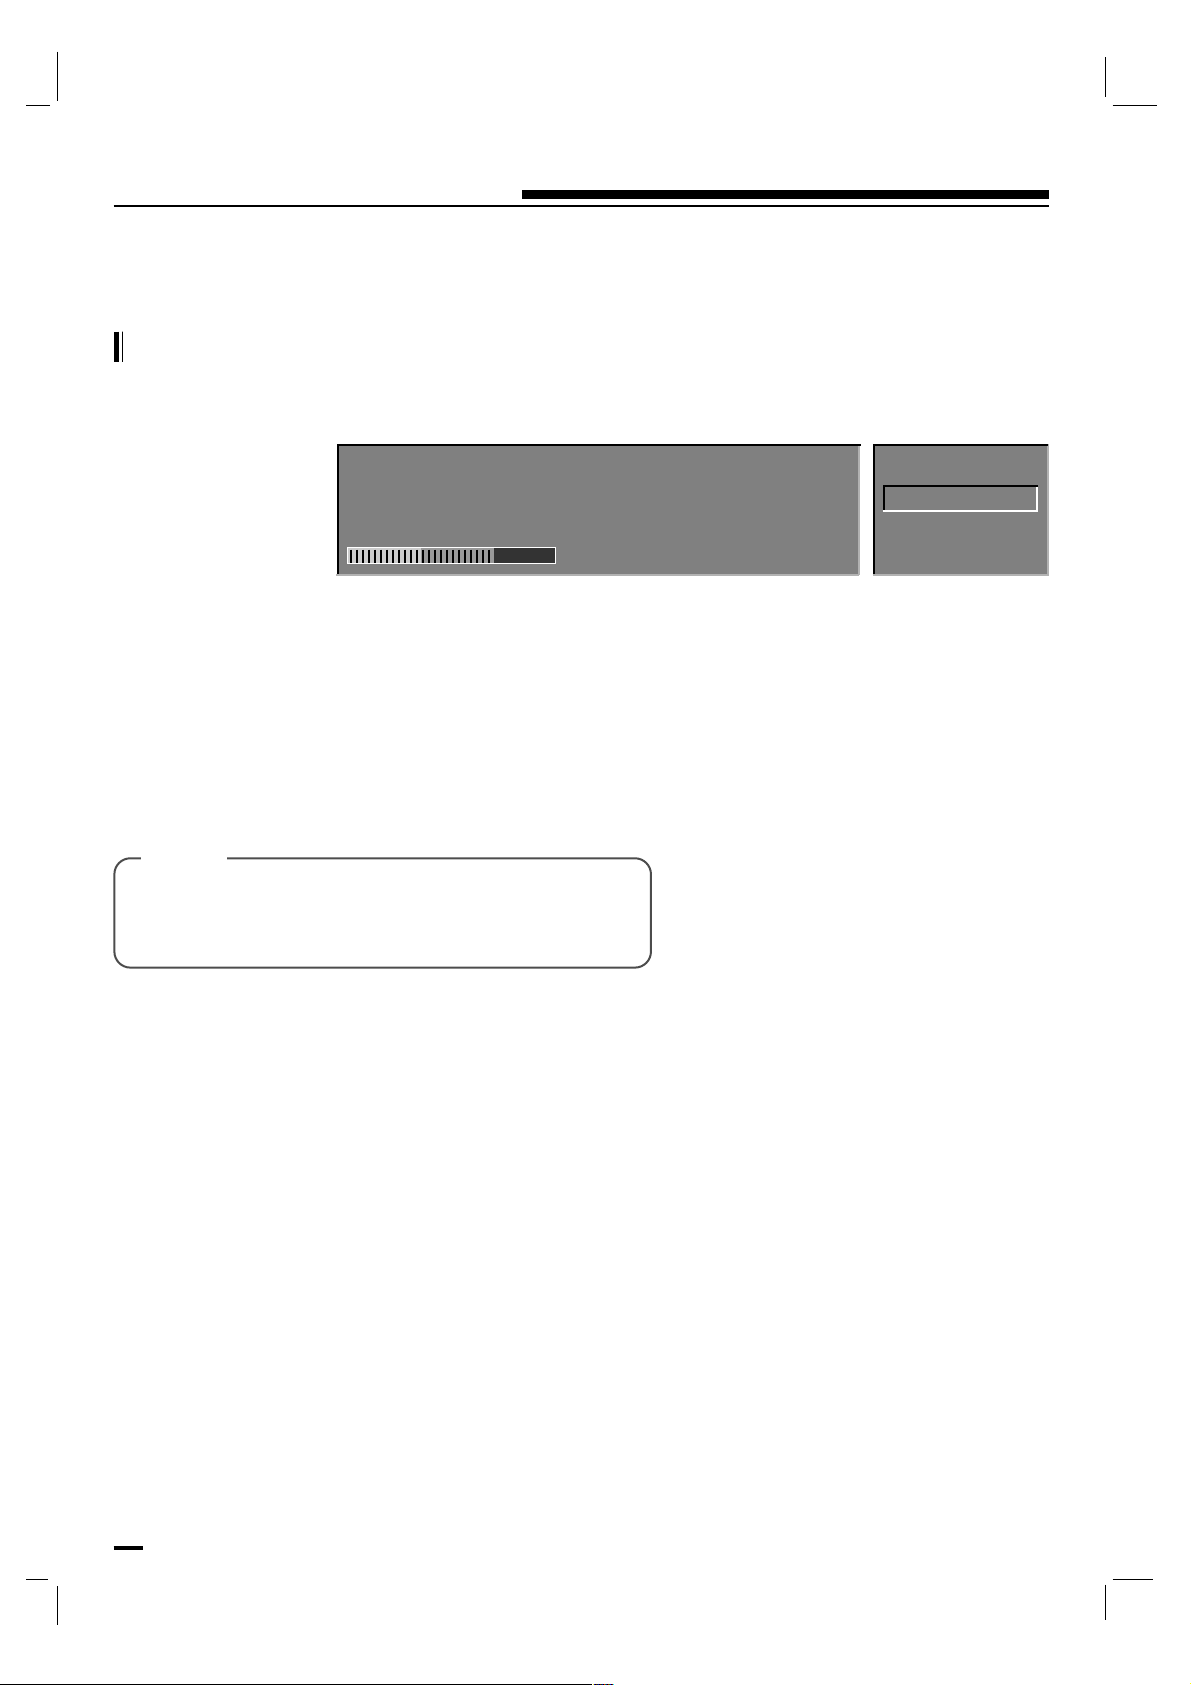
[ Note ]
40
Optional features
- This function shows the present screen information.
Press the OK button during watching TV.
The service information appears on screen.
Press the OK or EXIT button to exit.
- When you press the OK button, Signal Strength
aren’t displayed on the information OSD.
- It’s disappeared after a while.
Information
DTV 9-1
KBS D-1
16:9
3:27 PM
* DTV mode information appears on screen.
Ch 9-1 KBS D1
Speed
16:9 HD 1080i Not Rating
Aug/10/2006 3:27 PM
3:00 PM-4:45 PM
DD Stereo
CaptionMultilingual
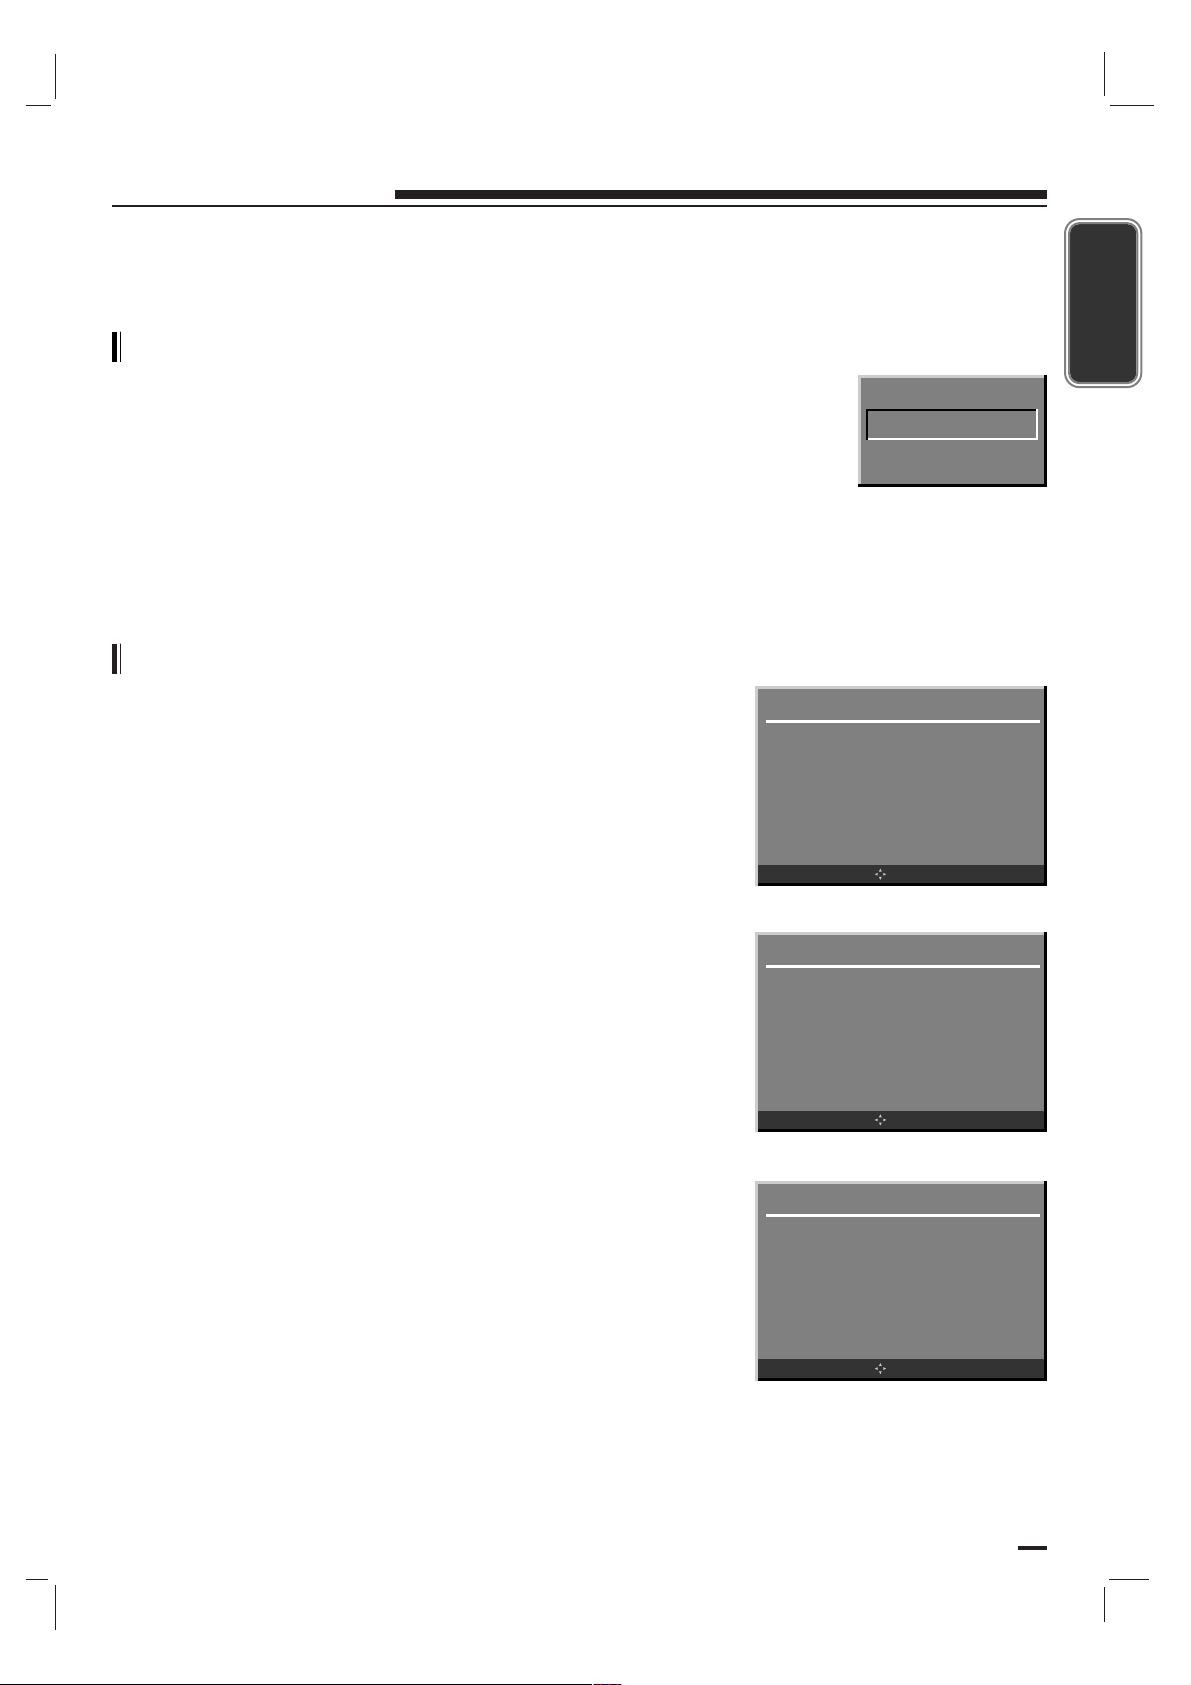
41
Radio Menu
ENGLISH
Basic Operation
- Be sure to select the Radio with INPUT button of the
remote control before operation.
- When pressing the channel (D / E) button one time, it will
increment the search by 0.1MHz.
- FM Radio reception quality depends on the broadcast
conditions and the antenna, which should be fully extended.
Radio Station Manual Search
Press the MENU button.
Press the D / E buttons to select Favorite Program.
Use the F / G buttons to select your Favorite program
selection.
Press the D / E buttons to select Storage.
Use the F / G buttons to select Memory or Erase.
Press the D / E buttons to select Frequency.
Use the F / G buttons to search the radio channel.
When pressing the channel (F / G) button one time, it will
increment the search by 0.1MHz.
Radio Menu
Favorite Program F 0 G
Storage Erase
Frequency 87.90 MHz
Auto Program GGG
OK MENU
Radio Menu
Favorite Program F 0 G
Storage Erase
Frequency 87.90 MHz
Auto Program GGG
OK MENU
Radio Menu
Favorite Program F 0 G
Storage Erase
Frequency 87.90 MHz
Auto Program GGG
OK MENU
RADIO
107.30 MHz
Mono FCR 0
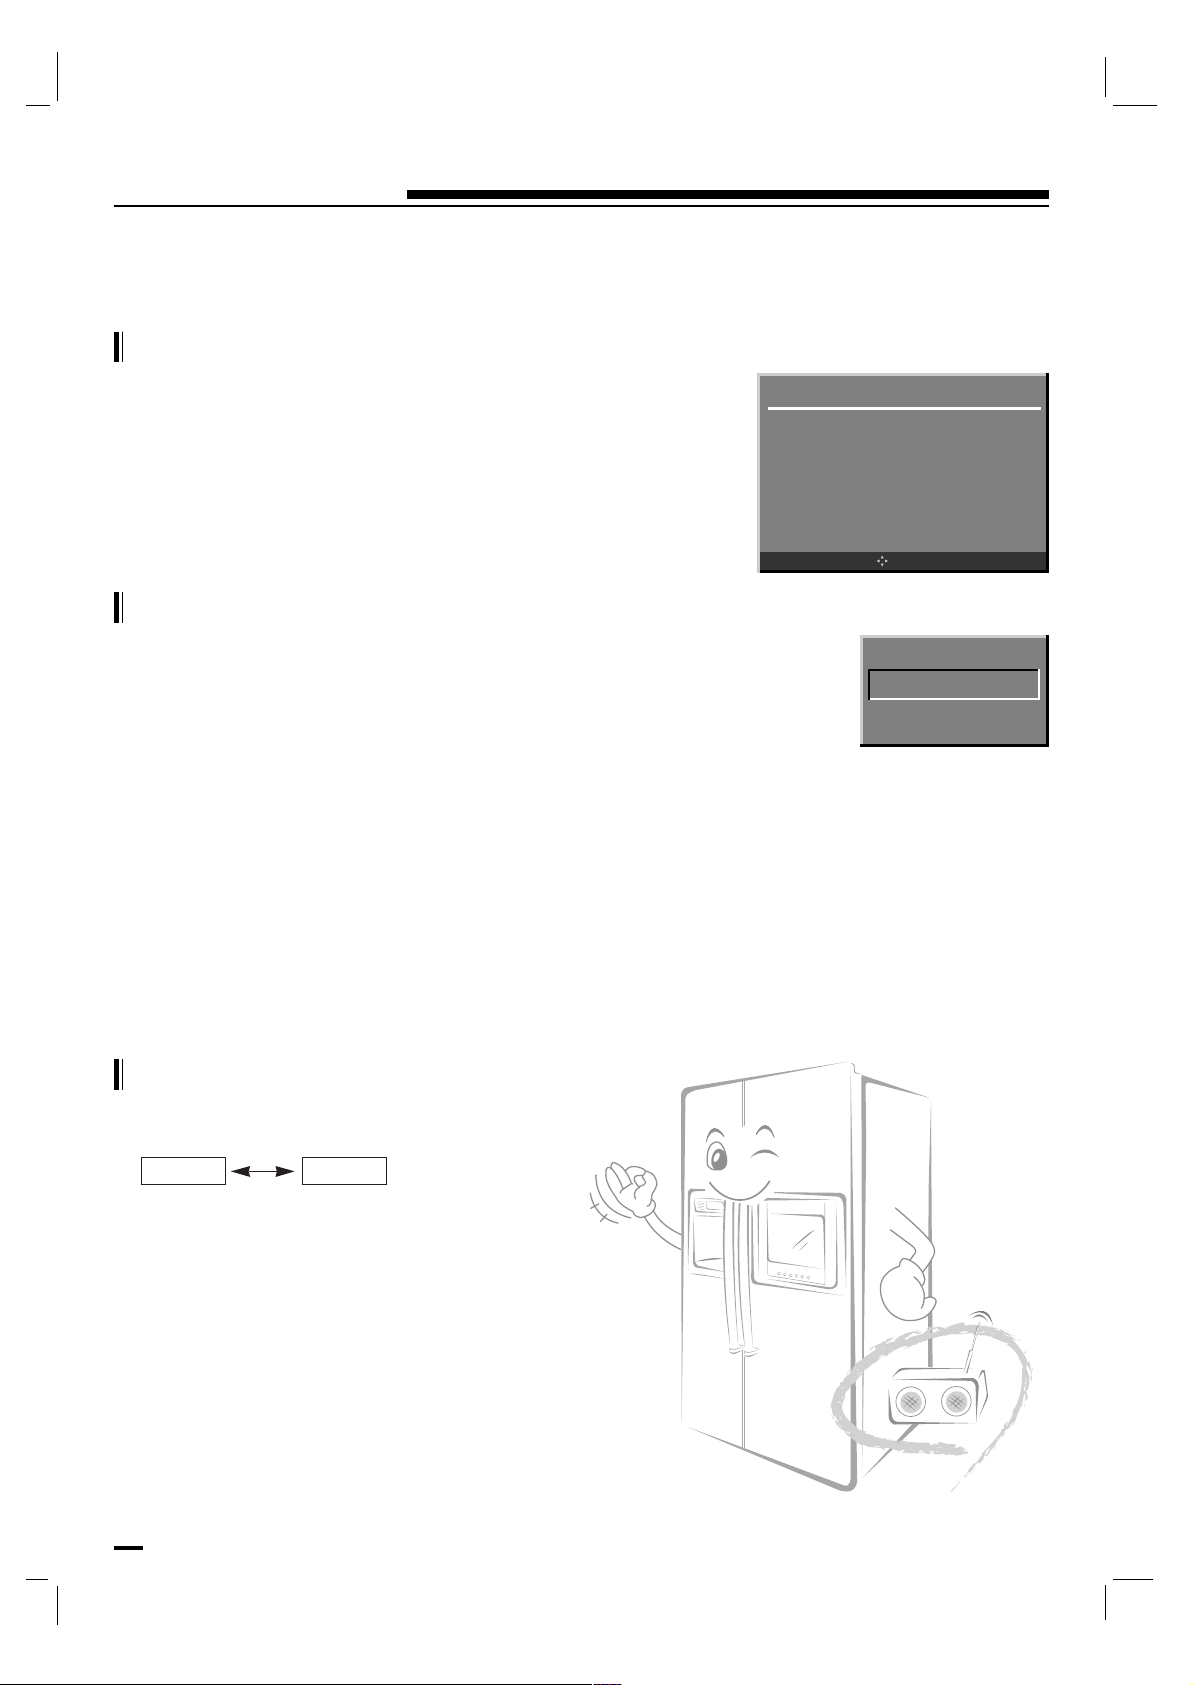
42
Radio Menu
Radio Station Auto Search
Press the MENU button.
Press the D / E buttons to select Auto Program.
Press the G button to begin the channel search.
Favorite Channel Memory
- Favorite channel memory is a convenient feature that
lets you quickly scan up to five channels of your choice
without having to wait for the radio to scan through all the
in-between channels.
Stereo Broadcast Setup
Press the mts button to toggle between Mono and Stereo.
Press the MENU button and then select your desired radio
channel.
Press the A OK button to save it to memory as the favorite
channel.
To tune a favorite channel, press the MENU button to cycle
through the saved favorites.
Mono Stereo
Radio Menu
Favorite Program F 0 G
Storage Erase
Frequency 87.90 MHz
Auto Program GGG
OK MENU
RADIO
107.30 MHz
Mono FCR 3
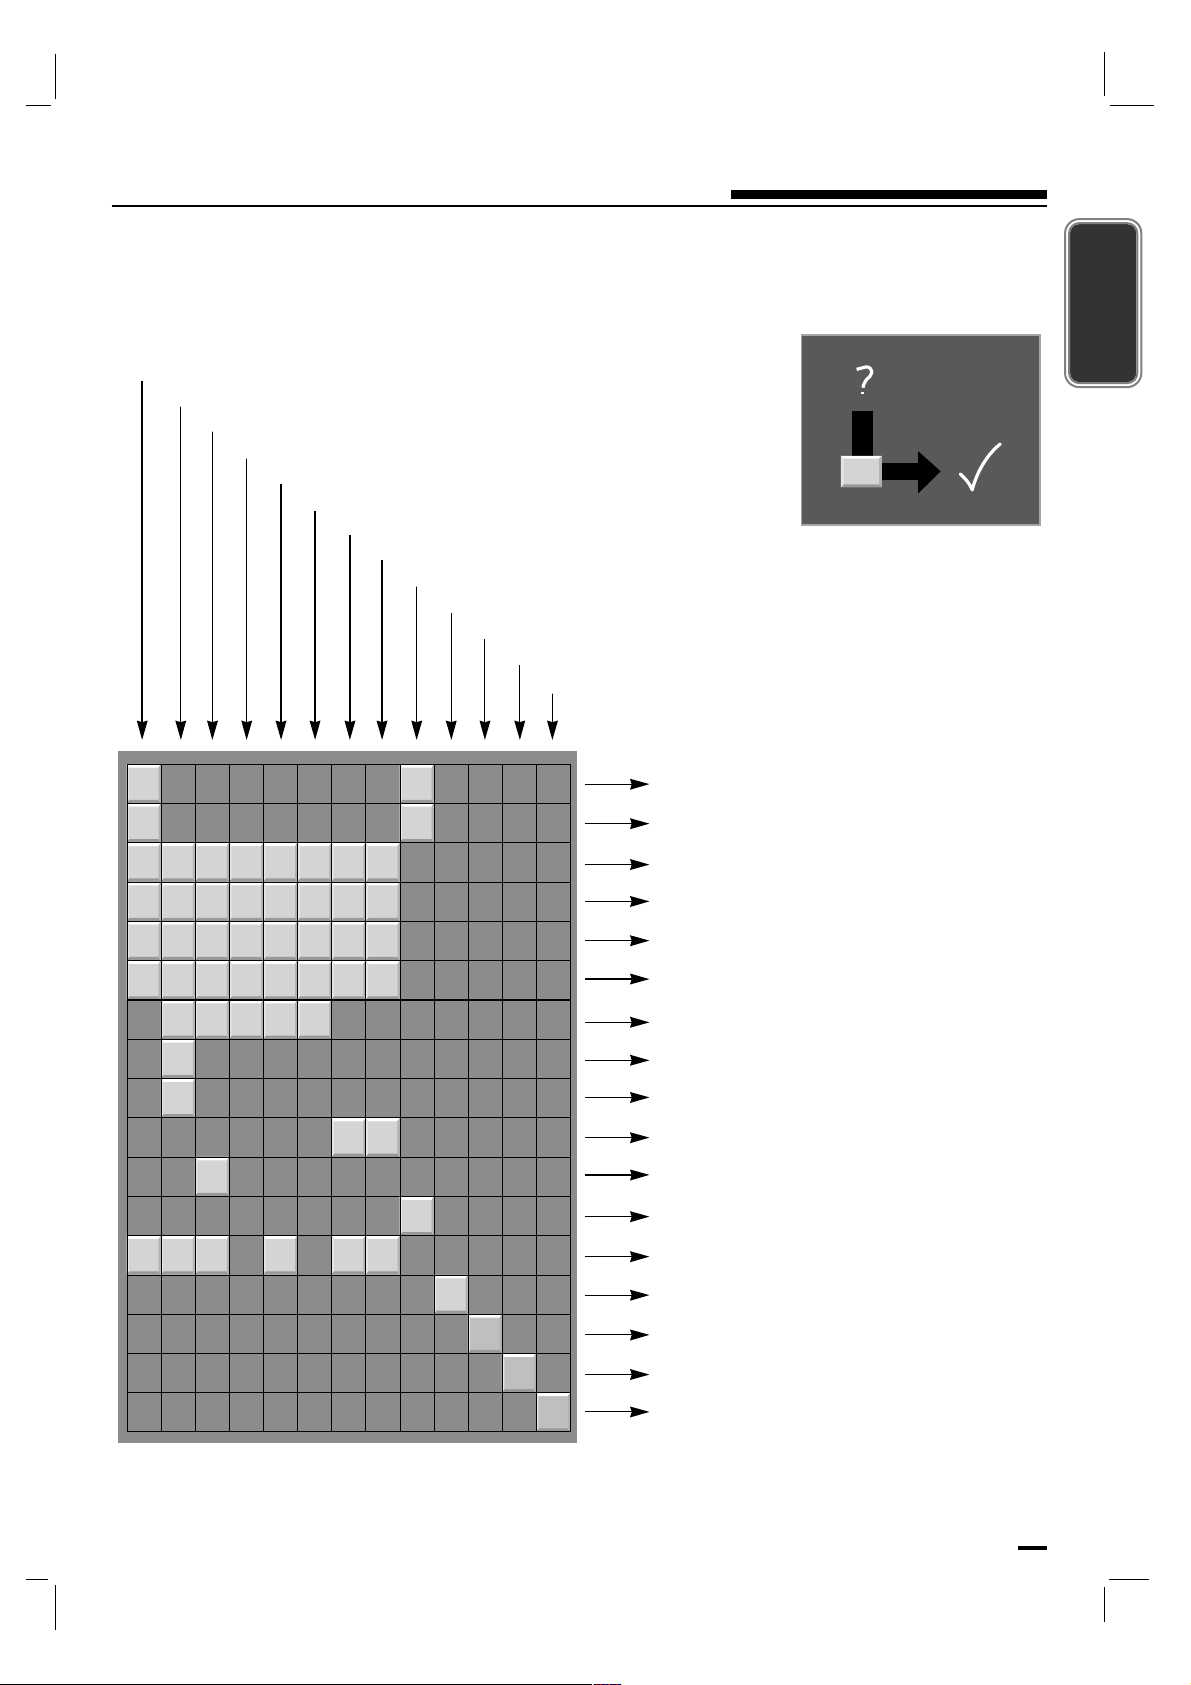
43
Troubleshooting Check list
ENGLISH
Check these items and try to adjust these
Symptoms
No picture, no sound
Sound OK, poor picture
Picture OK, poor sound
Picture blurred
Lines or streaks in picture
Poor reception on some channels
No color
Poor color
Remote control does not work
Incorrect position
Vertical bars or stripes on background
Horizontal noise
Signal Cable message appears
The mains plug-(plugged in and switched on)
Is the TV switched on
Try another channel (weak signal)
Check aerial (plugged into TV?)
Check aerial (broken lead?)
Check aerial
Check for local interference
Adjust contrast
Adjust brightness
Adjust color
Adjust volume
Check the batteries in remote control
Check distance and angle.
Check Audio/Video sockets (VCR only)
Auto-configure or adjust the H/V position
Auto-configure or adjust Clock
Auto-configure or adjust Clock Phase
Is the Signal Cable connected or loose

44
Commandes
Commandes 44 - 45
Avertissement 46 - 47
Consignes de sécurité 48 - 49
Emplacement et fonctions des commandes 50 - 51
Commandes
Touche Télécommande
Installation des piles
Branchements externes 52 - 54
Raccordement à une antenne/câblé
Câble ou VHF/UHF (Ou VHF seulement)
Câble et VHF/UHF (Ou VHF seulement)
Raccordement au réseau câblé
Prises d’entrée DVD
Fonctionnement de base 55
Mise sous/hors tension du téléviseur
Sélection des canal
Réglage du volume
Sélection de la langue pour l’affichage écran (en option)
Menus écran 56
Sélection des menus
Mémorisation des chaînes 57 - 61
Mémorisation des canaux avec Auto
Ajouter/Supprimer des canaux avec Manuelle
Mise au point
Réglage de chaînes préférées
Attribution d’un nom à la emetteur
Menu Image 62 - 64
Temp. Couleur (Mémoire de mode de couleur)
Couleur (Mémorisation des paramètres de l’image)
Réglage de l’image
Format de l’image

P/NO : 3828JD8984K