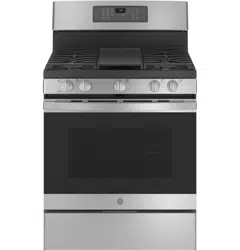
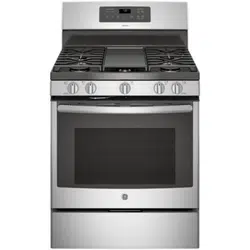
User Gudie GE JGB735SPSS Range
In Case of a Power Failure
- In the event of a power failure, the oven is inoperablem and no attempt should be made to operate it.
- However extreme caution, hold a lit match near the ports beneath the surface burner cap, then slowly turn the knob to the LITE position. Once lit, surface burners will continue to operate normally.
Surface Burners
Selecting a Flame Size
- Watch the flame, not the knob, as you adjust heat. When rapid heating is desired, the flame size should match the size of the cookware you are using.
- Flames larger than the bottom of the cookware will not heat faster and may be hazardous.
Using the Surface Burners
NOTES:
- Time without cookware on the grate. The finish on the grate may discolor or chip without cookware to absorb the heat. Damage to the product may occur.
- Place your hand, a pot holder or cleaning materials on them.
- Your rangetop has sealed gas burners that offer convenience, cleanability and flexibility for a wide range of cooking applications.
- The smallest burner is the simmer burner. A simmer burner turned down to LO provides precise cooking performance for foods such as delicate sauces that require low heat for a long cooking time.
- The extra-large burner is designed to quickly bring large amounts of liquid to a boil.
Aluminum:
- Medium-weight cookware is recommended because it heats quickly and evenly. Most foods brown fitting lids when cooking with minimum amounts of water.
Stainless Steel:
- This metal alone has poor heating properties and is usually combined with copper, aluminum or other metals for improved heat distribution.
- Combination metal skillets usually work satisfactorily if they are used with medium heat or as the manufacturer recommends.
Cast-Iron:
- If heated slowly, most skillets will give satisfactory results.
Enamelware:
- Follow the cookware manufacturer’s recommendations for cooking methods.
Glass:
- Oven use only and those for top-of-range cooking very slowly.
Heatproof Glass Ceramic:
- Can be used for either surface or oven cooking. It conducts heat very slowly and cools very slowly. Check the cookware manufacturer’s directions to be sure it can be used on gas ranges.
Using a Wok
- Make sure the wok bottom sits flat on the grate burner or grate may cause the burner to work improperly, resulting in carbon monoxide levels above allowable standards. This could be hazardous to your health.
Oven Cooking Guide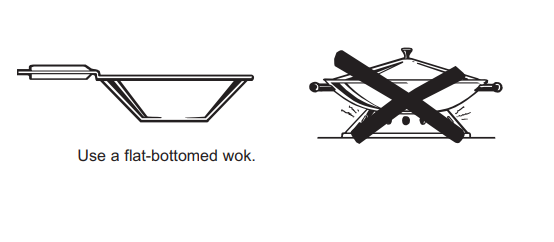
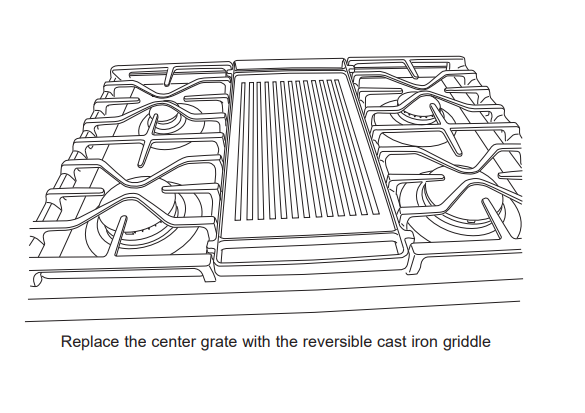
Griddle (on some models)
Using Your Cast Iron Griddle
- The ribbed side of the reversible griddle can be used for food normally grilled.
- Your griddle provides an extra-large cooking surface for meats, pancakes and other foods usually prepared in a skillet. Before first use, rinse with hot water and dry
Griddle Precautions:
- Cleaned up as soon as possible to prevent “baked on” food soil as it can be a fire hazard. Clean under the griddle with hot, soapy water as soon as it is cool.
Oven Controls
Traditional Cooking Modes:
- Your oven has the following traditional cooking modes: Bake,
- Broil and Warm. See the Oven Cooking Modes section for more information.
- Convection Cooking Modes (on some models): Convection cooking mode uses increased air circulation to improve performance.
- See the Oven Cooking Modes section for more information.
Clean: Your oven has two cleaning modes:
- Clean and Steam Clean. See the Cleaning the Oven section for important information about using these modes.
- Start: Must be pressed to start any cooking, cleaning, or timed function.
NOTE:
- If your display and keys dim, opening the oven door or pressing any key will wake and illuminate the control.
Cancel/Off:
- Cancels ALL oven operations except the clock and timer.
- Timer pad and use the number pads to program
- The oven will continue to operate when the timer countdown is complete. To turn the timer off, press the Timer pad.
Cook TIme:
- Counts down cooking time and turns off the oven when the cooking time is
- The number pads to program a baking temperature.
- Cook Time pad and use the number pads to program a cooking time in hours and minutes.
- Then press Start. This can only be used with Bake,
Convection Bake, Convection Roast, and Air Fry.
- Delay Time: Delays when the oven will turn
- Number pad to program a baking temperature.
- Delay Time program the time of day for the oven to turn on, and then press Start.
NOTE:
- When using the Delay Time feature, foods that spoil easily – such as milk, eggs, fish, stuffing, poultry, and pork – should not be allowed to sit forn temperature promotes the growth of harmful bacteria. Be sure that the oven light is off because heat from the bulb will speed harmful bacteria growth.
WiFi Connect (on some models):
- Allows you to control your oven remotely. For instructions on how to connect your oven, see the
- WiFi Connect section in this manual.
- Lock Controls: Locks out the control so that pressing the pads does not activate the controls.
- Lock Controls pad, for three seconds to lock or unlock the control. Cancel/Off is always active, even when the control is locked.
- Oven Light: Turns the oven light on or off.
Air Fry (on some models):
- The Air Fry mode is designed to produce foods with a crispier exterior than traditional oven cooking. See the Oven
- Cooking Modes section for more information.
Special Features
Adjust the Oven Temperature (OFSt)
- This feature allows the oven baking temperature to be this feature if you believe your oven temperature is too hot or too cold and wish to change it. This adjustment affects every cooking mode except broil.
- Enter into the special features menu as outlined above.
- Scroll through the features until “OFSt” is displayed and press pad to increase the adjusted temperature or use the 8 pad to decrease the adjusted temperature. Save and exit the special features menu.
End of Timer Signals (End tonE)
- This is the tone that signals the end of a timer. The tone every few seconds until a button on the control single tone at the end of the timer.
- Enter into the special features menu as outlined above. Scroll through the options until “End tonE” is displayed and press 6. Scroll through the options until the desired setting is displayed the setting and then 4 to exit the menu.
Oven Cooking Guide
Air Fry Cooking Guide
- Air Fry is a special. no-preheat. cooking mode that is designed to produce foods with a crispier exterior than traditional oven cooking.
- Select Air Fry. then input the desired set temperature and press Start. The temperature can be set between 300°F and 500°F.
Air Fry Cookware Guidelines
+ Only use broil safe cookware when using Air Fry mode.
+ A dark sheet pan is recommended. A dark pan promotes better browning and crisping.
+ Oven baking baskets and baking grids can also be used. A sheet pan should be placed on the rack below the foods to catch any drippings when using a baking basket.
Primary recommended cookware
General Tips for Air Fry Mode
+ The Air Fry mode is designed for cooking on a single rack.
+ The Air Fry mode is designed to be used without preheating.
+ Rack position 4 is recommended for most foods. Use rack position 3 for thicker foods.
+ Foods may cook faster than expected if the oven is already hot when food is placed in the oven.
+ When air frying foods with sauce. it is recommended to apply the sauce at the end of cooking.
+ If foods are browning too quickly. try a lower rack position or lower oven set temperature.
+ For packaged foods. use traditional oven cooking instructions for set temperature and expected cook time.
+ It is not necessary to flip or stir food during cooking
+ Arrange food in a single layer on the pan. do not overload the pan.
+ Always check internal food temperature to confirm minimum safe temperatures have been reached.
Minimum safe food temperatures can be found on packages and at IsIltDoneYet.gov.
Control Lockout
- If desired. the touch pads may be deactivated before cleaning.
- See Lock Controls in the Oven Controls section in this manual.
- Clean up splatters with a damp cloth.
- You may also use a glass cleaner.
- Remove heavier soil with warm. soapy water. Do not use abrasives of any kind.
- Reactivate the touch pads after cleaning.
Control Panel
- It's a good idea to wipe the control panel after each use.
- Clean with mild soap and water or vinegar and water. rinse with clean water and polish dry with a soft cloth.
Oven Exterior
- Do not use oven cleaners. abrasive cleansers. strong liquid cleansers. steel wool. plastic scouring pads. or cleaning powders on the interior or exterior of the oven.
- Clean with a mild soap and water or vinegar and water solution. Rinse with clean water and dry with a soft cloth.
- When cleaning surfaces. make sure that they are at room temperature and not in direct sunlight.
- Do not use abrasive cleansers. strong liquid cleansers. plastic scouring pads or oven cleaners on the control panel—they will damage the finish. including Black
- Stainless Steel.
- If stain on the door vent trim is persistent. use a mild abrasive cleaner and a sponge-scrubber for best results.
- Spillage of marinades. fruit juices. tomato sauces and basting liquids containing acids may cause discoloration and should be wiped up immediately. Let hot surfaces cool. then clean and rinse.
Painted Surfaces
- Painted surfaces include the sides of the range and the door. top of control panel and the drawer front. Clean these with soap and water or a vinegar and water solution.
- Do not use commercial oven cleaners. cleaning powders. steel wool or harsh abrasives on any painted surface. including Black Stainless Steel.
Range – Interior
Manual Cleaning
- Do not use oven cleaners. strong liquid cleansers. steel wool. or scouring pads on the interior of the oven. For soils on the oven bottom and other enameled surfaces. use a gentle abrasive containing oxalic acid. such as.
- Bar Keepers Friend. with a non-scratch sponge. Take care not to apply any abrasive cleaners or sponges to. the door glass. as it will scratch the reflective coating.
- The oven interior and door glass may be cleaned using a soft cloth with a mild soap and water. or vinegar and water solution. After cleaning. rinse with clean water and dry with a soft cloth.
Steam Clean Mode (on some models)
- The Steam Clean feature is for cleaning light soil from your oven at a lower temperature than Self Clean.
To use the Steam Clean feature:
1. Start with the oven at room temperature.
2. Wipe excess grease and soils from the oven.
3. Pour one cup of water onto the bottom of the oven.
4. Close the door.
5. Press the Clean pad. select Steam Clean and then press Start.
You cannot open the door during the 30 minute Steam
- Clean cycle. At the end of the Steam Clean cycle. soak up the remaining water. and wipe the moisture-softened soil from the oven walls and door.
Self Clean Mode
- Read Self-Cleaning Oven Safety Instructions at the beginning of this manual before using the Self Clean
- Mode. Self Clean uses very high temperatures to clean the oven interior.
- For a moderately soiled oven. run a3 hour self-clean cycle. For a heavily soiled oven. run a5 hour self-clean cycle.
- Only self-clean (black) racks and grates may remain in the oven during the self-clean cycle. All other items. including nickel plated (silver) racks. should be removed. If nickel plated (silver) racks are left in the oven during a self-clean cycle. the racks will tarnish.
- If either type of rack is left in the oven during a self-clean cycle. the rack may become difficult to slide. See the
- Oven Racks section for instructions on how to improve.
IMPORTANT: The health of some birds is extremely
To use the Self Clean feature:
1. Start with the oven at room temperature.
2. Wipe excess grease and soils from the oven and interior door.
3. Remove all items other than self-clean (black) racks and grates. if desired. See Cleaning the
Cooktop to determine if your grates may be self cleaned and for important details regarding grate placement.
4. Close the door.
5. Press the Clean pad. select Self Clean and then press Start.
Cleaning the Surface Burners
- Wash burner caps in hot. soapy water and rinse with clean water. You may scour with a plastic scouring pad to remove burned-on food particles.
- The round burner caps may also be cleaned in your dishwasher.
NOTE:
- Do not use stee! wool or scouring pads to clean the burner parts as these may clog the openings. Never wash burner heads in your dishwasher as dishwasher.
- Doing so may cause them to discolor.
- The ports in the burner heads must be kept clean at all times for an even. unhampered flame.
- Clogged or dirty burner ports or electrodes will not allow the burner to operate properly.
Manual Cleaning
- Grates should be washed in hot. soapy water and rinsed with clean water.
- To soften burned-on food. place grates in a solution containing %4-cup of household ammonia for several hours. Afterward. scrub grates with a plastic scouring pad soaked in hot. soapy water. Rinse well and dry.
Self Clean Mode
- If your grates do not have rubber bumpers on their bottom surface. they may be cleaned in the oven using the self-clean cycle. Do not attempt to clean your grates in the oven if your grates have rubber bumpers. Doing so will destroy the rubber bumpers and may affect the function of your surface burners.
- Porcelain-coated grates may gradually dull if continually exposed to self-clean temperatures.
- If your oven is equipped with self-clean (black) racks. it is recommended to follow the instructions for placing grates on racks
- . If your oven is equipped with nickel plated (silver) racks. it is recommended to follow the instructions for placing grates on the oven bottom.
- Nickel-plated racks should not remain in the oven during the self clean cycle. Doing so will tarnish the racks. If either type of rack is left in the oven during a self-clean cycle. the rack may become difficult to slide.
NOTE:
- When placing or removing grates from the oven. do not slide the grates on the racks or oven bottom.
- Doing so could damage the enamel on the racks or oven bottom.
To self-clean your grates on self-clean racks:
1. Insert racks in positions 1. 3. and 5 or positions 2 and 4.
2. Gently place one grate on each rack.
NOTE:
- DO NOT operate your cooktop during the:
Self Clean Mode because the Self Clean cycle will be canceled.
- To self clean your grates on the oven bottom:
- Remove all oven racks.
- Gently place one grate on the center of the oven bottom with the grate oriented in the upright position.
- Stack remaining grate(s) as shown below. Do not place or stack grates in any other configuration.
- Once the grates are placed in the oven. operate the self clean cycle per the instruction in the Cleaning the Oven section.
NOTE:
- Use caution when removing the grates from the oven after the self-clean cycle has ended. The grates may still be hot.
Once the self-clean cycle is complete. the grates may carefully be removed. You may notice a white residue on the grates.
Wipe it off with a damp sponge. If white spots persist. wet the sponge with a 50/50 solution of vinegar and water and wipe the grates again.
When replacing the grates on the cooktop. be sure to locate them correctly. Grates should fit securely into the cooktop.
Troubleshooting Tips
Oven light does not work
- Tighten or replace bulb. See the Maintenance section for instructions on how to replace the bulb.
Oven will not self-clean
- Allow the oven to cool and reset the controls.
Excessive smoking during clean cycle
- Cancel/Off pad. Open the windows to rid the room of smoke. Wait until the LOCKED light goes off.
- Wipe up the excess soil and reset the clean cycle.
Oven not clean after a clean cycle
- See the Cleaning the Oven section.
- Oven was heavily soiled. Clean up heavy spillovers before starting the clean cycle. Heavily soiled ovens may need to self-clean again or for a longer period of time.
Strong “burning” or “oily” odor emitting from the vent
- To speed the process, set a self-clean cycle for a minimum of 3 hours. See the Cleaning the Oven section. This is temporary.
Oven door will not open or LOCKED light is on when you want to cook.
- Cancel/Off pad. Allow the oven to cool below the locking temperature.
“F— and a number or letter” flash in the display
- Cancel/Off pad. Allow the oven to cool for one seconds and then reconnect power. If the function error code repeats again, call for service.
Power outage, clock flashes
- Reset the clock. If the oven was in use, you must reset it by pressing the Cancel/Off pad, setting the clock and resetting any cooking function.
Lock Controls or Control Lockout feature is activated
- If LOC ON appears in the display, the range control is locked. Turn this feature off to use the range. See the Lock Control feature in the Oven Controls section.
Burners do not light
- Plug on range is not completely inserted in the electrical outlet. Make sure electrical plug is plugged into a live, properly grounded outlet. Gas supply not connected or turned on. See the Installation Instructions that came with your range.
- A fuse in your home may be blown or the circuit breaker tripped. Replace the fuse or reset the circuit breaker. Burner parts not replaced correctly.
- See the Care and Cleaning of the range section. Burner slots near the electrode, or the round lighter port on the oval burner, may be clogged. Remove the burners and clean them.
- Check the electrode area for burned-on food or grease. See the Care and Cleaning of the range section. Food residue on electrode Lightly polish flat tip of electrode with nail file or sandpaper until shiny
Top burners do not burn evenly
- Make sure the burner caps are seated correctly. See the Care and Cleaning of the range section.
- Burner slots on the side of the burner may be clogged.
- Remove the burners for cleaning. See the Care and Cleaning of the range section.
- Burner flames are very large or yellow
- Improper air to gas ratio.