Loading ...
Loading ...
Loading ...
E-10
CD-BK310V(S)E1.fm01/4/26
ENGLISH
Preparation for Use
- System Connections -
!
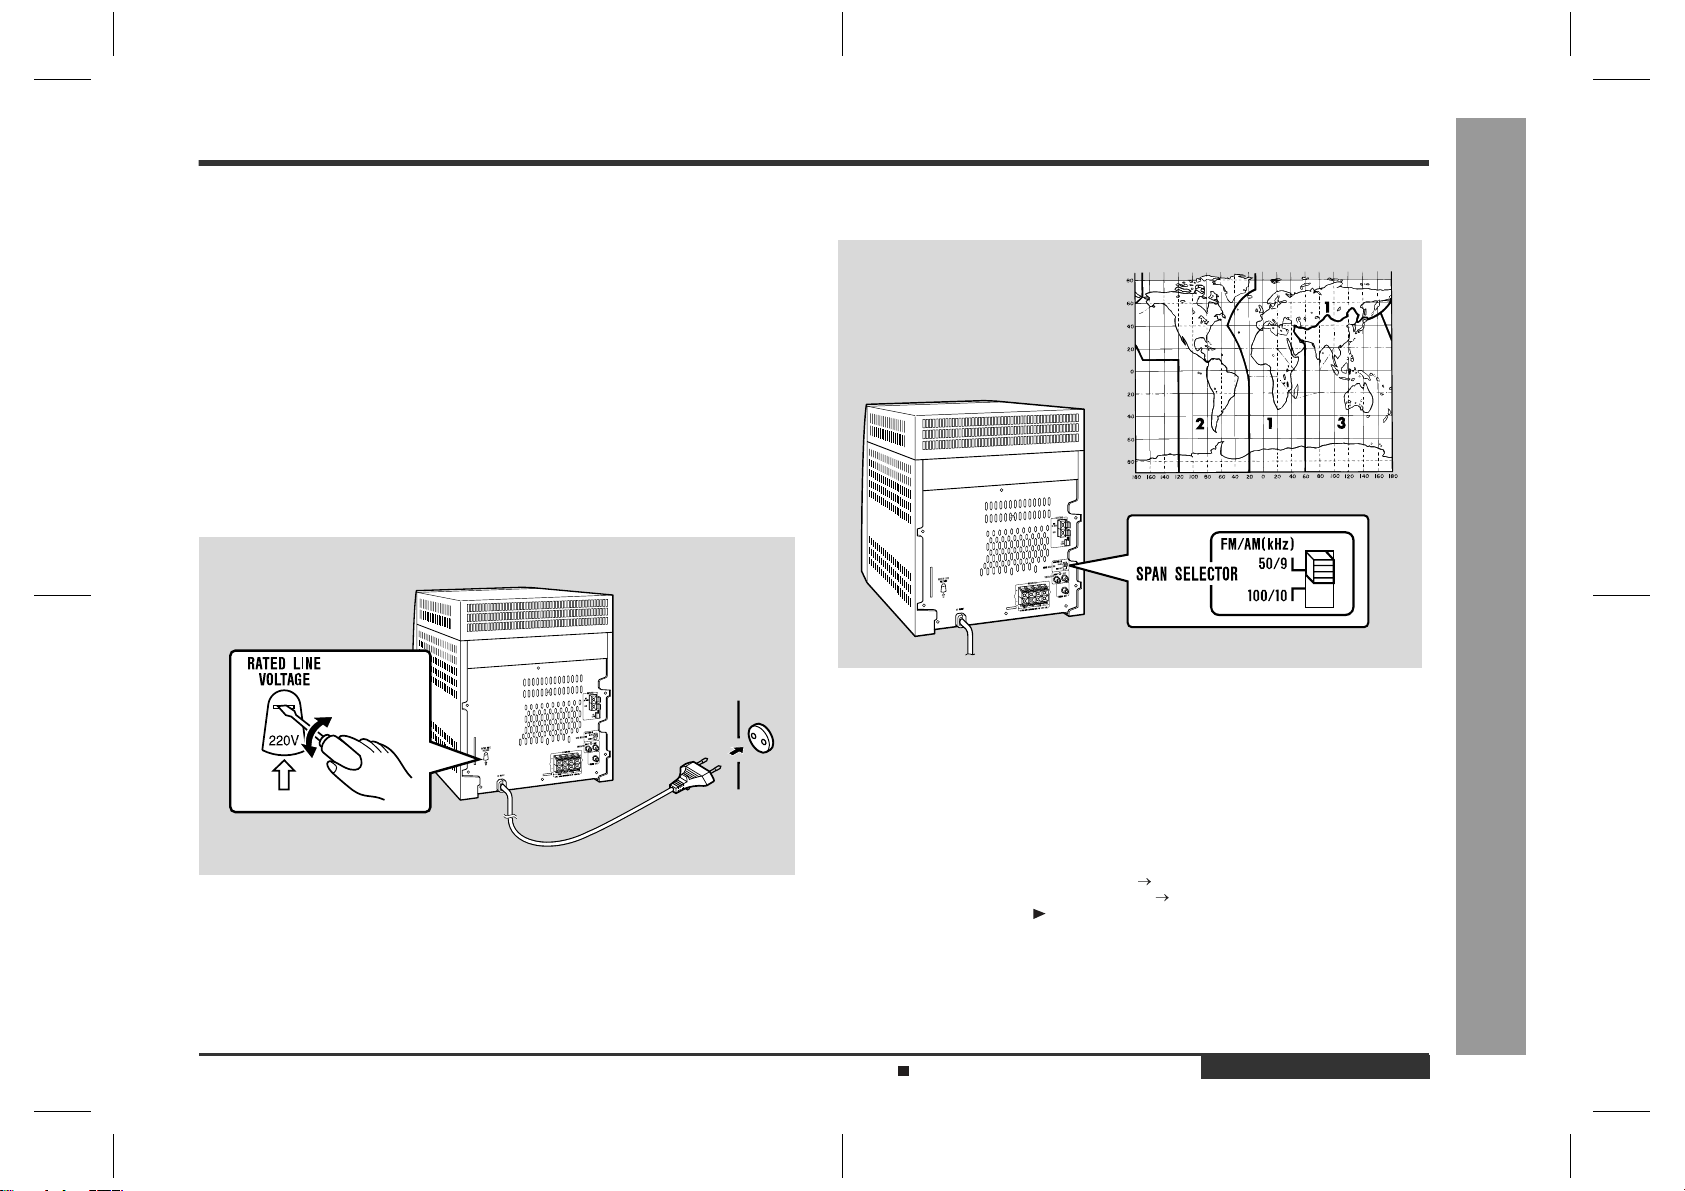
Setting the AC voltage selector
Check the setting of the AC voltage selector located on the rear panel before plug-
ging the unit into a wall socket. If necessary, adjust the selector to correspond to the
AC power voltage used in your area.
Turn the selector with a screwdriver until the appropriate voltage num-
ber appears in the window (110 V, 127 V, 220 V or 230 V - 240 V AC).
!
Connecting the AC power lead
After making all connections, plug the unit. If you plug the unit first,
the unit will enter the demonstration mode (see page 12).
Note:
Unplug the AC power lead from the wall socket if the unit will not be in use for a pro-
longed period of time.
!
Setting the FM/AM span selector
The International Telecommunication Union (ITU) has established that member coun-
tries should maintain either a 100 kHz or a 50 kHz interval between broadcasting fre-
quencies of FM stations and 10 kHz or 9 kHz for AM station. The illustration shows
the 50/9 kHz zones (regions 1 and 3), and the 100/10 kHz zone (region 2).
Before using the unit, set the SPAN SELECTOR switch (on the rear panel) to the
interval (span) of your area.
To change the tuning zone:
Caution:
This operation will erase all data stored in memory including clock, timer settings,
tuner preset, and CD programme.
Wall socket
(220V, 50/60 Hz)
1 Press the ON/STAND-BY button to enter the stand-by mode.
2 Set the SPAN SELECTOR switch (on the rear panel) as follows.
"
For 50 kHz FM interval (9 kHz in AM) 50/9
"
For 100 kHz FM interval (10 kHz in AM) 100/10
3 Whilst pressing down the button and the X-BASS/DEMO button, press the ON/
STAND-BY button until "CLEAR AL" appears.
Demonstration mode (See page 12.)
Downloaded from: http://www.usersmanualguide.com/
Loading ...
Loading ...
Loading ...