

Version:1.0
Page
1
Catalog
Catalog...........................................................................................................................1
Upgrading history........................................................................................................ 3
Statement.......................................................................................................................3
Matters need attention................................................................................................. 3
Basic functions.............................................................................................................. 4
Preparation before use.................................................................................................5
Key function....................................................................................................................................5
Key action definition.......................................................................................................................6
Startup & Shutdown........................................................................................................................6
Low battery..................................................................................................................................... 6
Expansion cards.............................................................................................................................. 6
Connect to PC............................................................................................................... 7
Connect to PC................................................................................................................................. 7
Main interface...............................................................................................................7
Music............................................................................................................................. 7
Music main menu list interface.......................................................................................................8
Music play interface........................................................................................................................8
Music submenu option.................................................................................................................... 9
Submenu (Playing)....................................................................................................................10
Submenu (Pause).......................................................................................................................11
Radio............................................................................................................................11
Main menu option......................................................................................................................... 11
Radio interface ............................................................................................................................ 12
Folders view................................................................................................................ 14
Line-in record............................................................................................................. 15
Line-in record interface.................................................................................................................15
Menu option .................................................................................................................. 16
Bluetooth..................................................................................................................... 17
Settings........................................................................................................................ 18
Tools.............................................................................................................................19
Calendar..................................................................................................................... 19
Photo ....................................................................................................................... 20

Version:1.0
Page
2
Menu option................................................................................................................................ 21
Recording....................................................................................................................21
Recording interface................................................................................................................... 22
Menu option.............................................................................................................................. 22
E-book......................................................................................................................... 23
Menue option................................................................................................................................ 25
Stopwatch...................................................................................................................... 25
FAQ............................................................................................................................................... 26
Troubleshooting............................................................................................................................ 27

Version:1.0
Page
3
Upgrading history
Statement
1. Duplication, transmission, distribution and storage of any contents of this manual in any form
without my company's prior written permission are forbidden.
2. During the compilation of this manual, we have strived for content correctness and
completeness without guaranteeing any omissions or errors in this manual. The company will not
be liable for errors or omissions that may appear in this manual.
3. We abide by sustainable development strategy, thus we reserve the right to make alterations and
improvements to any of the products described in this manual without prior notice.。
4. In no case shall we be responsible for any loss of data or income, or any special, accidental,
incidental or consequential damages regardless of the cause of the loss.
Matters need attention
This section is designed for user’s proper usage and good player performance. Please read it
carefully and obey it.
Do not strike the main unit.
Do not expose to chemicals such as benzene or thinner.
Please do not keep away from strong magnetic field or electric field.
Please avoid direct light or heating devices.
Do not disassemble, repair or remodel randomly.
Do not use the player and headphones when riding or driving a car or motorcycle to avoid danger.
Do not listen at a loud volume to avoid adverse hearing effects.
Discarded packaging, batteries, and used electronic products should be disposed properly.
Date
Version
Description
2019-06-18
1.0
New version release

Version:1.0
Page
4
Basic functions
Music play: support MP3, WMA, APE, FLAC, WAV, AAC-LC, ACELP, OGG format.
Record support: support FM, MIC recording. The format supports MP3, WAV, ACT.
Photo browsing support: support JPEG, BMP, GIF format browsing
FM Radio support.
Text document reading support.
Tool support: date, time, formatting and other functions.
Setting function: display and settings of each function attribute.
FAT16, FAT32, ExFAT/Fat64 file system support.
ADFU recovery and USB upgrade support.
Support Micro SD card.
Support multitask running
Support file navigation (and support hotkey start)
Version:1.0
Page
5
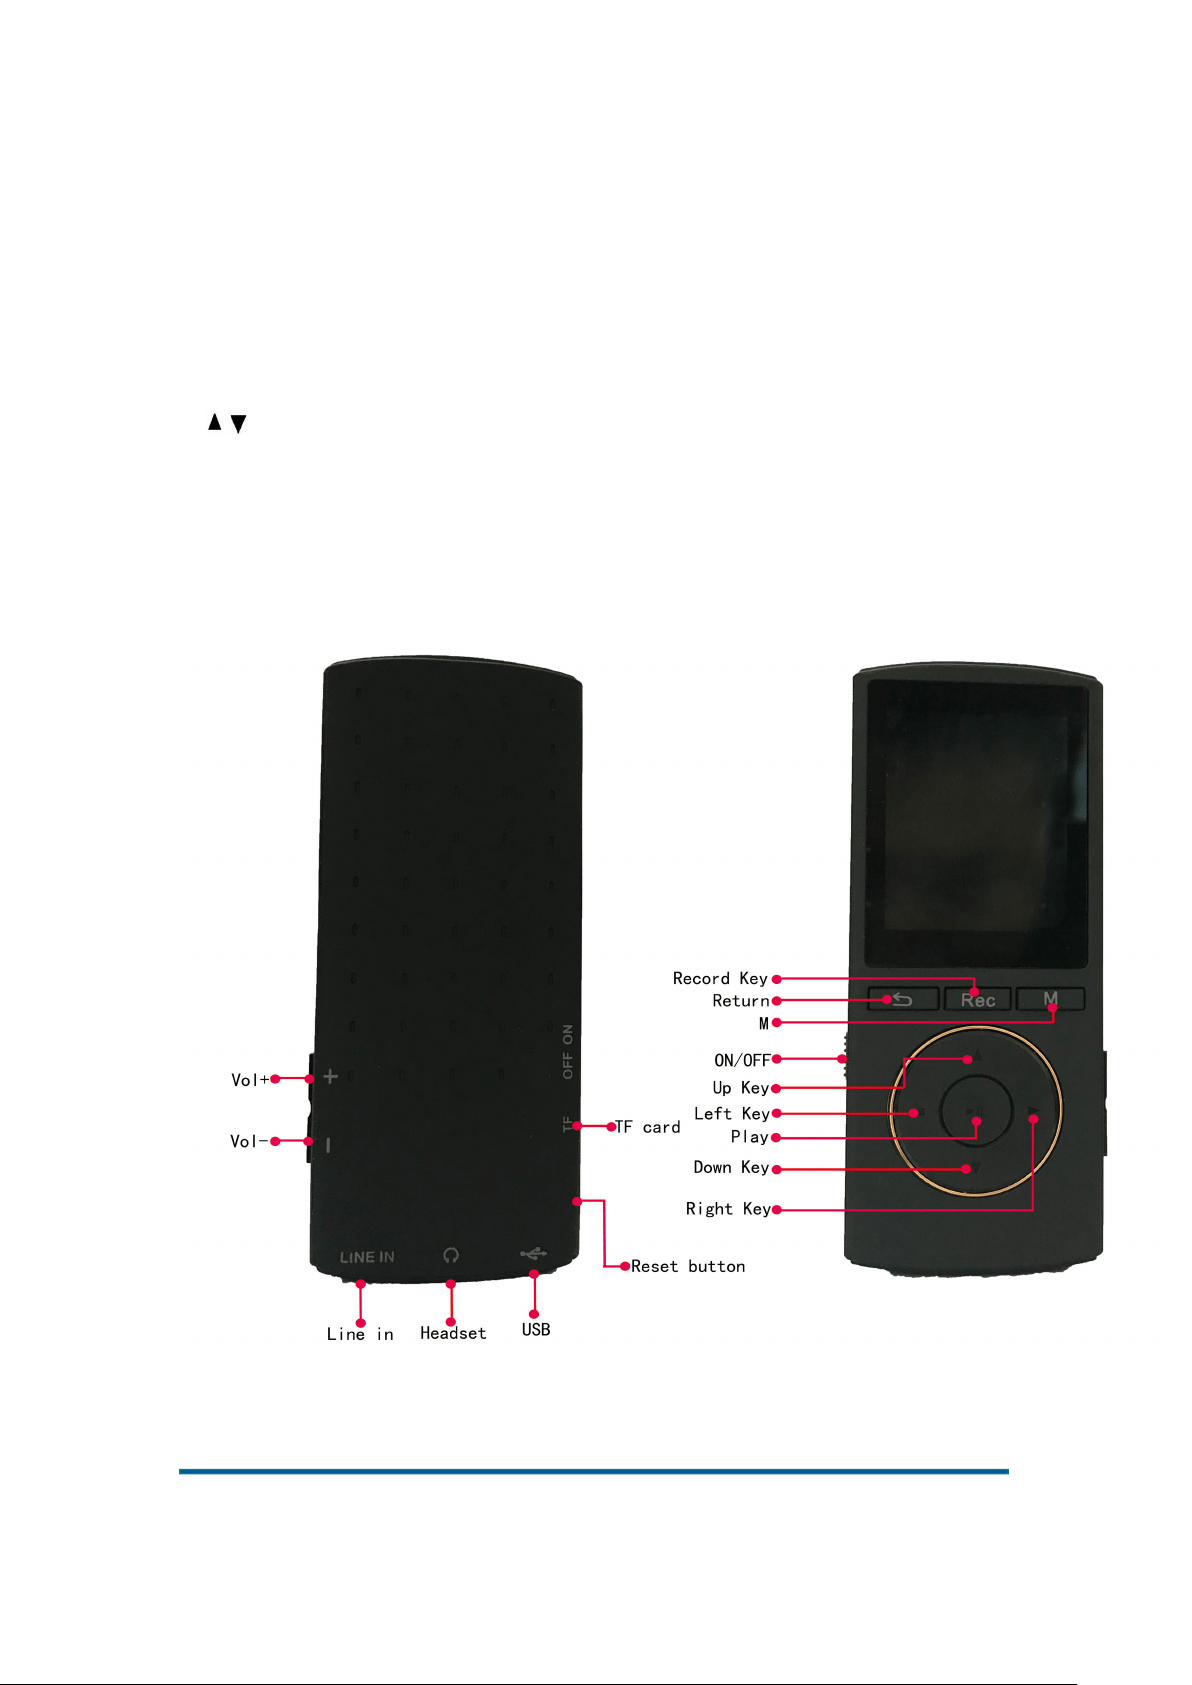
Preparation before use
Key function
1. Startup & Shutdown keys: Push to ON to startup, and push to OFF to shutdown
2. / Up and down keys
3. ◄/► Short press: the left and right keys, long press: fast forward or fast backward
4. OK Short press Enter key
5. M: Short press: submenu popup
6.Return key: Short press: return to previous menu
7.Record key: Short press: volume minus, long press: record
8. 十/—: Volume plus or minus

Version:1.0
Page
6
Key action definition
Action
Basic operation
Short press
Keypress time shorter than 1.2s
Long press
Keypress time longer than 1.2s
Hold
Press up and down keys to keep the mode
Note: Unless otherwise specified in this manual, short press is indicated.
Startup & Shutdown
Long press the Starting up key to boot.
When the system idle time reaches the user set shutdown time, the player automatically shuts
down.
Low battery
When low battery appears, the player prompts low power once, and then automatically shuts down
to enter the standby state. Do not restart at this time, please charge in time.
The recommended charger current specification is 500-1000mA.
Expansion cards
An expansion card slot is on the side of the body for inserting a Micro SD card.
Version:1.0
Page
7
Connect to PC
In the on/off state, the PC connected with this player by using the provided USB cable will prompt
a selection window of removable disk. Select a corresponding folder to copy files mutually.
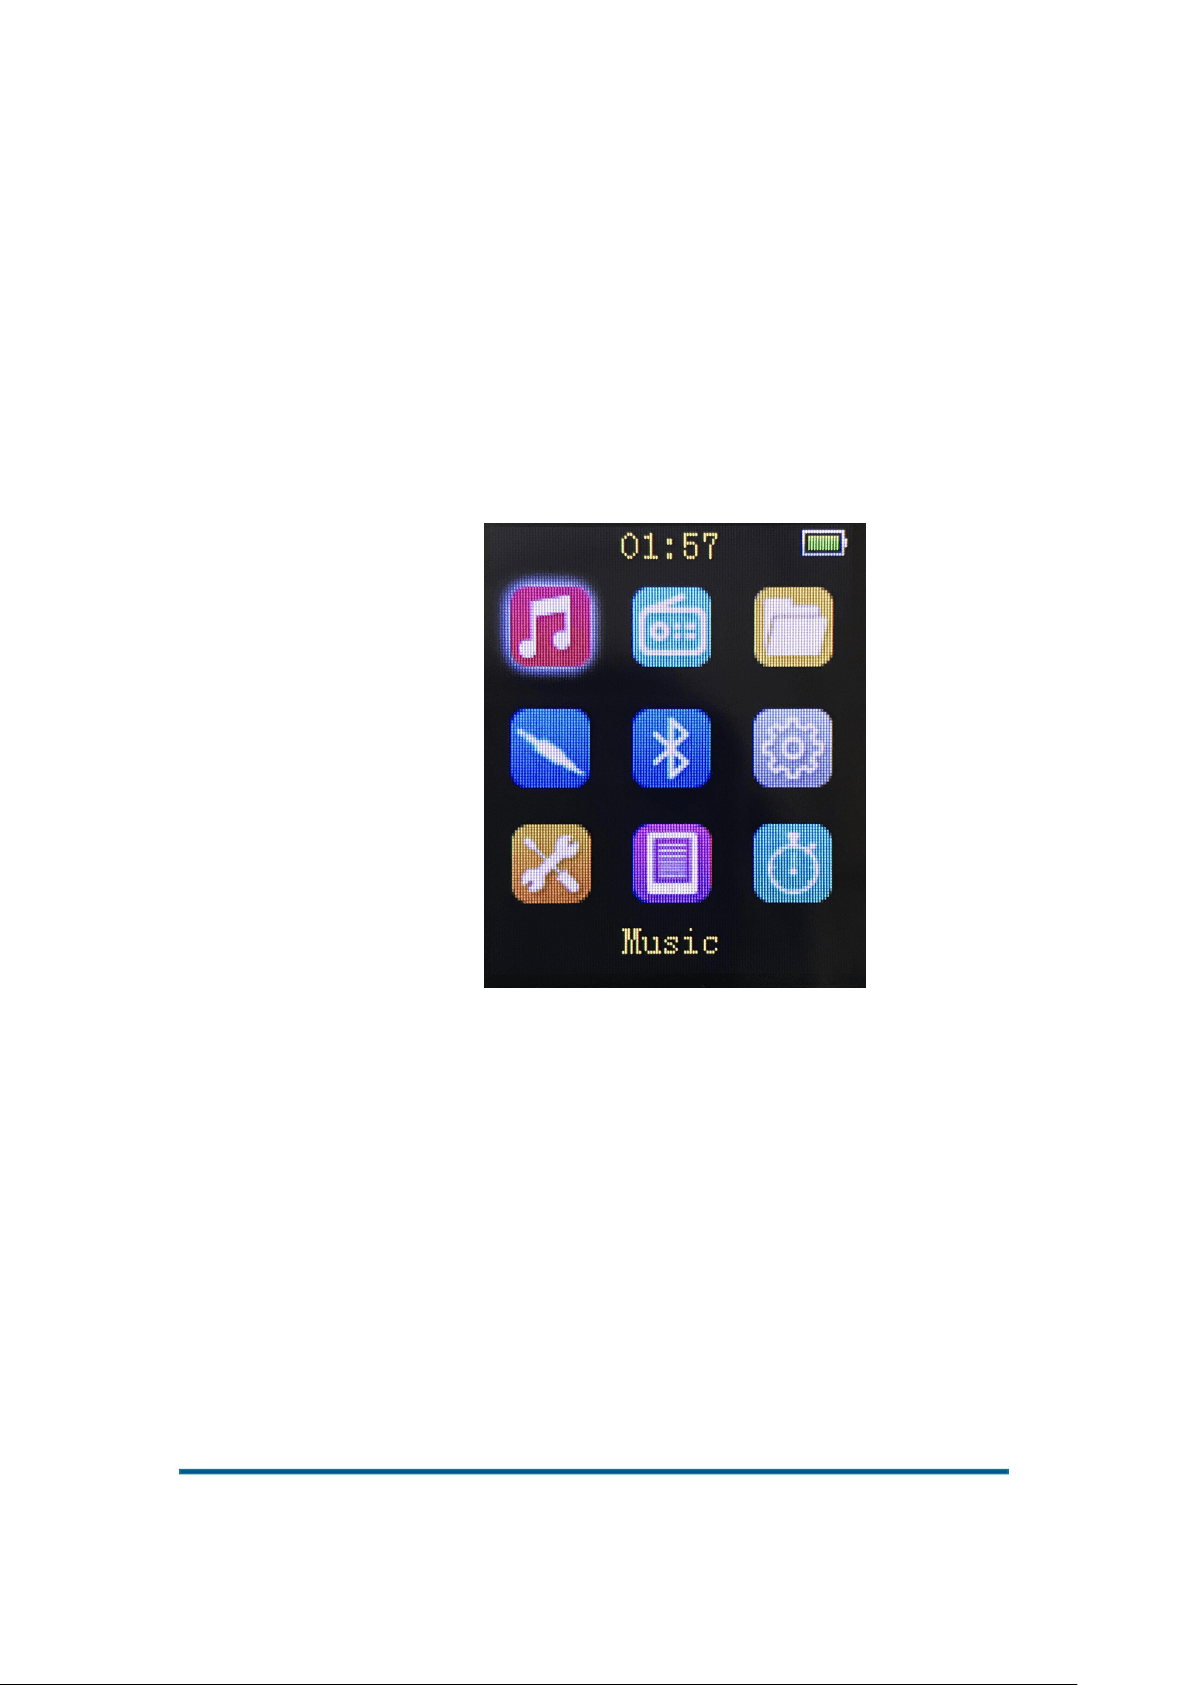
Main interface
Enter following system main interface after startup
:
Music
Select the music app and press OK to enter the main menu option interface.
Support breakpoint resumed play and background play. Breakpoint play refers to exit point of the
currently playing song for the latest time, only supported only in the ongoing playlist. Background
play means user can enter any conflict free app g with the audio.
Version:1.0
Page
8
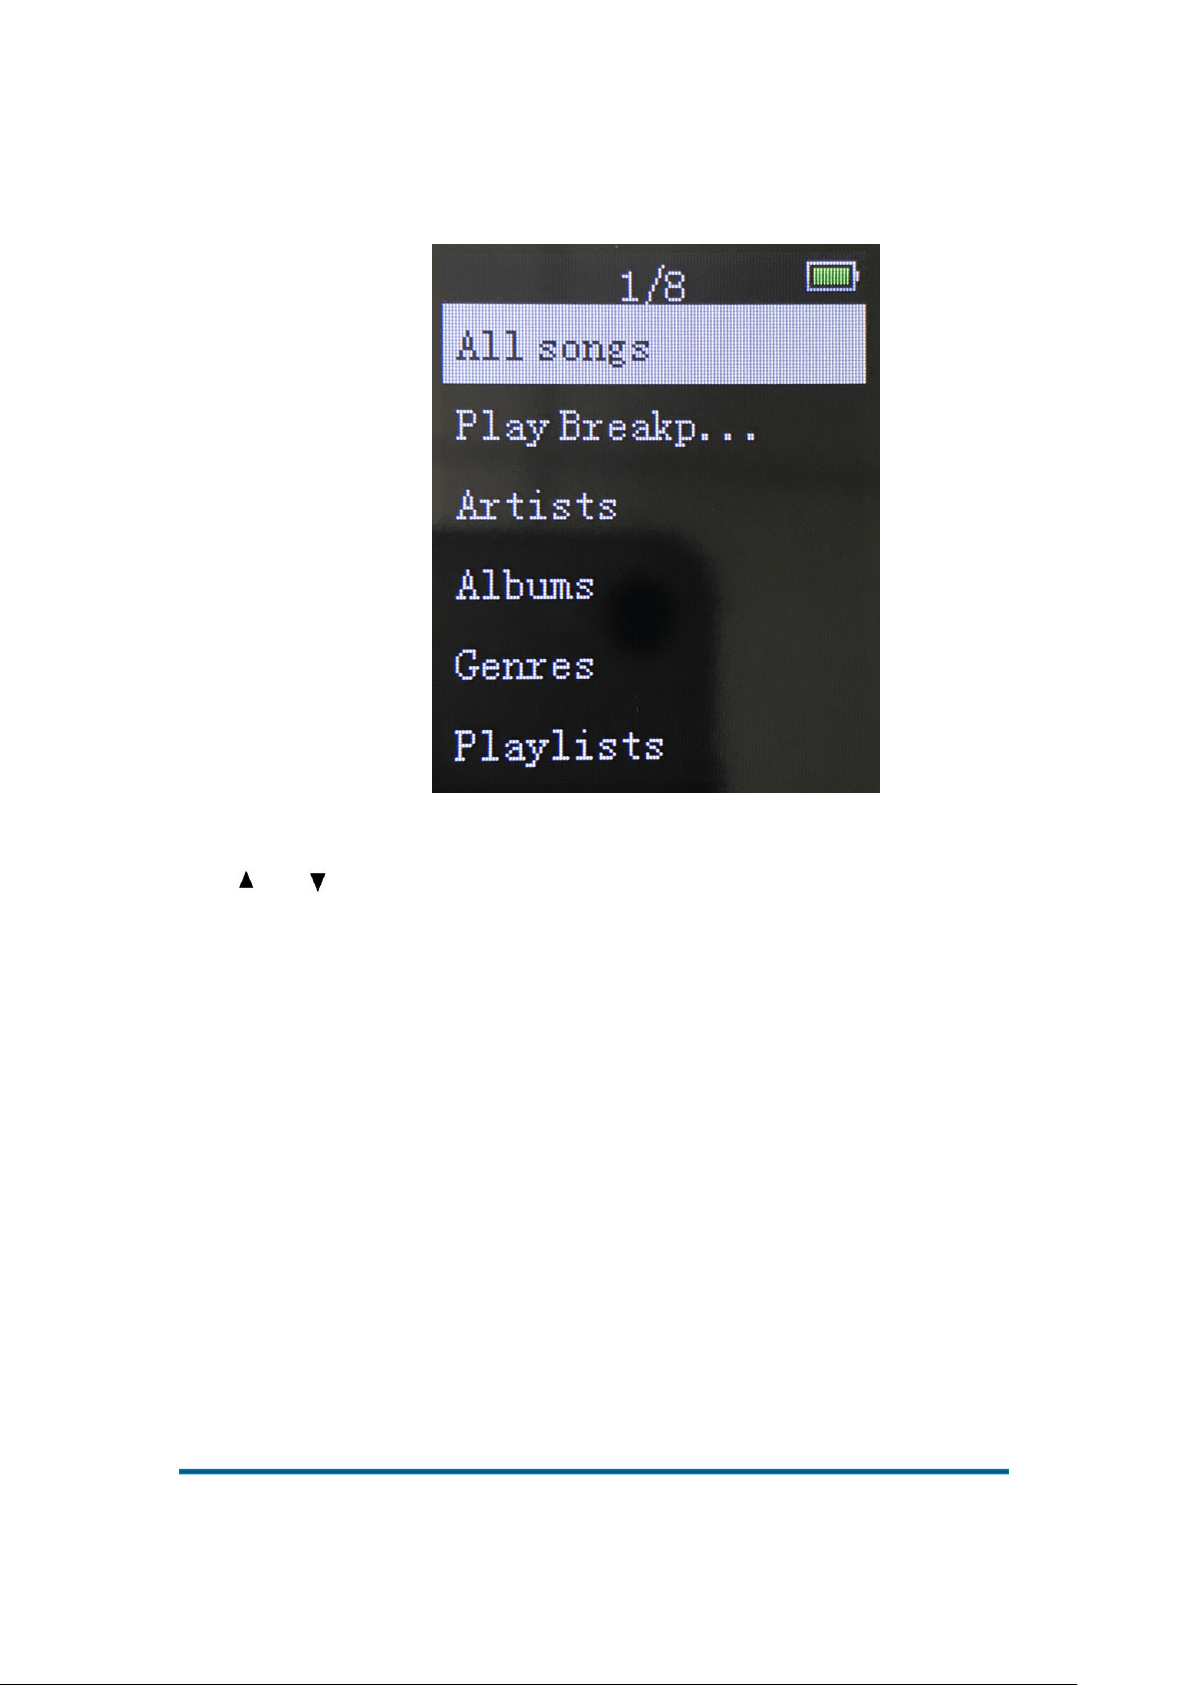
Music main menu list interface
The interface is shown as below:
Press and to switch up or down, press OK to select the option.
Menu options include: All songs, artists, albums, genres, playlists, refresh.
All songs: Display all random play and all song lists in memory.
Breakpoint Play: Connects to the latest time of song for resumed play.
Artists: The singers of all the songs in the internal memory are arranged in the alphabetical
order of the first name.
Album: Displays in alphabetical order according to the title of the album.
Genres: Display according to the built-in style of music downloaded.
Playlist: including "playlist [1], playlist[2], playlist[3]".
Folder browsing: User can play music in the main disc directory or card directory through
browsing.
Refresh: Search for all music by refreshing.
Version:1.0
Page
9
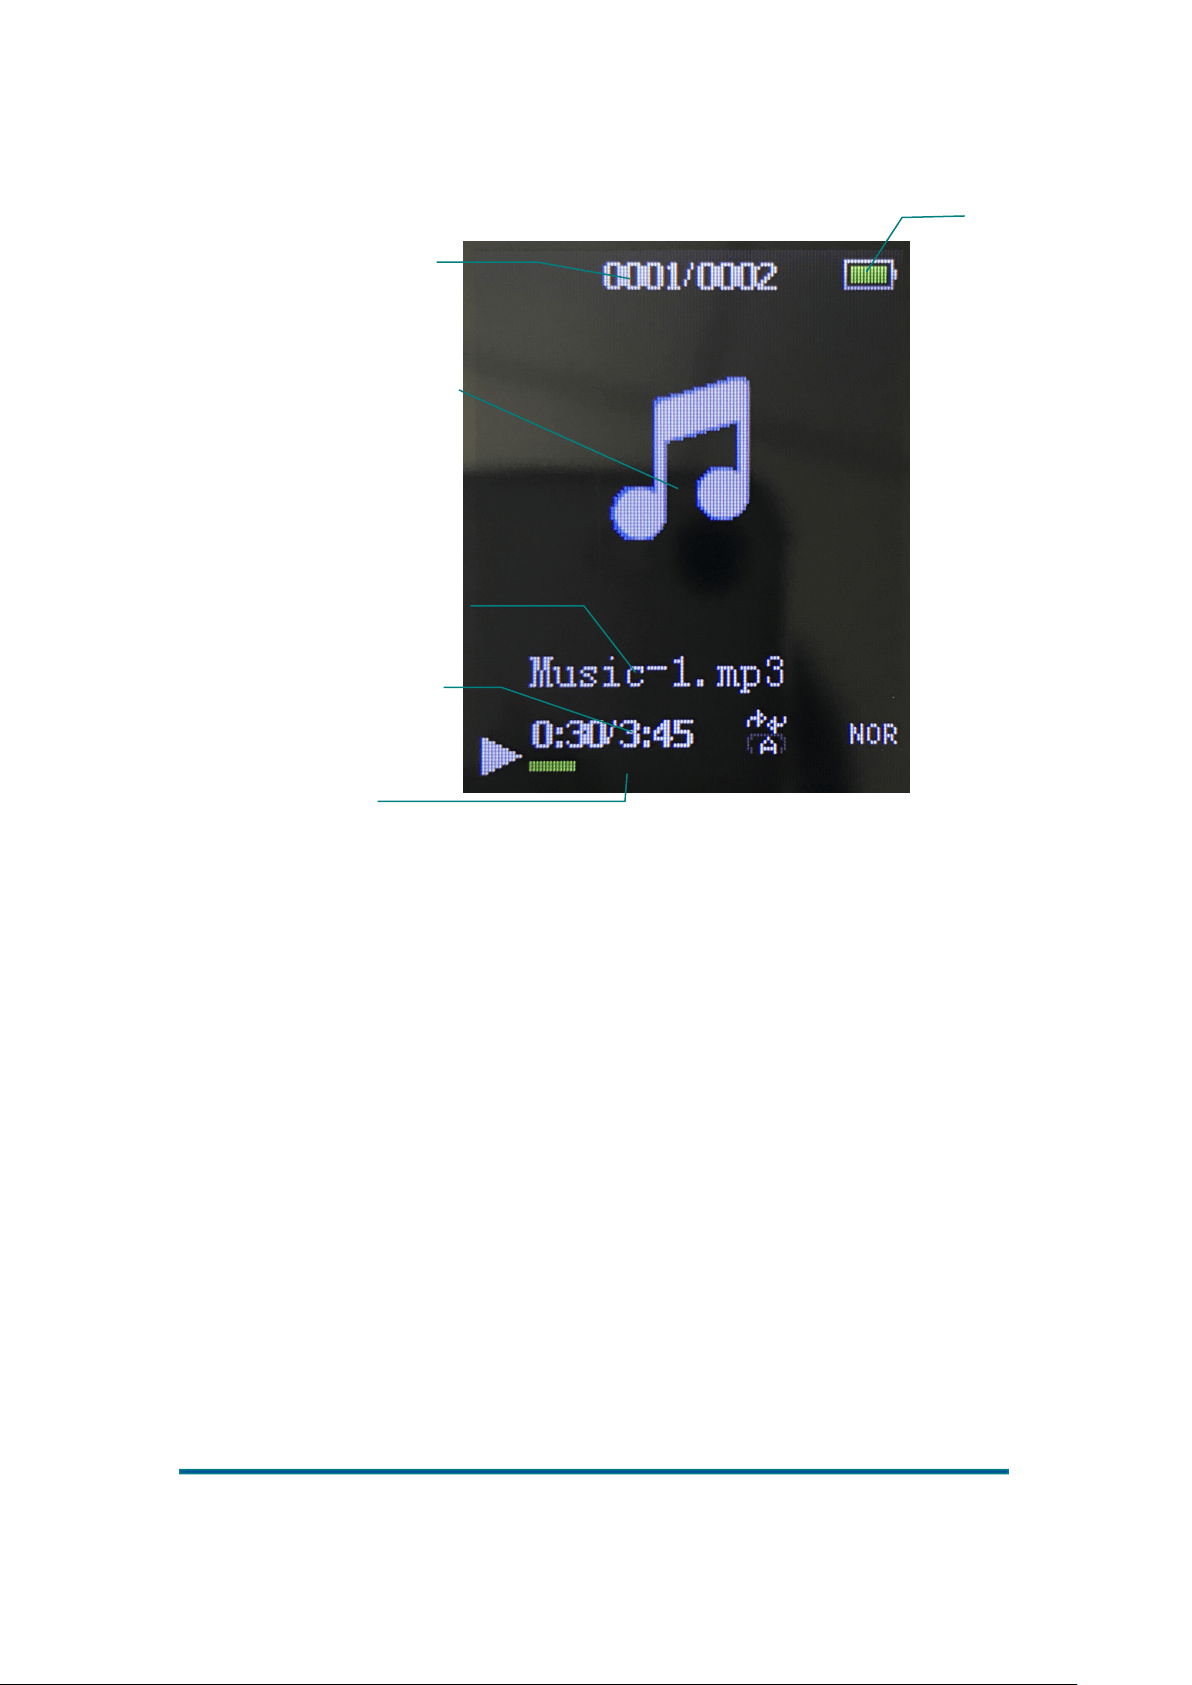
Music play interface
Press OK to switch between music play and stop, press ◄ and ► to move to the previous or next
file. Press ◄ and ► for a long time to fast forward and fast backward.
Press the volume + key or volume - key to adjust the volume, the volume range 0 ~ 31.
Press M to enter the submenu interface.
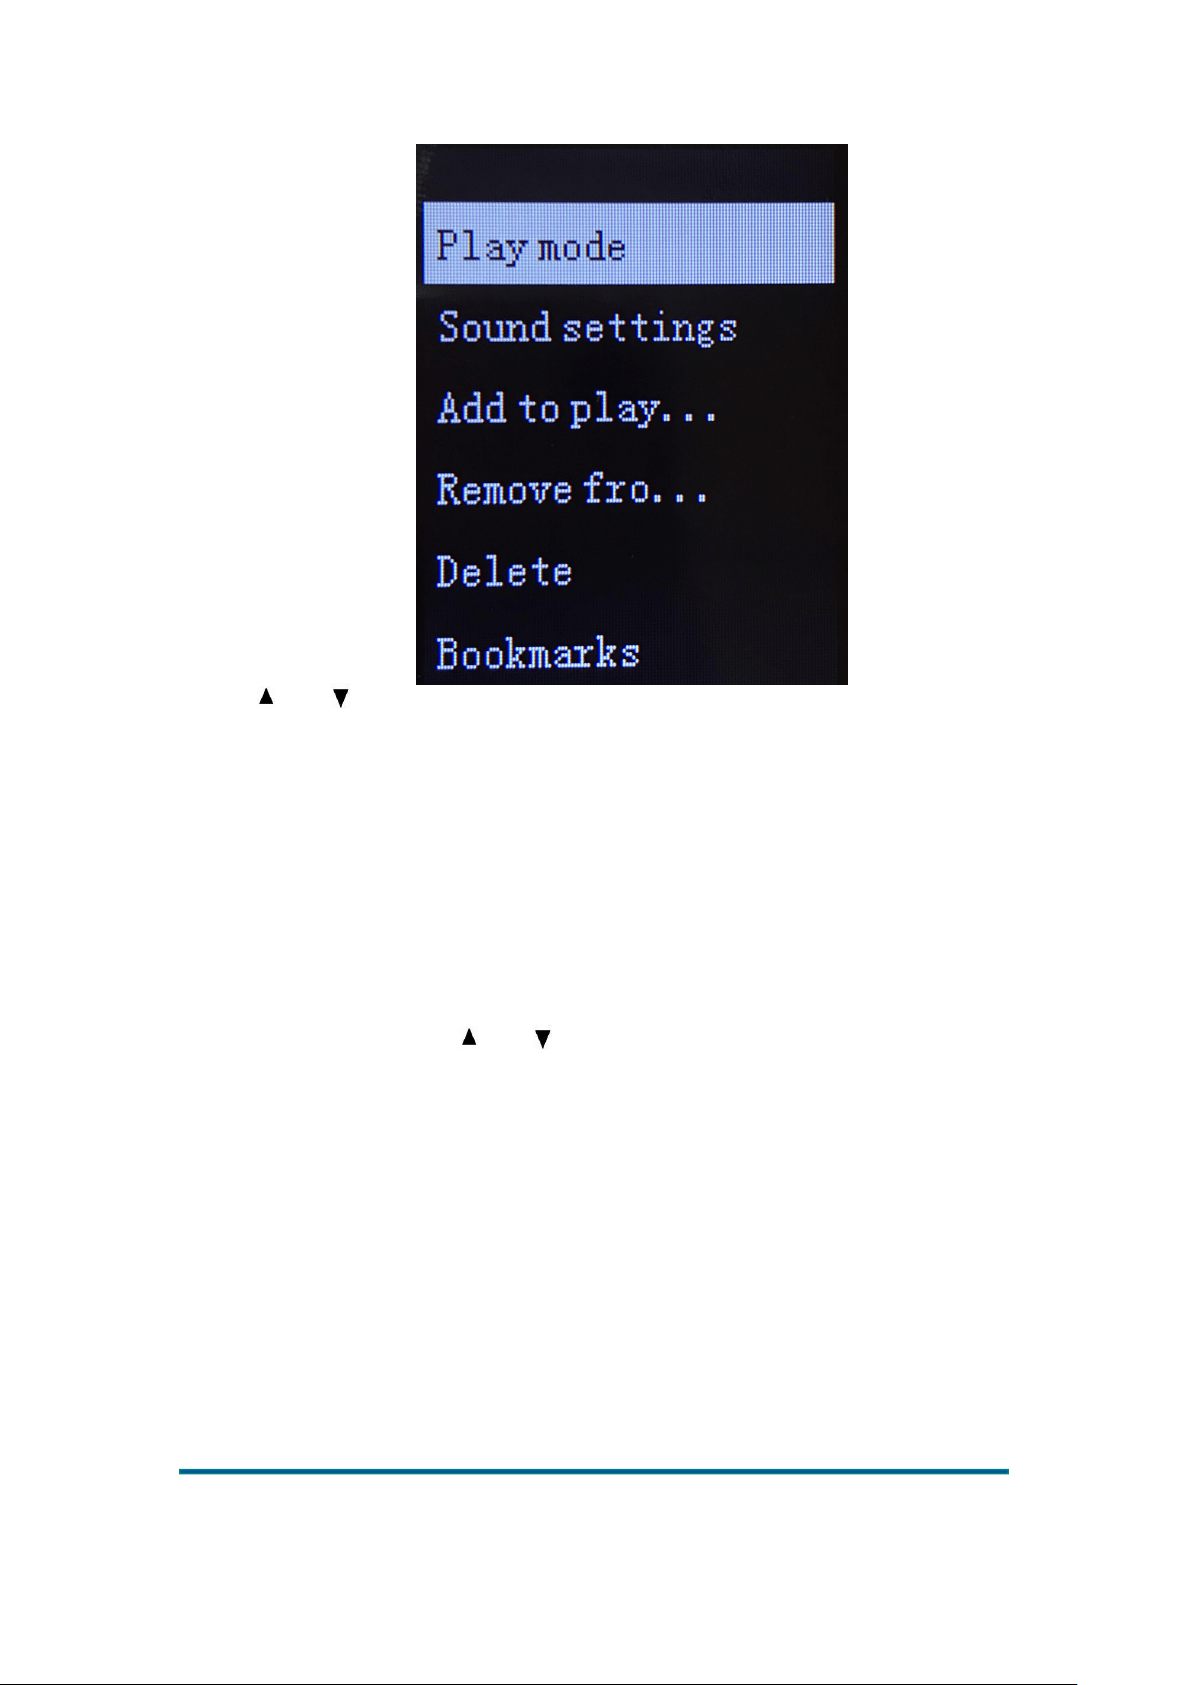
Music submenu option
1. Press M when music play or pause play, then system enters submenu. The menu options include:
Play Mode, Play via Bluetooth, Sound Settings, Add to Playlist, Remove from Playlist, Delete,
and Bookmarks.
Album picture lyrics/lyrics
display area
Battery
Current music
track/Total songs
Current file ID3
information
Current file progress
Current playback status
Version:1.0
Page
10
2. Press and to browse menu. Press the return key to return to the previous interface, press
OK to confirm the options (same for other applications), press the return key to return to the
previous interface.
3. When playing, under the submenu, without any operation for more than 30 seconds, the system
automatically enters the corresponding music play or pause play interface (same for other
applications).
Submenu (Playing)
Play mode: Select the play mode, display "music from ..., repeat play, random play, repeat
settings";
Select music from the ... option, display "... all songs, ... the artist, ... this album, ...
such genre", press and to browse the menu. Press OK to confirm the options.
If select ... all songs, the song is in all song catalogs; if select... this artist, the song is
in the artist's catalog; and so on. Press the return key to return to the previous
interface.
Select Repeat Play. Display "Repeat Play Off, Single Repeat, Play In Order, Browse
Play". Select Repeat Play Off to stop playing after playing all the songs in the list;
select Single Repeat to repeat and play the current song repeatedly; select All Repeat
to repeat all the songs in the current directory; select Browse Play to preview each
song for 10 seconds.
Select Random Play. Display “Off, On” and select any one to turn off/on Random
Play Mode.
Select Repeat Setting. Display “Replay Mode, Repeat Times, Repeat Interval”.
Selecting Repeat Mode, system will return to the music play interface. At this time,
point A (repeat start point) in the upper left and right corners of the LCD flickers.
Press ►, after confirming the current time selected as the start point for replay. Point
B (repeat end point) begins to flicker. Press ► again to confirm the end time. AB
repeat settings are completed. Select Repeat Times, Repeat Interval, and the system
will start repeat accordingly ranging from 0-10.

Version:1.0
Page
11
Sound settings: Selected sound settings, display "equalizer, variable speed playback, volume
limit";
Select the equalizer. Display "Off, Rock, Funk, Hip Hop, Jazz, Classical, Electronic,
Custom", custom 7-band settings: 80Hz, 200Hz, 488Hz, 980Hz, 4KHz, 8KHz,
16KHz, Setting range: -12db to +12db.
Select variable speed playback, ranging from -8 to 8 (currently only support mp3
format), the normal speed is 0.
Select the volume limit, adjust the volume limit for audition if a song is playing ,: If
the volume is 5, the volume limit is 8, the maximum volume cannot exceed 8 (No
higher than the volume limit); if the volume is 5, the volume limit is 3, the volume
will be reduced to level 3, and the maximum volume cannot exceed level 3.
Add to playlist: select Add to playlist. Display "playlist[1], playlist[2], playlist[3]", press and
to select three lists. Press OK to select the list. Popup interface "Add xxx...to playlist
[1]/[2]/[3]?'" Select 'Yes' to add to the playlist.
Remove from playlist: Select Remove from playlist:, display “playlist[1], playlist[2],
playlist[3]”, press OK to select any playlist if the playing song is in the list. Select the playlist to
delete the song (only the song in the playlist can be deleted but kept in the song directory).
Delete: Select Delete to delete the playing song.
Bookmarks: Select Bookmarks, Display "Add bookmark, Go to bookmark, Delete bookmark"
Select Add bookmark to add 10 bookmarks at most;
Select Go to bookmark. Select any bookmark, start playing from where you added the
bookmark;
Select Delete bookmark and select any bookmark to delete.
Submenu (Pause)
Same with "Submenu (Playing)".
Radio
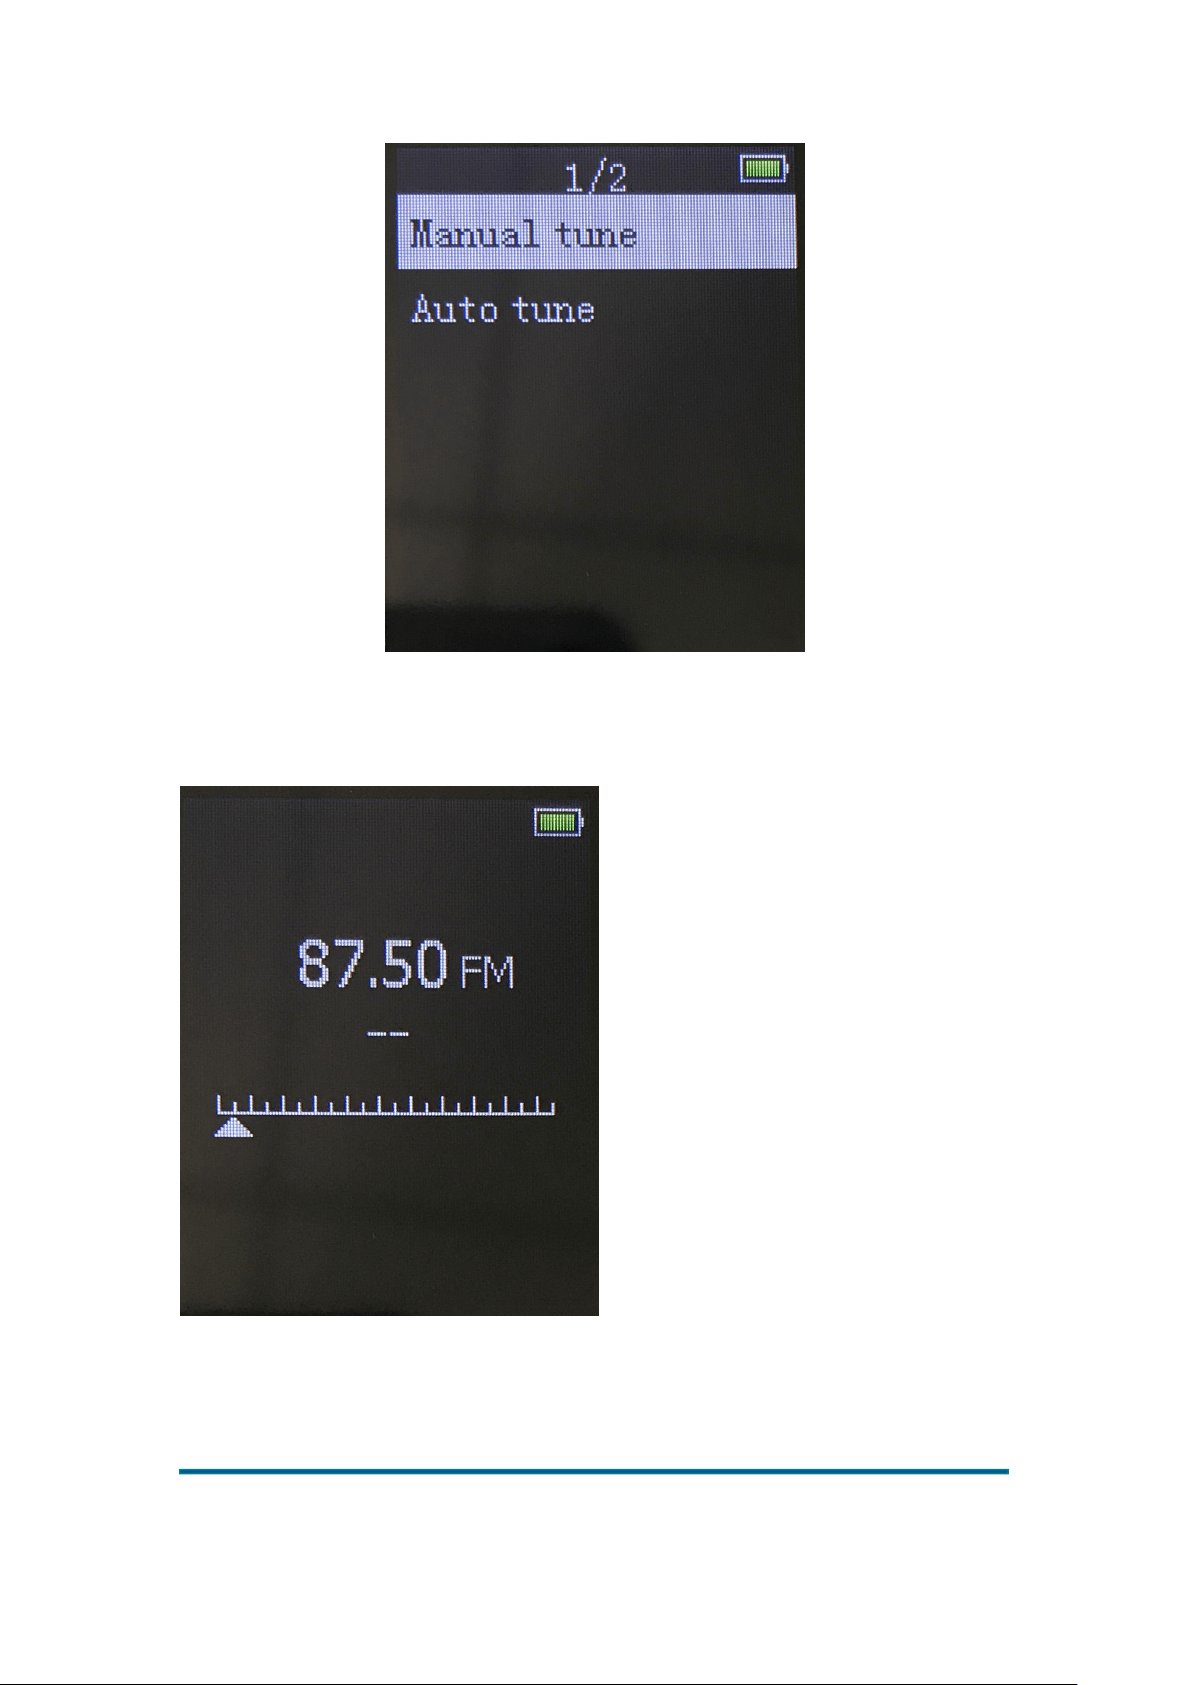
Main menu option
Press and to move up and down to select manual tuning and auto tuning. Start searching
after press OK key to confirm
Version:1.0
Page
12
Radio interface
Preset station: Displays the preset station frequency. At most 30 frequencies can be saved.
User Station: Displays the user’s station frequency. Display at most 30 frequencies.
Manual tune: Press OK to enter manual tune. Press ◄ and ► to manually adjust radio stations.
Version:1.0
Page
13
Adjust to a station, press M to enter submenu options, select Save to Preset, select any preset
station frequency. Press OK to confirm the option. The station is saved on this preset station.
Auto tune: Press OK to enter auto tune. Display “Automatic tune the current preset channel or
not”; select “Yes” to start auto search for radio station; select “No” to return to menu options.
FM recording: Press OK to enter the FM record library. If not recorded yet, it will prompt “FM
radio recording not found”. If file recorded, select the recorded file to play, or delete the recorded
file completely.
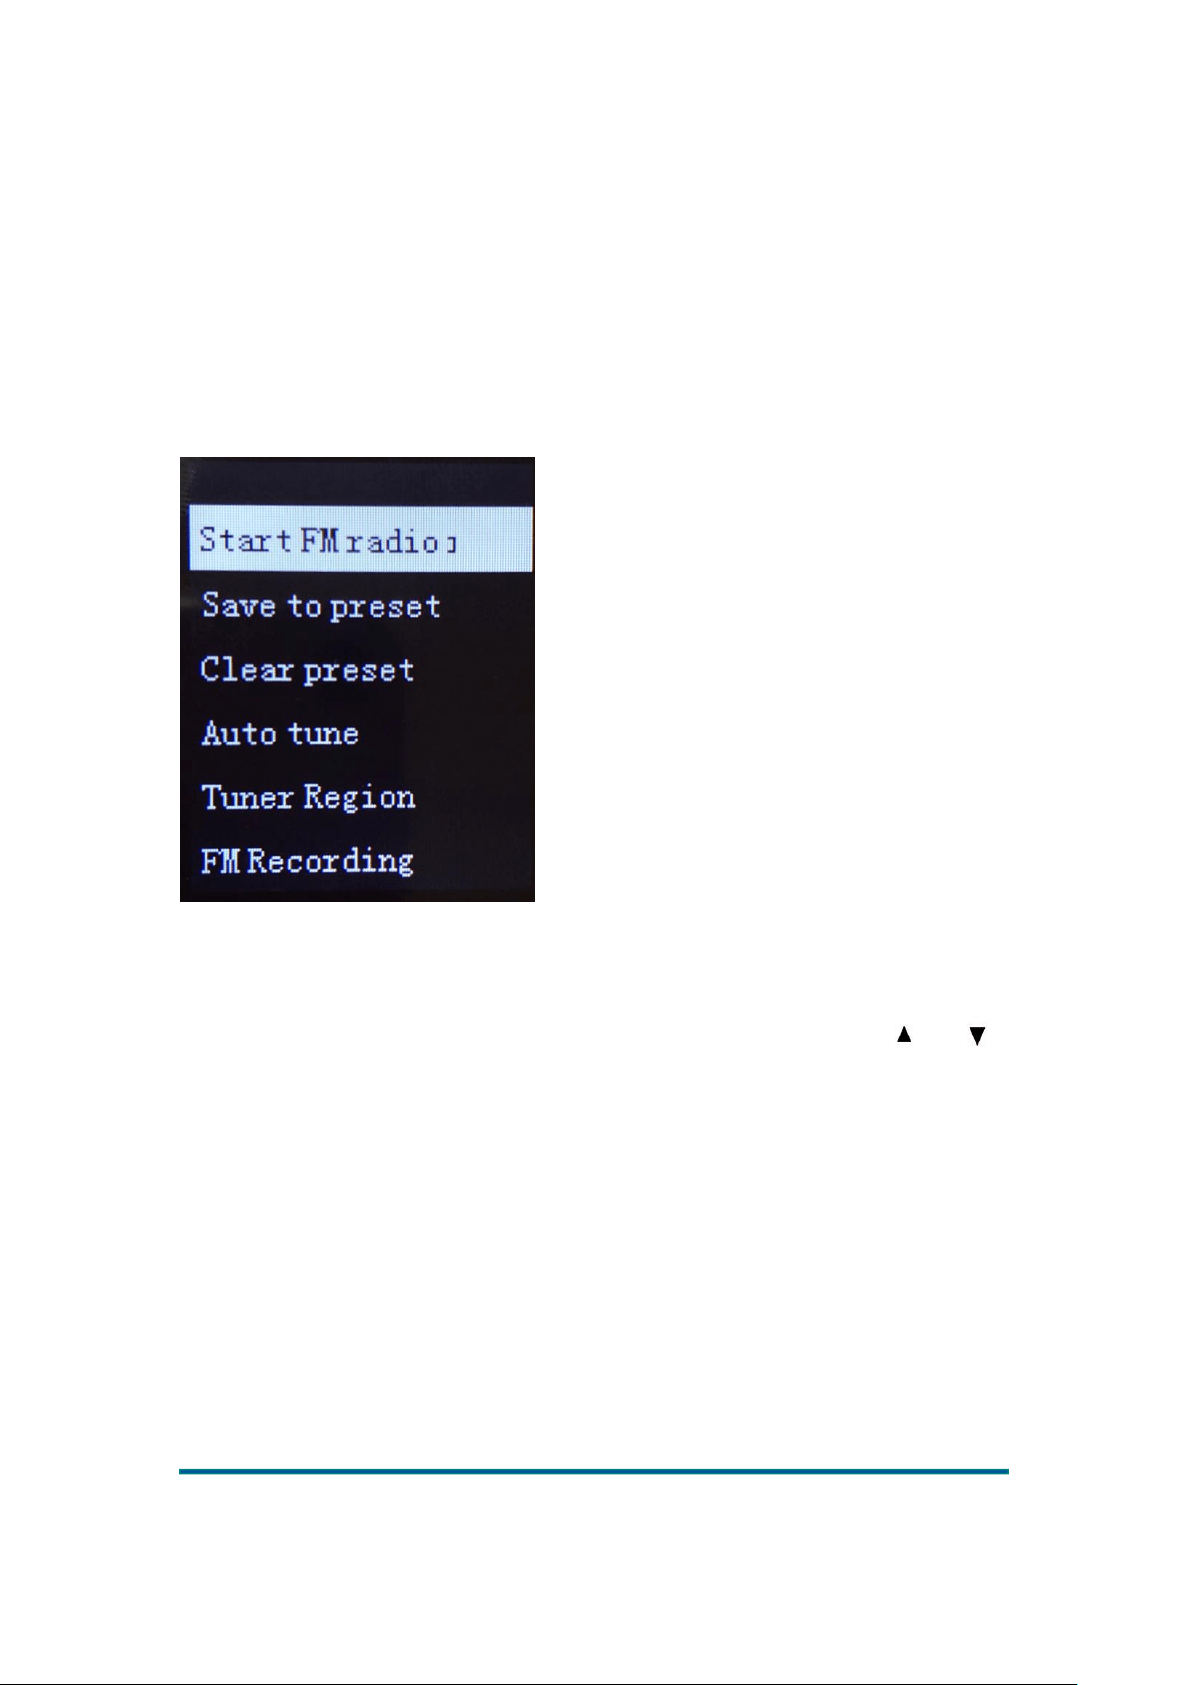
Press M to enter menu options.
Start FM radio recording: Press OK to enter the FM inner-recording interface.
Save to preset: Select any preset radio frequency, press OK to confirm the option, and the station
is saved in the preset station.
Clear preset: Press OK to confirm, automatically enter the preset station list, press and to
move up or down to select any radio station and press OK. The message “Clear preset xx?
Yes/No” will pop up.
Auto tune: After selecting this option, press OK to return to the radio function interface and start
searching for the radio station automatically. After searching for radio program, the system
automatically saves the radio and displays 01 on the interface. Continue searching and save by
number. Press the return key to stop searching. The stations searached is successfully saved. Press
OK to switch between the saved stations in this band.
Tuner Region: Ordinary frequency band - frequency scope:87.5MHZ-108.00MHZ
Japanese frequency band - frequency scope:76.00MHZ-90.00MHZ
European frequency band - frequency scope:87.50MHZ-108.00MHZ
FM recording: Press OK to enter FM recording library. If not recorded yet, display the message
“FM radio recording not found”. If the file is recorded already, select the recorded file to play.
You can also delete the recorded file completely.
Version:1.0
Page
14
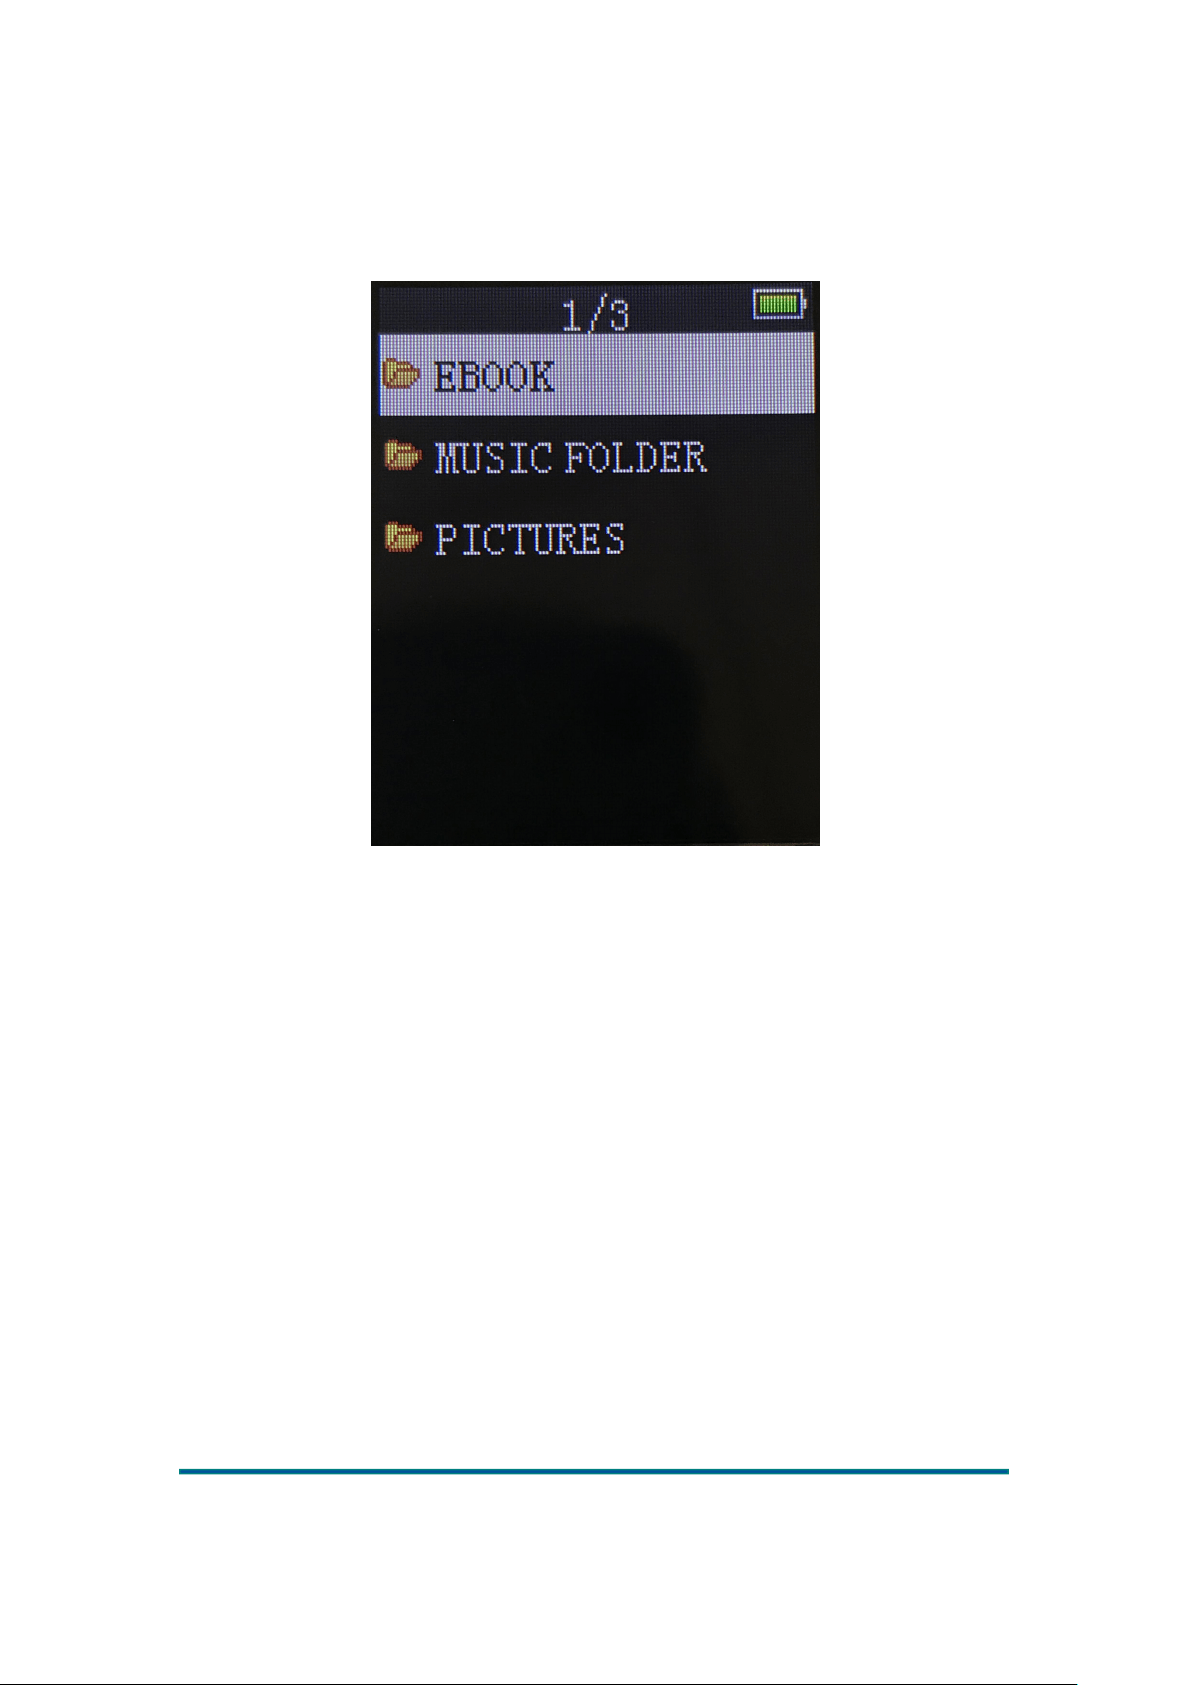
Folders view
Display all directories and files in the internal storage device::
Select a file in the file list and press M. Display “Delete”, as shown in the figure below. Press M or
return key to cancel deletion. Press OK to confirm Delete option.

Version:1.0
Page
15
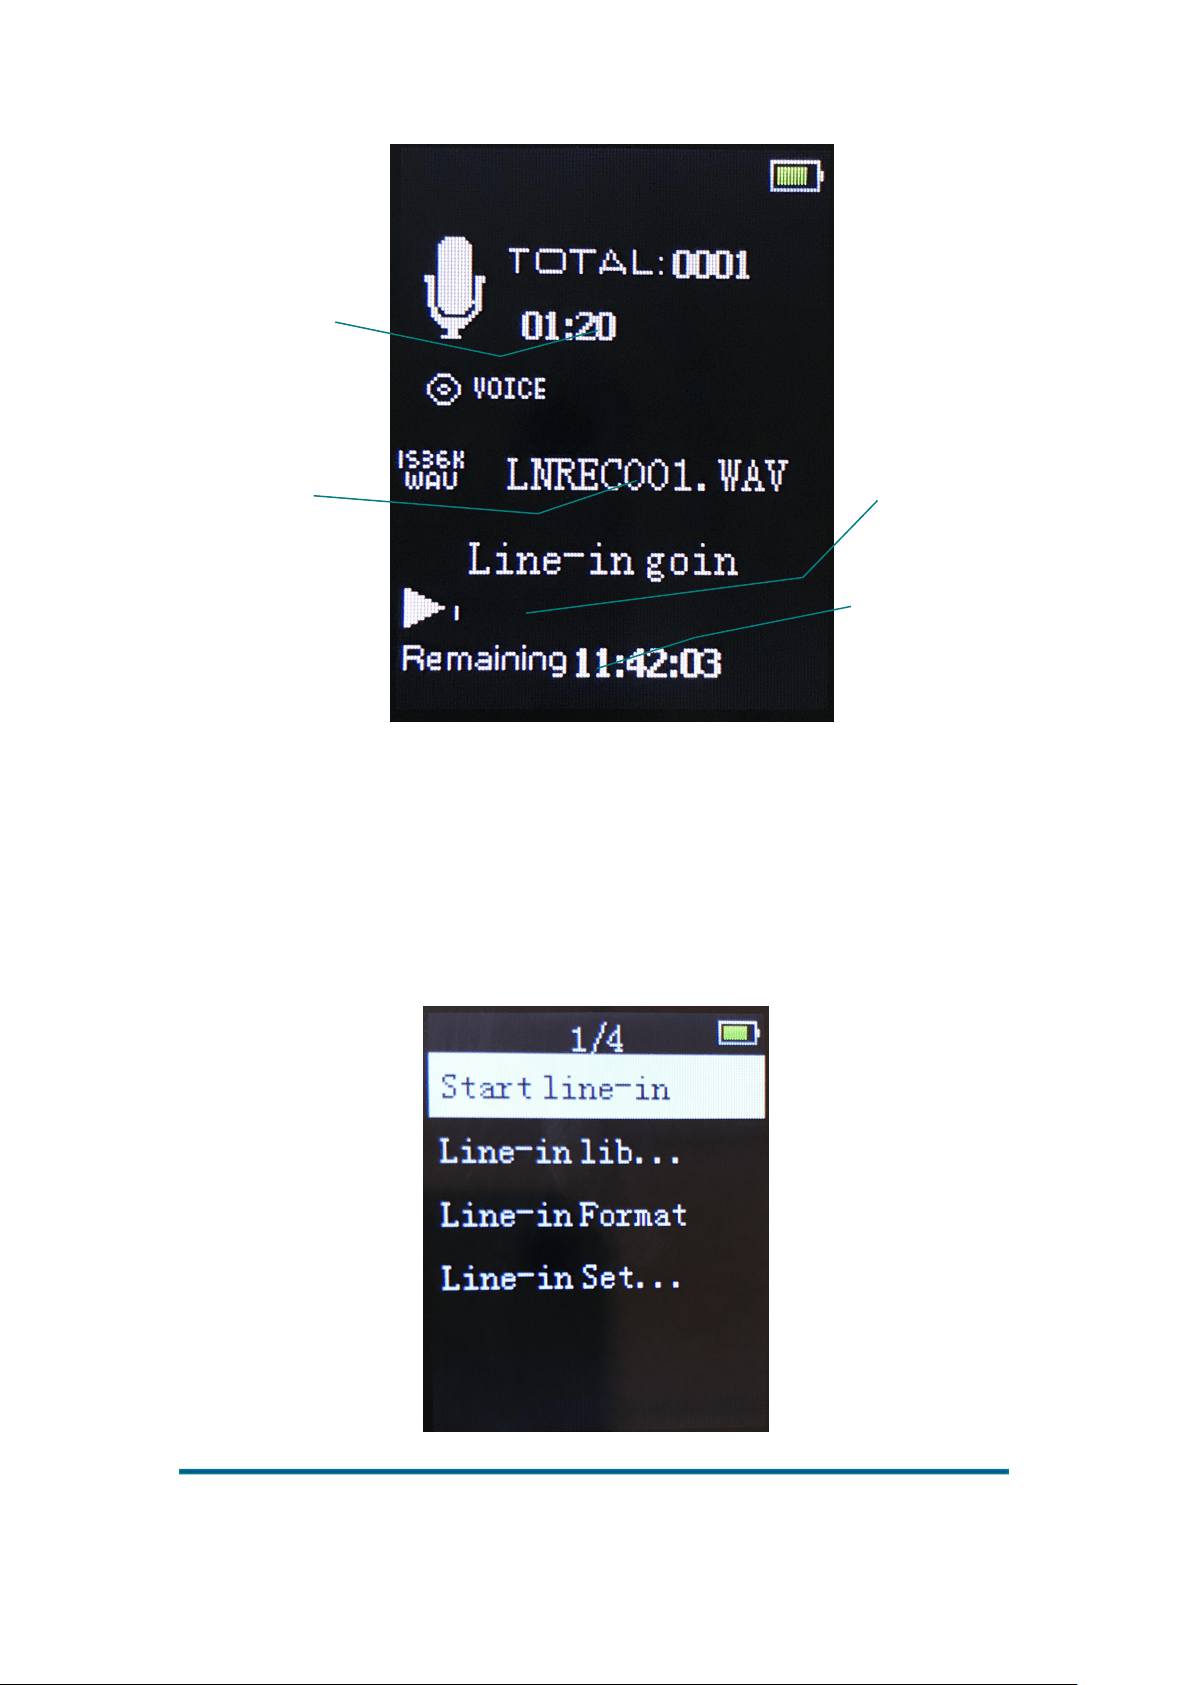
Line-in
Line-in interface
Version:1.0
Page
16
Press OK to start/pause/resume recording. Press return key to exit the Line-in interface.
Select “Yes/No” to save or not save the current recording, and return to the menu option
interface.
Menu option
Press OK to enter the record menu option. Menu options include: Start line-in, Line-in
library, Line-in Format, Line-in Settings.
Current inter-record
time
Current file name
Remaining time progress
bar for inter-record
Remaining time for inter-
record
Version:1.0
Page
17
Start line-in: Connect the MP3 player's LINE-IN earphone port to the compatible device's
earphone port with audio cable. Press OK to enter the line-in interface and start recording the line-
in audio file.
Line-in library: Enter line-in library, if no audio file is recorded yet, prompt "No line-in
recording is found". If the file is already recorded, select the recorded file to play, or delete the
recorded line-in file completely.
Line-in format: Select mp3 or wav as line-in format
Line-in settings: Display "Line-in bit rate, line-in sub-item avr mode"; wav format is optional for
the recording bit rate: 512 kbps/768 kbps/1024 kbps/1536 kbps (mp3 format: 32 kbps/64 kbps/128
kbps/192 kbps). Ordinary mode and automatic sub-item and avr mode can be selected. AVR mode
supports the voice control function. When the volume of the audio source is very small lasting for
a while, it enters the record pause mode. It continues to record when the volume is restored above
the threshold value.
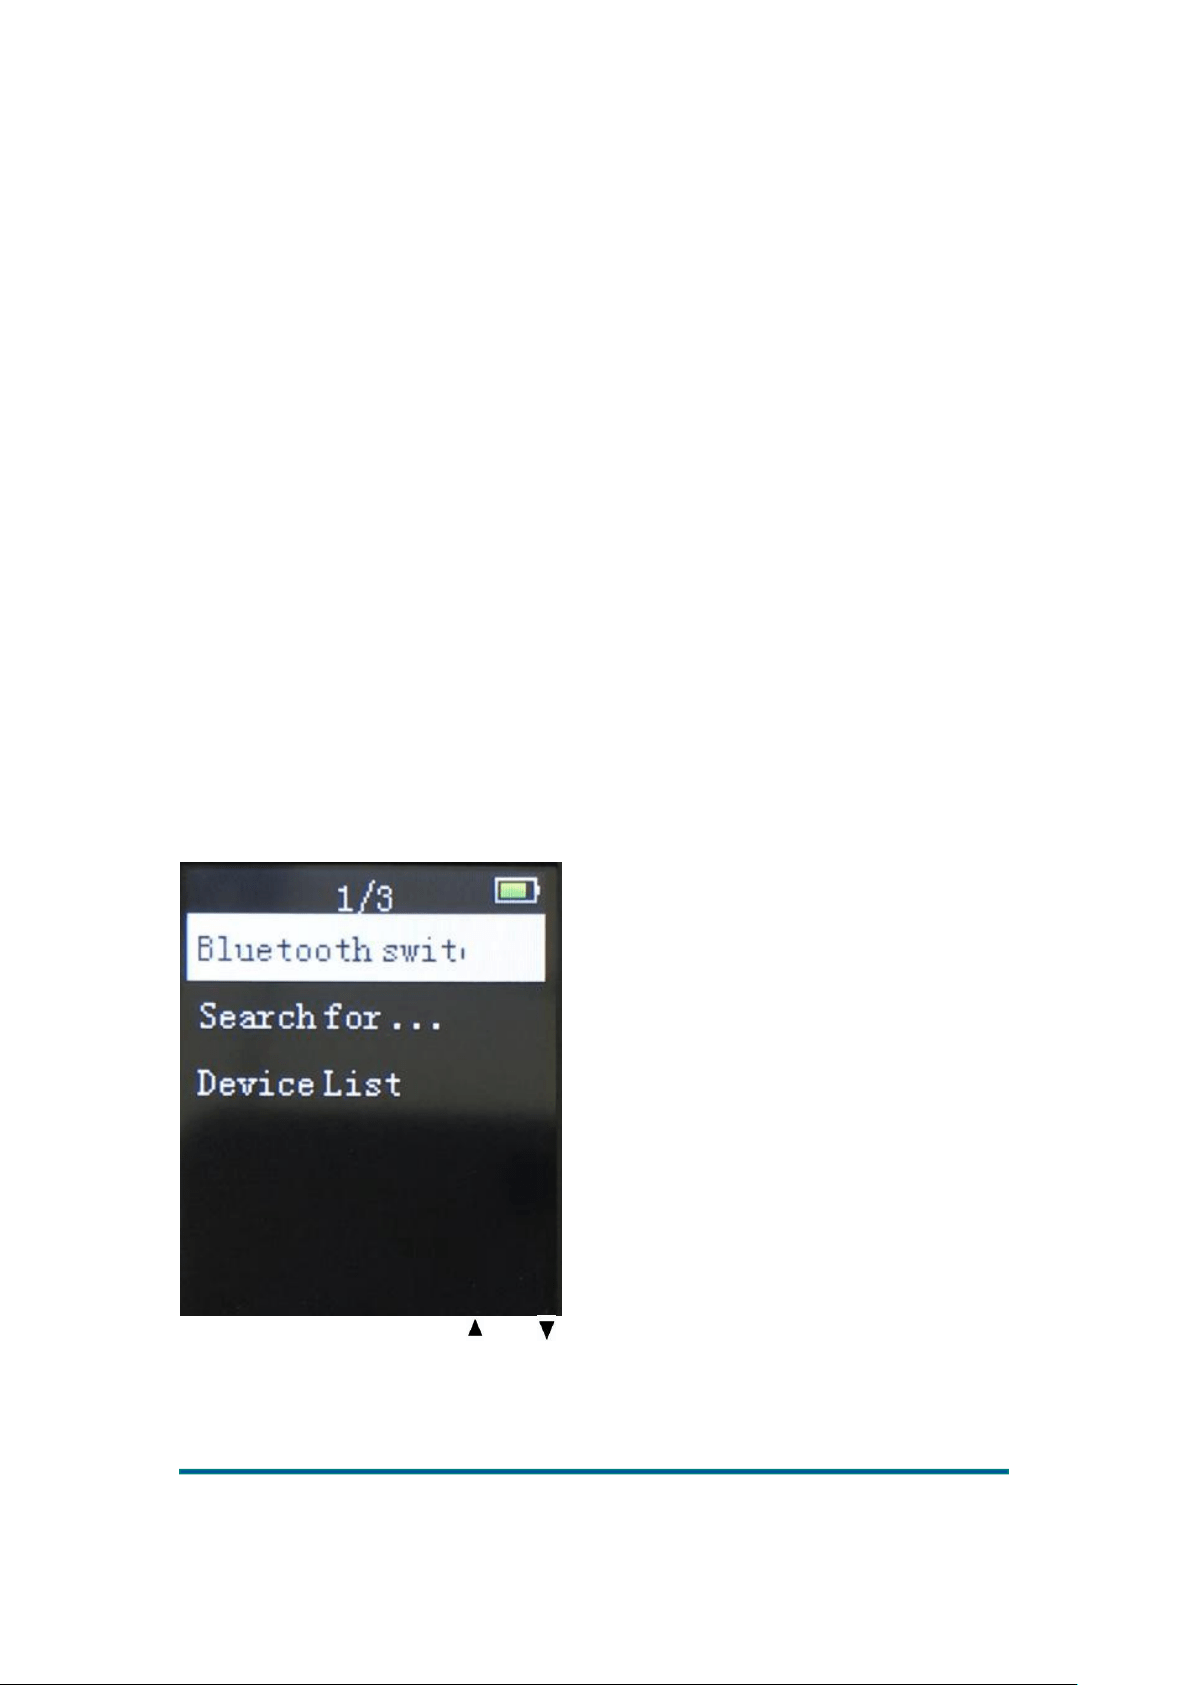
Bluetooth
Press OK to enter Bluetooth
Bluetooth switch control: Press and to select “BT on/off” press OK to confirm.
Search device: Press OK to confirm to re-search device.
Device List: Press OK to confirm to check the devices that can be paired.
Bluetooth connection steps: Firstly, turn on the Bluetooth headset or Bluetooth speaker device in
Version:1.0
Page
18
pair mode. Press OK button to enter Bluetooth. Bluetooth on, search for devices and pair. After
pairing is completed. The Bluetooth icon in the upper right corner of the display will turn green.
The connection is complete.
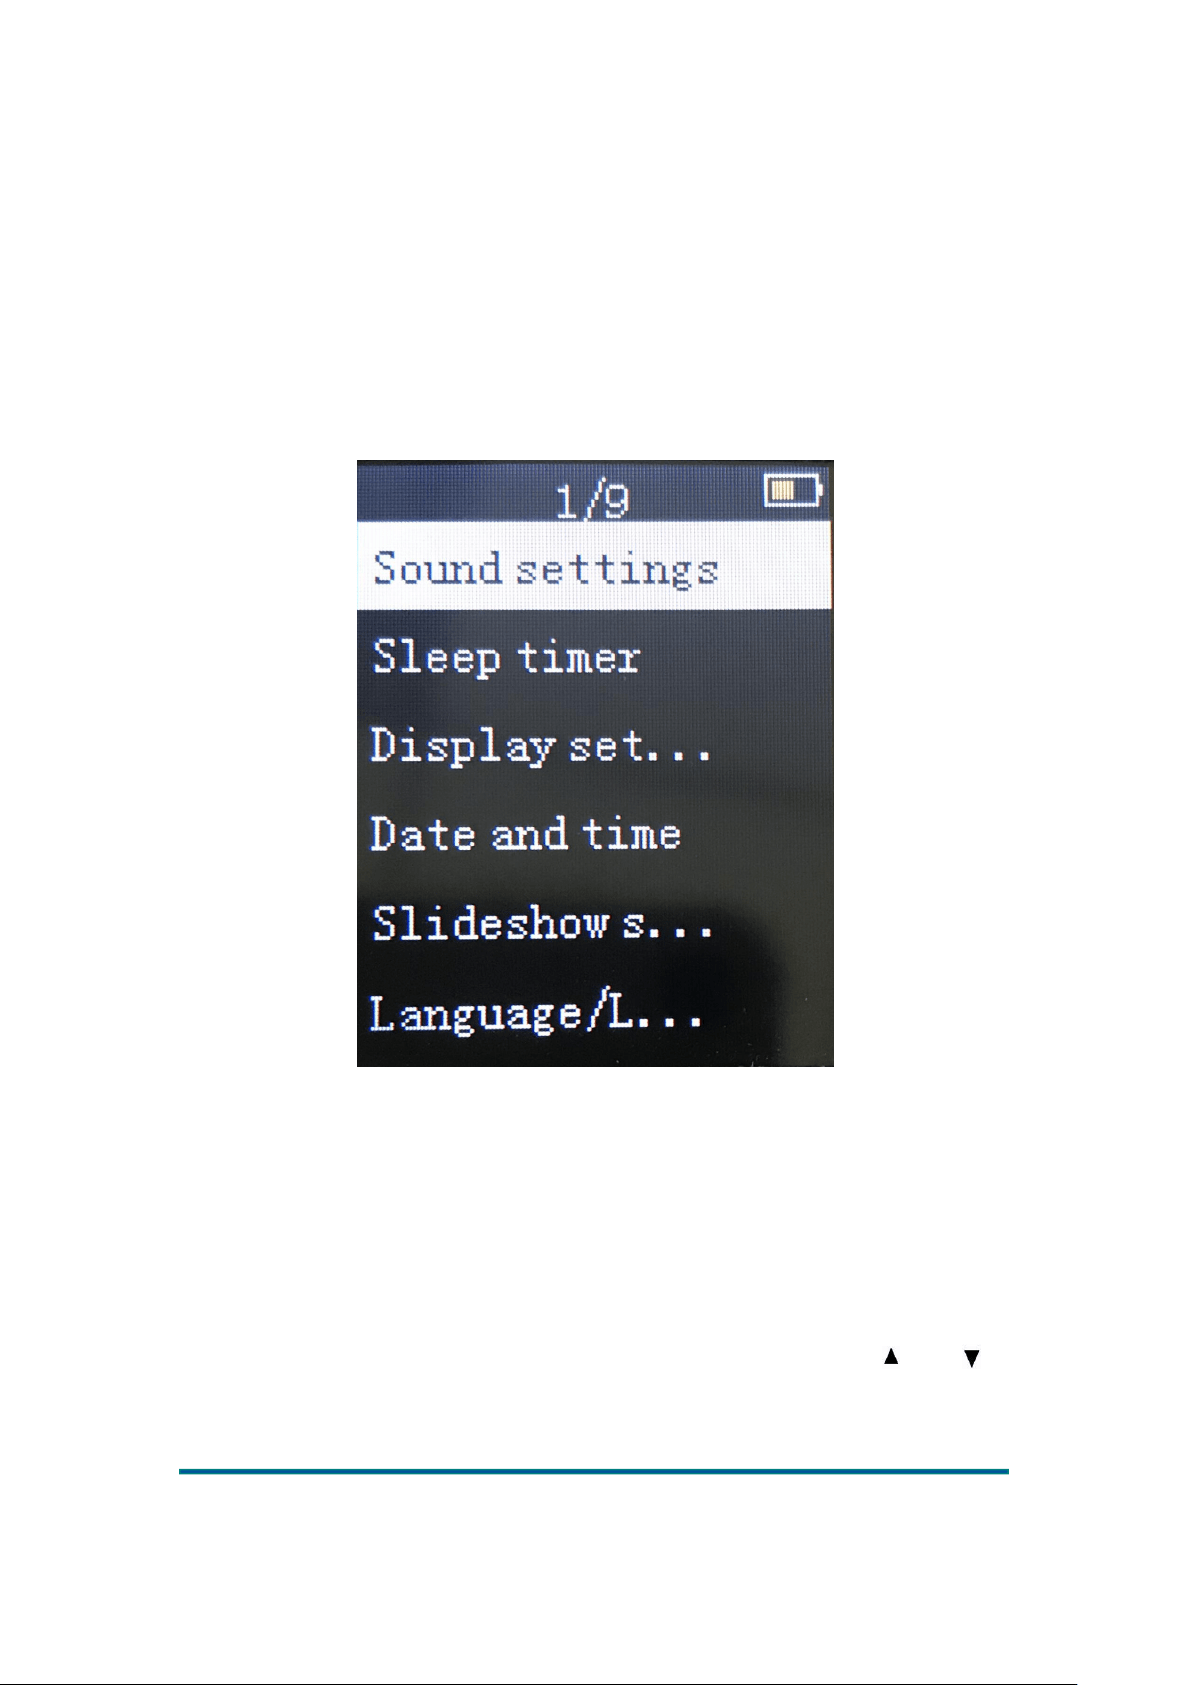
Settings
Enter the Settings interface as follows:
1. Sound settings similar to music module.
2. Sleep timer: Time range:1min~99min.
3. Display settings: Brightness, backlight timer and screen protection。
Brightness:Range 0~11, default is 5 (default value is 5).
Backlight timer: During this period, if no key operation, the backlight will turn off. Available
values: 10 seconds, 20 seconds, 30 seconds and always on。
Backlight time settings are invalid in the following interfaces: 1) Video play interface; 2) E-book
reading interface; 3) USB connection interface。
Screen protection: Options: None, Digital Clock, Screen Off, Demo Mode
4. Date and time: Adjust date and time
Press ◄ or ► to switch between year, month, hour, minute and second. Press and to
adjust the number. Press OK to save. Press return key to exit the Settings interface. Note: After the
date and time values are set, press OK to save the setting successfully.
5. Slide show settings: same as photo module.
Version:1.0
Page
19
6. Language : Support languages : Simplified Chinese, Traditional Chinese, English,
Japanese, Korean, French, German, Italian, Dutch, Portuguese, Spanish, Swedish, Czech, Danish,
Polish, Russian, Turkish, Hungarian, Romanian, Arabic, Hebrew, Thai, Indonesian, Greek.。
7. Information:Display "player info, disk space, supported file types"
Player info: Display model, software version, and support site
Disk space: Display available space, total space, number of songs, number of photos
Supported file types: Display supported music, photos。
8. Formatting device: no other memory directly prompts whether or not formatting operation on
the master disk is performed. If there is other storage in the small device, press OK to enter
Formatting device and display main directory and other directories. Press and to select the
storage, press OK to confirm the device for formatting.
9. Factory setting: All settings are restored to initial values (Recover backlight brightness,
screen protection mode, backlight time, shutdown time, volume, ..., etc. The current background
play will not stop). If time is set, the initial value of the time will not be restored in this operation.
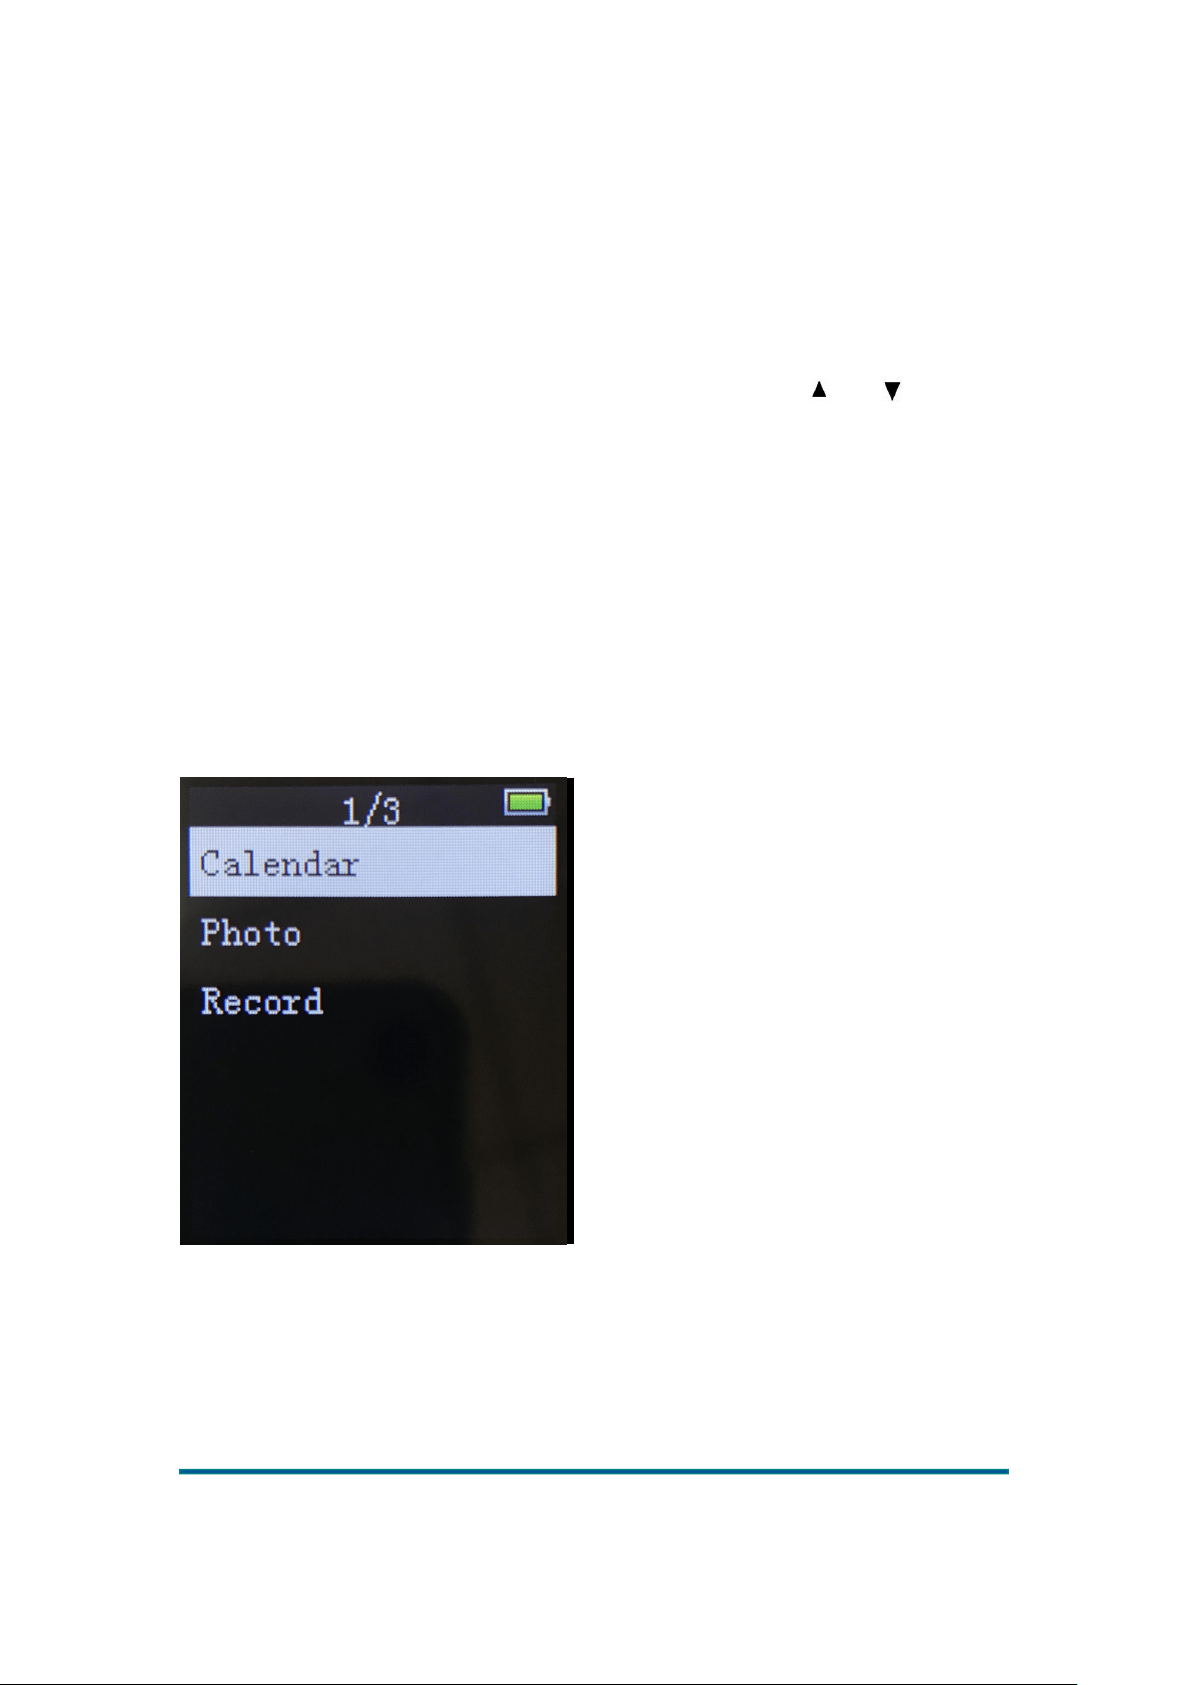
Tools
Press OK to enter the Tools interface as follows:
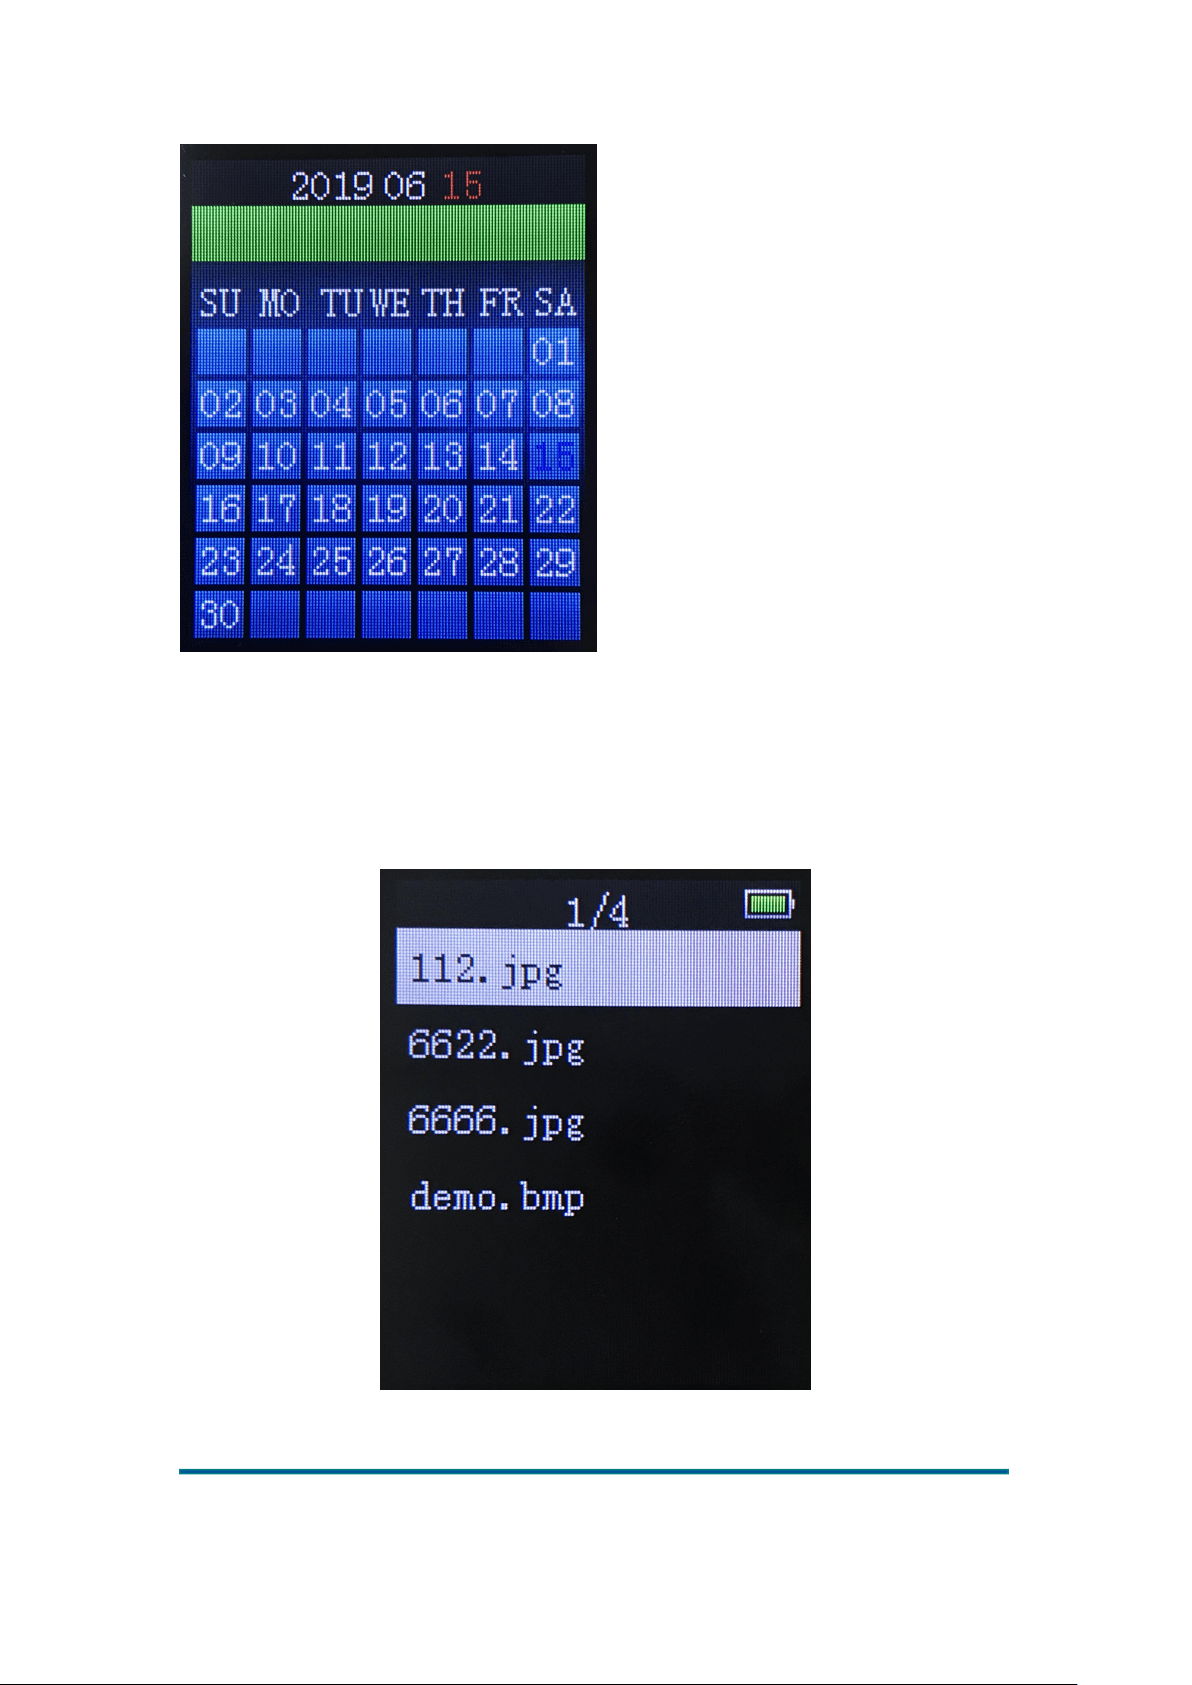
Calendar: Press OK to enter the Calendar and press ◄ or ► to view the date. Press return key to
exit.
Version:1.0
Page
20
Photo
Press OK to enter the photo list, as shown below:
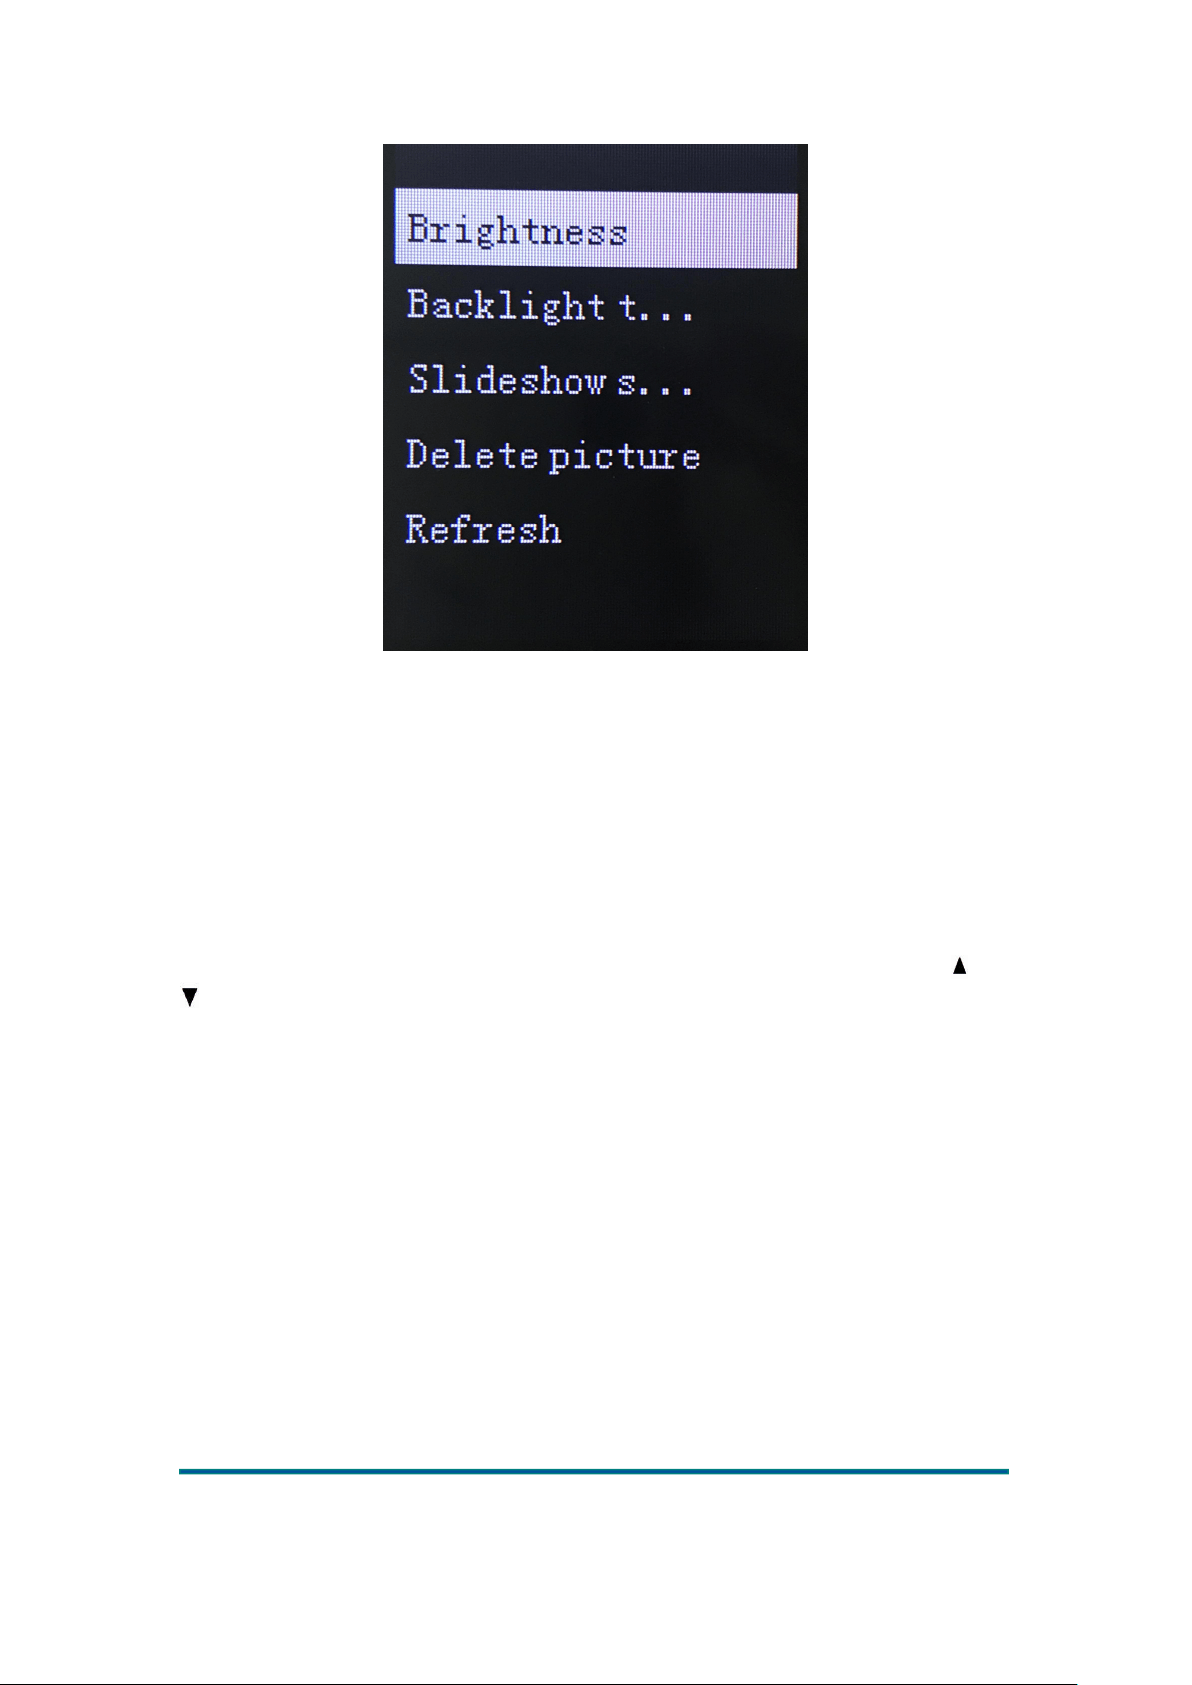
Press M to enter the menu options
Version:1.0
Page
21
In the photo list interface, press OK to enter the selected picture, press ◄ or ► to browse the
pictures back and forth, press M to enter the menu options, and press the return button to exit.
Menu option
Submenu items: Brightness, Backlight timer, Slideshow settings, Delete pictures, Refresh.
Except for the backlight timer and slide show settings, other menu items function and operation
method are the same as the previous application.
Backlight timer: Four options: 10 seconds / 20 seconds / 30 seconds / always on. Press and
to browse options, press OK to confirm, and press return to return key to the previous menu.。
Slide show settings: Enter this option, display "Time of each slide, Repeat play, Random play,
Thumbnail mode". The time range of each slide is 2s~30s for options; select “On/Off” to adjust
whether to repeat play or random play.
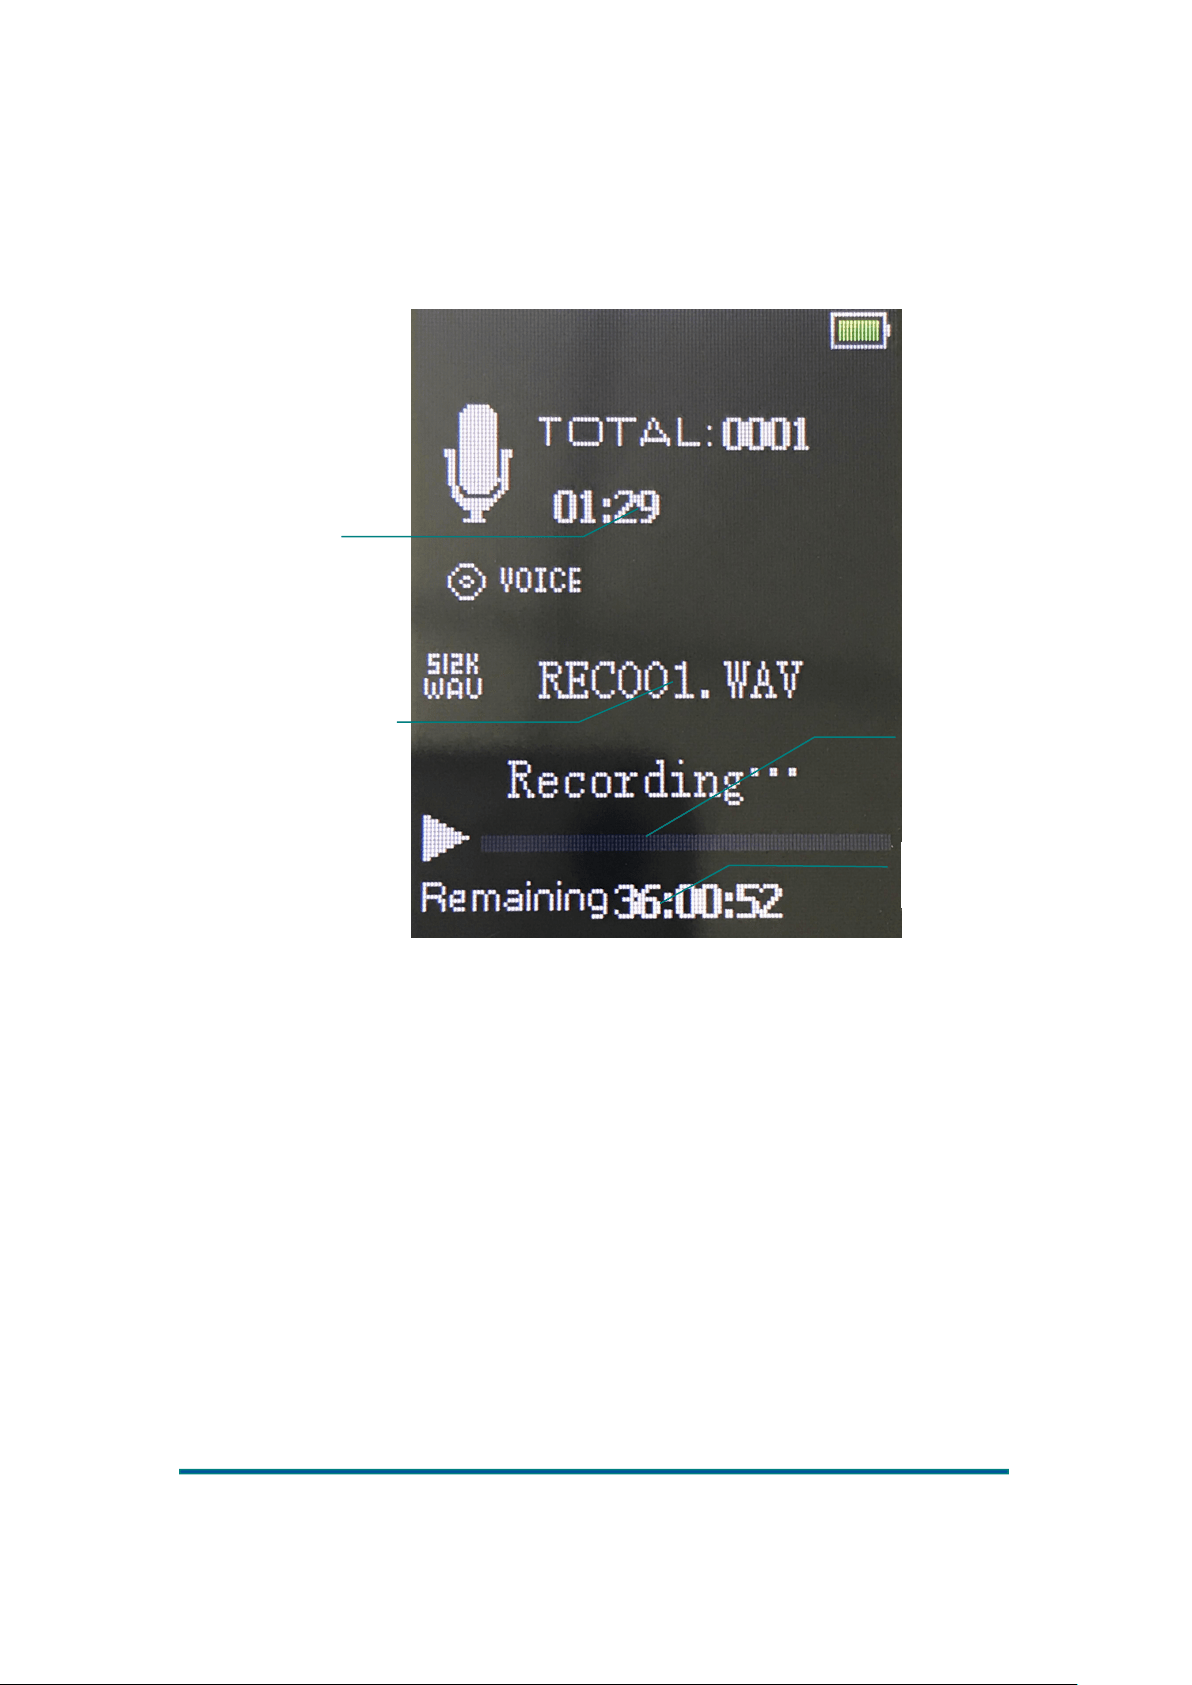
Recording
Version:1.0
Page
22
Recording interface
Press OK to start/pause/resume recording again. Press the return key to exit the record interface,
select “Yes/No” to save or not save the current recording, and return to the menu option interface.
Menu options
If a battery-low signal appears during the pause, the system will automatically save the recording
and return to the record function interface
System will prompt "full disk space!" when the disk is full.
Press OK to enter record menu options. Menu options include: start voice recording, recording
library, record format and recording settings.
Current file name
Current recording
time
Remaining recordable
time
Remaining recordable
time progress bar

Version:1.0
Page
23
Start voice recording: Press OK to enter the record interface and start recording voice files.
Recording library: Enter the recording library. If no audio file is recorded, display the message
“Voice recording not found”; If the file is recorded, select the recorded file to play, or delete all
recorded audio files.
Record format: Enter the record format to select mp3 or wav or ACT format.
Record settings: Shows "Record source, record bit rate, music avr mode". wav format is optional
for record bit : 512 kbps/768 kbps/1024 kbps/1536 kbps (mp3 format: 32 kbps/64 kbps/128
kbps/192 kbps); the avr mode is optional for normal mode and avr mode. AVR mode supports the
voice control function. When the volume of the external audio source is very small continuously
for a while, it enters record pause mode and continues recording when the volume is restored
above the threshold.
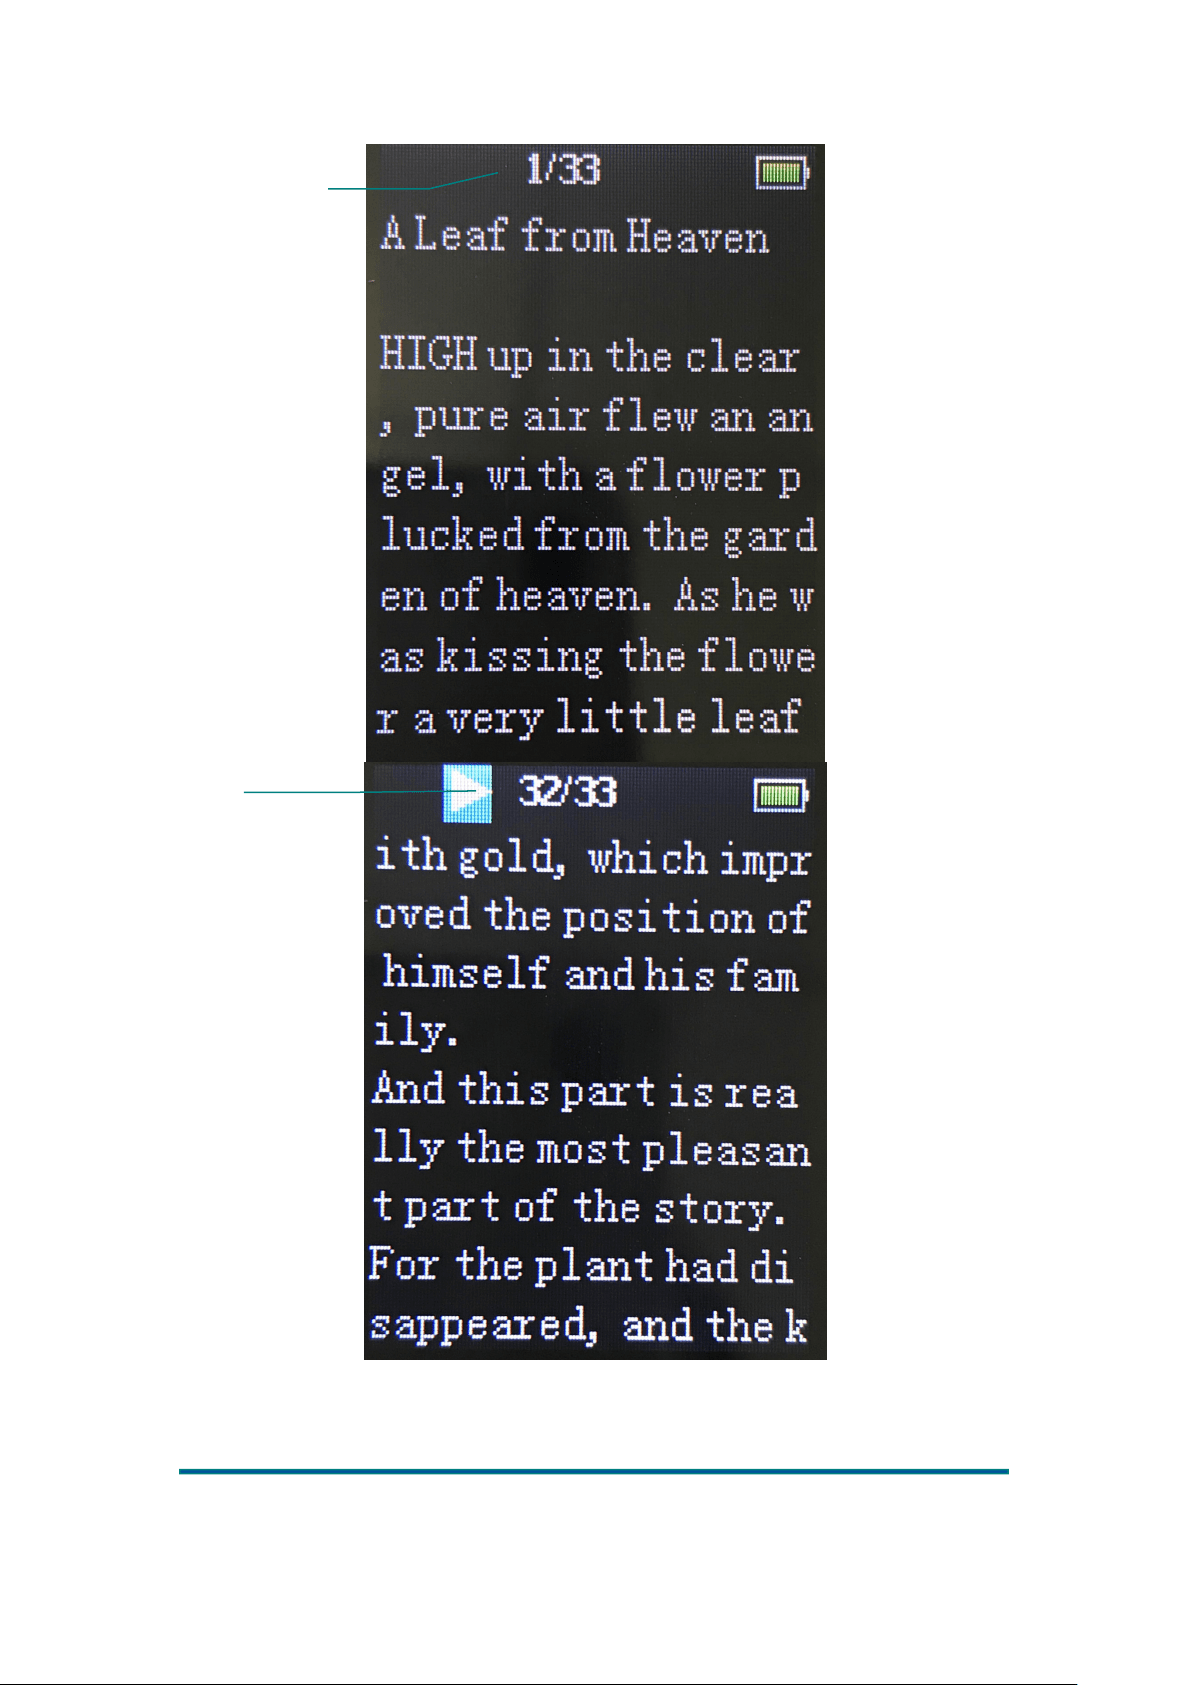
E-book
Press OK to enter the e-book text file list interface.
Press OK to confirm opening the text file, display the current page number of the file and the total
page number (the total page numbers are calculated in the background). Press ◄ or ► to page
forward or backward. During the e-book browsing, press OK to switch between manual and
automatic page turn. Press M key to enter the submenu options and press the return key to exit.
Version:1.0
Page
24
Auto Page Turn
Manual Page
Turn
Version:1.0
Page
25
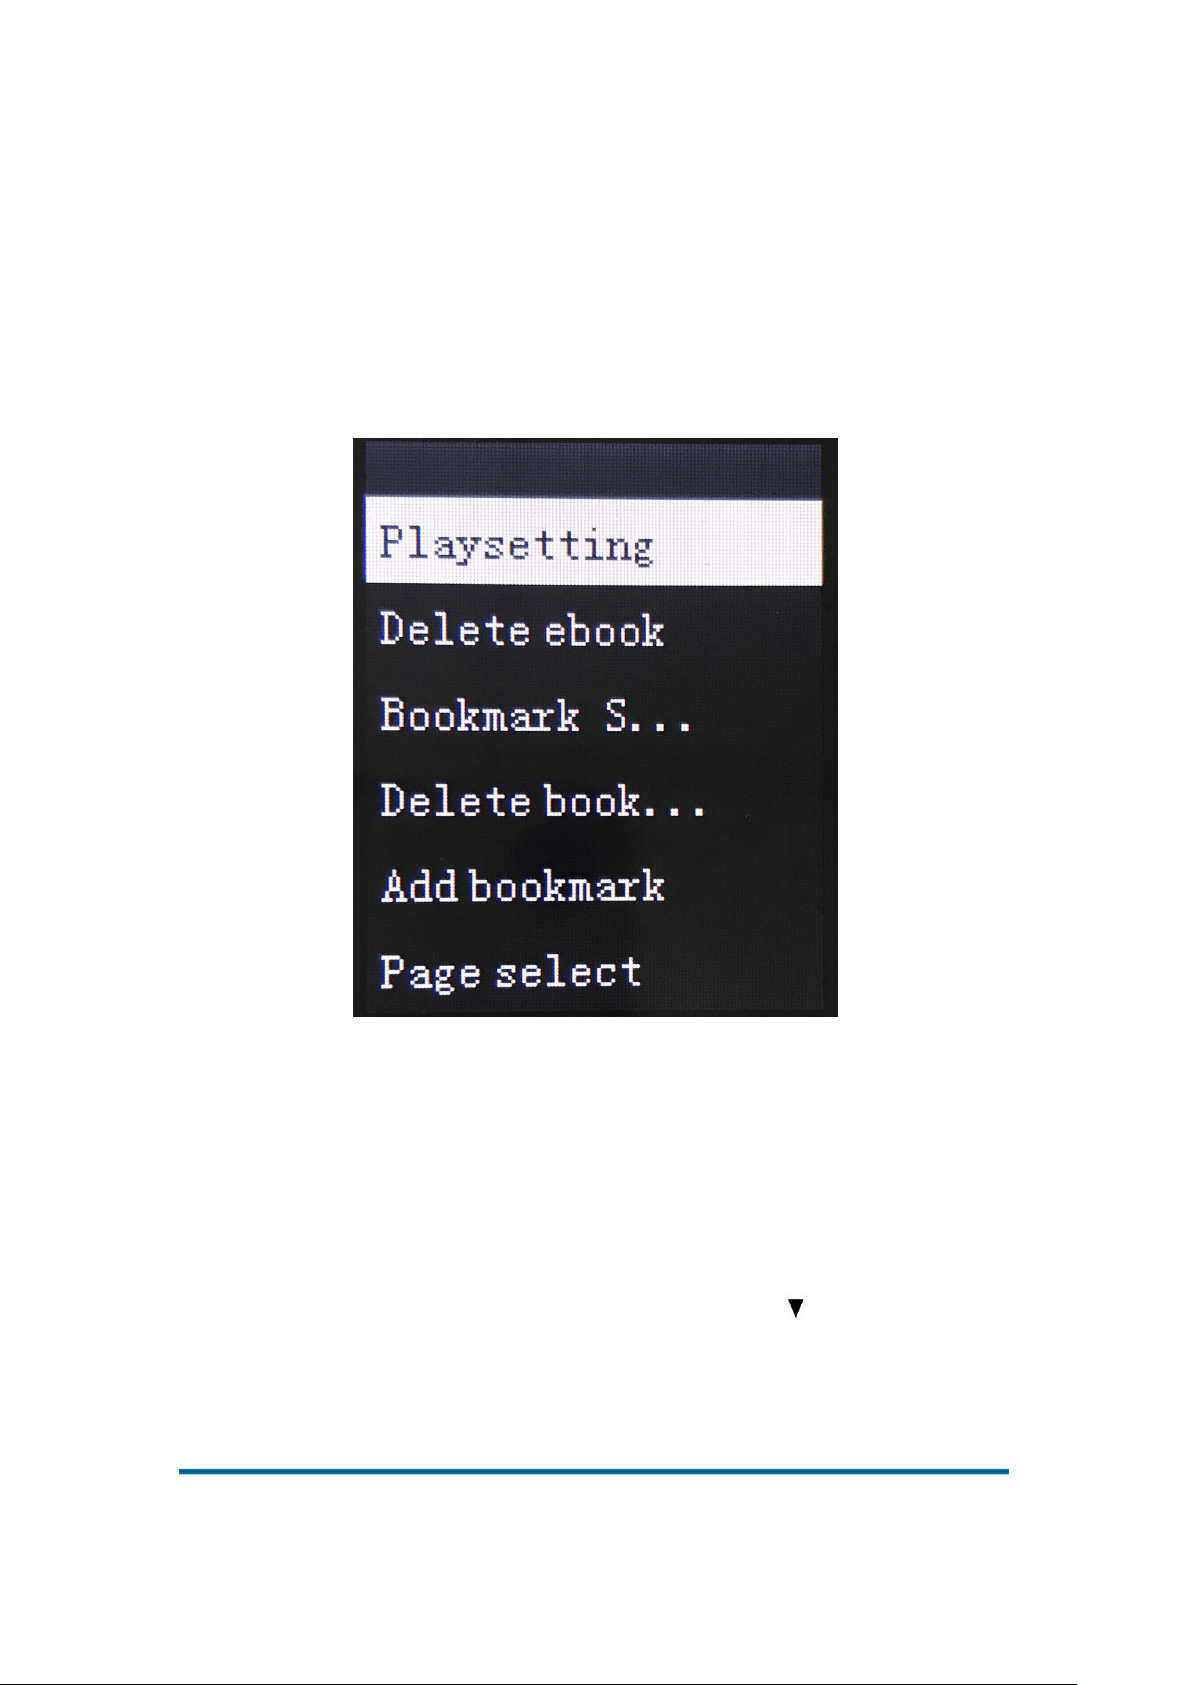
Menu option
In text file list interface, press M to enter the sub-menu, menu options include autoplay time
settings, delete e-books.
Auto-play time settings:Set automatic play interval: 2~30s
In the text reading interface, press M to enter submenu 2. Submenu options include auto-play
time settings, delete e-books, bookmark selection, delete bookmark, add bookmark and page
select. Bookmark function of the similar music app. Each text file supports 16 tags for the most.
Page select: User chooses to enter Page Option interface, press ◄or ► Scroll up and down the
page list, press OK to select the number of page, and press M and return key to exit.
Stopwatch
Press OK to enter the Stopwatch, press OK to start timing, and press start timing in the next
time point. Press ► to clear 0. Press OK to pause/start. Press the return key to exit.

Version:1.0
Page
26
FAQ:
1. How to create a playlist and put my favorite songs together?
Playlist function can be realized by two ways: Firstly, in the MUSIC application, select
“All songs”, select the song you want to listen to, press the M key, select “Add into
playlist”, select the playlist you want to add, and select “Yes”.
The second method is to connect the MP3 with a USB cable. Create a new folder In the
MUSIC folder of the computer end according to your preferences. Then you can see the
folder you created in the MP3 folder application and select Play.
Please note that the folders you create on the computer will only be synchronized to the
MP3 folder application. But you can only see the added song files in the MUSIC
application without seeing the folder classification.
2. Why can’t I find my Audiobook?
Our products only support following formats: MP3, WMA, APE, FLAC, WAV, AAC-LC,
ACELP, OGG.
Please make sure that the audio book format you downloaded is in the support list. The
Audiobooks beyond the list format can be downloaded to the MP3 but cannot be displayed
in the MUSIC application. Please understand if any inconvenience brought to you.

Version:1.0
Page
27
3.No charging after one-month use.
If long-time no use, it needs to be charged for 10 minutes to activate when it is used again.
4.How to play my favorite singer's music.
Firstly, Create a new folder (name by user self) in player internal memory on your PC, and
then copy in the categorized music of the singer. Check the [Folder View] menu in the
music function of the player and play the music.
5. Bluetooth devices cannot be found.
If no devices can be found after Bluetooth function is on for a while, Please press the reset
key to re-enter the Bluetooth search.
6. Do not connect to PC.
- Please unplug ON/OFF key to restart it. And use a USB cable to connect the PC and check
whether recognizable or not.
- If it doesn't work, try another USB cable or another PC. If a desktop computer, try connecting
to the rear USB port of the computer which is relatively stable and easily recognized by the
computer. If a laptop, try another 2.0 USB port.
Troubleshooting
1. Why is my MP3 not starting up?
Please try following steps: Plug in and unlock the key
-If the screen shows charging or starting up within 10 minutes, the battery has no power
(low power protection). Please wait for the battery full and continue to using. It usually
takes 4 hours for fully charging. (Power-on and charging times depend on the size of the
charging current)
2. Why is there no response after pressing keys?
Please try following operations:
-Check the position of the lock key. If the lock key is open, turn it on
- Press long Power OFF key for 8 seconds, or use the fine needle to press the reset hole below
the device to reset.。
- Please contact customer service if problems cannot be solved by previous two steps.
3. I downloaded 5 songs, but why can I see 1 in MP3?
- Please check whether song format you downloaded is in the support list. Unsupported
media type cannot be displayed in the MUSIC program.。
- Please play the downloaded song after fully loading or enter MUSIC interface to select
"Refresh" option.

Version:1.0
Page
28