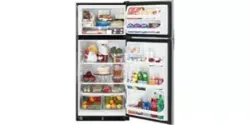
Use this page to become more familiar with the parts and features of your refrigerator.
NOTE: This guide covers several different models. The refrigerator you have purchased may have some or all of the items listed below. The locations of the features shown below may not match your model.
Swing-Down Shelf (p 18}*
Adjusts Cuba Ice Maker (p 22)*
Pull-Over Shelf (p 18}
Giide-Out Floor Tray (p 19)'
CooiSense Electronic Temperature Control System (p 12) (Digital Readout)*
Refrigerator Light (p 20)
Meat Tray * / Snack Pan (p 15)
Adjustable Shelves (p 15)
Can Dispenser*
Supra Fresh Crisper (with Ttft-Out Compartment*)(p. 18)
Base Grille (p.. 8)
Leveling Feel (inside) (p 11)
Refrigerator Door Rack (p 17)
Egg Box*
Modular Door Bins (p 17)
Frontchiil Door Cooling (p 11)*
Door Cooling
Dairy Comer (p 18)
Tilt-Out Door Basket (2 basket) (p. 18)‘
Freezer Light (p 21) * on some models
USING YOUR REFRIGERATOR
ENSURING PROPER AIR CIRCULATION
In order to ensure proper temperatures, air must flow between the refrigerator and freezer sections. As shown in the illustration below, cool air enters through the bottom of the freezer section and moves up. Most of the air then flows through the freezer section vents and recirculates under the freezer floor. The rest of the air enters the refrigerator section through the top vent
FRONTCHILL DOOR COOLING (on some models)
DOOR COOLING
To provide cool air everywhere, there are cool air vents on all four internal wails in Frontchiil Door Cooling and on two internal wail In Door Cooling.
This allows for more powerful and effective Cooling Especially noticeable when new food is placed in the refrigerator compartment.
Note: If you close the fresh food compartment door applying more force than necessary, freezer door may get open and dose again, due internal airflow of refrigerator.
SETTING THE CONTROLS (on some models)
Your refrigerator has two controls that let you regulate the temperature in the freezer and refrigerator compartments.
Initially set the REFRIGERATOR CONTROL at 4th position 37°F (3°C) and the FREEZER CONTROL at 4th position O°F(-10“C)
Leave it at this setting for 24 hours (one day) to stabilize. Then adjust the compartment temperature ss desired
Refrigerator control: Position 1 to 7 (30°F t 48°F or - 1°C to 9°C)
The lower the number setting, the colder the refrigerator compartment will become
NOTE; You can lock the controls so the settings cannot be changed.
To lock the control:
Set the contra! to the desired settings
Press and hold the lock pad for 3 seconds
When the controls are locked, the indicator light will be on and the cold and colder controls will not operate.
To unlock the control:
Press and hold the lock pad for 3 seconds.
After unlocking the controls, the lock indicator light will be out, and the setting can be changed.
Freezer control:- 6°F to 8"F (-21"C to -13"0)
When the setting is at a lower number, the freezer compartment becomes colder, But the refrigerator compartment becomes warmer because less cold air flows into the refrigerator
NOTE: "F/*C display control-press this control to cbar_ge the displayed temperature to °F or °C NOTE: To turn the refrigerator off, press and hold the °F /°C button for 3 seconds and it will show "FF" in the display. To turn the refrigerator on, press and hold the °F / °C button for 3 seconds again, and it will return to start-up status
NOTE: Pressing OFF control key, we setting the refrigerator for exhibition mode Only the refrigerator lights will work, not the refrigerator
NOTE: To turn the refrigerator off, press and hold the OFF button for 3 seconds. To turn the refrigerator ON, press and hold the OFF button for 3 seconds again
SETTING THE CONTROLS
Your refrigerator has two controls that let you regulate the temperature in the freezer and refrigerator compartments.
Initially set the REFRIGERATOR CONTROL at 4th position 37°F (3°C) and the FREEZER CONTROL at 4th position O°F(-10“C)
Leave it at this setting for 24 hours (one day) to stabilize. Then adjust the compartment temperature ss desired
Refrigerator control: Position 1 to 7 (30°F t 48°F or - 1°C to 9°C)
The higher position setting, the colder the refrigerator compartment will become
NOTE; You can lock the controls so the settings cannot be changed.
To lock the control:
Set the contra! to the desired settings
Press and hold the lock pad for 3 seconds
When the controls are locked, the indicator light will be on and the cold and colder controls will not operate.
To unlock the control:
Press and hold the lock pad for 3 seconds.
After unlocking the controls, the lock indicator light will be out, and the setting can be changed.
Freezer control:- 6°F to 8"F (-21"C to -13"0)
When the setting is at a lower number, the freezer compartment becomes colder, But the refrigerator compartment becomes warmer because less cold air flows into the refrigerator
NOTE: Pressing OFF control key, we setting the refrigerator for exhibition mode Only the refrigerator lights will work, not the refrigerator
NOTE: To turn the refrigerator off, press and hold the OFF button for 3 seconds. To turn the refrigerator ON, press and hold the OFF button for 3 seconds again
ADJUSTING CONTROL SETTINGS
Give the refrigerator time to cool down completely before adding food it is best to wait 24 hours before you put food into the refrigerator The mid-settings indicated in the previous section should be correct for normal household refrigerator usage. The controls are set correctly when milk or juice Is as cold as you like and when ice cream is firm
The refrigerator control functions as the thermostat for the entire appliance (refrigerator and freezer sections.) The higher the number setting, the longer the compressor will run to keep the temperature colder. The freezer control adjusts the cold air flow from the freezer to the refrigerator. Setting the freezer control to a lower temperature keeps more cold air in the Freezer compartment to make it colder. if you need to adjust temperatures in the refrigerator or freezer, start by adjusting the refrigerator first. Wait 24 hours after the refrigerator adjustment to check the freezer temperature, if it is too warm or too cold, then adjust the freezer control as well
Use the settings listed In the chart below as a guide. Always remember to wait at least 24 hours between adjustments.
CONDITION/REASON;
RECOMMENDEDADJUSTMENT:
REFRIGERATOR section too warm
Door opened often
Large amount of food added
Room temperature very warm
Turn REFRIGERATOR control to next higher number, wait 24 hours, then re-check
FREEZER section too warm/ Ice not made fast enough
Door opened often
Large amount of food added
Very cold room temperature (Can't cycle alien enough j
Heavy ice usage
Air vents blocked by items
Turn FREEZER control to next higher number, wait 24 hours, then re-check
Move items out of airstream
REFRIGERATOR section too cold
Controls not set correctly for your conditions
Turn REFRIGERATOR conb'olto next lower number, wait 24 hours, then re-check
FREEZER section too cold
Controls no! set correctly for your conditions
Turn REFRIGERATOR conb'olto next lower number, wait 24 hours, then re-check
FOOD STORAGE GUIDE
Storing Fresh Food
Wrap or store food in the refrigerator in airtight and moisture-proof material unless otherwise noted This prevents food odor and taste transfer throughout the refrigerator For dated products, check code date to ensure freshness
Butter or margarine
Keep opened butter in a covered dish or closed compartment. When storing an extra supply, wrap in freezer packaging and freeze
Cheese
Store in the original wrapping until you ere ready to use it..Once opened, rewrap tightly in plastic wrap or aluminum foil,.
Milk
Wipe miik cartons For best storage, place milk on interior shelf, not on door shelf
Eggs
Store in original carton on interior shelf, not on door shelf
Fruit
Wash, let dry and store in refrigerator in plastic bags or crisper. Do not wash or hull berries until they are ready to use Sort and keep berdes in original container in a crisper, or store in a loosely closed paper bag on a refrigerator shelf.
Leafy vegetables
Remove store wrapping and trim or tear off bruised and discolored areas Wash in cold water and drain Place in plastic bag or plastic container and store in crisper
Vegetables with skins (carrots, peppers)
Place in plastic bags or ptastic container and store tn crisper
Fish
Use fresh fish and shellfish the same day purchased,
Meat
Store most meat in original wrapping as long as it is airtight and moisture-proof Rewrap if necessary. See the following chart for storage times,, When storing meat longer than the times given, freeze the meat,.
Chicken .......................................... .... 1-2 days
Ground beef ....................................... .1-2 days
Organ meats (liver, heart, etc) ............. 1-2 days
Cold cuts ............................................. 3-5 days
Steaks/roasts ............................. ........ 3-5 days
Cured meats .............................. ....…7-10 days
Leftovers
Cover leftovers with plastic wrap or aluminum foil
STORING FROZEN FOOD
NOTE: For further informationabout preparing food for freezing or food storage times, check a freezer guide or a reliable cookbook
Packaging
Successful freezing depends on correct packaging When you close and seal the package, it must not allow air or moisture in or out If you do, you could have food odor and taste transfer throughout the refrigerator and also dry out frozen food
Packaging recommendations:
Rigid plastic containers with tight-fitting lids
Straight-sided canningtfreezing jars
Heavy-duty aluminum foil
Plastic-coated paper
Non-permeable plastic wraps
Specified freezer-grade self-seating plastic bags
Follow package or container instructions for proper freezing methods
Do not use;
Bread wrappers
Non-polyethylene plastic containers
Containers without tight lids o Wax paper or wax-coated freezer wrap
Thin, semi-permeable wrap
Freezing
Your freezer will not quick4reeze any large quantity of food Do not put more unfrozen food into the freezer than will freeze within 24 hours (no more than 2 to 3 Ibs of food per cubic foot of freezer space) Leave enough space in the freezer for air to circulatearound packages Be careful to leave enough room at the front so the door can close tightly.
Storage timeswill vary according to the quality and type of food, the type of packaging or wrap used (.airtight and moisture-proof) and the storage temperature, ice crystals inside a sealed package are normal This simply means that moisture in the food and air inside the package have condensed, creating ice crystals.
NOTE: Allow hot foods to cool at room temperature for minutes, then package and freeze, Cooling hot foods before freezing saves energy
NOTE: Do not store food near the sensor; it may cause the sensor to malfunction
REFRIGERATOR SHELVES
The shelves in your refrigerator are adjustable to meet your individual storage needs Your model may have glass or wire shelves
Storing similar food items together in your refrigerator and adjusting the shelves to fit different heights of items will make finding the exact item you want easier; it will also reduce the amount of time the refrigerator door is open, saving energy
IMPORTANT: Do not clean glass shelves with warm water when they are cold. Shelves may break if exposed to sudden temperature changes or impact, such as bumping. For your protection, glass shelves are made with tempered glass, which will shatter into small pebble sized pieces
NOTE: Glass shelves are heavy Use special care when removing them to avoid dropping them
Adjustable Shelves
Remove shelves from the shipping position and replace shelves in the position you want
To remove a shelf- Tilt up the front of the shelf in the direction of (1) and lift it in the direction of (2) Pull the shelf out
To replace a shelf- Tilt the front of the shelf up and place the shelf hooks into metal slots at desired position
Then lower the front of the shelf so that the hooks drop into the slots.
NOTE: Make sure that shelves are leveled from one side to the other_ Failure to do so may result in the sheff falling or spitling food.
Slide Out Shelves
You can slide some glass shelves in and out of your refrigerator as follows
To slide the shelf out, carefully pull front of shelf toward you
To slide shelf in, push shelf in until it stops
To remove a sliding shelf from its metal frame:
Pull the shelf toward you until it stops,
Tilt the front of the shelf up and pull it past the stop
Lift up the shelf to remove
Replace the shelf by reversing the above steps
Slide-Under Shelf (on some models)
Slide-Under Shelf: You can store taller items such as a gallon container or bottles by simply pushing in front half of shelf underneath back half of shelf Pull toward you to return to a full shelf_
MEAT TRAY (on some models) / SNACK PAN
While holding the meat tray with one hand, pull it forward slightly, Lift slightly and pull it ouL Meat tray on some models provide temperature control
SUPRAFRESH CRISPERS (WITH TILT-OUT COMPARTMENT on some models)
The SupraFresh Crispers provide fresher-tasting fruit and vegetables by letting you easily control humidity inside the crisper The SupraFresh Crispers include: 1) a humidity control knob at the front of the crisper cover and 2) a large lattice on the inner surface of the cover to hold or release moisture 3) Tilt-out compartment (on some models)
CRISPER HUMIDITY CONTROL.
You can control the amount of humidity in the moisture sealed crispers Adjust the control to any setting between and
lets moist air out of the crisper for best storage of fruits
keeps moist air in the crisper for best storage of fresh, leafy vegetables
CRISPER WITH TILT-OUT FEATURE (on some models)
How to use tilt-out drawer:
Push the button (1) and tilt the drawer (2)
To close drawer, push it in while slightly lifting it
To remove the tilt-out compartment:
Open the tilt-out crisper compartment
Grasp side wall with one hand and pull outward
Grasp tilt out cover with another hand and pull out until the circular piece disengages from opening
To remove the crisper:
Slide crisper straight out until it stops,
Lift front of crisper; then pull out to remove
Replace crisper by sliding it back,
CRISPER COVER WITH LATTICE ON INNER SURFACE
To remove the crisper cover;
Remove both crisper drawers
While holdingthe crisper cover support (2), pull the cover up and out (1),
WARNING: Be careful when handling glass cover since glass is not attached to cover
To remove lattice on inner surface
Remove Crisper cover (as illustrated above)
Hold the glass cover and overturn crisper cover
For each lattice hold lattice and pull sides of the cover outward to remove lattice,
To replace lattice on inner surface,
For each lattice insert middle tab in 1 (closest to glass cover) and pull sides of the cover to insert lattice
DOOR RACKS
The door racks may be removed for easier cleaning
Snap-On Door Racks
To remove the racks:
Remove all items in the door racks
Push the rack away from the inside wall of the door (A) and lift up the door rack (B)
To replace the racks:
Hold either end of the door rack against the inside wall of the door
Push down the rack end until it locks in place
MODULAR DOOR BINS
Bins can be moved side to side by sliding right or left
To remove the bin, lift until bin up bottom of bin unclicks and puit straight out
To replace the bin, slide it in above the desired support slot and firmly push down until it locks in place
WARNING: Be sure to clicks bottom portion of bin otherwise, bins may fall
NOTE: Do not adjust a bin that is loaded with food
DAIRY CORNER
To remove the dairy comer, simply lift it and pull straight out
To replace the dairy corner, slide it in above the desired support slot and _ push down until it locks in place
TILT-OUT DOOR BASKETS
Tilt-Out Door Basket (2 baskets on some models):
You can remove foods easily by tilting out the wire basket in Me freezer compartment
To remove the tilt-out basket (1), pull the bracket outward until you hear a clicking sound; then remove the wire rack (2)
To replace Ihe tilt-out basket, hook the end of the rack in the bracket (1), then push down until the rack locks into place (2)
SWING-DOWN SHELF (on some models)
Putt swing_down shelf down to store pizza boxes This feature lets you free up more space in the freezer compartment for other items
PULL OVER SHELF
Adjust the divider to either side as desired
NOTE; To adjust divider, lift slightly and mover
To extend the pult ever shelf, pull straight out and up
To push back the pull over shelf, push down and in
GLIDE-OUT FLOOR TRAY (on some models)
The glide-out floor tray is a slide-out tray which allows easy access to the foods at the rear of the compartment
To remove the Glide-out floor tray, lift slightty (1) and pull out towards you (2)
To replace the Gtide-out floor tray, push in toward refrigerator.
ICETRAY (on some models)
Icemaking
If the tray is fiIled with water to the highest level, itwifl be difficult to remove ice cubes
To remove ice cubes, twist the tray.
Do not bend the ice tray. Doing so may result in damage to the tray
CARE AND CLEANING
Both the refrigerator and freezer sections defrost automatically However, clean both sections about once a month to prevent odors Wipe up spills immediately
GENERAL CLEANING TiPS
Unplug refrigerator or disconnect power.
Remove all removable parts, such as shelves, crispers, etc.
Use a clean sponge or soft cloth and a mild detergent in warm water. Do not use abrasive or harsh cleaners.
Hand wash, rinse and dry all surfaces thoroughly.
Plug in refrigerator or reconnect power.
OUTSIDE
Waxing external painted metal surfaces helps provide rust protection. Do not wax plastic parts. Wax painted metal surfaces at least twice a year using appliance wax (or auto paste wax). Apply wax with a clean, soft cloth.
For products with a stainless steel exterior, use a clean sponge or soft cloth and a mild detergent in warm water. Do not use abrasive or harsh cleaners. Dry thoroughly with a soft cloth. Do not use appliance wax, bleach, or other products containing chlorine on stainless steel.
INSIDE WALLS (allow freezer to warm up so the cloth will not stick)
To help remove odors, you can wash the inside of the refrigerator with a mixture of baking soda and warm water. Mix 2 tablespoons of baking soda to 1 quart of water (26 g soda to 1 liter water.) Be sure the baking soda is completely dissolved so if does not scratch the surfaces of the refrigerator.
DOOR LINERS AND GASKETS
Do not use cleaning waxes, concentrated detergents, bleaches, or cleaners containing petroleum on plastic refrigerator parts.
PLASTIC PARTS (Covers and Panels)
Do not use window sprays, abrasive cleansers, or flammable fluids. These can scratch or damage the material.
CONDENSER COILS
Remove base grille, (See the base grille section on page 7.)
Use a vacuum cleaner with an extended attachment to clean condenser coils
Vacuum coils when dusty or dirty. Coils may need to be cleaned as often as every other month.
Replace base grille
LIGHT BULB REPLACEMENT
NOTE: Not all appliance bulbs will fit your refrigerator. Be sure to replace the bulb with one of the same size, shape and wattage.
To change the refrigerator light:
Unplug the power cord from the outlet
Remove refrigerator shelves
For each hold cover and press front tab white pulling shield down to remove it.
Turn the bulb counterclockwise and remove.
Replace a bumed-out light bulb with a new bulb, turning it clockwise
Replace the light shield pushing it up.
Replace the refrigerator shelves
Plug the power cord to the oulet
To change the freezer light:
Unplug refrigerator or disconnect power,
Remove the light shield and remove bufb.
Replace with a 40 watt appliance bulb and replace light shield,
Plug in refrigerator or reconnect power
POWER INTERRUPTiONS
If the electricity in your house goes off, call the power company and ask how long it will be off
If the power will be out for 24 hours or less,keep all refrigerator doors closed to help foods stay cold and frozen.
If the power will be out for more than 24 hours,
remove all frozen food and store it in a frozen food locker. OR
Place 2 lbs (ca lkg) of dry ice in the freezer for every cubic foot (28 L) of freezer space This wilt keep the food frozen for two to four days, While handling dry ice, wear gioves to protect your hands from ice burns. OR
If neither a food locker nor dry ice is available,f neither a food locker nor dry ice is available, consume or perish food at once
REMEMBER: In a power failure, a fuj! freezer stays co_dlonger than a partially filled one Afreezer rut{of meat stays cold longer than a freezer fu{t of baked goods if you see that food contains ice crystals, it may be safety refrozen, although the quality and flavor may be affected if the condition of the food is poor, or if you feel it is unsafe, dispose of it,
WHEN YOU GO ON VACATION
If you choose to leave the refrigerator on while you are away, follow these steps to prepare your refrigerator before you leave.
Use up any perishables and freeze other items.
Turn off the icemaker and empty the ice bin.
if you choose to turn the refrigerator off before you leave, follow these steps.
Remove all food from the refrigerator.
Depending on your model, set the thermostat control (refrigerator control) to OFF. See the Setting the Controls section.
Clean the refrigerator, wipe it and dry well.
Tape rubber or wood blocks to the tops of both doors to prop them open far enough for air to get in. This stops odor and mold from building up.
WHEN YOU MOVE
When you are moving your refrigerator to a new home, follow these steps to prepare it for the move.
Remove all food from the refrigerator and pack ail frozen food in dry ice
Depending on your model, turn the thermostat control (refrigerator control) to OFF, See the “Setting the Controls' section
Unplug the refrigerator,
Empty water from the defrost pan.
Clean, wipe and dry thoroughly.
Take out all removable parts, wrap them well and tape them together so they don't shift and rattle during the move,
Depending on the model, raise the front of the refrigerator so it rolls more easily OR screw in the leveling legs all the way so they don't scrape the floor. See the "Door Closing” section.
Tape the doors shut and tape the power cord to the refrigerator cabinet.
When you get to your new home, put everything back and refer to the "installing Your Refrigerator” section for preparation instructions.
CONNECTING THE WATER LINE
BEFORE YOU BEGIN
Unless it is performed by Sears service this water line installation is not warranted by the refrigerator or icemaker manufacturer. _
Follow these instructions carefully to minimize the risk of expensive water damage.
Water hammer (water banging in the pipes) in house plumbing can cause damage to refrigerator parts and lead to water leakage or flooding. Call a qualified plumber to correct water hammer before installing the water supply line to the refrigerator.
To prevent bums and product damage, do not hook up the water line to the hot water line, if you use your refrigerator before connecting the water line, make sure the icemaker power switch is in the O (off) position.
Do not install the icemaker tubing in areas where temperatures fail below freezing When using any electrical device (such as a power drill) during installation, be sure the device is doubleinsulated or grounded in a manner to prevent the hazard of electric shock, or is battery-powered.
All installations must be in accordance with local plumbing code requirements.
INSTALLATION INSTRUCTIONS
Install the shutoff valve on the nearest frequently used drinking water line.
SHUT OFF THE MAIN WATER SUPPLY Turn on the nearest faucet to relieve the pressure on the line.
CHOOSE THE VALVE LOCATION Choose a location for the valve that is easily accessible. It is best to connect into the side of a vertical water pipe. When it is necessary to connect into a horizontal water pipe, make the connection to the top or side, rather than at the bottom, to avoid drawing off: any sediment from the water pipe.
DRILL THE HOLE FOR THE VALVE Drill a 1/4 in. hole in the water pipe using a sharp bit. Remove any burrs resulting from drilling the hole in the pipe. Be careful not to allow water to drain into the drill. Failure to drill a 1/4 in. hole may result in reduced ice production or smaller cubes.
FASTEN THE SHUTOFF VALVE Fasten the shutoff: valve to the cold water pipe with the pipe clamp.
Tighten the clamp screws until the sealing washer begins to swell.
ROUTE THE TUBING Route the tubing between the cold water line and the refrigerator. Route the tubing through a hole drilled in the wall or floor (behind the refrigerator or adjacent base cabinet) as close to the wall as possible. NOTE: Be sure there is suMcient extra tubing (about 8 feet coiled into 3 turns of about 10 in. diameter) to allow the refrigerator to move out from the wall after installation.
CONNECT THE TUBING TO THE VALVE Place the compression nut and ferrule (sleeve) for copper tubing onto the end of the tubing and connect it to the shutoff valve. Make sure the tubing is fully inserted into the valve. Tighten the compression nut securely.
FLUSH OUT THE TUBING Turn the main water supply on and flush out the tubing until the water is clear. Shut the water oft: at the water valve after about one quart of water has been flushed through the tubing.
CONNECT THE TUBING TO THE REFRIGERATOR NOTE: Before making the connection to the refrigerator, be sure that the refrigerator power cord is not plugged into the wall outlet. Place the compression nut and ferrule (sleeve) onto the end of the tubing.Insert the end of the tubing into the water vaive connection as far as possible While holding the tubing, tighten the fitting Fasten the tubing into the tubing Clamp attached to the back of the refrigerator. First you loosen the screw fastening the clamp, next insert the tubing in the groove, last re-fasten the screw
TURN THE WATER ON AT THE SHUTOFF VALVE Tighten any connections that leak.
PLUG iN THE REFRIGERATOR Arrange the coil of tubing so that it does not vibrate against the back of the refrigerator or against the wall. Push the refrigerator back to the wall.
START THE ICEMAKER Set the icemaker power switch to the ON position. The icemaker will not begin to operate until it reaches its operating temperature of 15°F (-9°C) or below. It will then begin operation automatically if the icemaker power switch is in the ON (I) position.
TROUBLESHOOTING GUIDE
UNDERSTANDING SOUNDS YOU M/V HEAR
Your new refrigerator may make sounds that your old one didn’t make Because the sounds are new to you, you might be concerned about them. Most of the new sounds are normal, Hard surfaces, like the floor, wails and cabinets, can make the sounds seem louder than they actually are The following describes the kinds of sounds and what may tie making them.
The defrost timer will click when the automatic defrost cycle begins and ends The thermostat control (or refrigerator control, depending on the model) will also click whan cycling on and off
Rattling noises may come from the flow of refrigerant, the water line or items stored on top of the refrigerator.
Your refrigerator is designed to run more efficiently to keep your food items at the desired temperature.
The high efficiency compressor may cause your new refrigerator to run longer than your old one, and you may hear a pulsating or high-pitched sound
Contraction and expansion of the inside walls may cause a popping noise.
You may hear the evaporator fan motor circulating the air through the refrigerator and freezer compartments
Water dripping on the defrost heater during a defrost cycle may cause a sizzling sound
As each cycle ends, you may hear a gurgling sound due to the refrigerant flowing in your refrigerator
You may hear air being forced over the condenser by the condenser fan.
You may hear water running into the drain pan during the defrost cycle
Note; Due to refrigerator's low energy consumption design, the fans will remain off by the door switch activates the inner compartment light
REFRIGERATOR DOES NOT OPERATE
Check if...
Then...
The power supply cord is unplugged.,
Firmly plug the cord into a live outlet with proper voltage .
A household fuse has blown or circuit breaker tripped.
Replace the fuse or reset the circuit breaker.
The refrigerator control is set to the OFF pbsifon.
Refer to the Setting the Controls section on page 11-12.
Refrigerator is in the defrost cycle-
Wait about 30 minutes for defrost cycle to end-
VIBRATION OR RATTLING NOISE
Check if...
Then...
The refrigerator is not resting solidly on the floor.
Floor is weak or uneven or leveling legs need adjusting, See Installation section on page 10
LIGHTS DO NOT WORK
Check If...
Then...
The power supply cord is unplugged.
Firmly plug the cord into a live outlet with proper voltage.
Light bulb is loose in the socket
Turn the refrigerator control to the OFF position and unplug the refrigerator Gently remove the buib and reinsert Then plug in refrigerator and reset the refrigerator control
Light bulb has burned out
Replace with an appliance bulb of the same wattage, size ! and shape available at your local hardware store (See the Changing the Light Bulb(s) section on pages 19—20.) Turn the temperature control to the OFF position and unplug the refrigerator prior to replacement.
COMPRESSOR MOTOR SEEMS TO RUN TOO MUCH
Check If...
Then...
The refrigerator that was replaced was an older model
Modern refrigerators with more storage space require more operating time
The room temperature is hotter than normal, 1
The motor will run longer under warm conditions, At normal room temperatures, expect your motor to run about 40% to 80% of the time, Under warmer conditions, expect it to run even more often.
The door is opened often or a iarge amount of food has just been added
Adding food and opening the door warms the refrigerator.
It is normal for the refrigerator to run longer in order to cool the refrigerator back down. Adding a large amount of food warms the refrigerator See the Food Storage Guide section on page 13. In order to conserve energy, try to get everything you need out of the refrigerator at once, keep food organized so It is easy to find and close the door as soon as the food is removed
The refrigerator was recently plugged in and the refrigerator control was set correctly,
The refrigerator will take up to 24 hours to cool completely
The refrigerator control is not set correctly for the surrounding conditions
See the Setting the Controls section on page 11-12
The doors are not dosed completely.
Push the doors firmly shut. If they will not shut all the way, see "Doors will not close completely’’ below
The condenser cdIIs are dirty,
This prevents air transfer and makes the motor work harder Clean the condenser coils Refer to the Care and Cleaning section on page 19.
DOORS WILL NOT CLOSE COMPLETELY
Check If...
Then...
The refrigerator is not level.
See the installation section on page 10 to level refrigerator.
Food packages are blocking the door opart
Rearrange food containers to dear door and door shelves
The ice bin, crisper cover, pans, shelves, door bins or baskets are out of position.
Push bins ail the way in and put crisper cover, pans, shelves and baskets into their correct positions. See the Using Your Refrigerator section on pages 14-1?
The gaskets are sticking.
Glean gaskets and the surface that they touch Rub a thin coat of paraffin wax on the gaskets after cleaning
The refrigerator wobbles or seems unstable.
Level the refrigerator Refer to the Door Closing and Alignment section on page 10
The doors were removed during product installation and not properly replaced.
Remove and replace the doors according to the Removing, Reversing (optional) and Replacing Refrigerator Doors section on pages B—9, or call a qualified service technician
FROST OR ICE CRYSTALS ON FROZEN FOOD
Check If...
Then...
The door is not closing properly
See "Doors will not close completely" above
The door is opened often.
When the door is opened, warm, humid air is allowed in the freezer resulting in frost,
ICE HAS OFF-TASTE OR ODOR
Check If...
Then...
The icemaker was recently Installed.
Discard first few batches of ice to avoid discolored or off-flavored ice
The ice has been stored for too long.
Throw away old ice and make new supply.
The food has not been wrapped tightly in either compartment.
Rewrap foods since odors may migrate to the ice if food is not wrapped properly
The water supply contains minerals such as sulfur
A filter may need to be instailed to eliminate taste and odor problems.
The interior of refrigerator needs cleaning
See Care and Cleaning section on page 19.
ice storage bin needs cleaning
Empty and wash bin. Discard old cubes.
THERE IS WATER IN THE DEFROST DRAIN PAN
Check If...
Then...
The refrigerator is defrosting
The water will evaporate, it is normal for water to drip into the defrost pan
it is more humid than normal-
Expect that the water in the defrost pan will take longer to evaporate This is normal when it is hot or humid
THE REFRIGERATOR SEEMS TO MAKETGO MUCH NOISE
Check If...
Then...
The sounds may be normal for your refrigerator
Refer to the Understanding Sounds You May Hear section on page 25.
THE ICEMAKER IS NOT PRODUCING ICE OR ICE CUBES ARE FREEZINGTOO SLOWLY
Check If...
Then...
The freezer temperature is cold enough to produce ice
Wait 24 hours after hook-up for ice production. See the Setting the Controls section on page 11-12.
Door left open.
Check to see if something is holding door open
CUBES PRODUCED BY ICEMAKER ARE TOO SMALL
Check If...
Then...
Smaller cube size level is selected.
Select larger cube size using cube size selector.
Water shutoff vaive connecting refrigerator to water line may be dogged.
Call a plumber to clear the valve.
THE DOORS ARE DIFFICULT TO OPEN
Check If...
Then...
The gaskets are dirty or sticky.
Clean gaskets and the surfaces that they touch Rub a thin coat of paraffin wax on the gaskets following cleaning
The door is reopened within a short time after having been opened
When you open the door, warmer air enters the refrigerator. As the warm air cools, it can create a vacuum. If the door is hard to open, wait 5 minutes to allow the air pressure to equalize, then see if it opens more easily
AUTOMATIC ICEMAKER DOES NOT WORK
Check If...
Then...
Icefnaker power switch in the 0 (off) position
Move the switch to the 1 (on) position.
Water supply turned off or not connected
See the Connecting the Water Line section on page 22,
Freezer compartment too warm
Wait 24 hours for the freezer to reach its ideal temperature.
Piled up cubes in the storage bin cause the icemaker to shut off,
Level cubes fay hand
TEMPERATURE IS TOO WARM OR THERE IS INTERIOR MOISTURE BUILDUP
Check If...
Then...
The air vents are blocked. Cold air circulates from the freezer to the fresh food section and back again through atr vents in the wall dividing the two sections.
Locate air vents by using your hand to sense airflow and move all packages that block vents and restrict airflow Refer to Frontchill Door Cooling / Door Cooling on page 11 for the location of air vents.
The doors are opened often.
When the door is opened, warm humid air is allowed into the refrigerator.. The more the door is opened, the faster the humidity builds up, and the more warm air the refrigerator must cool In order to keep the refrigerator cool, try to get everything you need out of the refrigerator at once, keep food organized so it is easy to find and close the door as soon as the food is removed.
The control is not set correctly for the surrounding conditions,
Refer to the Setting the Controls section on page 11-12
Wait 24 hours for temperatures to stabilize or even out. if the temperature is too cold or too warm, move the dial one number at a time
A large amount of food has just been added to the refrigerator or freezer
Adding food warms the refrigerator It can take a few hours for the refrigerator to return to norma! temperature.
The food is not packaged correctly.
Wrap food tightly and wipe off damp containers prior to storing In the refrigerator to avoid moisture accumulation. If necessary repackage food according to the guidelines in the Food Storage Guide section on page 13
The doors are not closing completely
See “Doors will not close completely" on page 26,
The weather is humid
In humid weather, air carries moisture into refrigerator when doors are opened
A self-defrost cycle was completed.
It is normal for droplets to form on the back wail after the refrigerator self-defrosts.


 and
and