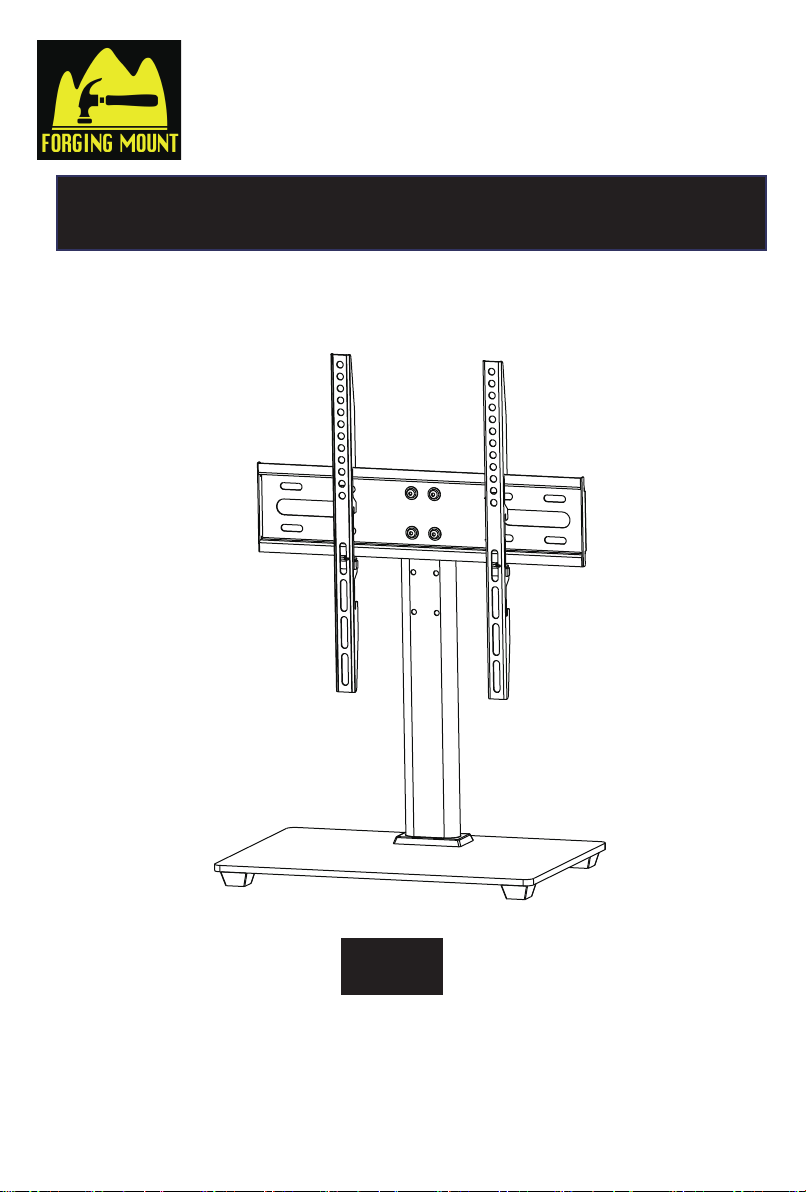
Instruction Manual
Table Top TV Stand
®
Thank you for choosing our product! We strive to provide the best quality
and services for our customers. Would you kindly share your experience
on Amazon if you are satisfied? If you have any questions, please feel
free contact us.
Email:
We’re ready to help!
HY4001
1
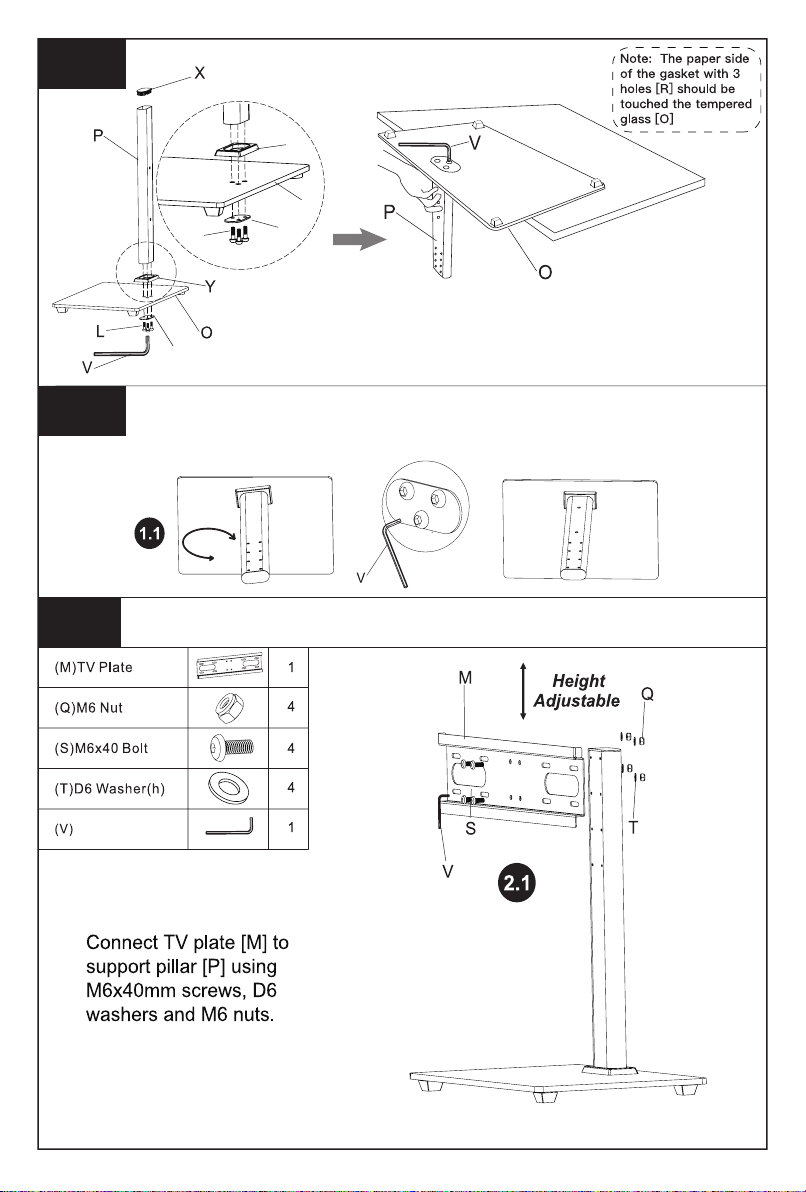
Connecting the Support Pillar to Tempered Glass
Step 1
Pillar
x4
x
x
x
x
x
x3
• Carefully open the carton, remove contents and lay out on cardbard or other protective
surface to avoid damage.
• Check to assure that all components were received undamaged. Do not use damaged or
defective parts.lf you require replacement parts, contact customer service at
• Carefully read all instructions before attempting installation.
UNPACKING INSTRUCTIONS
IMPORTANT SAFETY INFORMATION
•Install and operate this product with care. Please read this instruction before beginning the
installation, and carefully follow all instructions contained herein. Use proper tools during
installation.
•
If you do not understand the instructions or have any concerns or questions, please contact
customer service at
WARNING:
Exceeding the weight capacity can result in serious personal injury or damage to equipment!
over resulting in death or serious injury!
This product contains small items that could be a choking hazard if swallowed.
Keep these items away from yong children
:
It is the installer’s responsibility to make sure the combined weight of HY4001 and the display
does not exceed 88 ibs(40kg).Use with heavier televisions may result in instability causing tip
Step 1-1
2
Connecting the TV Plate to Support Pillar
Step 2
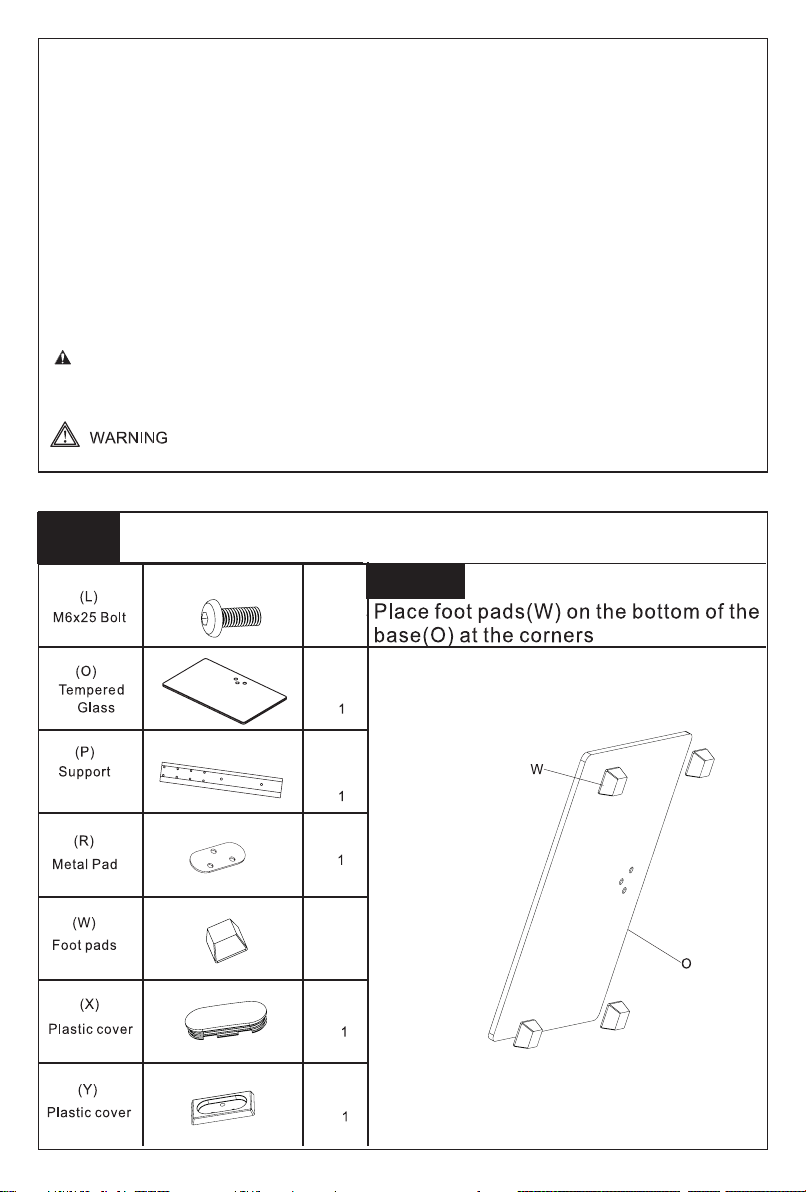
Put O (Tempered Glass) on the table. Put R (Metal Pad) and L
(M6x25 Bolt) under O. Turn Y (Plastic Cover) and P (Support
Pillar) upside down under O to install and then tighten screws.
If you find the support column (P) is not in the correct direction, please see figure 1.1
below. Loosen M6x25 screws(L), adjust the support to the correct direction then
tighten screws again.
R
Y
O
L
R
Step 1-2
Step 1-3
Allen key
3 positions
3
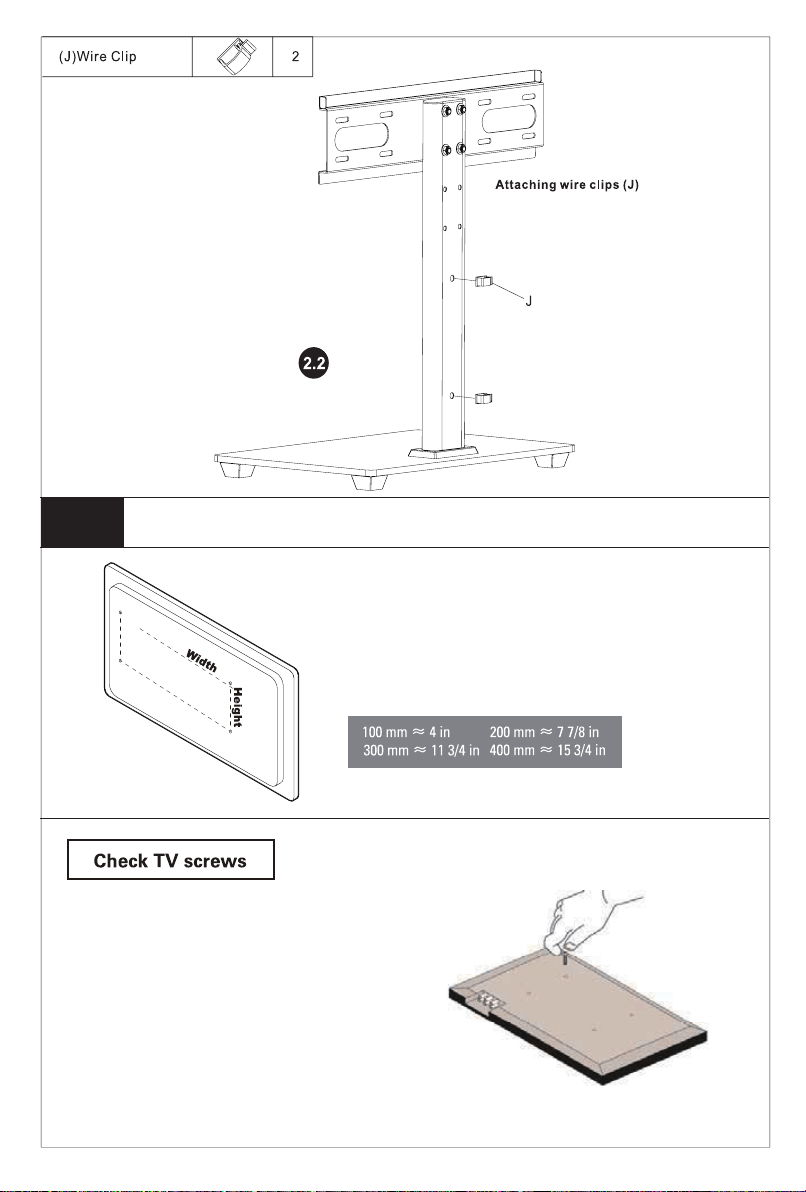
Measure VESA and Check TV screws
Measure the distance between the holes located at the
back of your TV (these measures may form the shape of a
square, or a rectangle) and check that these taken
measures are within the VESA (*) range for this wall
mount. (*) VESA: International standard established by the
TV manufacturers used to determine if LCD/LED TVs are
compatible with wall mounts.
Please select the proper screw length for your
TV by hand tightening to check your flat panel
thread depth.
Step 3
4
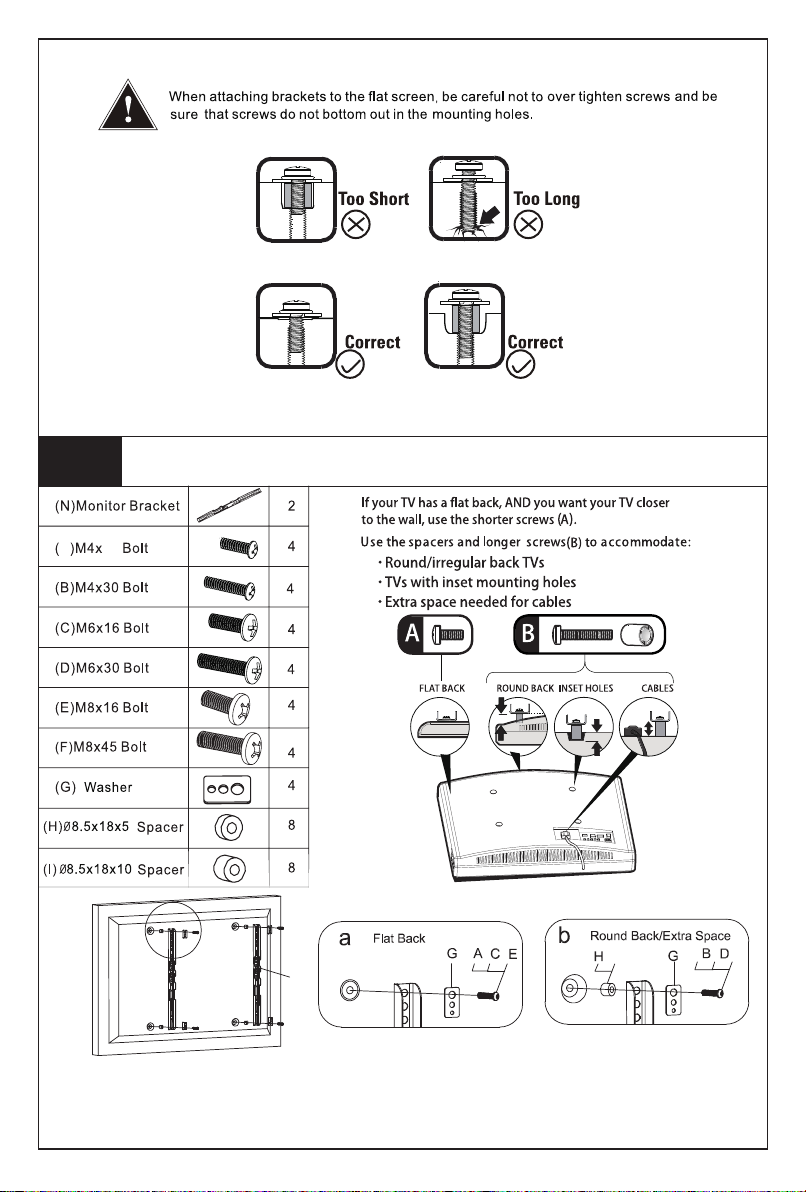
Mounting the Monitor Brackets(N) to your TV
Step 4
A
16
I
First, make sure the diameter of the bolt(A-F) fits your TV. Then, please see the diagram above.
You will need to thread the bolt into the TV using the correct washer (G) and spacer (G or I) if
necessary with a screwdriver(Not included). Please make sure the monitor brackets(N) are vertically
centered and level with each other.
N
F
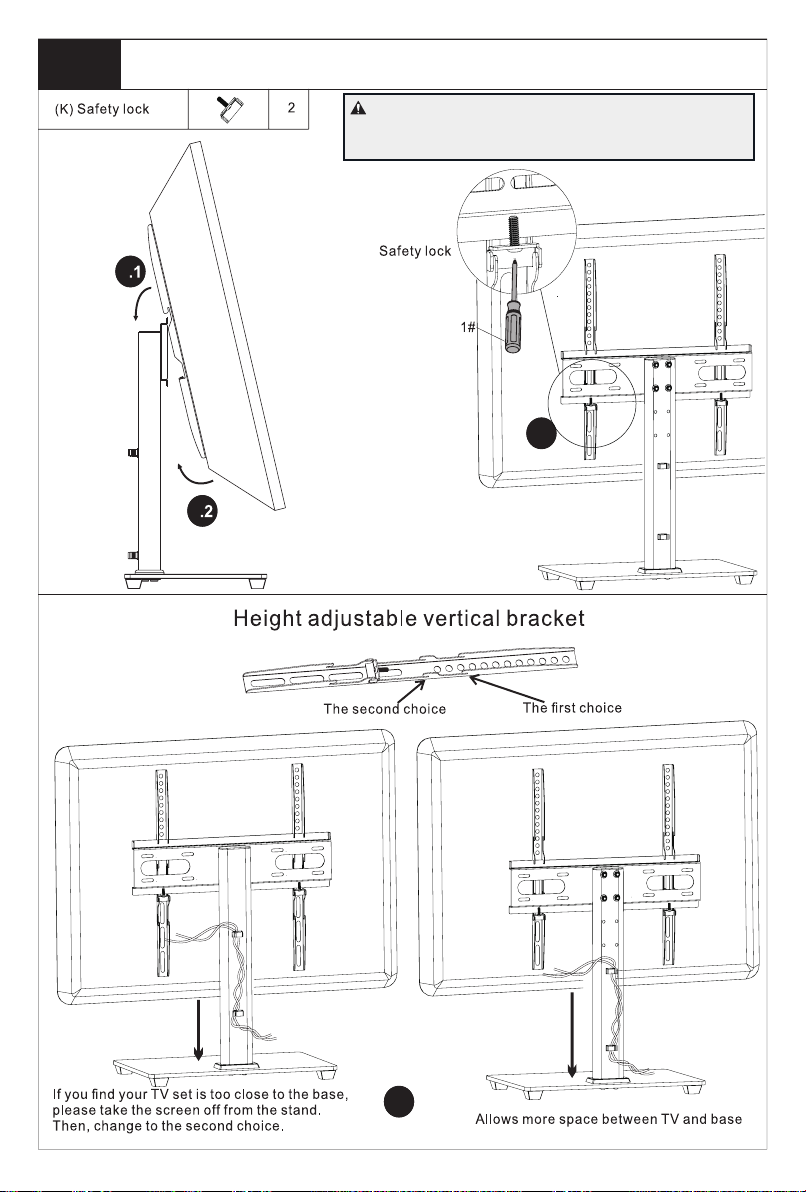
5
Insert the safety lock in the bottom of
the bracket and then tighten the screws.
5
5
5.3
5.4
Attaching TV to TV Plate and Mananging the Wires
Step 5
CAUTION:
Avoid potential personal injury or property damage!
Make sure your locking screws
are tightened BEHIND the mounting plate
so the TV is securely fastened in place.
cable management