Loading ...
Loading ...
Loading ...
16
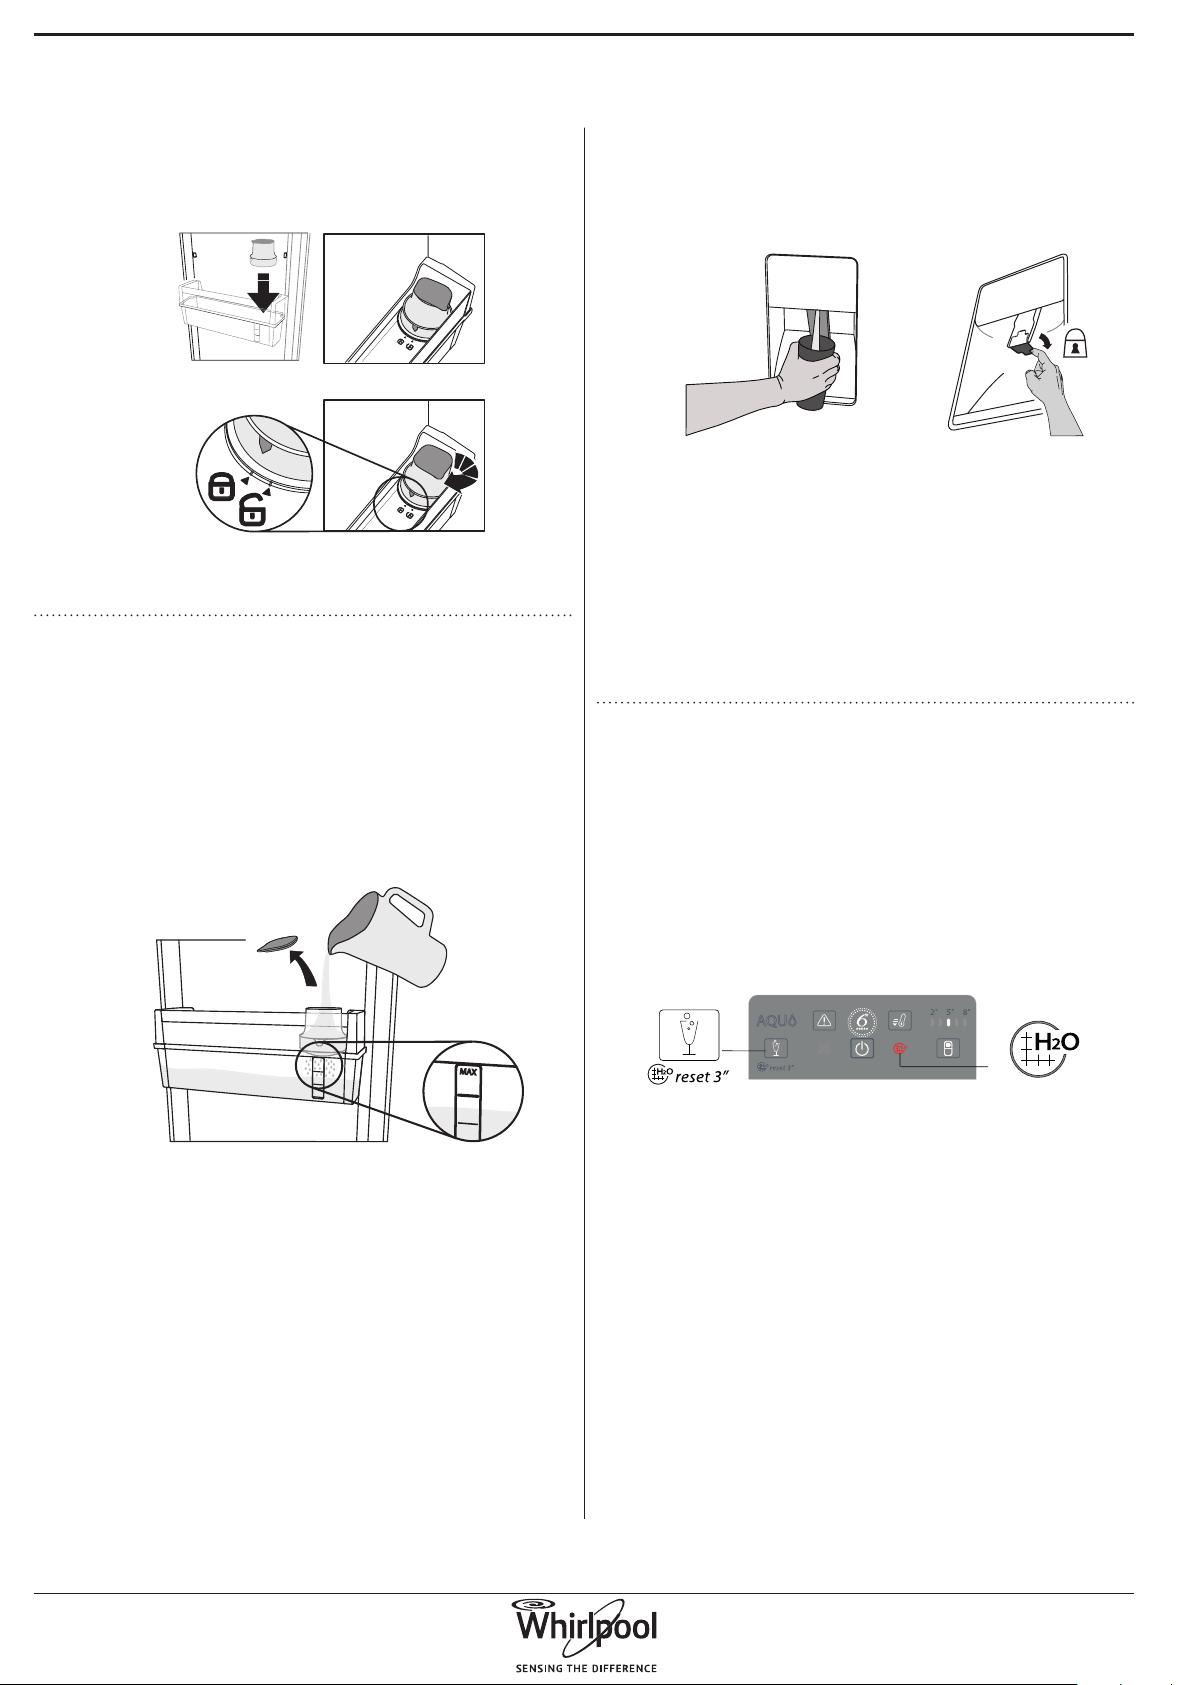
Then place the whole lter in the bottle balcony and
lock it following the sequence in Fig 8.
ab
c
Fig 8
FILLING AND FILTERING WATER
Remove the cap and pour water into the funnel (Fig.
9): the water fill will be filtered and will fill the water
tank.
You can fill up to 3 litres. Don’t overfill water (the max
water level is indicated on the tank).
Note: ll water only in the tank. Do not insert juice, coke or other
drink because they can damage the lter and the dispenser
functionality.
MAX
Fig 9
DISPENSING WATER
To dispense water press the paddle with a glass (Fig.
10) and release the paddle to stop dispensing.
Fig 10 Fig 11
Note: possible black dots in the ltered water or in lter area are
normal and not dangerous, they are due the normal carbon lter
functionality.
DISPENSER CHILD LOCK: You can lock the
dispenser’s paddle to avoid children dispensing water
(flip the small lever behind the paddle as shown in
(Fig. 11)
REPLACING THE CARBON CARTRIDGE
The carbon filter lasts max 2 months for continuous
use (up to 225 lt).
The filter indicator on the control panel (if
available, see Fig.12, b ) tells you when it’s time to
change the cartridge: when the filter is in regular
status the indicator is off. When the filter is expired
the indicator lit on and is blinking.
(For models without filter indicator on control panel
please check the Month of installation - visible in the
filter housing window).
F
ilter reset
button
b
a
Filter indicato
r
Fig 12
To replace the carbon cartridge:
- unlock the lter and remove it from the balcony;
- remove the funnel from lter housing rotating it
anticlockwise;
- remove the old carbon cartridge and insert the new
one after activated, with current month faced in the
window).
(You can follow the procedure described in Carbon
lter activation and Filter installation - Fig. 3, 4, 5, 6,
7, 8).
"Once replaced, Reset the carbon filter by the Filter
Reset button ( see Fig.12 a) keeping it pressed for 3
seconds."
Loading ...
Loading ...
Loading ...