Loading ...
Loading ...
Loading ...
5
INSTALLATION REQUIREMENTS
Tools and Parts
Gather the required tools and parts before starting installation.
Read and follow the instructions provided with any tools listed
here.
Tools Needed
Through-the-wall installation:
In addition to the tools listed above, the following tools are
needed for though-the-wall installation.
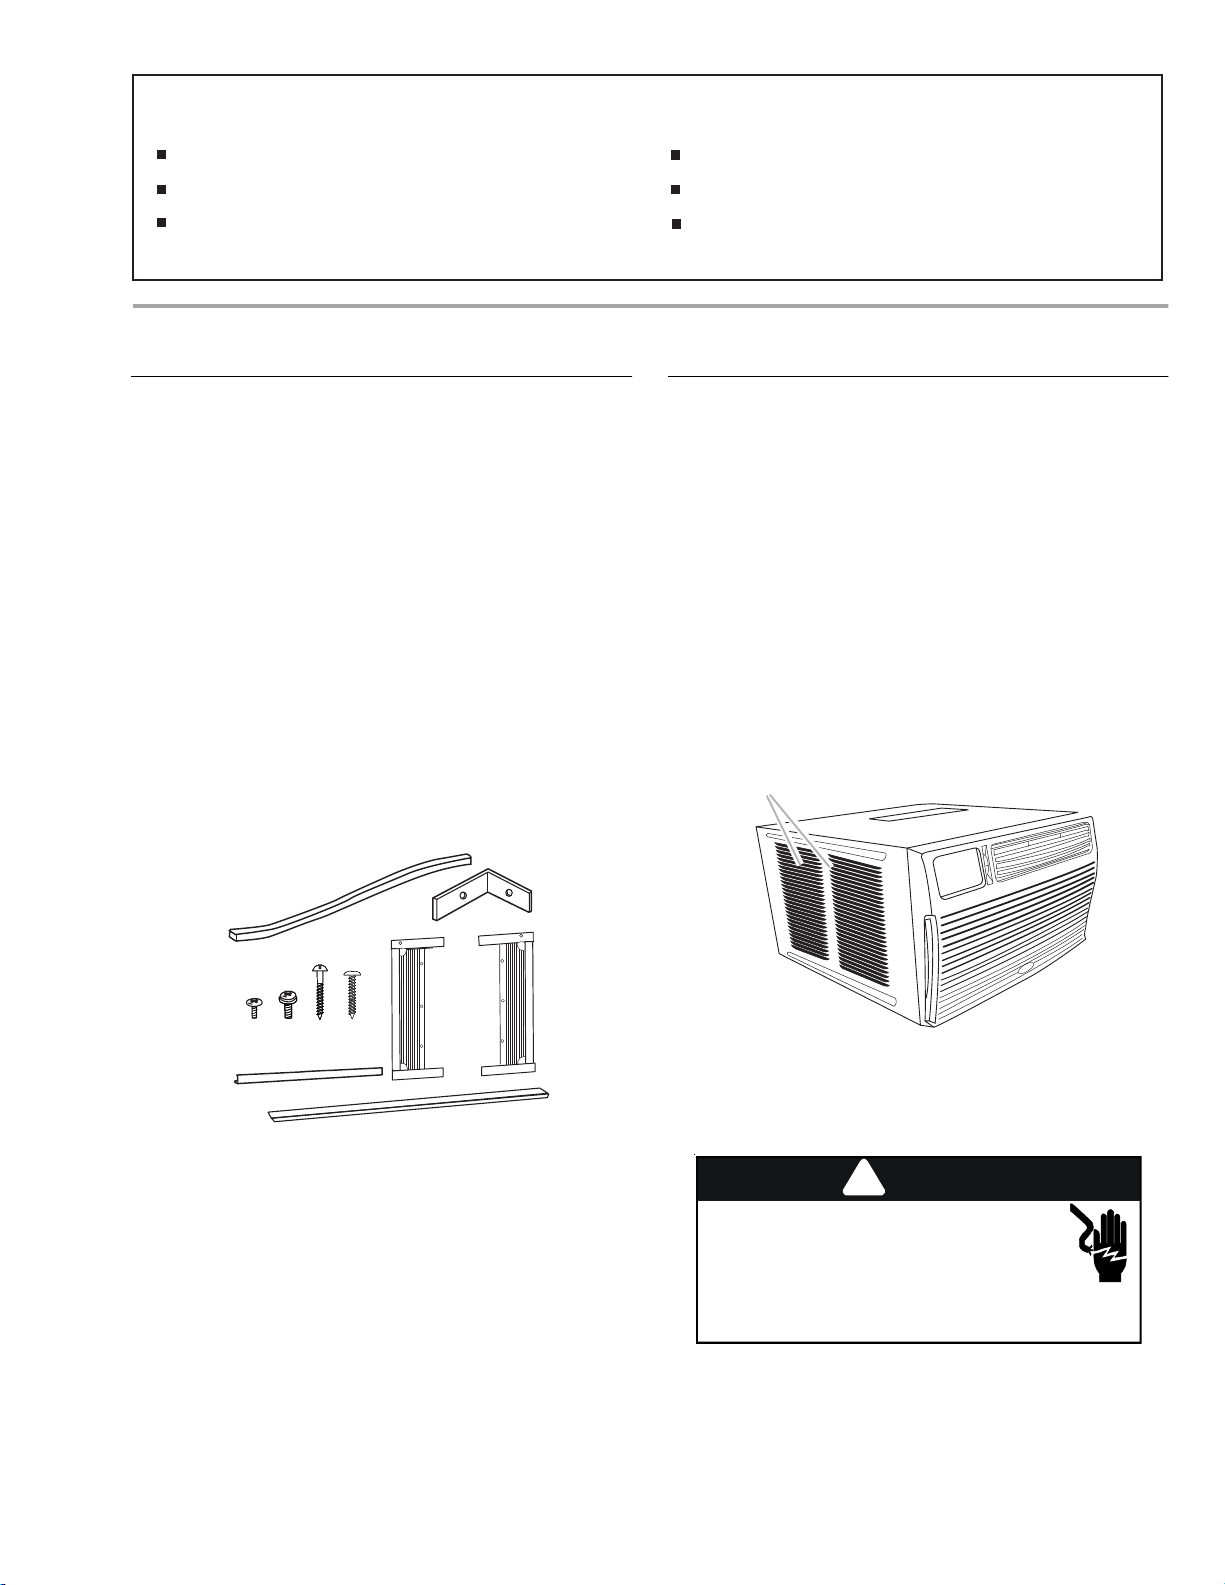
Parts supplied (on some models)
Check that all parts are included in parts package.
NOTE: Installation parts are supplied for double-hung windows
up to 40" (101.6 cm) wide. A special Wide Window Kit is available
from your dealer or service center. See “Accessories.”
Location Requirements
IMPORTANT: Observe all governing codes and ordinances.
Check the location where air conditioner will be installed. Proper
installation is your responsibility. Make sure you have everything
necessary for correct installation.
The location should provide:
■
Grounded electrical outlet within 4 ft (122 cm) of where the
power cord exits the air conditioner.
NOTE: Do not use an extension cord.
■
Free movement of air in room to be cooled.
■
A large enough opening for the air conditioner.
■
Adequate wall support for weight of air conditioner. Air
conditioner weighs between 94 and 103 lbs (43 to 47 kg).
NOTE: Cabinet louvers must not be obstructed. Air must be able
to pass freely through the cabinet louvers.
IMPORTANT SAFETY INSTRUCTIONS
WARNING:
To reduce the risk of fire, electrical shock or injury when using your air conditioner, follow these basic precautions:
SAVE THESE INSTRUCTIONS
Unplug air conditioner before servicing.
Use two or more people to move and install air conditioner.
Plug into a grounded 3 prong outlet.
Do not remove ground prong.
Do not use an adapter.
Do not use an extension cord.
■
Flat-blade and Phillips
screwdrivers
■
Level
■
Tape measure
■
Drill and ³⁄₁₆" or smaller bit
■
Saw
■
Wood preservative
■
Caulk
■
1" (2.5 cm) or thicker
lumber
■
7 - #10 x 1" wood screws
A. Foam window sash seal
B. Window lock brackets (2)
C. #10 x
¹⁄₄
" pan-head Phillips
screws (6)
D. #10 x
³⁄₈
" pan-head
Phillips screws (3)
E. #10 x
³⁄₄
" round -head screws (6)
F. #10 x
1
/
2
" pan-head Phillips
screws (3)
G. Top channel
H. Side curtains (2)
I. Foam seal
B
C
G
F
E
A
H
I
A. Cabinet louvers
A
D
HIGH VOLTAGE
WARNING
Disconnect ALL power before servicing
or installing this unit. Multiple power
sources may be present. Failure to do so may
cause property damage, personal injury or
death.
!
Loading ...
Loading ...
Loading ...