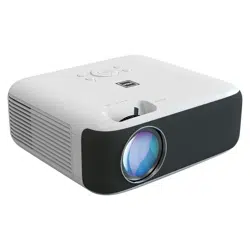
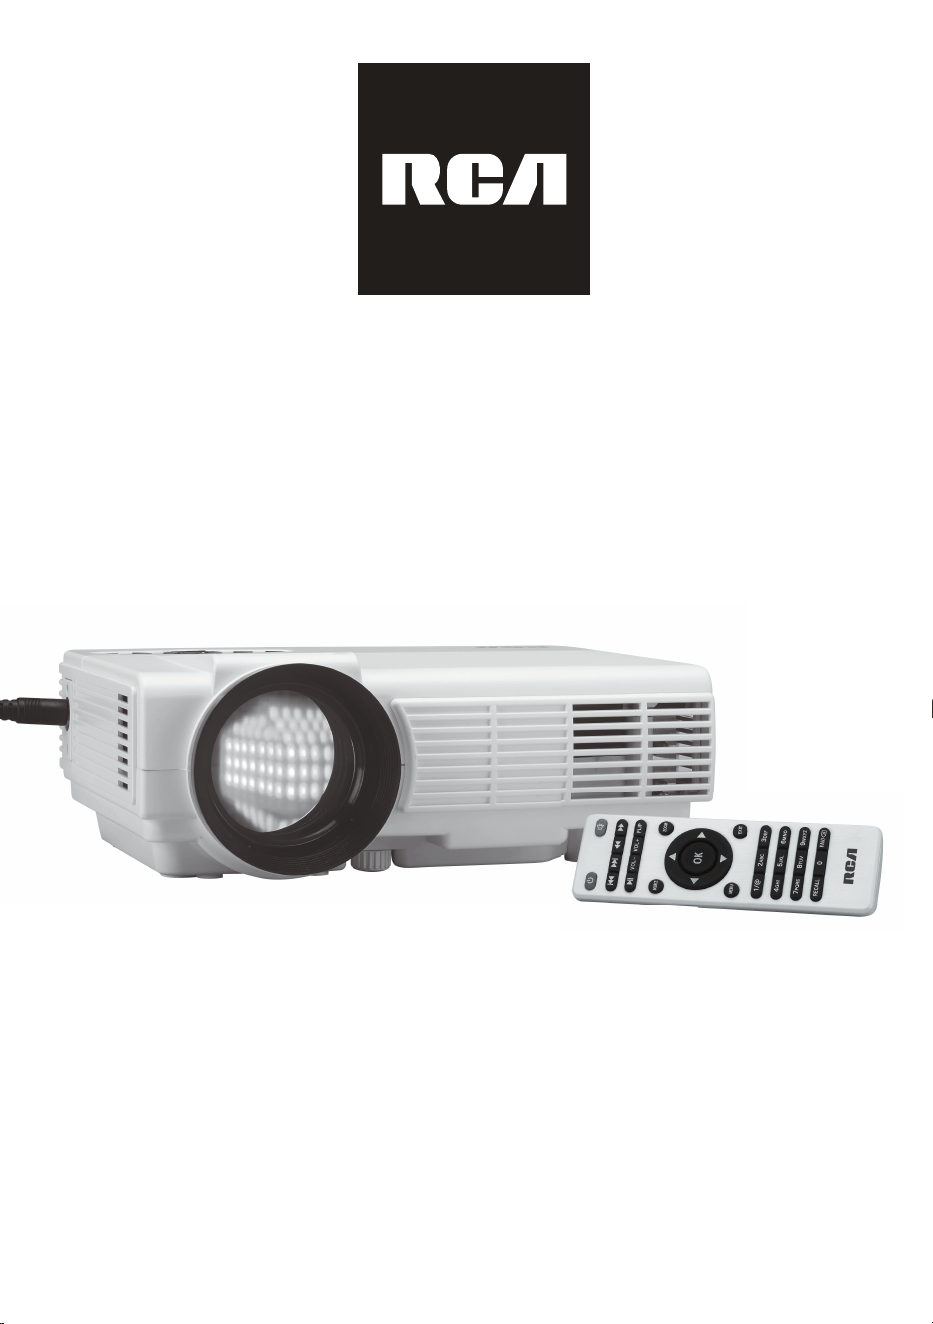
MODEL NO. RPJ112
MULTIMEDIA PROJECTOR
,16758&7,210$18$/
3/($6(5($'%()25(23(5$7,1*7+,6(48,30(17
7KLVSURGXFWLVPDQXIDFWXUHGDQGVROGE\&XUWLV,QWHUQDWLRQDO/WG
5&$WKH5&$ORJRWKHWZRGRJV1LSSHUDQG&KLSSHUORJRDUH
UHJLVWHUHGWUDGHPDUNVRUWUDGHPDUNVRI5&$7UDGHPDUN
0DQDJHPHQWDQGDUHXVHGXQGHUOLFHQVHE\&XUWLV,QWHUQDWLRQDO/WG
$Q\RWKHUSURGXFWVHUYLFHFRPSDQ\WUDGHRUSURGXFWQDPHDQGORJR
UHIHUHQFHGKHUHLQDUHQHLWKHUHQGRUVHGQRUVSRQVRUHGE\
5&$7UDGHPDUN0DQDJHPHQWRULWVDIILOLDWHV

Important Safety Instrucons
Important Safety Instrucons
1
1. Read these Instrucons.
2. Keep these Instrucons.
3. Heed all Warnings.
4. Follow all instrucons.
5. Do not use this apparatus near water.
6. Clean only with a dry cloth.
7. Do not block any venlaon openings. Install in accordance with the
manufacturer’s instrucons.
8. Do not install near any heat sources such as radiators, heat registers, stoves, or
other apparatus (including amplifier) that product heat.
9. Protect the power cord from being walked on or pinched parcularly at plugs,
convenience receptacles, and the point where they exit from the apparatus.
10. Only use aachments/accessories specified by the manufacturer.
11. Unplug this apparatus during lightning storms or when unused for long periods of
me.
12. Refer all servicing to qualified service personnel. Servicing is required when the
apparatus has been damaged in any way, such as power-supply cord or plug is
damaged, liquid has been spilled or objects have fallen into the apparatus, the
apparatus has been exposed to rain or moisture, does not operate normally, or has
been dropped.
13. Use only with a cart, stand, tripod, bracket, or table specified by the manufacturer
or sold with the apparatus. When a cart is used, use cauon when moving the cart/
apparatus combinaon to avoid injury from p-over.

Addional Warnings and Precauons
2
1. Do not look directly into the projector light.
2. Don’t touch the project lens
3. Mains adapter is used as disconnect device and it should remain readily operable
during intended use. In order to disconnect the apparatus from the mains completely,
the mains plug should be disconnected from the mains socket outlet completely.
4. CAUTION: Use of controls or adjustments or performance of procedures other than
those specified may result in hazardous radiaon exposure.
5. WARNING: Changes or modified to this unit not expressly approved by the party
responsible for compliance could void the user’s authority to operate the equipment.
6. WARNING: Use of this unit near fluorescent lighng may cause interference regarding
use of the remote. If the unit is displaying errac behavior move away from any
fluorescent lighng, as it may be the cause.
7. WARNING: Shock hazard - Do Not Open.
8. Cauon and marking informaon is located at the rear or boom of the apparatus.
9. WARNING: To reduce the risk of fire or electric shock, do not expose this apparatus to
rain, moisture, dripping, or splashing.
10. Objects filled with liquids, such as vases, shall not be placed on the apparatus.

FCC Warning
3
Warning: Changes or modified to this unit not expressly approved by the party responsible
for compliance could void the user’s authority to operate the equipment.
NOTE: This equipment has been tested and found to comply with the limits for a Class B
digital device, pursuant to Part 15 of the FCC Rules. These limits are designed to provide
reasonable protecon against harmful interference in a residenal installaon. This
equipment generates, uses, and can radiate radio frequency energy and, if not installed
and used in accordance with the instrucons, may cause harmful interference to radio
communicaons. However, there is no guarantee that interference will not occur in a
parcular installaon. If this equipment does cause harmful interference to radio or
television recepon, which can be determined by turning the equipment off and on, the
user is encouraged to try to correct the interference by one or more of the following
measures:
• Reorient or relocate the receiving antenna.
• Increase the separaon between the equipment and receiver.
• Connect the equipment into an outlet on a circuit different from that to which the
receiver is connected.
• Consult the dealer or an experienced radio/TV technician for help.
Table of Contents
In The Box
Important Safety Instructions
Additional Warnings and Precautions
FCC Warning
Table of Contents
In The Box
Remove & Close the Dust Cap
Install the Focus Ring
Placing Your Projector
Placing Your Projector On Ceiling
Adjust the Vertical Location
Adjust the Focus and Trapezoidal Screen
Controls of Remote
Install / Remove Battery Of Remote
Controls of Projector
Install Power Adapter
Main Operation
Connect HDMI show the Image On Projector Screen
Connect VGA Show The Image On Projector Screen
Connect AV Show The Image On Projector Screen
Connect Audio Output (Aux Out / Line Out / Earphones)
Install USB Device And Micro Sd Card “TF”
Using SD Card and USB Playback
Using Projector Menu 1.0
Using Projector Menu 2.0
Using Projector Menu 3.0
Using Projector Menu 4.0
Specifications
P1
P2
P3
P4
P4
P5
P5
P6
P7
P8
P8
P9
P9
P10
P11
P11
P12
P13
P14
P15
P16
P16
P17
P18
P19
P20
P21
4
MODEL NO. RPJ112
MULTIMEDIA PROJECTOR
,16758&7,210$18$/
3/($6(5($'%()25(23(5$7,1*7+,6(48,30(17
7KLVSURGXFWLVPDQXIDFWXUHGDQGVROGE\&XUWLV,QWHUQDWLRQDO/WG
5&$WKH5&$ORJRWKHWZRGRJV1LSSHUDQG&KLSSHUORJRDUH
UHJLVWHUHGWUDGHPDUNVRUWUDGHPDUNVRI5&$7UDGHPDUN
0DQDJHPHQWDQGDUHXVHGXQGHUOLFHQVHE\&XUWLV,QWHUQDWLRQDO/WG
$Q\RWKHUSURGXFWVHUYLFHFRPSDQ\WUDGHRUSURGXFWQDPHDQGORJR
UHIHUHQFHGKHUHLQDUHQHLWKHUHQGRUVHGQRUVSRQVRUHGE\
5&$7UDGHPDUN0DQDJHPHQWRULWVDIILOLDWHV
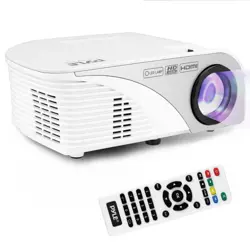
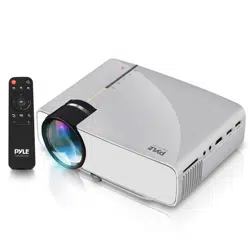
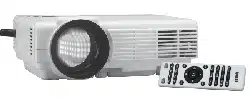
Remote
Main unit
Lens Hood User ManualAC Power Adapter
If the projector is not used for an extended period of time,
please cover the lens with the included lens cap.
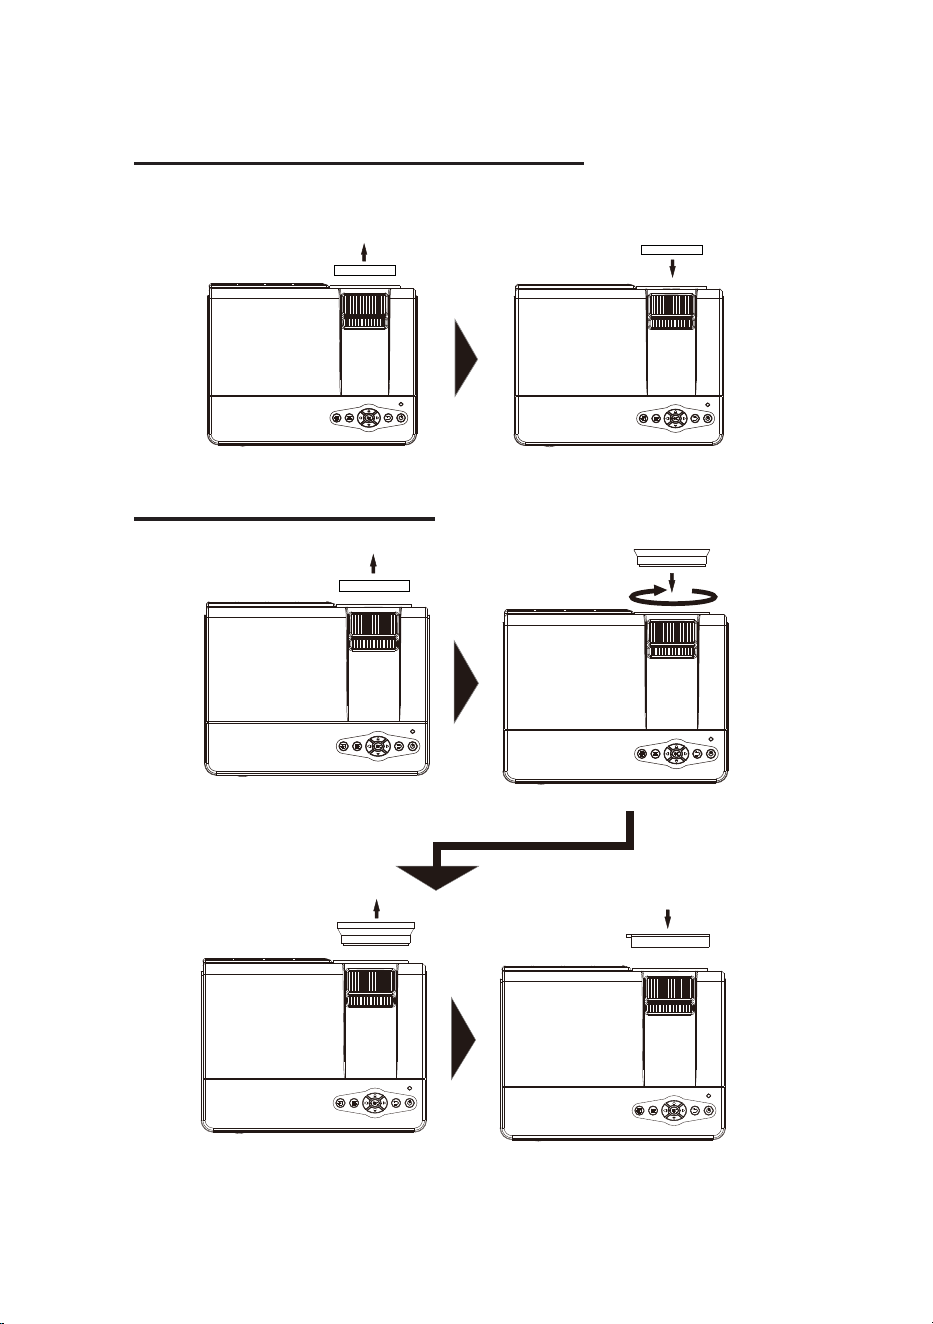
Remove & Close The Lens Cover
Install The Lens Hood
5
CLOSE
REMOVE
LENS COVER
LENS COVER
LENS HOOD
LENS COVER
REMOVE
INSTALL
LENSGHOOD
LENS COVER
REMOVE
INSTALL
Close the lens cover when unit not in use.
For protect the projector lens.
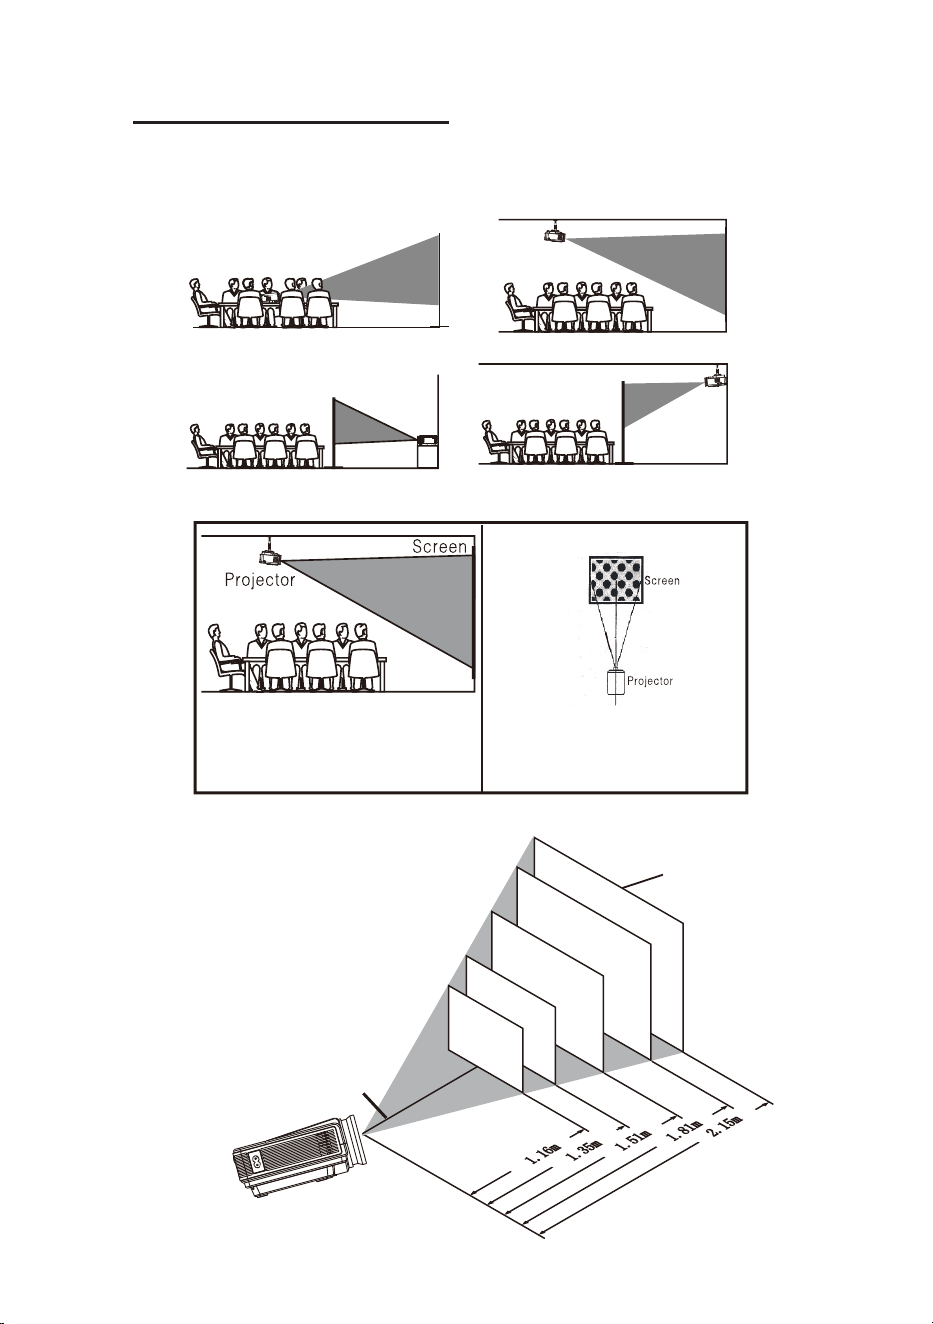
You projector can be installed in four different configurations (see pictures below).
Distance between the projector and screen
Placing Your Projector
NOTE: If the projector is installed in rear configurations, please use a screen suitable
for rear projection.
6
FRONT PROJECTION FRONT PROJECTION
REAR PROJECTION REAR PROJECTION
THE CENTER OF LENS
SCREEN
P
P
P
P
P
Square /Rectangle
To reduce image distortion, it is
recommended to position the projector
as close to the center of the screen as
possible.
A projector mount is required to install
the projector in a ceiling.
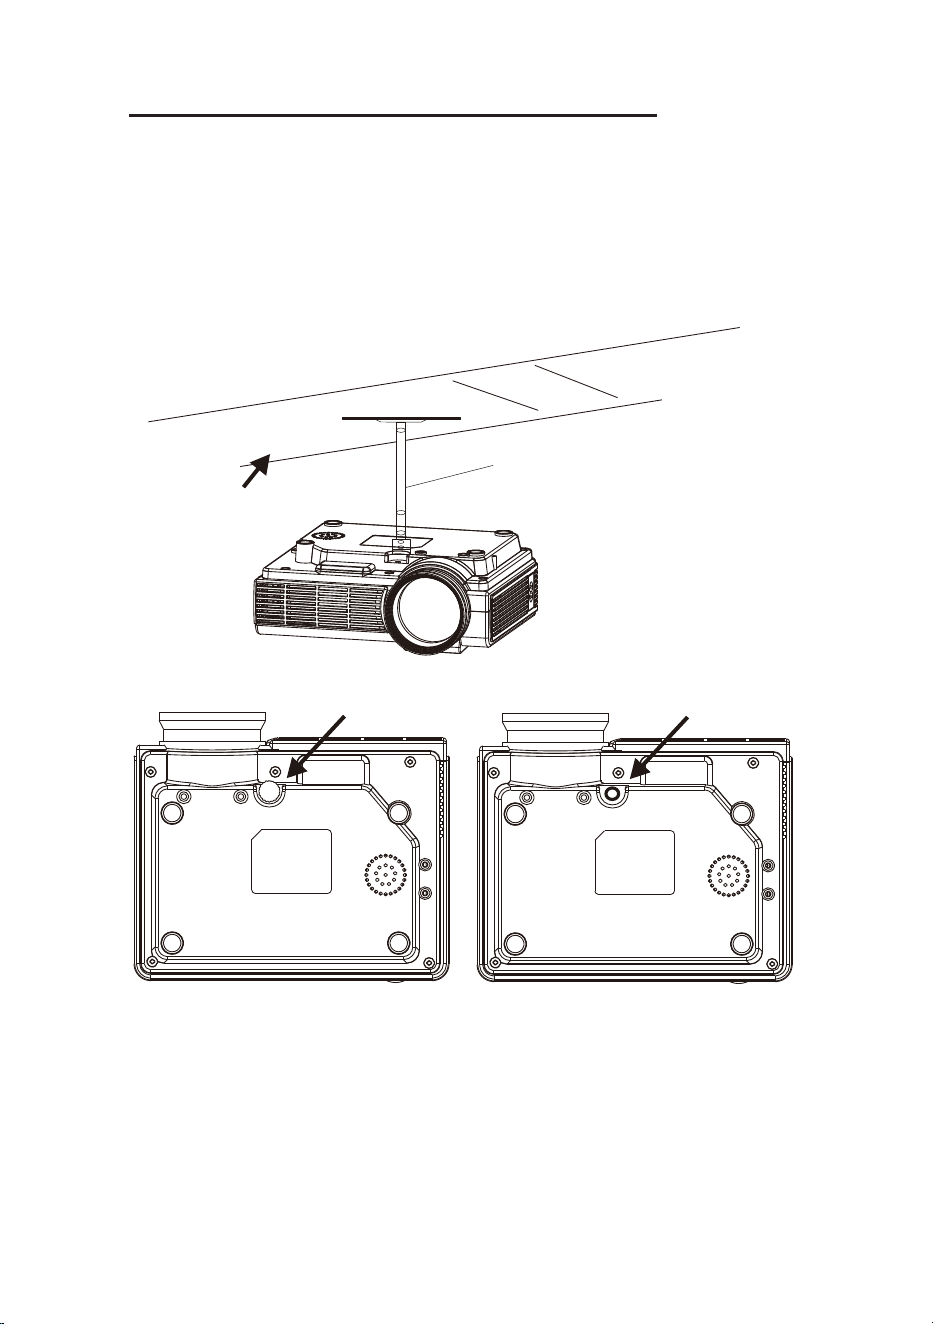
Installing your projector in the ceiling
7
CEILING
PROJECTOR MOUNT
REMOVE THE KNOB
SCREW HOLE FOR FASTENING
PROJECTOR MOUNT
When installing the projector in the ceiling, please purchase a projector mount
recommended by an installation professional and follow the instructions that come
with the mount.
Before installing the projector in the ceiling, please check to make sure the ceiling
structure can support the weight of the projector and the mount. If in doubt, please
ask the advise from an installation professorial.
Note: Projector mount and screw(s) not included.
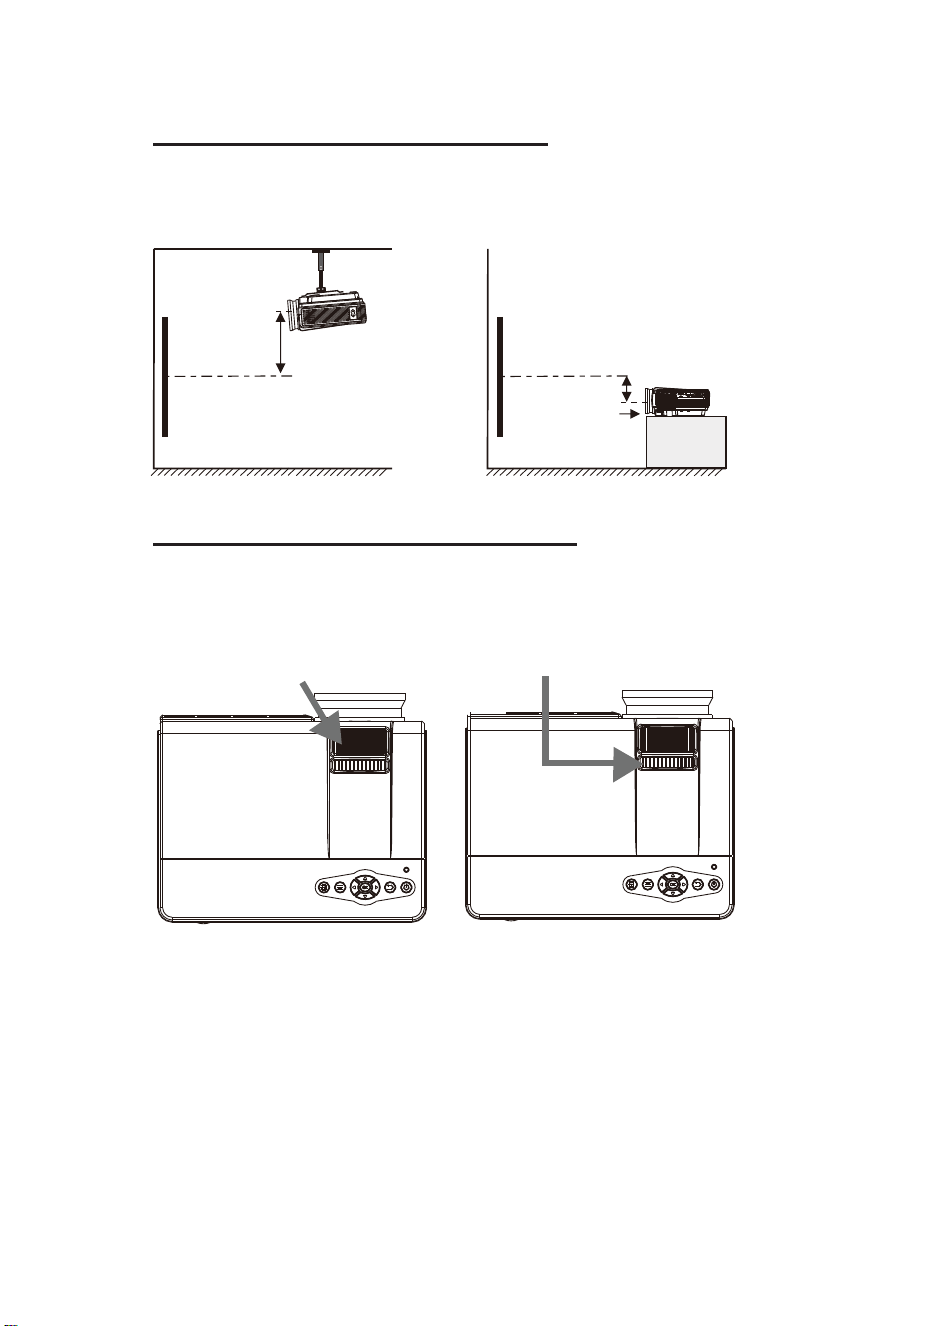
Follow below picture to adjust the vertical location.
Adjust The Vercal Locaon
Follow below picture to adjust the focus and trapezoidal screen.
Adjusng Focus and Keystone
8
SCREEN
PROJECTOR
VERTICAL
DIMENSION
VERTICAL
DIMENSION
SCREEN
PROJECTOR
FOCUS ADJ. KNOB
To reduce image distortion, it is recommended that the center of the projector
lens be as close to the center of the screen as possible.
KEYSTONE CORRECTION KNOB
Adjust the focus by turning the
knob while observing the image
pixels near the center of the
screen. Optimal focus is
obtained when the pixels are
clearly visible. Depending on
the projected screen size, the
focus near the screen edges
may be less sharp than the
screen center.
Then sharpen the image
by rotating the focus knob.
Keystone image is created
when the projector beam is
projected to the screen in an
angle. Keystone correction will
restore the distorted image to a
rectangular or square shape.
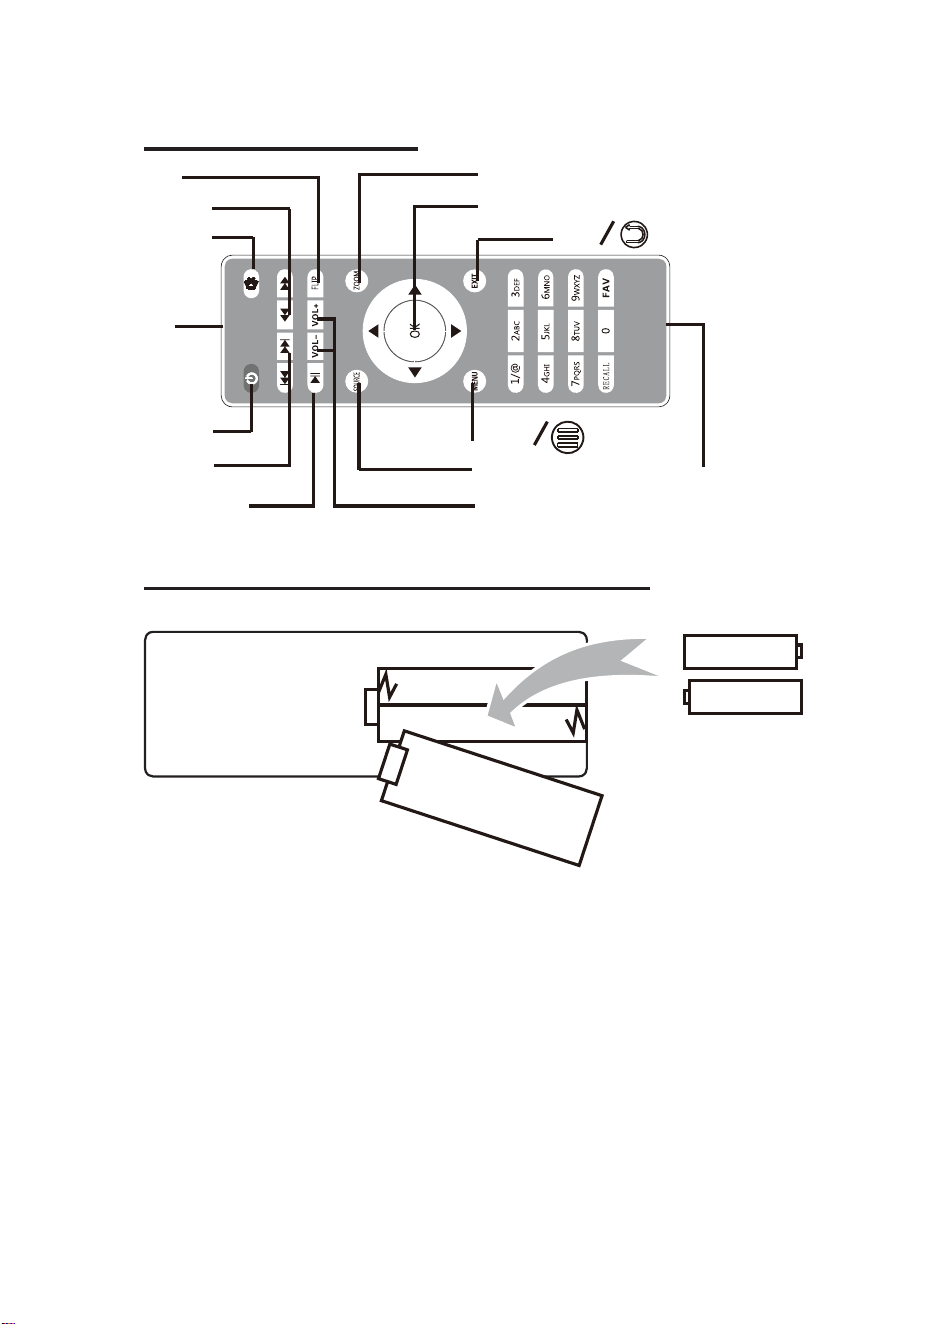
Controls of Remote
Install / Remove Baery Of Remote
9
EXIT
POWER
MUTE
IR
FLIP
SKIP
SEARCH
PLAY /PAUSE
VOLUME
SOURCE
MENU
NETVIGATOR
ZOOM
BATTERY COMPARTMENT
(VIEW SIDE OF REMOTE)
AAA / UM4
AAA / UM4
BATTERY DOOR
Remove the baery compartment cover on the back of your remote by carefully sliding
to open. The baery cover can then be lied away. Fit the correct baeries (not
included), referring to the polarity markings. Finally, replace the cover.
NOTES:
• Baeries shall not be exposed to excessive heat such as sunshine, fire
• Be sure that the baeries are installed polarity correctly.
• Do not mix old and new baeries.
• Only same or equivalent type baeries as recommend are to be used.
• Do not dispose of baeries in fire, baery may explode or leak. Do not try to
recharge a baery
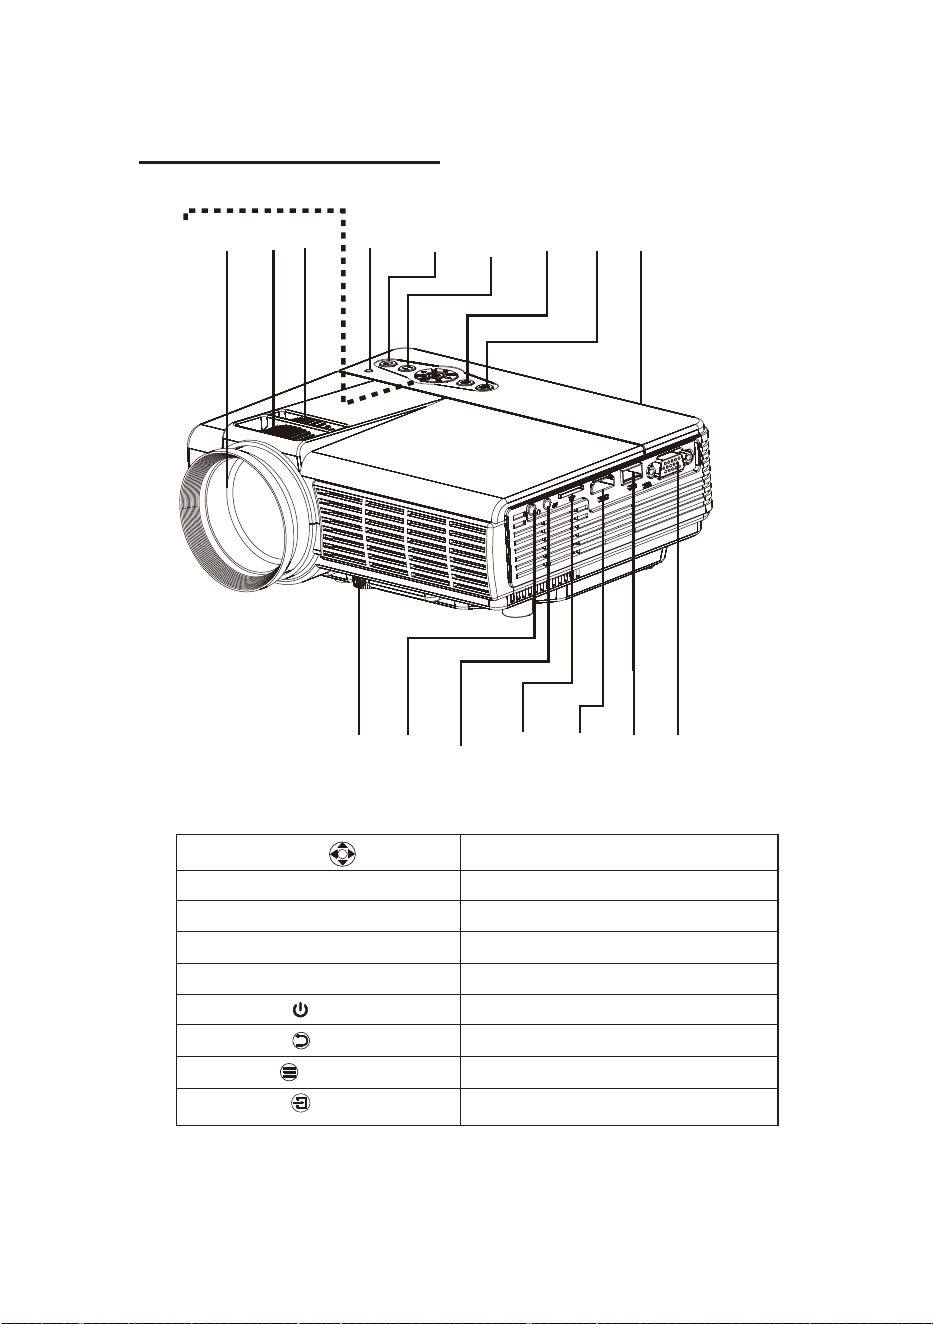
Controls Of Projector
10
1
2
3
4
6
8
10
11
12
13
14
15
16
5
7
9
17
1. NETVIGATOR Buons
2. LENS
3. FOCUS ADJ. Knob
4. TRAPEZOIDAL ADJ. Knob
5. POWER Indicator
6. POWER Buon
7. RETURN Buon
8. MENU Buon
9. SOURCE Buon
10. IR Window
11. ANGEL ADJ. Knob
12. EAR PHONE Jack
13. AV OUT Jack
14. TF Card Slot ( Micro SD Card )
15. HDMI Port
16. USB Port
17. VGA Port
OK
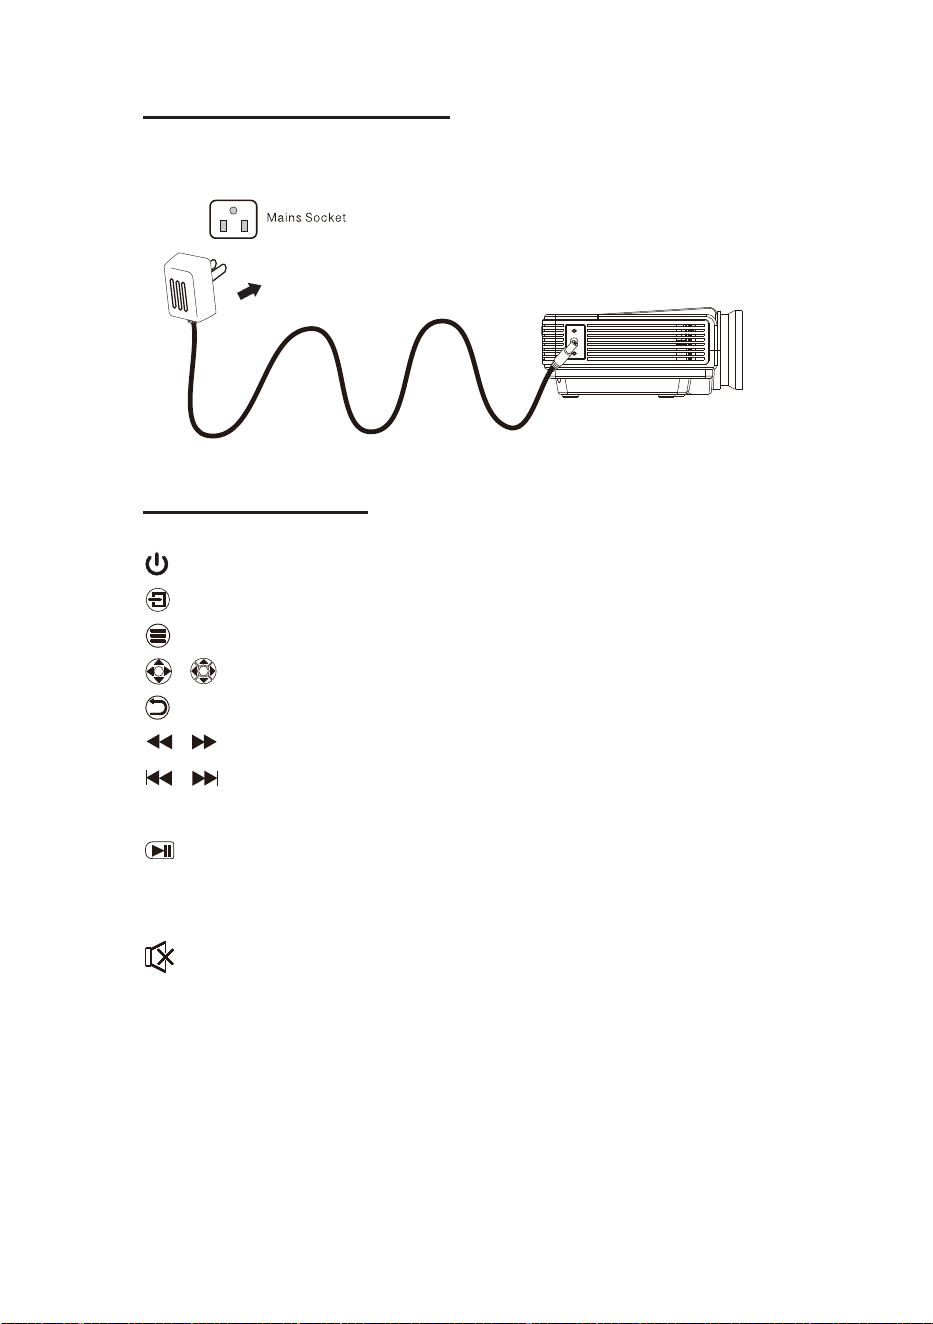
Install Power Adapter
Main Operaon
11
Follow below picture to connect power adapter
Connect small end of adapter FIRST.
- Press the buon to turn on unit, press again to turn off.
/ SOURCE - Press the buon to select input source.
/ MENU - Press the buon to enter projector menu.
/ - Press the buons to select screen item of projector menu.
/ EXIT - Press the buon to exit the projector menu.
/ - Press the buons to fast search forward and rewind on USB / TF.
/ - Press the buons to search next or previous file on USB / TF.
- Press the buons to control the volume from the projector.
- Press the buon to play/pause the connect USB / TF card.
- Press the buon to rotate / mirror projector screen
- Press the buon to select image scale.
- Press to mute the audio from the projector, press again to resume.
OK
OK
VOL+ / VOL
ZOOM
FLIP
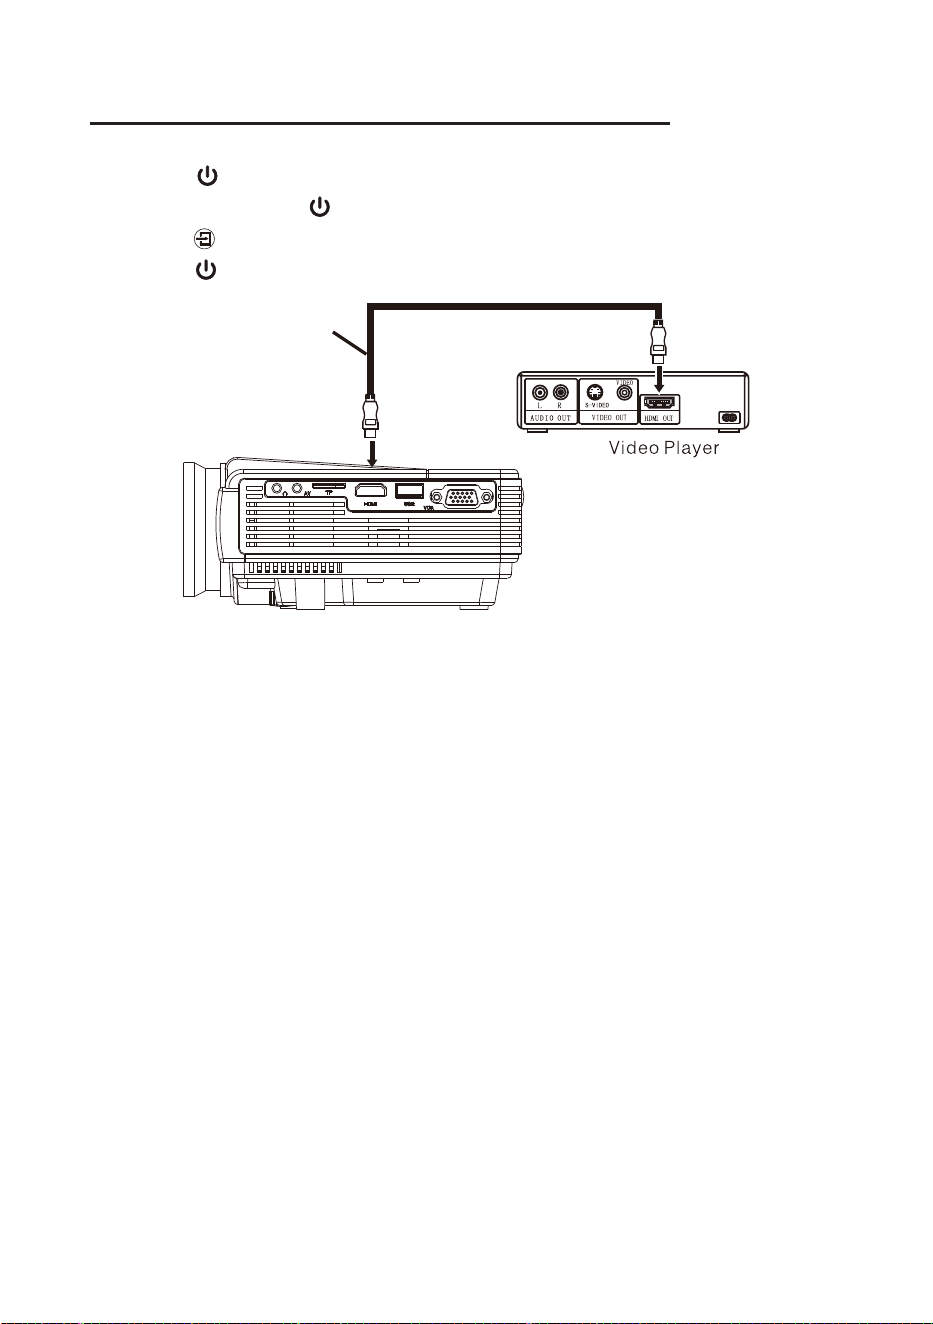
Connecng a video player by HDMI cable
12
Follow below picture to connect a video player to the projector.
1. Press the buon to turn off power of your projector before connecon.
2. Aer connect, press the buon to turn on unit and power indicator will light GREEN
3. Press the buon to HDMI mode and the video of HDMI device will show on projector screen.
4. Press the buon to turn off unit power.
H
(Not Included)
DMI CABLE
In rare cases, if the projector's
speaker has no sound when playing
a DVD movie in a player connecting
to the HDMI input, please check the
player's digital audio settings and
make sure it is set to "Auto" mode or
"PCM" mode.
13
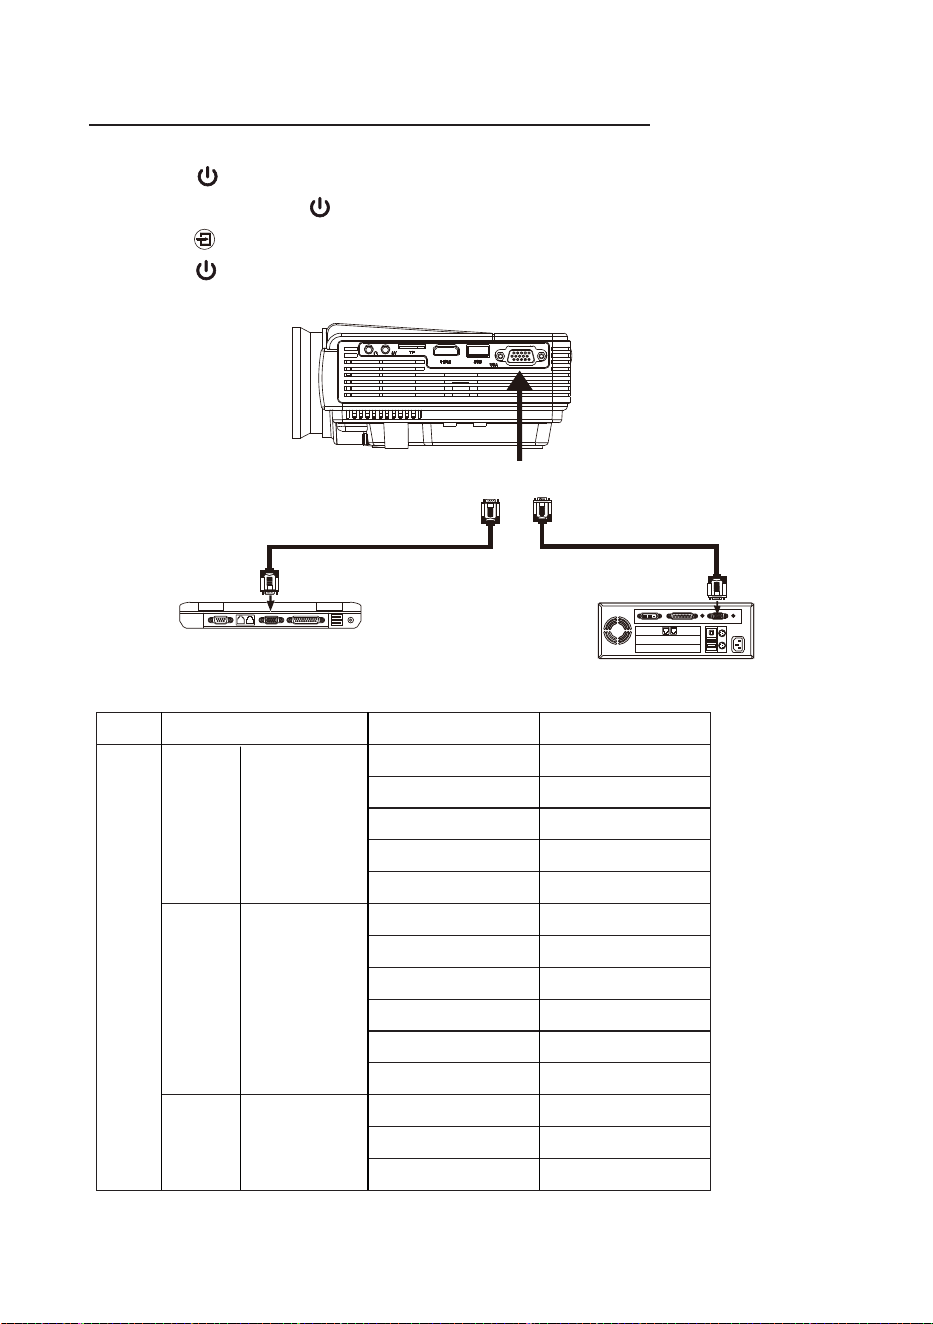
Connecng to a computer by VGA cable
Follow below picture to connect a computer to the projector.
1. Press the buon to turn off power of your projector before connecon.
2. Aer connect, press the buon to turn on unit and power indicator will light GREEN
3. Press the buon to VGA mode and the video of VGA device will show on projector screen.
4. Press the buon to turn off unit power.
Please refer to the following table to adjust the output signal from computer
To V
Computer cable not included
GA PORT
NOTE BOOK
DECK TOP
OR
COMPUTER CABLE
COMPUTER CABLE
Type Resoluon Frequency Field Frequency
VGA 640x480 31.5 60
34.7 70
37.9 72
37.5 75
31.4 50
35.1 56
SVGA 800x600 37.9 60
46.6 70
48.1 72
46.9 75
40.3 50
XGA 1024x768 48.4 60
56.5 70
PC
Follow below picture to connect a video player to the projector.
1. Press the buon to turn off power of your projector before connecon.
2. Use AV cable to connect follow below figure
3. Aer connect, press the buon to turn on unit and power indicator will light GREEN
4. Press the buon to AV mode and the video of AV device will show on projector screen
5. Press the buon to turn off unit power.
AV cable not include
Connecng a video player by AV cable
14
LEFT CHANNEL
RIGHT CHANNEL
VIDEO CABLE
VIDEO PLAYER
VIDEO CABLE : YELLOW
AUDIO LEFT CHANNEL : WHITE
AUDIO RIGHT CHANNEL : RED
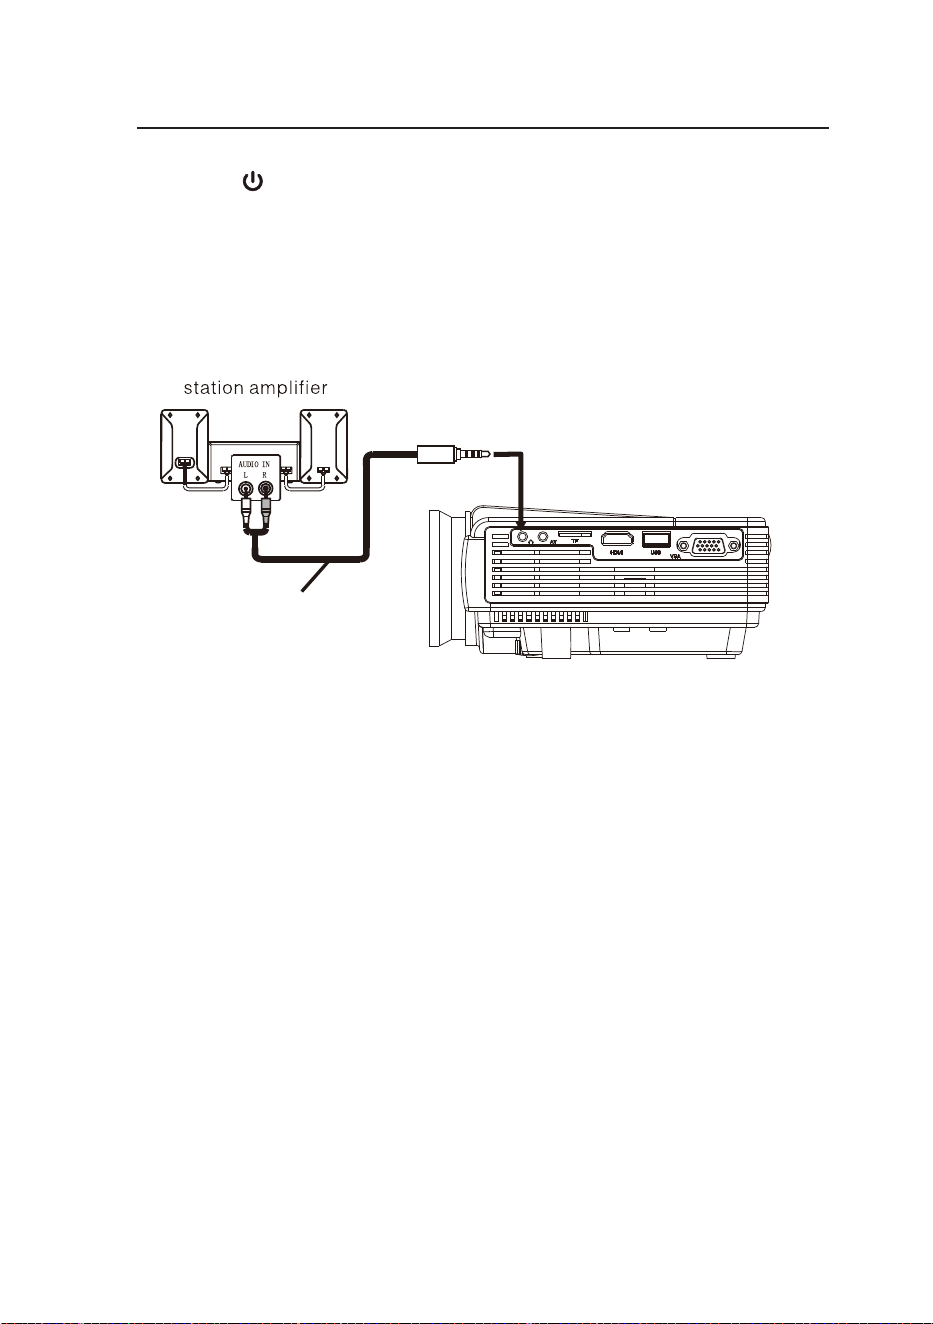
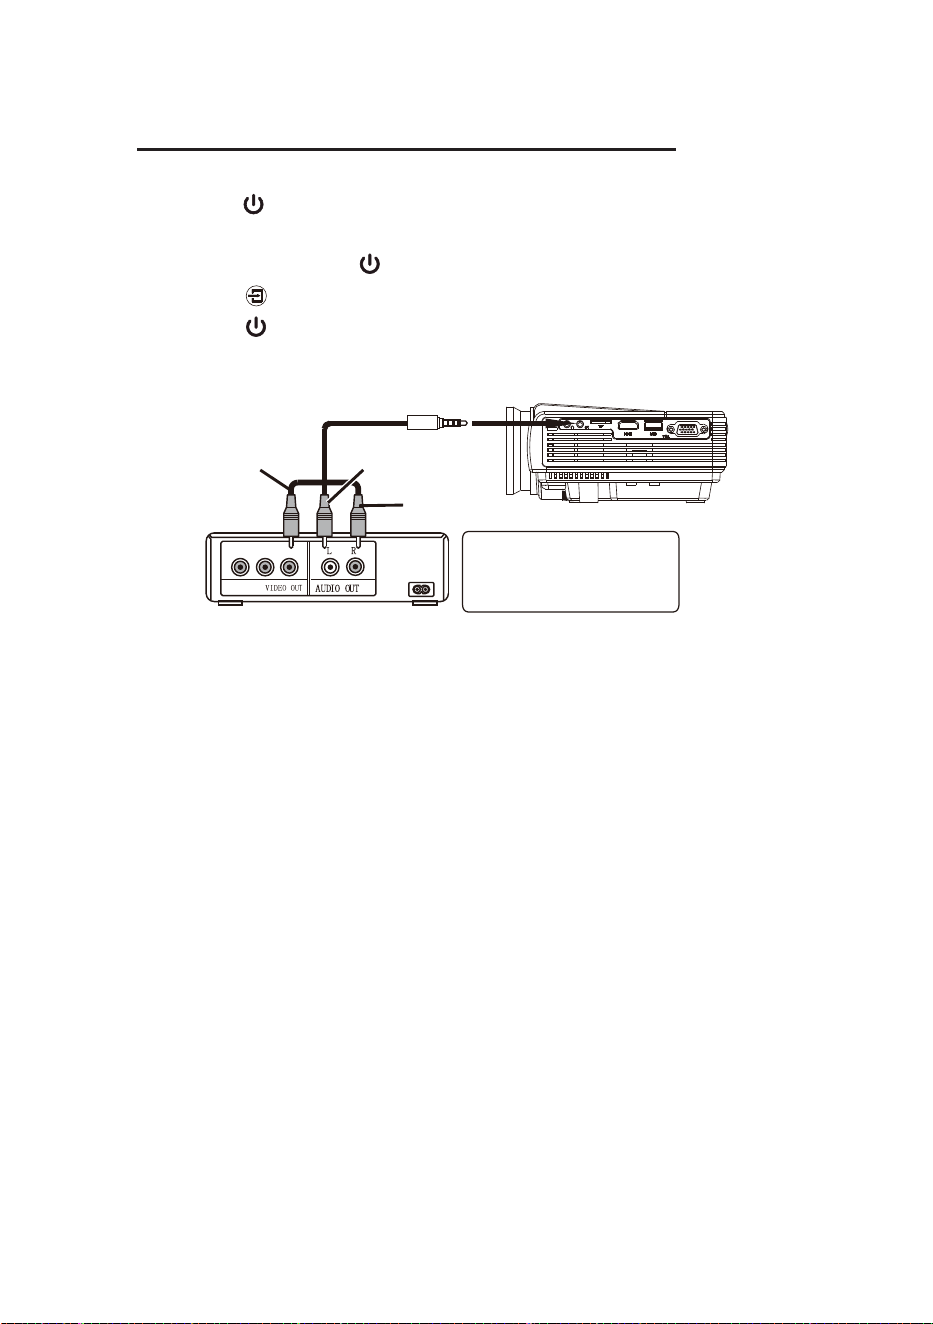
Follow below picture to connect the audio out from the projector to an amplifier.
1. Press the buon to turn off power of your projector before connecon.
2. Connect the audio cable by referring to the figure below.
3. Aer connecon, turn both units on, then audio will be heard from the external
amplifier's speakers.
4. Switch both units off aer use.
Audio cable not include
Connecng audio output to an external amplifier
15
AUDIO CABLE
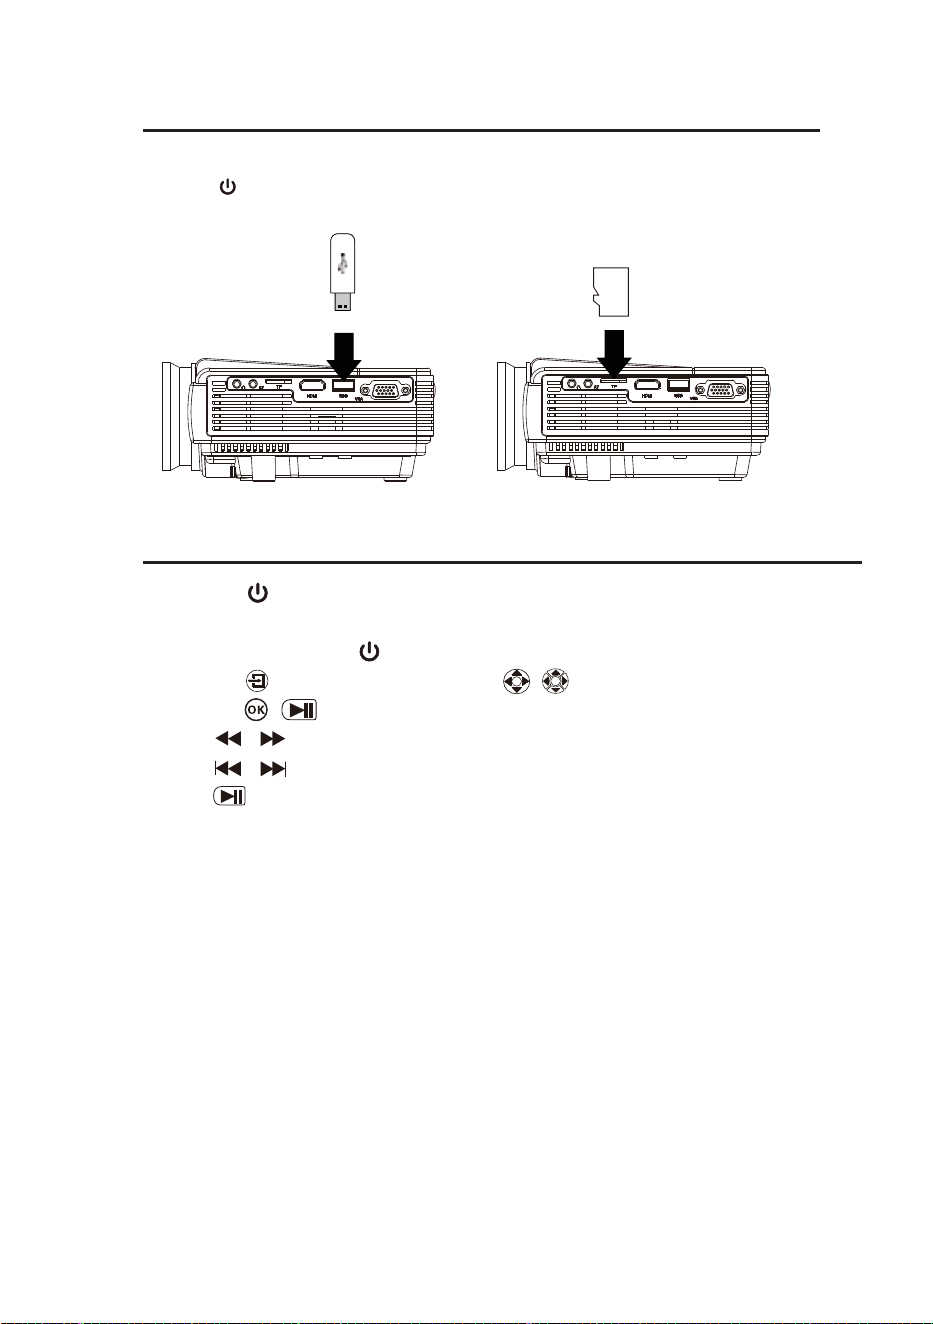
Connecng an USB drive and Micro SD (TF) card
16
Follow below picture to connect an USB drive or a Micro SD (TF) card.
Press the buon to turn off power of your projector before connecon.
Playback from an USB drive or a Micro SD (TF) card
1. Press the buon to turn OFF POWER and the power indicator will light RED.
2. Install the USB device into USB port.
3. Aer connect, press the buon to turn on unit and power indicator will light GREEN
4. Press the buon to USB / TF mode, use / buons to search the file and
press the / buon to start play back.
5. Press / to fast search forward and rewind.
6. Press / to search next or previous file.
7. Hold buon to stop playback.
Note: Please switch off the projector before removing the USB drive or TF card.
OK
OK
Micro
SD card
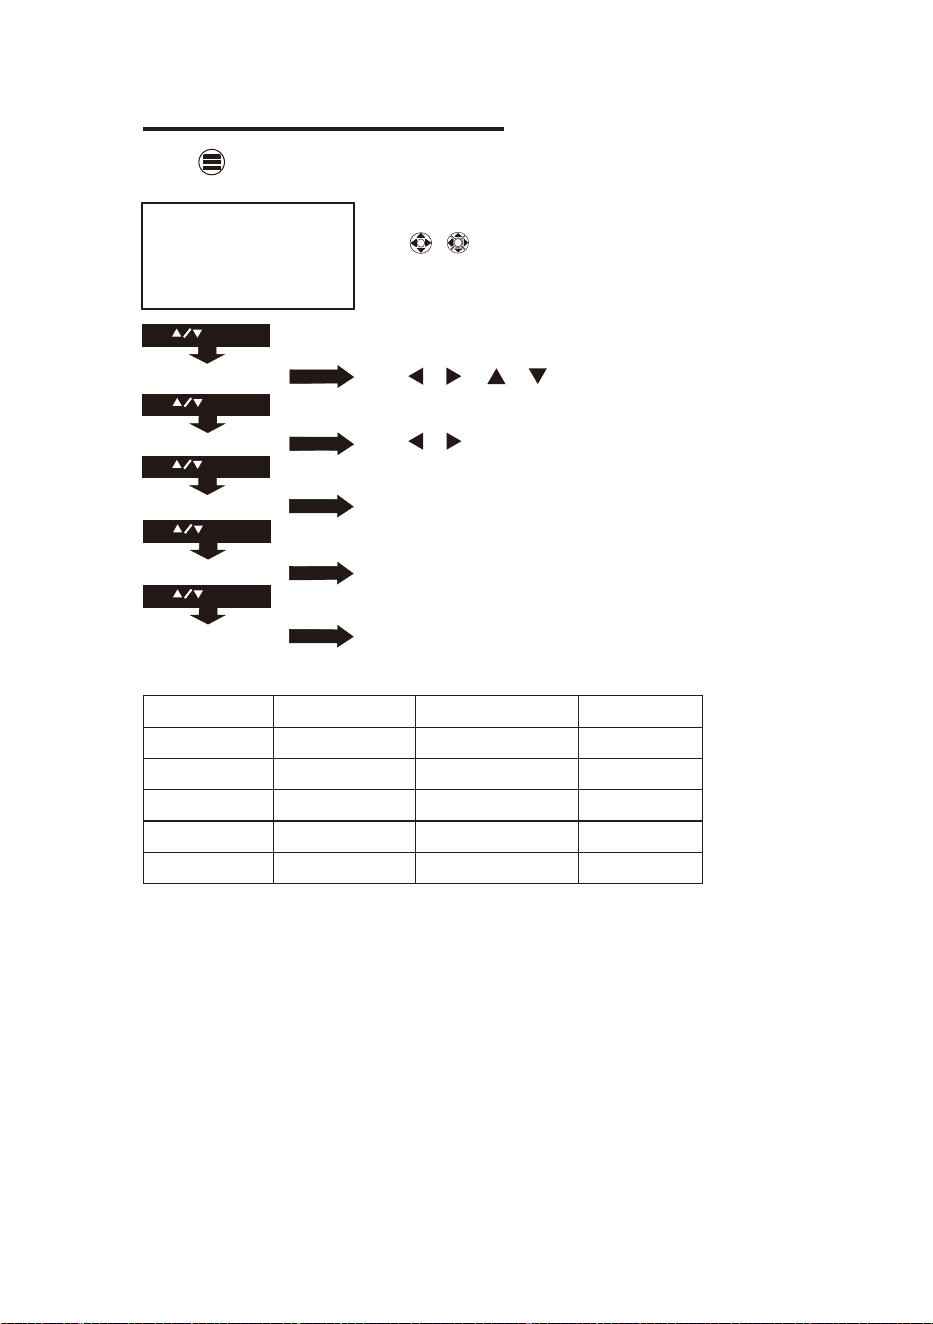
Using Projector Menu 1.0
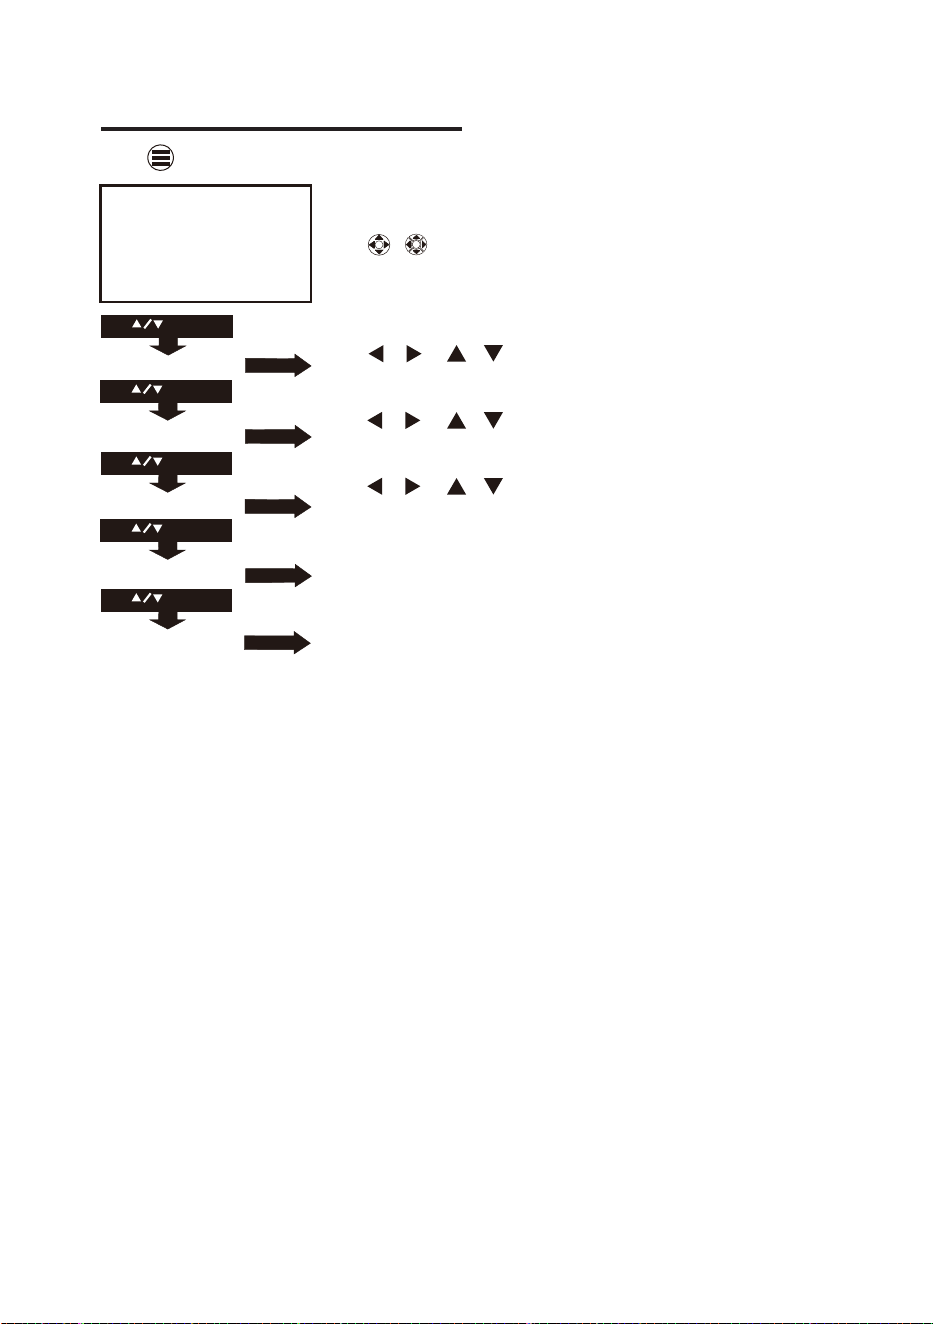
Press button to enter projector menu. Press again to previous status.
17
OSD Language
Restore Factory Default
Software Update (USB)
Rotate1
OsdDuration off
OSD Language
Restore Factory Default
USE
TO SELECT
Rotate1
USE
TO SELECT
USE
TO SELECT
Software Update (USB)
OsdDuration off
USE
TO SELECT
PRESSGOK
PRESSGOK
USE
TO SELECT
PRESSGOK
PRESSGOK
Use / buons to select manual page.
This manual showed on right upper of view screen.
Use / or / to select different language.
Use / buons to select Y or N , If chose “Y”,
unit go to factory reset.
To select different angle and mirror the projector screen.
To different duraon me to off / 5 sec / 10 sec / 15 sec / 30 sec.
Service use only.
OK
OK
English Hrvatski Nederlands Chinese
Franais Deutech Slovenina Slovak
Espanol Italiano Norsk
Portugues Magyar Srpski
Esky Polski Svenska
Dansk Romnete Suomi
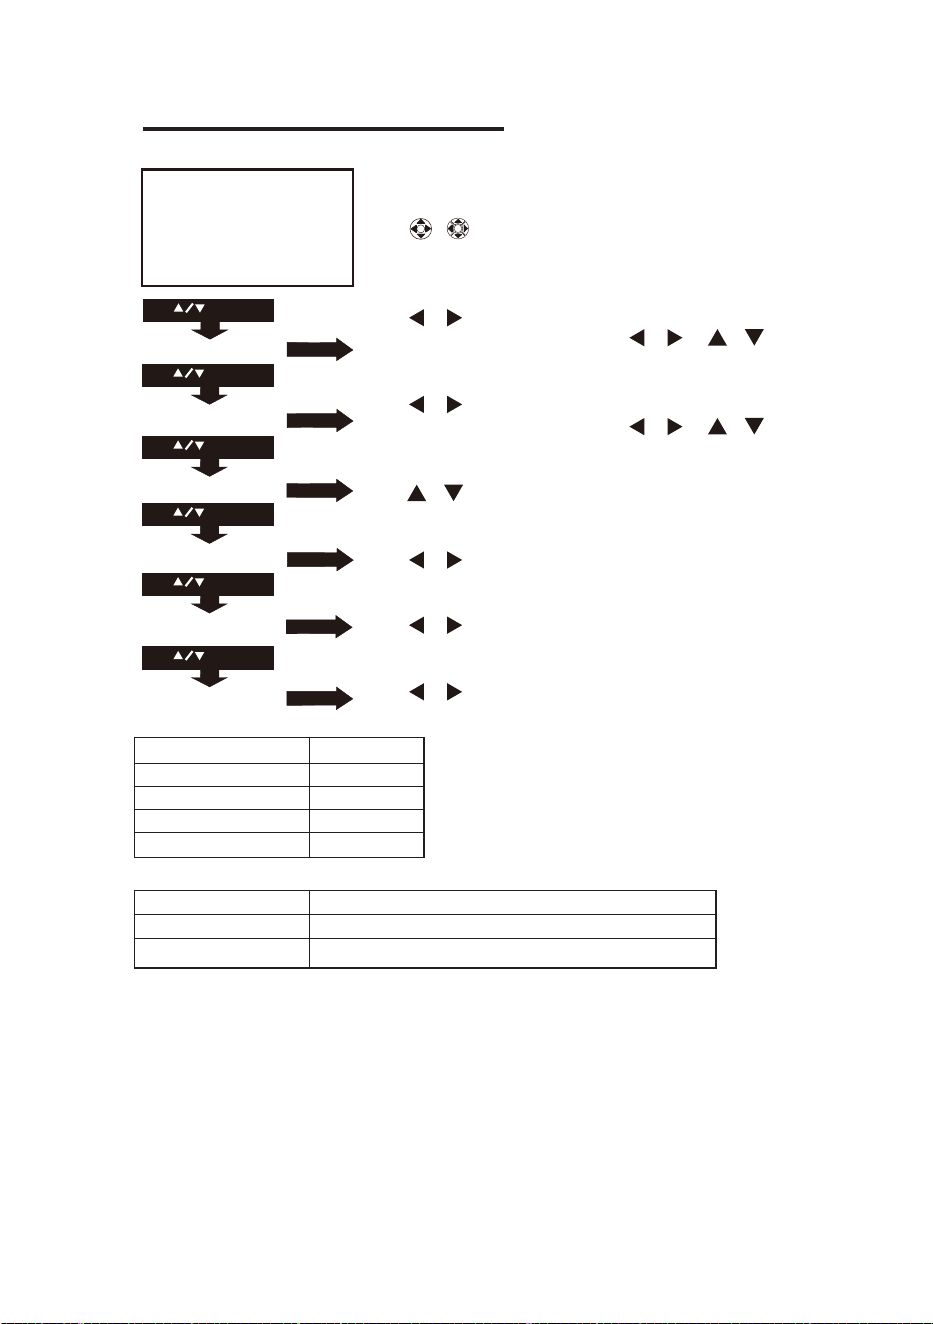
Using Projector Menu 2.0
18
USE
TO SELECT
USE
TO SELECT
USE
TO SELECT
USE
TO SELECT
Picture Mode
Color Temperture
Aspect Ratio
Noise Reduction
PC Setting
Reduce disp1 100
Picture Mode
Color Temperture
Aspect Ratio
Noise Reduction
PC Setting
USE
TO SELECT
USE
TO SELECT
PRESSGOK
PRESSGOK
PRESSGOK
PRESSGOK
PRESSGOK
PRESSGOK
Use / buons to select manual page.
This manual showed on right upper of view screen.
Use / to select different picture effect to
So / Medium / Vidid / User. Use / or / to select Red /
Green / Blue digit If chose User item.
Use / to select different color temperature to
So / Medium / Vidid / User. Use / or / to select Red /
Green / Blue digit If chose User item.
Use / buons to select screen rao 4:3 or 16:9.,
Use / buons to select Off / Low / Middle / High / Default,
Use / buons to select PC seng to Auto adjust/
Horizontal Pos/Vercal Pos / Size / Phase.
Use / to select reduce display to 75-100.
OK
OK
Color temperature
Customer define Parameter
red 0-100
blue 0-100
green 0-100
Aspect Rao
4:3 The signal in a 4:3 aspect rao projecon image
16:9 The signal in a 16:9 aspect rao projecon image

Using Projector Menu 3.0
Press button to enter projector menu. Press again to previous status.
19
Soumd Mode Medium
Balance 0
Auto Volume Off
Surround Sound Off
Soumd Mode Medium
Balance 0
Auto Volume Off
Surround Sound Off
USE
TO SELECT
USE
TO SELECT
USE
TO SELECT
PRESSGOK
PRESSGOK
USE
TO SELECT
PRESSGOK
PRESSGOK
Use / buons to select manual page.
This manual showed on right upper of viewing screen.
Use / to select different sound effect Medium / Movie /
Music / Sports / User. Follow below figure.
Use / to select Balance level to 0-50.
To select Off / On.
Use / to select different sound effect to Off
SRS TruSurround / Surround.
OK
OK
User Define Parameter
Treble 0-100
Bass 0-100
Using Projector Menu 4.0
20
USE
TO SELECT
USE
TO SELECT
USE
TO SELECT
USE
TO SELECT
Clock - - - -
Off Timer Off
On Time Off
Sleep Timer Off
Auto Time Off
Clock - - - -
Off Timer Off
On Timer Off
Sleep Timer Off
Auto Timer Off
USE
TO SELECT
PRESSGOK
PRESSGOK
PRESSGOK
PRESSGOK
PRESSGOK
Use / buons to select manual page.
This manual showed on right upper of viewing screen.
Use / / / to select clock to Day / Month / Year /
Hour / Minutes.
Use / / / to select mer turn off to Day /
Hour / Minutes.
Use / / / to select mer turn on to Day /
Hour / Minutes.
To select sleep mer turn to Off / 10min / 20min / 30min /
60min / 90min.
To select auto mer funcon to turn On / Off.
Press buon to enter projector menu. Press again to previous status.
OK
OK
Specifications
Power Input DC 12V , 3A
Connect included adapter
Included Adapter Input AC100-240V,50/60Hz
Connect DC input of unit Output DC12V , 3A.
Display Color 16.7K
Projecon Size 30-100 inch
Signal Port Video / VGA / HDMI
USB Port Support USB device up to 32GB
Support format mpeg1, Mpeg2 ,mpeg4, mp3 , Jpeg
SD Card Support SD card up to 32GB
Support format mpeg1, Mpeg2 ,mpeg4, mp3 , Jpeg
Weight 0.8KG
Dimension 198 x 153 x 68.5 mm
Light source type LED
Display nave resoluon 800 x 480
HDMI input supported video
resoluon
Power consumpon Operang 36W; Standby 0.8W
21
1080p, 1080i, 720p, 576i, 480p and 480i
For service assistance and product information,
please call: 1-800-968-9853.
Pour obtenir assistance et information appelez:
1-800-968-9853.
Curtis International Ltd.
7045 BECKETT DRIVE, UNIT 15,
MISSISSAUGA, ON, L5S 2A3
www.curtisint.com

©Curtis International Ltd.
7045 BECKETT DRIVE, UNIT 15, MISSISSAUGA, ON, L5S 2A3 www.curtisint.com
LIMITED PRODUCT WARRANTY
This quality product is warranted to be free from manufacturer’s defects in material and workman-ship,
provided that the unit is used under the normal operating conditions intended by the manufacturer.
Should you have any problem with this product, please and it is highly recommended to visit our website at
www.curtisint.com before you take any other steps as we have additional copies of instruction manuals,
operating manuals and trouble shooting tips on our website which gives you the answer on most of the
questions you could have in operating the unit.
TERMS OF WARRANTY
C.I. Service Dept. warrants this product to be free from defects in materials and workmanship for 90 days on
parts and 90 days on labor. If you originally purchased your product more than 90 days ago, a repair fee
may apply.
Nothing within this warranty shall imply that C.I. will be responsible or liable for any damage to any items
placed in this product, whether due to any defect of the product, or its use, whether proper or improper.
EXCLUSIONS
Save as herein provided, C.I. Service Dept. (Canada) or C.I. Service Dept. (USA), there are no other
warranties, conditions, representations or guarantees, express or implied, made or intended by C.I. or its
authorized distributors and all other warranties, conditions, representations or guarantees, including any
warranties, conditions, representations or guarantees under any Sale of Goods Act or like legislation or
statue is hereby expressly excluded. Save as herein provided, C.I. Service Dept. (Canada) or C.I. Service
Dept. (USA), shall not be responsible for any damages to persons or property, including the unit itself,
howsoever caused or any consequential damages arising from the malfunction of the unit and by the
purchase of the unit, the purchaser does hereby agree to indemnify and save harmless C.I. from any claim
for damages to persons or property caused by the unit.
TO OBTAIN REPAIRS UNDER THE TERMS OF THIS WARRANTY
The original purchaser must present a copy of the original bill of sale and the service warranty card.
Any alterations, abuse, misuse, battery corrosion or accidental damage voids the warranty.
The warranty does not cover cabinets and accessories.
4. No warranty or insurance contained or set out shall apply when damage or repair is caused by power
failure; damage in transit or when moving the unit; improper power supply; use for commercial or
industrial purposes; service calls resulting in customer education, etc.
The defective product should be mailed to:
Canada
C.I. Service Dept.
7045 Becke Drive, Unit 15
Mississauga, ON
L5S 2A3
U.S.A
Curs Internaonal Ltd
c/o Lotus Internaonal Company
6880 Commerce Blvd.
Canton MI 48187
U.S.A.
For service assistance and product information, please call: 1-800-968-9853.
If mailing the product, the freight must be prepaid and a money order for $7.00 should be included
to cover the cost of insurance and the return of the product.
C.I. reserves the right to repair or replace the parts which have become defective.
To begin the warranty repair process, please note that you MUST obtain a return authorization number
prior to returning your product for warranty based support.This can be placed under the 1-800-968-9853
contact line.
Model No. Date Purchased Serial No.