10/06/2017
SERVICE, INSTALLATION AND INSTRUCTION MANUAL
For AUTHORIZED PARTS or TECHNICAL SERVICE, please contact:
1-877-368-2797 or Service@MaxxHelp.com
3355 Enterprise Avenue, Suite 160, Fort Lauderdale, FL 33331 USA
Phone: (954) 202-7419 • Website: MaxximumFoodService.com
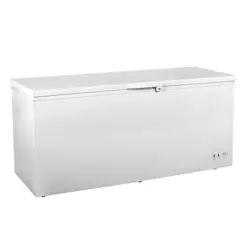
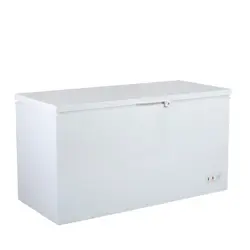
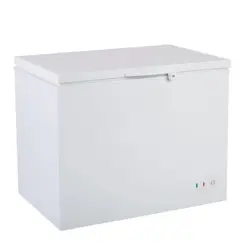
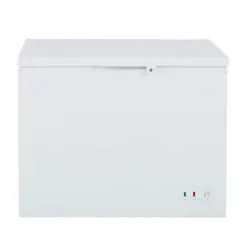
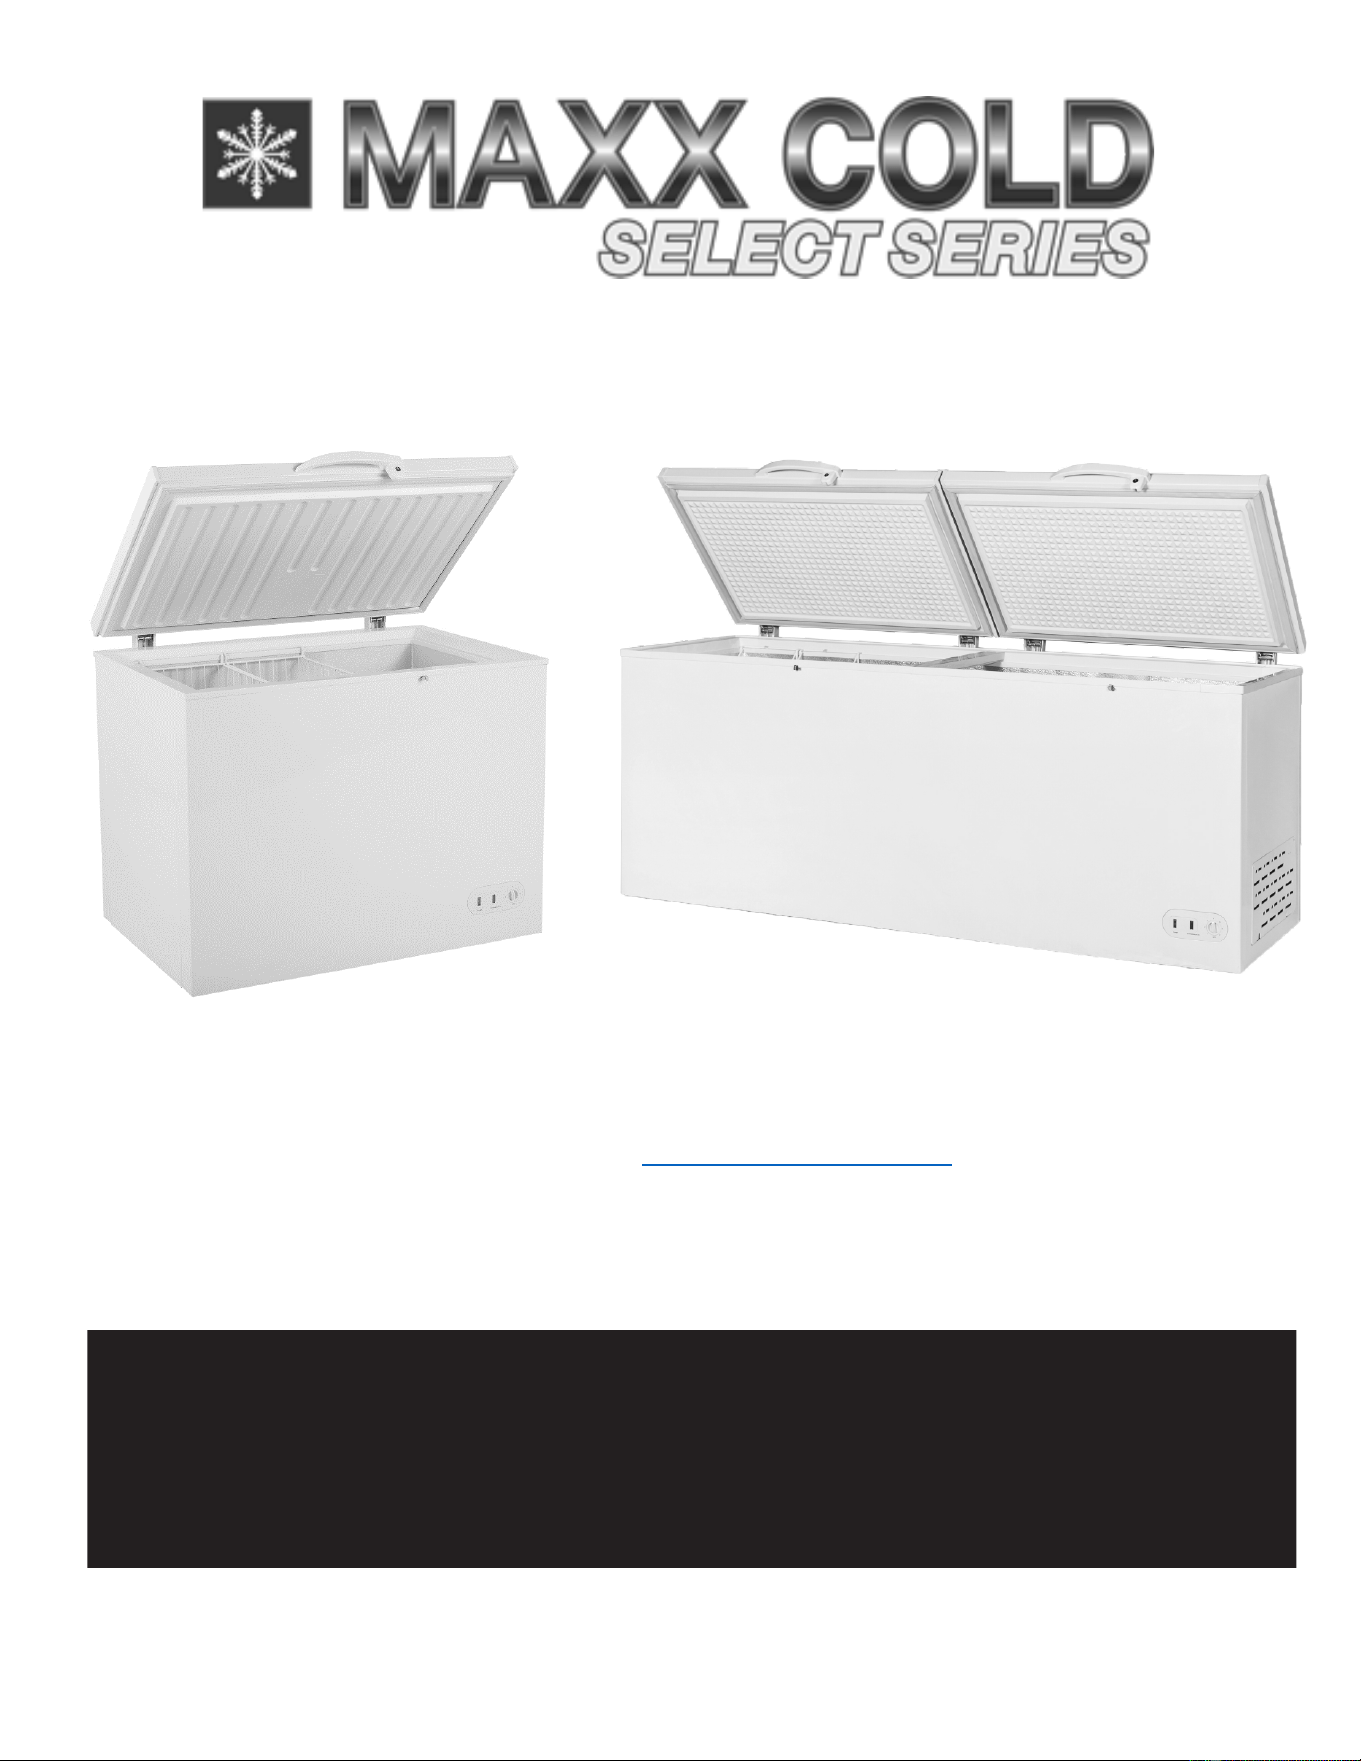
MXSH9.6SHC MXSH19.4SHC
MXSH12.7SHC MXSH23.6SHC
MXSH15.9SHC MXSH30.0SHC
SELECT SERIES CHEST FREEZERS
PLEASE READ CAREFULLY

Page 2 of 16
Table of Contents
SERIAL NUMBER INFORMATION ..........................................................................................................................................3
APPLIANCE SAFETY ..............................................................................................................................................................4
IMPORTANT SAFEGUARDS ...................................................................................................................................................4
DIMENSIONS ..........................................................................................................................................................................6
TECHNICAL INFORMATION ..................................................................................................................................................6
RECEIVING AND INSPECTING THE EQUIPMENT .................................................................................................................8
INTRODUCTION
....................................................................................................................................................................8
COMPONENT INFORMATION
..............................................................................................................................................8
APPLIANCE INSTALLATION ..................................................................................................................................................9
Before Using Your Appliance ...................................................................................................................................................9
Remove Packaging Materials ............................................................................................................................................... 10
Location Requirements ........................................................................................................................................................ 10
Installation Clearance .......................................................................................................................................................... 10
Leveling .............................................................................................................................................................................. 11
Stabilizing ........................................................................................................................................................................... 11
Electrical Connection ........................................................................................................................................................... 11
OPERATION .......................................................................................................................................................................... 11
Setting the Temperature Control ............................................................................................................................................ 11
Defrosting Your Freezer:...................................................................................................................................................... 12
The Freezer Compartment .................................................................................................................................................... 12
Freezing Fresh Foods ........................................................................................................................................................... 12
CLEANING AND MAINTENANCE ....................................................................................................................................... 13
Exterior and Interior Cleaning of Appliances ......................................................................................................................... 13
Cleaning the Condenser Coil ................................................................................................................................................ 13
Gasket Maintenance ............................................................................................................................................................ 13
TROUBLESHOOTING GUIDE
............................................................................................................................................ 14
TROUBLESHOOTING .......................................................................................................................................................... 14
WIRING DIAGRAMS ............................................................................................................................................................ 16
PARTS ................................................................................................................................................................................... 16

Page 3 of 16
READ THIS MANUAL IN ITS ENTIRETY
TO HELP FAMILIARIZE YOURSELF WITH YOUR NEW EQUIPMENT BEFORE PROCEEDING.
We have provided many important safety messages in this manual.
Always read and obey all safety messages.
Understanding of safety messages will assist in alerting you to potential hazards, as well as tell you
how to reduce the chance of injury. Follow the instructions as outlined in this manual.
VISIT OUR WEBSITE for the MOST UP-TO-DATE VERSION of this MANUAL.
http://www.maxximumfoodservice.com/
Fill out and return the enclosed warranty postcard or visit our website/warranty registration.
Keep the dated proof of purchase invoice which establishes the appliance's warranty period.
SERIAL #:______________________________________________________________________________________________
MODEL
#:_________________________________________ DATE OF PURCHASE:_________________________
SERIAL NUMBER INFORMATION
l The serial number of all models is located inside the unit on the rear wall.
l Always have the serial number of your unit available when calling for parts or service.
l This manual covers standard units only. If you have a custom unit, consult customer service department at the number listed on
cover page.
Due to periodic changes in designs, methods, procedures, policies and regulations, the contents of this manual are subject
to change without notice. While we exercise good faith efforts to provide information that is accurate, we are not
responsible for errors or omissions in information provided or conclusions reached as a result of using this reference
manual. By using the information provided, the user assumes all risks in connection with such use.

Page 4 of 16
APPLIANCE SAFETY
Your safety and the safety of others are very important.
Always read and obey all safety messages in this manual.
T
his is the Safety Alert Symbol. This symbol alerts you to potential hazards that can kill or injure
you and
others. All safety messages will follow the Safety Alert Symbol and either the words
”DANGER”, “WARNING” or “CAUTION”.
DANGER
D
ANGER
means that failure to heed this safety statement may result in
Death or Severe
Personnel Injury
.
WARNING
W
ARNING
means that failure to heed this safety statement may result in extensive product
damage, serious personal injury, or death.
CAUTION
C
AUTION
means that failure to heed this safety statement may result in minor or moderate
personal injury, or property or equipment damage.
All safety messages will alert you to what the potential hazard is, tell you how to reduce the chance of injury, and let you know
what can happen if the instructions are not followed.
NOTE: IMPORTANT SAFETY INSTRUCTIONS
WARNING
To reduce the risk of fire, electric shock or injury, when using your appliance, follow these basic
precautions:
l
Plug into grounded 3-prong outlet.
l
Do not remove grounding prong.
l
Do not use an adapter.
l
Do not use an extension cord.
l
Disconnect power before cleaning.
l
Disconnect power before servicing.
l
Use 2 or more people to move and install appliance.
SAVE THESE INSTRUCTIONS
IMPORTANT SAFEGUARDS
Before the appliance is used, it must be properly positioned and installed as described in this
manual, so read the manual carefully. We strongly recommend that you have a professional
install your new machine. The warranty may be affected or voided by an incorrect installation. To
reduce the risk of fire, electrical shock or injury when using the appliance, follow basic
precautions, including the following:
DANGER
l
It is recommended that a separate circuit, serving only your appliance, be provided. Use receptacles that cannot be
turned off by a switch or pull chain.
l Please ensure that the required voltage is being supplied at all times.
l The unit should be plugged into a grounded and properly-sized electrical outlet with appropriate over-current protection.
l Ensure unit is not resting on or against the electrical cord.
l
Do not connect or disconnect the electric plug when your hands are wet.

Page 5 of 16
l
Never unplug the appliance by pulling on the power cord. Always grip the plug firmly and pull straight out from the
outlet.
l
Never clean appliance parts with flammable fluids. Do not store or use gasoline or other flammable vapors and liquids
in the vicinity of this or any other appliance. The fumes can create a fire hazard or explosion.
l
Before proceeding with cleaning and maintenance operations, make sure the power line of the unit is disconnected.
l
Unplug the appliance or disconnect power before cleaning or servicing. Failure to do so can result in electrical shock or
death.
l If the unit is not in use for a long period of time, best to unplug the unit from the outlet.
l After unplugging the unit, wait at least 8 minutes before plugging it back in. Failure to do so could cause damage to the
compressor.
l If the power cuts off, wait at least 8 minutes before turning the unit on to avoid damage to the compressor.
l
Do not attempt to repair or replace any part of your appliance unless it is specifically recommended in this manual. A
qualified technician should do all other servicing or repairs.
l Child entrapment and suffocation are not problems of the past.
Junked or abandoned chest freezers are still dangerous.”
l Before you throw away your old chest freezer: Take off the doors.
l Never allow children to operate, play with, or crawl inside the chest freezer.
WARNING
l
Use two or more people to move and install appliance. Failure to do so can result in
back, knee
or other injury.
l
This appliance must be properly installed and located in accordance with the Installation Instructions before it is used.
l
Do not touch the cold surfaces in the cold compartment when hands are damp or wet. Skin may stick to these extremely cold
s
urfaces.
l
To ensure proper ventilation for your appliance, the front of the unit must be completely unobstructed. Choose a well-ventilated
area with temperatures above 60°F (16°C) and below 90°F (32°C). This unit must be installed in an area protected from the
elements, such as wind, rain, water spray or drips.
l
The appliance should not be located next to ovens, grills,
broilers
or other sources of high heat.
l
It is important for the appliance to be level for proper operation. You may need to make adjustments to level it.
l
Remove the packing materials and clean the appliance before using.
l
Do not use this apparatus for other than its intended purpose.
Electrical Connection
•
Do not, under any circumstances, cut or remove the third (ground) prong from the power cord. For personal safety, this
appliance must be properly grounded.
•
The power cord of this appliance is equipped with a 3-prong grounding plug that mates with a standard 3-prong
gr
ounding wall outlet to minimize the possibility of electric shock hazard from the appliance.
•
Have the wall outlet and circuit checked by a qualified electrician to make sure the outlet is properly grounded.
•
The appliance should always be plugged into its own individual electrical outlet which has a voltage rating that matches the
rating label on the appliance. This provides the best performance and also prevents overloading house wiring circuits
which could cause a fire hazard from overheated wires.
•
Repair or replace immediately all power cords that have become frayed or otherwise damaged. Do not use a cord that shows
cracks or abrasion damage along its length or at either end.
•
When moving the appliance, be careful not to damage the power cord.
Refrigerant Disposal
If you are throwing away your old freezer it may have a cooling system that uses “Ozone Depleting” chemicals. Make sure the
refrigerant is removed for proper disposal by a qualified service technician.
Page 6 o
f 16
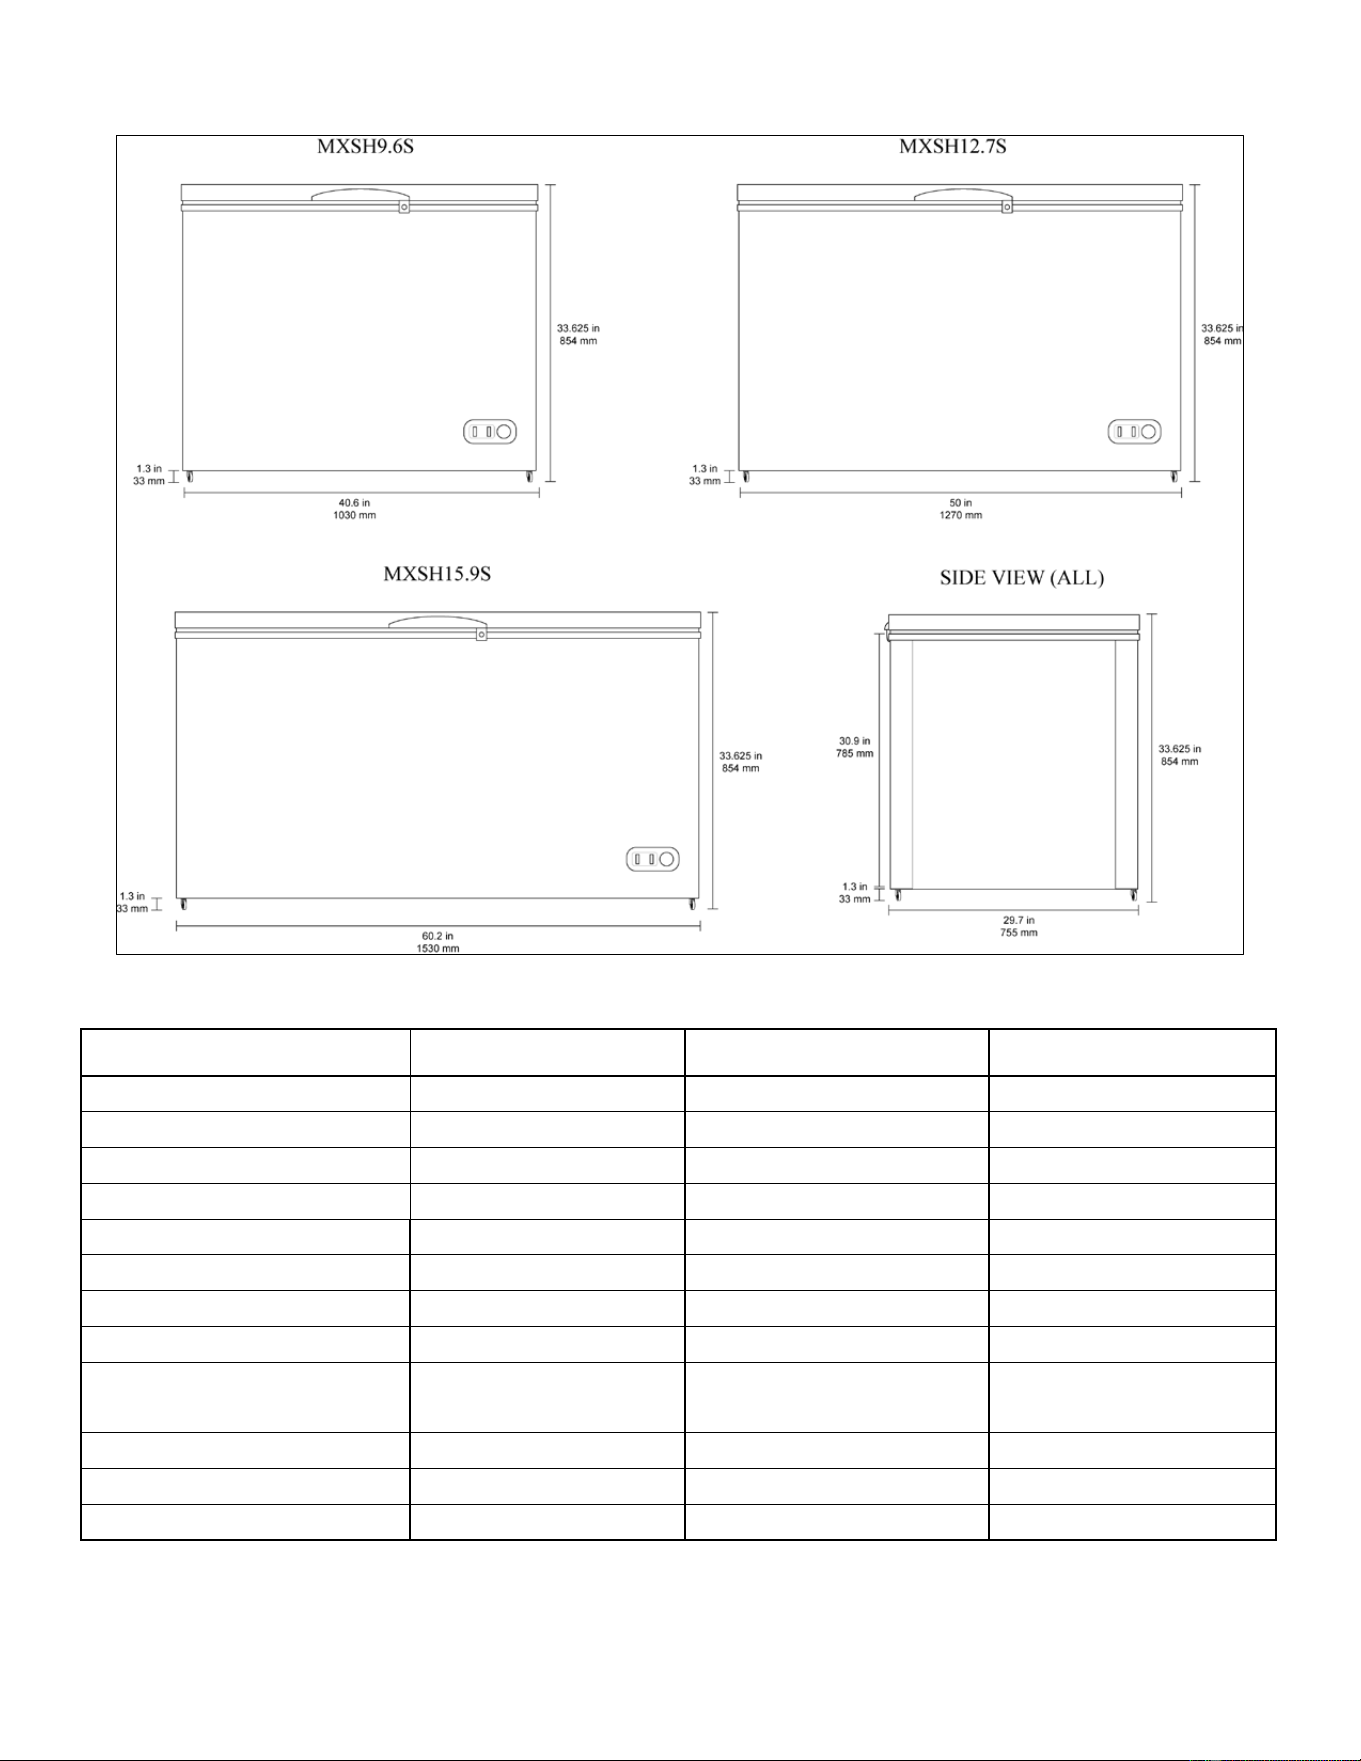
DIME
NSIONS
TECHNICAL INFORMATION
Mo
del MXSH9.6SHC MXSH12.7SHC MXSH15.9SHC
In:
Overall Dimension W*D*H 40.6 x 29.7 x 33.625 50 x 29.7 x 33.625 60.2 x 29.7 x 33.625
m
m
: Overall Dimension W*D*H 1030 x 755 x 854 1270 x 755 x 854 1530 x 755 x 854
No
minal Capacity 9.6 Cu Ft / 272 L 12.7 Cu Ft / 360 L 15.9 Cu Ft / 450 L
Ap
pliance Weight 115 lbs / 52 kg 130 lbs / 59 kg 151 lbs / 68.5 kg
Hi
nged Lids 1 1 1
St
orage Basket 1 1 2
El
ectrical Service 115V/60Hz/1Ph 115V/60Hz/1Ph 115V/60Hz/1Ph
Av
erage Amp Draw (WATTS) 0.6 (105) 0.8 (125) 0.85 (145)
Tem
perature Range
Fº/
Cº
-11º to -1º F
-24º
to -18º C
-11º to -1º F
-24º
to -18º C
-11º to -1º F
-24º
to -18º C
R
ef
rigerant R-600A R-600A R-290
Pr
ovided 6’ NEMA Cord Set 5-15 5-15 5-15
Fact
ory Temperature Setting 5°F (-15°C) 5°F (-15°C) 5°F (-15°C)
P
age 7 of 16
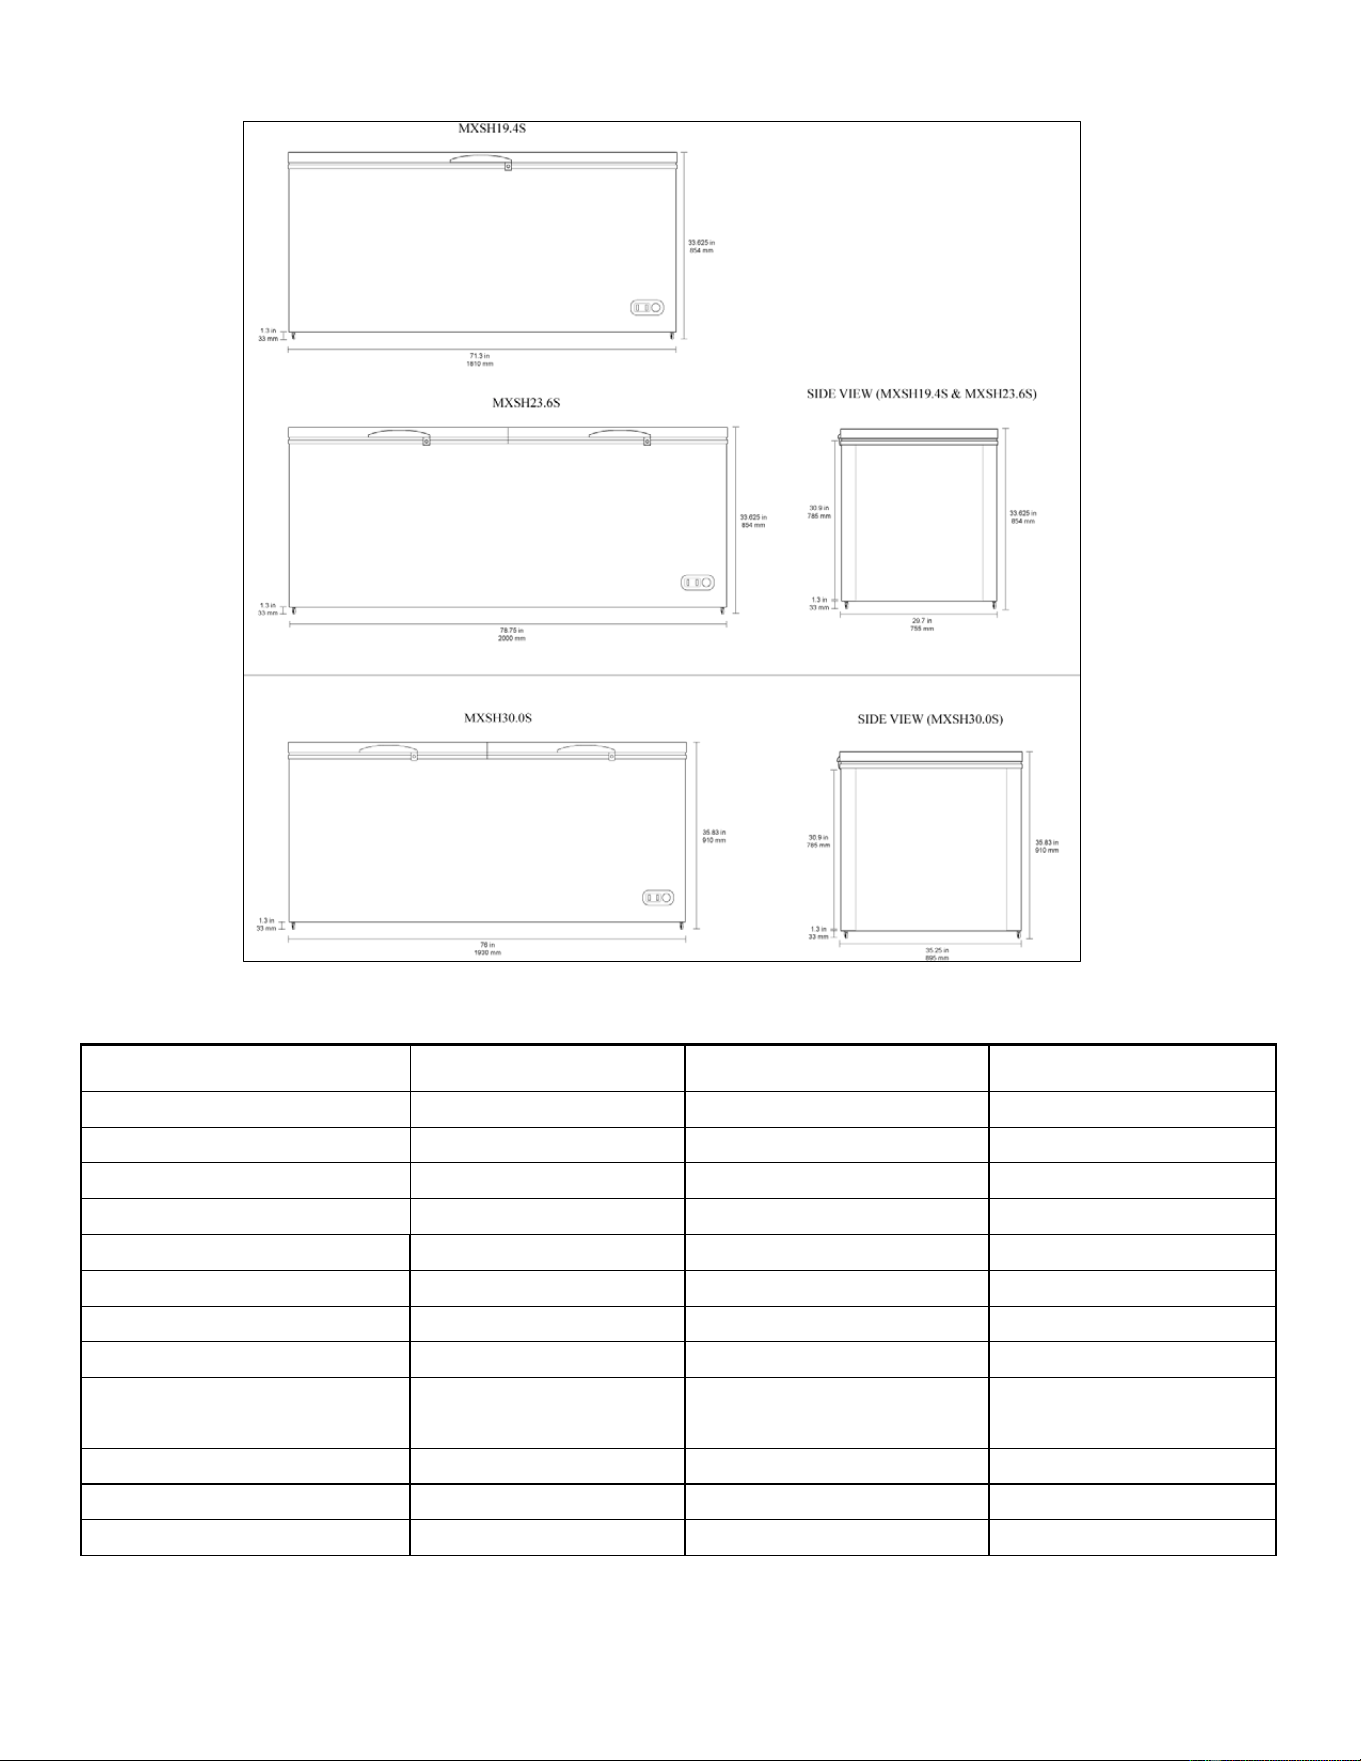
DI
MENSIONS
TECHNICAL INFORMATION
M
odel MXSH19.4SHC MXSH23.6SHC MXSH30.0SHC
I
n: Overall Dimension W*D*H 71.3 x 29.7 x 33.625 78.75 x 29.7 x 33.625 76 x 35.25 x 35.83
m
m: Overall Dimension W*D*H 1810 x 755 x 854 2000 x 755 x 854 1930 x 895 x 910
N
ominal Capacity 19.4 Cu Ft / 549 L 23.6 Cu Ft / 669 L 30 Cu Ft / 850 L
A
ppliance Weight 167 lbs / 76 kg 176 lbs / 80 kg 209 lbs / 95 kg
H
inged Lids 1 2 2
S
torage Basket 2 2 2
E
lectrical Service 115V/60Hz/1Ph 115V/60Hz/1Ph 115V/60Hz/1Ph
A
verage Amp Draw (WATTS) 1.0 (160) 2.0 (200) 2.2 (220)
T
emperature Range
Fº
/Cº
-11º to -1º F
-2
4º to -18º C
-11º to -1º F
-2
4º to -18º C
-11º to -1º F
-2
4º to -18º C
R
efrigerant R-290 R-290 R-290
P
rovided 6’ NEMA Cord Set 5-15 5-15 5-15
F
actory Temperature Setting 5°F (-15°C) 5°F (-15°C) 5°F (-15°C)
Page 8 of 16
RECEIVING AND INSPECTING THE EQUIPMENT
Even though most equipment is shipped crated, care should be taken during unloading so the equipment is not damaged while being
moved into the building.
1. Visually inspect the exterior of the package and skid or container. Any damage should be noted and formally reported to the delivering
carrier as soon as possible within 10 days.
2. If damaged, open and inspect the contents with the carrier.
3. In the event that the exterior is not damaged, yet upon opening, there is concealed damage to the equipment, notify the carrier.
Notification should be made verbally as well as in written form.
4. Request an inspection by the shipping company of the damaged equipment. This should be done within 10 days from receipt of the
equipment.
5. Be certain to check the compressor compartment housing and visually inspect the refrigeration package. Be sure lines are secure and base
is still intact.
6. Freight carriers can supply the necessary damage forms upon request.
7. Retain all crating material until an inspection has been made or waived.
INTRODUCTION
This user’s manual is intended for installing, using and servicing your Maxx Cold Select Series Appliance. It is recommended that
this manual be kept in an accessible place. Every Maxx Cold machine is designed and manufactured according to the highest
standards of safety and performance. It meets or exceeds the safety standard of UL 471 and sanitation standard NSF 7.
The Legacy Companies assumes no liability or responsibility of any kind for products manufactured by Maxx Cold, that have been
altered in any way, including the use of any parts and/or other components not specifically approved by The Legacy Companies.
Maxx Cold reserves the right to make design changes and/or improvements at any time. Specifications and designs are subject to
change without notice.
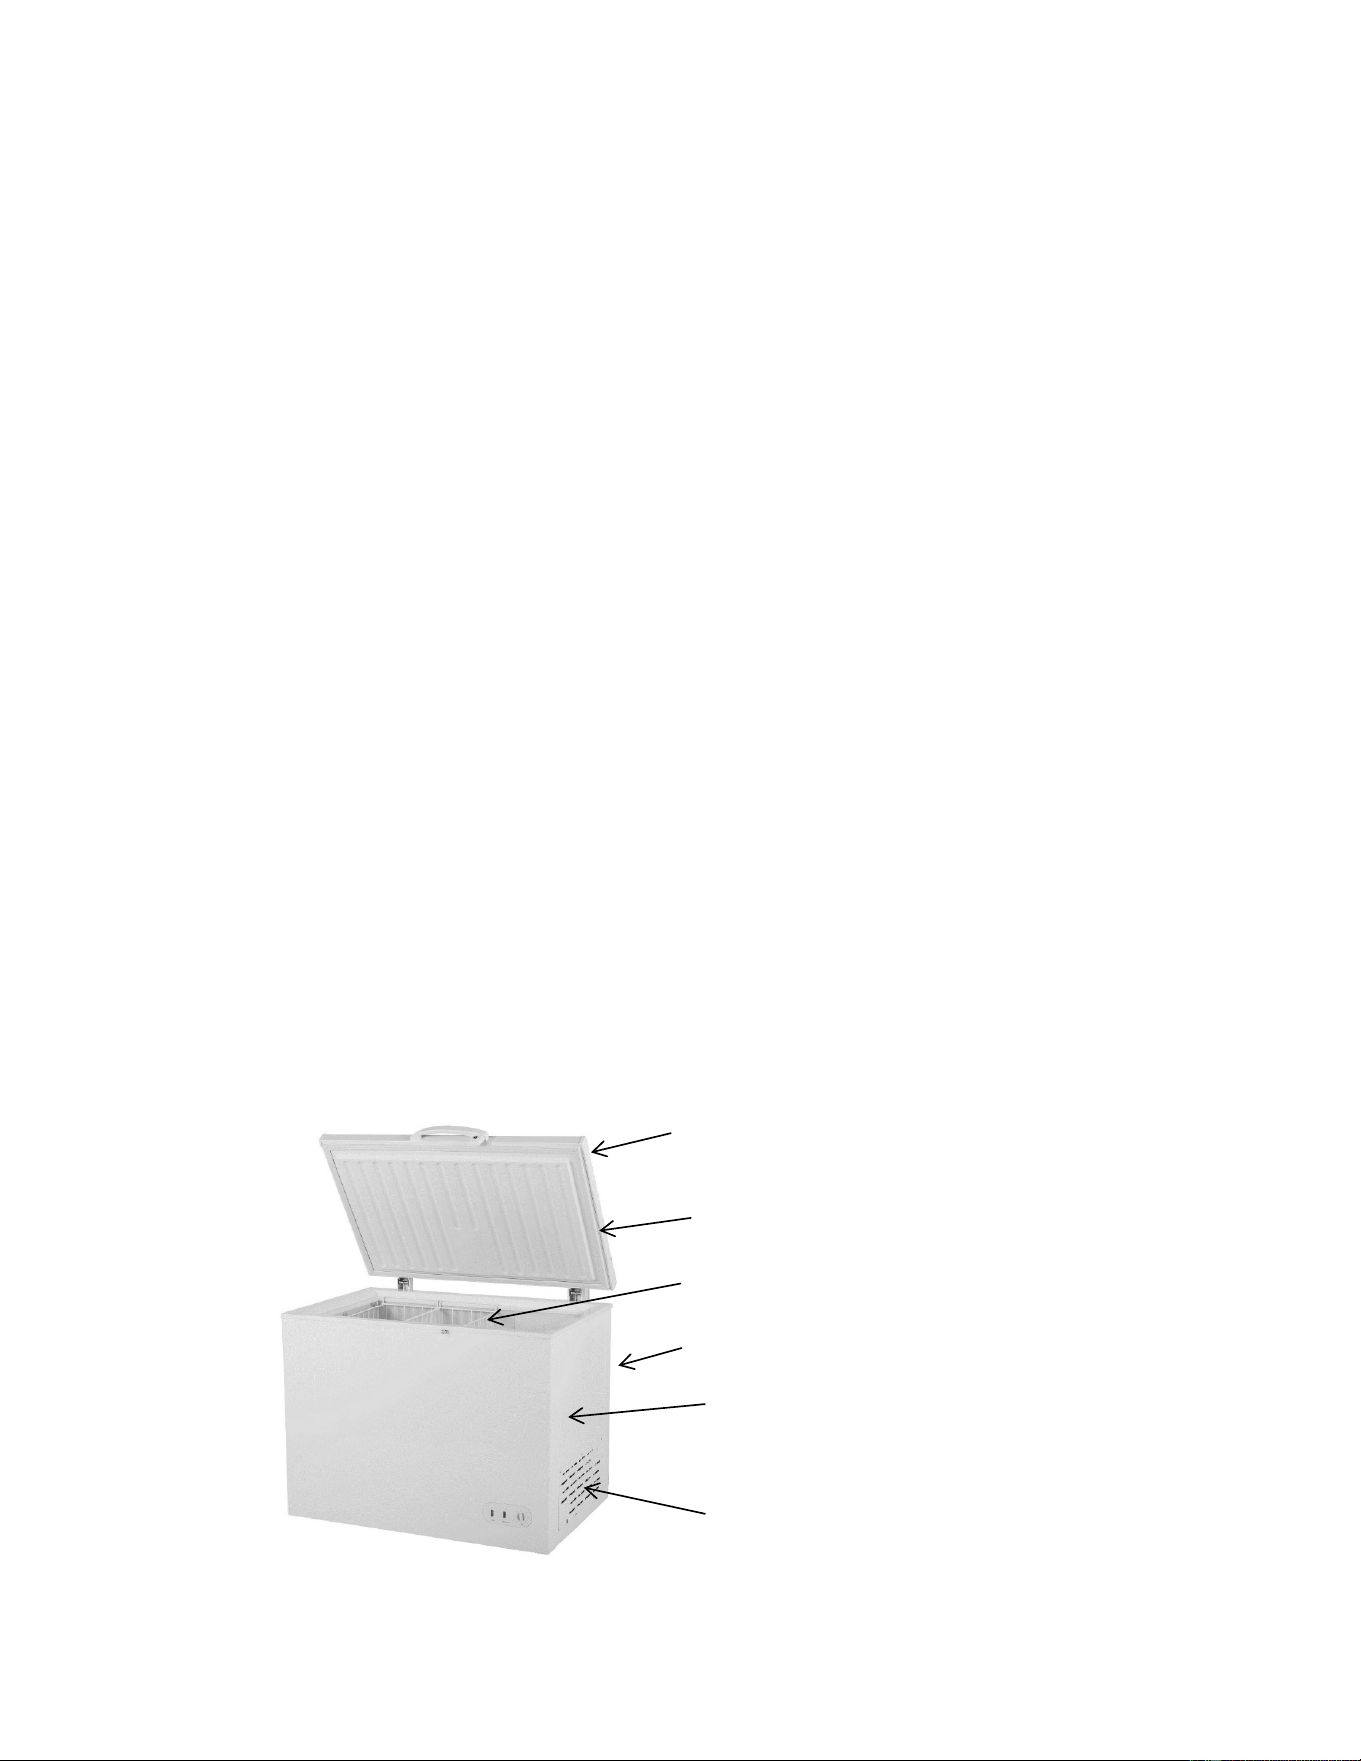
COMPONENT INFORMATION
ALL MODELS
STORAGE
BASKET(S)
LID GASKET(S)
COUNTER BALANCED
LID(S)
INTERNAL DRAIN PLUG
(Bottom of storage
compartment)
CORD SET and DRAIN OUTLET
(Located at rear of freezer)
AIR INTAKE
LOUVER PANEL
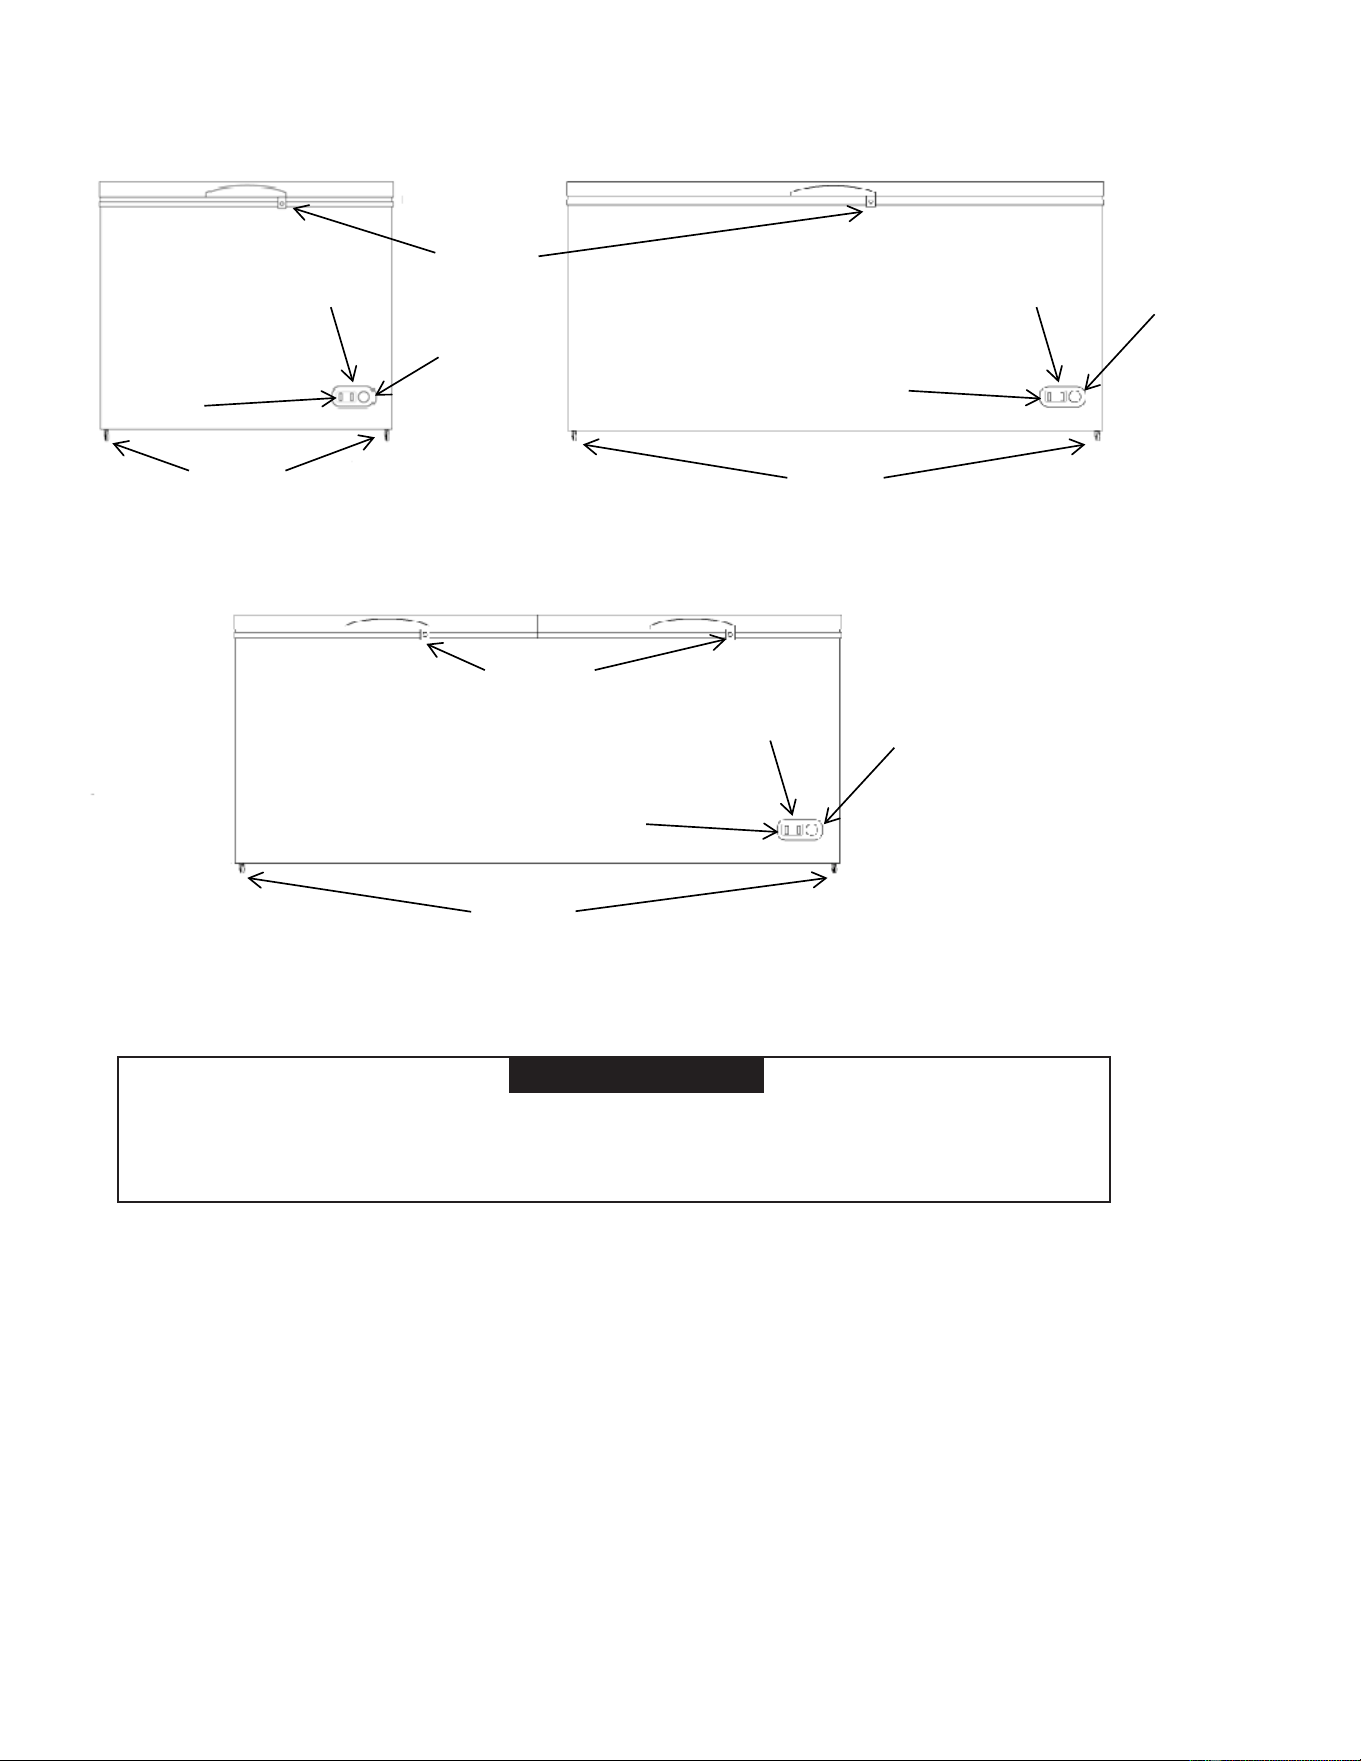
Page 9 of 16
COMPONENT INFORMATION (cont.)
APPLIANCE INSTALLATION
Before Using Your Appliance
•
Remove the exterior and interior packing.
•
Check to be sure you have all of the following parts:
• 1 or 2 Storage Baskets (quantity of storage baskets depends on model)
• 1 Drain Plug
• 1 Instruction Manual
• 1 Plastic Scraper
• 2 Keys for Lid Lock
•
Locate the unit away from direct sunlight and sources of heat (stove, heater, radiator, etc.). Direct sunlight may
affect the
acrylic coating and heat sources may increase electrical consumption. Extreme cold ambient
temperatures may also cause
the appliance not to perform properly.
WARNING
Excessive Weight Hazard
Use two or more persons to move and install appliance.
Failure to do so may result in back or other injury.
HANDLE
WITH LOCK
MXSH23.6SHC/ MXSH30.0SHC
MXSH9.6SHC / MXSH12.7SHC
MXSH15.9SHC
/ MXSH19.4SHC
CASTERS
COMPRESSOR
ON LIGHT
THERMOSTAT
CONTROL
(TEMPERATURE
)
THERMOSTAT
CONTROL
(TEMPERATURE
)
COMPRESSOR
ON LIGHT
POWER
LIGHT
POWER
LIGHT
CASTERS
HANDLES
WITH LOCK
CASTERS
THERMOSTAT
CONTROL
(TEMPERATURE
)
COMPRESSOR
ON LIGHT
POWER
LIGHT
Page 10 of 16
APPLIANCE INSTALLATION (cont.)
•
Avoid locating the unit in damp, very humid or moist areas.
•
Before connecting the unit to the power source, let it stand upright for approximately 4 hours. This will reduce the
possibility of
a malfunction in the cooling system from handling during transportation.
•
Clean the interior surface with lukewarm water or mild detergent aqueous solution using a soft cloth that won’t
scratch the
surface of this appliance.
Remove Packaging Materials
IMPORTANT:
Do not remove any permanent instruction labels or the data label on your appliance.
• Remove tape and glue from your appliance before using.
• To remove any remaining tape or glue, rub the area briskly with your thumb. Tape or glue residue can also be easily
removed by rubbing a small amount of liquid dish soap over the adhesive with your fingers. Wipe with warm water and
dry with a soft cloth.
• Do not use sharp instruments, rubbing alcohol, flammable fluids, or abrasive cleaners to remove tape or glue. These products
can damage the surface of your appliance.
NOTICE:
LOSS OR SPOILAGE OF PRODUCTS IN YOUR APPLIANCE IS NOT COVERED BY WARRANTY. IN ADDITION TO
FOLLOWING RECOMMENDED INSTALLATION PROCEDURES. PLEASE RUN THE APPLIANCE 24 HOURS PRIOR TO
USAGE.
Location Requirements
• Appliances represented in this manual are intended for indoor use only.
• Be sure the location chosen has a floor strong enough to support the total weight of the appliance and contents as a fully loaded
unit can weigh as much as 1500 pounds (680kg).
• Reinforce the floor as necessary to provide for maximum loading.
• For the most efficient refrigeration, be sure to provide good air circulation around appliance.
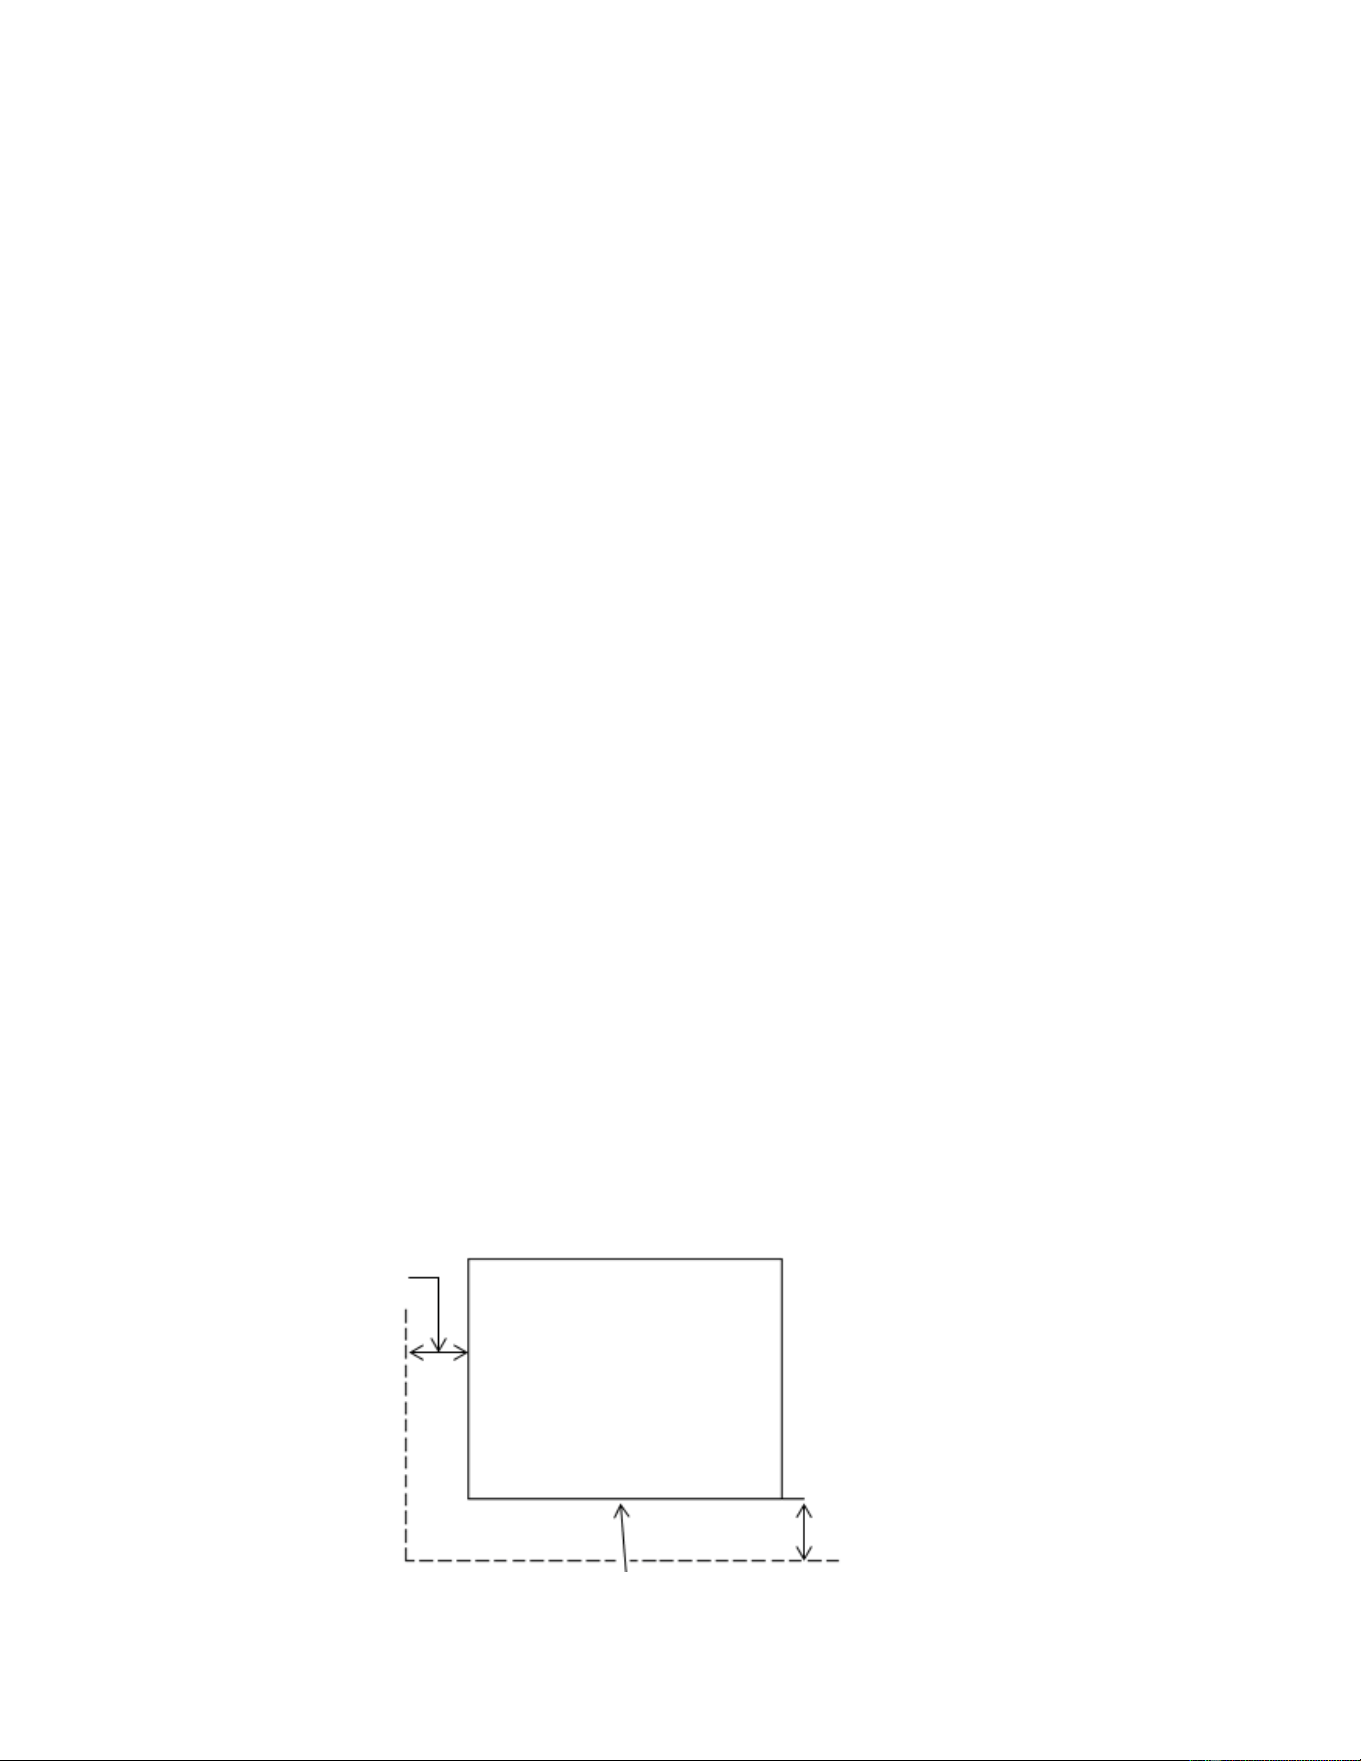
Installation Clearance
Be sure that the unit has access to ample air. Avoid hot corners and locations near stoves and ovens.
Allow 5 inches of space between the back and sides of the unit, which allows the proper air circulation to cool the
compressor and
condenser.
TOP VIEW
Minimum
to wall: 5“
Minimum
to wall: 5“
Rear of Freezer

Page 11 of 16
APPLIANCE INSTALLATION (cont.)
Leveling
Ensure the floor where the unit is to be located is level, or shim the unit to level.
Stabilizing
All models are supplied with casters for your convenience. It is very important, however, that the cabinet be installed in a stable
condition with the front wheels locked while in use. Should it become necessary to lay the unit on its side or back for any reason,
allow at least 24 hours before start-up to allow compressor oil to flow back into place. Failure to meet this requirement can cause
compressor failure and unit damage.
NOTICE:
Unit repairs will not be subject to standard unit warranties if due to improper installation procedures.
Electrical Connection
Refer to the amperage data on the Technical Information table, the serial tag, your local code or the National Electrical Code to be
sure that unit is connected to the proper power source.
DANGER
The unit must be turned OFF and disconnected from the power source whenever performing service,
maintenance functions or cleaning the refrigerated area. Failure to comply may result in Death or
Severe Personnel Injury.
OPERATION
Setting the Temperature Control
To control the internal temperature, adjust the control dials according to the intended use requirements for
proper/safe
product storage.
1.
The first time you turn the unit on, set the temperature control to “7”. The range of the temperature control is from
position
“1” [the warmest] to “7” [the coldest] in the freezer section.
2.
After 24 to 48 hours, adjust the temperature control to the setting that best suits your needs. The setting of “4”
should
be correct for most home or office use needs or applications.
CAUTION
If the unit is unplugged, has lost power, or is turned off, you must wait at least 8 minutes
before restarting the unit. If
you attempt to restart before this time delay, the
appliance may not start properly.
NOTE:
•
Turning the temperature control to "OFF" position stops the cooling cycle but does not shut off the power to the appliance.
•
If the unit is unplugged, loses power, or is turned off; you must wait at least 8 minutes before restarting the unit. If you
attempt to restart before this time delay, the appliance may not start properly.
•
Large amounts of food will lower the cooling efficiency of the appliance and may require a colder thermostat setting.
•
If you choose to change the thermostat setting, adjust thermostat control by one numerical increment at a time.
•
Allow
several hours for temperature to stabilize between adjustments.

Page 12 of 16
OPERATION (cont.)
Defrosting Your Freezer:
• A proper defrost operation may require 3 to 6 hours.
• When? For the most efficient operation and minimum energy consumption, defrost the freezer when the frost on
the freezer walls is
excessive or becomes ¼ inch thick as that ice or frost build up will negatively impact your
appliance’s performance.
• Choose a time when the stock of frozen food is low or empty the unit if there is another convenient refrigerated
storage space for
these perishable food items.
• Leaving the lid open will help speed the process. Also, pouring warm water
(not boiling) on the ice/frost will help speed melting.
CAUTION
Do not use boiling water because it may damage the plastic parts. In addition, never use a sharp or
metallic instrument to
remove frost as it may damage the side walls and will void the
warranty. We recommend using the plastic scraper provided with
your unit.
1.
Remove the frozen food from the freezer and place it in a cooler to protect the food.
2.
Turn the thermostat knob to “OFF”.
3.
Unplug the freezer. The “POWER ON INDICATOR” light should be OFF.
NOTE: During defrosting, the ice melts into the cabinet.
4.
If the appliance has a drain plug, remove it from the inside floor of the freezer by pulling straight out.
5.
Place a shallow pan outside drain outlet. The defrost water will drain out.
6.
Check the pan occasionally so the water does not overflow.
7.
Clean and dry the interior of the freezer.
8.
Replace the plug on the inside floor.
9.
Reconnect electrical connection. The “POWER ON INDICATOR” light should be ON.
10.
Reset the thermostat to desired setting.
11.
Allow the cabinet to cool for one hour.
12.
Return food to the freezer.
The Freezer Compartment
•
This compartment is designed for the long-term storage of frozen food. Storage time is up to three months.
•
The storage life of frozen foods varies and the recommended storage time should not be exceeded. The instructions
regarding the care
of frozen foods should be followed when defrosting the freezer.
•
Pre-packed commercially frozen food should be stored in accordance with the frozen foods manufacturer’s
instructions for
a three star frozen food storage compartment or home freezer.
•
Place frozen food into the freezer as quickly as possible after purchase. If there are instructions on the packet,
carefully follow
these instructions regarding storage times.
•
The freezer lid is susceptible to breaking due to excessive ice buildup. Be sure to properly defrost the appliance
if and when the ice
reaches ¼ to ½ inch thick.
A storage basket is provided for the organization of odd-shaped items. To reach other packages in the freezer, just slide
the basket to
one side, or lift it out.
Freezing Fresh Foods
•
Proper use of the appliance, adequately packed food, correct temperature and taking into account hygienic
precautions
will substantially influence the quality of freezing the food or storing of the frozen foods.
•
This compartment is designed for the long-term storage of frozen food.
•
The storage life of frozen foods varies and the recommended storage time should not be exceeded.
•
Pre-packed commercially frozen food should be stored in accordance with the frozen foods manufacturer’s
instructions
for a three star frozen food storage compartment or home freezer.
•
Place frozen food into the freezer as quickly as possible after purchase. If there are instructions on the packet,
carefully follow
these instructions regarding storage times.
•
Carefully select food you intend to freeze, it should be of adequate quality and suitable for freezing.
•
Use correct packaging and wrap it / seal it tight.
•
The packaging should be airtight and shouldn’t leak since this could cause substantial vitamin loss and dehydration
of foods.
•
Foils and bags should be soft enough to tightly wrap around the foods.
•
When preparing foods to be frozen, consider sanitary precautions.
•
Mark packages with following data: kind and amount of foods and the date of loading.

Page 13 of 16
OPERATION (cont.)
•
It is most important that the food is frozen as quickly as possible.
•
If the loading amount is too large, the quality of freezing is reduced which affects the quality of frozen foods.
•
Do not attempt if there is ¼” of ice or frost build up on the compartment walls until after the appliance has been
thoroughly
defrosted and returned to its proper holding temperature.
•
Do not load food product within 4 inches of the cover.
•
Do not load more than 25-percent of the unit's storage capacity with non-frozen product. It is best if the product is
pre-chilled to
50°F (10°C) before product is placed in the storage freezer.
•
Ice may be made in the unit if ice trays are placed in the baskets.
CLEANING AND MAINTENANCE
DANGER
The unit must be turned OFF and disconnected from the power source whenever performing service,
maintenance functions or cleaning the refrigerated area. Failure to comply may result in Death or
Severe Personnel Injury.
Exterior and Interior Cleaning of Appliances
Clean using soap and warm water. If this isn't sufficient, try ammonia and water or a nonabrasive liquid cleaner.
Do not use an abrasive cleaner because it will scratch the plastic and can damage the breaker strips and gaskets.
Cleaning the Condenser Coil
CAUTION
Never use a high pressure water wash for this cleaning procedure as water can damage the electrical
components located near or at the condenser coil.
Regular cleaning is recommended every 90 days. In some instances, you may find that there is a large amount of debris and dust or grease
accumulated prior to the 90 day time frame. In these cases the condenser coil should be cleaned every 30 days.
If the buildup on the coil consists of only light dust and debris, the condenser coil can be cleaned with a simple brush. Heavier dust build-
up may require a vacuum or even compressed air to blow through the condenser coil.
If heavy grease is present, there are de-greasing agents available for refrigeration use and specifically for the condenser coils. The
condenser coil may require cleaning with the de-greasing agent and then blown through with compressed air.
Failure to maintain a clean condenser coil can initially cause high temperatures and excessive run times. Continuous operation with dirty or
clogged condenser coils can result in compressor failures. Neglecting the condenser coil cleaning procedures will void any warranties
associated with the compressor or cost to replace the compressor.
• For efficient operation, keep the condenser surface free of dust, dirt, and lint.
• We recommend cleaning the condenser coil at least once per month.
• Clean the condenser with a commercial condenser coil cleaner and a soft brush, available from any commercial refrigeration
equipment retailer, or vacuuming the condenser with a shop vac or use CO
2
.
Gasket Maintenance
Gaskets require regular cleaning to prevent mold and mildew build up and also to keep the elasticity of the gasket. Gasket cleaning
can be done with the use of warm soapy water. Avoid full strength cleaning products on gaskets. Do not use sharp tools or knives to
scrape or clean the gasket.
Gaskets can easily be replaced and don’t require the use of tools or authorized service technicians. The gaskets are "Dart" style and
can be pulled out of the grove in the lid and replaced by pressing the new one back into place.
Page 14 of 16
TROUBLESHOOTING GUIDE
BEFORE CALLING FOR SERVICE
If the unit appears to be malfunctioning, read through the OPERATION section of this manual first. If the problem persists, see
Troubleshooting below. The problem may be something very simple that can be solved without a service call.
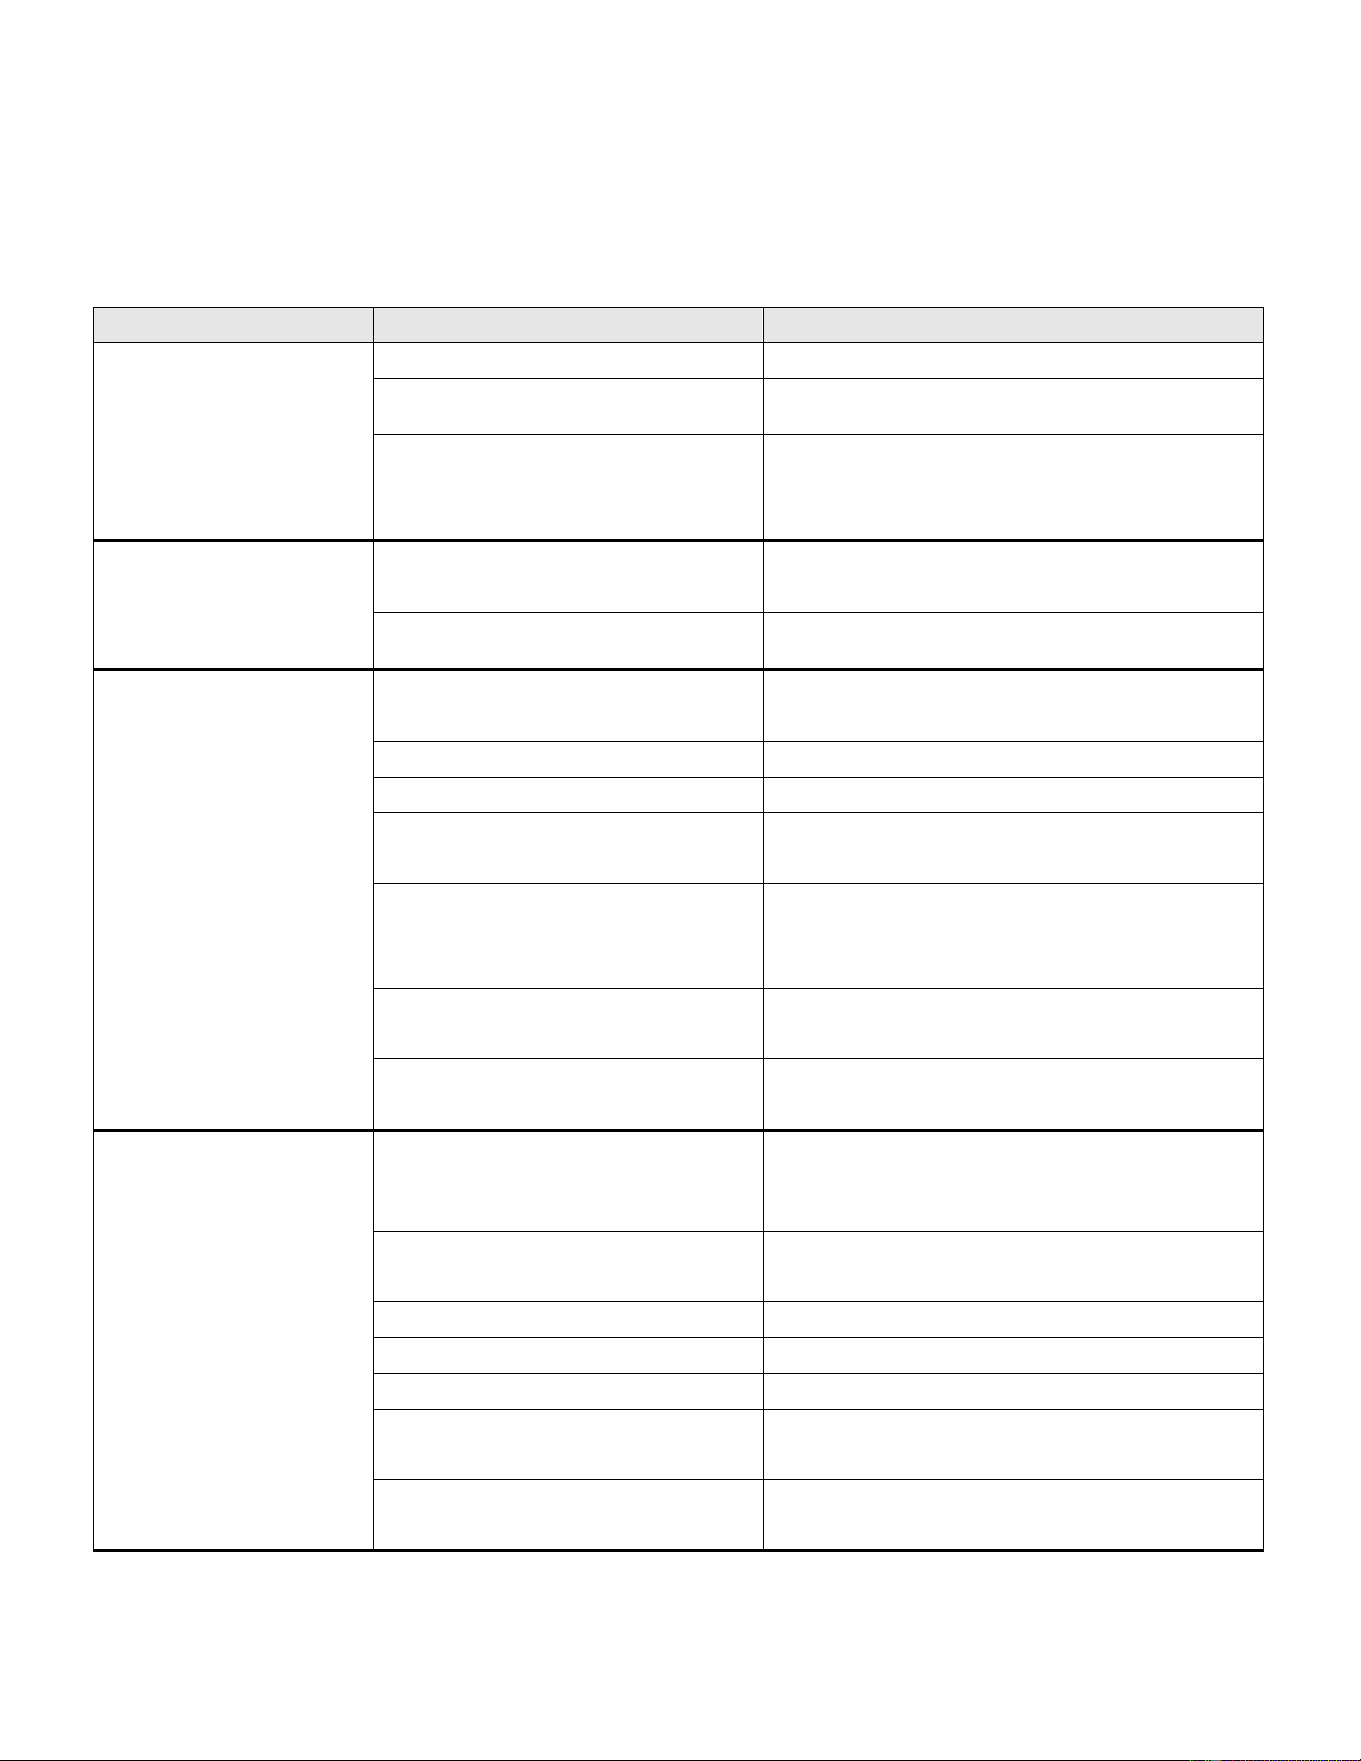
TROUBLESHOOTING
Fault Possible Cause Action
Freezer does not operate.
Power cord unplugged. Plug freezer into a grounded 3 prong outlet.
Freezer temperature control is set to "OFF". Turn the temperature control to a setting between 1 and 7.
Fuse blown or circuit breaker tripped.
Replace fuse or reset circuit breaker. If replacement of fuse
or reset of circuit breaker doesn’t correct problem contact a
qualified service technician.
Compressor runs constantly.
Room temperature is hotter than normal.
Bring room temperature to a lower temperature for proper
unit operation.
Unit may have a low refrigerant charge. Contact a qualified service technician.
Compressor turns on and off
frequently.
Frequent or prolonged lid openings.
Limit lid openings to maintain the internal temperature of
the freezer.
Lid is not closed completely. Completely close the freezer lid.
Temperature control is not set correctly. Adjust temperature control to a setting between 1 and 7.
Lid gasket does not seal properly or is
torn/damaged.
Clean, repair, or replace lid gasket.
Freezer does not have the correct clearances.
Allow 5 inches of space between back and sides of unit,
which allows proper air circulation. See “Installation
Instructions”.
Freezer has recently been disconnected for a
period of time.
Four hours
are required for freezer to cool down completely.
Frost or ice has formed on freezer wall.
Defrost freezer.
See “Defrosting Your Freezer Instructions.”
Food temperature is too warm.
Temperature control is not set to a cold enough
temperature.
Adjust the temperature control to a colder setting and allow
several hours for freezer temperature to stabilize.
Frequent or prolonged lid openings.
Limit lid openings to maintain the internal temperature of
the freezer.
Lid is not closed completely. Completely close the freezer lid.
Freezer lid is not sealing properly. Clean, adjust, repair, or replace lid gasket.
A large load of food was recently added. Allow time for freezer temperature to stabilize.
Freezer has recently been disconnected for a
period of time.
Allow four hours for freezer temperature to stabilize.
There is an ice or frost build up on internal
compartment walls.
Defrost freezer.
See “Defrosting Your Freezer Instructions.”
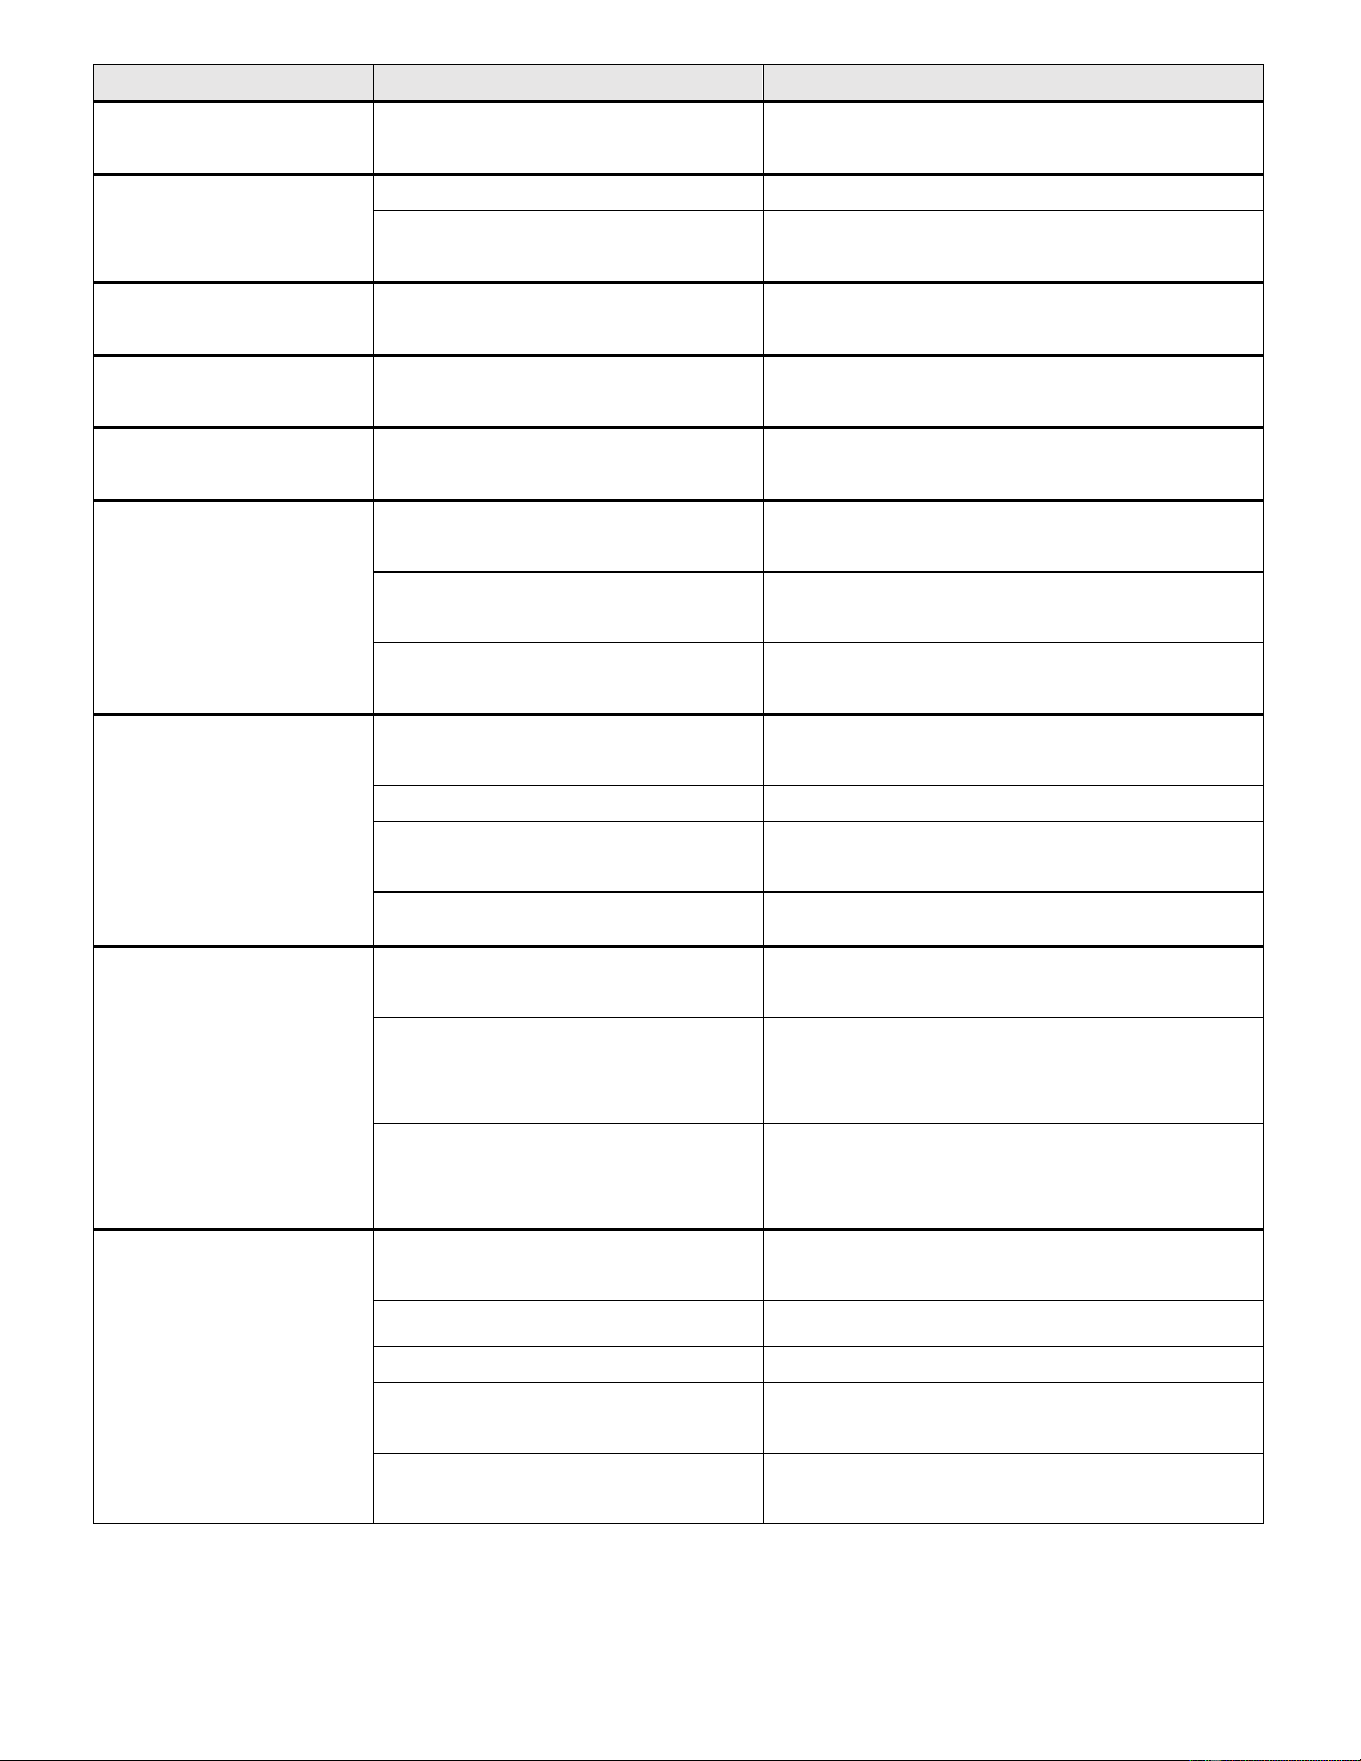
Page 15 of 16
Fault Possible Cause Action
Food temperature is too cold. Temperature control is set too cold.
Turn control to a warmer setting
and allow several hours for
freezer temperature to stabilize.
Freezer has an odor.
Freezer needs cleaning. Clean the freezer. See “Cleaning Your Freezer”.
Food is improperly wrapped or sealed and is
giving off odor.
Wrap and seal food tightly before storing in freezer.
Temperature of external freezer
surface is
warm.
Exterior freezer walls can be as much as 30°F
(-1°C) warmer than room
temperature.
This is normal while compressor works to transfer heat from
inside freezer cabinet.
Popping or cracking sound
when
compressor comes on.
Metal parts undergo expansion and
contraction, as in hot water pipes.
This is
normal. Sound will level off or disappear as freezer
continues to run.
Bubbling or gurgling sound, like
water
boiling.
Refrigerant (used to cool freezer) is circulating
throughout the system.
This is
normal.
Excessive vibrations.
Check to assure that freezer is on a level
surface and sits level.
Reposition freezer and/or level freezer with wood or metal
shims under part of freezer.
Floor is uneven or weak. Freezer rocks on
floor when it is moved
slightly.
Be sure floor can adequately support freezer. Level freezer
with wood or metal shims.
Freezer is touching the wall.
Allow 5 inches of space between back and sides of unit.
See “Installation Instructions”.
Moisture forms on inside freezer
walls.
Weather is hot and humid, which increases
internal rate of frost build-up.
This is normal.
Lid is slightly open. Completely close the freezer lid.
Lid is kept open too long, or is opened too
frequently.
Don’t leave lid open for long periods, or open lid less often.
Lid is not sealed properly. Adjust, clean, repair, or replace lid gasket.
Moisture forms on outside of
freezer.
Lid is slightly open, causing cold air from
inside freezer to meet outside warm moist air.
Close lid properly.
Room ambient temperature is near or at the
dew point resulting in
condensation on the
exterior surfaces.
This is normal.
Washing the floor around the unit has changed
the ambient conditions to be at or below the
dew point.
This is normal.
Lid will not close properly.
Freezer is not on a level surface or set level.
Reposition freezer and/or level freezer with wood or metal
shims under part of freezer.
Gasket is dirty, or damaged. Clean, repair, or replace lid gasket as necessary.
Storage basket is out of position. Reposition storage basket.
Hinges have been damaged or misaligned.
Contact a qualified service technician to adjust or replace
as required.
Lid latch has failed.
Contact a qualified service technician to adjust or replace
as required.
Page 16 of 16
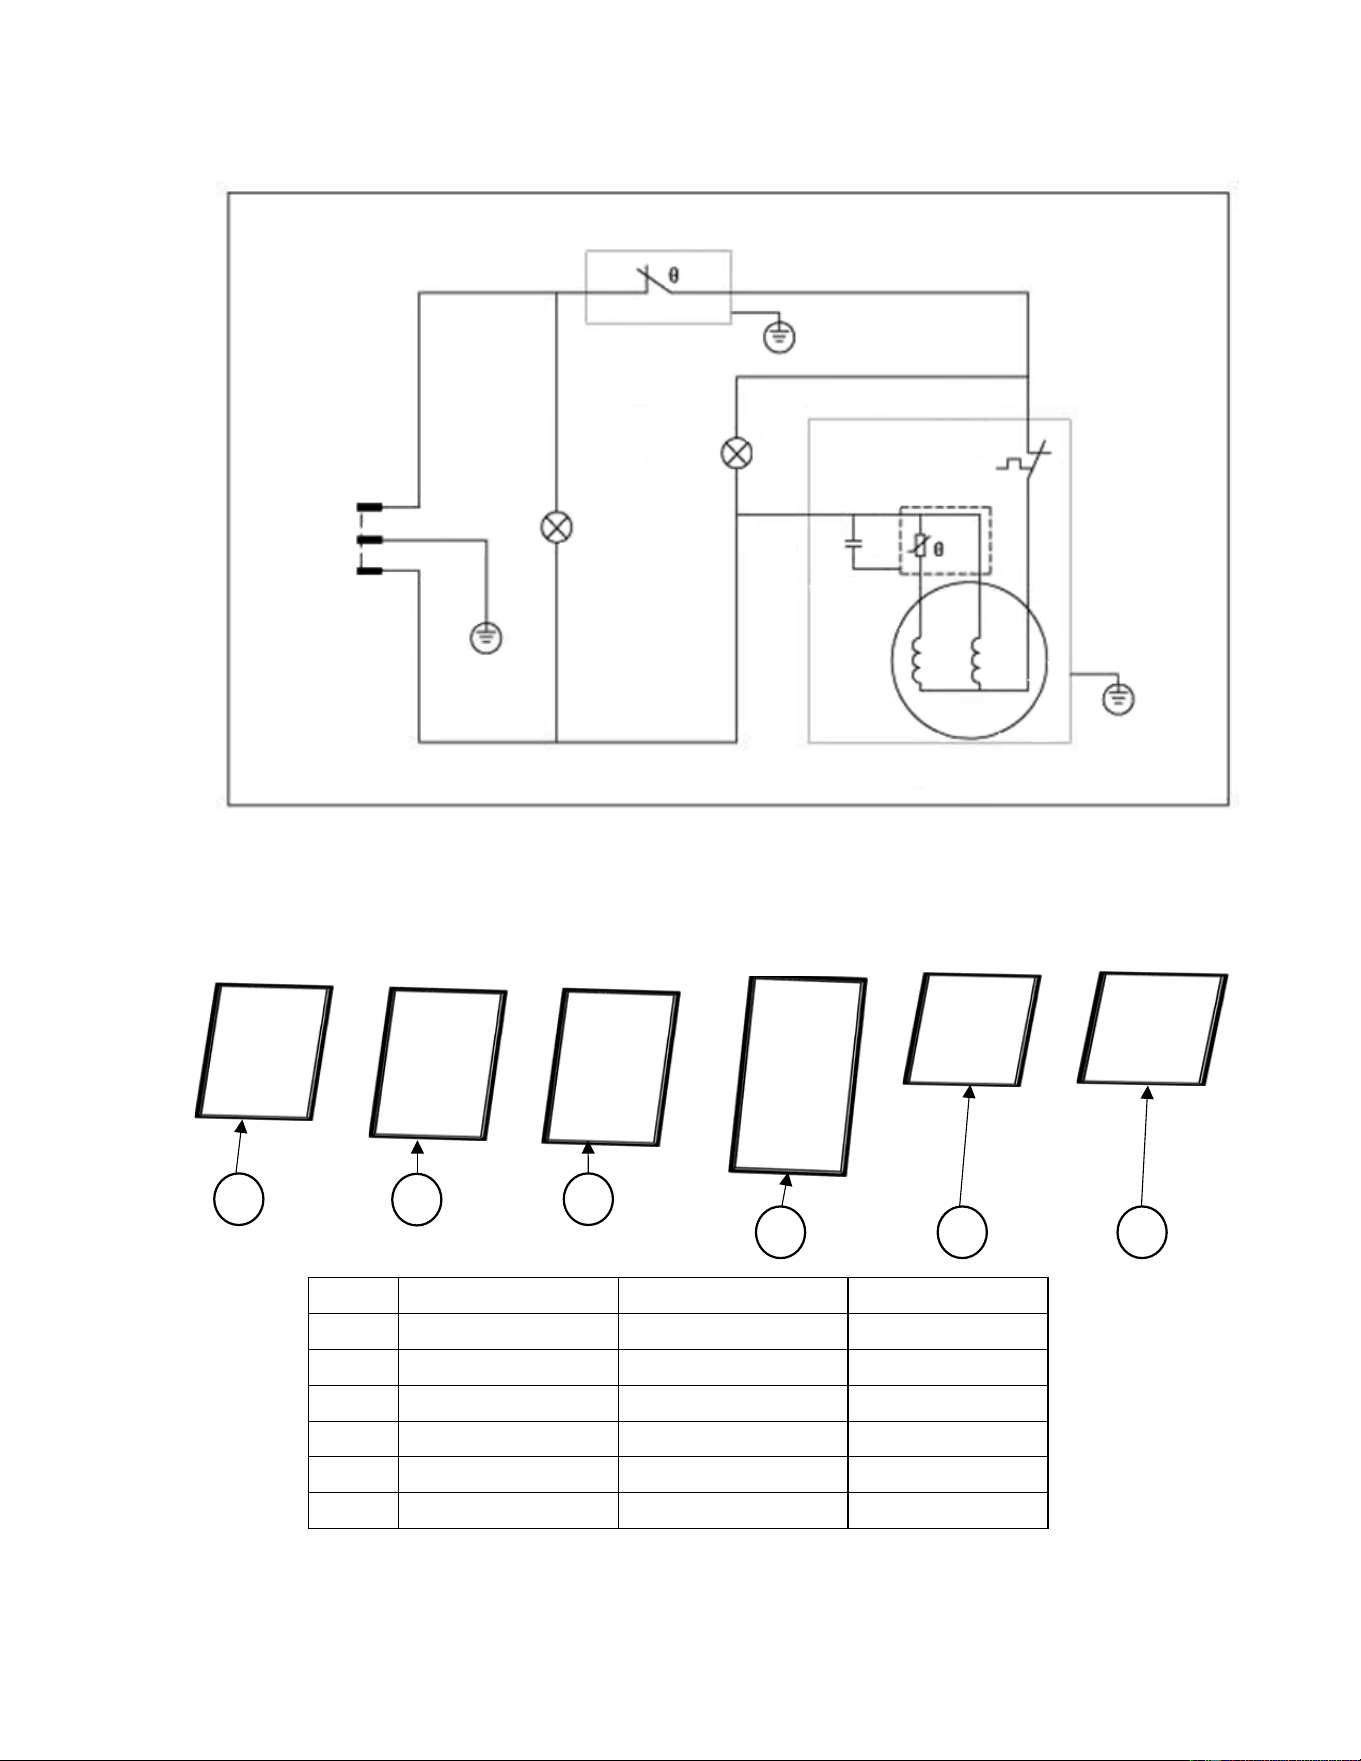
WIRING DIAGRAMS
MODEL
:
ALL MODELS
PARTS
Item # Part Number Descriptions Qty / Unit
1 DOOR GASKET-1 Gasket 1
2 DOOR GASKET-2 Gasket 1
3 DOOR GASKET-3 Gasket 1
4 DOOR GASKET-4 Gasket 1
5 DOOR GASKET-5 Gasket 2
6 DOOR GASKET-6 Gasket 2
MXSH15.9S
MXSH12.7S
MXSH9.6S
1
2
3
MXSH19.4S MXSH23.6S
MXSH30.0S
4 5 6
L
E
N
G
COMPRESSOR
ON LIGHT
POWER
LIGHT
CAPACITOR
PTC STARTER
MOTOR
PROTECTOR
COMPRESSOR
THERMOSTAT
G
G
PLUG