
User Guide
Festa VPN Gateway
© 2024 TP-Link REV1.0.1 1910013856
This guide uses Festa FR205 as an example

CONTENTS
About This Guide
Intended Readers ................................................................................................................................................................1
Conventions ...........................................................................................................................................................................1
More Information .................................................................................................................................................................1
Accessing the Gateway
Determine the Management Method ........................................................................................................................... 3
Web Interface Access ........................................................................................................................................................4
Configuring Network
Overview .................................................................................................................................................................................7
Supported Features .................................................................................................................................................................................7
WAN Configuration .............................................................................................................................................................8
Configuring the Number of WAN Ports .........................................................................................................................................8
Configuring the WAN Connection ...................................................................................................................................................8
LAN Configuration ............................................................................................................................................................ 18
Configuring the IP Address of the LAN Port ............................................................................................................................18
Configuring the DHCP Server ..........................................................................................................................................................19
Configuring the DHCP Relay ............................................................................................................................................................22
Viewing the DHCP Client List ...........................................................................................................................................................22
System Tools
Overview .............................................................................................................................................................................. 25
Overview ......................................................................................................................................................................................................25
Supported Features ..............................................................................................................................................................................25
Management ....................................................................................................................................................................... 26
Factory Default Restore ......................................................................................................................................................................26
Reboot ..........................................................................................................................................................................................................26
Firmware Upgrade ..................................................................................................................................................................................26
Controller Settings ........................................................................................................................................................... 28
Enable Cloud-Based Controller Management .......................................................................................................................28
Configure Controller Inform URL ...................................................................................................................................................28
Diagnostics ......................................................................................................................................................................... 29
Remote Assistance ...............................................................................................................................................................................29

About This Guide Intended Readers
User Guide
1
About This Guide
This User Guide provides information for managing Festa VPN Gateway in standalone
mode. The Standalone mode for Festa devices only supports some basic troubleshooting.
For device management, please use the Festa Cloud-Based Controller.
Intended Readers
This Guide is intended for network managers familiar with IT concepts and network
terminologies.
Conventions
When using this guide, notice that features available may vary by model and software
version. All images, steps, and descriptions in this guide are only examples and may
not reflect your actual experience. This guide uses images of the Festa FR205 for
demonstration.
The information in this document is subject to change without notice. Every effort has
been made in the preparation of this document to ensure accuracy of the contents, but
all statements, information, and recommendations in this document do not constitute
the warranty of any kind, express or implied. Users must take full responsibility for their
application of any products.
In this Guide, the following conventions are used:
■ The symbol
stands for Note. Notes contain suggestions or references that helps
you make better use of your device.
■ Menu Name > Submenu Name > Tab page indicates the menu structure. Network >
LAN > LAN means the Interface Statistics page under the Traffic Statistics menu option
that is located under the Status menu.
■ Bold font indicates a button, toolbar icon, menu or menu item.
More Information
■ The latest software and documentations can be found at Download Center at
https://www.tp-link.com/support.
■ The Installation Guide (IG) can be found where you find this guide or inside the package
of the gateway.
■ Specifications can be found on the product page at https://www.tp-link.com.
■ To ask questions, find answers, and communicate with TP-Link users or engineers,
please visit https://community.tp-link.com to join TP-Link Community.
■ Our Technical Support contact information can be found at the Contact Technical
Support page at https://www.tp-link.com/support.


Accessing the Gateway Determine the Management Method
User Guide
3
1
Determine the Management Method
Before building your network, choose a proper method to manage your gateway based on
your actual network situation. The gateway supports two configuration options: Standalone
Mode or Controller Mode.
Firstly, you should configure the gateway in Standalone mode to connect it to the internet,
then you can manage it in controller mode via Festa SDN Controller.
■ Controller Mode
If you want to configure and manage a large-scale network centrally, which consists
of mass devices such as access points, switches, and gateways, Controller Mode is
recommended. In Controller Mode, the gateway can be centrally configured and monitored
via Festa SDN Controller.
To prepare the gateway for Festa SDN Controller Management, refer to Controller
Settings. For detailed instructions about the network topology in such situations
and how to use Festa SDN Controller, refer to the User Guide of Festa SDN
Controller. The guide can be found on the download center of our official website:
https://www.tp-link.com/support/download/.
■ Standalone Mode
In Standalone Mode, you can access and manage the gateway using the GUI (Graphical
User Interface, also called web interface in this text).
This User Guide introduces how to configure the gateway in Standalone Mode.
Note:
The GUI is inaccessible while the gateway is managed by a controller. To turn the gateway back to
Standalone Mode and access its GUI, you can forget the gateway on the controller or reset the gateway.
User Guide 4
Accessing the Gateway Web Interface Access
2
Web Interface Access
The following example shows how to log in via the web browser.
1) Connect a PC to a LAN port of the gateway with an RJ45 port properly. If your computer
is configured with a fixed IP address, change it to “Obtain an IP address automatically“.
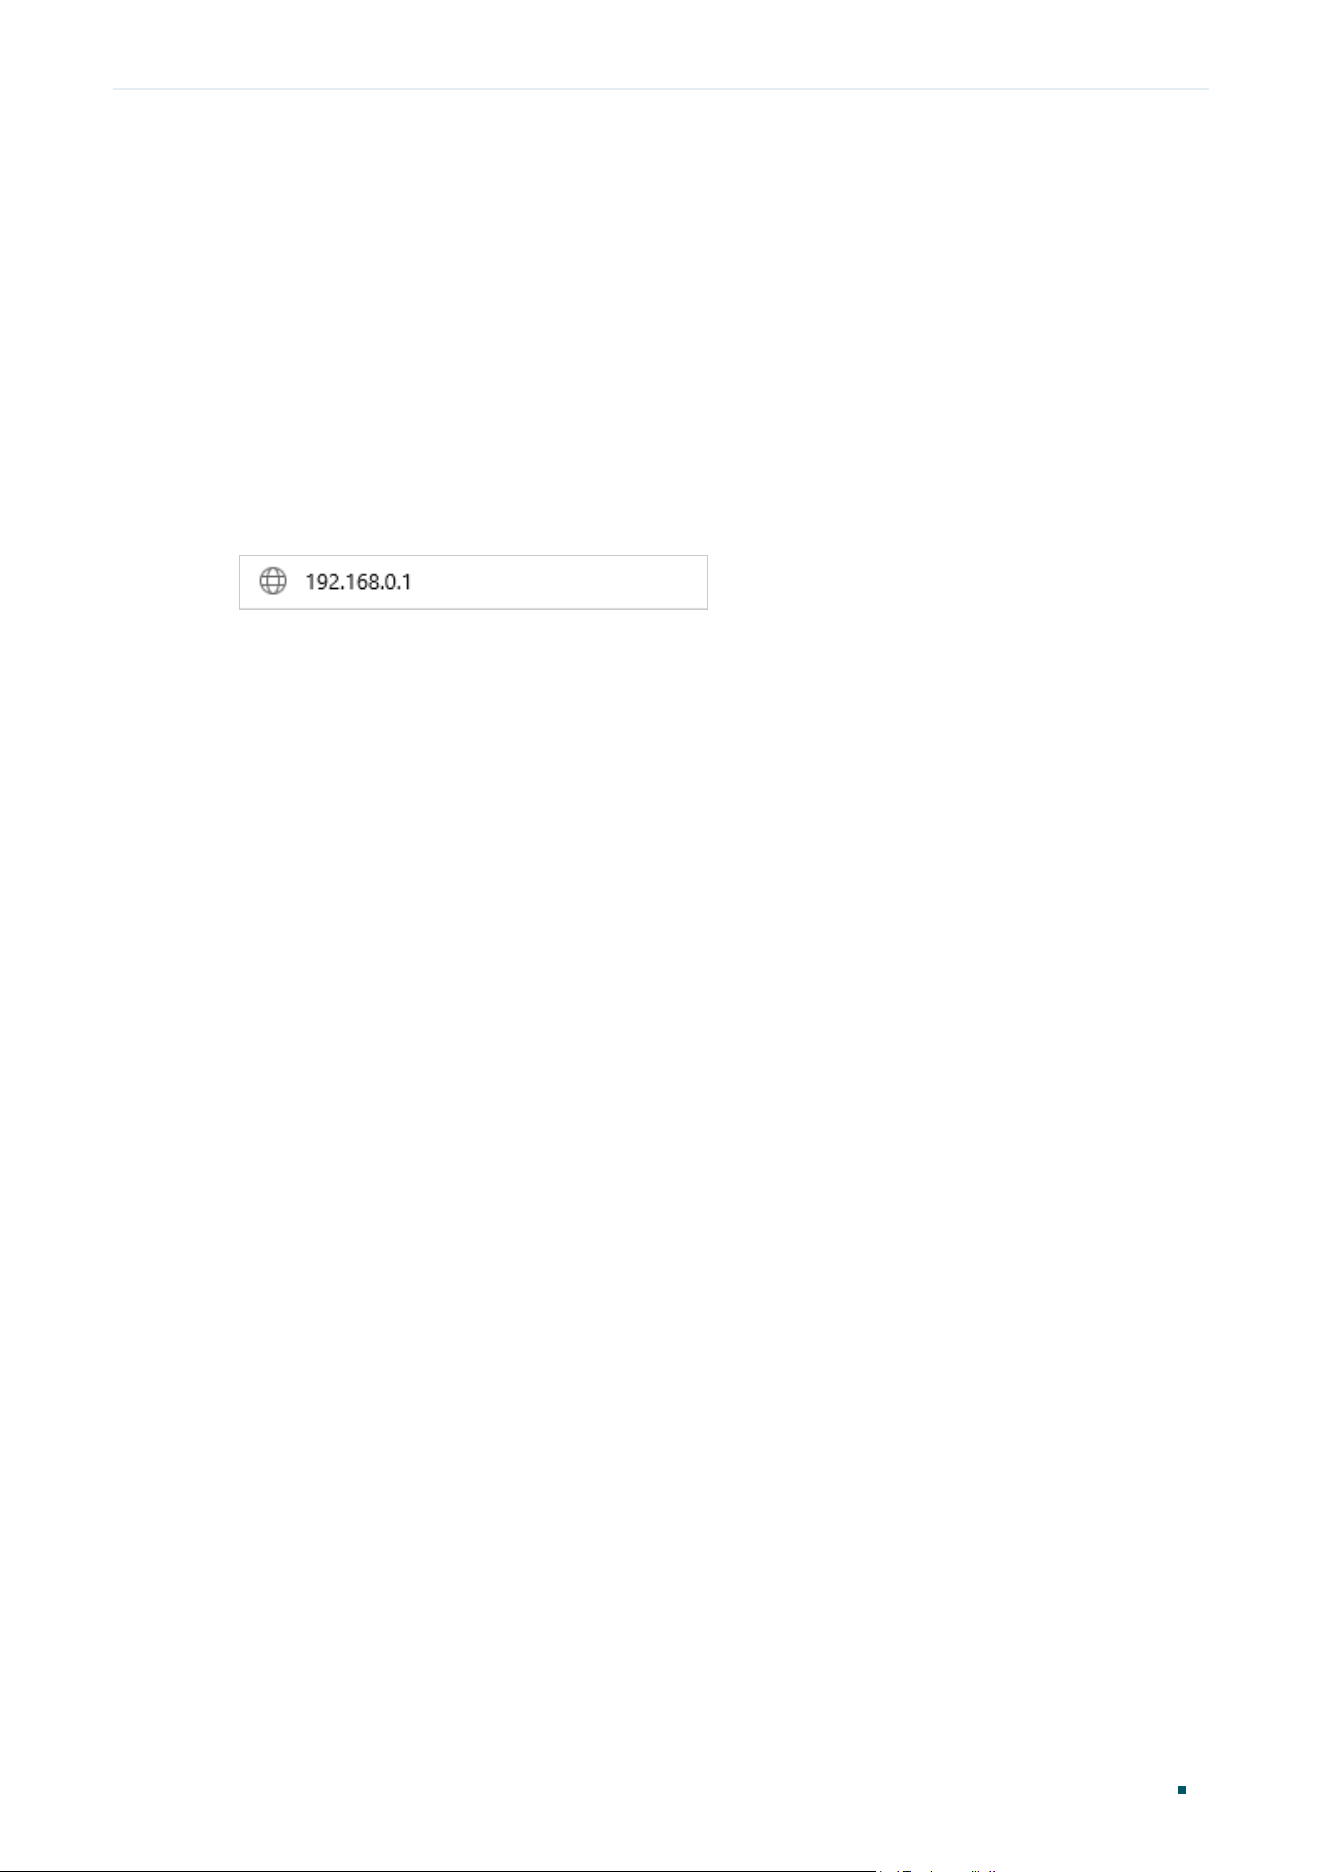
2) Open a web browser and type the default management address http://192.168.0.1 in
the address field of the browser, then press the Enter key.
Figure 2-1 Enter the gateway's IP Address In the Browser
3) Create a username and a password for subsequent login attempts.
Figure 2-2 Create a Username and a Password

Accessing the Gateway Web Interface Access
User Guide
5
4) Use the username and password set above to log in to the webpage.
Figure 2-3 Login Authentication
5) After a successful login, you can configure the function by clicking the setup menu on
the left side of the screen.


Configuring Network Overview
User Guide
7
1
Overview
The Network module provides basic gateway functions, including WAN connection and
LAN settings.
1.1 Supported Features
WAN
WAN ports connect to the internet. You can configure multiple WAN ports for your network.
Each WAN port has its own connection type and parameters, which you should configure
according to the requirements of your ISP.
LAN
When the LAN ports of the gateway connect to your local network devices, the gateway
functions as the gateway, which allows those devices to connect to the internet.
User Guide 8
Configuring Network WAN Configuration
2
WAN Configuration
You can configure multiple WAN ports for your network. Each WAN port can have its own
WAN connection, providing link backup and load balancing.
To complete WAN configuration, follow these steps:
1) Configure the number of WAN ports.
2) Configure the WAN connection.
2.1 Configuring the Number of WAN Ports
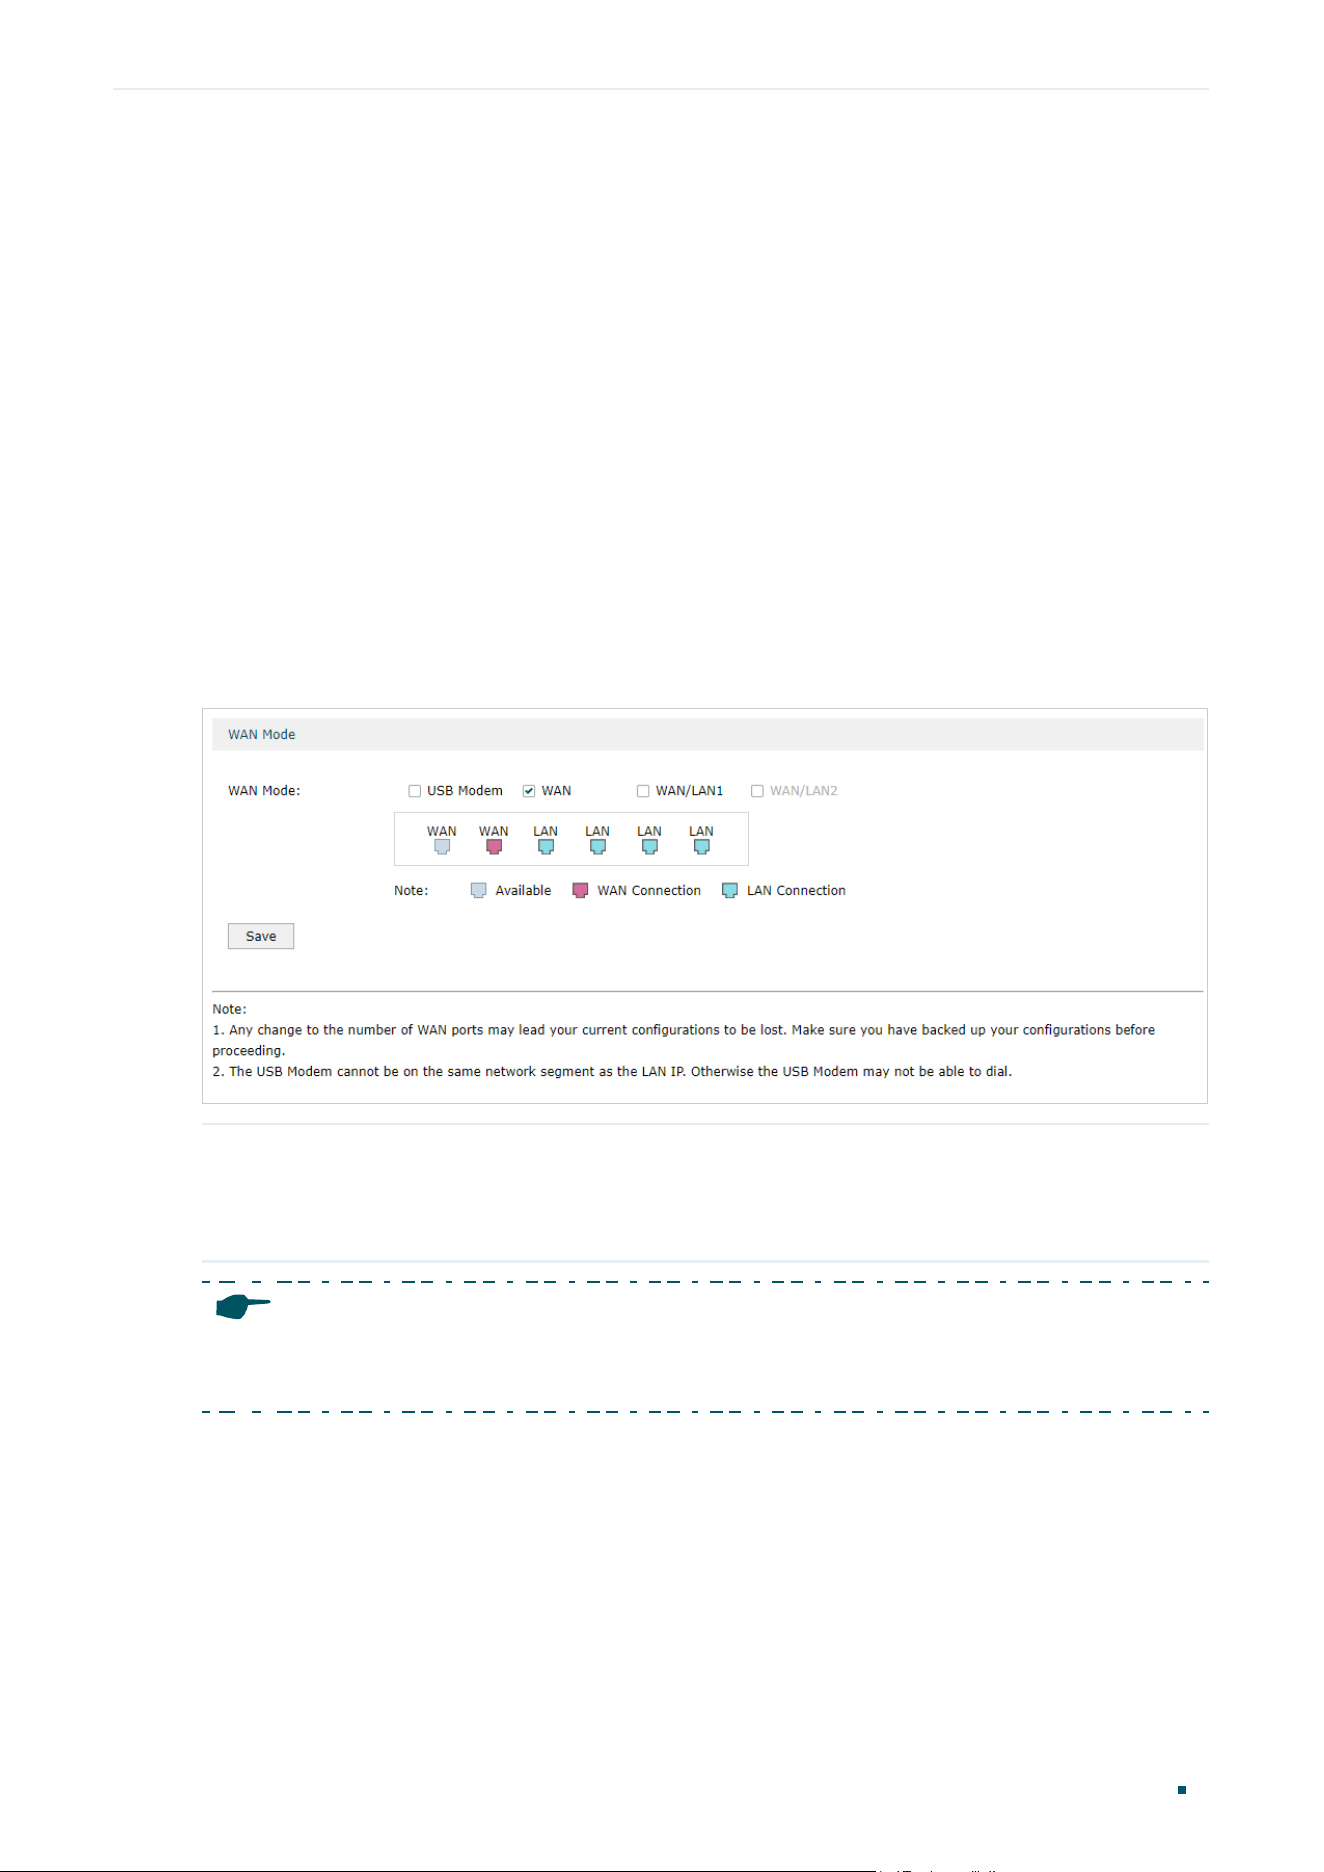
Choose the menu Network > WAN > WAN Mode to load the following page.
Figure 2-1 Configuring the WAN Mode
WAN Mode Determine the number of WAN ports according to your needs. To enable a port
as WAN port, check the box of the desired port. To configure multiple WAN ports,
enable the ports one by one. Only WAN, WAN/LAN, SFP WAN (for certain devices)
and USB Modem can function as WAN port.
Note:
Any change to the number of WAN ports may lead your current configurations to be lost. Make sure
you have backed up your configurations before proceeding.
2.2 Configuring the WAN Connection
The gateway supports five connection types: Static IP, Dynamic IP, PPPoE, L2TP, PPTP,
you can choose one according to the service provided by your ISP.
Static IP: If your ISP provides you with a fixed IP address and the corresponding
parameters, choose Static IP.
Configuring Network WAN Configuration
User Guide
9
Dynamic IP: If your ISP automatically assigns the IP address and the corresponding
parameters, choose Dynamic IP.
PPPoE: If your ISP provides you with a PPPoE account, choose PPPoE.
L2TP: If your ISP provides you with an L2TP account, choose L2TP.
PPTP: If your ISP provides you with a PPTP account, choose PPTP.
Note:
The number of configurable WAN ports is decided by WAN Mode. To configure Wan Mode, refer to
Configuring the Number of WAN Ports.
■ Configuring the Dynamic IP
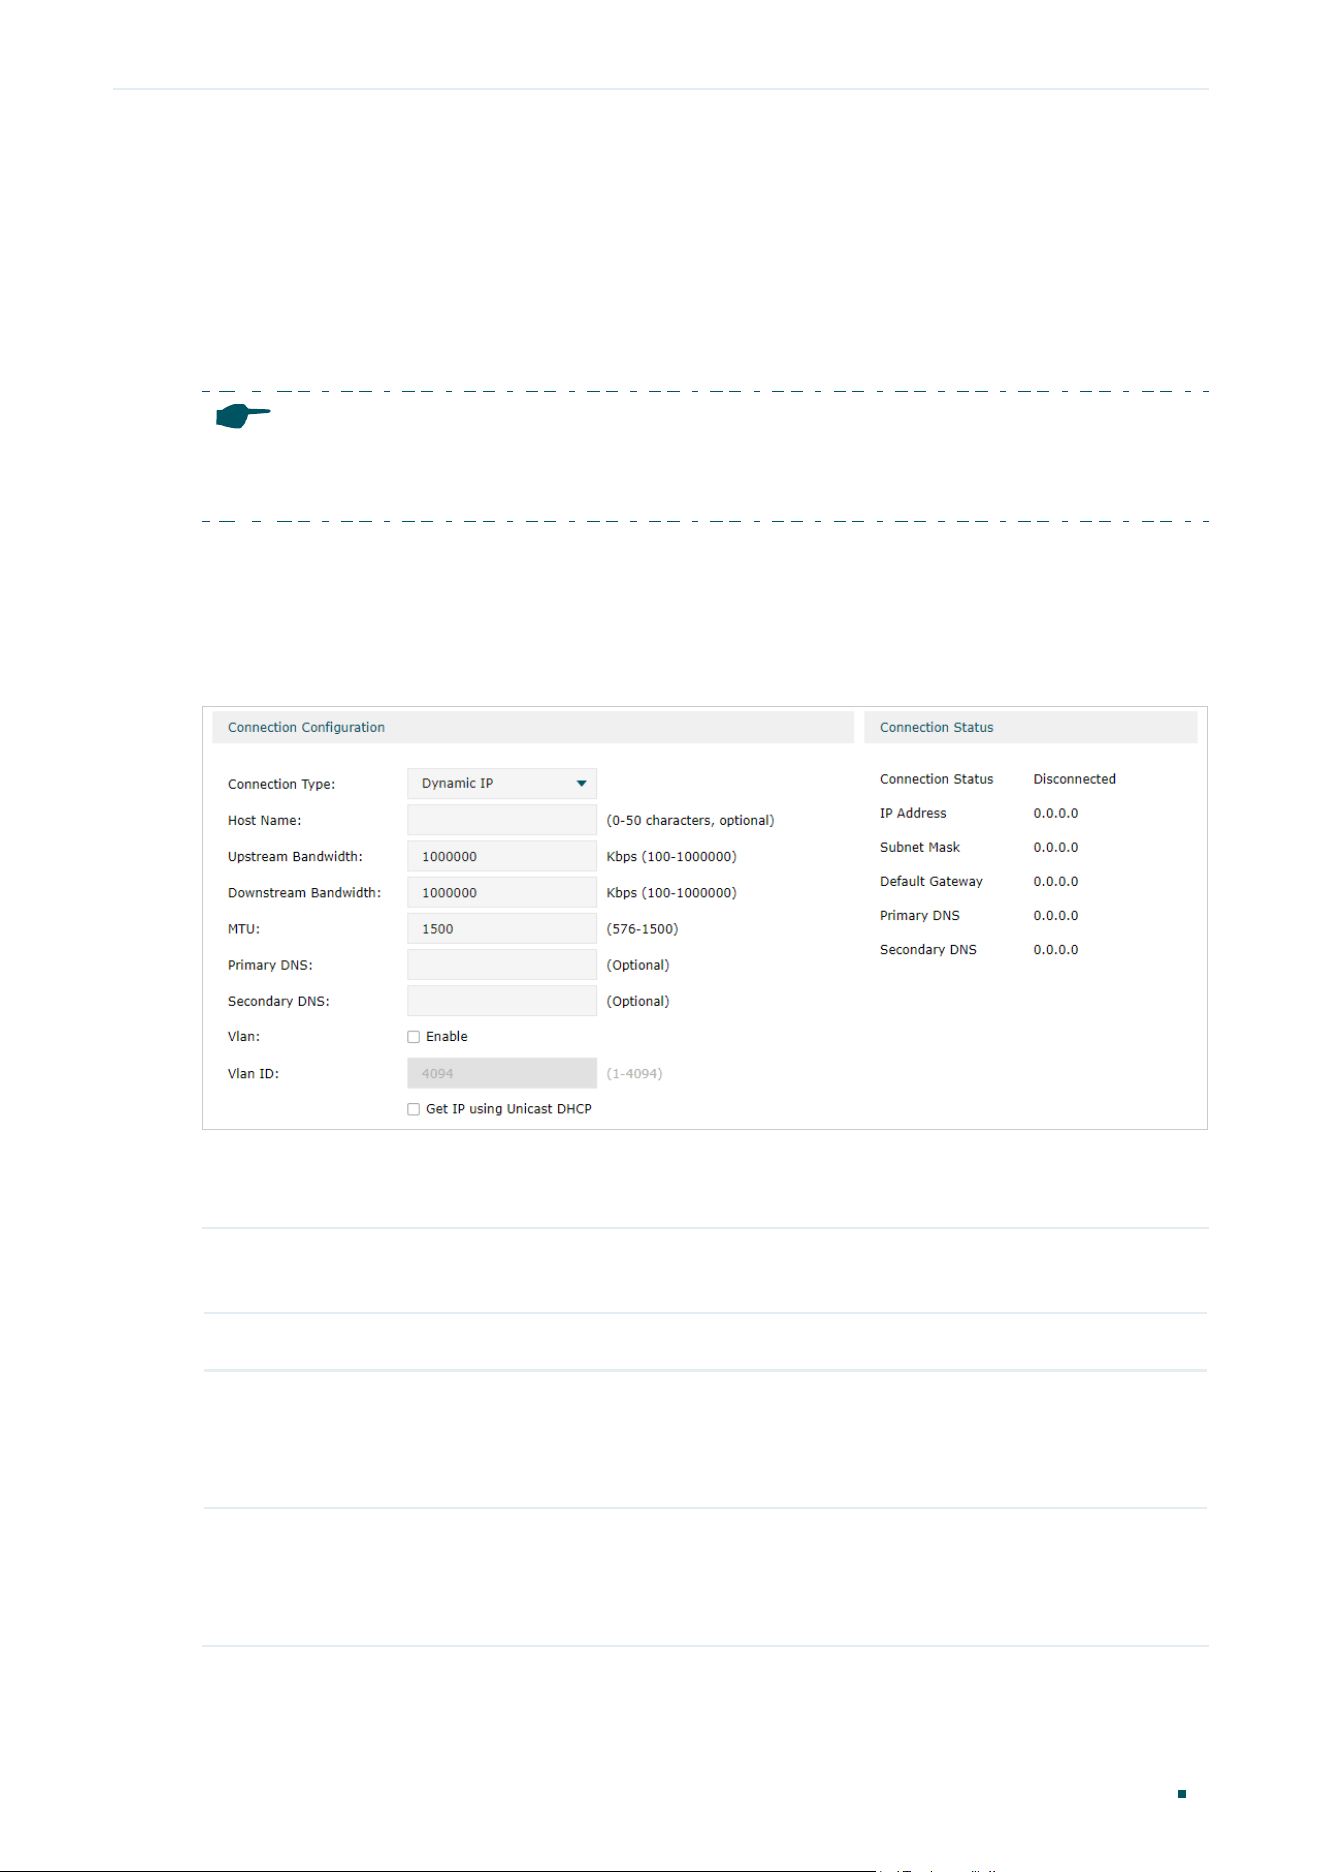
Choose the menu Network > WAN > WAN to load the following page.
Figure 2-2 Configuring the Dynamic IP
In the Connection Configuration section, select the connection type as Dynamic IP. Enter
the corresponding parameters and click Save.
Connection Type Choose the connection type as Dynamic IP if your ISP automatically assigns the IP
address.
Host Name (Optional) Enter a name for the gateway. It is null by default.
Upstream
Bandwidth
Specify the upstream bandwidth of the WAN port. The value configured here is the
upper limit of the “Maximum Upstream Bandwidth” in Bandwidth Control set on
the Festa Cloud-Based Controller, to make “Bandwidth Control” take effect, please
ensure this parameter is set correctly.
Downstream
Bandwidth
Specify the downstream bandwidth of the WAN port. The value configured here
is the upper limit of the “Maximum Downstream Bandwidth” in Bandwidth Control
set on the Festa Cloud-Based Controller, to make “Bandwidth Control” take effect,
please ensure this parameter is set correctly.
User Guide 10
Configuring Network WAN Configuration
MTU Specify the MTU (Maximum Transmission Unit) of the WAN port.
MTU is the maximum data unit transmitted in the physical network. When Dynamic
IP is selected, MTU can be set in the range of 576-1500 bytes. The default value is
1500.
Primary/
Secondary DNS
(Optional) Enter the IP address of the DNS server provided by your ISP.
VLAN Add the WAN port to a VLAN. Generally, you don’t need to manually configure it
unless required by your ISP.
By default, the WAN port is automatically assigned to a VLAN, and the egress rule of
the VLAN is UNTAG, so the packets are transmitted by the WAN port without VLAN
tags. If you want the WAN port to transmit packets with VLAN tag, you need to create
the corresponding VLAN first and configure its egress rule as TAG, then manually
add the WAN port to that VLAN. To create VLANs, go to Festa Cloud-Based
Controller.
Get IP using
Unicast DHCP
The broadcasting requirement may not be supported by a few ISPs. Select this
option if you can not get the IP address from your ISP even with a normal network
connection. This option is not required generally.
Connect/
Disconnect
Click the button to active/terminate the connection.
■ Configuring the Static IP
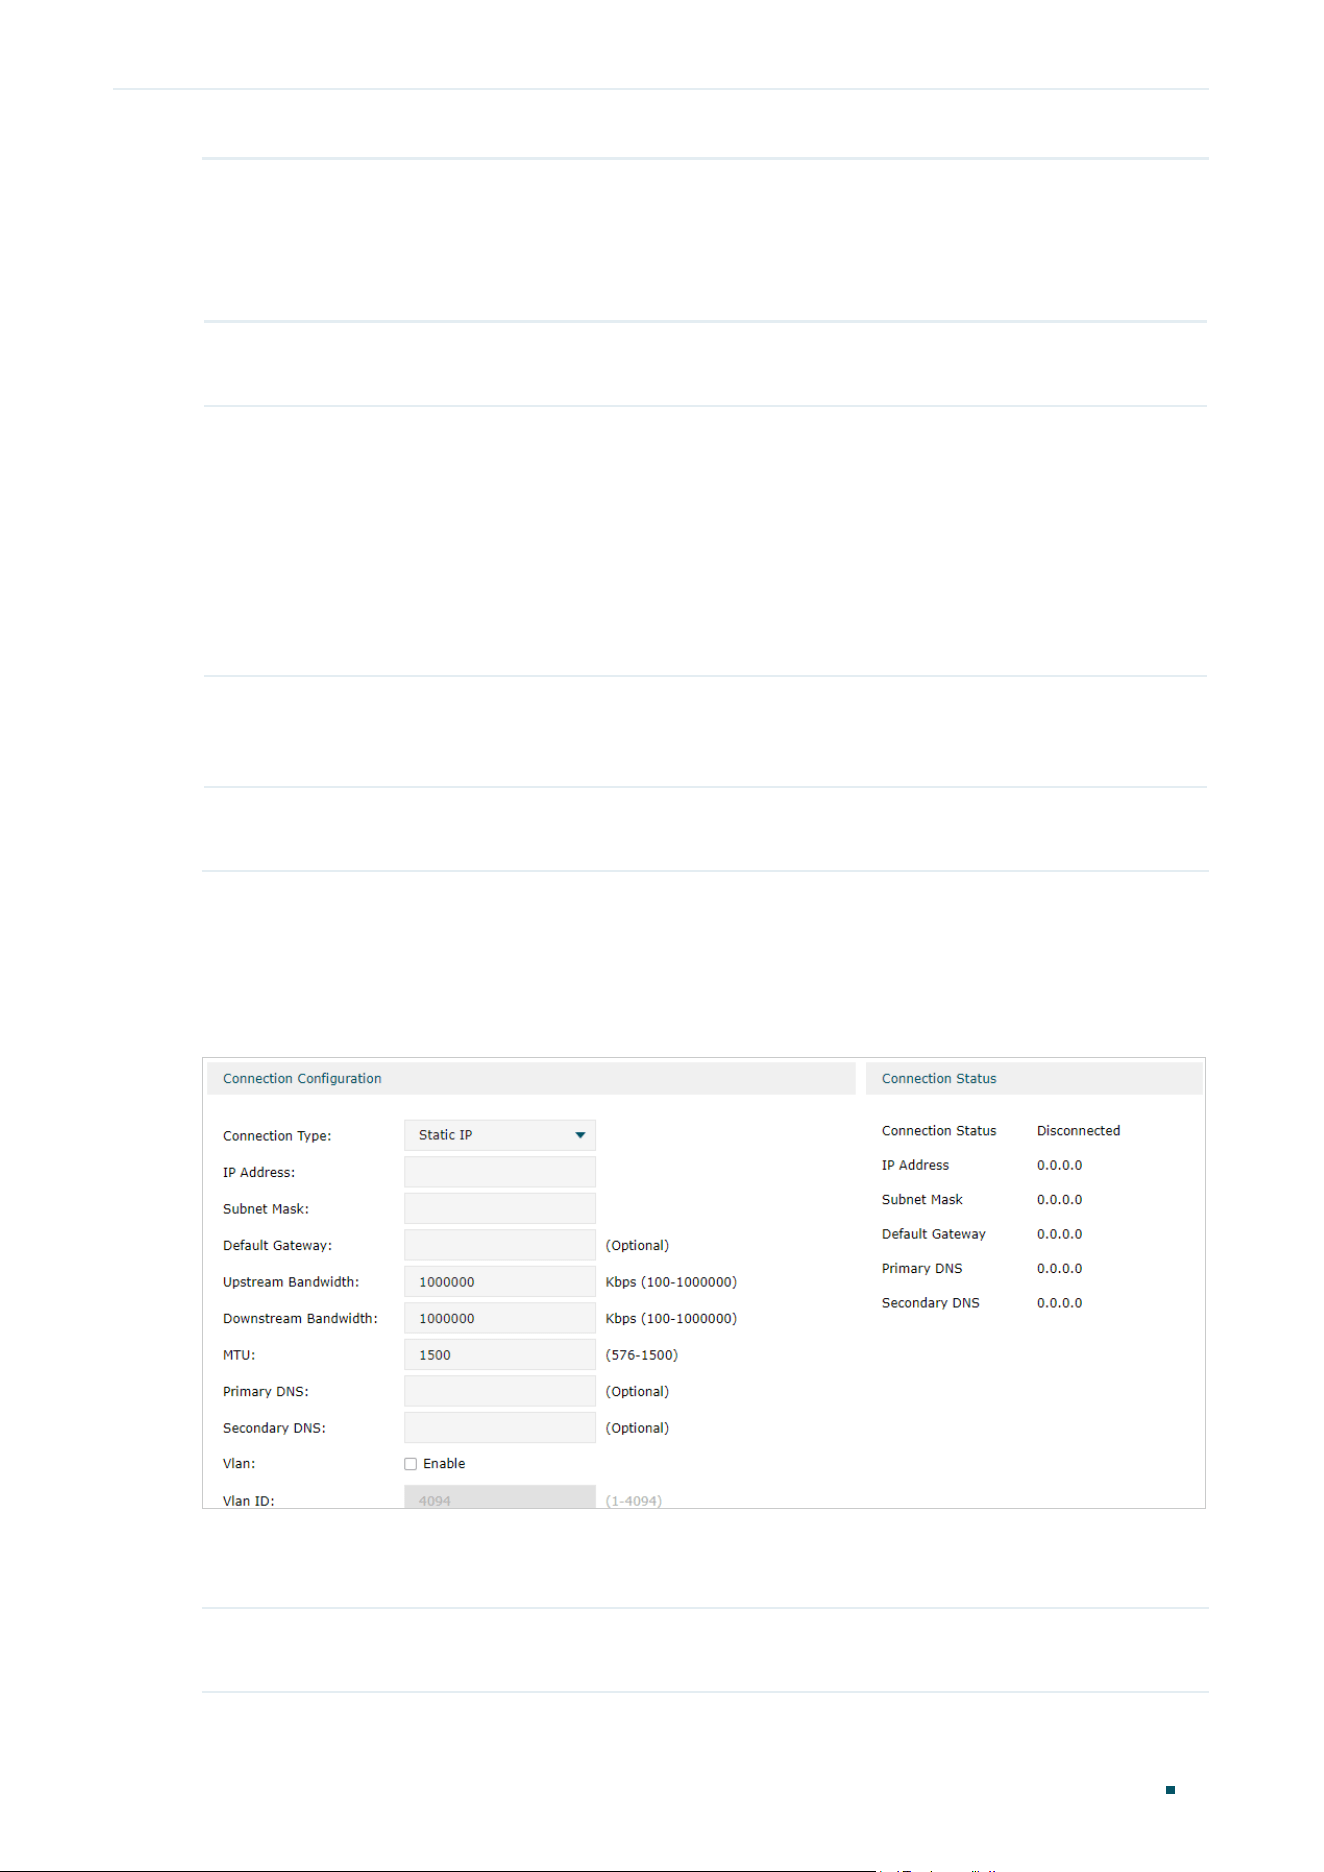
Choose the menu Network > WAN > WAN to load the following page.
Figure 2-3 Configuring the Static IP
In Connection Configuration section, select the connection type as Static IP. Enter the
corresponding parameters and click Save.
Connection Type Choose the connection type as Static IP if your ISP has offered you a fixed IP
address.

Configuring Network WAN Configuration
User Guide
11
IP Address Enter the IP address provided by your ISP.
Subnet Mask Enter the subnet mask provided by your ISP.
Default Gateway Enter the default gateway provided by your ISP.
Upstream
Bandwidth
Specify the downstream bandwidth of the WAN port. The value configured here
is the upper limit of the “Maximum Downstream Bandwidth” in Bandwidth Control
set on the Festa Cloud-Based Controller,, to make “Bandwidth Control” take effect,
please ensure this parameter is set correctly.
Downstream
Bandwidth
Specify the downstream bandwidth of the WAN port. The value configured here
is the upper limit of the “Maximum Downstream Bandwidth” in Bandwidth Control
set on the Festa Cloud-Based Controller,, to make “Bandwidth Control” take effect,
please ensure this parameter is set correctly.
MTU Specify the MTU (Maximum Transmission Unit) of the WAN port.
MTU is the maximum data unit transmitted in the physical network. When Static IP is
selected, MTU can be set in the range of 576-1500 bytes. The default value is 1500.
Primary/
Secondary DNS
(Optional) Enter the IP address of the DNS server provided by your ISP.
VLAN Add the WAN port to a VLAN. Generally, you don’t need to manually configure it
unless required by your ISP.
By default, the WAN port is automatically assigned to a VLAN, and the egress rule of
the VLAN is UNTAG, so the packets are transmitted by the WAN port without VLAN
tags. If you want the WAN port to transmit packets with VLAN tag, you need to create
the corresponding VLAN first and configure its egress rule as TAG, then manually
add the WAN port to that VLAN. To create VLANs, go to Festa Cloud-Based
Controller.

User Guide 12
Configuring Network WAN Configuration
■ Configuring the PPPoE
Choose the menu Network > WAN > WAN to load the following page.
Figure 2-4 Configuring the PPPoE
In the Connection Configuration section, select the connection type as PPPoE. Enter the
corresponding parameters and click Save.
Connection Type Choose the connection type as PPPoE if your ISP provides you with a PPPoE
account.
Username Enter the PPPoE username provided by your ISP.
Password Enter the PPPoE password provided by your ISP.
Connection
Mode
Choose the connection mode, including Connect Automatically, Connect Manually
and Time-Based.
Connect Automatically: The gateway will activate the connection automatically
when the gateway reboots or the connection is down.
Connect Manually: You can manually activate or terminate the connection.
Time-Based: During the specified period, the gateway will automatically activate the
connection.
Time Choose the effective time range when the Connection Mode is chosen as Time-
Based. To create the time range, go to Festa Cloud-Based Controller.
Upstream
Bandwidth
Specify the upstream bandwidth of the WAN port. The value configured here is the
upper limit of the “Maximum Upstream Bandwidth” in Bandwidth Control set on
the Festa Cloud-Based Controller, to make “Bandwidth Control” take effect, please
ensure this parameter is set correctly.

Configuring Network WAN Configuration
User Guide
13
Downstream
Bandwidth
Specify the downstream bandwidth of the WAN port. The value configured here is the
upper limit of the “Maximum Downstream Bandwidth” on Transmission > Bandwidth
Control > Bandwidth Control page, to make “Bandwidth Control” take effect, please
ensure this parameter is set correctly.
MTU Specify the MTU (Maximum Transmission Unit) of the WAN port.
MTU is the maximum data unit transmitted in the physical network. When PPPoE is
selected, MTU can be set in the range of 576-1492 bytes. The default value is 1492.
Service Name (Optional) Enter the service name. This parameter is not required unless provided by
your ISP. It is null by default.
Primary/
Secondary DNS
(Optional) Enter the IP address of the DNS server provided by your ISP.
VLAN Add the WAN port to a VLAN. Generally, you don’t need to manually configure it
unless required by your ISP.
By default, the WAN port is automatically assigned to a VLAN, and the egress rule of
the VLAN is UNTAG, so the packets are transmitted by the WAN port without VLAN
tags. If you want the WAN port to transmit packets with VLAN tag, you need to create
the corresponding VLAN first and configure its egress rule as TAG, then manually
add the WAN port to that VLAN. To create VLANs, go to Festa Cloud-Based
Controller.
Secondary
Connection
Secondary connection is required by some ISPs. Select the connection type required
by your ISP.
None: Select this if the secondary connection is not required by your ISP.
Dynamic IP: Select this if your ISP automatically assigns the IP address and subnet
mask for the secondary connection.
Static IP: Select this if your ISP provides you with a fixed IP address and subnet mask
for the secondary connection.
Connect/
Disconnect
Click the button to active/terminate the connection.

User Guide 14
Configuring Network WAN Configuration
■ Configuring the L2TP
Choose the menu Network > WAN > WAN to load the following page.
Figure 2-5 Configuring the L2TP
In the Connection Configuration section, select the connection type as L2TP. Enter the
corresponding parameters and click Save.
Connection Type Choose the connection type as L2TP if your ISP provides you with an L2TP account.
Username Enter the L2TP username provided by your ISP.
Password Enter the L2TP password provided by your ISP.
Connection
Mode
Choose the connection mode, including Connect Automatically, Connect Manually
and Time-Based.
Connect Automatically: The gateway will activate the connection automatically
when the gateway reboots or the connection is down.
Connect Manually: You can manually activate or terminate the connection.
Time-Based: During the specified period, the gateway will automatically activate the
connection.
Time Choose the effective time range when the Connection Mode is chosen as Time-
Based. To create the time range, go to Festa Cloud-Based Controller.

Configuring Network WAN Configuration
User Guide
15
Upstream
Bandwidth
Specify the upstream bandwidth of the WAN port. The value configured here is the
upper limit of the “Maximum Upstream Bandwidth” in Bandwidth Control set on
the Festa Cloud-Based Controller, to make “Bandwidth Control” take effect, please
ensure this parameter is set correctly.
Downstream
Bandwidth
Specify the downstream bandwidth of the WAN port. The value configured here
is the upper limit of the “Maximum Downstream Bandwidth” in Bandwidth Control
set on the Festa Cloud-Based Controller, to make “Bandwidth Control” take effect,
please ensure this parameter is set correctly.
MTU Specify the MTU (Maximum Transmission Unit) of the WAN port.
MTU is the maximum data unit transmitted in the physical network. When L2TP is
selected, MTU can be set in the range of 576-1460 bytes. The default value is 1460.
Primary/
Secondary DNS
(Optional) Enter the IP address of the DNS server provided by your ISP.
VLAN Add the WAN port to a VLAN. Generally, you don’t need to manually configure it
unless required by your ISP.
By default, the WAN port is automatically assigned to a VLAN, and the egress rule of
the VLAN is UNTAG, so the packets are transmitted by the WAN port without VLAN
tags. If you want the WAN port to transmit packets with VLAN tag, you need to create
the corresponding VLAN first and configure its egress rule as TAG, then manually
add the WAN port to that VLAN. To create VLANs, go to Festa Cloud-Based
Controller.
Secondary
Connection
Select the secondary connection type provided by your ISP. If you select the
secondary connection type as Static IP, you need to configure IP Address, Subnet
Mask, Default Gateway, Primary/Second DNS.
The secondary connection is required for L2TP connection. The gateway will get
some necessary information after the secondary connection succeeded. These
information will be used in the L2TP connection process.
VPN Server/
Domain Name
Enter the VPN Server/Domain Name provided by your ISP.
IP Address Enter the IP address provided by your ISP for the secondary connection.
Subnet Mask Enter the subnet mask provided by your ISP for the secondary connection.
Default Gateway Enter the default gateway provided by your ISP for the secondary connection.
Primary/
Secondary DNS
Enter the primary/secondary DNS provided by your ISP for the secondary
connection.
Connect/
Disconnect
Click the button to active/terminate the connection.

User Guide 16
Configuring Network WAN Configuration
■ Configuring the PPTP
Choose the menu Network > WAN > WAN to load the following page.
Figure 2-6 Configuring the PPTP
In Connection Configuration section, select the connection type as PPTP. Enter the
corresponding parameters and click Save.
Connection Type Choose the connection type as PPTP if your ISP provides you with a PPTP account.
Username Enter the PPTP username provided by your ISP.
Password Enter the PPTP password provided by your ISP.
Connection
Mode
Choose the connection mode, including Connect Automatically, Connect Manually
and Time-Based.
Connect Automatically: The gateway will activate the connection automatically
when the gateway reboots or the connection is down.
Connect Manually: You can manually activate or terminate the connection.
Time-Based: During the specified period, the gateway will automatically activate the
connection.
Time Choose the effective time range when the Connection Mode is chosen as Time-
Based. To create the time range, go to Festa Cloud-Based Controller.

Configuring Network WAN Configuration
User Guide
17
Upstream
Bandwidth
Specify the upstream bandwidth of the WAN port. The value configured here is the
upper limit of the “Maximum Upstream Bandwidth” in Bandwidth Control set on
the Festa Cloud-Based Controller, to make “Bandwidth Control” take effect, please
ensure this parameter is set correctly.
Downstream
Bandwidth
Specify the downstream bandwidth of the WAN port. The value configured here
is the upper limit of the “Maximum Downstream Bandwidth” in Bandwidth Control
set on the Festa Cloud-Based Controller, to make “Bandwidth Control” take effect,
please ensure this parameter is set correctly.
MTU Specify the MTU (Maximum Transmission Unit) of the WAN port.
MTU is the maximum data unit transmitted in the physical network. When PPTP is
selected, MTU can be set in the range of 576-1420 bytes. The default value is 1420.
Primary/
Secondary DNS
(Optional) Enter the IP address of the DNS server provided by your ISP.
VLAN Add the WAN port to a VLAN. Generally, you don’t need to manually configure it
unless required by your ISP.
By default, the WAN port is automatically assigned to a VLAN by default, and the
egress rule of the VLAN is UNTAG, so the packets are transmitted by the WAN port
without VLAN tags. If you want the WAN port to transmit packets with VLAN tag, you
need to create the corresponding VLAN first and configure its egress rule as TAG,
then manually add the WAN port to that VLAN. To create VLANs, go to Festa Cloud-
Based Controller.
Secondary
Connection
Select the secondary connection type provided by your ISP. If you select the
secondary connection type as Static IP, you need to configure IP Address, Subnet
Mask, Default Gateway, Primary/Second DNS.
The secondary connection is required for PPTP connection. The gateway will get
some necessary information after the secondary connection succeeded. These
information will be used in the PPTP connection process.
VPN Server/
Domain Name
Enter the VPN Server/Domain Name provided by your ISP.
IP Address Enter the IP address provided by your ISP for the secondary connection.
Subnet Mask Enter the subnet mask provided by your ISP for the secondary connection.
Default Gateway Enter the default gateway provided by your ISP for the secondary connection.
Primary/
Secondary DNS
Enter the primary/secondary DNS provided by your ISP for the secondary
connection.
Connect/
Disconnect
Click the button to active/terminate the connection.

User Guide 18
Configuring Network LAN Configuration
3
LAN Configuration
The LAN port is used to connect to the LAN clients, and works as the default gateway
for these clients. You can configure the DHCP server for the LAN clients, and clients will
automatically be assigned to IP addresses if the method of obtaining IP addresses is set as
“Obtain IP address automatically”.
For LAN configuration, you can:
■ Configure the IP address of the LAN port.
■ Configure the DHCP server.
■ Configure the DHCP relay.
■ View the DHCP Client List
3.1 Configuring the IP Address of the LAN Port
Choose the menu Network > LAN > LAN to load the following page.
Figure 3-1 Configuring the LAN IP Address
(Optional) With LAN Settings, you can set up IGMP Proxy.
IGMP Proxy Check the box to enable IGMP Proxy.
IGMP Proxy sends IGMP querier packets to the LAN ports to detect if there is any
multicast member connected to the LAN ports.
IGMP Version Choose the IGMP version as V2 or V3. The default is IGMP V2.
Configuring Network LAN Configuration
User Guide
19
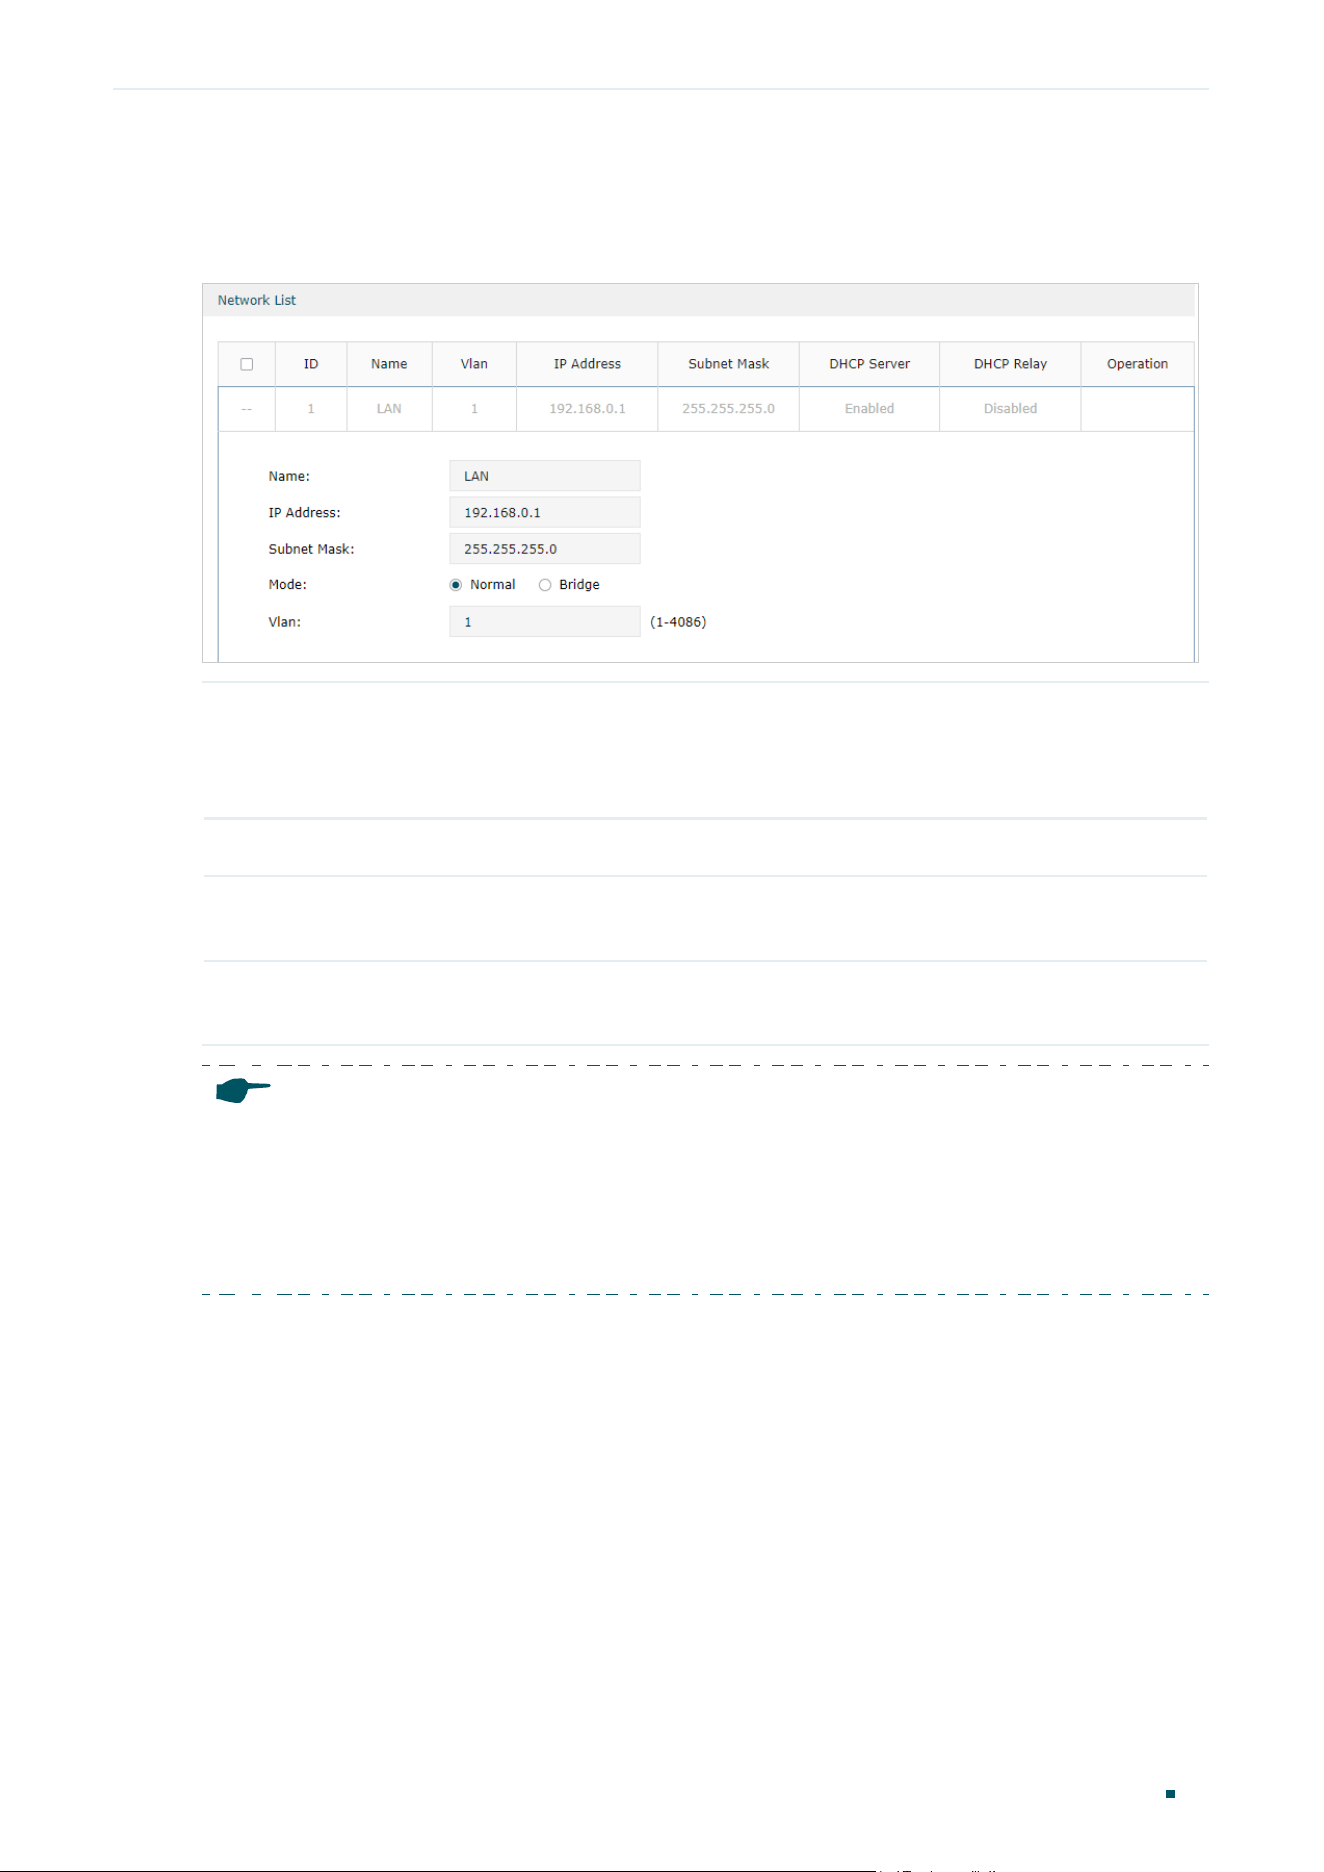
Click the Edit button to load the following page. Enter the IP address of the LAN port, and
click OK.
IP Address Enter the IP address of the LAN port.
This IP address is the default gateway of the LAN clients, and the IP addresses of all
the LAN clients should be in the same subnet with this LAN IP address.
Subnet Mask Enter the subnet mask of the LAN port.
Mode Specify whether to use a normal VLAN or bridge VLANs. When bridge is selected, you
can configure multiple VLANs for devices to access the LAN network.
Vlan Specify the VLAN of the LAN port, only the clients in the specified VLAN can access
and manage the gateway.
Note:
•
Changing the IP address of LAN port will automatically redirect the browser to the new
management page. If the redirecting failed, please try to reconnect your PC to the gateway to
automatically get a new IP address, or configure a proper static IP address manually.
•
Changing the IP address of the LAN port may affect some related functions, like the IP pool of
the DHCP server.
3.2 Configuring the DHCP Server
You can configure an IP address pool for the DHCP server to assign IP addresses. When
clients send requests to the DHCP server, the server will automatically assign IP addresses
and the corresponding parameters to the clients.
Choose the menu Network > LAN > LAN to load the following page. Click the Edit button in
the Network List section.

User Guide 20
Configuring Network LAN Configuration
Figure 3-2 Configuring the DHCP Server
Select DHCP Server, and configure the parameters of the DHCP server, then click Save.
Starting/Ending
IP Address
Enter the starting IP address and ending IP address of the DHCP server’s IP pool. The
IP pool defines the IP range that can be assigned to the clients in the LAN.
Note: The starting IP address and ending IP address should be in the same subnet
with the IP address of the LAN port.
Lease Time Specify the lease time for DHCP clients.
Lease time defines how long the clients can use the IP address assigned by the DHCP
server. Generally, the client will automatically request the DHCP server for extending
the lease time before the lease expired. If the request failed, the client will have to stop
using that IP address when the lease finally expired, and try to get a new IP address
from the other DHCP servers.
Default Gateway (Optional) It is recommended to enter the IP address of the LAN port.
Default Domain (Optional) Enter the domain name of your network.
Primary/
Secondary DNS
(Optional) Enter the DNS server address provided by your ISP. If you are not clear,
please consult your ISP.
Status Check the box to enable the DHCP server.
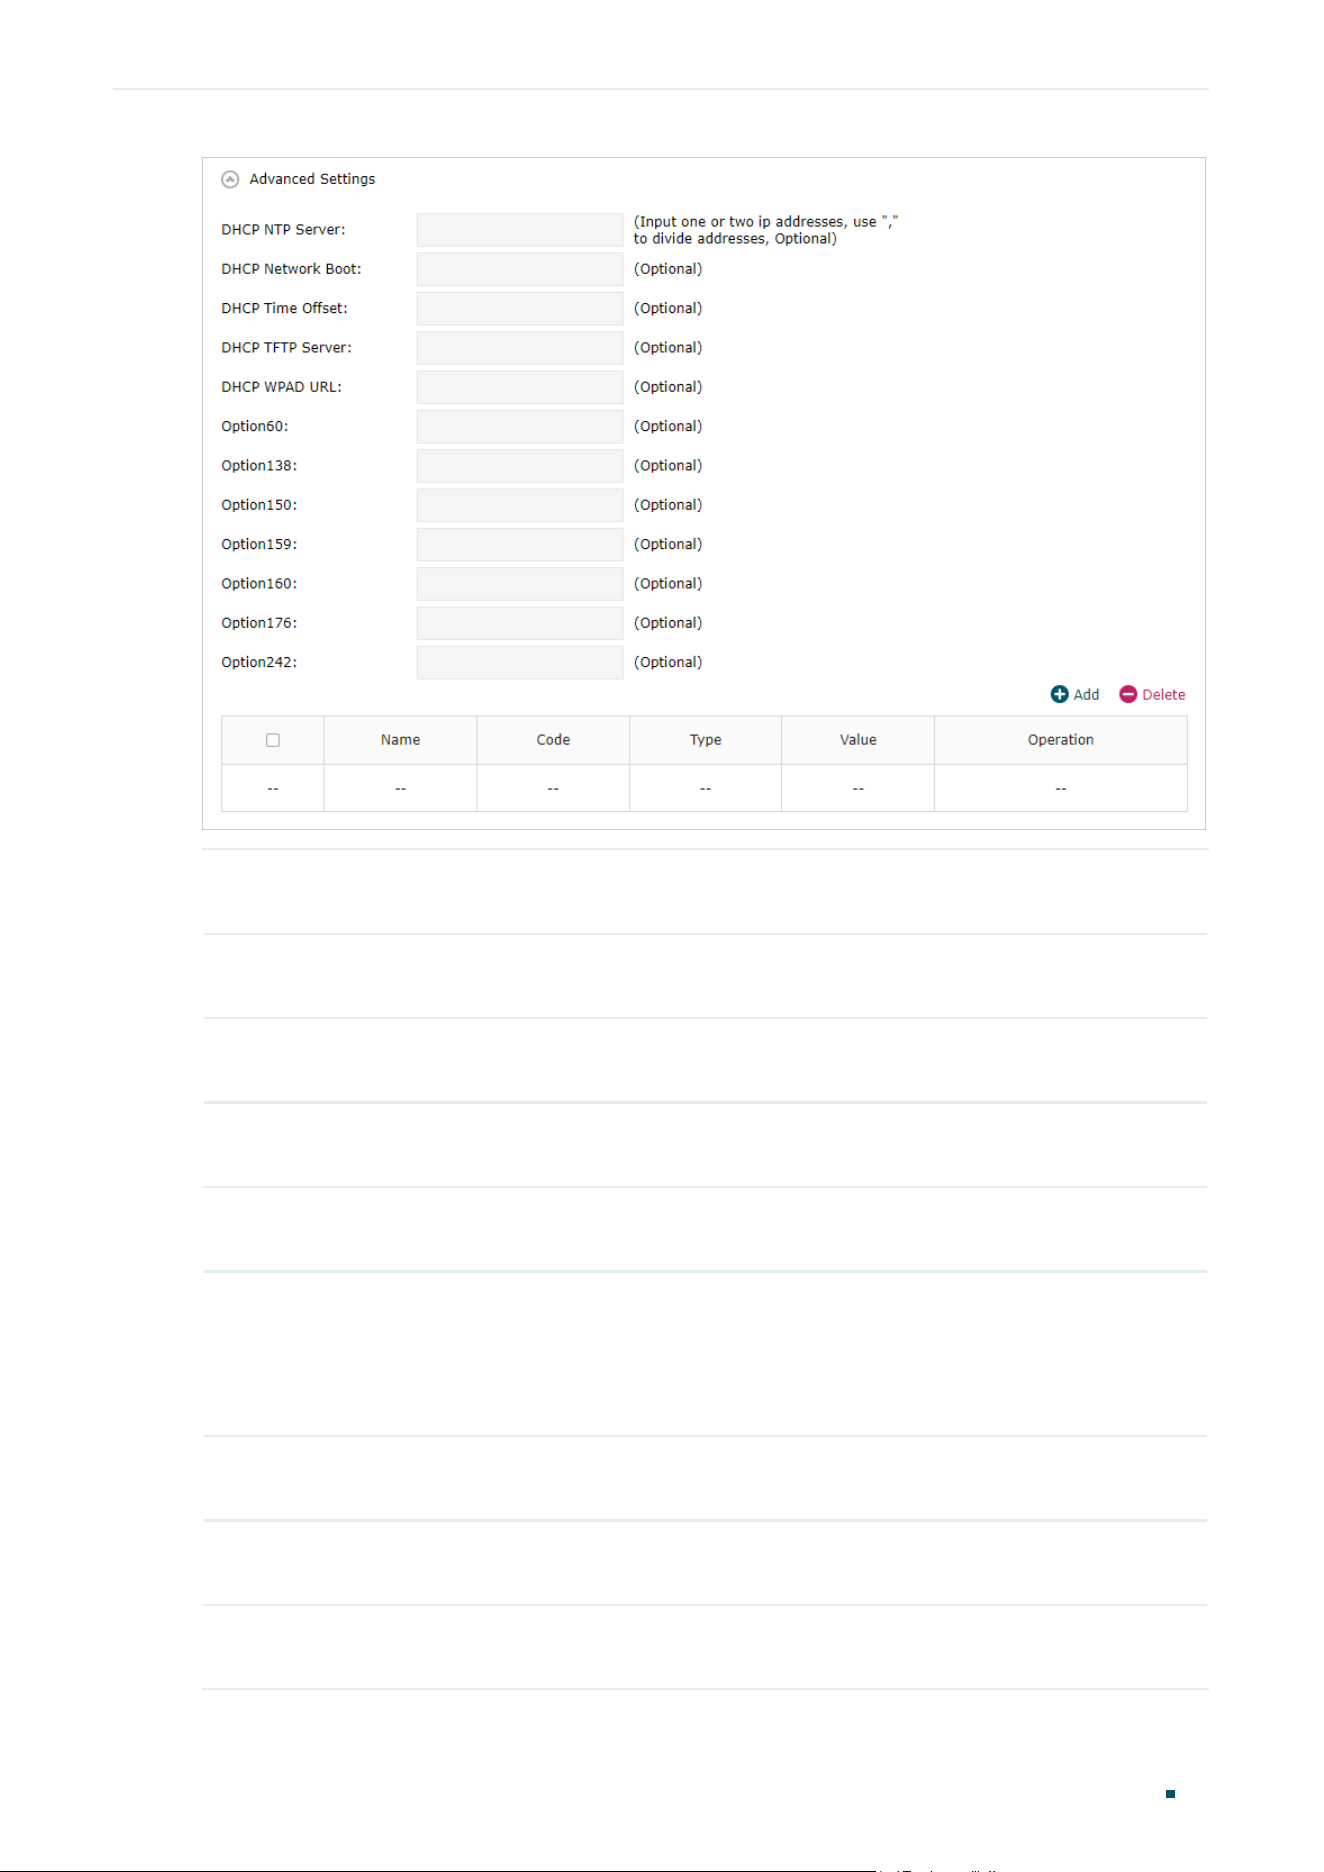
Click Advanced Settings to configure more settings.
Configuring Network LAN Configuration
User Guide
21
DHCP NTP
Server
(Option 42) Enter one or two DHCP NTP Server addresses to get the system time from
internet. Use “,” to divide addresses.
DHCP Network
Boot
(Option 67) Enter the value for DHCP Option 67. It specifies the boot file name.
DHCP Time
Offset
(Option 2) Enter the time offset of the DHCP client’s subnet in seconds from the UTC
time.
DHCP WPAD
URL
(Option 252) Enter the DHCP WPAD (Web Proxy Auto-Discovery) URL for the DHCP
client to configure its proxy settings.
DHCP TFTP
Server
(Option 66) Enter the TFTP server address for file transfer.
Option60 (Optional) Enter the value for DHCP Option 60. DHCP clients use this field to optionally
identify the vendor type and configuration of a DHCP client. Mostly, it is used in
the scenario where the APs apply for different IP addresses from different servers
according to the needs. For detailed information, please consult the vendor. For TP-
Link, this entry should be TP-Link.
Option138 (Optional) Enter the value for DHCP Option 138. It is used in discovering the devices
by the Omada controller.
Option150 (Optional) Enter the value for DHCP Option 150. It specifies the TFTP server
information and supports multiple TFTP server IP addresses.
Option159 (Optional) Enter the value for DHCP Option 159. This option is used to configure a set
of ports bound to a shared IPv4 address.
User Guide 22
Configuring Network LAN Configuration
Option160 (Optional) Enter the value for DHCP Option 160. This option is used to configure DHCP
captive portal.
Option176 (Optional) Enter the value for DHCP Option 176. This option is used to configure
parameters for IP phones.
Option242 (Optional) Enter the value for DHCP Option 242. This option is used to provide the
TMS address automatically.
Add Click to add a DHCP option entry
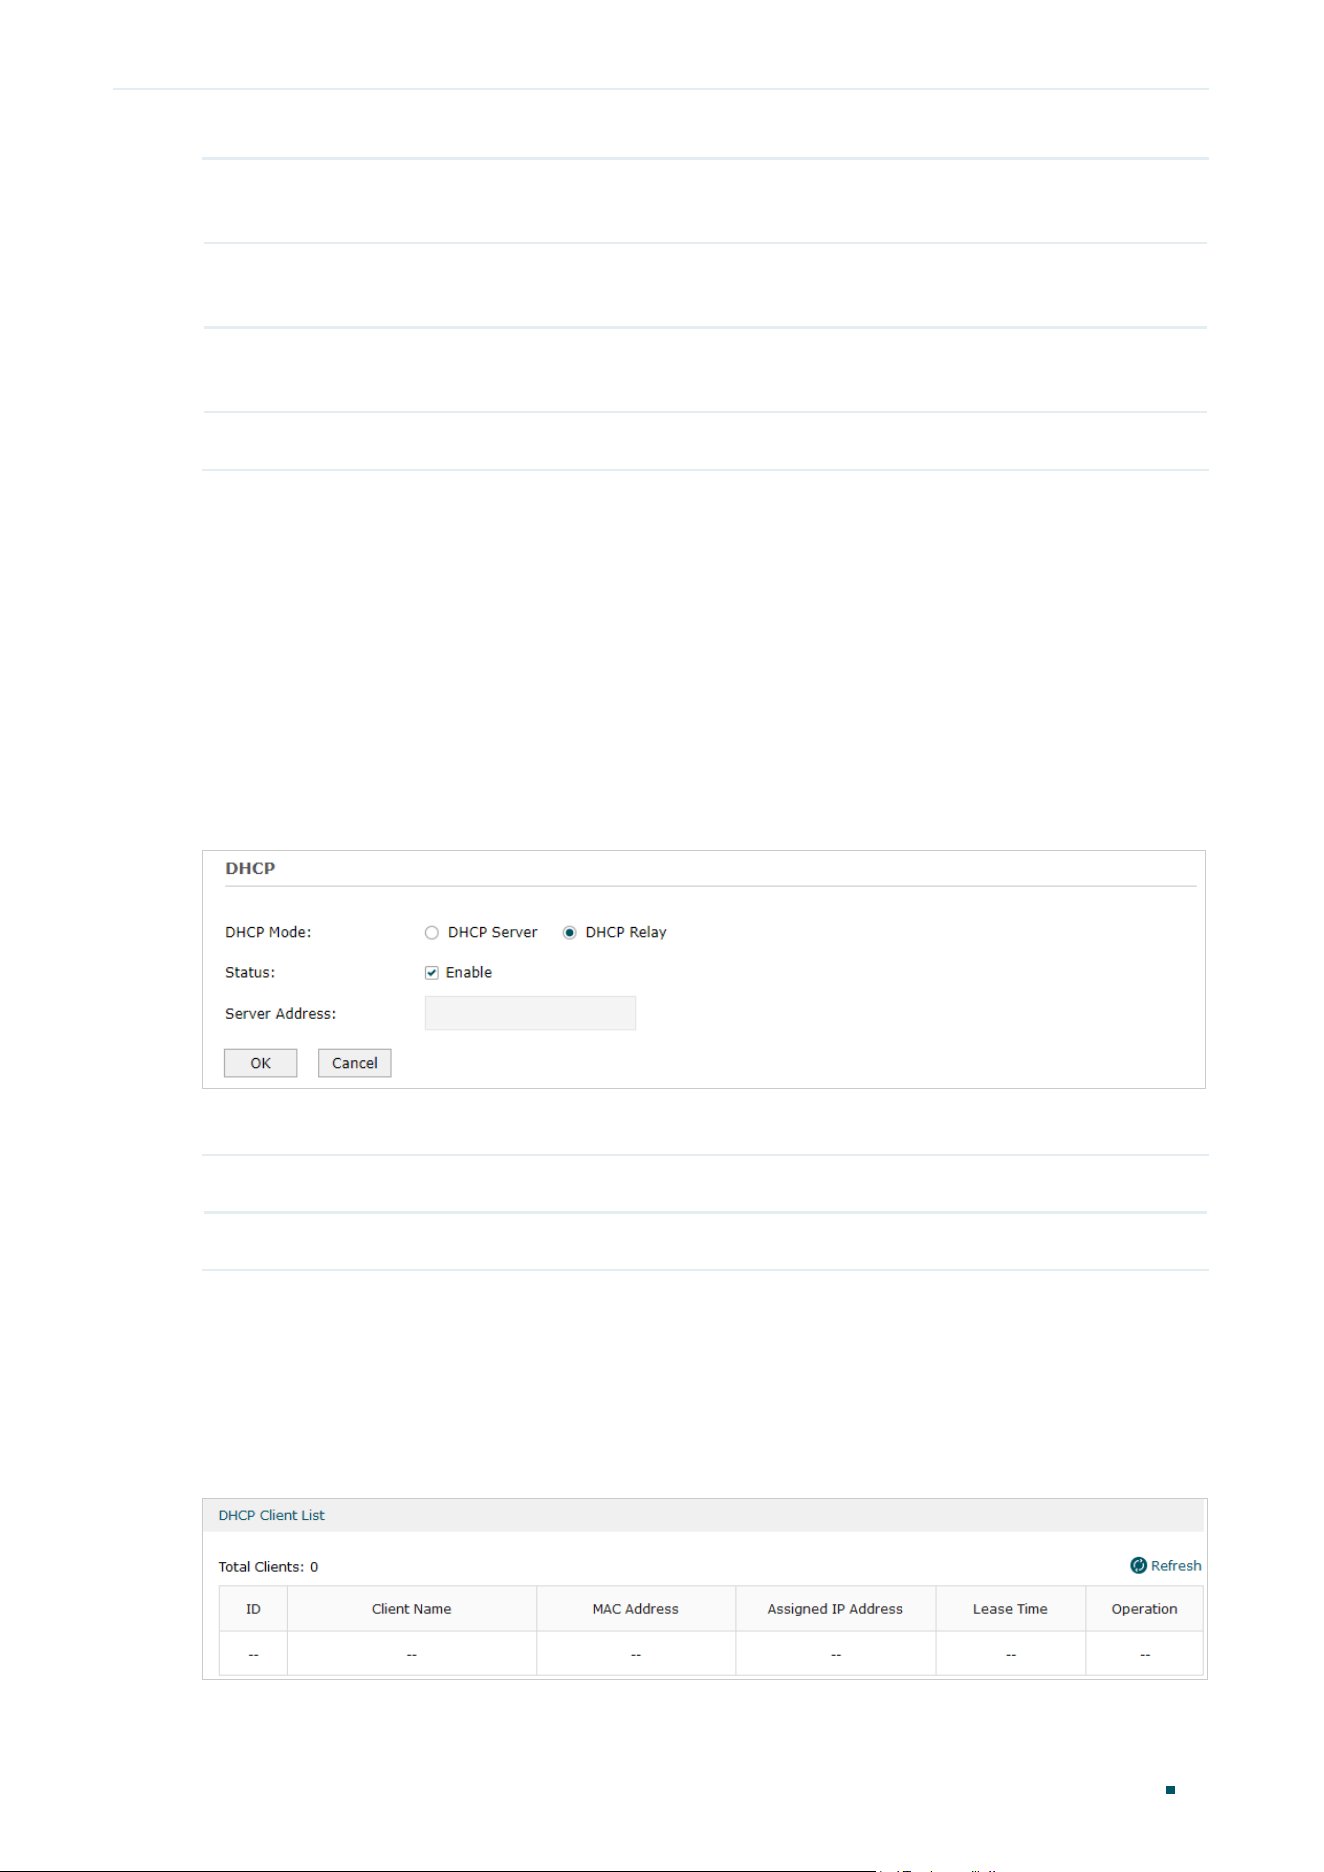
3.3 Configuring the DHCP Relay
If you select DHCP Relay as DHCP Mode, the gateway will relay DHCP requests from
LAN clients to the DHCP server in another network. Then the DHCP server will assign IP
addresses to the LAN clients. Configure the following parameters.
Choose the menu Network > LAN > LAN to load the following page. Click the Edit button in
the Network List section.
Figure 3-3 Configuring the DHCP Relay
Select DHCP Relay, and configure the parameters of the DHCP replay, then click Save.
Status Check the box to enable DHCP Relay.
Server Address Enter the IP address of the DHCP server.
3.4 Viewing the DHCP Client List
Choose the menu Network > LAN > DHCP Client List to load the following page.
Figure 3-4 Viewing the DHCP Client List
Here you can view the DHCP client list.

Configuring Network LAN Configuration
User Guide
23
Client Name Displays the name of the client.
MAC Address Displays the MAC address of the client.
Assigned IP
Address
Displays the IP address assigned to the client.
Lease Time Displays the remaining lease time of the assigned IP address. After the lease expires,
the IP address will be re-assigned.


System Tools Overview
User Guide
25
1
Overview
1.1 Overview
The System Tools module provides several system management tools for users to manage
the gateway.
1.2 Supported Features
Management
With this function, you can reset the gateway, reboot the gateway and upgrade the
firmware.
Controller Settings
Configure your gateway to be discovered by Festa SDN Controller, then it can be managed
centrally via Festa Cloud-Based Controller.
Diagnostics
Enable the Remote Assistance function to get help from the technicians if you fail to solve
your network problem.
User Guide 26
System Tools Management
2
Management
In Management module, you can configure the following features:
■ Factory Default Restore
■ Reboot
■ Firmware Upgrade
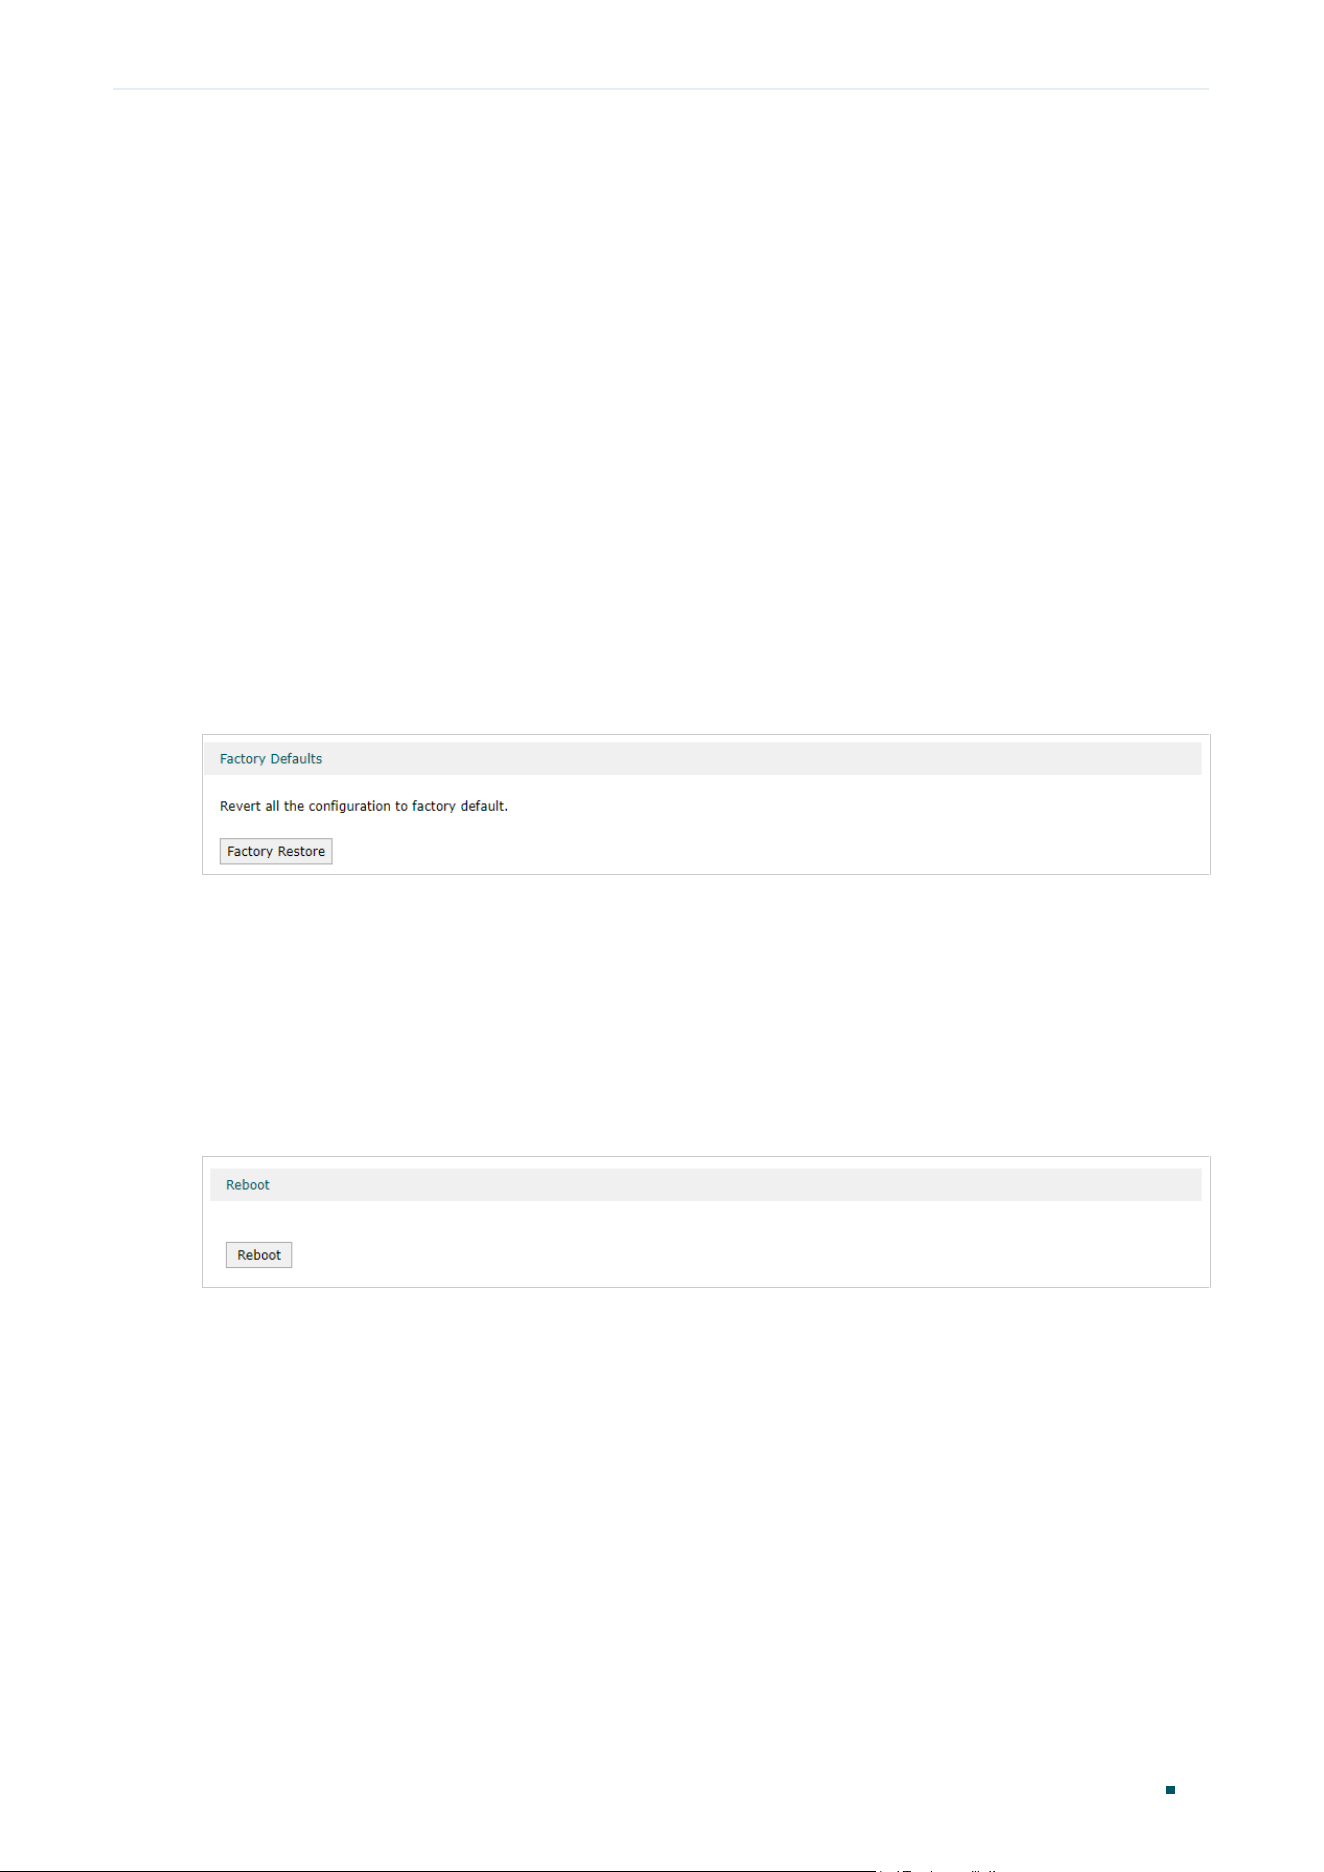
2.1 Factory Default Restore
Choose the menu System Tools > Management > Factory Default Restore to load the
following page.
Figure 2-1 Reseting the Device
Click Factory Restore to reset the device.
2.2 Reboot
Choose the menu System Tools > Management > Reboot to load the following page.
Figure 2-2 Rebooting the Device
Click Reboot to reboot the device.
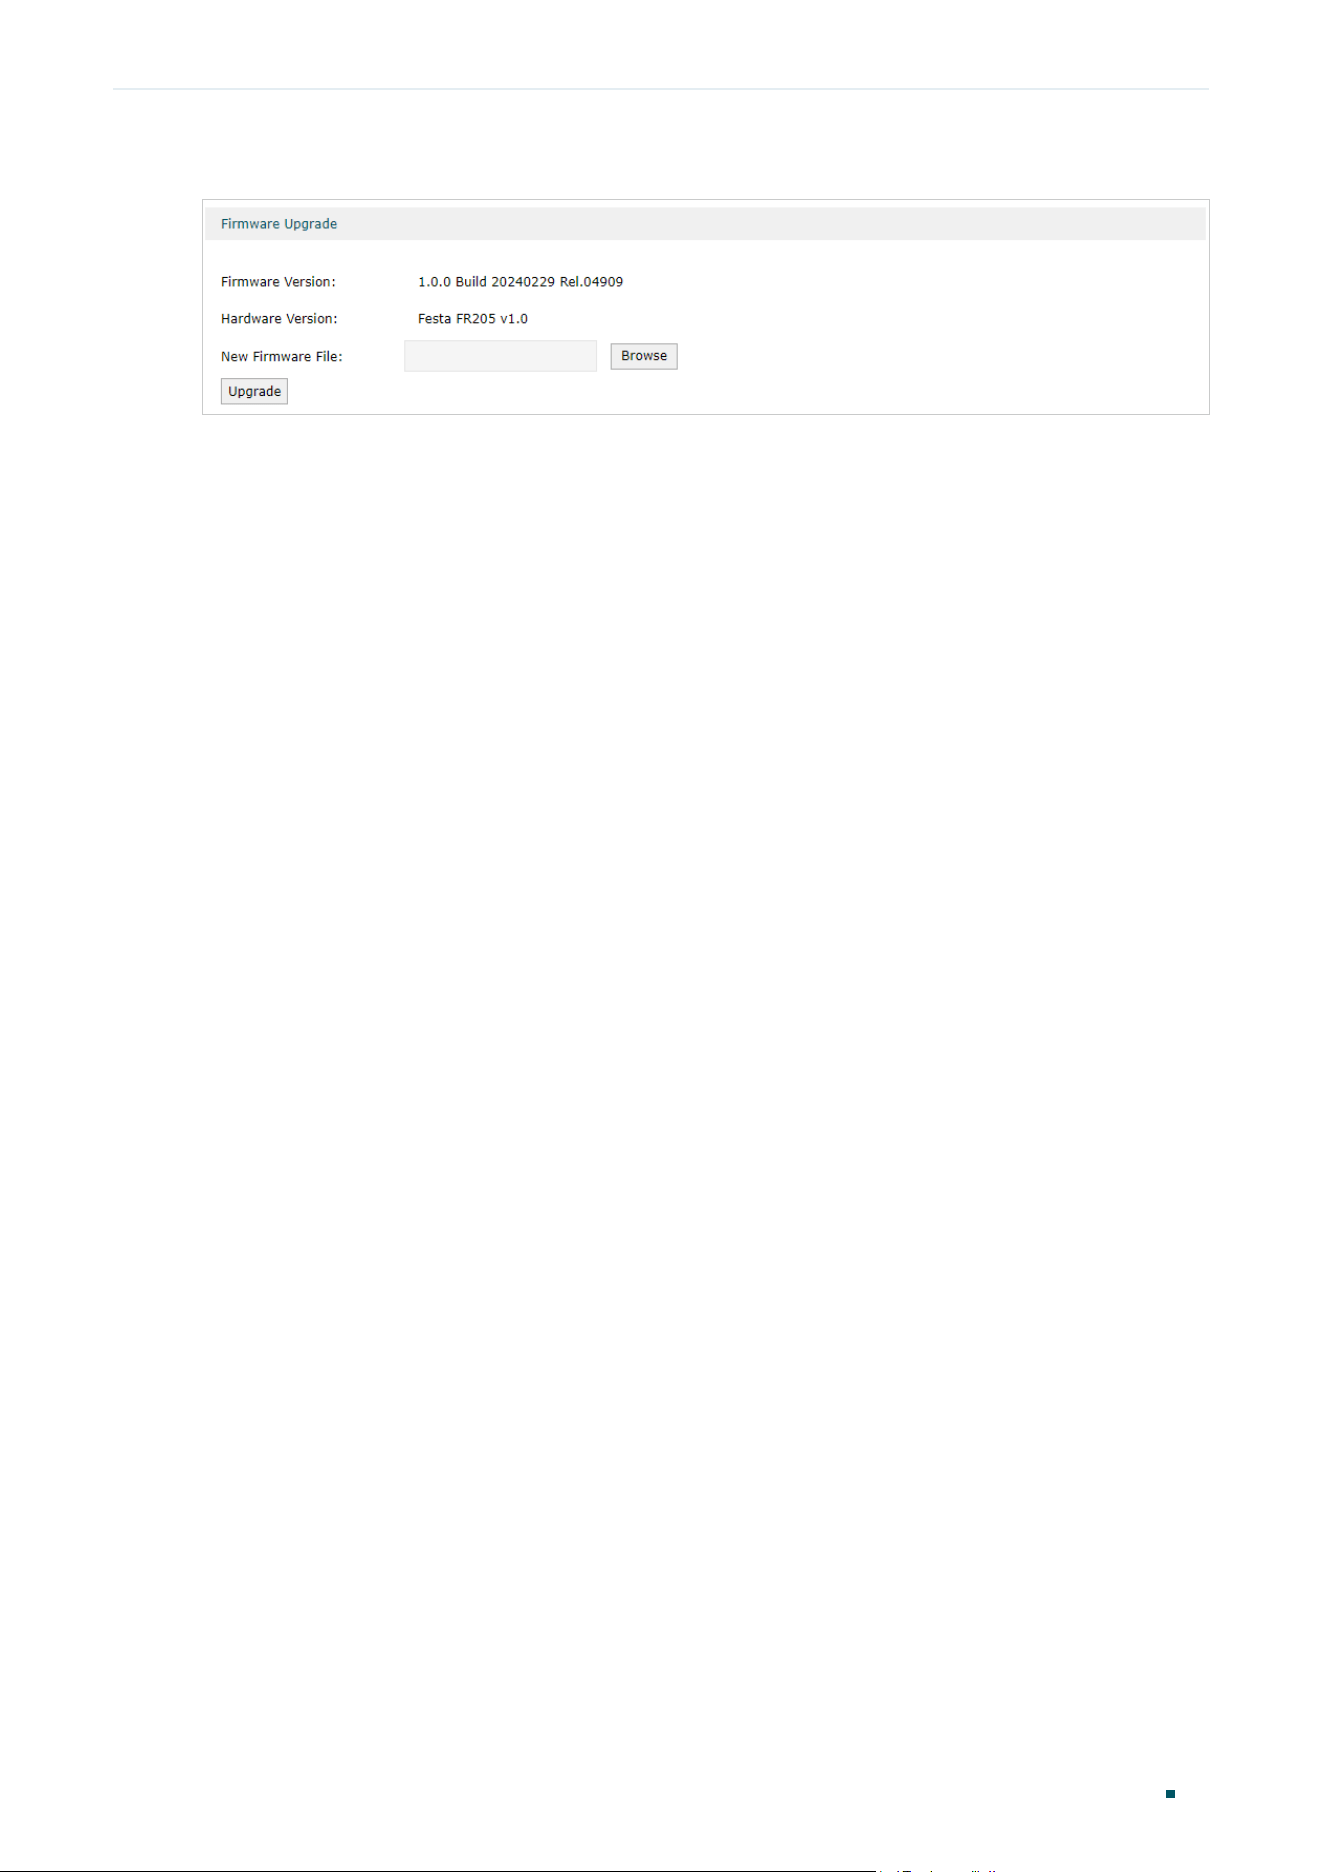
2.3 Firmware Upgrade
Choose the menu System Tools > Management > Firmware Upgrade to load the following
page.
System Tools Management
User Guide
27
Figure 2-3 Configure System Settings
Select one firmware file and click Upgrade to upgrade the firmware of the device.
User Guide 28
System Tools Controller Settings
3
Controller Settings
To make your controller adopt your gateway, make sure the gateway is connected to the
internet and configure controller Settings enable your gateway to be discovered by the
Festa Cloud-Based Controlle.
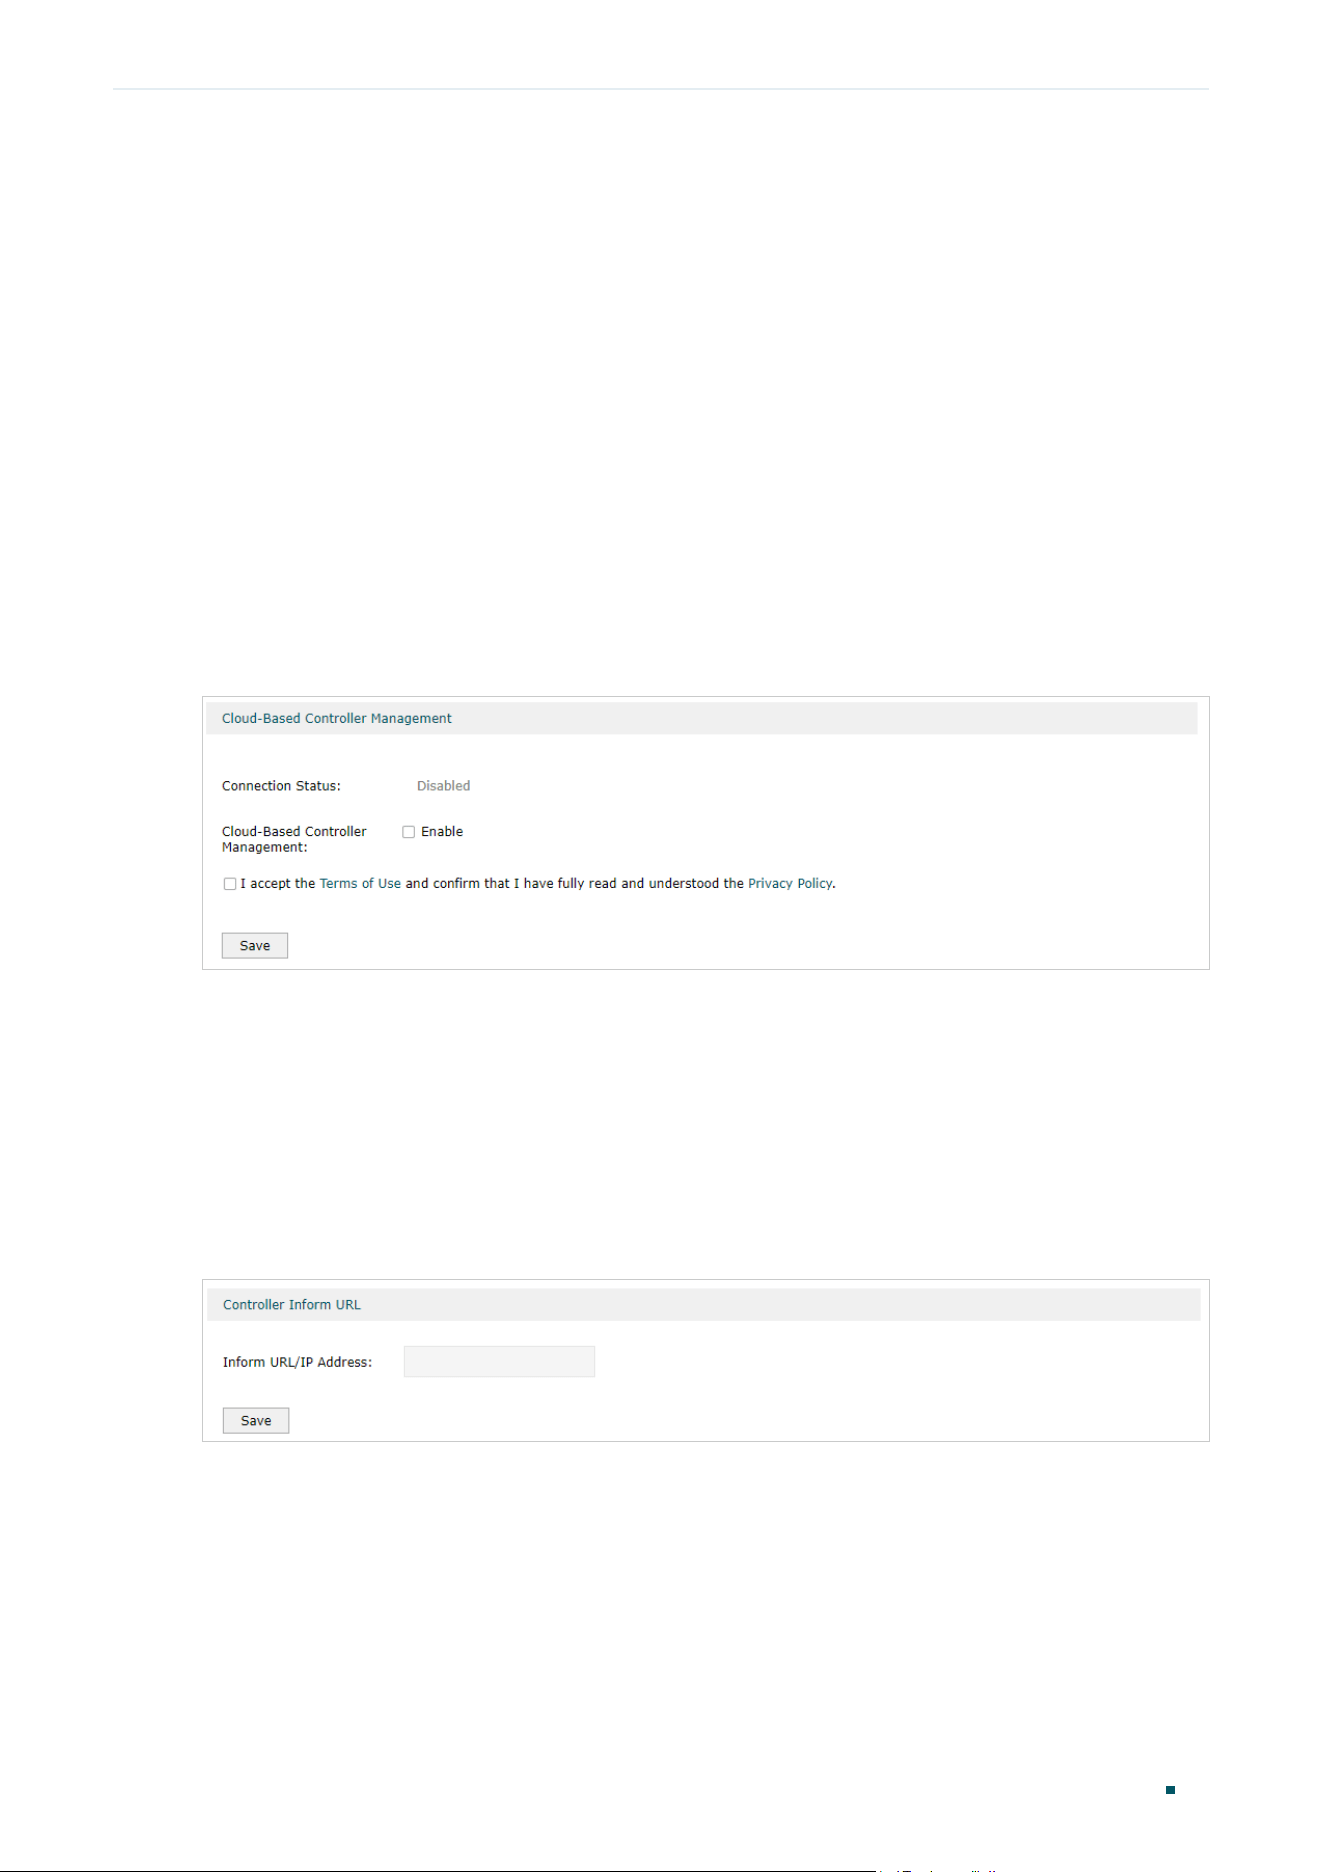
3.1 Enable Cloud-Based Controller Management
Choose the menu System Tools > Controller Settings page. In the Cloud-Based Controller
Management section, enable Cloud-Based Controller Management and click Save. You can
check the connection status on this page.
Figure 3-1 Cloud-Based Controller Management
3.2 Configure Controller Inform URL
Choose the menu System Tools > Controller Settings page. In the Controller Inform URL
section, inform the gateway of the controller’s URL/IP address, and click Save. Then the
gateway makes contact with the controller so that the controller can discover the gateway.
Figure 3-2 Cloud-Based Controller Management
System Tools Diagnostics
User Guide
29
4
Diagnostics
In Diagnostics module, you can configure the following features:
■ Remote Assistance
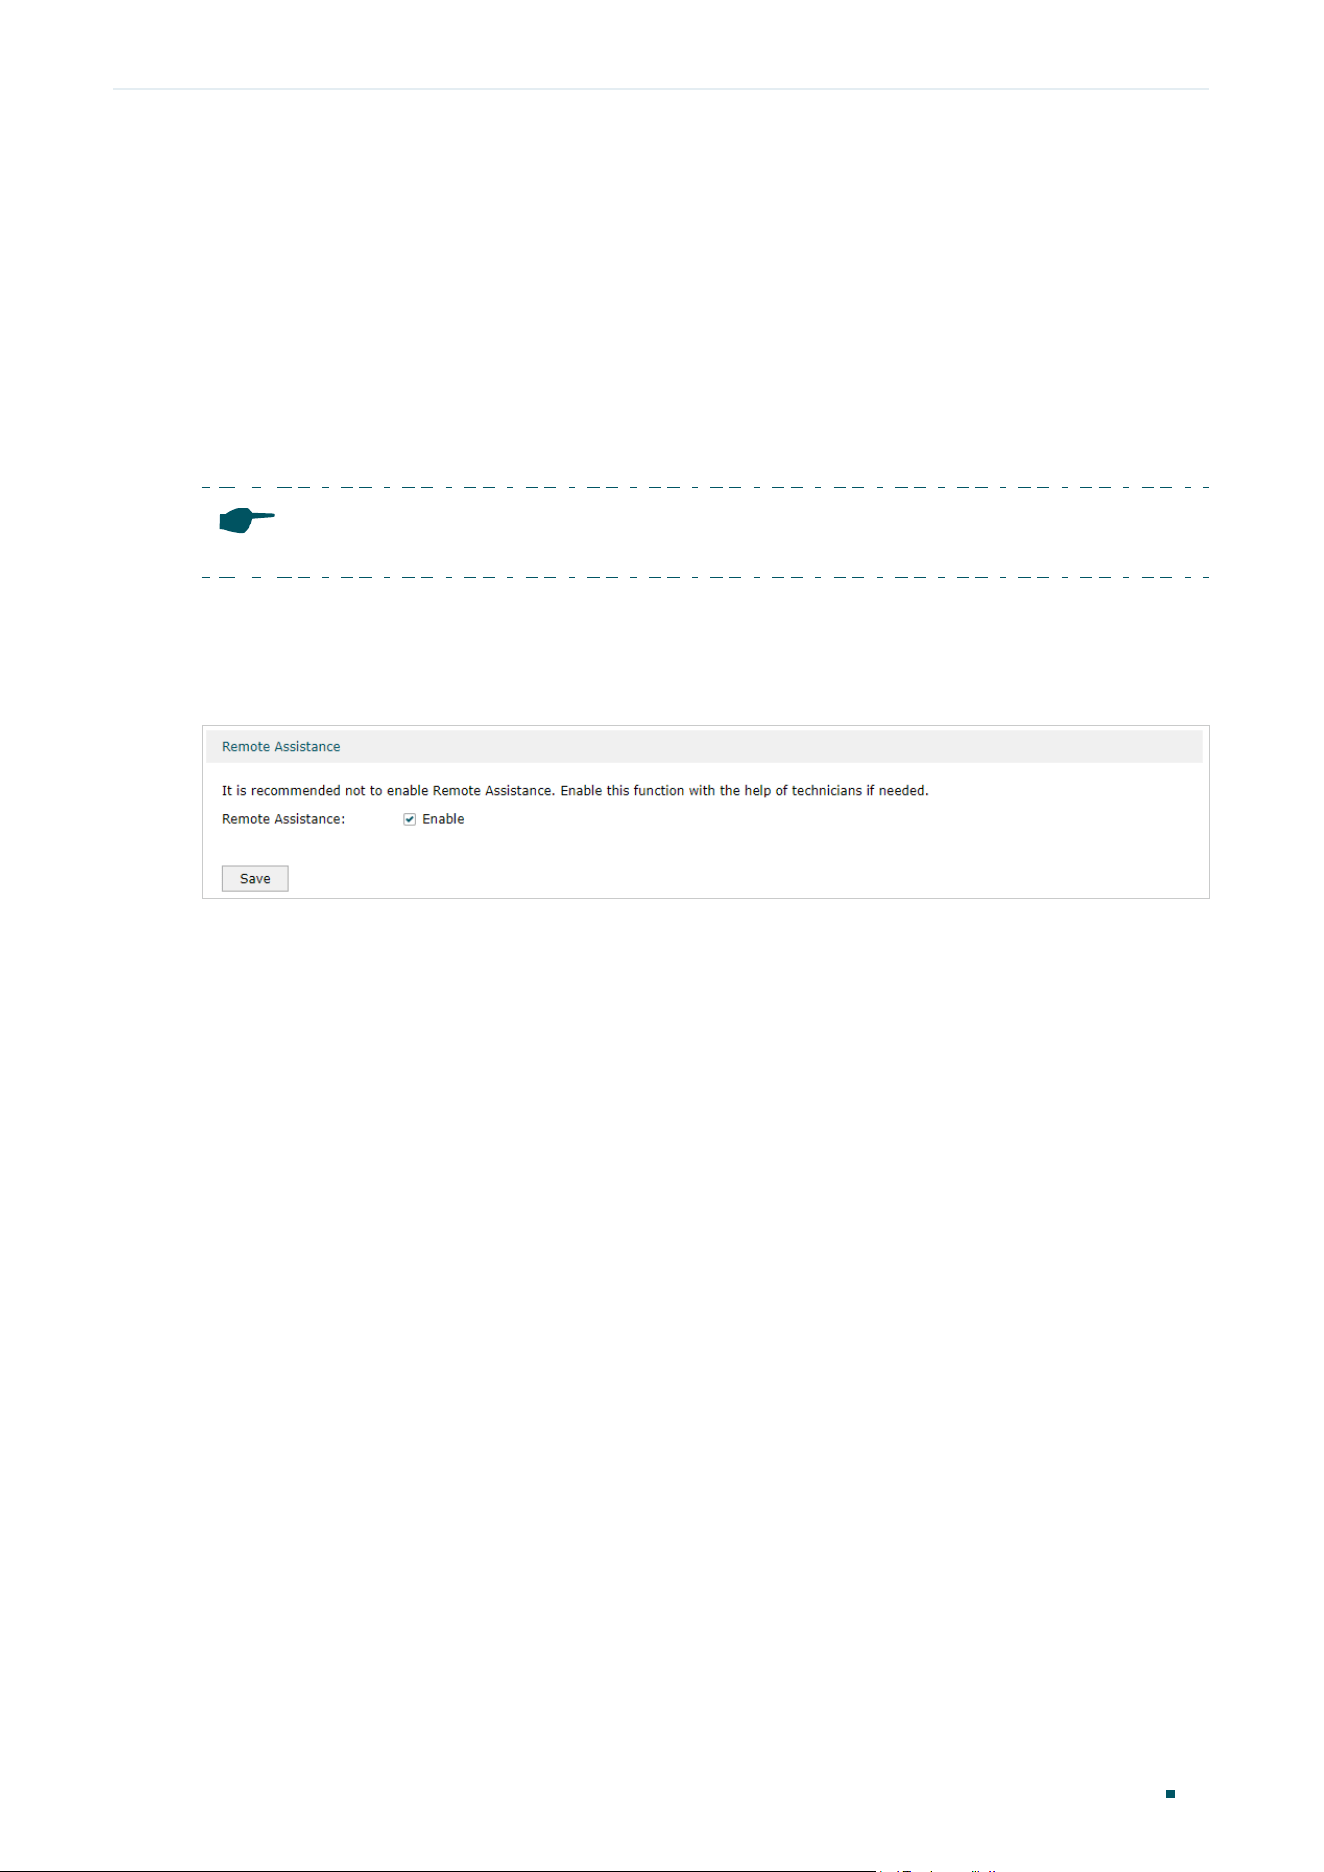
4.1 Remote Assistance
Note:
Please make contact with the technicians before trying to use this function.
Choose the menu System Tools > Diagnostics > Remote Assistance to load the following
page.
Figure 4-1 Remote Assistance Page
Check the box and click Save to enable the remote assistance function and then the
technicians can access your gateway and help to solve the problems by SSH..
