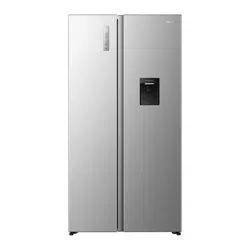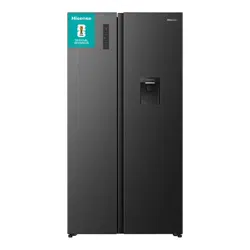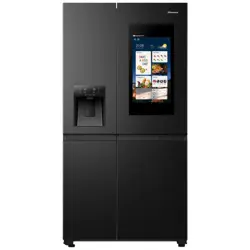

English
EN
USER’S OPERATION MANUAL
Before operating this unit, please read this manual
thoroughly, and retain for future reference.
This is a short version of the User’s Manual. For more information,
please scan the QR code above to view the full version of the manual.
NOTE:
1. Please adjust your mobile or tablet device
to portrait mode during the browsing of
electronic manuals to achieve the best
viewing experience.
2. To ensure a smooth experience with the
download feature of the electronic manuals,
we recommend using Google Chrome,
Microsoft Edge, or the Safari browser.
1
Before using the appliance for the first time
Before connecting the appliance to the power mains, please read carefully
the instructions for use which describe the appliance and its correct and safe
use. The instructions apply to several appliance types/models; thus, settings
or equipment may be described herein which is not available in your
appliance. We recommend saving this instruction manual for future reference
and attach it to the appliance if it is sold in the future.
Check for any damage or irregularities on your appliance. If you find your
appliance is damaged, notify the retailer from which you have purchased the
appliance.
Before connecting the appliance to the power mains, let the appliance rest in
a vertical position for a minimum of 2 hours. This will reduce the possibility of
operation faults due to the effect of transport on the cooling system.
Important safety instructions
The appliance must be connected to the power mains and grounded in
compliance with the effective standards and regulations.
WARNING! Do not locate multiple portable socket-outlets or
portable power supplies at the rear of the appliance.
Before cleaning the appliance, unplug it from the power mains (unplug the
power cord from the wall outlet).
WARNING! If the supply cord is damaged, it must be
replaced by the manufacturer, its service agent or similarly
qualified persons in order to avoid a hazard.
WARNING! When positioning the appliance, ensure the
supply cord is not trapped or damaged.
WARNING! The LED light must not be replaced by the user!
If the LED light is damaged, contact the customer helpline
for assistance.
SAFETY AND WARNING INFORMATION
WARNING
Risk of fire/flammable materials
2
SAFETY AND WARNING INFORMATION
WARNING! Do not use electrical appliances inside the
food storage compartments of the appliance, unless they
are of the type recommended by the manufacturer.
WARNING! Do not use mechanical devices or other
means to accelerate the defrosting process, other than
those recommended by the manufacturer.
WARNING! To avoid any hazard resulting from poor
stability of the appliance, make sure it is installed as
instructed.
Freeze burn hazard
To avoid freeze burn, never put frozen food in your mouth and do not touch
frozen food.
Safety of children and vulnerable persons
The appliance is not intended for use by persons (including children) with
reduced physical, sensory or mental capabilities, or lack of experience and
knowledge, unless they have been given supervision or instruction concerning
use of the appliance by a person responsible for their safety.
Children should be supervised to ensure that they do not play with the
appliance.
Cleaning and user maintenance shall not be made by children without
supervision.
Remove the packaging intended to protect the appliance or particular parts
during transport and keep it outside the reach of children. It presents danger
of injury or suffocation.
When removing a used appliance, disconnect the power cord, remove the
door, and leave the shelves in the appliance. This will prevent children from
locking themselves in the appliance.
For European markets only
This appliance can be used by children aged from 8 years and above and
persons with reduced physical, sensory or mental capabilities or lack of
experience and knowledge if they have been given supervision or instruction
concerning use of the appliance in a safe way and understand the hazards
involved.
Children shall not play with the appliance.
Cleaning and user maintenance shall not be made by children without
supervision.
Children aged from 3 to 8 years are allowed to load and unload refrigerating
appliances.
o be used in residential
3
SAFETY AND WARNING INFORMATION
In order to sense the temperature and humidity near the appliance and make
the appliance run better, add temperature and humidity sensors outside the
box of appliance, there are also proximity and light sensors on the device.
Warning regarding the refrigerant
The appliance contains a small amount of an environmentally friendly yet
flammable gas R600a. Make sure that no parts of the cooling system are
damaged. A gas leak is not hazardous to the environment, but it could cause
eye injury or fire.
In case of a gas leak, ventilate the room thoroughly, disconnect the appliance
from the power mains, and call a service technician.
Important information on the use of appliance
WARNING! This appliance is intended t
household and similar applications such as:
• staff kitchen areas in shops, offices and other working
environments;
• farm houses and by clients in hotels, motels and other
residential type environments;
• bed and breakfast type environments;
• catering and similar non-retail applications.
WARNING! Keep ventilation openings, in the appliance
enclosure or in the built-in structure, clear of obstruction.
The appliance may not be used outdoors and it may not be exposed to rain.
Do not store explosive substances such as aerosol cans with a flammable
propellant in this appliance.
If the appliance will be out of use for an extended period of time, switch it off
using the relevant button, and unplug it from the power mains. Empty the
appliance, defrost it, clean it, and leave the door ajar.
In case of an error or power supply failure, do not open the freezer
compartment unless the freezer has not operated for over 16 hours. After this
period, use the frozen food or provide sufficient cooling (e.g. a replacement
appliance).
Technical information on the appliance
Rating plate can be found in the appliance interior. It indicates data on
voltage, gross and net volume, type and amount of refrigerant, and
information on the climate classes.
4
SAFETY AND WARNING INFORMATION
If the language on the rating plate is not the language of your choice or the
language of your country, replace it with the one supplied.
WARNING! Do not damage the refrigerant circuit.
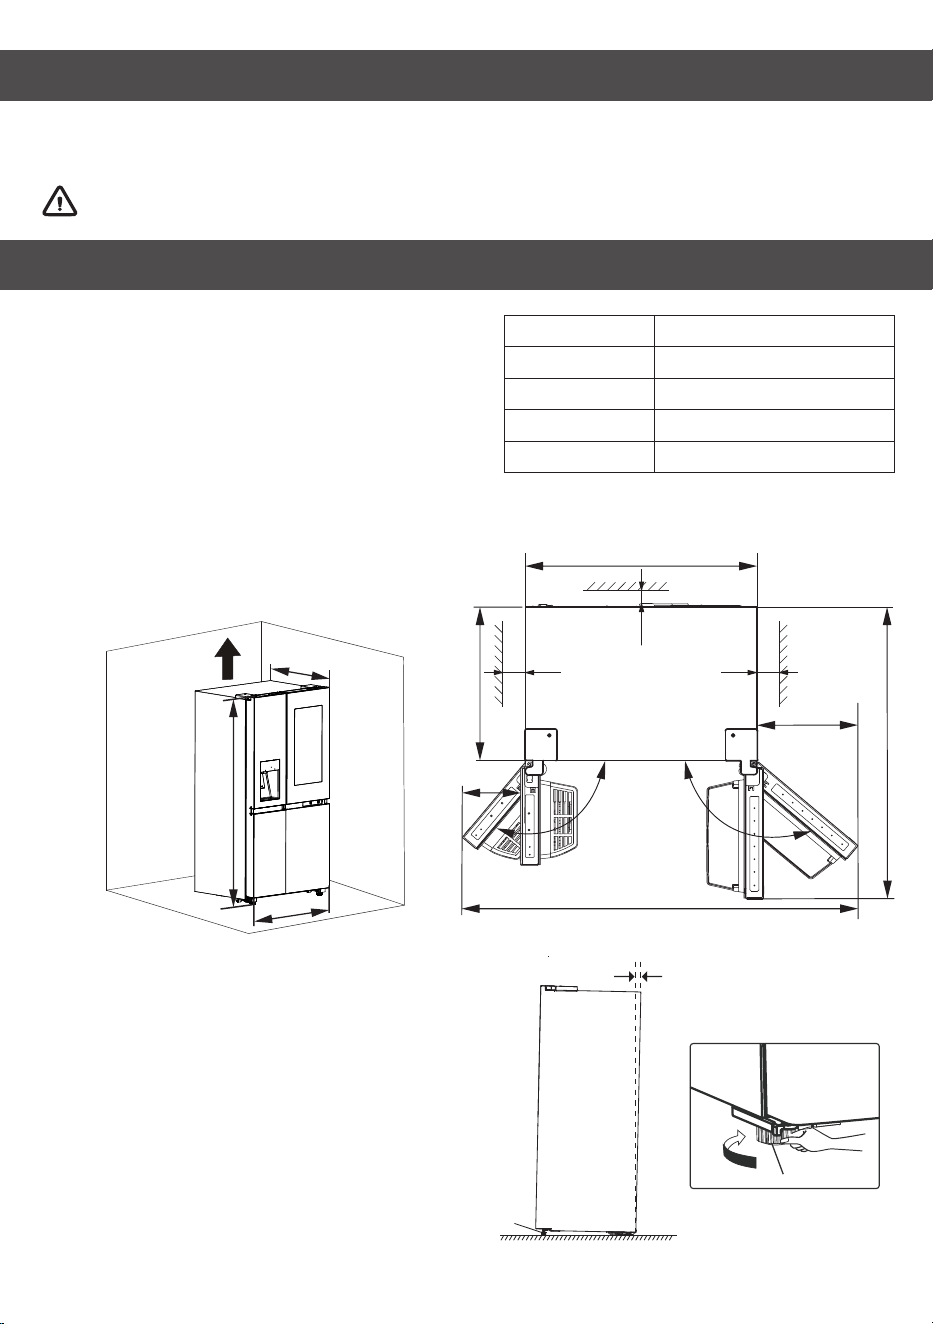
INSTALLING YOUR NEW APPLIANCE
• Stand your appliance in a dry and well
ventilated place. Keep the appliance out of
direct sunlight, rain or frost.
• The diagram shows the temperature range
of each climate class. The climate class of
this appliance is specified on the rating
plate. Use beyond this range may result in
poor performance.
Ambient temperature
+10°C to +32°C
+16°C to +32°C
+16°C to +38°C
+16°C to +43°C
Climate class
SN
N
ST
T
• Sufficient clear space should be available
around the appliance to facilitate
ventilation and heat dissipation.
• Suggested space is indicated in the figure.
Leveling of appliance (if needed):
• The figure is for reference only.
• The appliance is fitted with adjustable feet
that can be used to level the appliance.
• To allow the doors to self-close, tilt the top
backwards by turning the adjustable feet.
Adjustable feet
Adjustable feet
1563mm
908mm
610mm
1143mm
≥100mm
≥50mm
130°
135°
≥100mm
267mm
388mm
≥100mm
910mm
1900mm
600mm
INSTALLING YOUR NEW APPLIANCE
• For proper installation, this refrigerator
must be placed on a level surface of
hard material that is the same height
as the rest of the flooring. This surface
should be strong enough to support a
fully loaded refrigerator.
• The rollers should be only used for
forward or backward movement.
Moving the refrigerator sideways may
damage your floor and the rollers.
WARNING
5
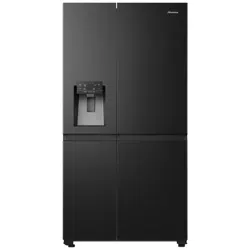
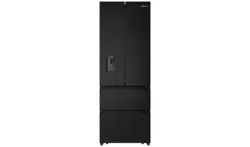
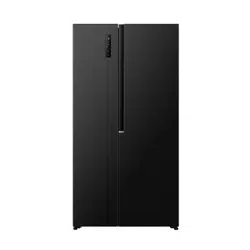
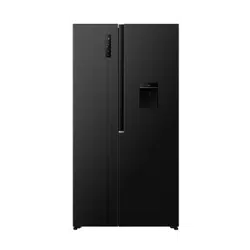
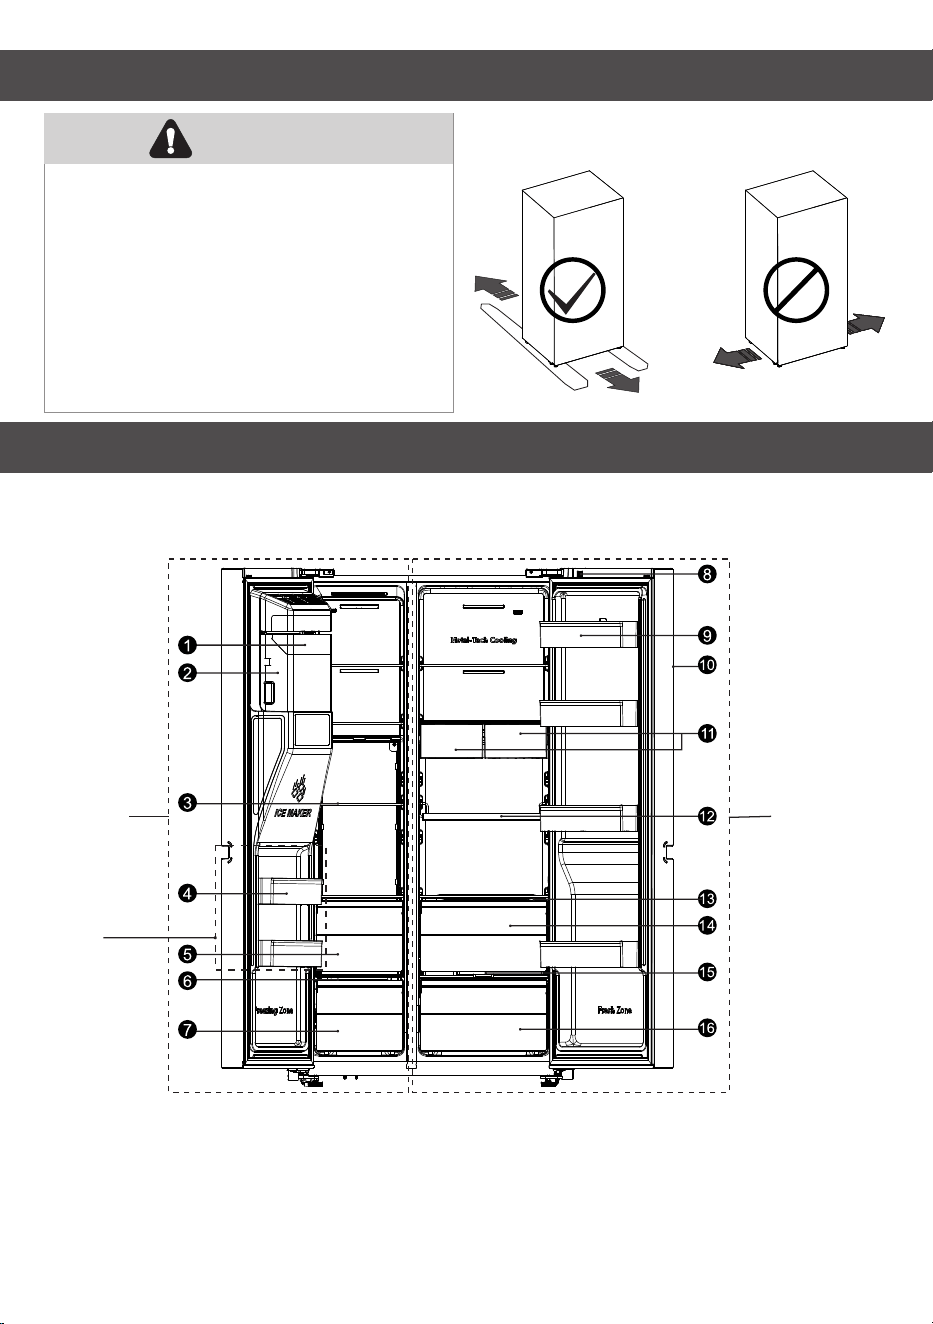
DESCRIPTION OF THE APPLIANCE
• Appliance interior equipment may change according to the appliance model.
• The diagram may slightly differ from the appliance you purchased, please get more
information in the E-manual.
* : If the model is without a Water Filter, the Snack drawer(left) is replaced by a Water Tank.
A: Freezer
B: Fridge
8.
9.
10.
11.
12.
1.
2.
3.
4.
Ice-Maker front cover
component
Ice bucket component
Shelf
Door rack
Display switch
Door rack
21-inch display
Snack drawer *
Multi-use beverage tray
13.
14.
15.
16.
Crisper box cover plate
Upper drawer
Humidity control
cover plate
Lower drawer
5.
6.
7.
Upper drawer
Lower drawer cover plate
Lower drawer
A
B
2-star
CONTROL PANEL
6
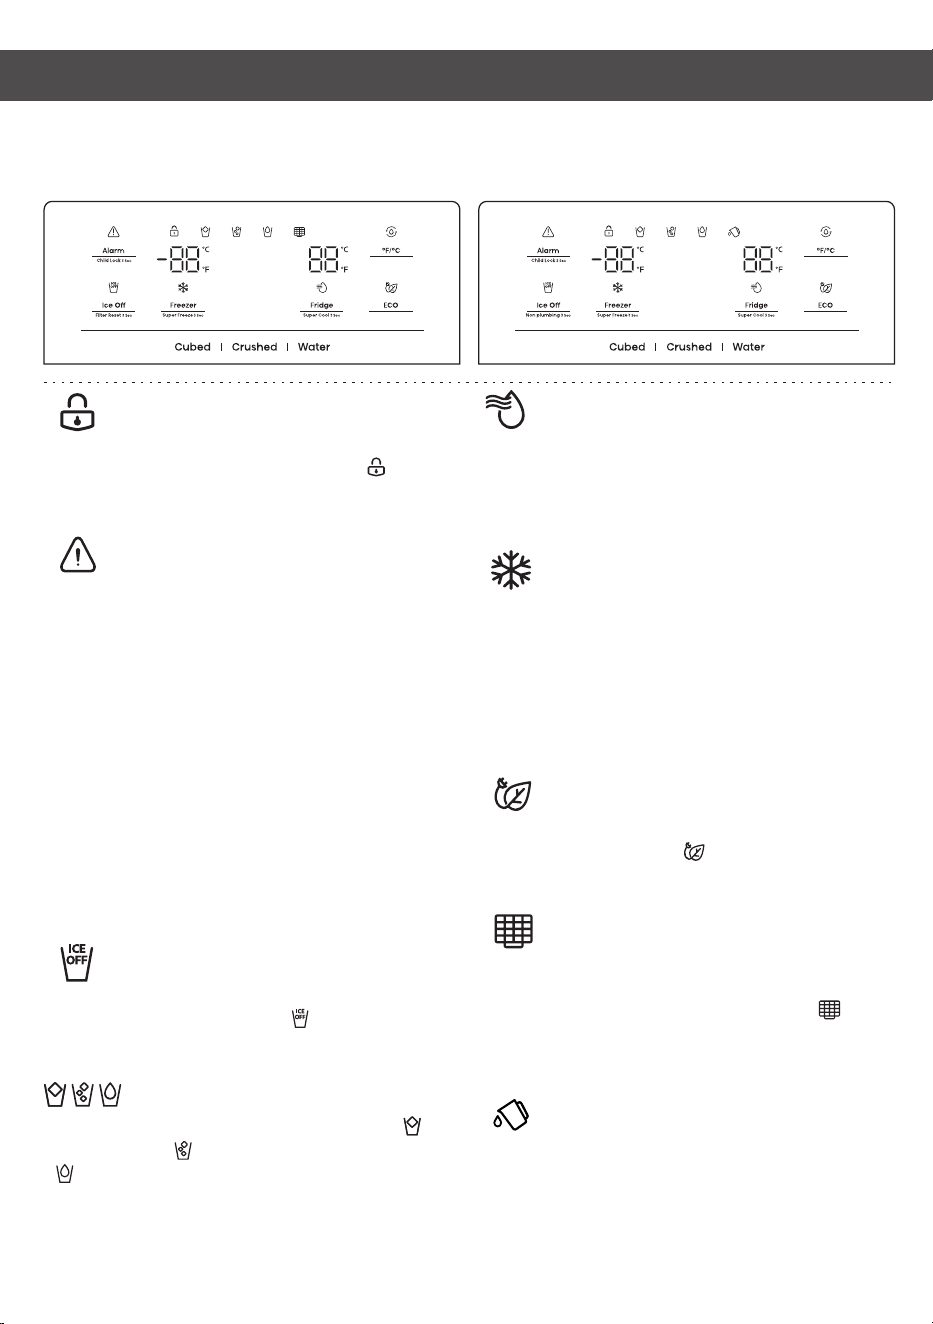
Child Lock
Press and hold the “Alarm” button for 3
seconds to lock all controls, the “ ” will
be on. To unlock, press and hold the
“Alarm” button for 3 seconds again.
Door Alarm & Over-
temperature Alarm
1. Any door open for more than 2 minutes
will activate the door alarm. Press the
“Alarm” button or close all doors to stop it.
2. The temperature of the freezer room is
greater than -8°C, more than 4h, will
activate the over-temperature alarm.
Press the“Alarm” button to stop it.
Fridge Temperature Control
Press “Fridge” button continuously to set
the fridge temperature from 2°C to 8°C.
Freezer Temperature Control
Press “Freezer” button continuously to set
the freezer temperature from -14°C to
-24°C.
Ice Off
Touch the “Ice Off” button to turn off the
ice maker, and the icon “ ” will be
illuminated. Touch the “Ice Off” button
again to turn on the ice maker.
Dispense Control
With Child Lock off, select “Cubed” - “ ” or
“Crushed” - “ ” for ice type, or “Water” -
“ ” for water, each with a corresponding
illuminated icon.
Super Cool
Super Cool will quickly cool down the food
in the refrigerator.
Note: When Super Cool is activated, the
temperature of fridge is set to 2°C, which
automatically exits after 6 hours.
Super Freeze
Super Freeze will quickly lower the
temperature in freezer so food will freeze
faster.
Note: Switch on Super Freeze at least 24
hours before use. When Super Freezer is
activated, the temperature of freezer is set
to -24°C, which automatically exits after 52
hours.
Energy Save
Press “Eco” button to switch Energy Save
mode, the Eco icon “ “ lights, which sets
fridge to 6°C and freezer to -17°C. Turning it
off reverts to previous settings.
Water Filter(TYPE 1 only)
Generally, change the water filter every 6
months to ensure the highest possible
water quality. When the filter icon “ ”
blinks, replace the water filter, then press
and hold the “Ice Off” button for 3 seconds
to reset the water filter state.
Water Tank Alarm(TYPE 2 only)
If the water tank is not correctly installed or
not installed, the water tank alarm will
come out for reminding. Press and hold
the “Ice Off” button for 3 seconds to cancel
it.
TYPE 1:
TYPE 2:
NOTE: The control panel may differ by model, so choose according to your appliance.
Please refer to the E-manual for more information.
CONTROL PANEL
7
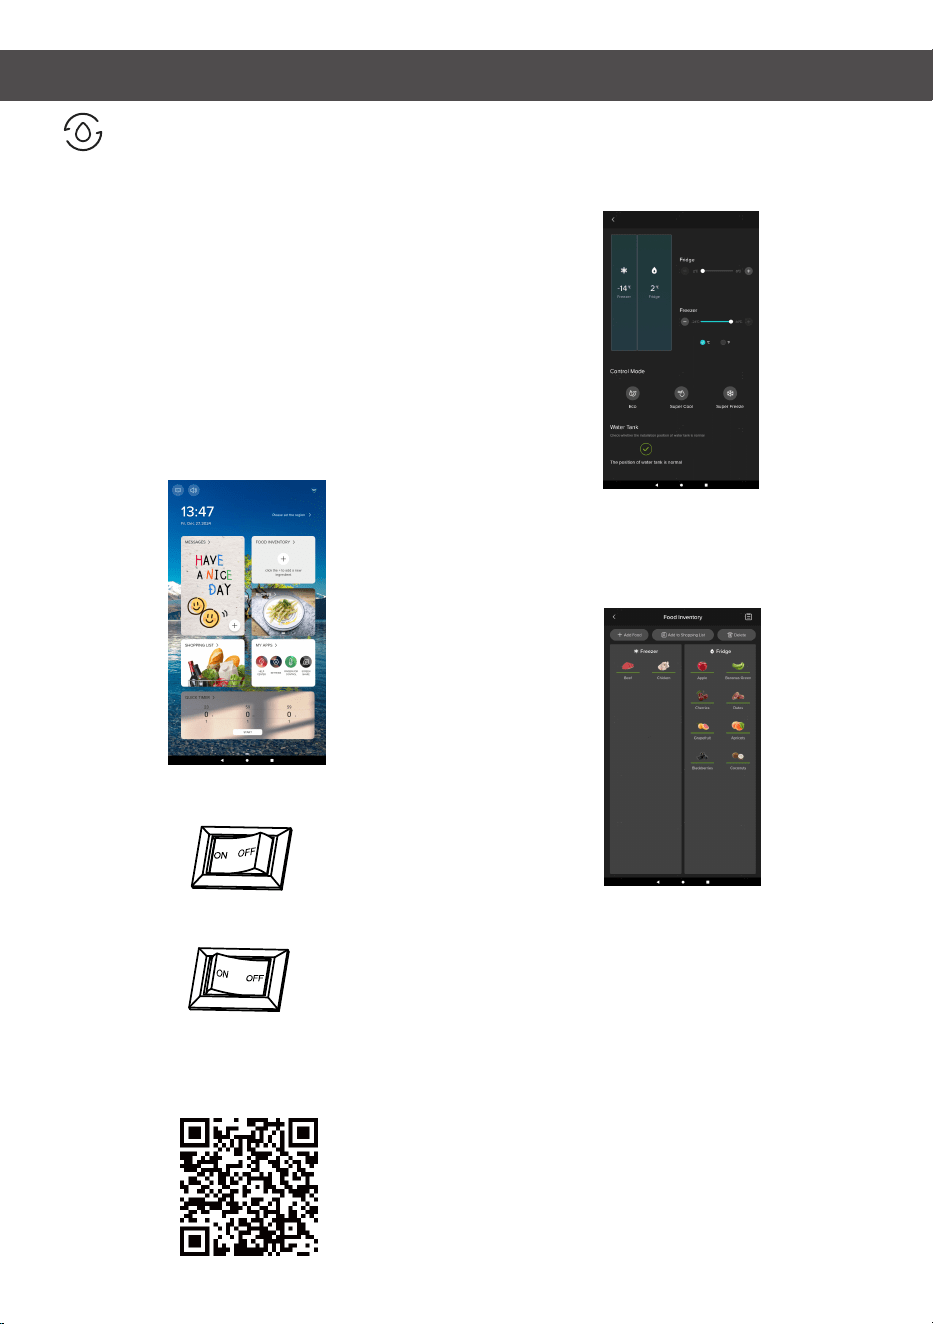
The refrigerator control interface
The refrigerator control interface reminds
the user of the status of each area, and
can set the temperature separately.
Using the 21-inch display
The 21-inch display integrates technologies
such as smart cloud, Internet of Things,
and big data, and has functions such as
smart ice control and food management.
To switch on/off the display
1. You can press “ON” to switch on the
display.
2. If you don’t need the display, you can
press “OFF” to switch off the display.
ConnectLife APP
The ConnectLife APP is available to
download free of charge from the Apple
App Store or from the Google Play Store.
The Food management
The Food management function displays
the list of ingredients and ingredient status
in each room, and the user can manually
edit part of the ingredient information.
NOTE: As the application continues to be
upgraded, please refer to the actual
display interface. The user's data can be
deleted through the Factory reset function
in the settings.
User manual:
• Transmitting frequency band(s) and max
allowed transmitting power in the
operating frequency band(s):
2400~2483.5MHz, less than or equal to
20dBm; 5150~5350MHz, less than or equal
to 23dBm; 5745~5825MHz, less than or
equal to 33dBm.
• This equipment should be installed and
operated with minimum distance 20cm
between the radiator and your body.
°F/°C Switching
In the unlocked state, press the “°F/°C”
button to switch between Celsius and
Fahrenheit.
Demo Mode
This mode, indicated by “OF”, stops making
cool air but appears operational. Cancel it
by pressing “Alarm” + “°F/°C” for 3 seconds,
confirmed by a long buzzer sound.
USING THE APPLIANCE
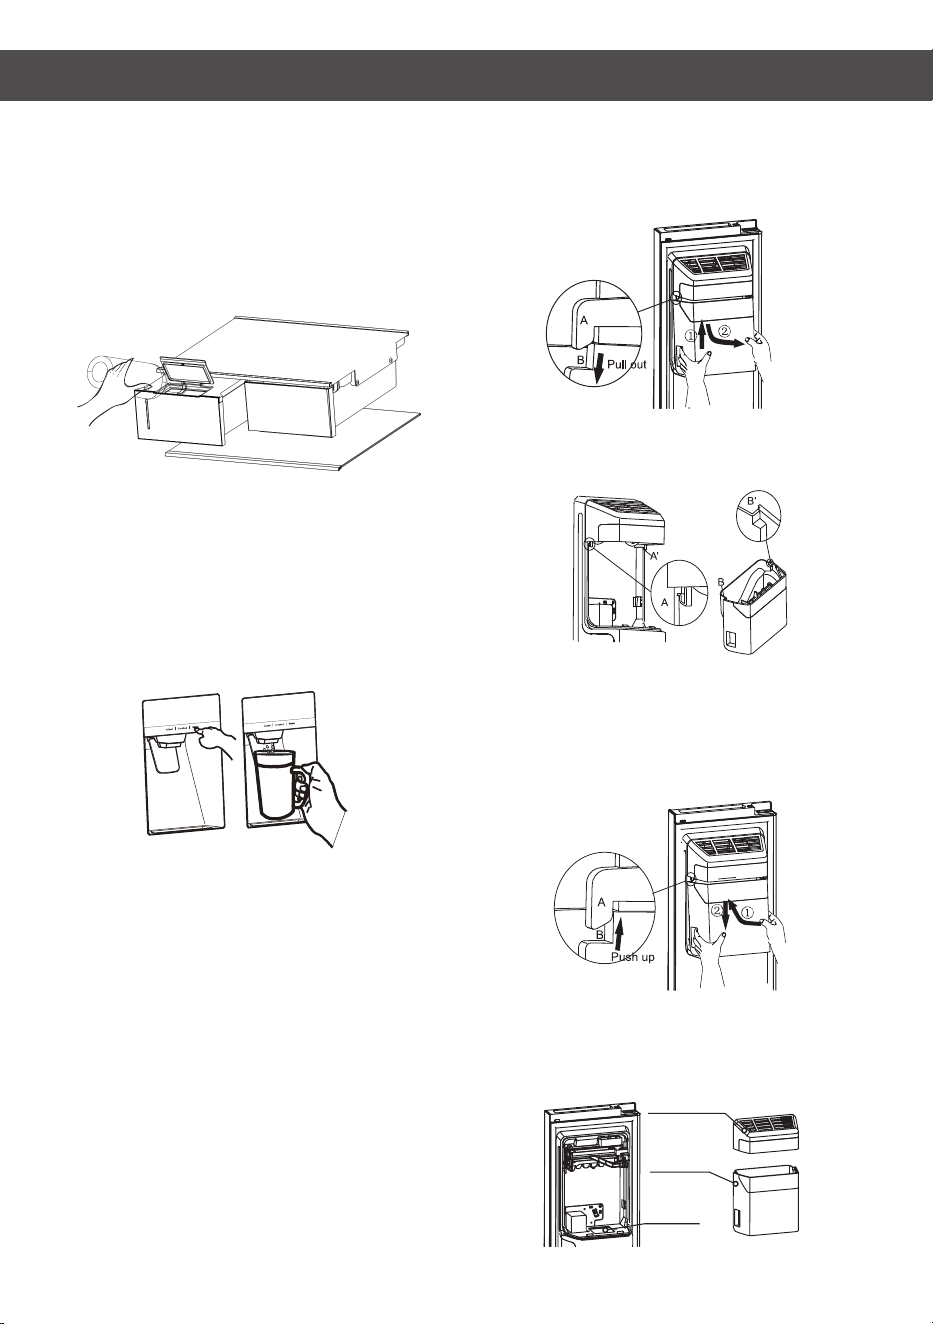
Water tank(TYPE 2 only)
It is for providing water for ice maker
and water dispenser. If you need to inpour
water into the water tank, you can lift the
front small cover, and then inpour directly.
It can be removed horizontal outward if
you need to clean it.
WARNING: Fill with portable water only.
Using the dispenser
You can choose the type of ice or water by
touching the “Cubed” or “Crushed” or
“Water” button. When you choose ice type,
push the dispenser gently with your cup.
Ice will be released from the dispenser.
Make sure the cup is in line with the
dispenser, and the ice exactly fall into
the cup.
Using the ice bucket
Removing steps:
1. Lift up the Ice Bucket.
2. Pull the Ice Bucket out slowly.
When you put it back, please make sure
the two side(B&B') of Ice Bucket is wedged
into the buckles(A&A').
Installing steps:
1. Push the Ice Bucket up, and make the
two side(B&B ') of Ice Bucket wedge into
the buckles(A&A').
2. Pull the Ice Bucket down, and make sure
the Ice Bucket is held the bracket firmly.
If ice doesn’t come out, please check for
any ice stuck in the chute and remove it.
Or pull out the Ice Bucket and check for
any ice cubes clump, then remove them.
Ice chute
Ice Maker Cover
Ice Bucket
Making ice
1. Allow your refrigerator to operate and
cool down for 24 hours.
2. Switch on the ice maker and securing
water source.
3. Refrigerator should have ice production
within 8 hours.
WARNING: Don’t store food in the ice
bucket to avoid damaging the ice maker
and spilling ice.
• In case of power failure, ice may melt
and refreeze.
NOTE:
• Don’t press the water dispenser lever
without a cup underneath to prevent
spills.
• Keep the dispenser installed even when
not in use to prevent cold air leakage.
8
USING THE APPLIANCE
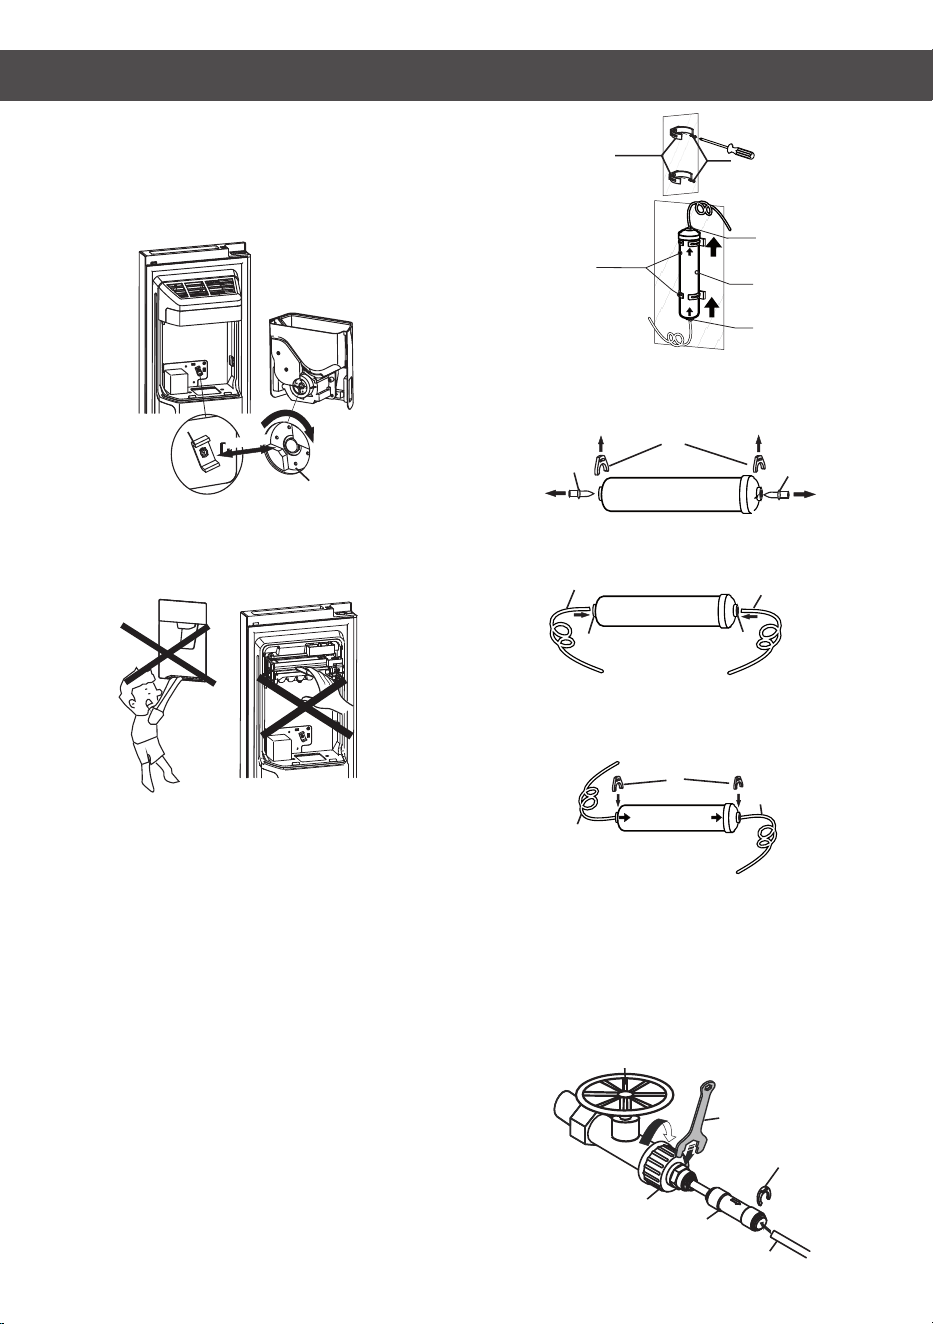
Do not allow your children to hang off the
dispenser or pluck the ice storage bin. This
could cause injury.
Before replacing back the Ice Bucket,
please check the two couplers are at a
suitable angle to connect correctly. If not,
please turn the Ice bucket coupler to the
right angle to match the motor coupler.
Connect
Motor Coupler
Ice Bucket Coupler
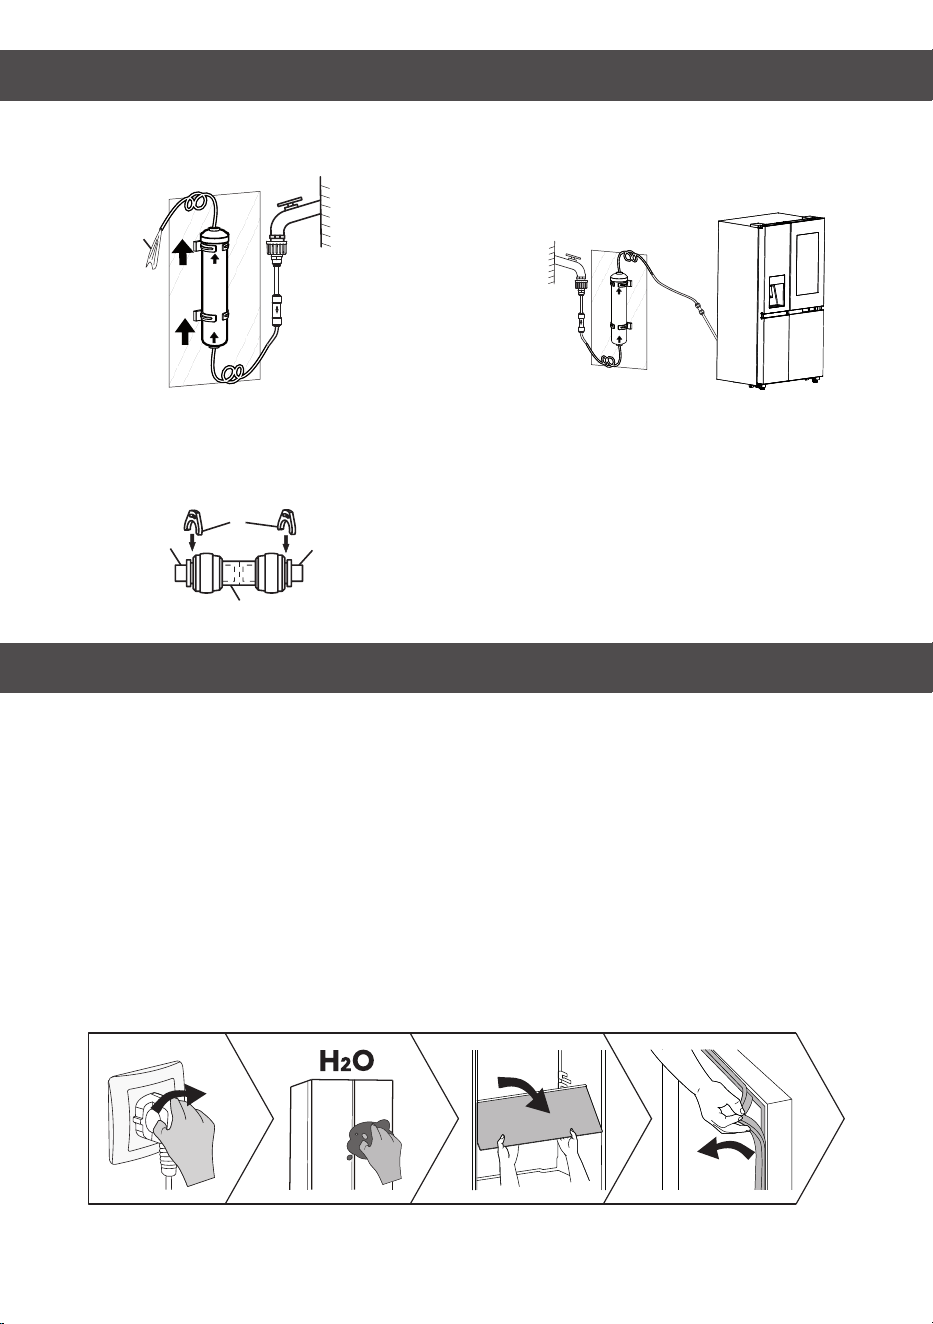
Installing the water filter(TYPE 1 only)
Fit the water filter
1. Take out the water filter and water lines
from the fridge room.
2. Determine the location to mount the
external filter.
3. Determine the distance between the
filter and the tap, and the distance from
the filter to the fridge. Prepare lines as
required lengths.(Cut the proper lengths
of water lines which you determine to
connect with the filter inlet or outlet.)
4. Mount the filter holder onto the wall by
using a screwdriver and attach the
water filter.
Connecting the filter inlet line to
the water supplier
Screw the adaptor onto a suitable 3/4" BSP
connector water outlet, and use the
spanner to tighten it. Fully insert the water
line into the check valve. Then insert the
clip in the install pack as the figure shown
below.
Filter Holder
Screw
Filter Holder
Filter
Inlet
Outlet
FLOW
Installing the water lines of the filter
1. Take the 2 clips out, then pull out the 2
stopper of the water filter.
Clip
Stopper
Stopper
Water Filter
2. Fully insert the water lines into the Inlet
and Outlet of the water filter.
Water line
Water Filter
Water line
Outlet
Inlet
2. Insert the 2 clips in the proper position
as the figure shown below, and confirm
that each clip holds the water line firmly.
Clip
Water line
Water line
FLOW
Clip
Connector
Filter inlet line
Water valve
Spanner
Check valve
9
USING THE APPLIANCE
After installed the filter, please open the
water valve to flush the filter for 5 minutes
before use.
FLOW
Water
Connect filter outlet line to the fridge
Insert the 2 clips in the install pack as
shown in the diagram, and then confirm
that each clip holds the line firmly.
Clip
Connector
Water line
Water line
NOTE: After connect the filter outlet line
with the refrigerator(as shown in the
diagram below), please dispense lines
before use.
WARNING!
After turning on the water valve, make sure
that there is no leakage at all connection
points of the water lines. If there is a
leakage, turn off the valve immediately
and tighten the water connector or make
the lines fully inserted into the connector.
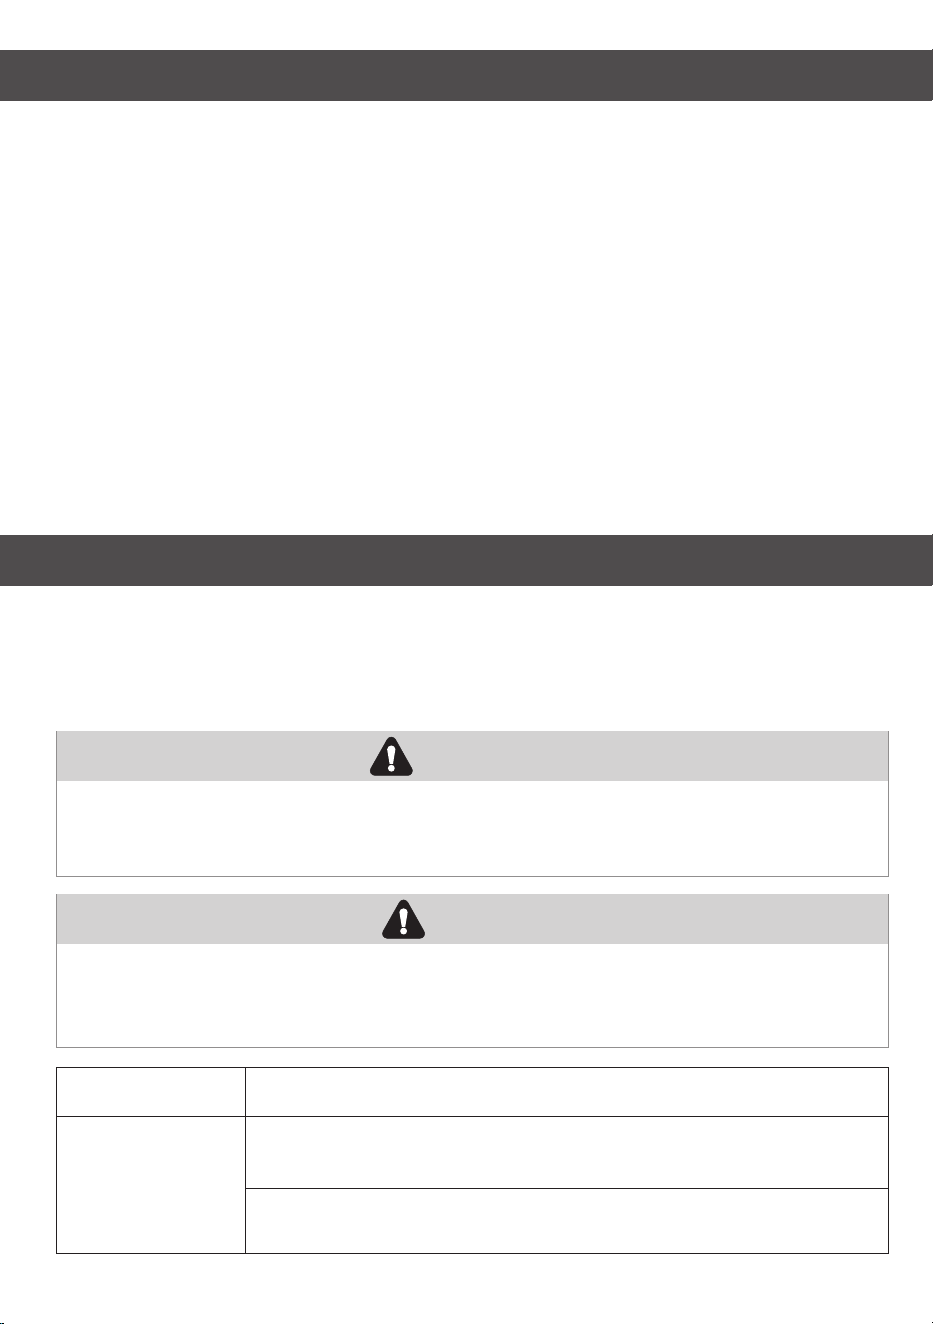
CLEANING AND CARE
• For hygiene, clean the appliance (exterior and interior accessories) regularly at least
every two months.
• Ensure the appliance is completely dry before switching back on and plugging back
into the mains socket.
• Wipe the inside of the appliance with a weak solution of bicarbonate of soda, and
then rinse with warm water using a wrung-out sponge or cloth.
• Take care to keep door seals clean. Sticky food and drinks can cause seals to stick to
the cabinet. Wash the seals with a mild detergent and warm water. Rinse and dry
them thoroughly after cleaning.
• This product contains a light source of energy efficiency class G.
• For more cleaning details, please refer to the E-manual.
10
FLOW
HELPFUL HINTS AND TIPS
We recommend that you follow the tips to save energy.
• Try to avoid keeping the door open for long periods.
• Ensure the appliance is away from any sources of heat.
• Don’t set the temperature colder than necessary.
• Don’t store warm food or evaporating liquid in the appliance.
Energy saving tips
If the appliance needs to be switched off for an extended period, the following steps
should be taken prevent mould on the appliance.
1. Remove all food.
2. Remove the power plug from the mains socket.
3. Clean and dry the interior thoroughly.
4. Ensure that all the doors are wedged open slightly to allow air to circulate.
Switching off your appliance
• Please refer to the E-manual for more information.
TROUBLESHOOTING
Don’t try to repair the appliance yourself. If the problem persists after you have made
the checks mentioned below, contact a qualified electrician, authorized service
engineer or the shop where you purchased the product.
WARNING
• If you experience a problem with your appliance or are concerned that the appliance
is not functioning correctly, you can carry out the following easy checks before calling
for service.
• NOTE: You can find more relevant information in the E-manual.
DANGER
Risk of child entrapment. Before you throw away your old refrigerator or freezer:
• Take off the doors.
• Leave the shelves in place so that children may not easily climb inside.
Problem
Possible cause & Solution
Appliance is not
working correctly
Check whether the power cord is plugged into the power outlet
properly.
The ambient temperature is too low. Try setting the chamber
temperature to a colder level to solve this problem.
11
TROUBLESHOOTING
Problem
Possible cause & Solution
A layer of frost
occurs in the
compartment
Temperature
inside is too warm
Check that the air outlets are not blocked by food and ensure
food is placed within the appliance to allow sufficient ventilation.
Ensure that the door can be fully closed.
You may have left the doors open too long or too frequently; or
the doors are kept open by some obstacle; or the appliance is
located with insufficient clearance at the sides, back and top.
The Wi-Fi password was entered incorrectly, or the network could
not be found.
For specific network configuration operations, please refer to the
electronic manual.
Unable to connect
appliance to Wi-Fi
network
DISPOSAL OF THE APPLIANCE
It is prohibited to dispose of this appliance as household waste.
Packaging materials
Packaging materials with the recycle symbol are recyclable. Dispose of the packaging
into a suitable waste collection container to recycle it.
Before disposal of the appliance
1. Pull out the mains plug from the mains socket.
2. Cut off the power cord and discard with the mains plug.
Correct Disposal of this product
This marking indicates that this product should no be
disposed with other household wastes throughout the EU.
To prevent possible harm to the environment or human
health from uncontrolled waste disposal, recycle it
responsibly to promote the sustainable reuse of material
resources. To return your used device, please use the
return and collection systems or contact the retailer where
the product was purchased. They can take this product for
environmental safe recycling.
Refrigerators contain refrigerant and gases in the insulation. Refrigerant and gases
must be disposed of professionally as they may cause eye injuries or ignition.
Ensure that tubing of the refrigerant circuit is not damage prior to proper disposal.
WARNING
12
SUGGESTION OF USING THE APPLIANCE
To avoid contamination of food, please respect the following instructions:
• Opening the door for long periods can cause a significant increase of the
temperature in the compartments of the appliance.
• Clean regularly surfaces that can come in contact with food and accessible drainage
systems.
• Clean water tanks if they have not been used for 48h; flush the water system
connected to a water supply if water has not been drawn for 5 days.(Special for
models with water tanks)
• Store raw meat and fish in suitable containers in the refrigerator, so that it is not in
contact with or drip onto other food.
• Two-star frozen-food compartments are suitable for storing pre-frozen food, storing or
making ice-cream and making ice cubes.
• One-, two- and three-star compartments are not suitable for the freezing of fresh food.
• If the refrigerating appliance is left empty for long periods, switch off, defrost, clean,
dry, and leave the door open to prevent mould developing within the appliance.
• NOTE: The information below is for reference only, as functions may vary by models.
Please get more details in the E-manual.
Appropriate food
Eggs, cooked food, packaged food, fruits
and vegetables, dairy products, cakes,
drinks and other foods which are not
suitable for freezing
Compartments
type
Order
Target storage
temp.[°C]
1
Fridge
+2~+8
2
Two-star
≤-12
3
4
Seafood, freshwater aquatic products
and meats
Four-star
≤-18
Three-star
≤-18
One-star
≤-6
5
Zero-star
-6~0
Fresh pork, beef, fish, chicken, some
packaged processed foods, etc. Partially
packed/wrapped up encapsulated
processed foods (non-freezable foods)
6
7
Seafood, pork, beef, chicken, freshwater
aquatic products, etc.
Chill
-3~+3
8
9
Fresh pork, beef, fish, chicken, cooked
food, etc.
Fresh Food
0~+4
Red wine, white wine, sparkling wine, etc.
Wine
+5~+20
Storage life
≤1 month
≤2 months
≤3 months
≤3 days
≤3 days
2~7 days
/
/
Declaration of conformity
The company declares that the device with the function Connectlife complies with the
essential requirements and other relevant provisions of Directive 2014/53/EU. The
detailed Declaration of Conformity can be found at the web address
https://auid.connectlife.io on the page of your device among the additional documents.
13
Hisense UK Ltd
Ground floor Munroe Court
White Rose Office Park
Millshaw Park Lane
Leeds LS11 0EA