© 2010 Martin Professional A/S
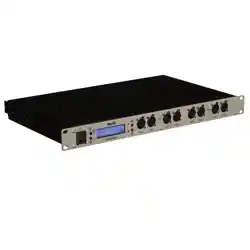
Ether2DMX8
User Manual
©2010 Martin Professional A/S. Information subject to change without notice. Martin Professional A/S and all affiliated
companies disclaim liability for any injury, damage, direct or indirect loss, consequential or economic loss or any other loss
occasioned by the use of, inability to use or reliance on the information contained in this manual. The Martin logo, the Martin
name and all other trademarks in this document pertaining to services or products by Martin Professional A/S or its affiliates and
subsidiaries are trademarks owned or licensed by Martin Professional A/S or its affiliates or subsidiaries.
P/N 35000241 Rev. A
Disposing of this product
Martin products are supplied in compliance
w ith Directive 2002/96/EC of the European
Parliament and of the Council of the European
Union on WEEE (Waste Electrical and
Electronic Equipment), as amended by
Directive 2003/108/EC, w here applicable.
Help preserve the environment! Ensure that
this product is recycled at the end of its life.
Your supplier can give details of local
arrangements for the disposal of Martin
products.

I © 2010 Martin Professional A/S
Ether2DMX8 User Manual
Table of Contents
......................................................................................1
Introduction
................................................................................................................................... 1Ether2DMX8 Safety Information
................................................................................................................................... 2Dimensions
................................................................................................................................... 3Features
......................................................................................4
Connections
................................................................................................................................... 5AC Connections
................................................................................................................................... 5DMX Connections
................................................................................................................................... 6Ethernet Data Connection
................................................................................................................................... 6USB
................................................................................................................................... 7Switch Inputs
................................................................................................................................... 7Others
......................................................................................8
Menu
................................................................................................................................... 8Navigating the Menu System
................................................................................................................................... 9Home Display Screen
......................................................................................11
Factory Presets
................................................................................................................................... 121. Maxxyz
................................................................................................................................... 132. Maxedia
................................................................................................................................... 143. Maxxyz/Maxedia
................................................................................................................................... 154. 8x Input (MSD)
................................................................................................................................... 165. 4 In - 4 Out
................................................................................................................................... 176. DMX Split 1-7
................................................................................................................................... 187. DMX Split 1-3
................................................................................................................................... 198. Artnet Clone
................................................................................................................................... 209. Broadcast 2.x
................................................................................................................................... 2110. Broadcast 10.x
......................................................................................22
DMX Configuration
................................................................................................................................... 22DMX Port Options
................................................................................................................................... 24DMX Merge Options
......................................................................................25
IP Configuration
................................................................................................................................... 25Automatic IP
................................................................................................................................... 26Custom IP
......................................................................................27
User Preset
................................................................................................................................... 27Store Preset
................................................................................................................................... 28Load Preset
......................................................................................29
DMX Monitor

II © 2010 Martin Professional A/S
Ether2DMX8 User Manual
................................................................................................................................... 29Value View
................................................................................................................................... 30Graphical View
......................................................................................31
DMX Test
................................................................................................................................... 31DMX Port Test
................................................................................................................................... 32Artnet Universe Test
......................................................................................33
Cues
................................................................................................................................... 34Recording Cues
................................................................................................................................... 35Linking and Timings
................................................................................................................................... 35Playing Back Cues
................................................................................................................................... 37Cue Browser
......................................................................................38
Switch Inputs
................................................................................................................................... 38Hardware
................................................................................................................................... 39Configuration
......................................................................................40
System
................................................................................................................................... 40Device Name
................................................................................................................................... 40Backup
................................................................................................................................... 41Display Timeout
................................................................................................................................... 41Display Scroll
................................................................................................................................... 42DMX Hold
................................................................................................................................... 43Startup Settings
................................................................................................................................... 44Firmware Update
................................................................................................................................... 45Reset to Default Settings
......................................................................................46
Ether2DMX8 Web Interface
................................................................................................................................... 47Assigning a static IP Address in Windows XP
................................................................................................................................... 50Connecting to the Router
................................................................................................................................... 51Status Page
................................................................................................................................... 52Factory Presets
................................................................................................................................... 52User Preset
................................................................................................................................... 53Cues
................................................................................................................................... 54DMX Configuration
................................................................................................................................... 55DMX Merging
................................................................................................................................... 56IP Configuration
................................................................................................................................... 57Switch Inputs
................................................................................................................................... 58System
......................................................................................59
Ether2DMX8 Factory Defaults
......................................................................................60
Decimal to Artnet Conversion Table
......................................................................................62
Specifications

III © 2010 Martin Professional A/S
Ether2DMX8 User Manual
1 © 2010 Martin Professional A/S
Ether2DMX8 User Manual
Introduction
Thank you for purchasing the Ether2DMX8 Router. This device is a multi purpose DMX and Artnet
processor with many advanced features.
Please read the manual carefully and in its entirety to understand all functions of the unit.
For quick setup as a Artnet Output device without advanced features jump ahead to the Factory
Presets which allow fast and uncomplicated setup of the most common applications.
Further information, updated user manuals and software can be found at www.martin.com
Ether2DMX8 Safety Information
The Ether2DMX8 Router is not for household use. For safe operation, read this manual before use and
follow the safety precautions listed below.
If you have questions about how to operate the device safely, please contact your Martin distributor or
dealer.
Disconnect the device from AC power before removing fuses or any part, and when not in use.
Always ground (earth) the device electrically.
Use only a source of AC power that complies with local building and electrical codes and has
both overload and ground-fault protection.
Do not expose the device to rain or moisture.
Never attempt to bypass fuses. Always replace defective fuses with ones of the specified type
and rating.
Refer all service to a qualified technician.
Do not modify the device or install other than genuine Martin parts.
Caution: Risk of Fire and Electrical Shock. Use only in dry locations.
Caution: Risk of Explosion if Battery is replaced by an incorrect type. Dispose of used batteries
according to local environmental regulations.
Installations Instructions
Equipment is supposed to be installed into the protective environment of a 19” cabinet. Use
otherwise at your own risk.
2 © 2010 Martin Professional A/S
Ether2DMX8 User Manual
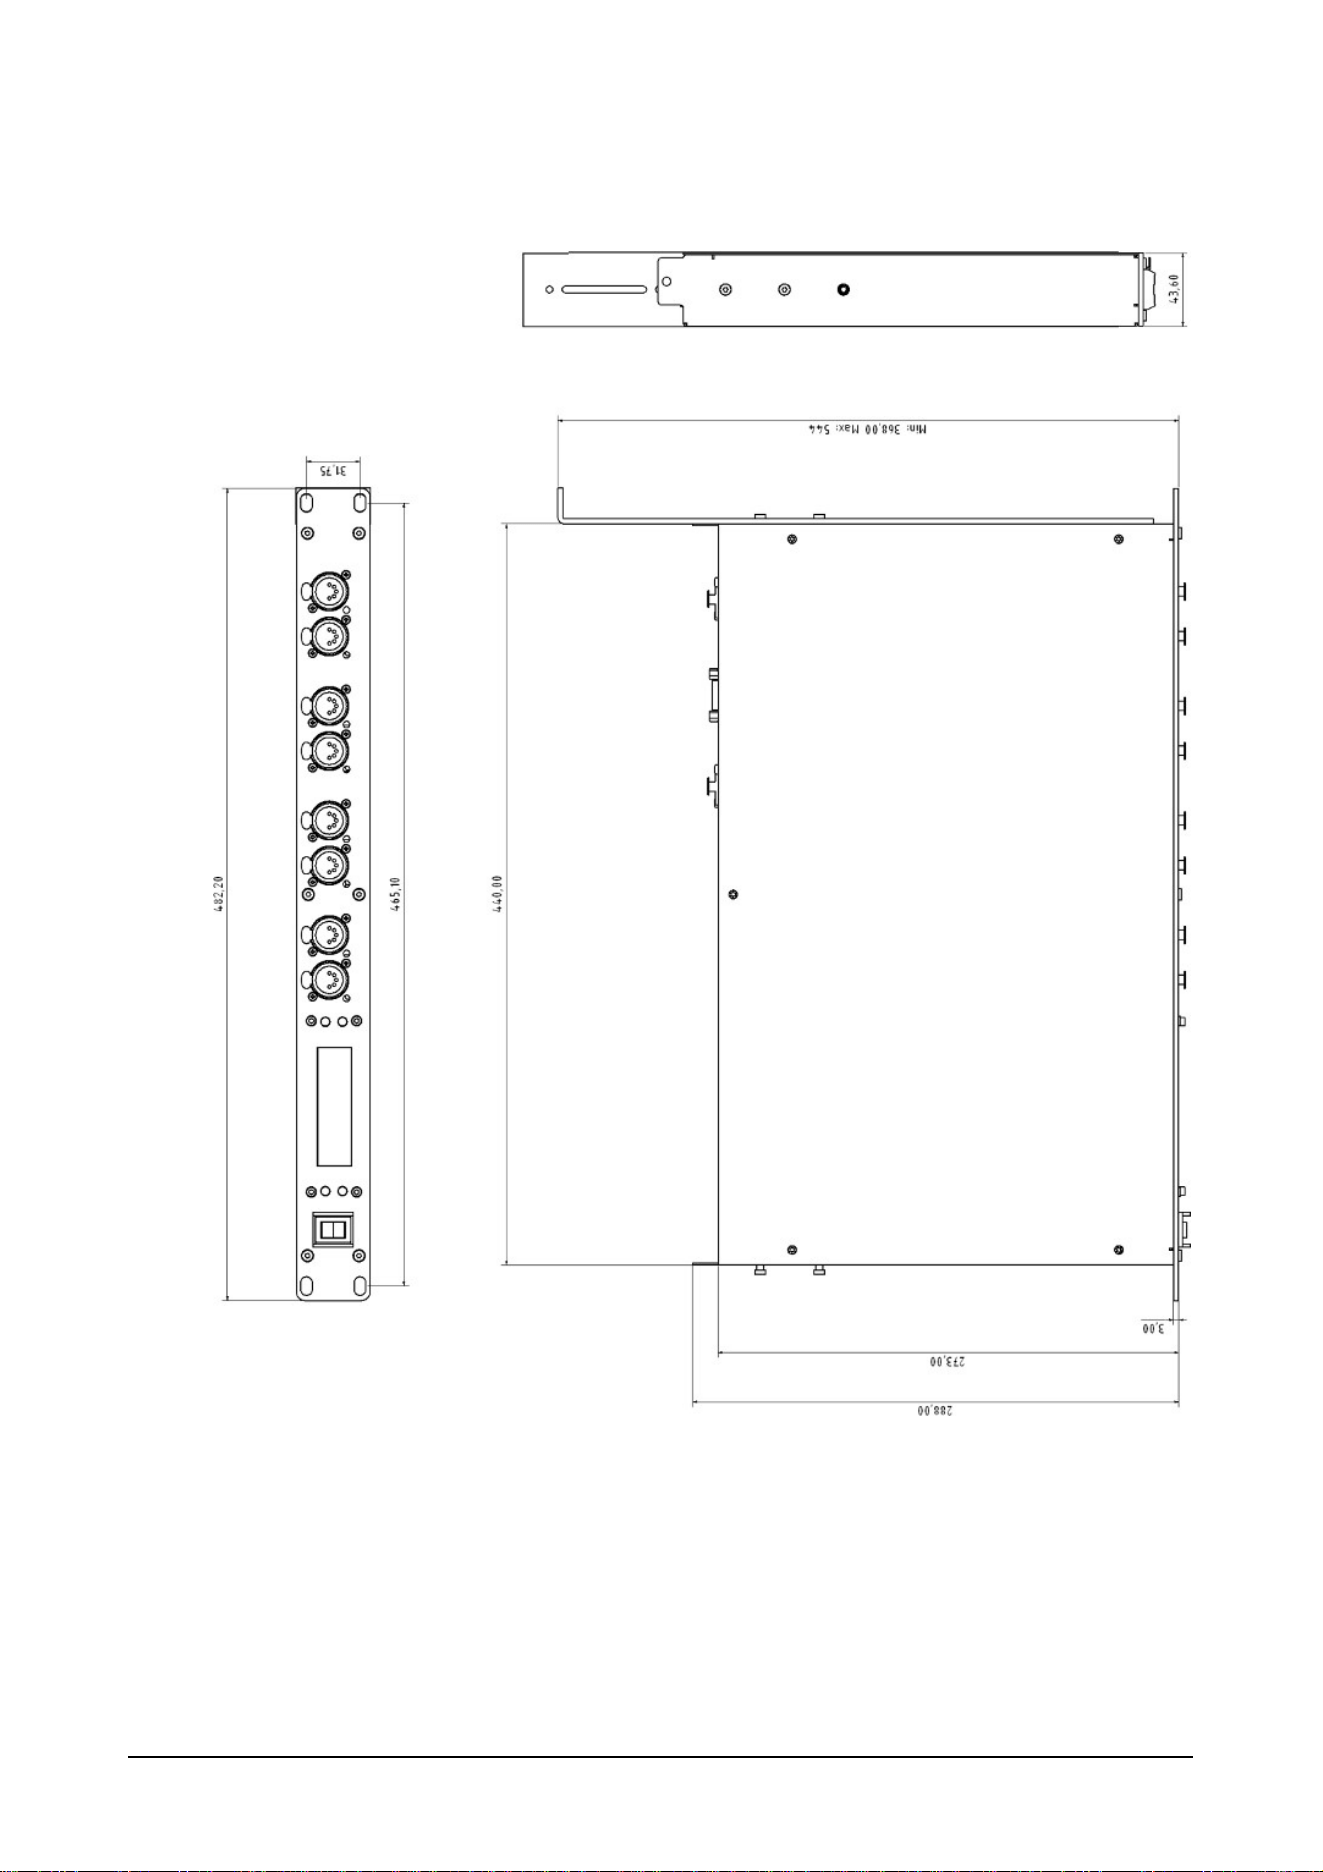
Dimensions

3 © 2010 Martin Professional A/S
Ether2DMX8 User Manual
Features
The Ether2DMX8 device offers a lot of unique and powerful features.
Almost all settings can be accessed from the built in display and menu system.
All settings are available from the integrated web configuration which allows remote access to the
Ether2DMX8 device from any web browser.
This router essentially packages the features of two standard Artnet converters, DMX merger, DMX
patch-bay and a DMX recorder into one compact unit.
Artnet to DMX conversion
DMX to Artnet conversion
8 Factory Presets
10 User Presets
99 Cues with Fade Time, Hold Time and Cue linking
8 Switch Inputs
DMX Splitter
DMX Monitor
DMX and Artnet Test Generator
USB port for backup and firmware updates
4 © 2010 Martin Professional A/S
Ether2DMX8 User Manual
Connections
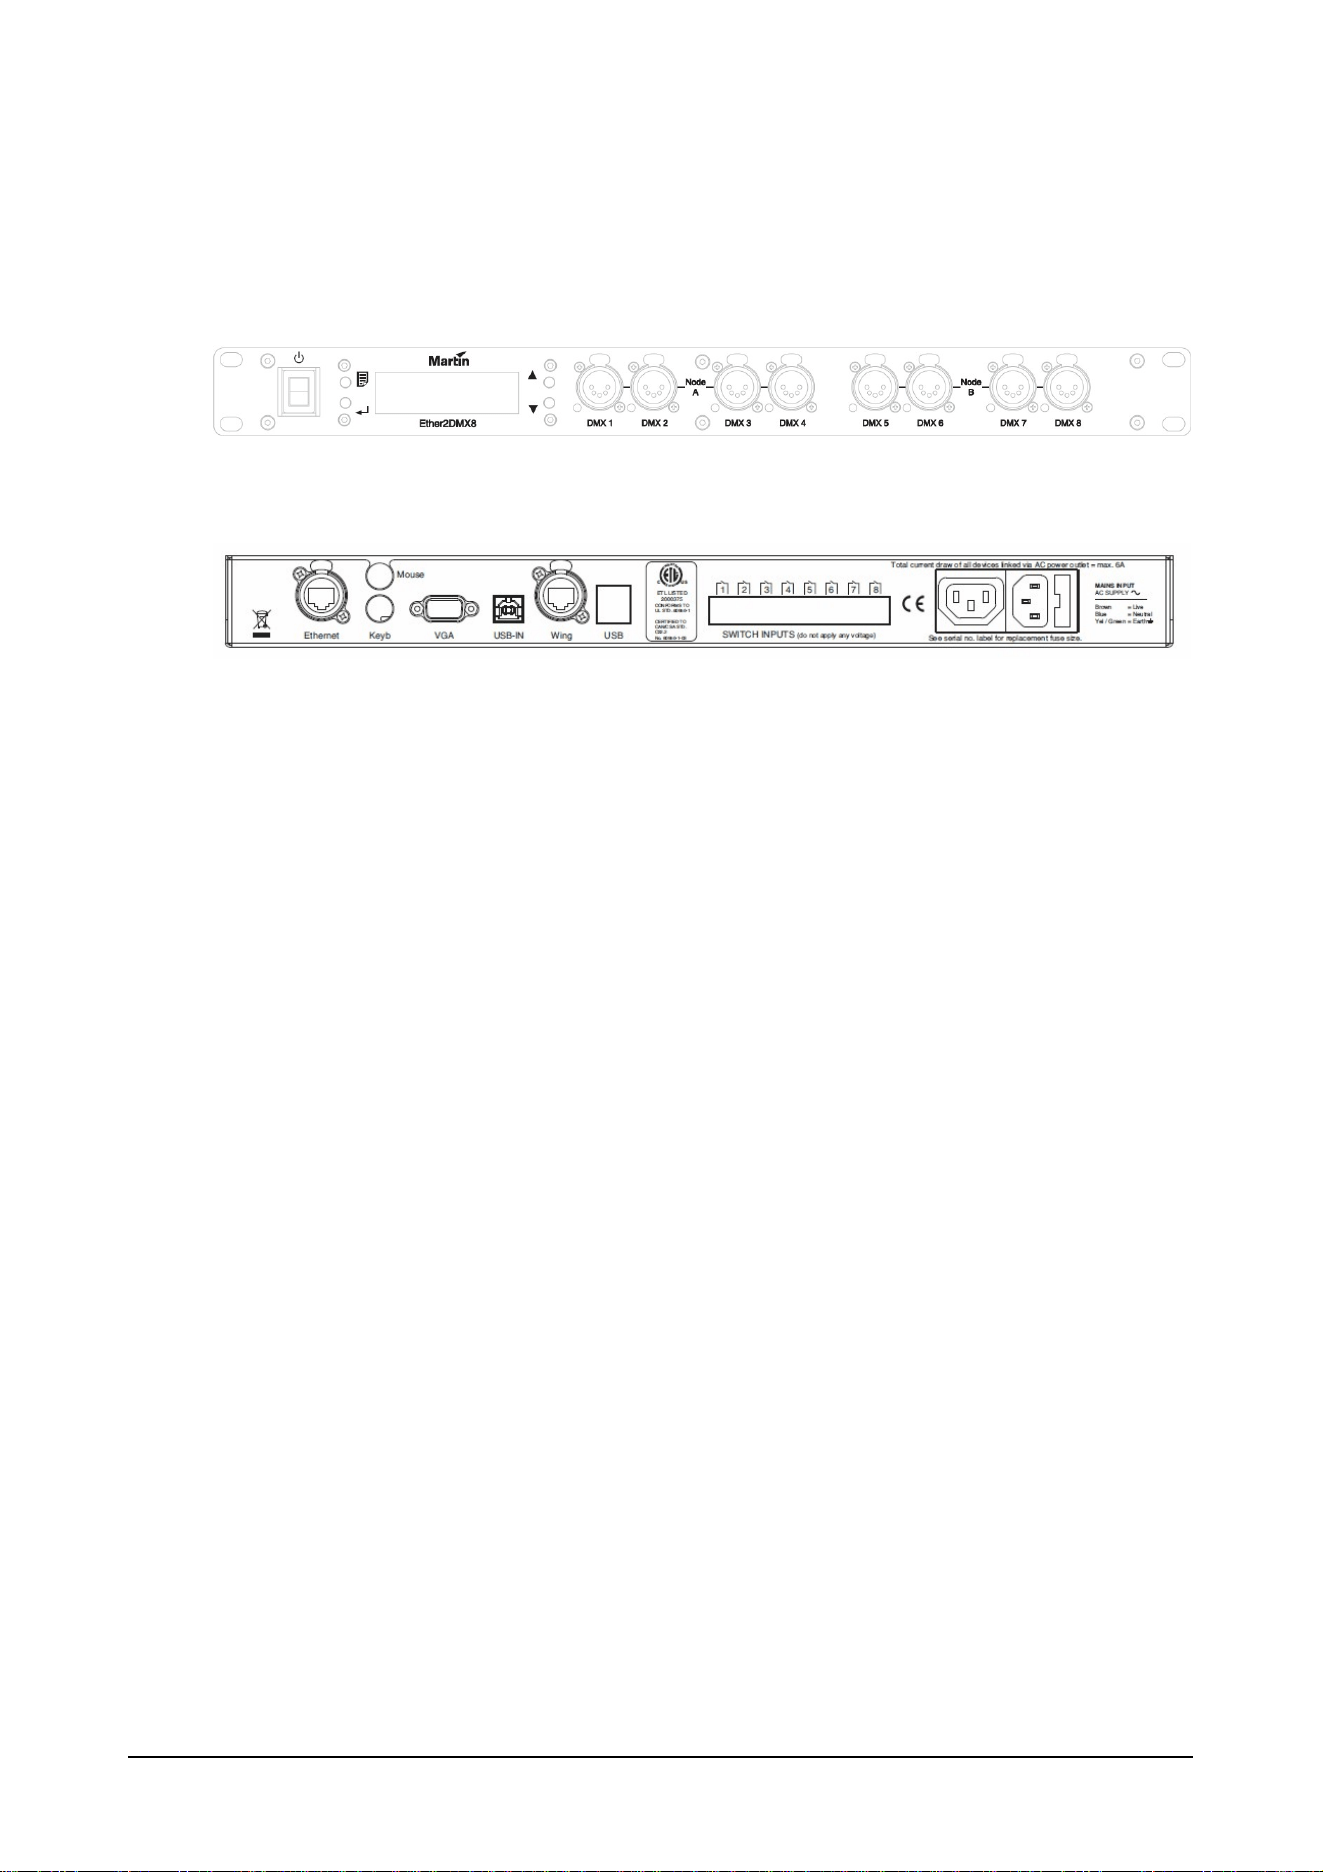
Front Connections
Back Connections
5 © 2010 Martin Professional A/S
Ether2DMX8 User Manual
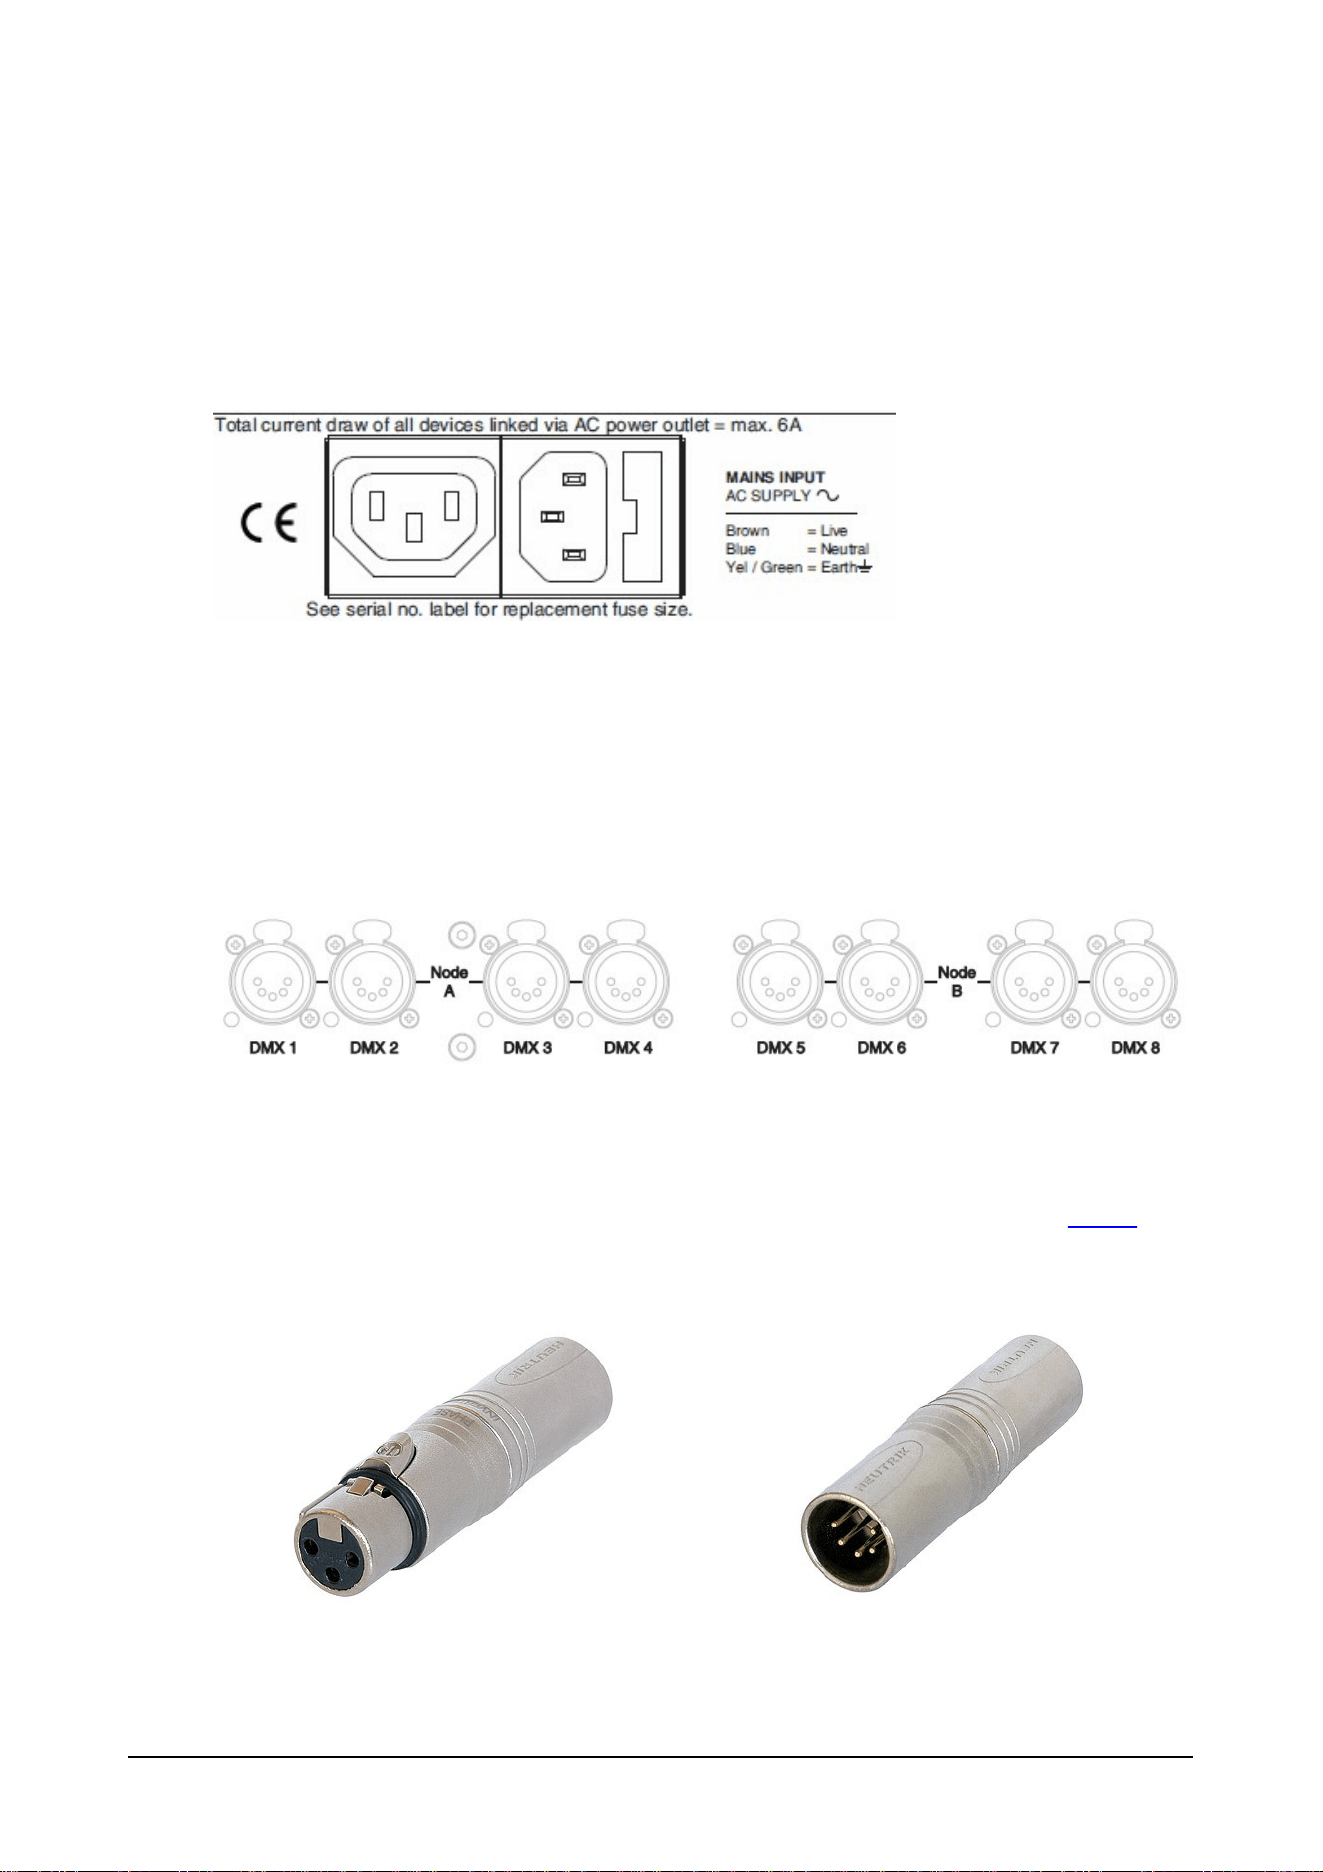
AC Connections
On the back of the unit an IEC connection is provided for the AC power connection. Use a cable with
the appropriate connector for your local electrical system.
Always connect ground and NEVER use a ground lift adapter when connecting the Ether2DMX8
device.
In addition to the input a loop through IEC output connection is provided. This allows daisy chaining
power between multiple Ether2DMX8.
Do not exceed more than 6A total power draw from the IEC output.
DMX Connections
DMX Output connections are 5pin female XLR connectors.
The pin-out on all sockets is pin 1 to shield, pin 2 to cold (-), and pin 3 to hot (+). Pins 4 and 5 are not used.
Connect the DMX cables carefully to the desired ports.
Provide support and strain relief to prevent damage to the DMX ports. Avoid connecting heavy FOH
Snakes directly to the ports.
Adapters may be required for certain functions. The following adapters are available from Neutrik
3 pin DMX Output
5 pin DMX Input
Neutrik NA3F5M
Neutrik NA5MM
XLR 3 pole female - XLR 5 pole male
5 pole XLR male - 5 pole XLR male
6 © 2010 Martin Professional A/S
Ether2DMX8 User Manual
Ethernet Data Connection
The Ethernet cable from the Artnet Source is connected on the back of the router into the port labeled
"ETHERNET" . This is a Ethercon connector and the use of Ethercon cables is recommended.
However any RJ45 connector is suitable.
Be careful not to plug the cable into the LINK port which is also an Ethercon connection, but with a
blue ring around it.
To connect multiple Ether2DMX8 to an Artnet Source an Ethernet switch is required to split the data
into the desired amount of streams. It is recommended to use an unmanaged switch to ensure
accurate transfer of the Artnet Data without delay.
To connect a single Artnet Source like a Maxedia Pro media server to the router, use a RJ45
crossover cable.
Please note that the EtherDMX port of a Maxxyz Compact is auto sensing and a normal patch
cable is sufficient for this connection.
The Ethernet connection is also used to connect a computer to the Ether2DMX8 for remote
configuration via a web browser. Information about the web access can be found here in the manual.
USB
The back of the router provides USB connections for firmware updates and backups.
Use commonly found USB sticks for any file transfer. The USB stick has to be formatted in FAT32 to
be usable with the router.
Do not use portable hard drives that draw high currents of the USB ports.
7 © 2010 Martin Professional A/S
Ether2DMX8 User Manual
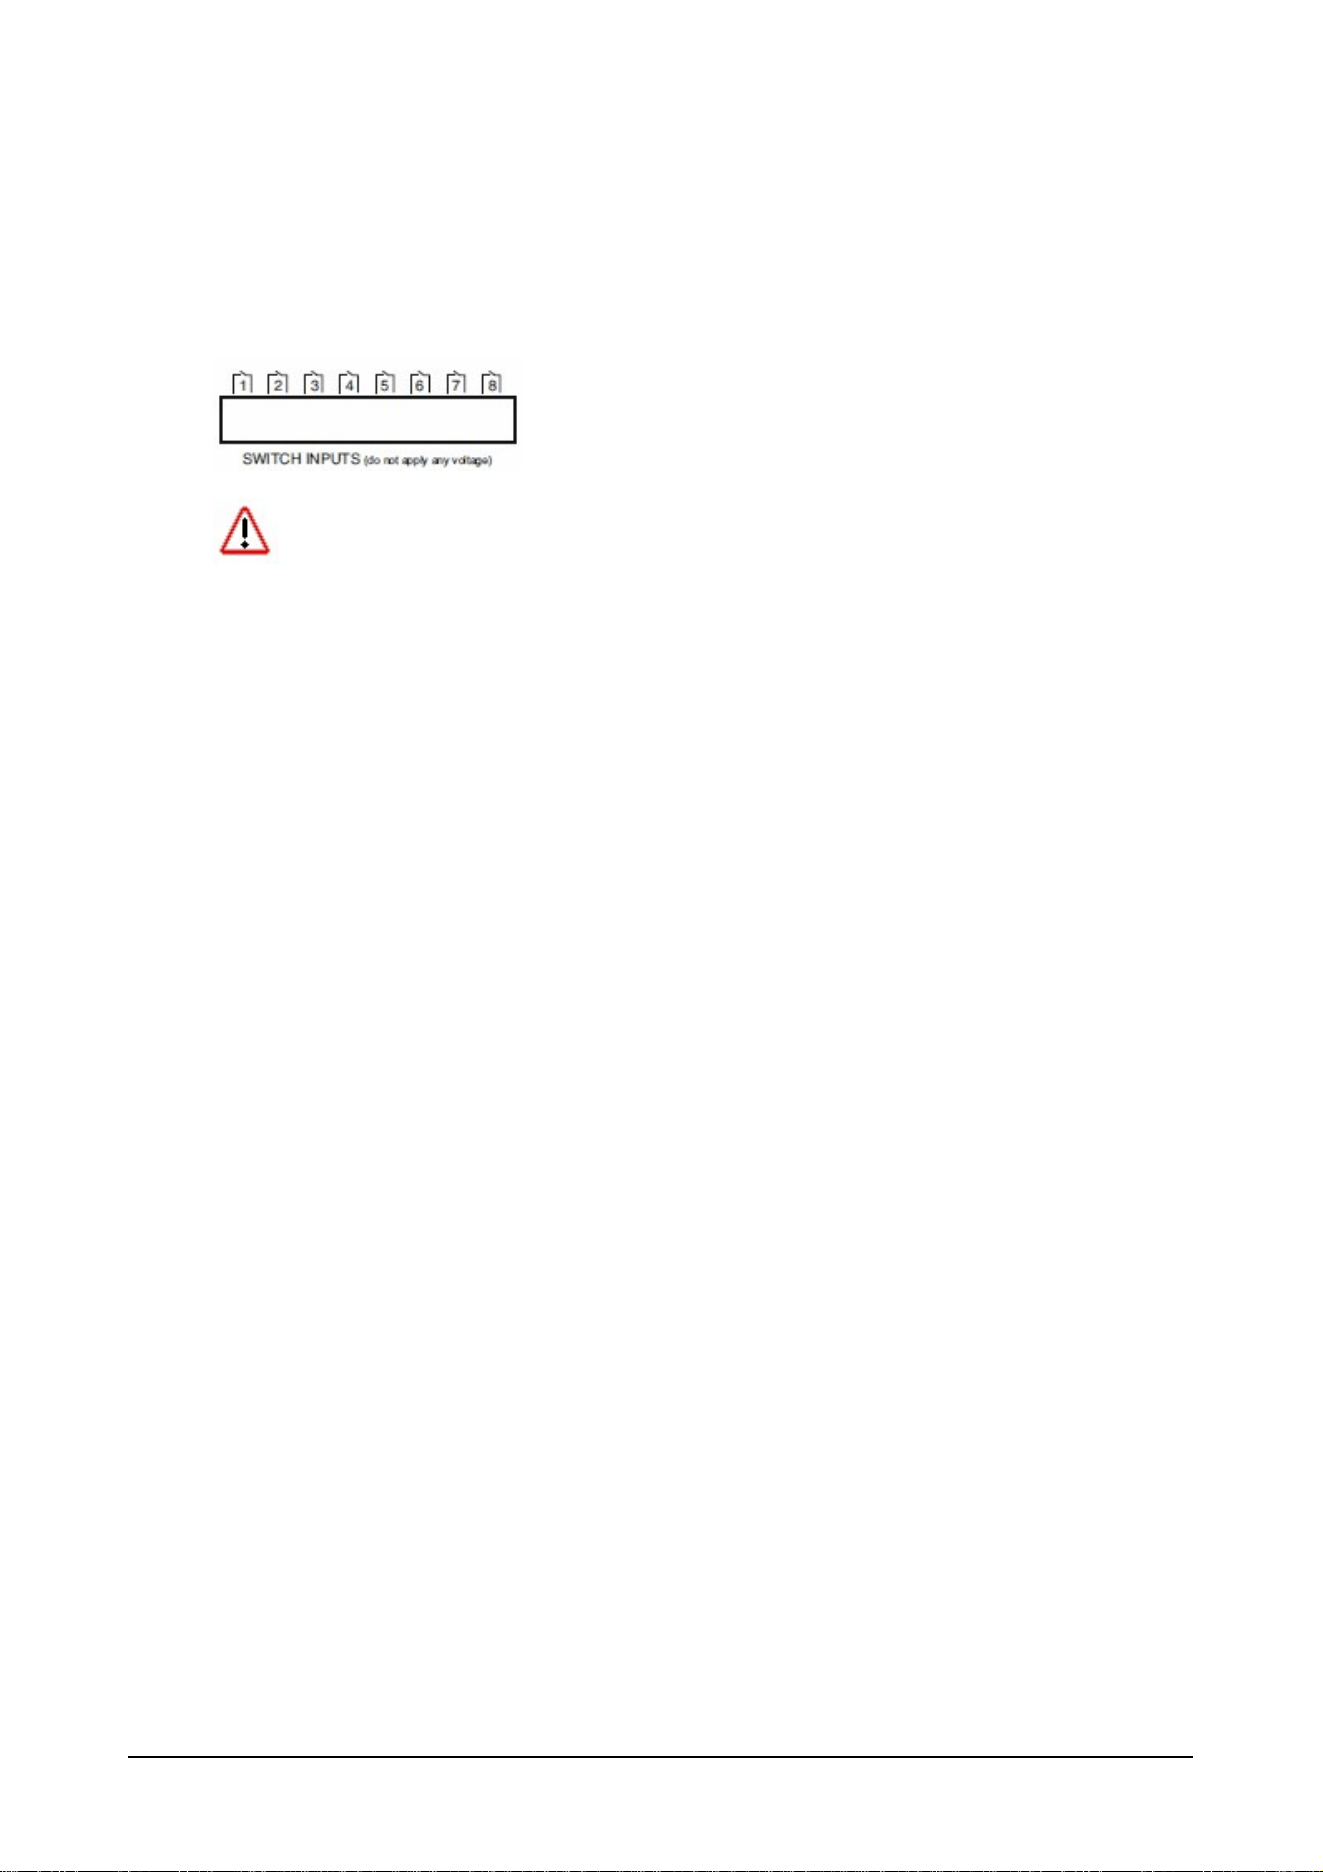
Switch Inputs
8 Inputs are provided that can be mapped to various functions of the Ether2DMX8 router.
The inputs are simple contact closures.
Do not apply any voltage to contacts. Doing so will damage the router and is not covered
under warranty !
The router is shipped with four terminal blocks that connect to the ports. Lost or missing blocks can
be purchased from various electronic vendors.
Others
The back of the Ether2DMX8 offers additional connections that may be used in future software
versions.
Currently none of these connections are active and are not required for the operation of the router.
8 © 2010 Martin Professional A/S
Ether2DMX8 User Manual
Menu
Navigating the Menu System
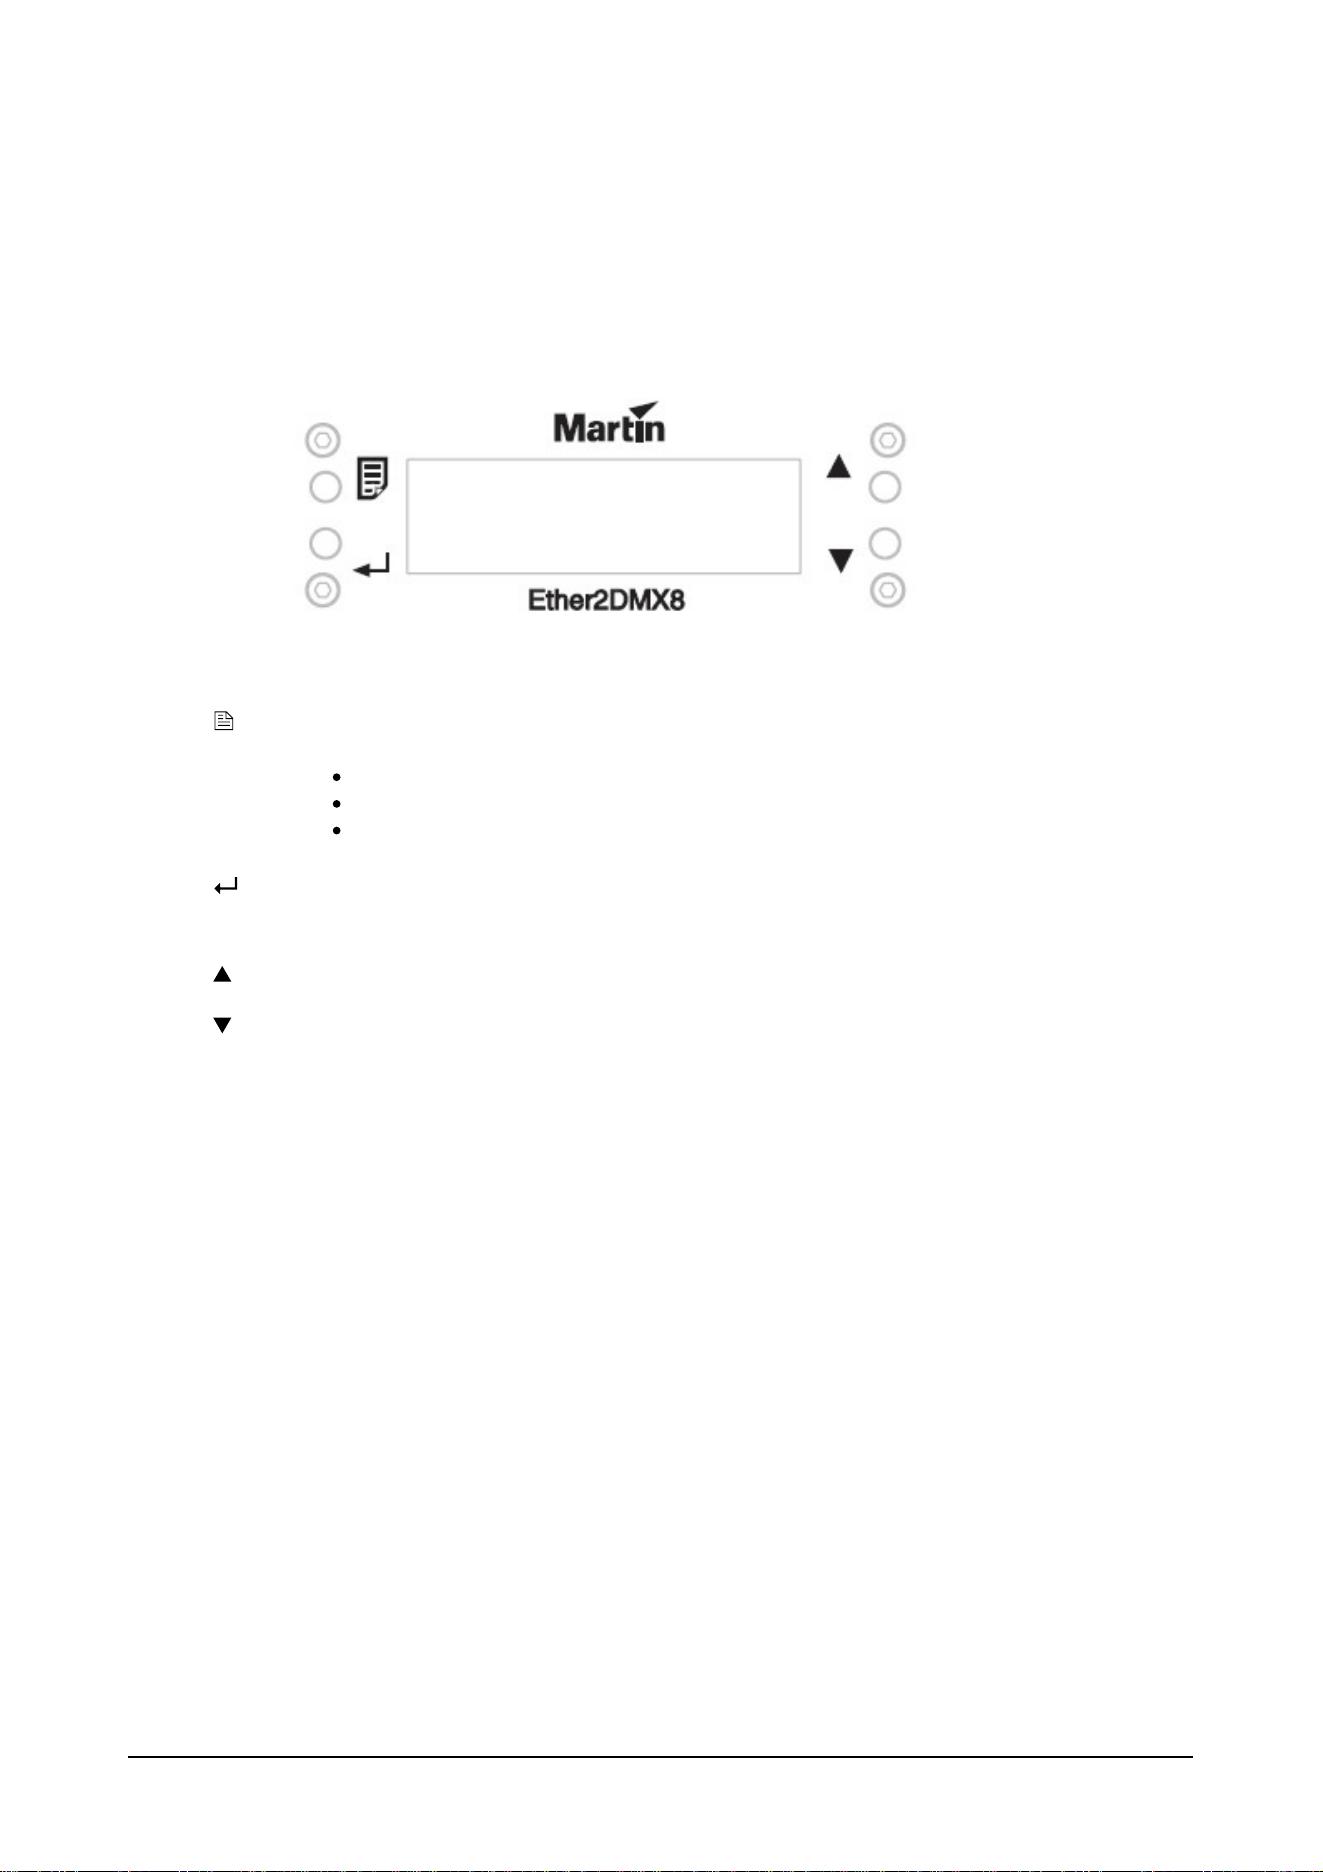
The menu is accessed by the 4 buttons surrounding the display.
(Menu)
The menu button has several functions
Access the Menu
Exit the Menu
Step backwards on certain operations
(Enter)
Enter is used to open a menu item or to confirm a choice or setting.
Arrows are used to navigate the menu tree or to increase and decrease values.
9 © 2010 Martin Professional A/S
Ether2DMX8 User Manual
Home Display Screen
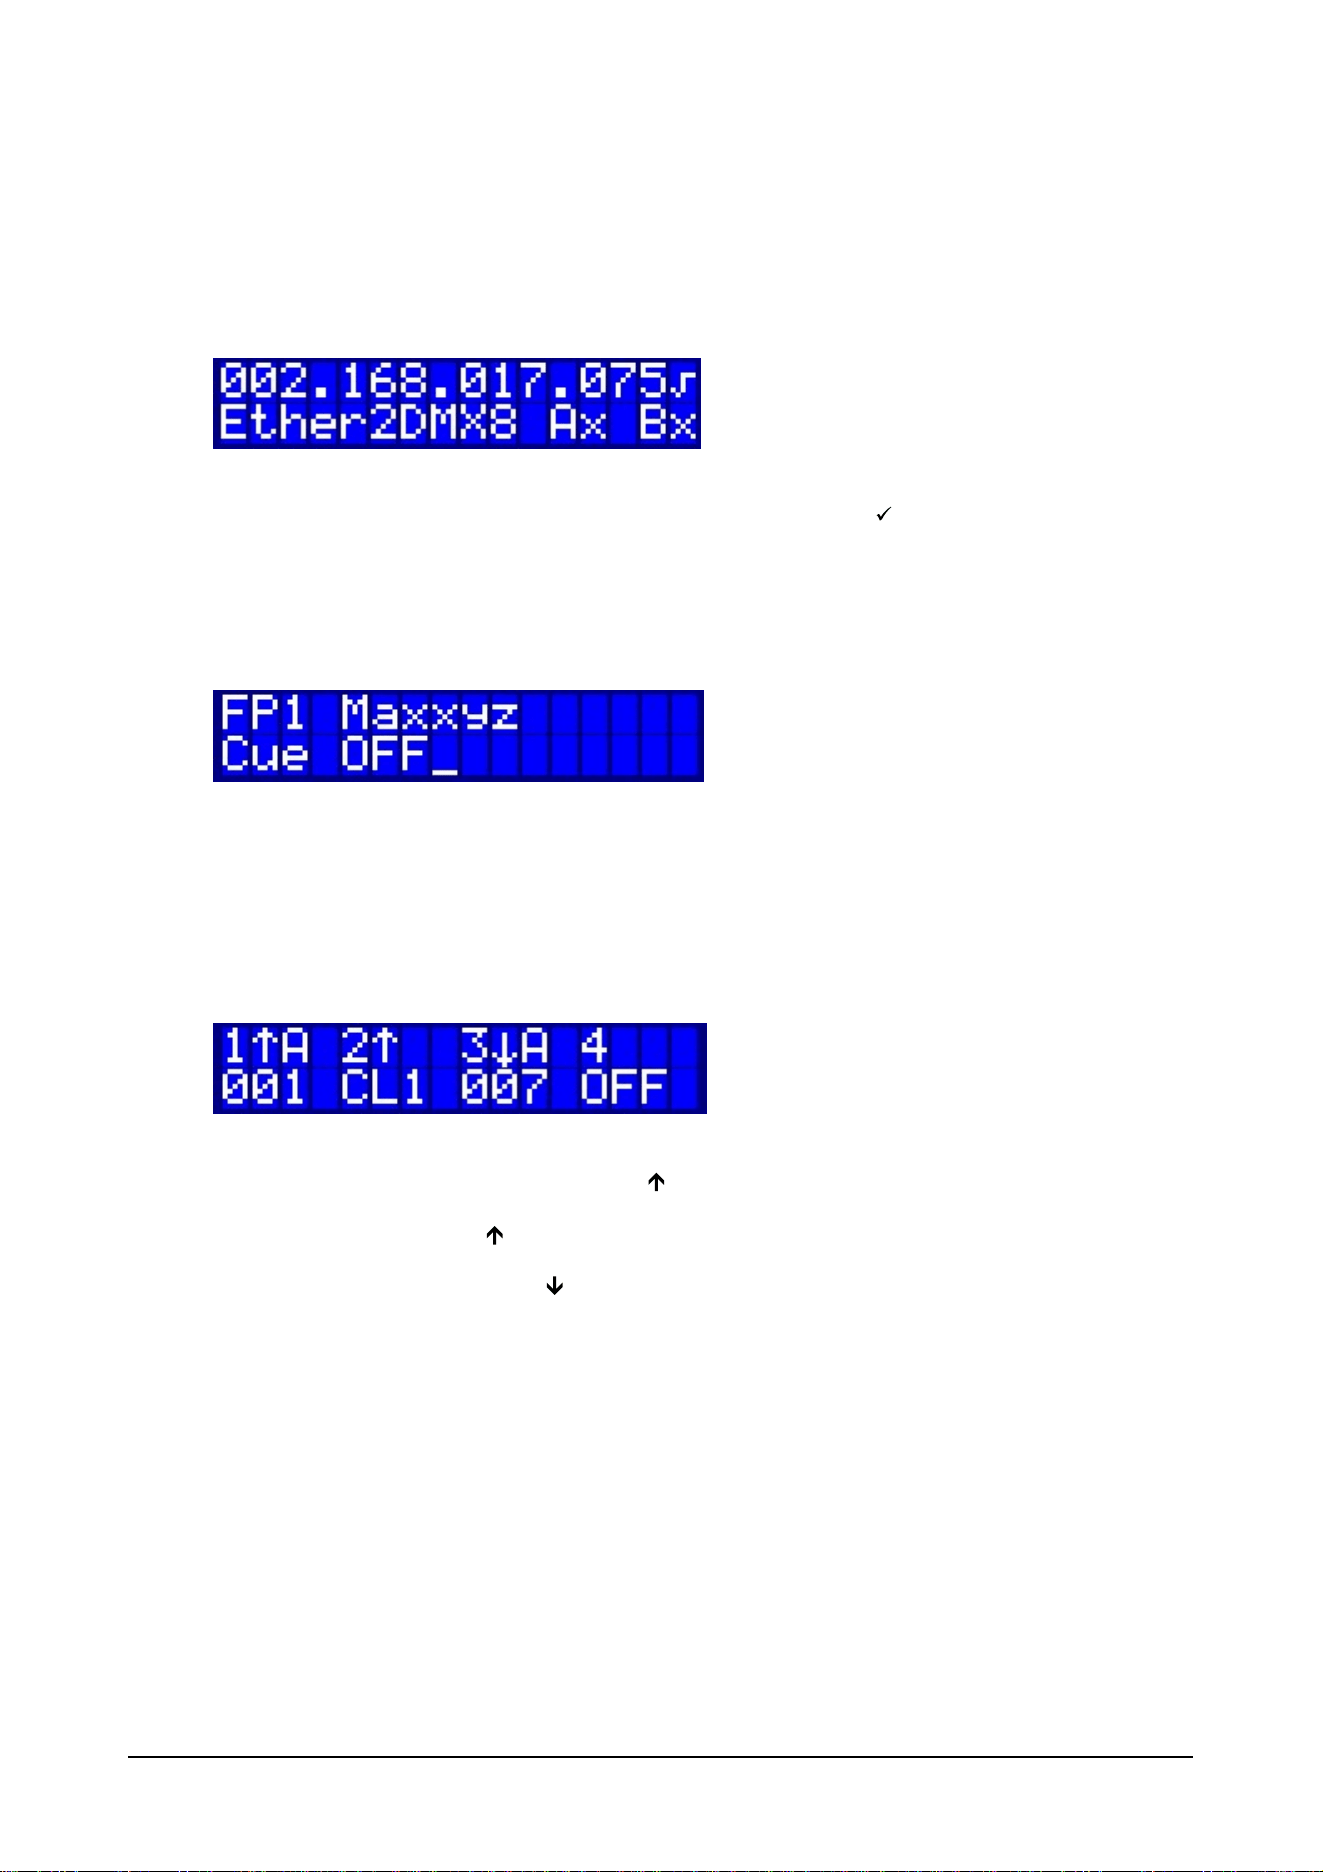
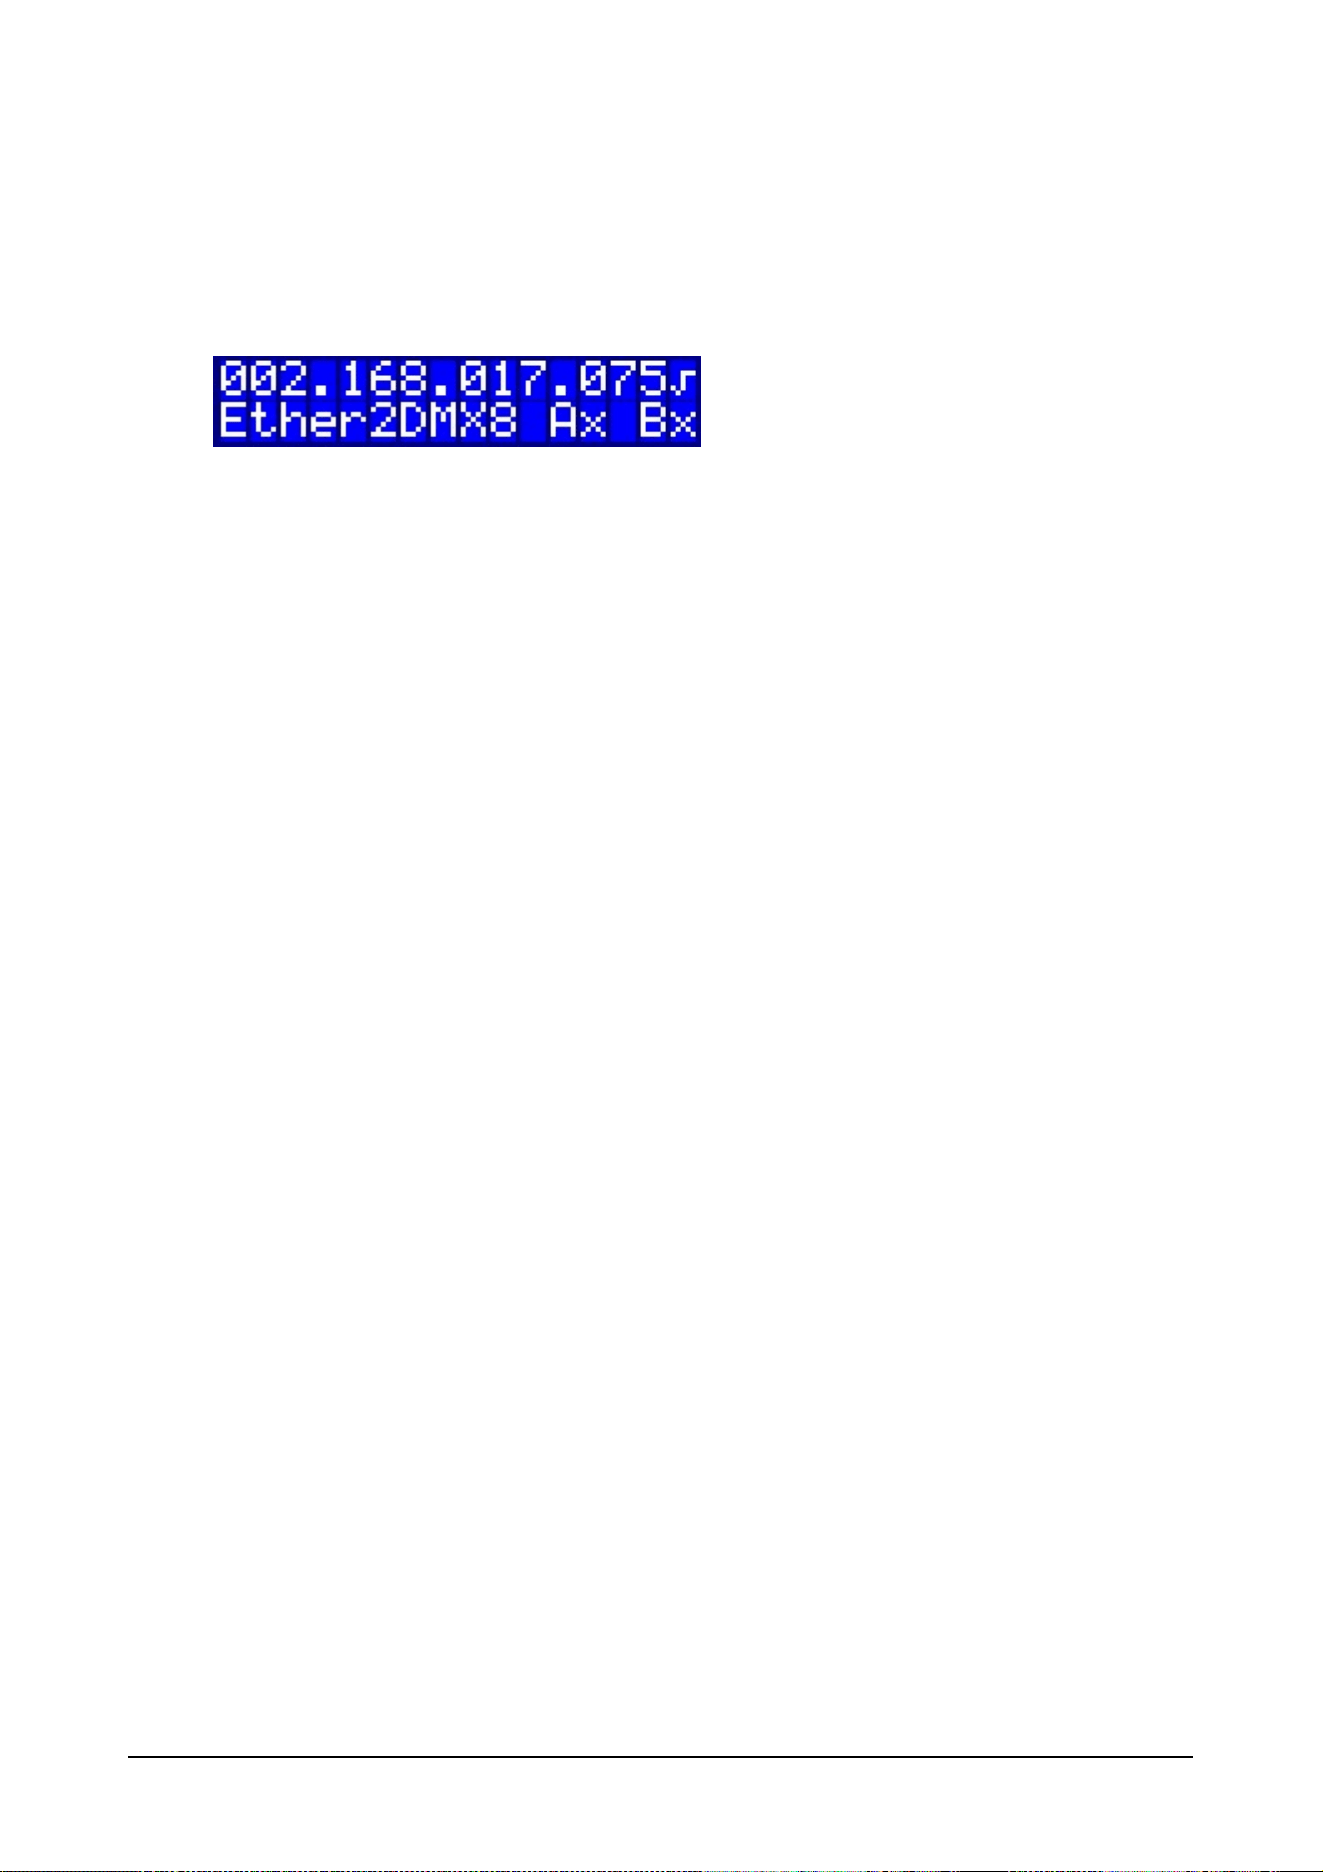
The home display is used to indicate the status of the router and confirm the main settings quickly.
This is the standard display shown after powering on the router.
The top row indicates the IP address 2.168.17.75 of the router. The " " check mark at the end
indicated that Artnet data is being received by the router.
Below it shows the router name Ether2DMX8 and the two internal Artnet nodes. Here the "x" indicates
that no Artnet traffic is received.
Navigate to the next page with the arrow down key.
On the top row the current factory (FP) or user (UPr) preset is indicated, otherwise it reads "No
Preset Active"
The CUE row indicates if a cue is currently running.
The next two pages down show the current DMX port configuration. The first page shows DMX ports 1
through 4.
DMX 1 is set to Node A (A) and Output ( ). The current DMX Universe on this port is 001.
DMX 2 is set to Output ( ) and to clone the DMX traffic from port 1 (CL1).
DMX 3 is set to Node A Input ( ). The current DMX Universe captured is 007.
DMX 4 is disabled (OFF)
10 © 2010 Martin Professional A/S
Ether2DMX8 User Manual
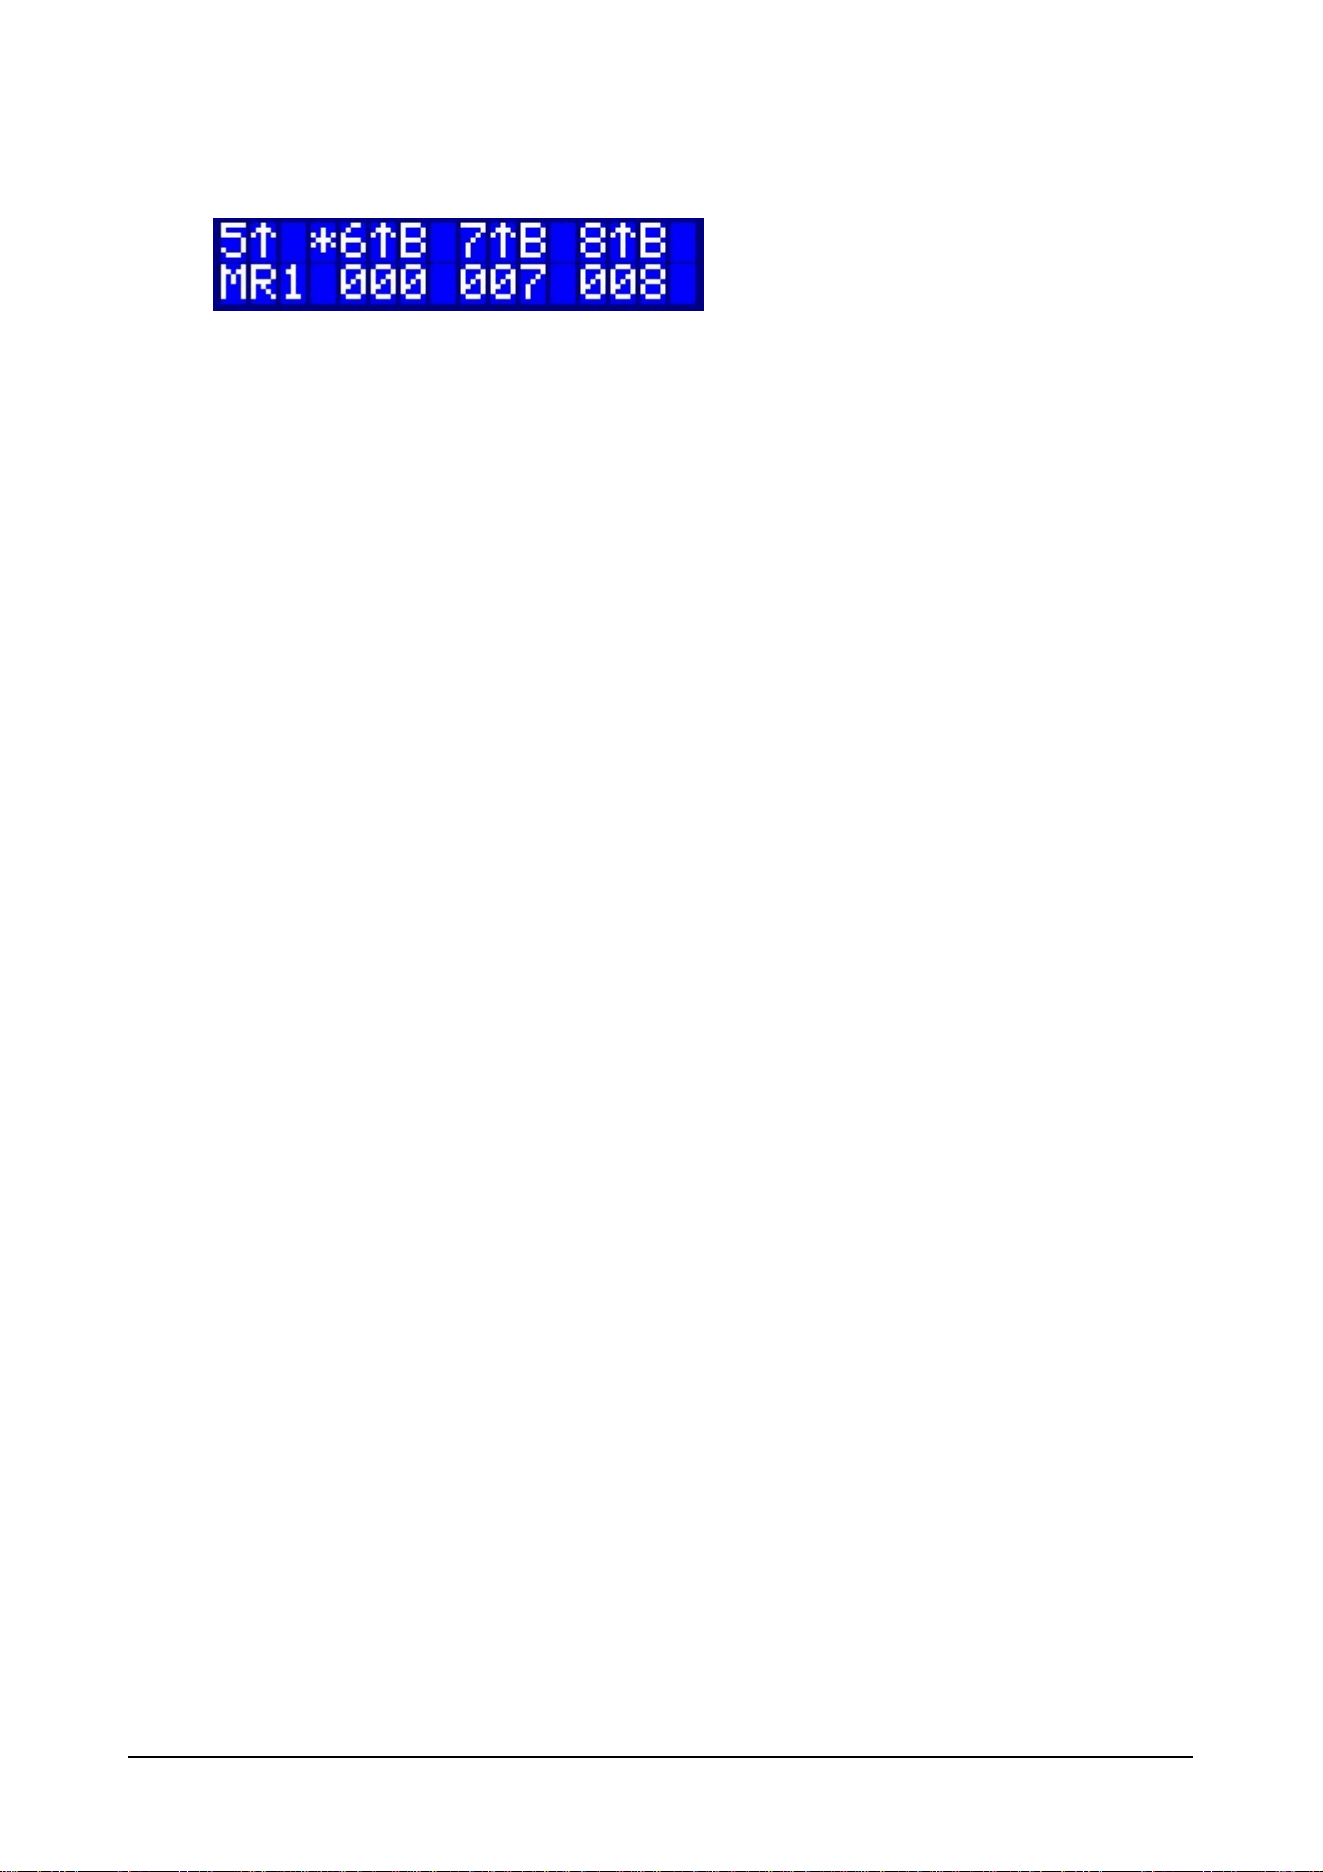
DMX 5 is set to Output the contents of Merger 1
DMX 6 is set to send DMX value 0 on all 512 channels
DMX 7 is set to Artnet Output of 007.
DMX 8 is set to Artnet Output of 008.
11 © 2010 Martin Professional A/S
Ether2DMX8 User Manual
Factory Presets
The quickest way to set up the Ether2DMX8 router is to use factory presets.
The router contains 10 of the most common settings that can be recalled quickly and without the
need to study the manual completely.
Factory presets contain the necessary IP settings and all DMX port settings.
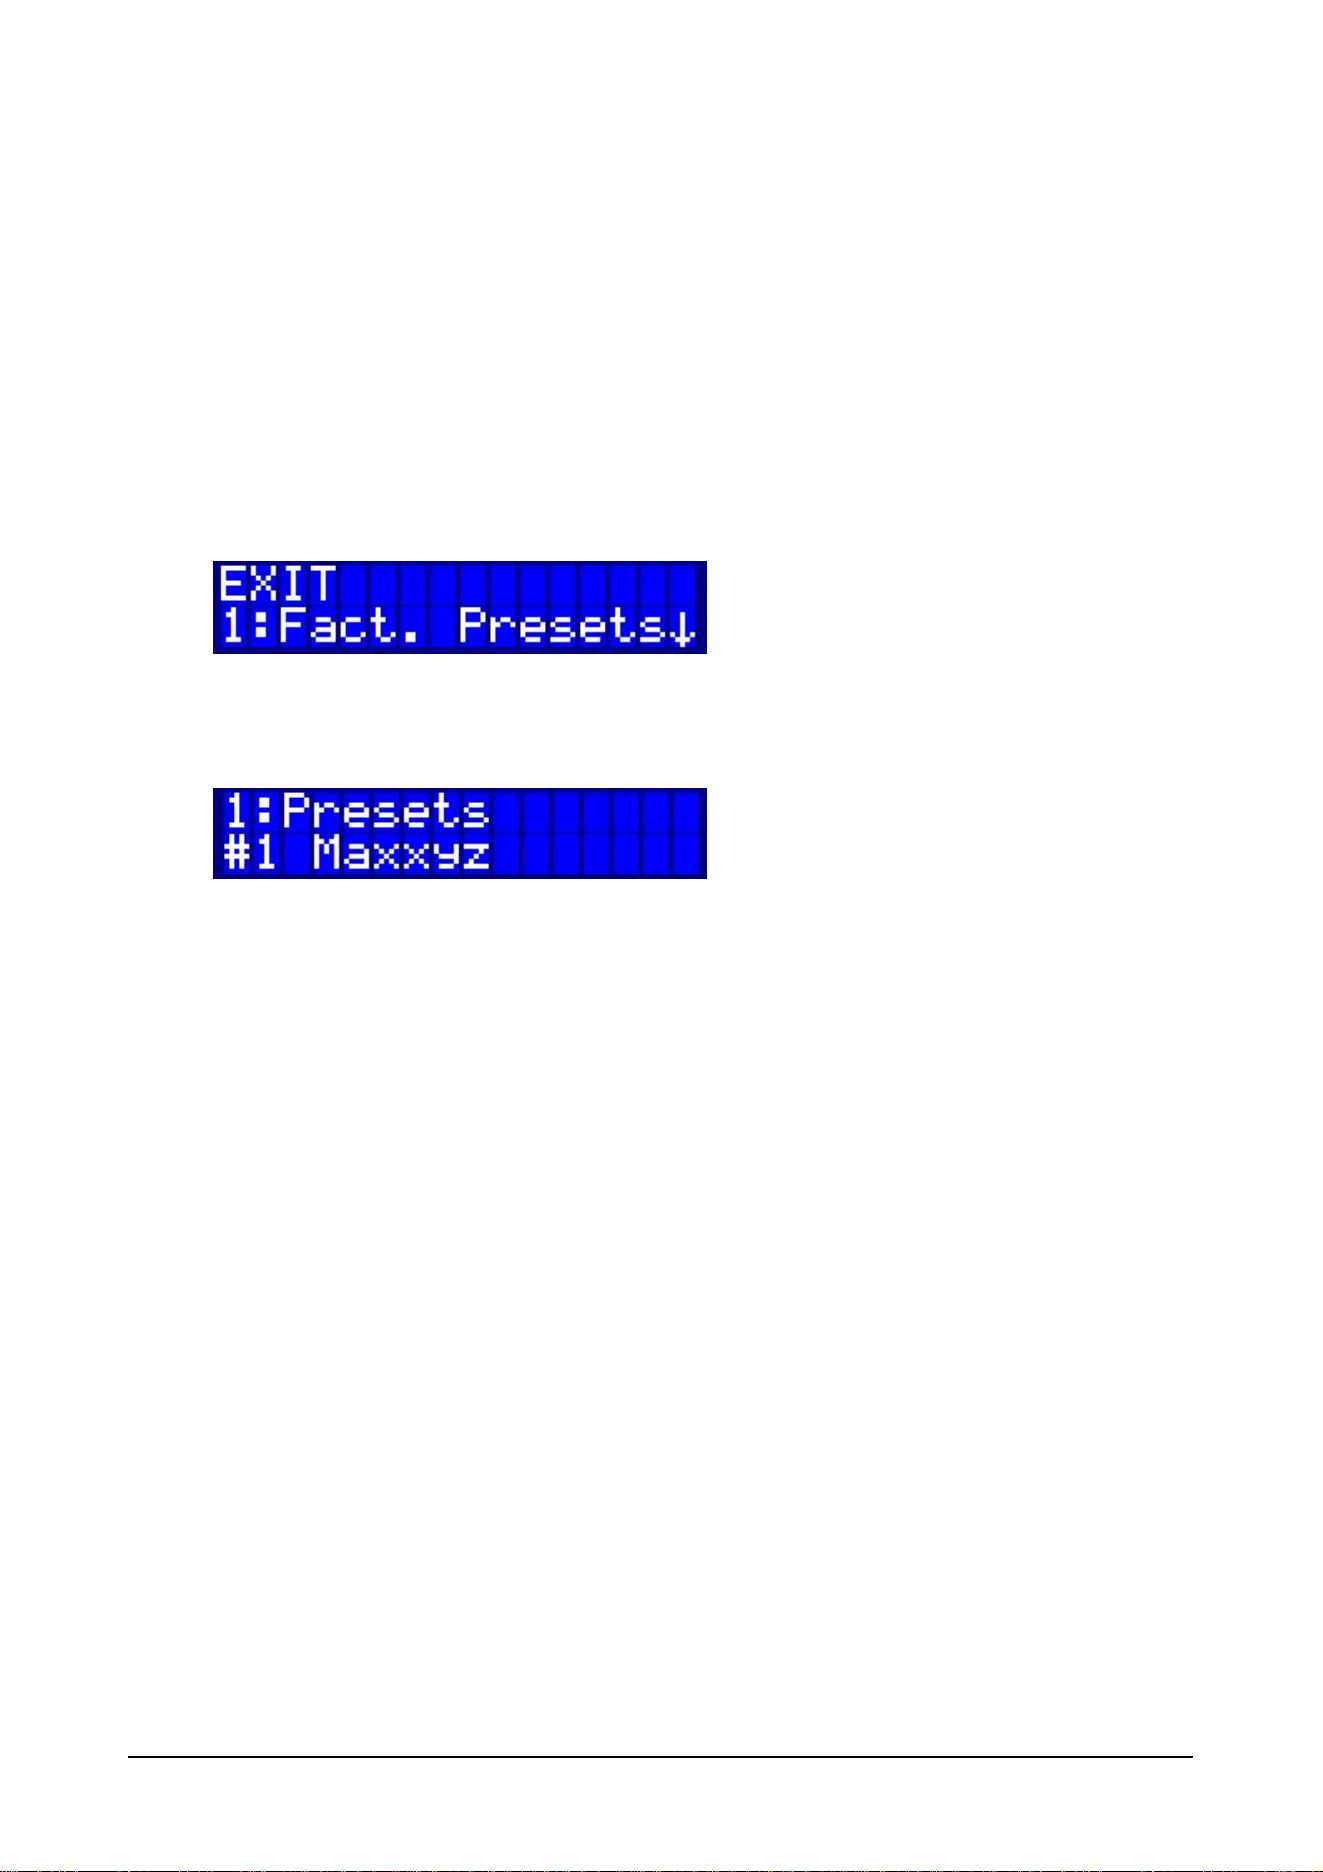
The Factory Presets are accessed in Menu #1. Use the MENU key to start the navigation, then press
ENTER to enter Menu #1.
Use the arrow keys to navigate the Menu if necessary.
Select the desired preset from the 8 choices and confirm with Enter.
12 © 2010 Martin Professional A/S
Ether2DMX8 User Manual
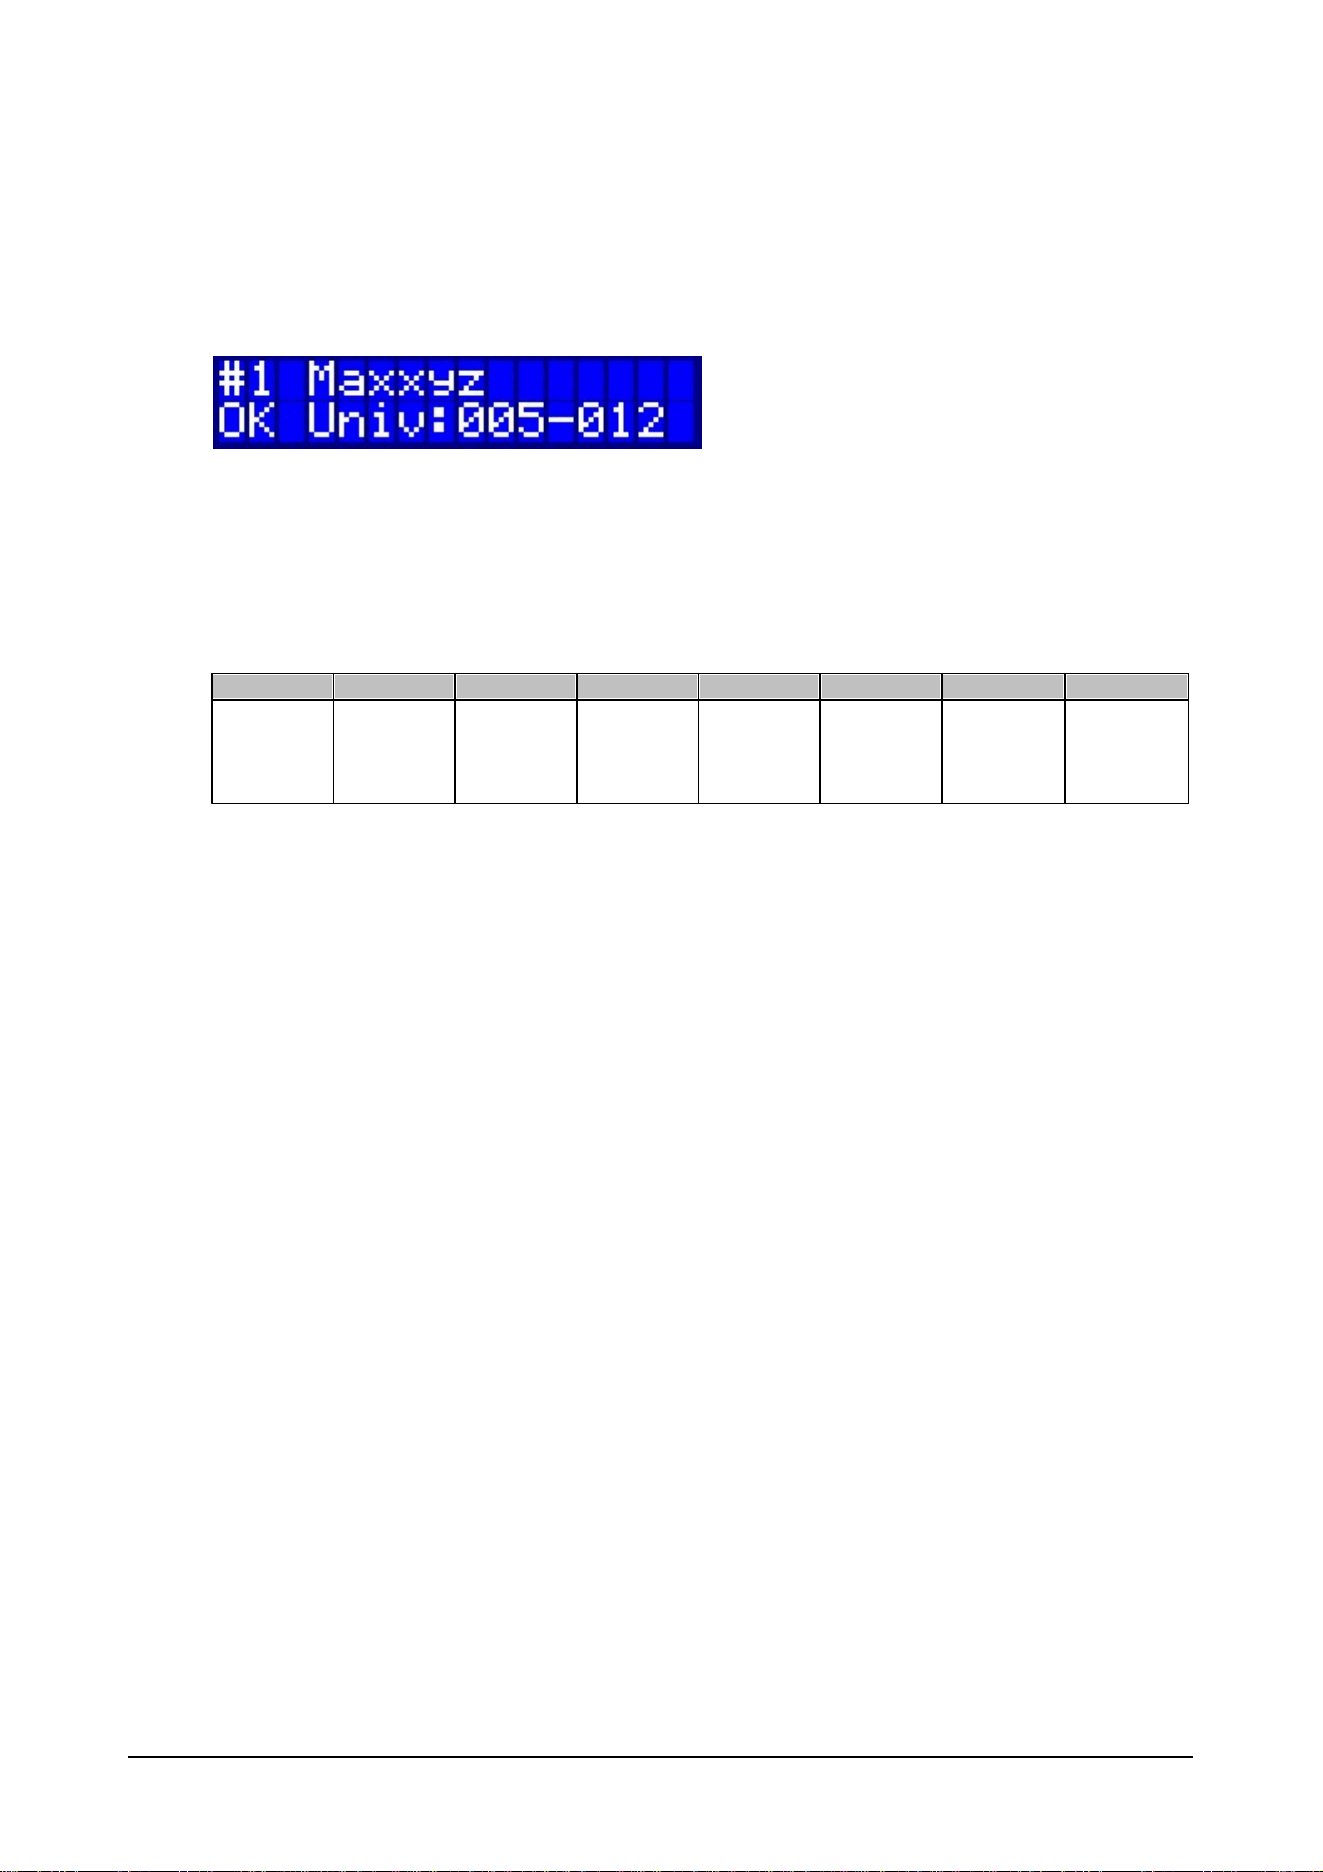
1. Maxxyz
The preset is used for DMX output on all 8 ports from any Artnet source using the 2.x.x.x address
range.
This includes all Maxxyz Consoles and many other lighting controllers in the market.
Use the up and down arrows to set the desired Universe range. Confirm with OK (Enter button)
IP Address
2.x.x.x
Subnet:
255.0.0.0
DMX 1
DMX 2
DMX 3
DMX 4
DMX 5
DMX 6
DMX 7
DMX 8
DMX Out
DMX Out
DMX Out
DMX Out
DMX Out
DMX Out
DMX Out
DMX Out
13 © 2010 Martin Professional A/S
Ether2DMX8 User Manual
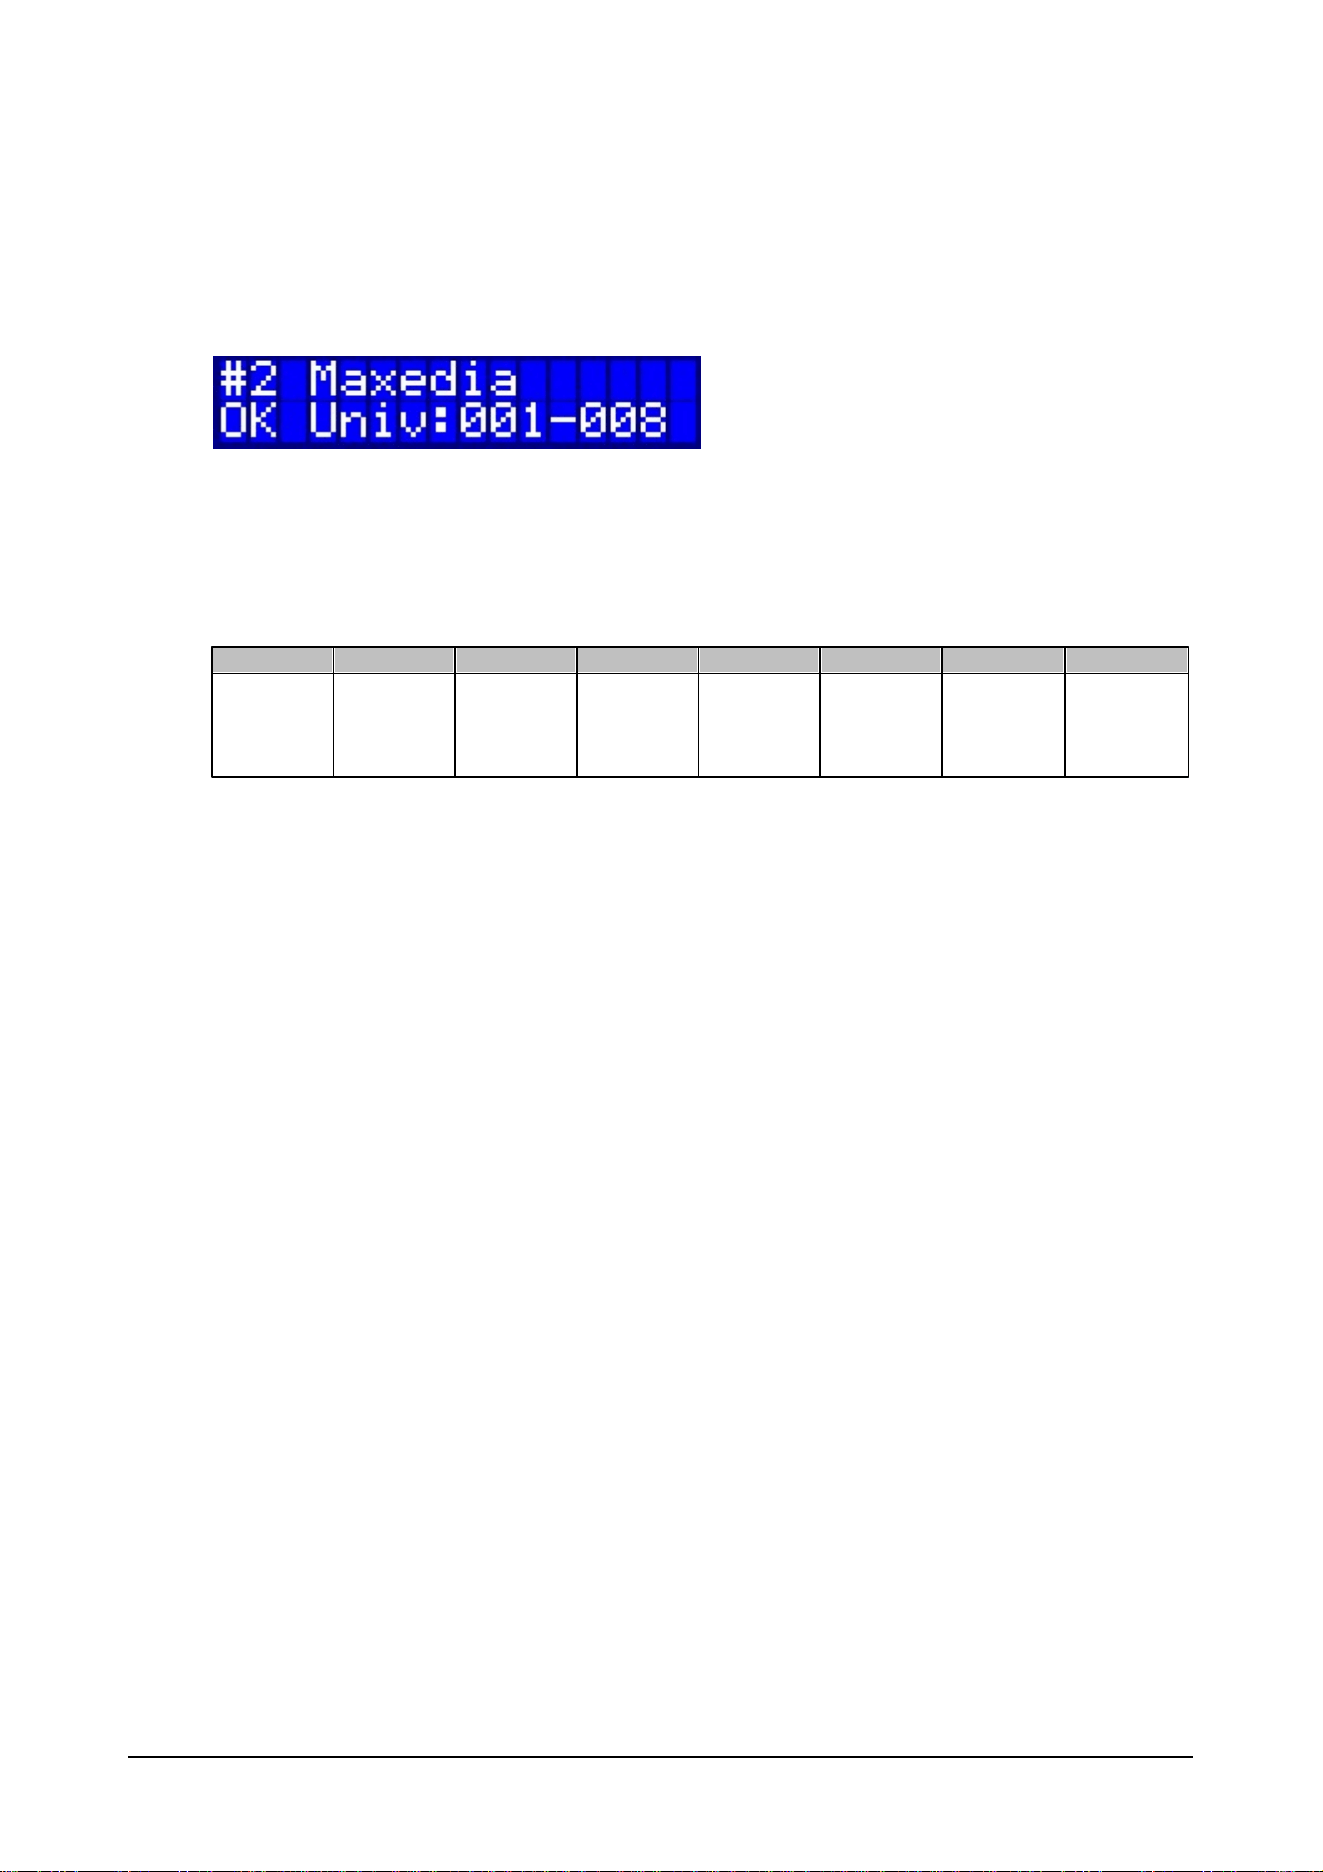
2. Maxedia
The preset is used for DMX output on all 8 ports from any Artnet source using the 10.x.x.x address
range.
This includes all Maxedia Media Servers.
Use the up and down arrows to set the desired Universe range. Confirm with OK (Enter button)
Please note that changes in the IP address require a reboot of the Ether2DMX8.
IP Address
10.x.x.x
Subnet:
255.0.0.0
DMX 1
DMX 2
DMX 3
DMX 4
DMX 5
DMX 6
DMX 7
DMX 8
DMX Out
DMX Out
DMX Out
DMX Out
DMX Out
DMX Out
DMX Out
DMX Out

14 © 2010 Martin Professional A/S
Ether2DMX8 User Manual
3. Maxxyz/Maxedia
The preset is used for DMX output on all 8 ports from two Artnet source using the 2.x.x.x AND the
10.x.x.x address range.
This allows to use 4 ports for regular Artnet traffic from the Maxxyz console and use 4 ports for
pixelmapping traffic from a Maxedia server.
Use OK for the second screen.
Use the up and down arrows to set the desired Universe ranges for Node A and B. Confirm with OK
(Enter button)
Please note that changes in the IP address require a reboot of the Ether2DMX8.
IP Address
2.x.x.x + 10.x.x.x
Subnet:
255.0.0.0
DMX 1
DMX 2
DMX 3
DMX 4
DMX 5
DMX 6
DMX 7
DMX 8
DMX Out
2.x.x.x
DMX Out
2.x.x.x
DMX Out
2.x.x.x
DMX Out
2.x.x.x
DMX Out
10.x.x.x
DMX Out
10.x.x.x
DMX Out
10.x.x.x
DMX Out
10.x.x.x
15 © 2010 Martin Professional A/S
Ether2DMX8 User Manual
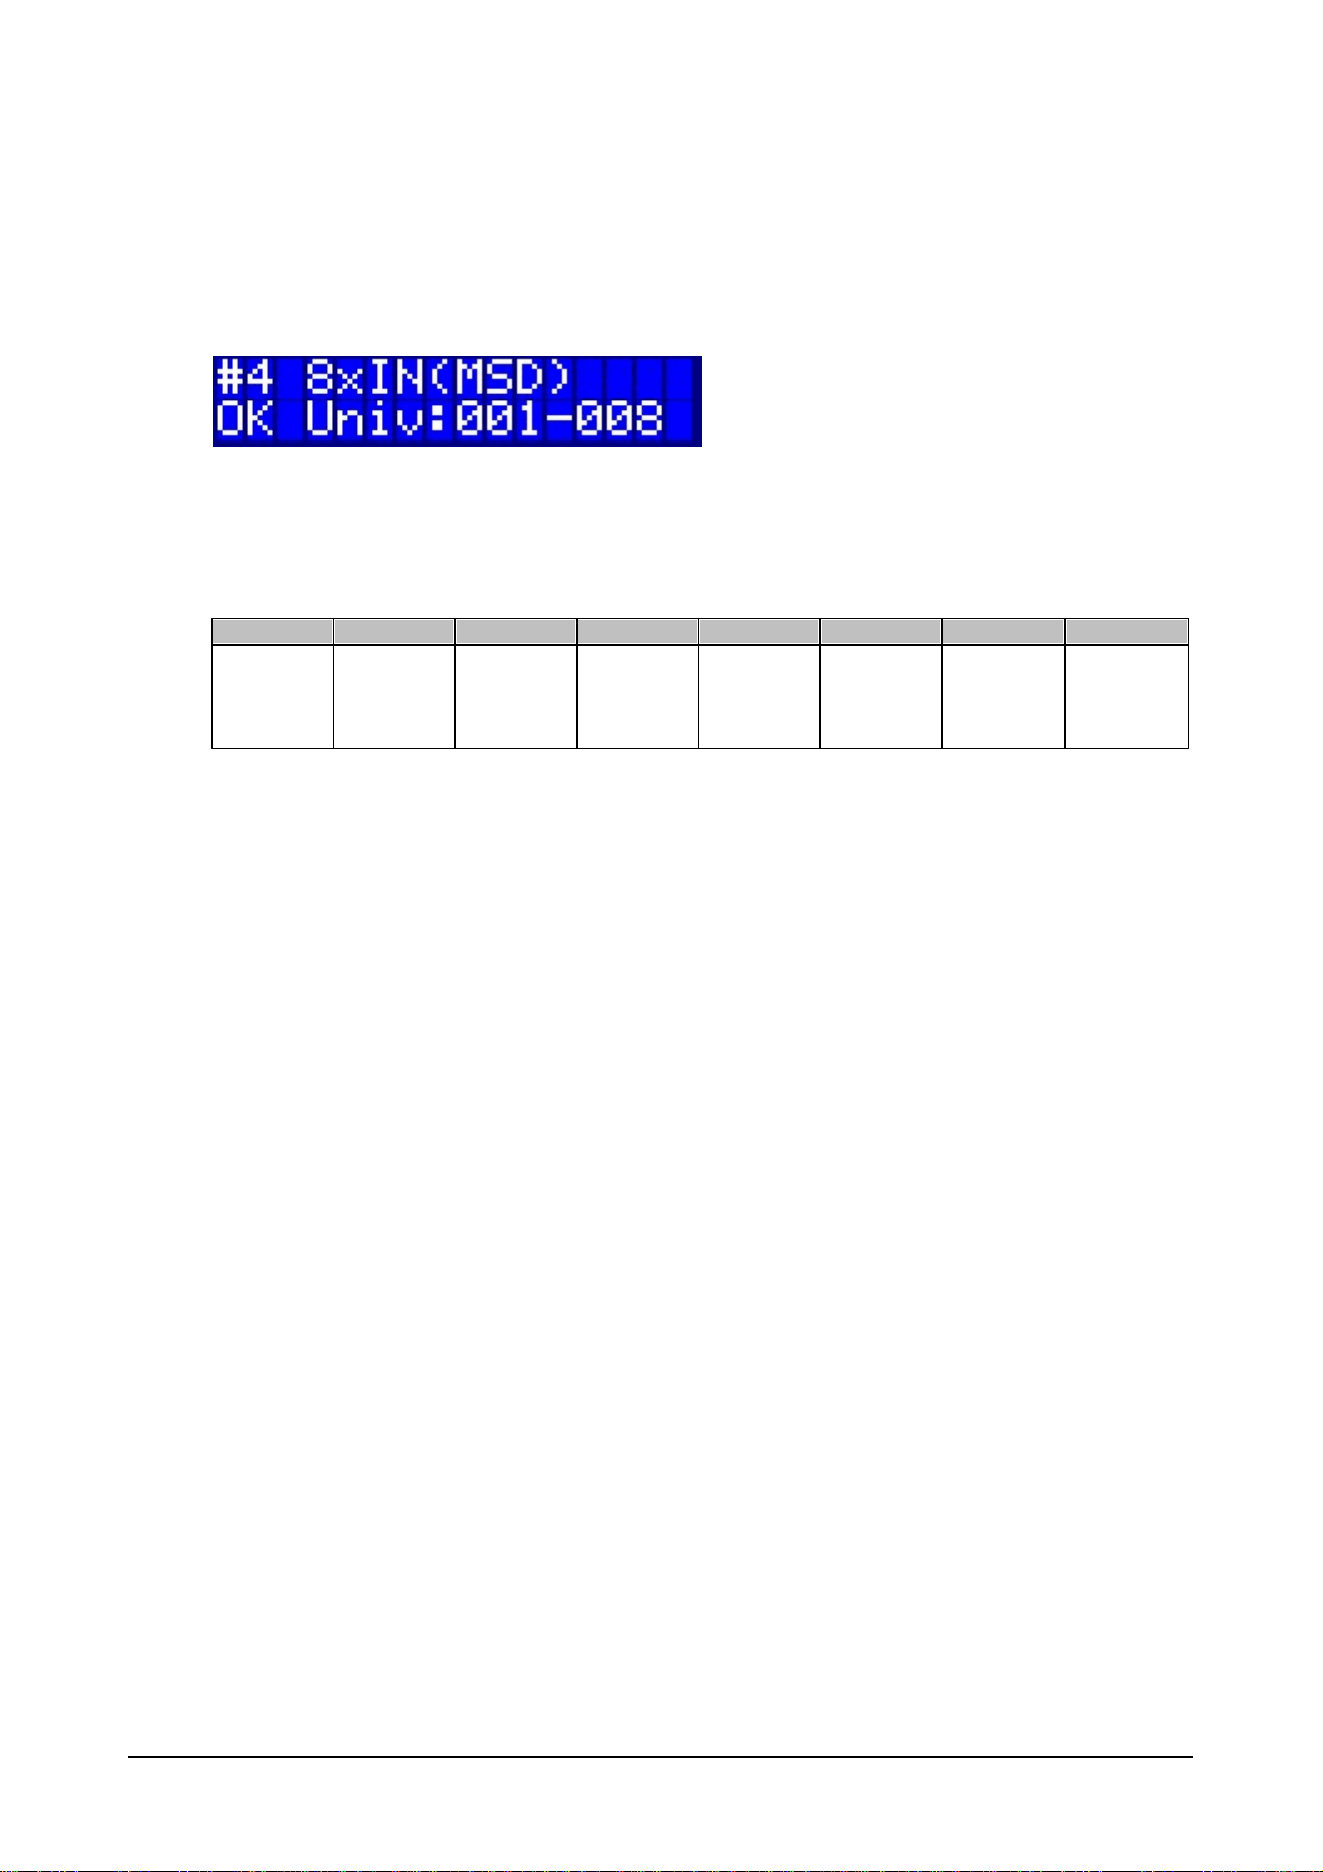
4. 8x Input (MSD)
The preset is used for DMX input conversion to Artnet on all 8 ports using the 2.x.x.x address range.
This includes Martin Show Designer and many other visualization programs. It can also be used to
capture older consoles with no Artnet output and route them into an Artnet system.
Use the up and down arrows to set the desired Universe range. Confirm with OK (Enter button)
IP Address
2.x.x.x
Subnet:
255.0.0.0
DMX 1
DMX 2
DMX 3
DMX 4
DMX 5
DMX 6
DMX 7
DMX 8
DMX In
DMX In
DMX In
DMX In
DMX In
DMX In
DMX In
DMX In
16 © 2010 Martin Professional A/S
Ether2DMX8 User Manual
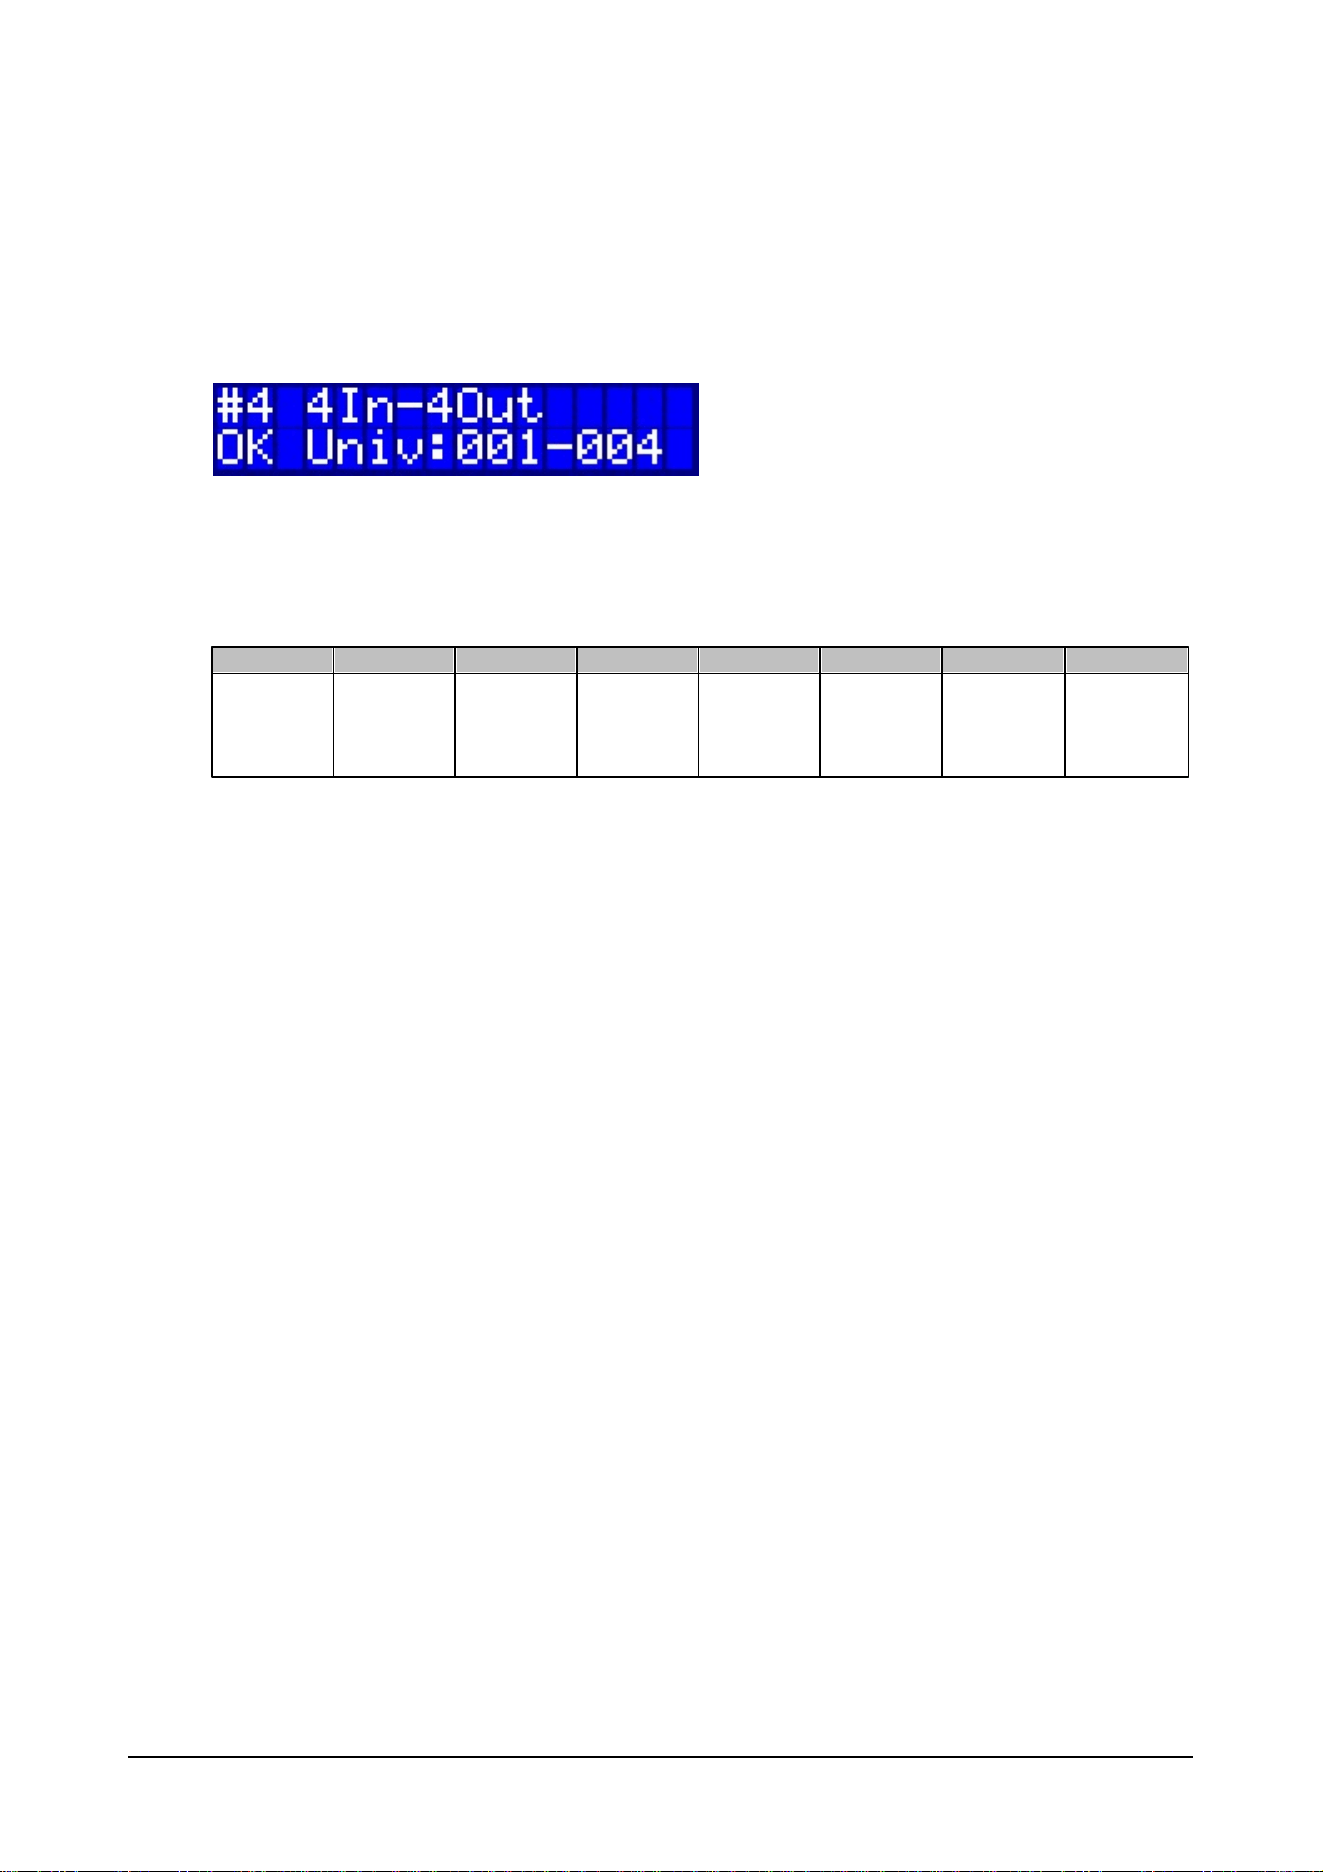
5. 4 In - 4 Out
The preset is used for to intercept 4 Universes, capture them as Artnet with address range 2.x.x.x
and output them again without changes.
Applications include capturing DMX streams for visualizers like Martin Show Designer with the ability
to have the DMX signal connected to actual fixtures.
Use the up and down arrows to set the desired Universe range. Confirm with OK (Enter button)
IP Address
2.x.x.x
Subnet:
255.0.0.0
DMX 1
DMX 2
DMX 3
DMX 4
DMX 5
DMX 6
DMX 7
DMX 8
DMX In
To Artnet
DMX In
To Artnet
DMX In
To Artnet
DMX In
To Artnet
DMX Out
from DMX 1
DMX Out
from DMX 2
DMX Out
from DMX 3
DMX Out
from DMX 4
17 © 2010 Martin Professional A/S
Ether2DMX8 User Manual
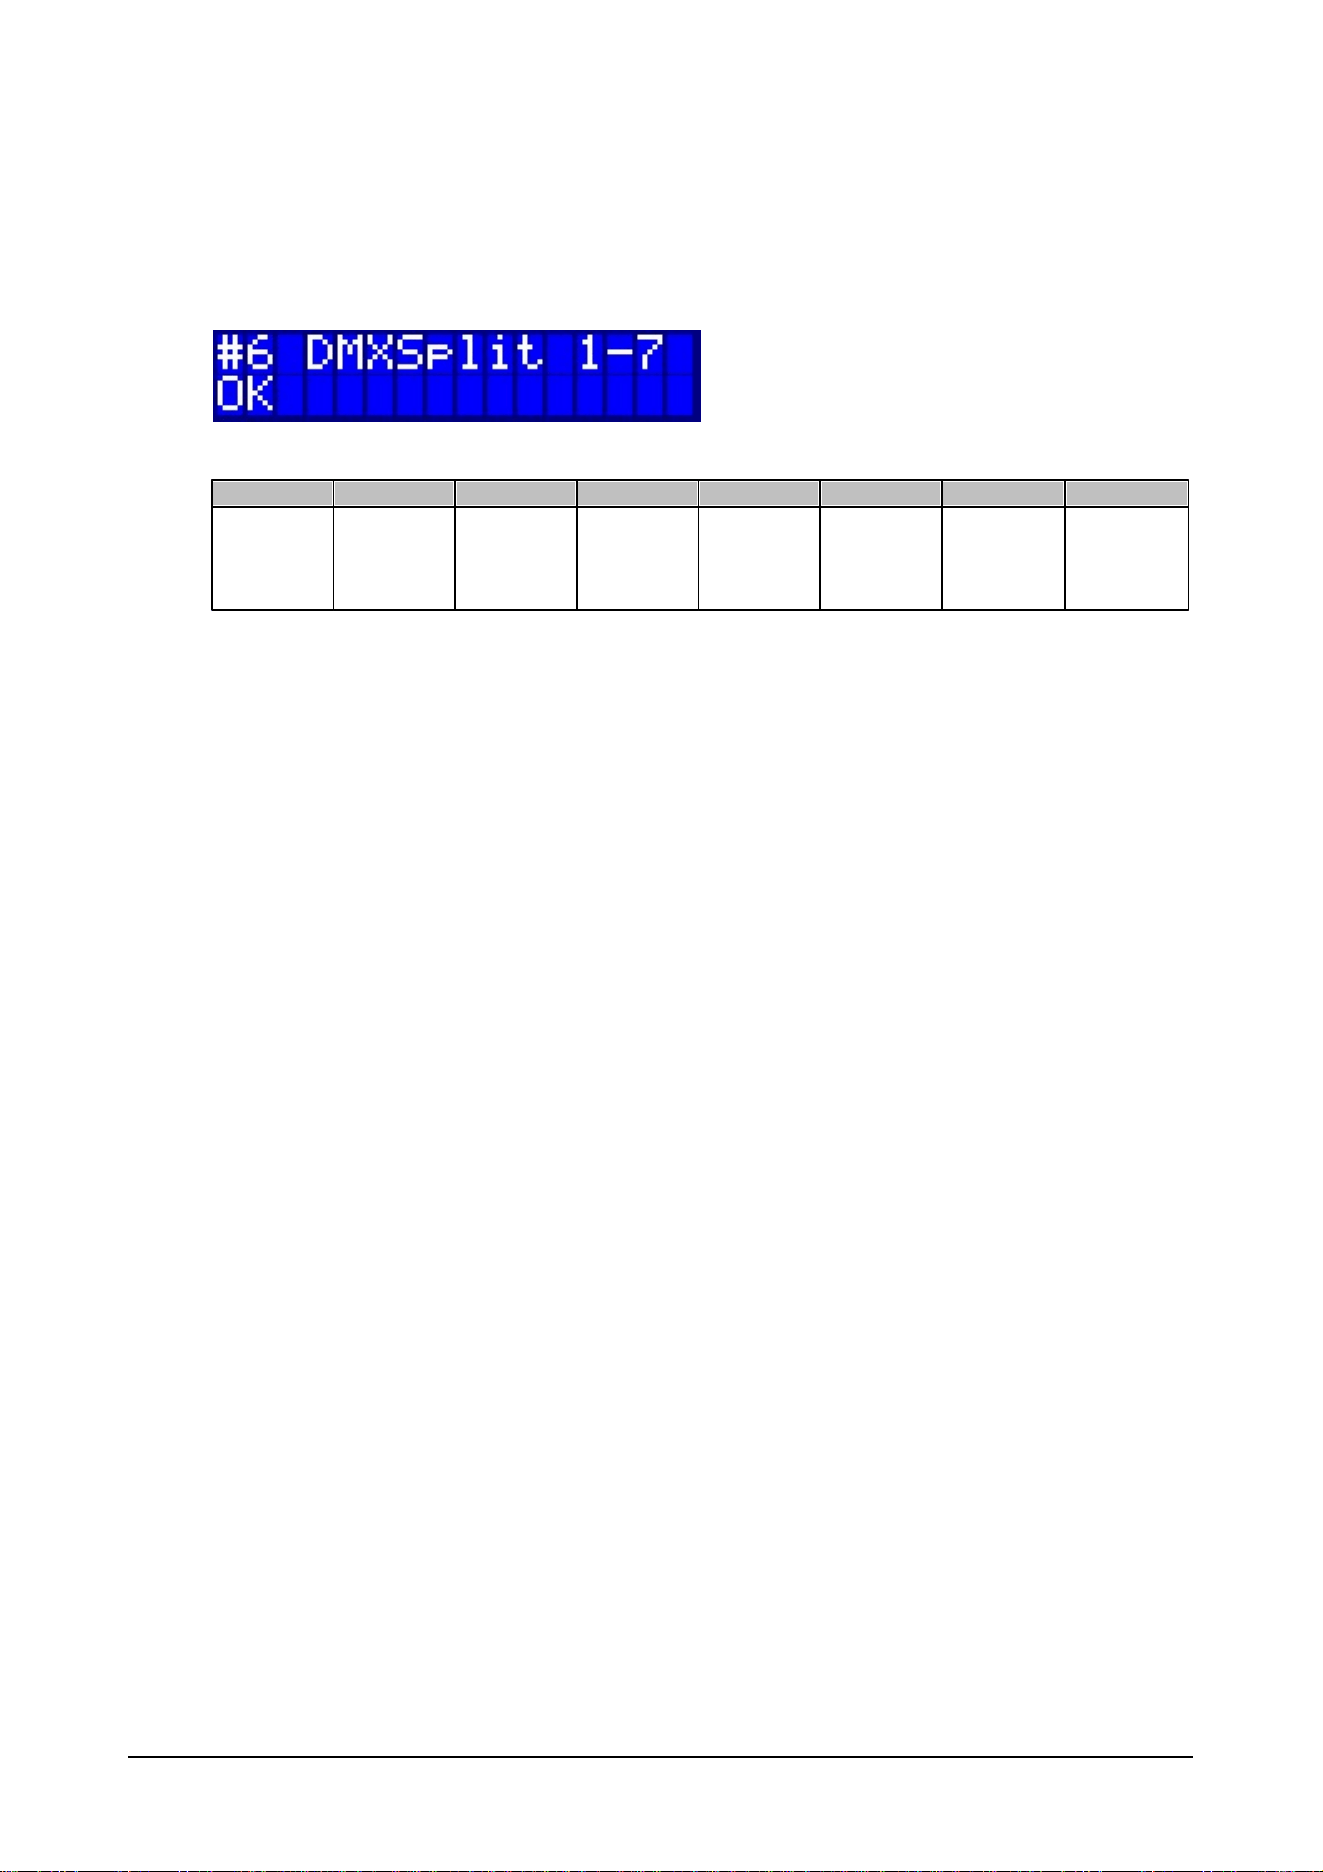
6. DMX Split 1-7
The Ether2DMX8 can be used as a DMX splitter with 1 Input to 7 Outputs. Any data received by DMX
1 is repeated on DMX 2 through 7.
.
DMX 1
DMX 2
DMX 3
DMX 4
DMX 5
DMX 6
DMX 7
DMX 8
DMX Input
DMX Out
from DMX 1
DMX Out
from DMX 1
DMX Out
from DMX 1
DMX Out
from DMX 1
DMX Out
from DMX 1
DMX Out
from DMX 1
DMX Out
from DMX 1
18 © 2010 Martin Professional A/S
Ether2DMX8 User Manual
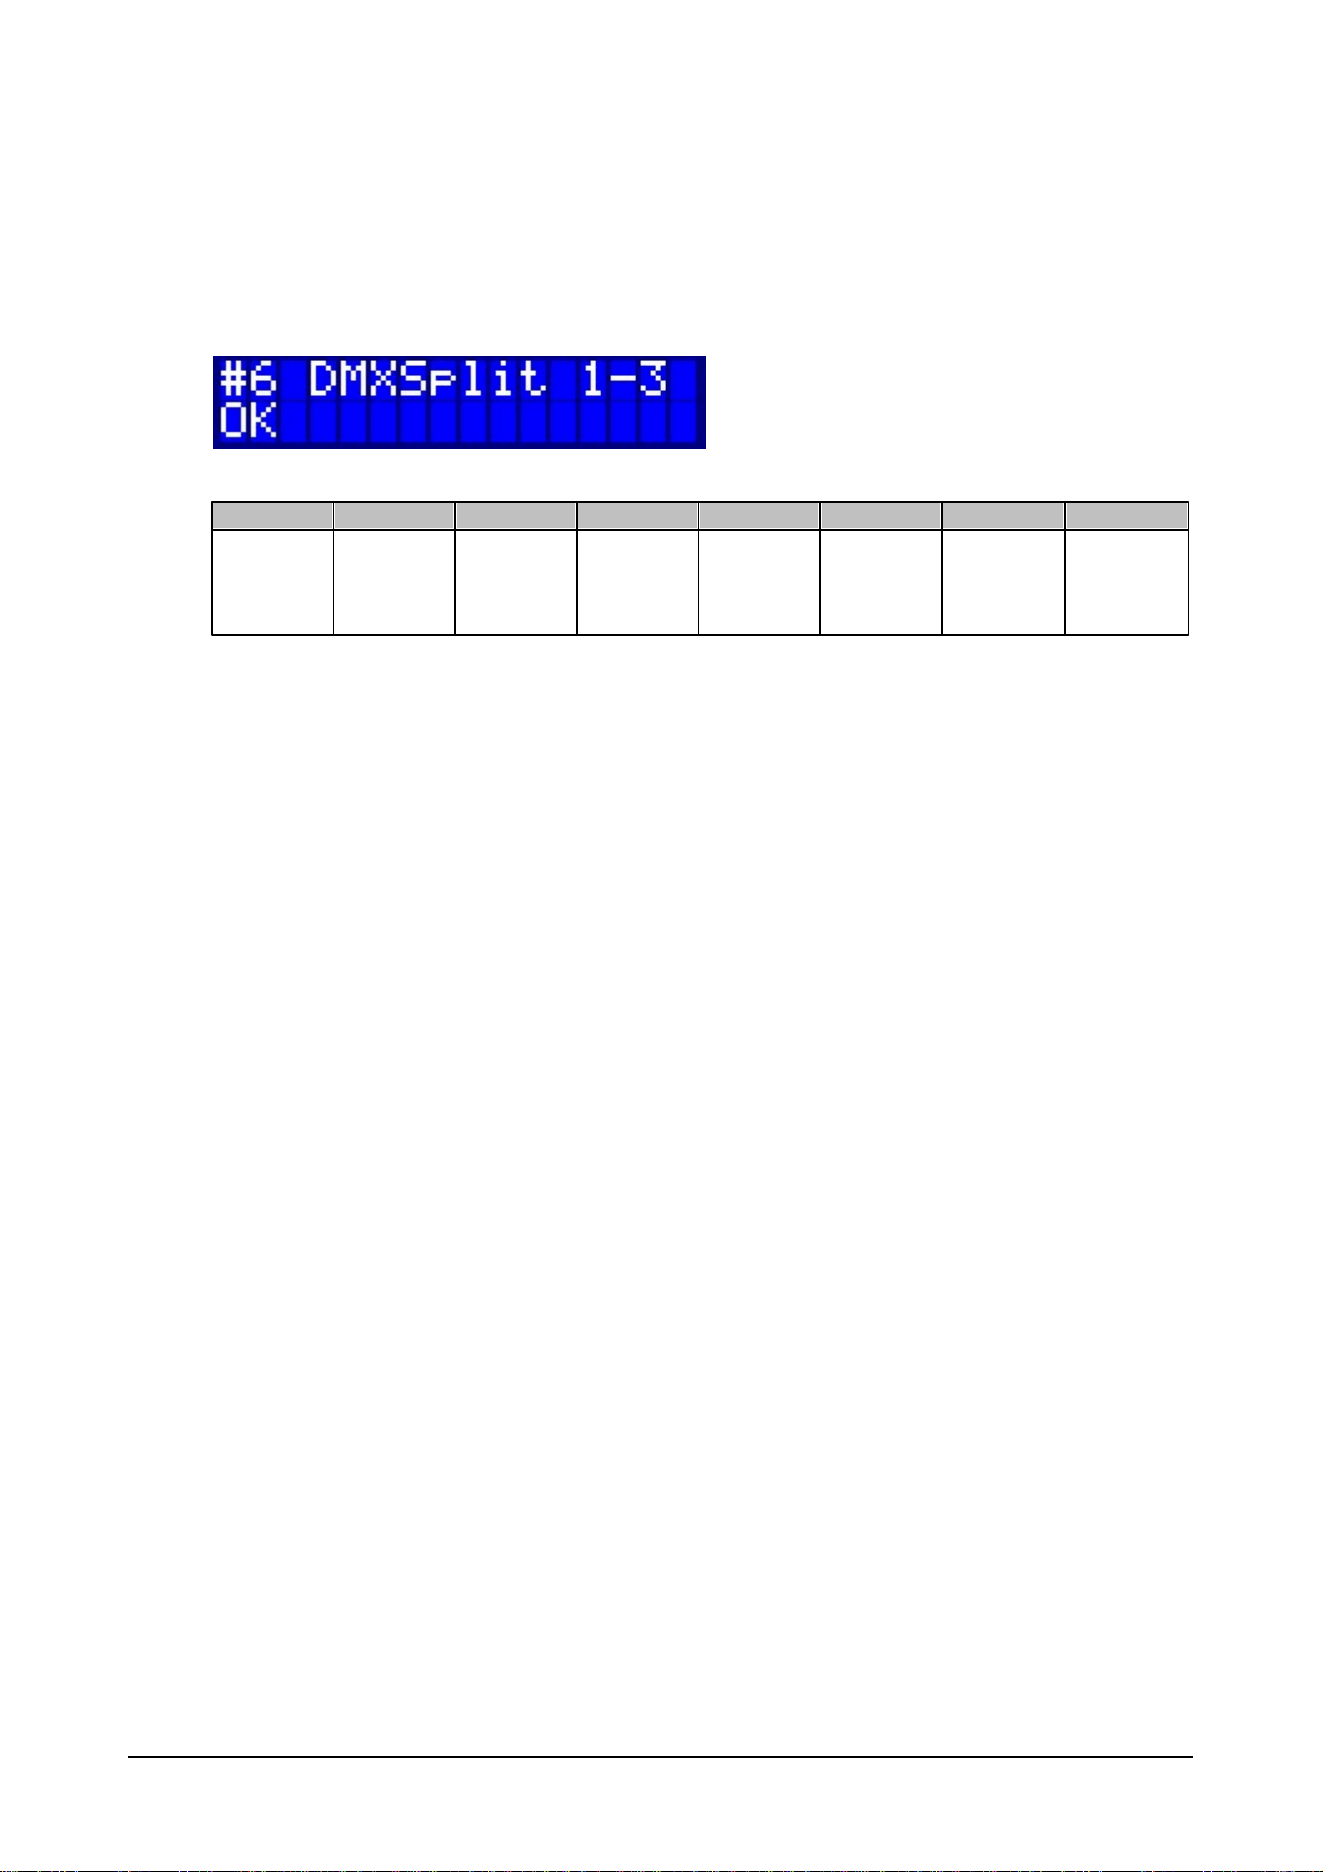
7. DMX Split 1-3
The Ether2DMX8 can be used as two DMX splitters with 1 Input to 3 Outputs.
Any data received by DMX 1 is repeated on DMX 2 through 4. Any data received by DMX 5 is
repeated on DMX 6 through 7.
DMX 1
DMX 2
DMX 3
DMX 4
DMX 5
DMX 6
DMX 7
DMX 8
DMX Input
DMX Out
from DMX 1
DMX Out
from DMX 1
DMX Out
from DMX 1
DMX Input
DMX Out
from DMX 5
DMX Out
from DMX 5
DMX Out
from DMX 5
19 © 2010 Martin Professional A/S
Ether2DMX8 User Manual
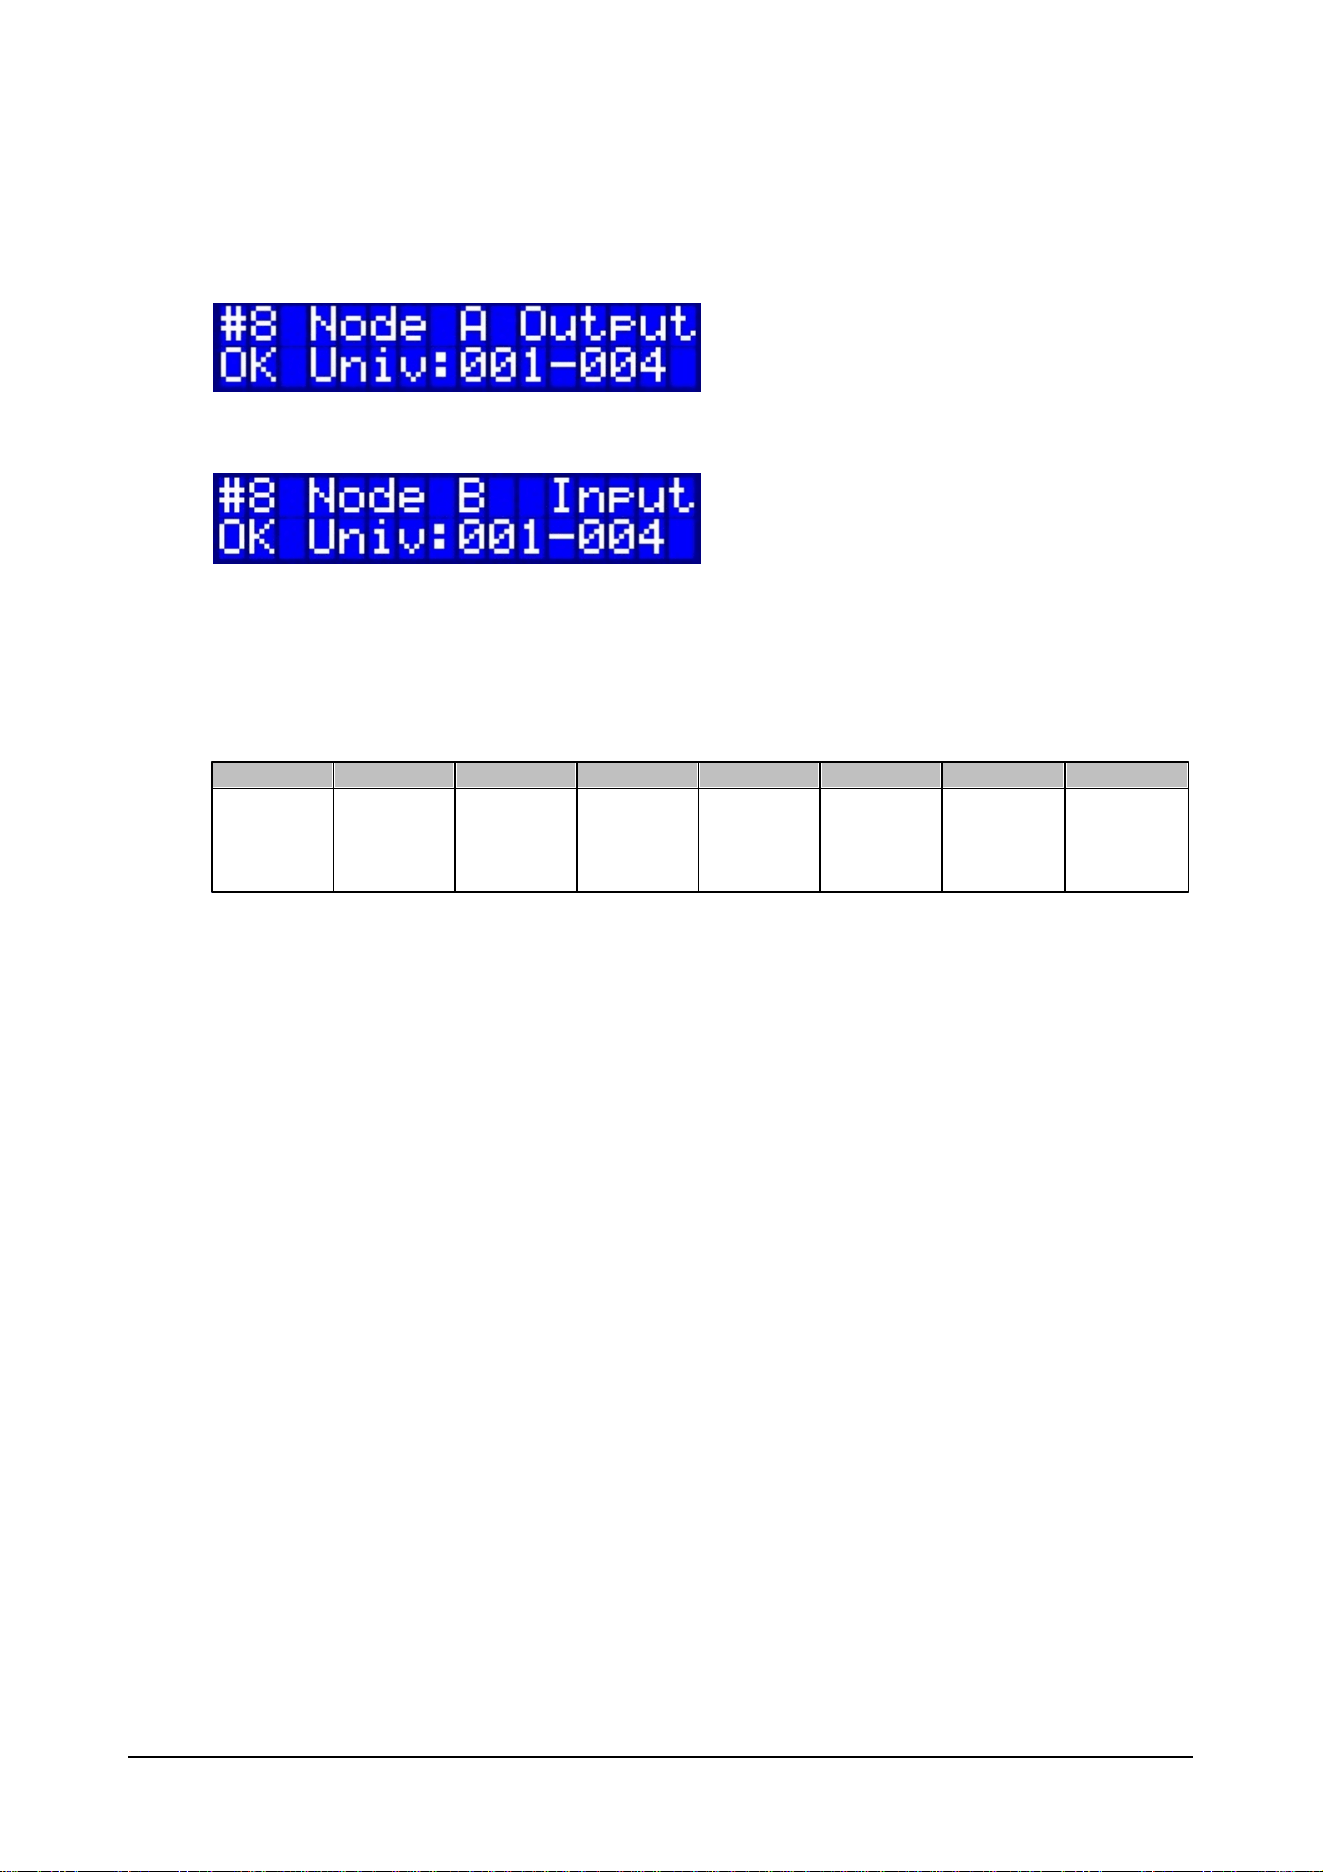
8. Artnet Clone
The preset is used to replicate a standard Artnet node with 4 Input ports and 4 output ports.
Use OK for the second screen.
Use the up and down arrows to set the desired Universe ranges for Node A and B. Confirm with OK
(Enter button).
IP Address
2.x.x.x + 10.x.x.x
Subnet:
255.0.0.0
DMX 1
DMX 2
DMX 3
DMX 4
DMX 5
DMX 6
DMX 7
DMX 8
DMX Out
DMX Out
DMX Out
DMX Out
DMX In
DMX In
DMX In
DMX In
20 © 2010 Martin Professional A/S
Ether2DMX8 User Manual
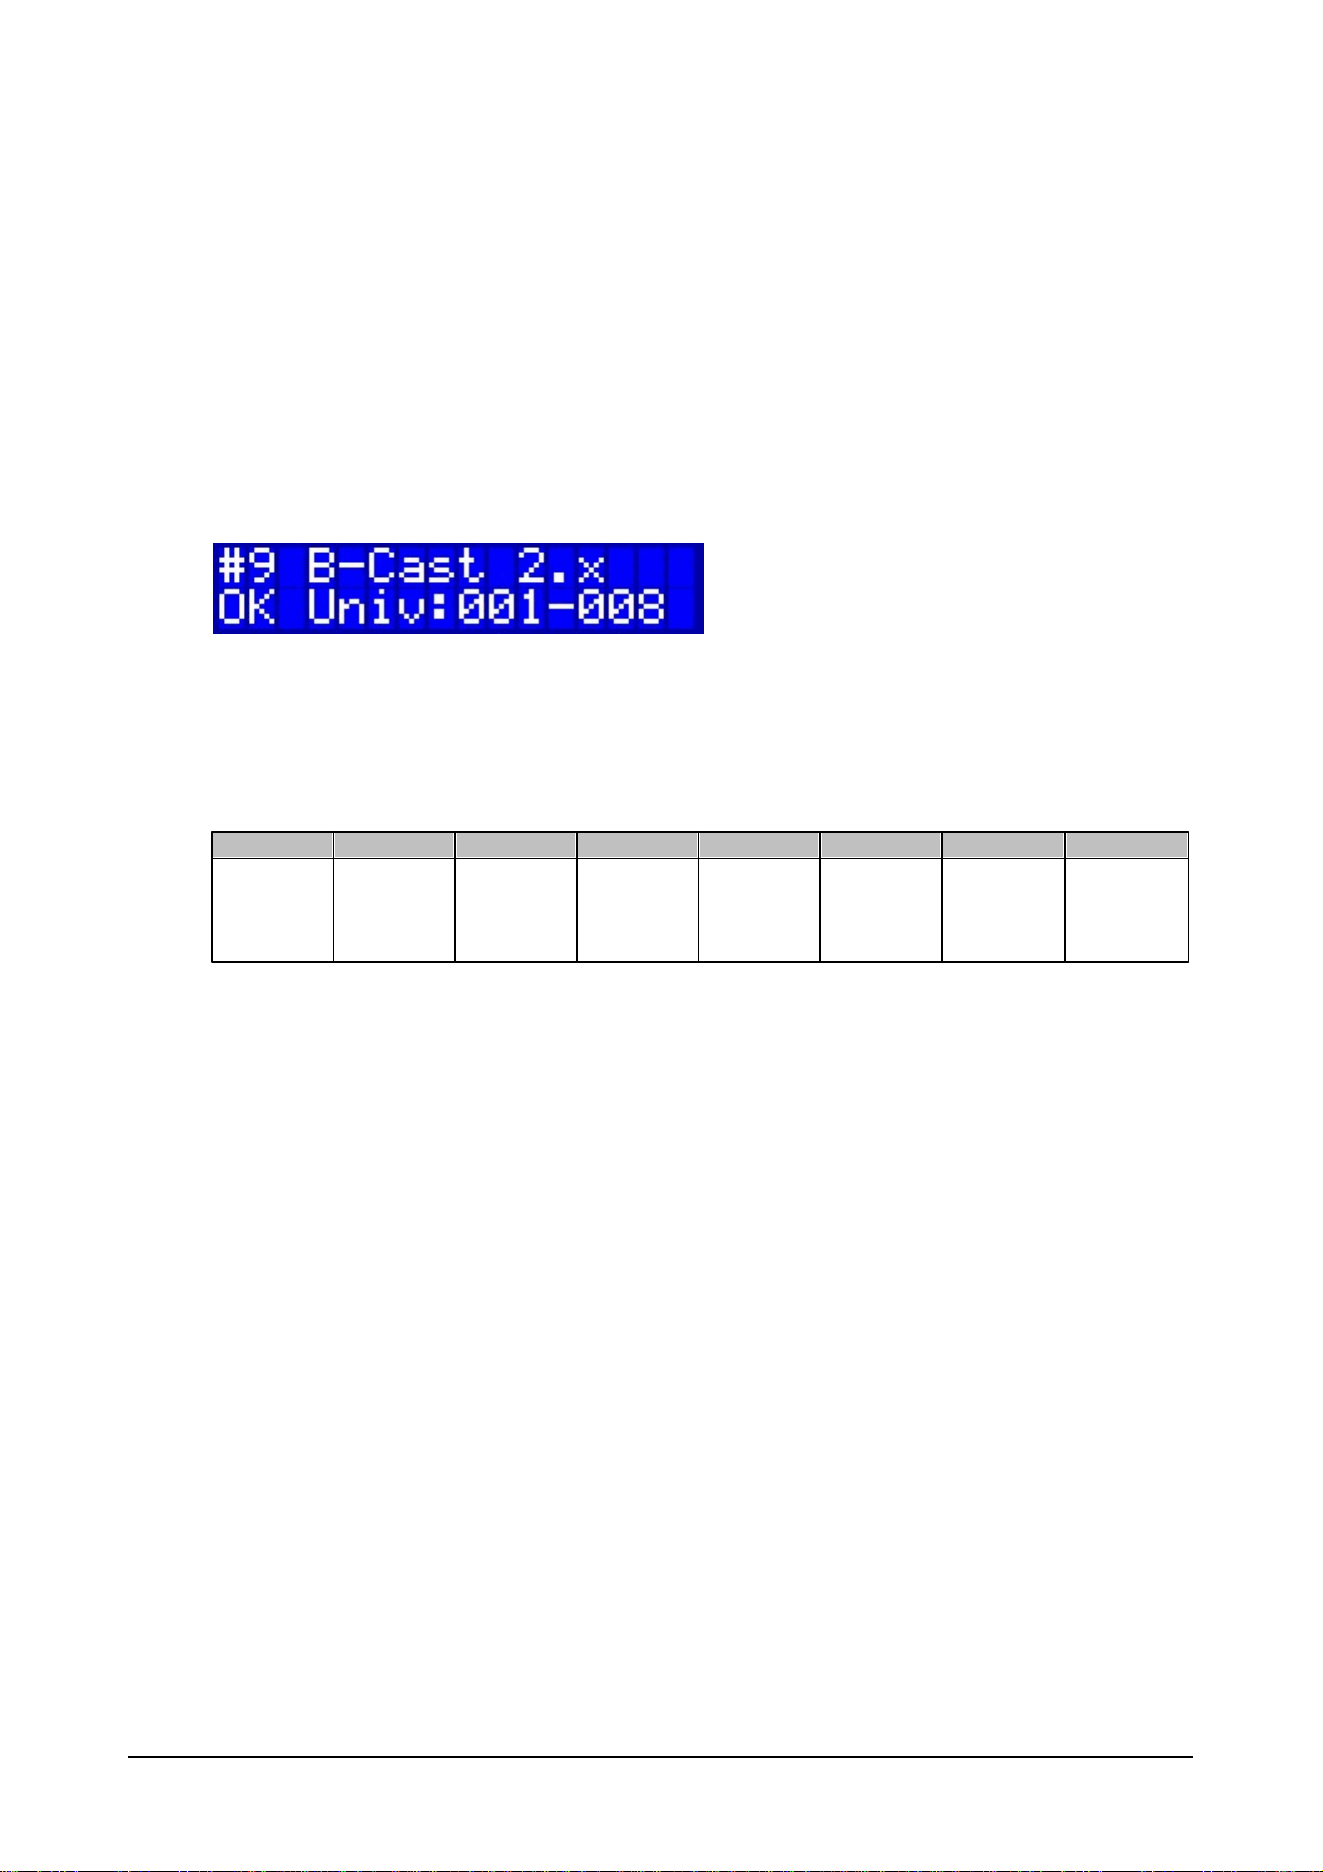
9. Broadcast 2.x
This mode can be used if the Ether2DMX8 shows performance drops.
Performance problems can show as slowed down refresh rate or changes being out of sync on the
different outputs.
The box processor can become overloaded by large amounts of Artnet traffic is Artnet is sent as
Broadcast traffic. It is not recommended to send more than 32 Universes in Broadcast Mode.
However not every Artnet sender can handle Unicast.
This mode will adjust the internal data routing to reduce processor load, but it results in a non Artnet
compliant device as the unit will calculcate 8 Universes on a single Artnet Node (the specification is 2
Nodes of 4 ports).
Use this mode only if there is a problem using the Maxxyz Preset which is fully Artnet compliant.
Use the up and down arrows to set the desired Universe ranges for Node A and B. Confirm with OK
(Enter button).
IP Address
2.x.x.x
Subnet:
255.0.0.0
DMX 1
DMX 2
DMX 3
DMX 4
DMX 5
DMX 6
DMX 7
DMX 8
DMX Out
DMX Out
DMX Out
DMX Out
DMX Out
DMX Out
DMX Out
DMX Out
21 © 2010 Martin Professional A/S
Ether2DMX8 User Manual
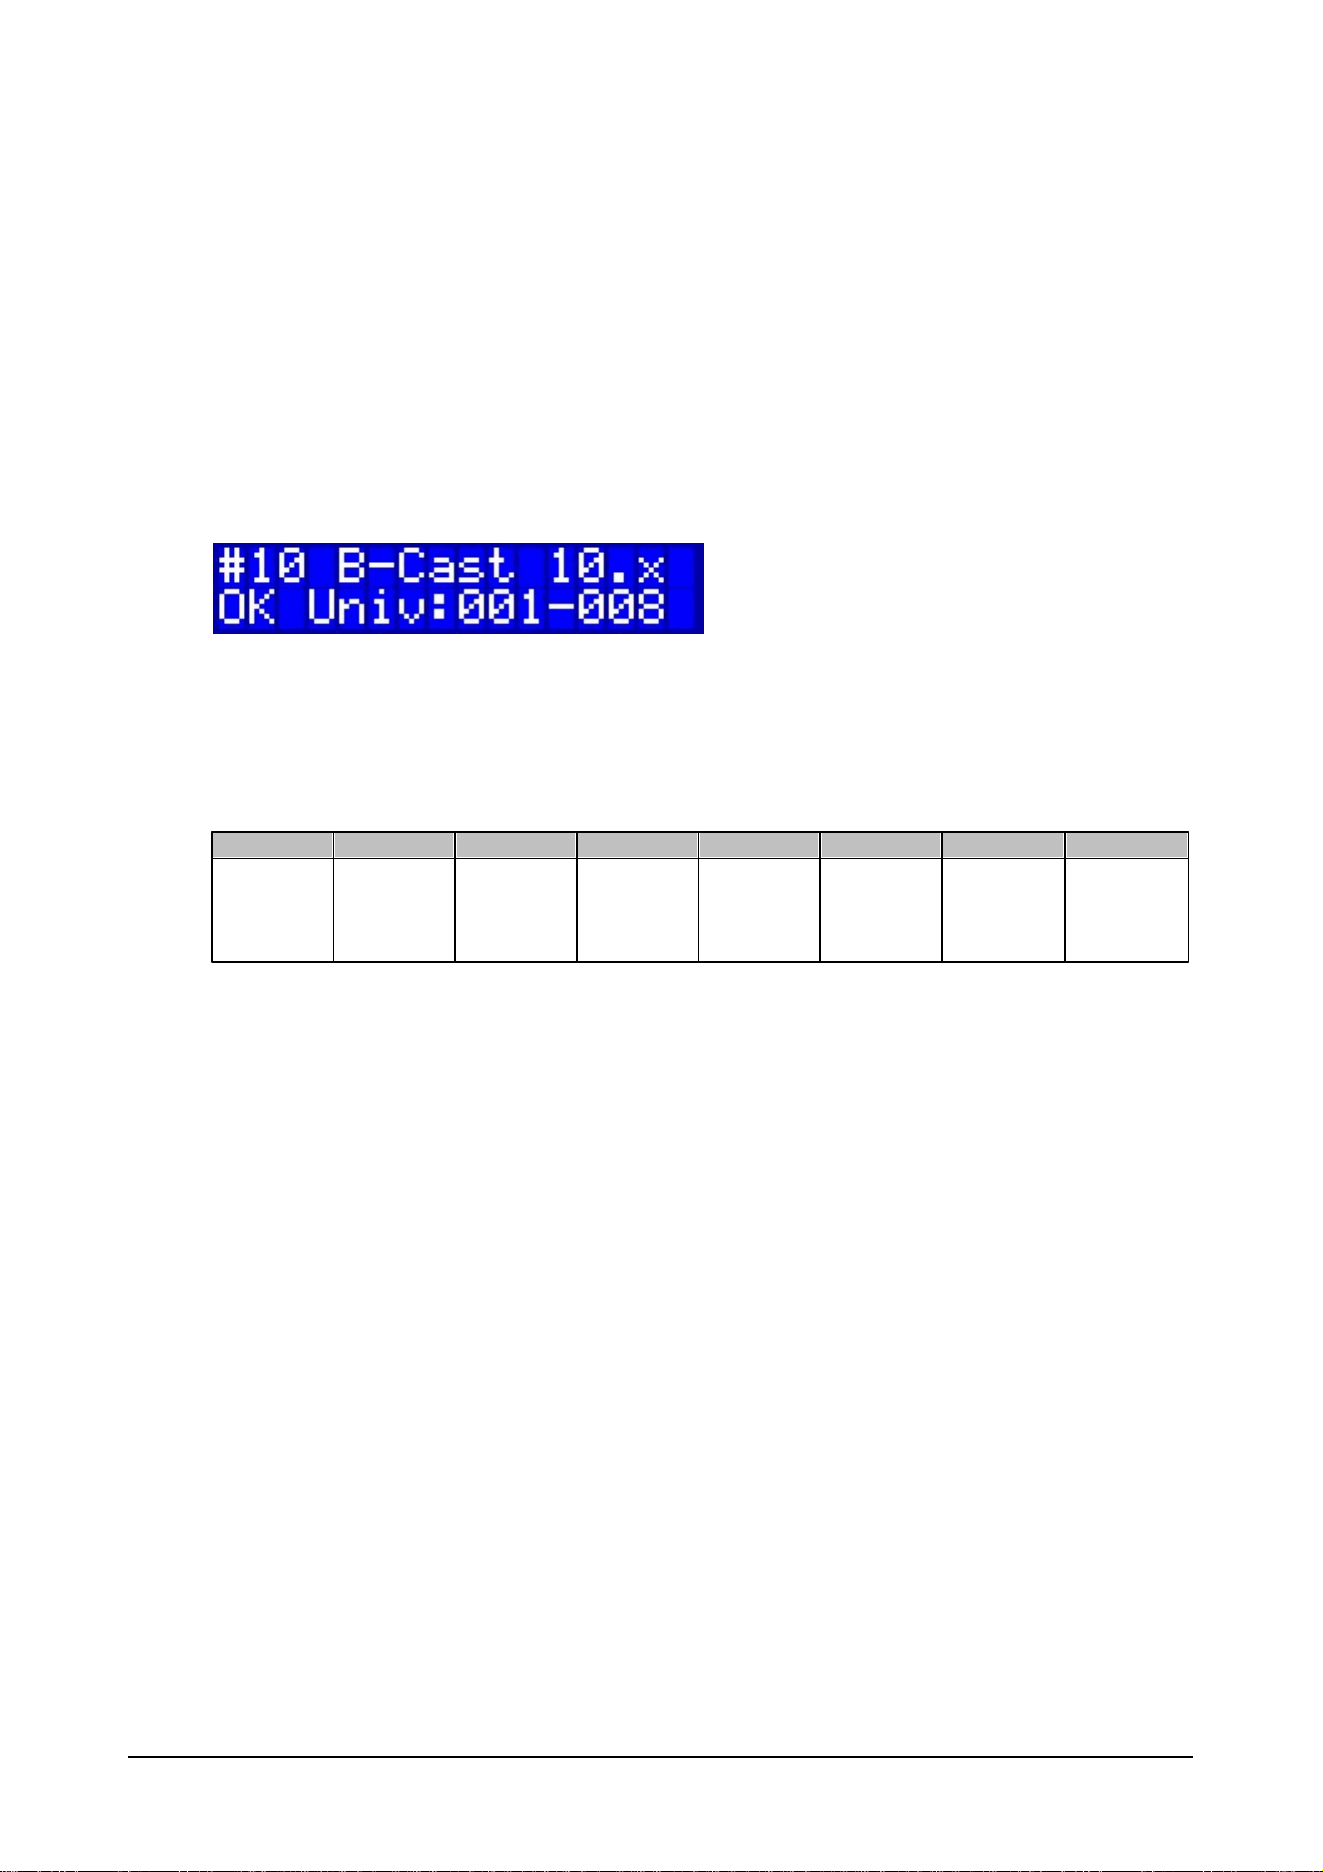
10. Broadcast 10.x
This mode can be used if the Ether2DMX8 shows performance drops.
Performance problems can show as slowed down refresh rate or changes being out of sync on the
different outputs.
The box processor can become overloaded by large amounts of Artnet traffic is Artnet is sent as
Broadcast traffic. It is not recommended to send more than 32 Universes in Broadcast Mode.
However not every Artnet sender can handle Unicast.
This mode will adjust the internal data routing to reduce processor load, but it results in a non Artnet
compliant device as the unit will calculcate 8 Universes on a single Artnet Node (the specification is 2
Nodes of 4 ports).
Use this mode only if there is a problem using the Maxedia Preset which is fully Artnet compliant.
Use the up and down arrows to set the desired Universe ranges for Node A and B. Confirm with OK
(Enter button).
IP Address
10.x.x.x
Subnet:
255.0.0.0
DMX 1
DMX 2
DMX 3
DMX 4
DMX 5
DMX 6
DMX 7
DMX 8
DMX Out
DMX Out
DMX Out
DMX Out
DMX Out
DMX Out
DMX Out
DMX Out
22 © 2010 Martin Professional A/S
Ether2DMX8 User Manual
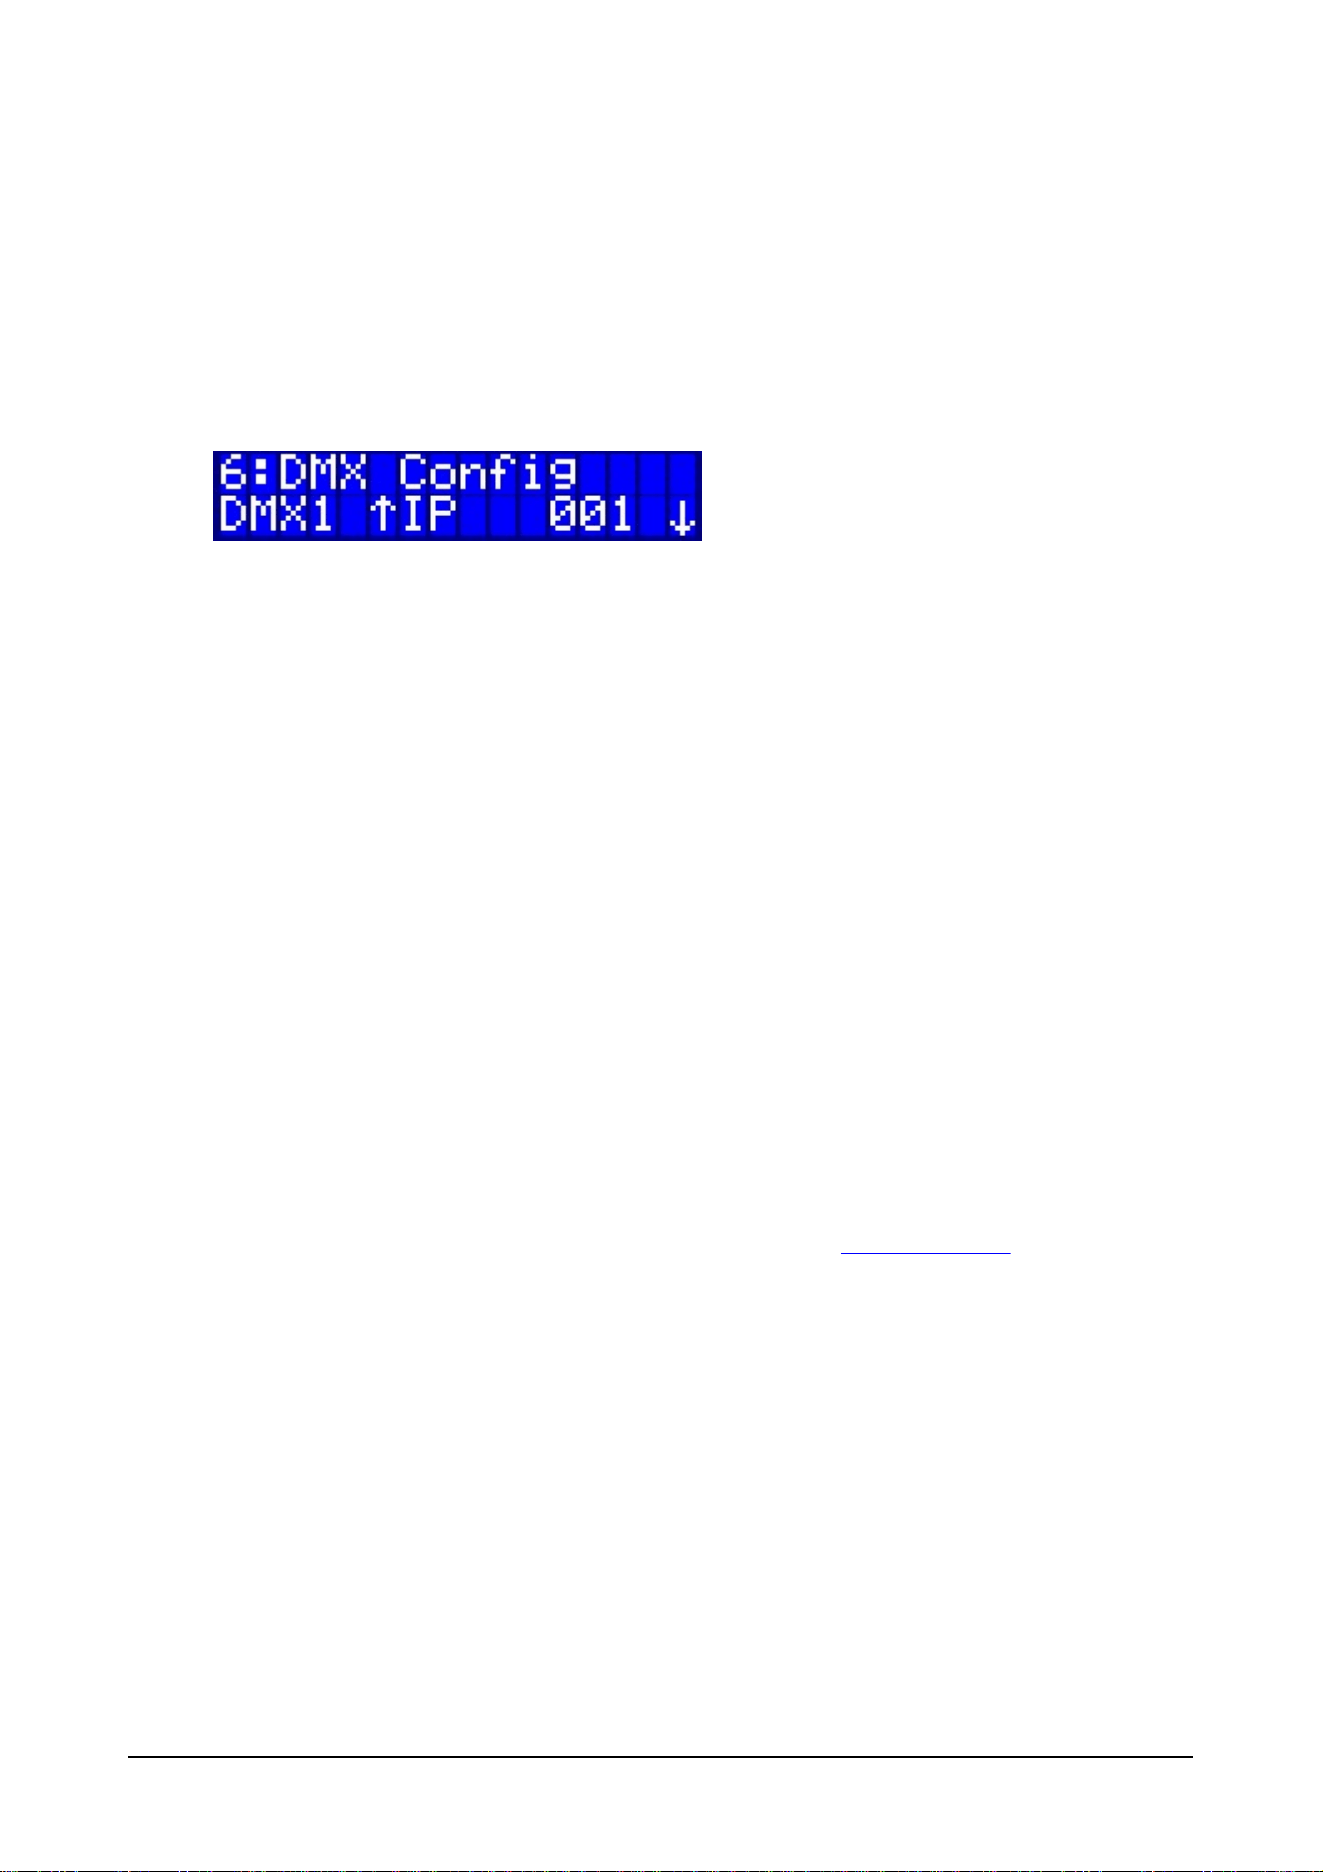
DMX Configuration
This menu allows to assign the desired options for the DMX ports.
Use Menu #6 to access the DMX Configuration.
DMX Port Options
Enter the DMX Configuration and use the arrow keys to browse to the desired DMX port.
The current settings can be seen easily on the bottom row.
In this example DMX Port 1 is set to Output of Artnet Universe 001.
Hit Enter to access the settings menu.
The following settings are possible:
Mode
Output
Artnet Output of a specific Universe
Input
Artnet Input of a specific Universe
Disable
The port is not active
Send 0
The port send a value of 0 on all 512 channels
Source
Source setting is only available when the Mode is Output.
IP
The Output is generated from the Artnet Stream
Clone 1- 8
The Output is identical to the DMX data of another port
Merge 1- 4
The Output is generated from a Merge Slot (see next chapter)
23 © 2010 Martin Professional A/S
Ether2DMX8 User Manual
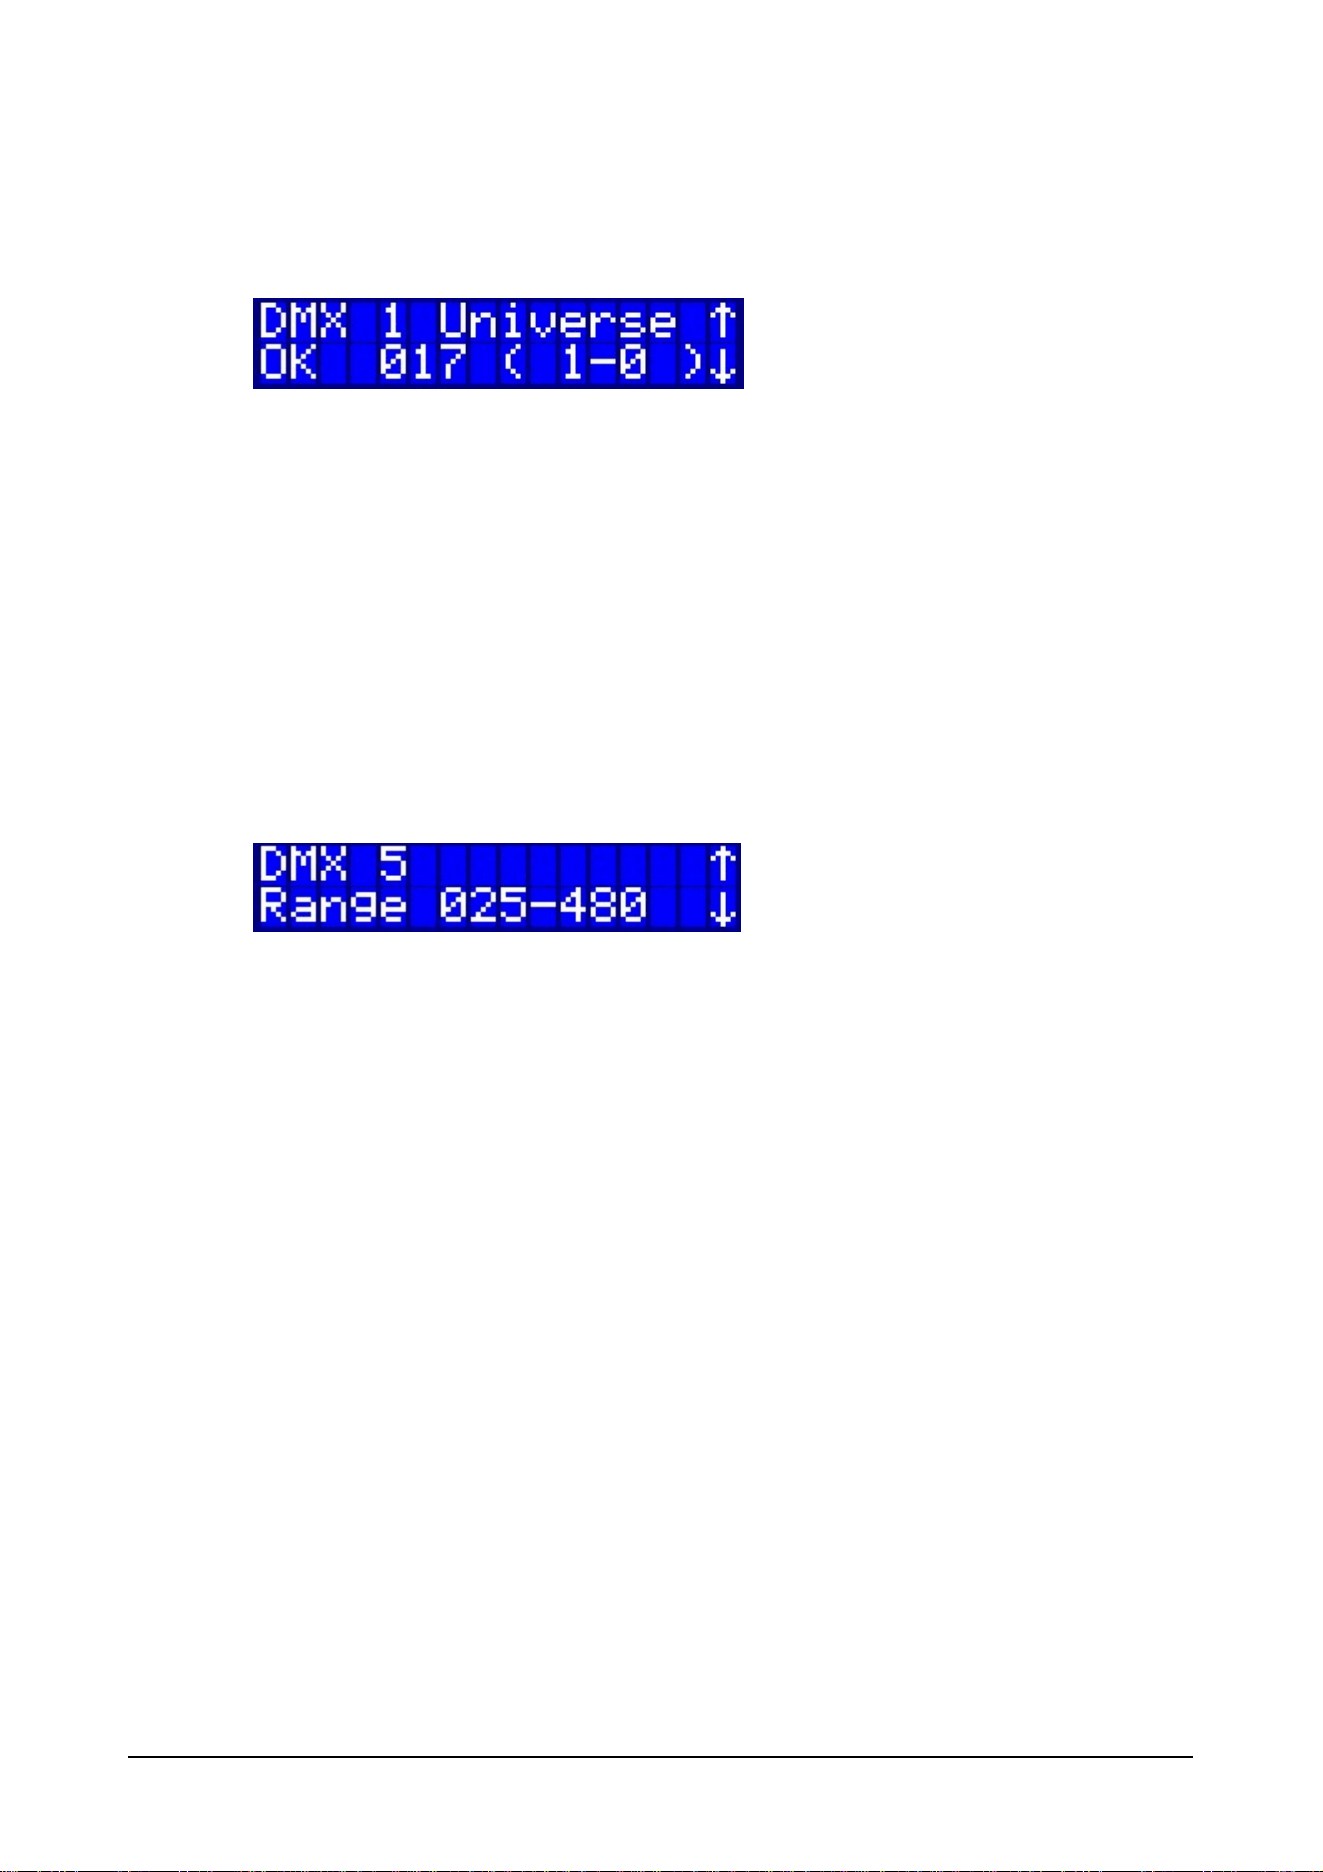
Universe
Universe Settings are available when the Mode is Input or Output.
The Universe is indicated as a decimal number. In addition is is shown as the Artnet subnet and
Universe number.
This makes it easy to work with consoles that do not use decimal Universe numbers for their
Artnet Configuration.
Universes numbers can be set from 1 to 256 (0-0 to F-F) with the arrow keys. Confirm the desired
Universe with the Enter key.
Range
Range allows to limit the DMX channels submitted by a port. This can be helpful to protect certain
DMX addresses, for example houselights or Special FX from accidental use.
Enter the Range Menu and use the arrow keys to define the start channel of the range. Press
Enter and define the end channel of the range.
Another Enter press confirms the range and it will be indicated in the display.
Framerate
The refresh rate of the DMX port can be set from 10Hz up to 39Hz, and to "Follow Input"
With Follow Input the rate is set identical to the incoming rate of Artnet packages, increasing
accuracy.
24 © 2010 Martin Professional A/S
Ether2DMX8 User Manual
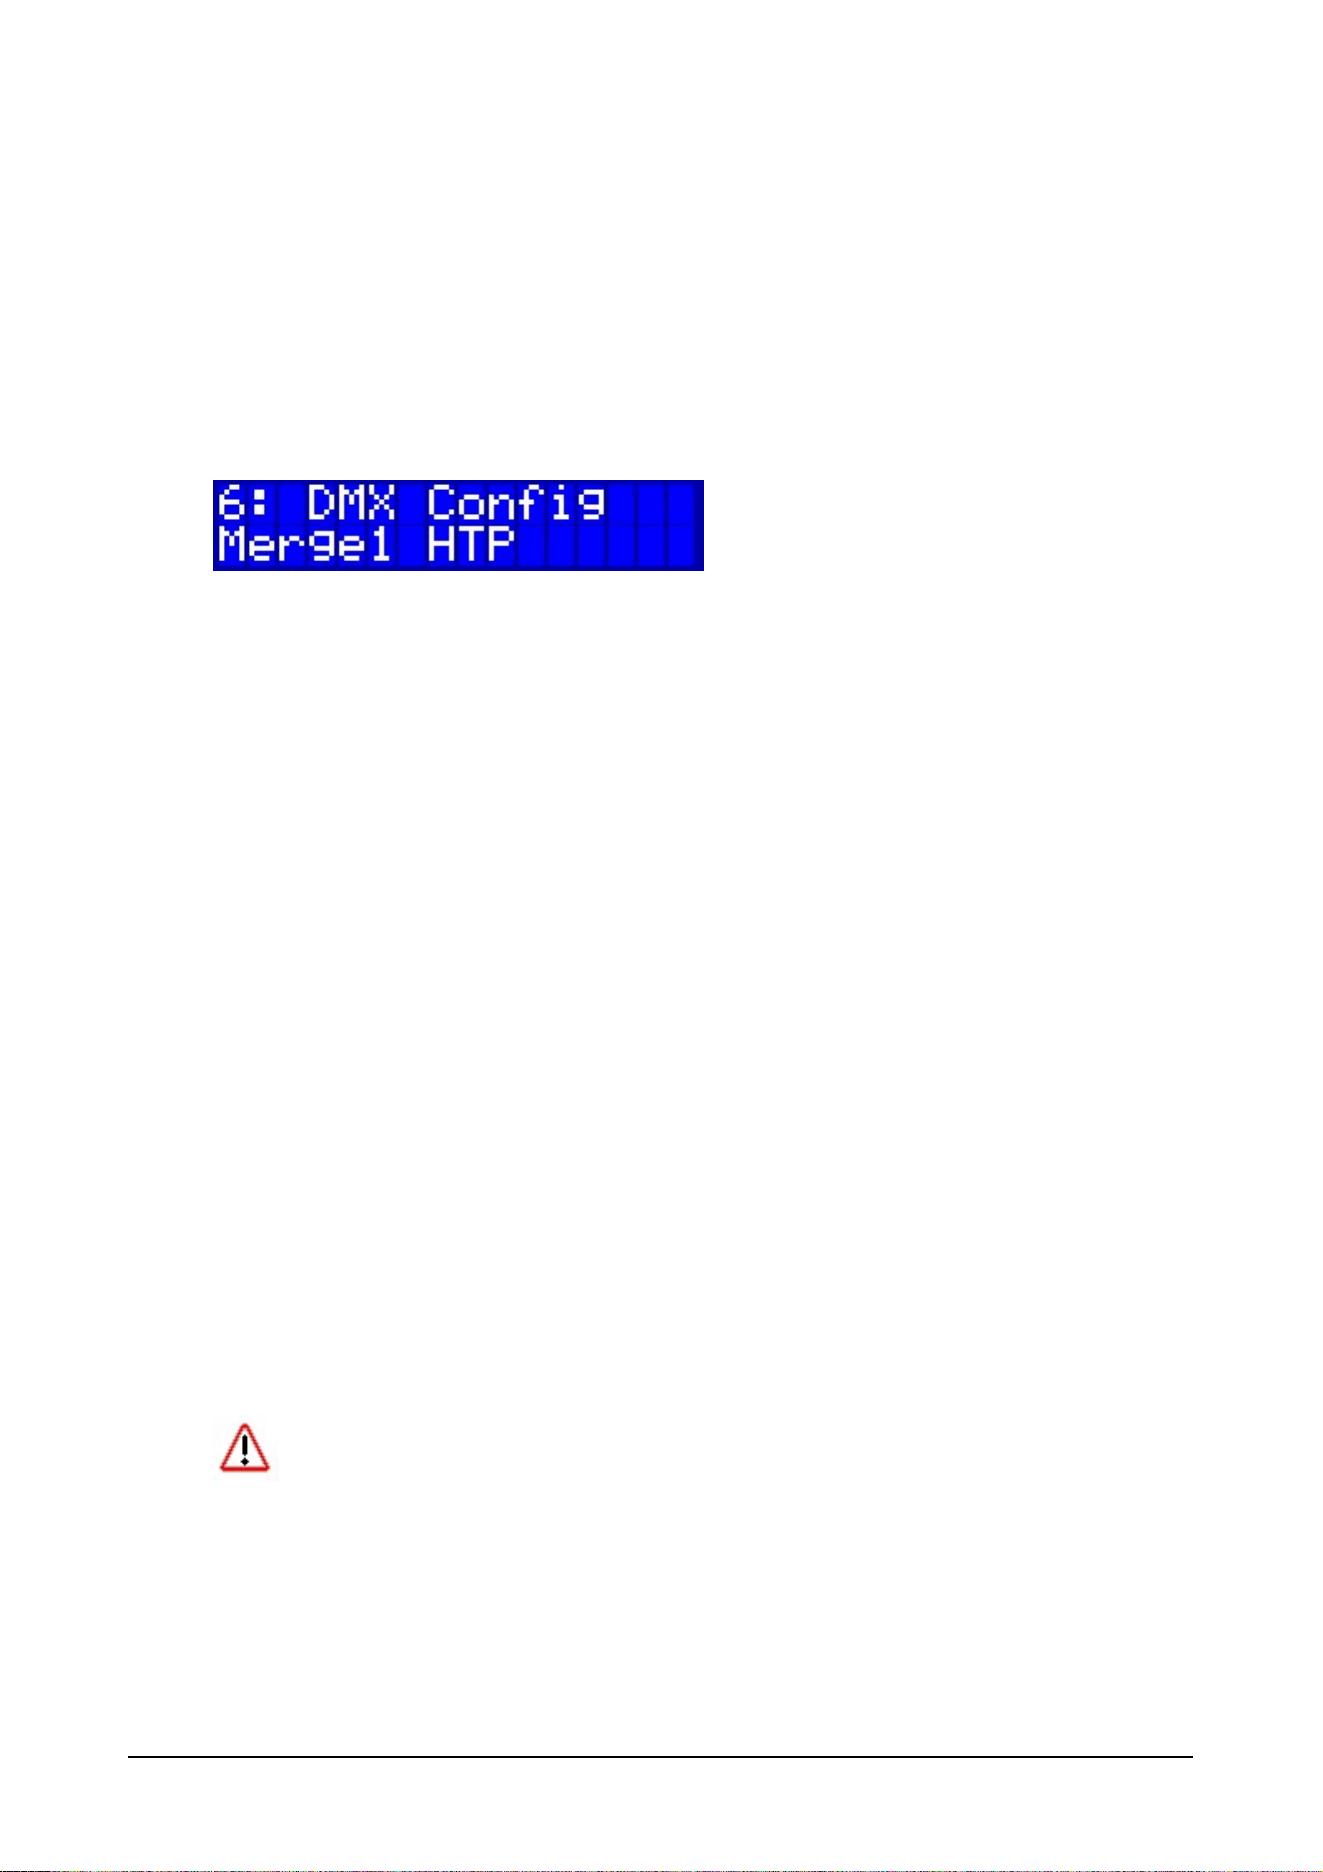
DMX Merge Options
DMX values from different sources can be merged together, and the merged results can be used as
the source for the DMX outputs.
The router uses Merging slots and there is only a limited amount available (currently 4).
Each slot has two input connections that need to be defined. Afterwards the Merge slot number can
simply be used in the DMX configuration as a source.
Hit Enter to access the settings menu for the current Merge Slot.
Mode
OFF
The Merger is disabled.
HTP
The inputs are merged using Highest Takes Precedence.
LTP
The inputs are merged using Latest Takes Precedence. This is calculated for
each DMX channel separately.
Toggle
The inputs are not merged but actually switched on a Latest Takes Precedence
Rule.
Any change in one Input will toggle the entire Merger to use that inputs DMX
values.
Input (1 and 2)
DMX 1-8
The input is read from the Data of the DMX port.
MRG 1-4
The input is read from a Merge Slot
IP-A
(Universe)
The input is read from one Universe of the Artnet stream for Node A
IP-B
(Universe)
The input is read from one Universe of the Artnet stream for Node B
Always disable Mergers that are not used as they use processing resources.
25 © 2010 Martin Professional A/S
Ether2DMX8 User Manual
IP Configuration
Menu # 7 allows setting the IP addresses for the box.
By default a unique IP address is generated for each box and no configuration is necessary.
Also the Factory Presets set the IP addresses accordingly for use with Maxxyz, Maxedia and Martin
Show Designer.
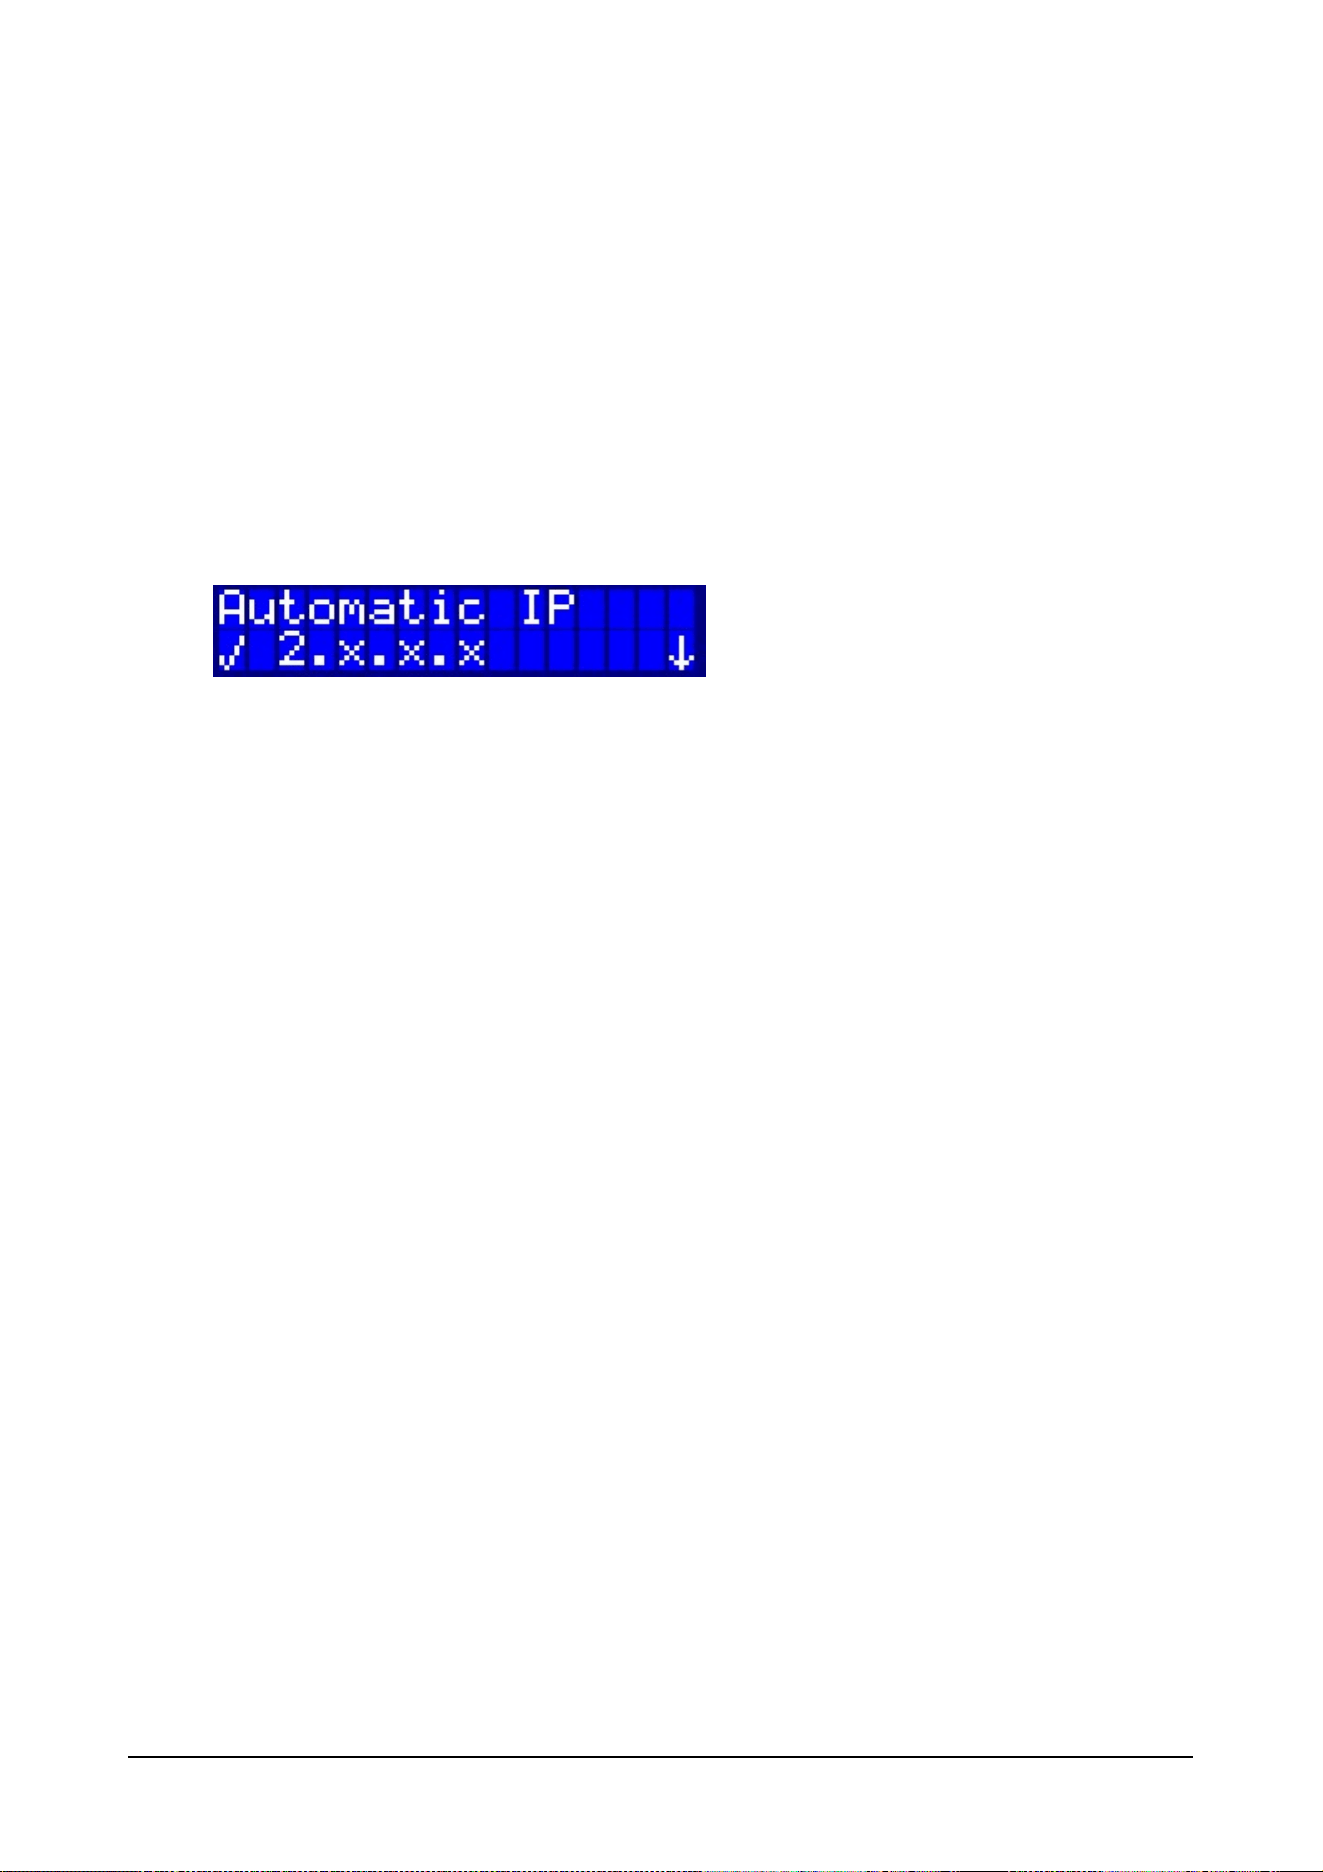
Automatic IP
The Automatic IP setting uses an Artnet compliant algorithm to generate unique IP addresses for the
Ether2DMX8 router.
Three options are available.
The check mark indicates the current active setting.
IP Address
2.x.x.x
Subnet:
255.0.0.0
IP Address
10.x.x.x
Subnet:
255.0.0.0
IP Address
2.x.x.x + 10.x.x.x
Subnet:
255.0.0.0
26 © 2010 Martin Professional A/S
Ether2DMX8 User Manual
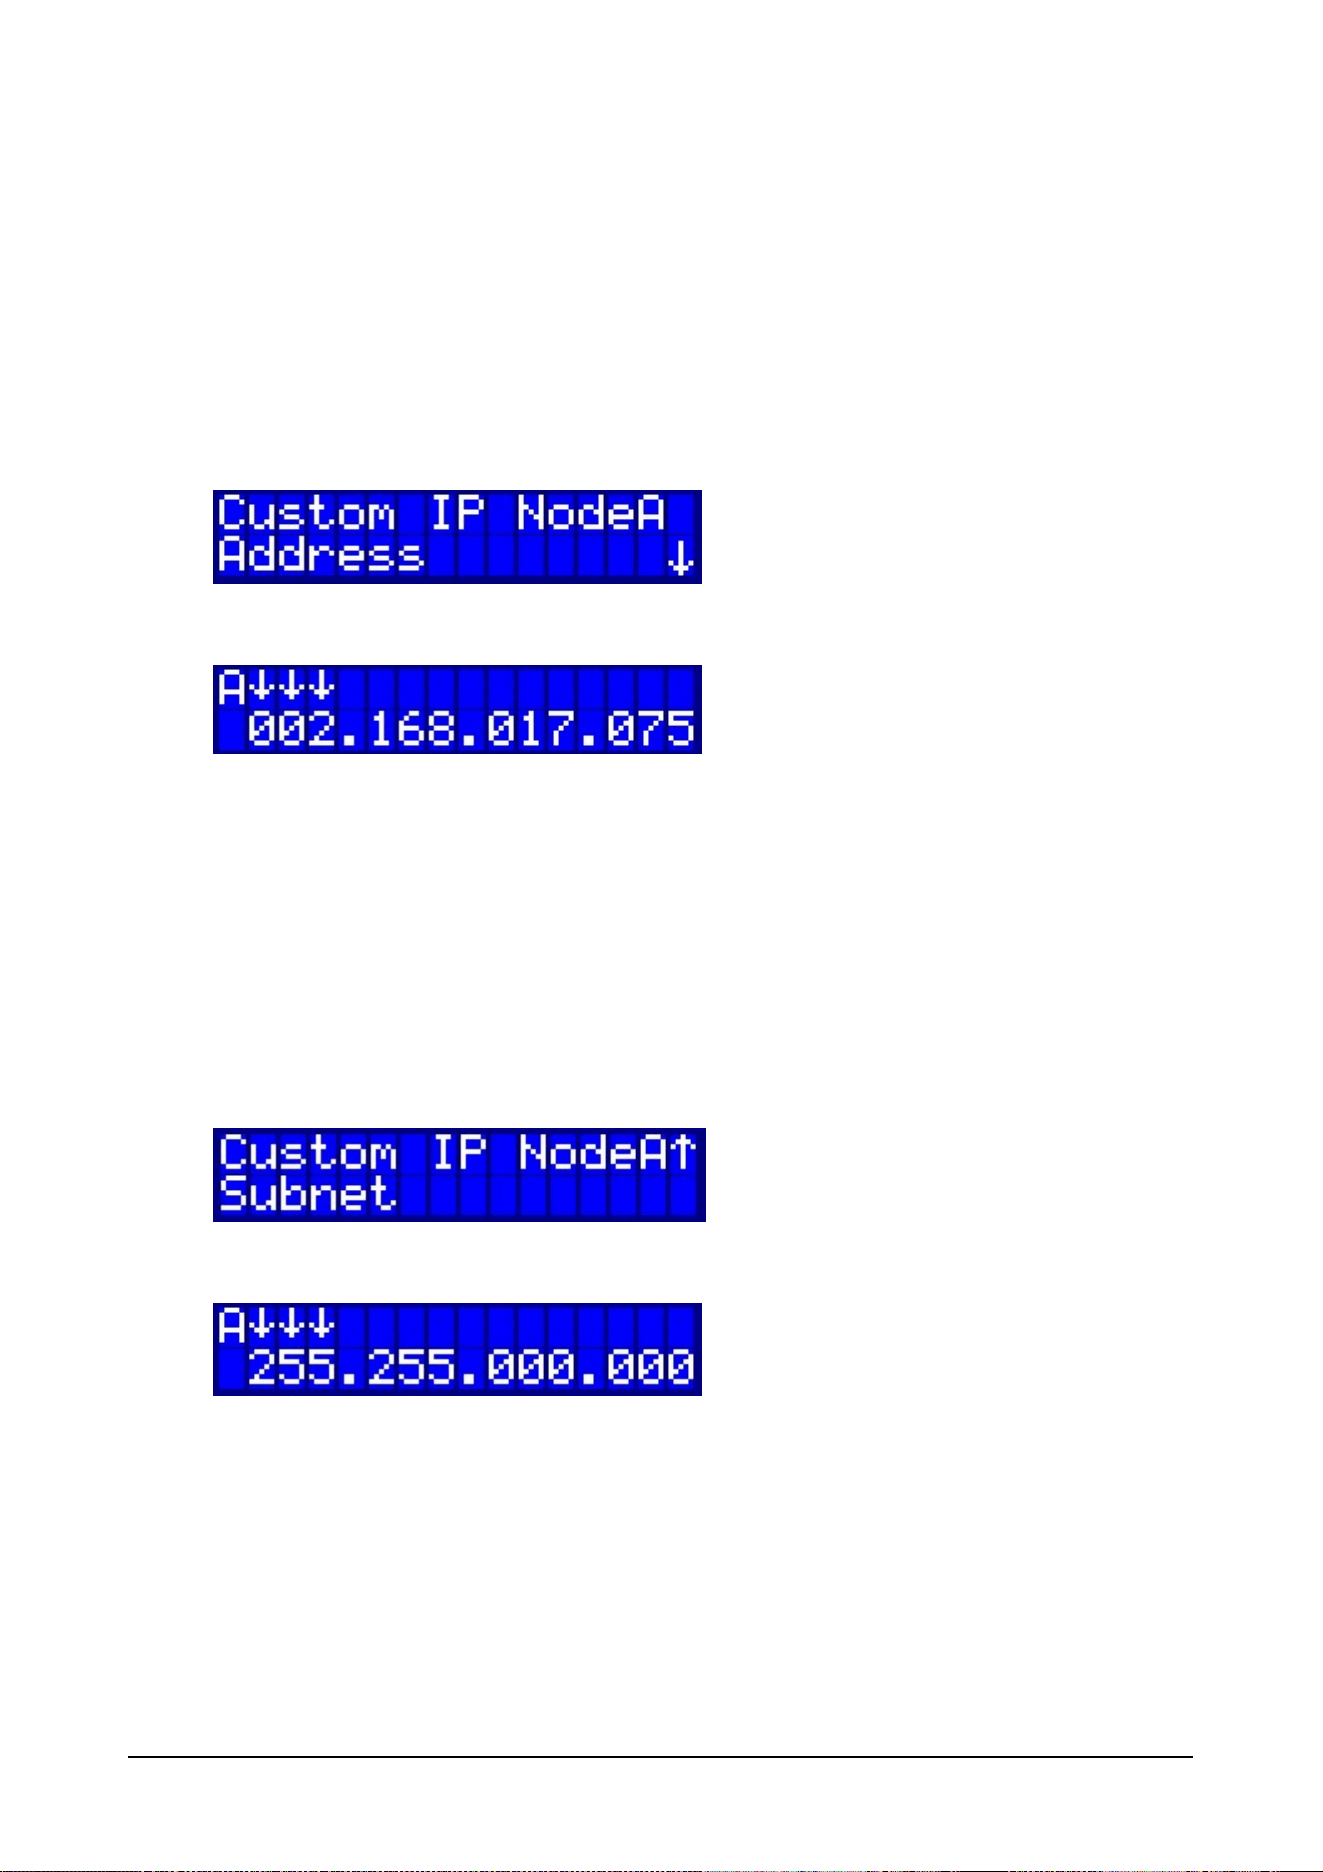
Custom IP
It is possible to set a completely customized IP address if necessary.
The address can be set differently for Node A (DMX 1-4) and Node B (DMX 5-8).
One limitation is that the Subnet is identical for both Nodes.
Changing the IP Address
Enter the Custom IP and select Node A.
Hit Enter to set the Address:
The three arrows indicate what numbers are modified with the up and down arrow.
To step forward to the second set of numbers, use ENTER.
To step backwards to the previous set of numbers, use MENU.
To confirm the changes, press Enter on the last set of numbers.
Changing the Subnet
Use the arrow down key to access the next menu screen.
Hit Enter to set the Subnet:
27 © 2010 Martin Professional A/S
Ether2DMX8 User Manual
User Preset
In addition to the factory presets the Ether2DMX8 router also allows storage of 10 User Presets.
The presets includes all settings for each DMX port, the IP settings and all System settings.
It does not include any stored Cue data.
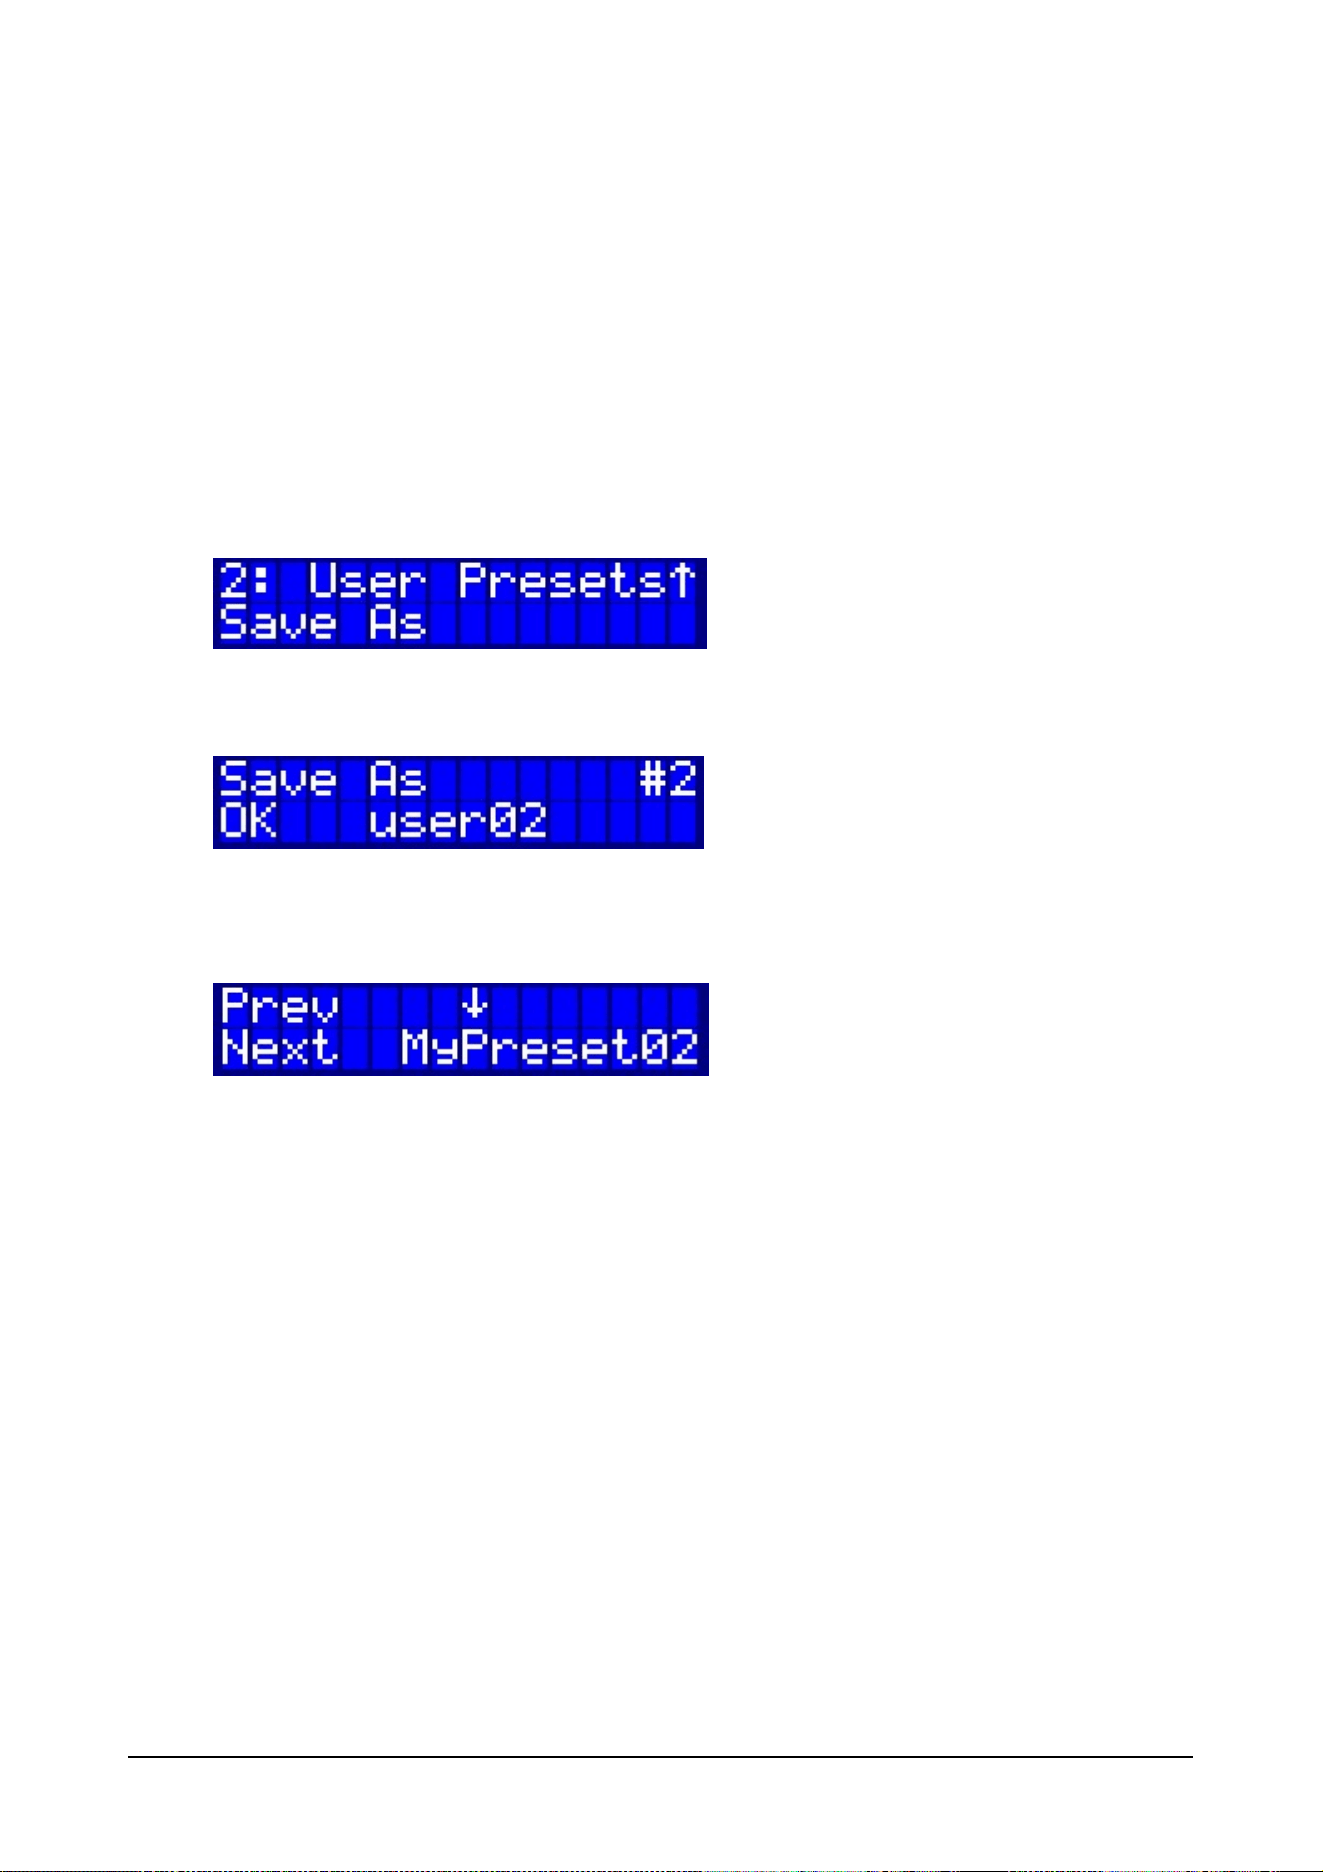
Store Preset
To save a User Preset scroll to Menu # 2 and hit Enter.
Scroll down with the arrow key until "Save As" is shown on the display.
Hit Enter for the next step and use the arrow keys to browse to the desired User Preset number (1 -
10).
Hit Enter to confirm the Preset number.
In the next step a custom name can be defined with maximum 10 characters.
The arrow above a character indicates the position for adjustment. Use the arrow up and down key to
browse the characters.
Use Menu/Enter to step forward and backward through the screen.
To confirm the name, hit Enter at the last character.
The preset is not stored until the last character is confirmed.

28 © 2010 Martin Professional A/S
Ether2DMX8 User Manual
Load Preset
Recalling a User Preset is identical to recalling a Factory Preset.
In Menu # 2 use the arrow key to scroll down the list of User Presets, then confirm the desired Preset
with OK.
29 © 2010 Martin Professional A/S
Ether2DMX8 User Manual
DMX Monitor
This menu allows to visualize the DMX data on a specific port.
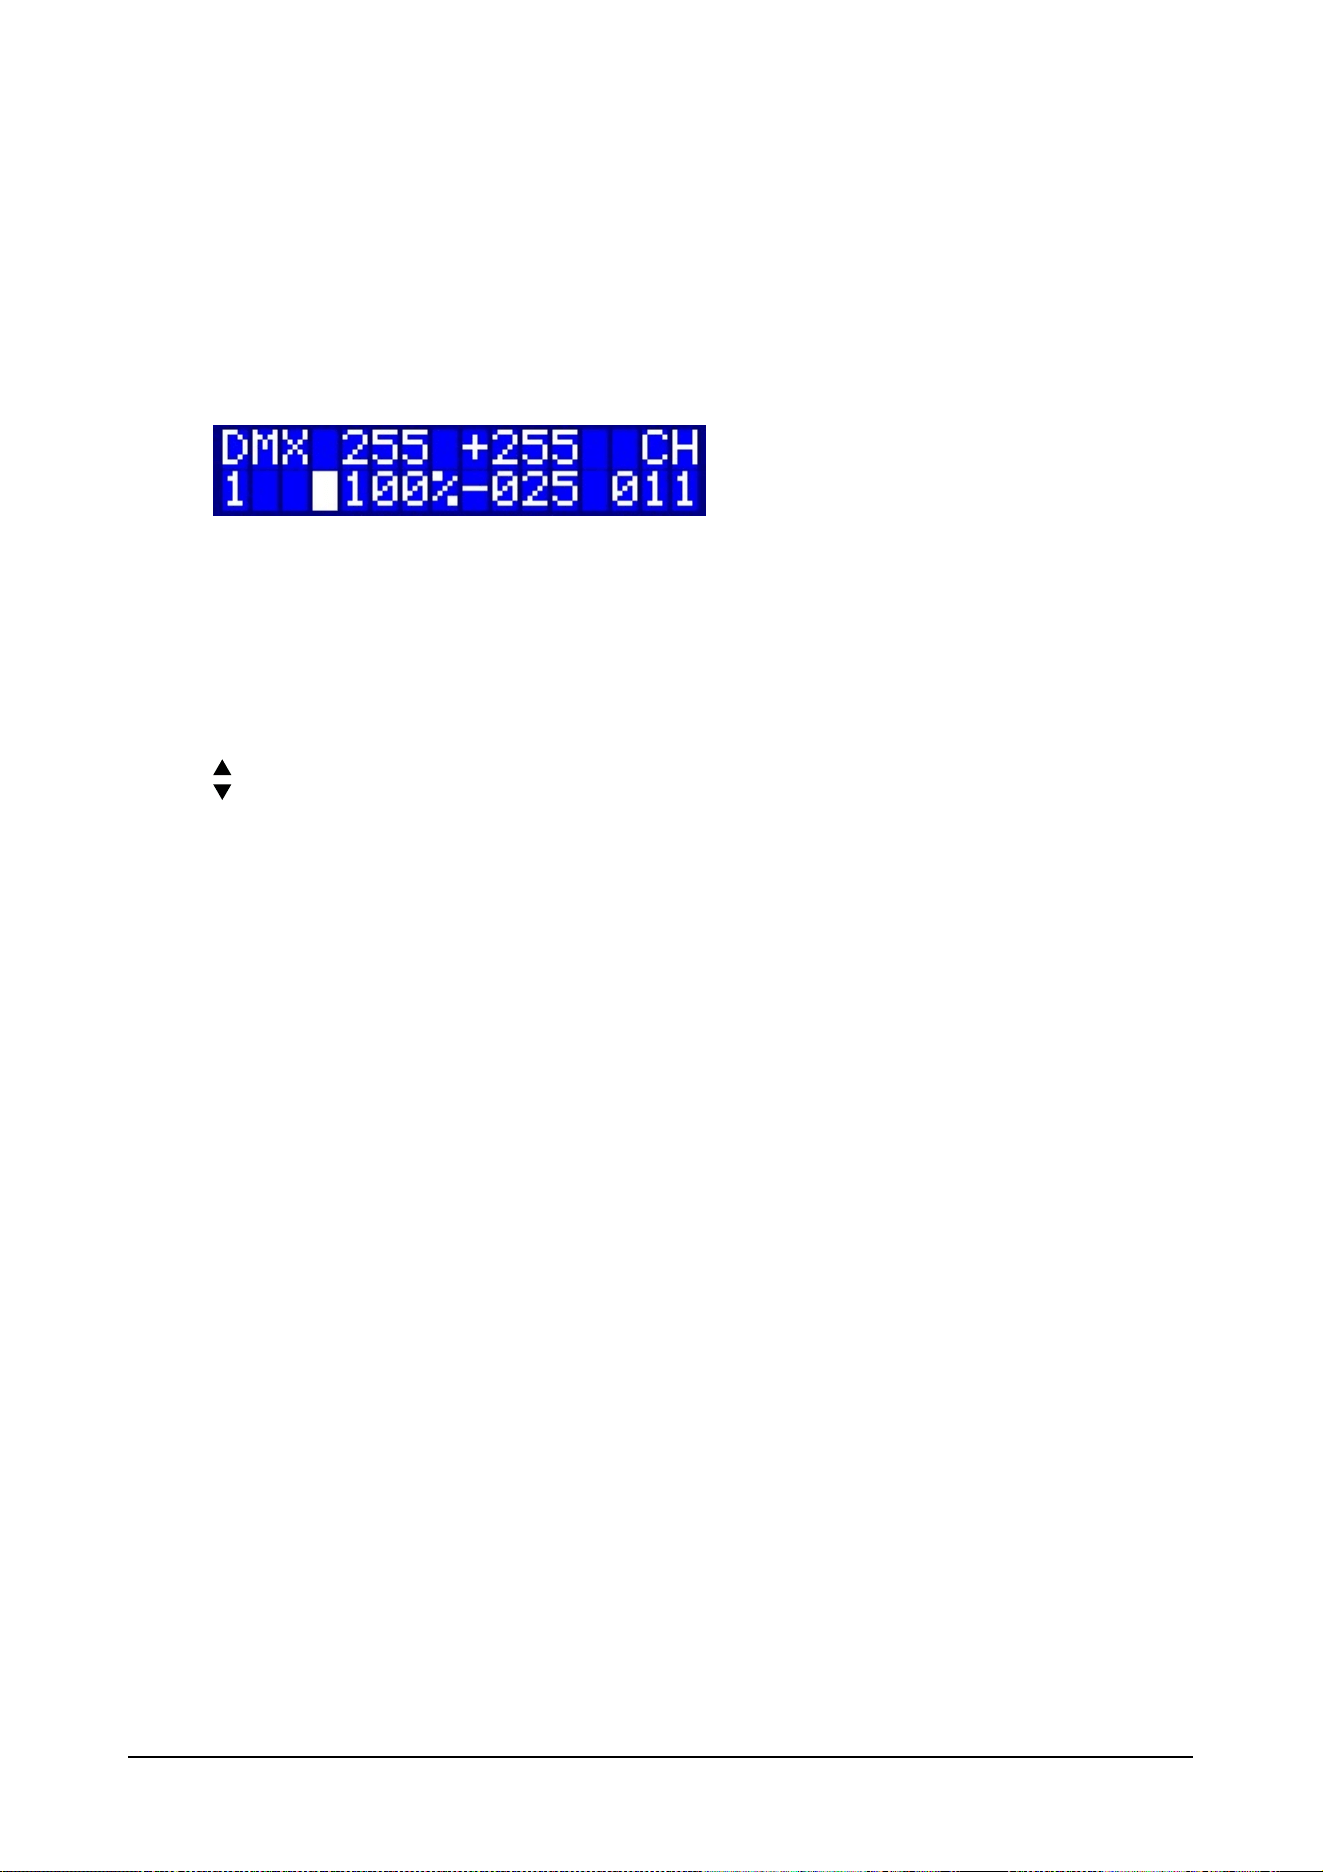
Value View
This view allows to see one specific DMX channel on one specific port.
Menu
Exits the Value View
Enter
Cycles the DMX Ports from 1 to 8
Arrows are used to select the DMX channel
The current value is shown as a DMX (255) and percentage (100%) value.
To the left of the percentage value a graphical indicator shows a visual representation of the DMX
level.
To the right is an indication of the minimum (-025) and maximum (+255) value for the specific DMX
channel.

30 © 2010 Martin Professional A/S
Ether2DMX8 User Manual
Graphical View
This view allows monitoring the values of 10 DMX channels at the same time.
Menu
Exits the Graphical View
Enter
Cycles the DMX Ports from 1 to 8
Arrows are used to select the DMX channels in blocks of 10
The top row shows the value as 0-F in 10% steps.
The bottom row shows a graphical representation of the DMX level.
31 © 2010 Martin Professional A/S
Ether2DMX8 User Manual
DMX Test
DMX Test is used to generate DMX data for troubleshooting and testing purposes.
It is a slow gradual cycle between the DMX values of 20 and 200.
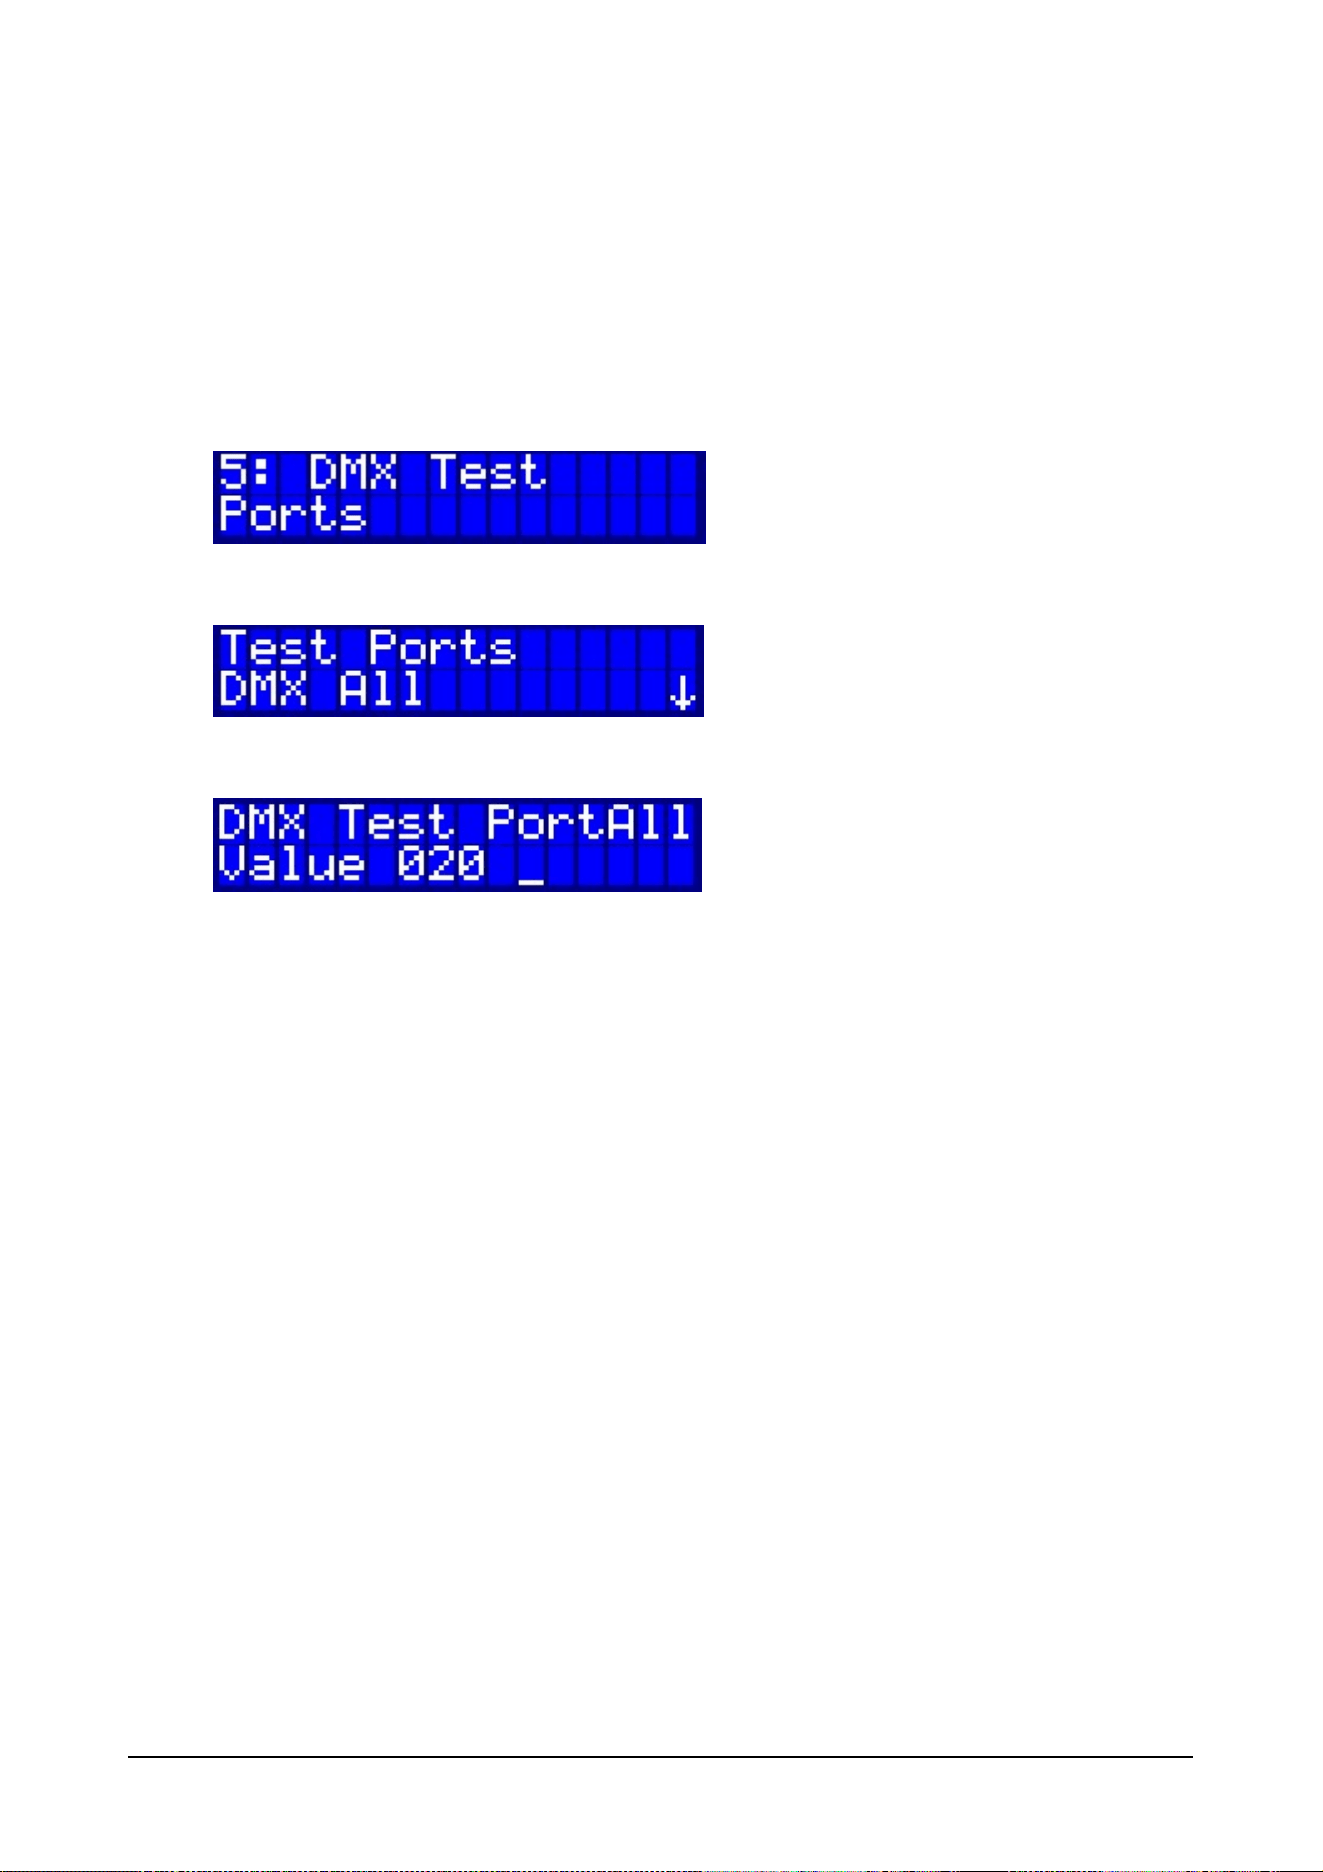
DMX Port Test
The test data can be sent to individual ports or to all of them simultaneously.
Select "Ports" with Enter.
Use the arrow keys and select ALL or a single Port with Enter.
The test data is sent and indicated in the display.
To Exit the test sequence use MENU.
32 © 2010 Martin Professional A/S
Ether2DMX8 User Manual
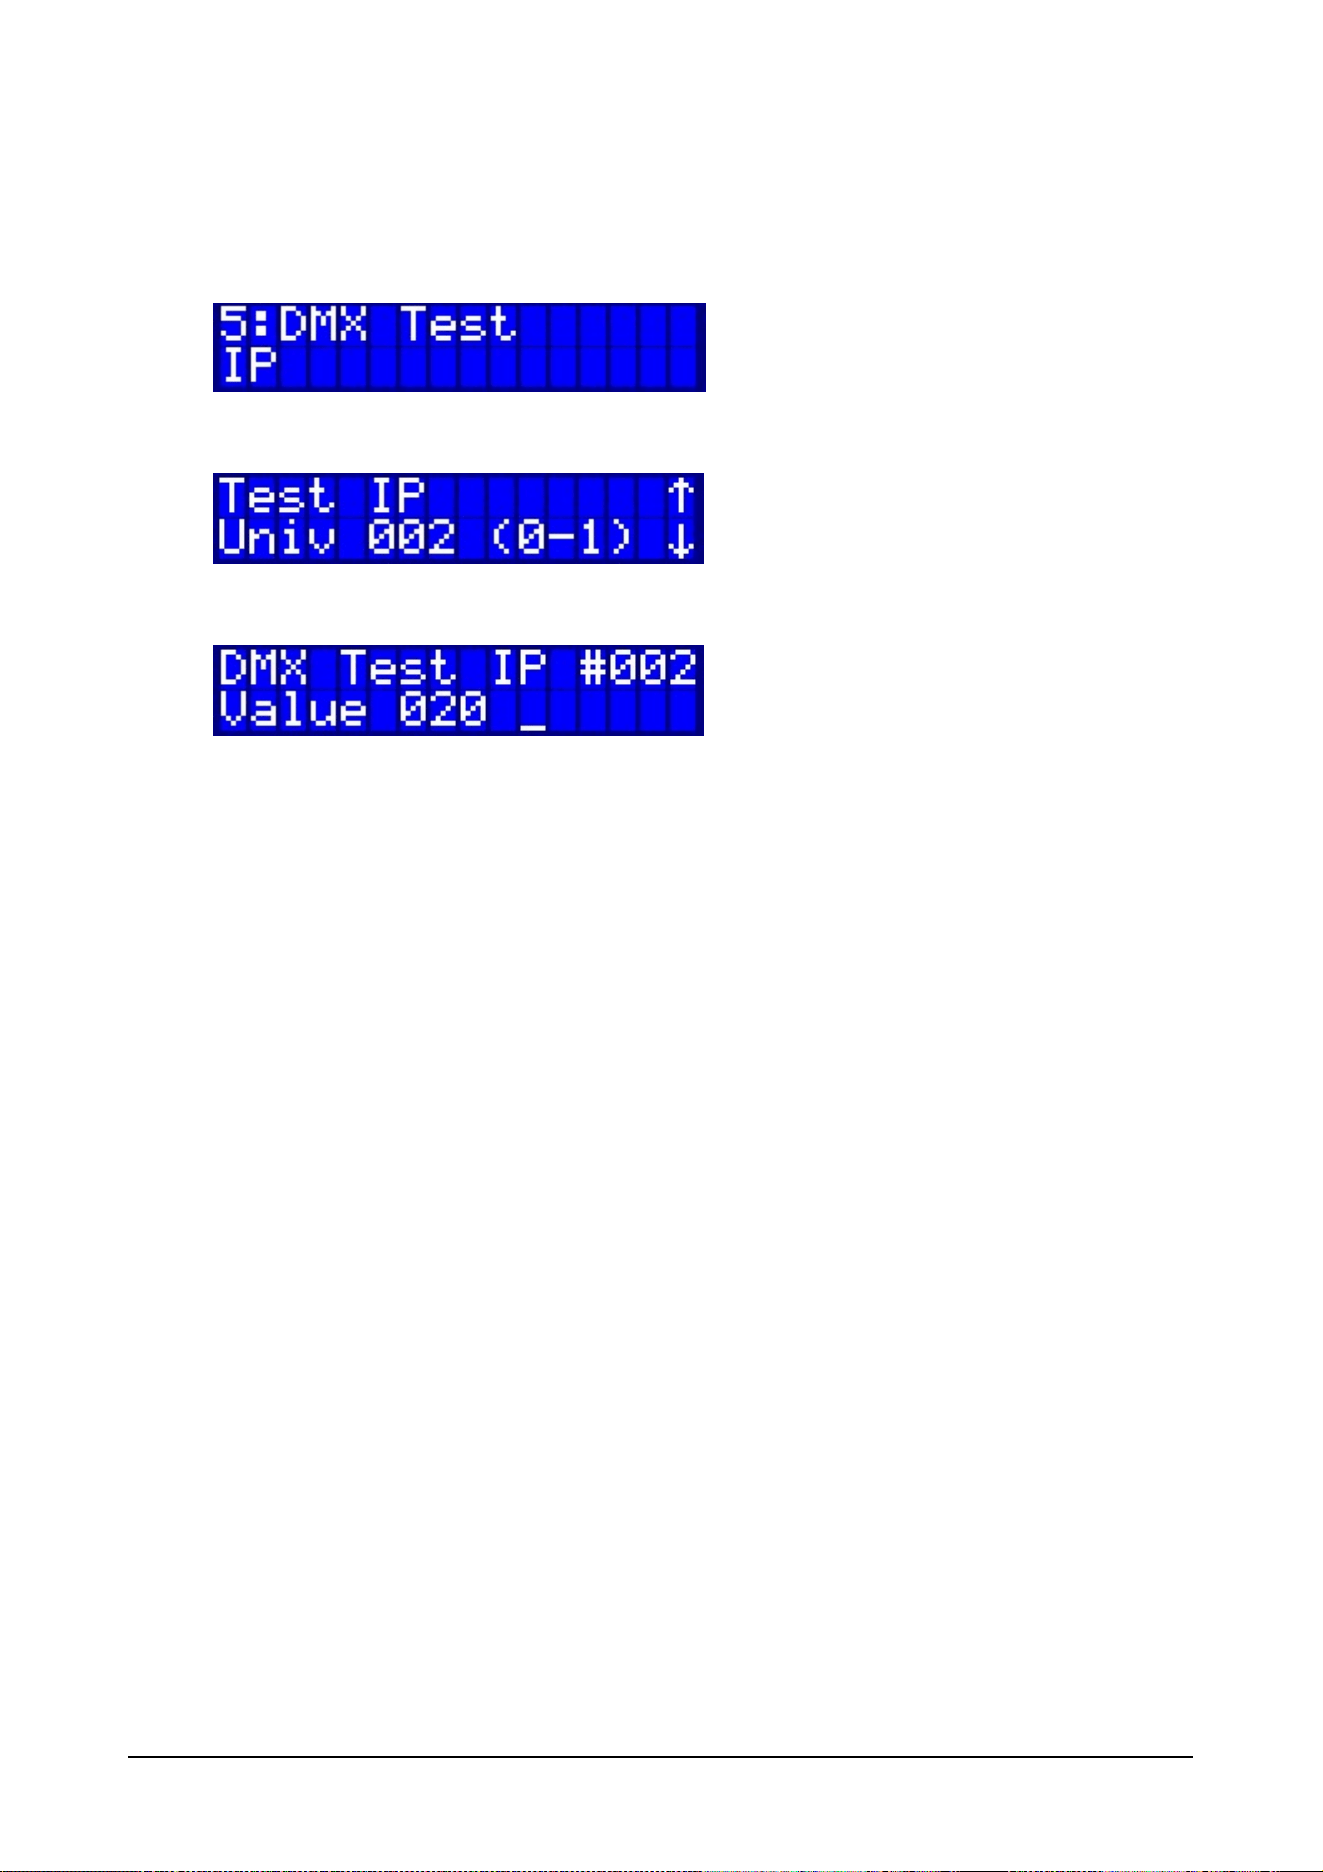
Artnet Universe Test
Test values can also be generated as Artnet traffic and sent to a specific Universe number.
Confirm with Enter:
Use the arrow keys to change the Universe Numbers. Confirm with Enter to start the test.
The test data is sent and indicated in the display.
To Exit the test sequence use MENU.

33 © 2010 Martin Professional A/S
Ether2DMX8 User Manual
Cues
The Ether2DMX8 router has the ability to store 99 cues. A cue is a snapshot of the current levels
(4096 channels) on all 8 DMX ports.
It is not possible to record streaming DMX data.
However the router allows to assign fade and hold times to the cues, and multiple cues can be linked
to each other to create a simple cuelist.
Only one cue can be played back at any given time. Playing back a cue will block any other DMX
processing until the cue is stopped.
Switch Inputs can be linked to cues, allowing the Ether2DMX8 router to function as a simple playback
device for installations, trade show booth or a simple retail environment.
It is also possible to assign a cue to be run on startup of the router.
Cues have many different uses. Some examples are:
Standalone playback
Backup Cues in case of controller failure
Emergency Lighting Cue for a fire alarm via the switch inputs
Automatic Lamp Strike during system power on
Lighting cue without the need for a lighting console to be turned on
Lighting cues triggered by standard light switches
34 © 2010 Martin Professional A/S
Ether2DMX8 User Manual
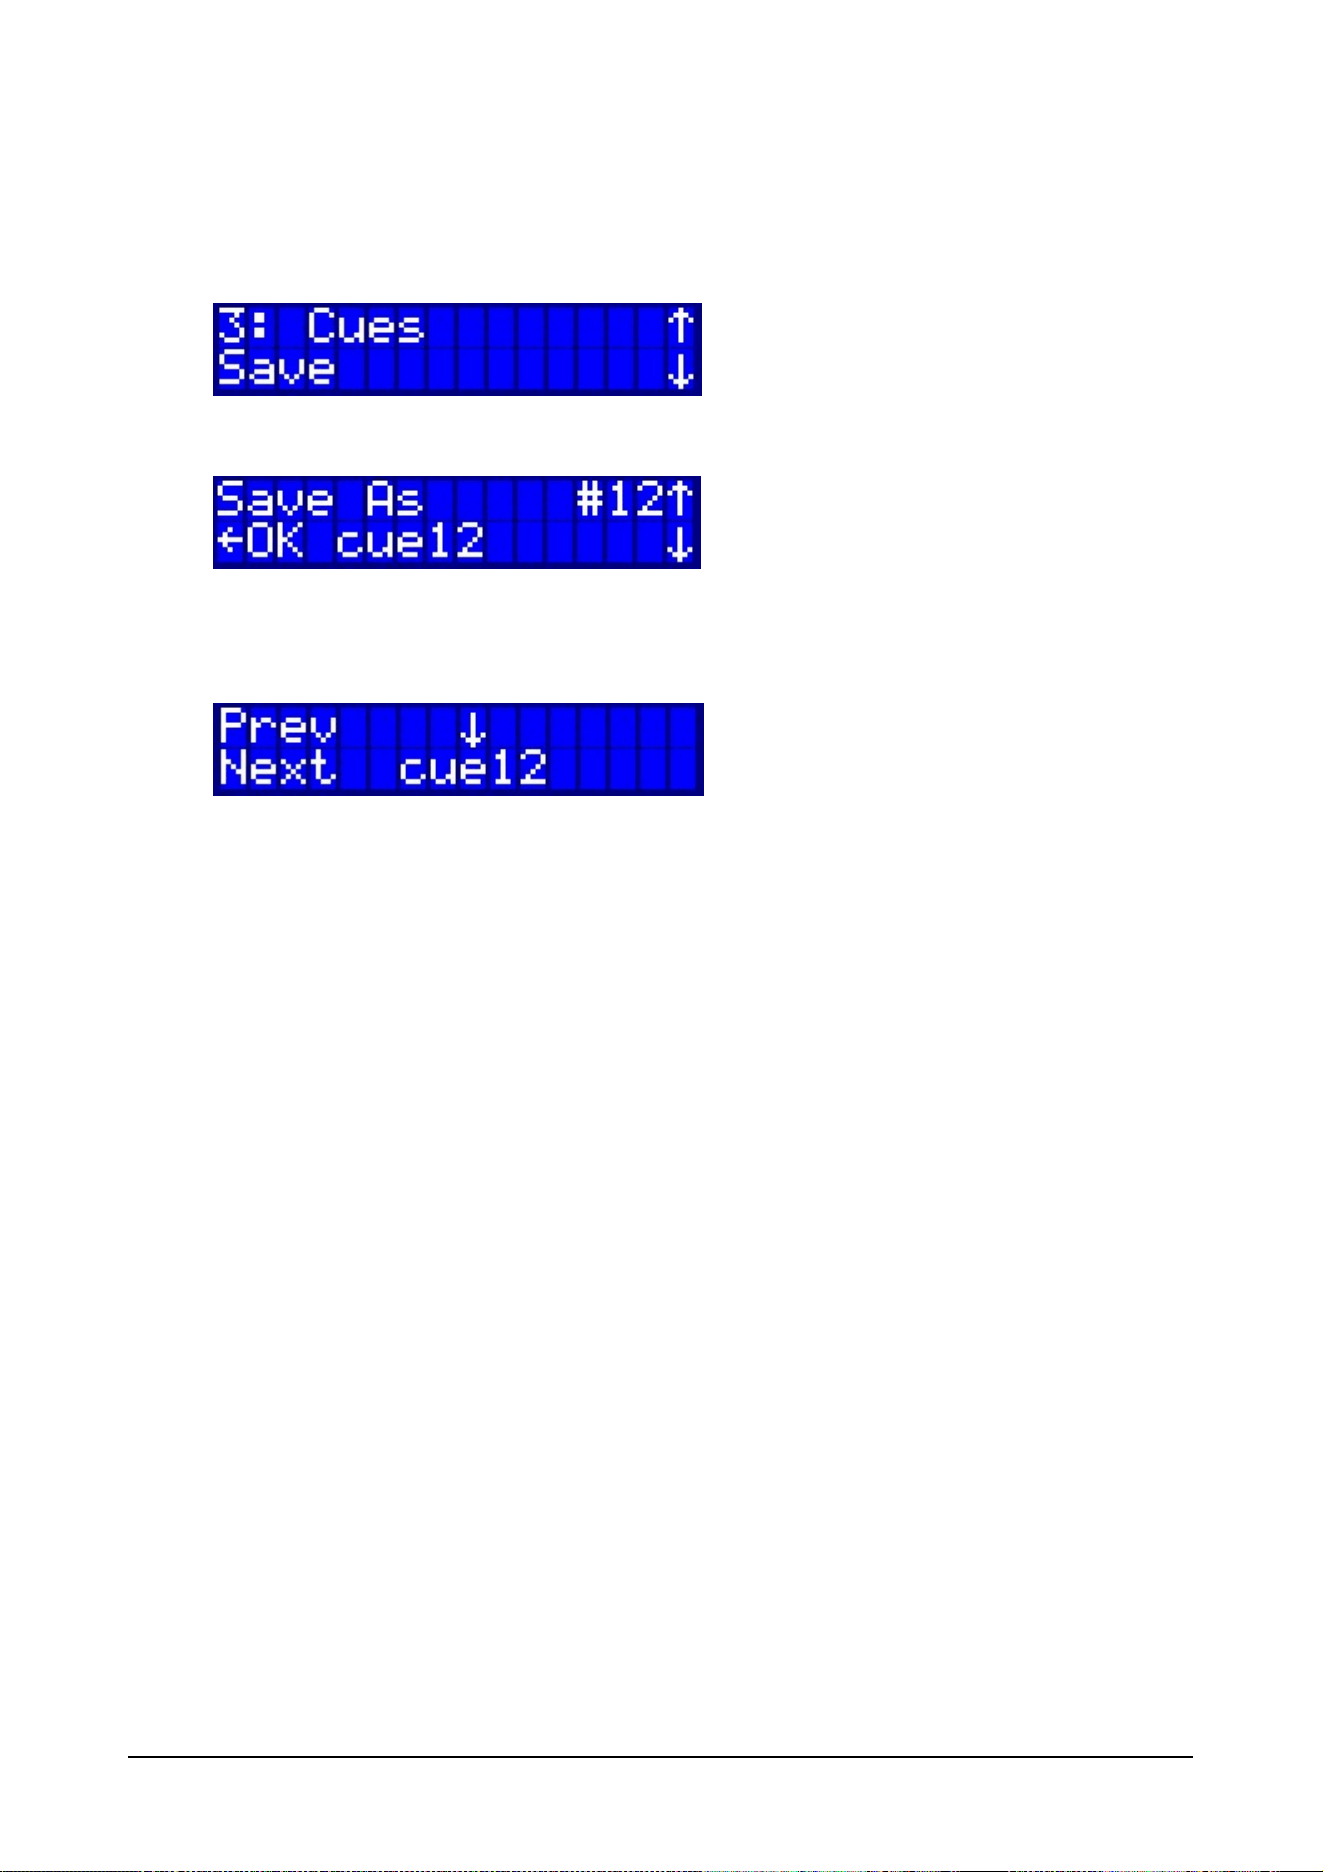
Recording Cues
To record a cue go to Menu # 3 and use the arrow keys until "Save" is displayed.
Press Enter to confirm.
Select the desired Cue # with the arrow keys, then hit Enter to confirm.
In the next step a custom name can be defined with maximum 10 characters.
The arrow above a character indicates the position for adjustment. Use the arrow up and down key to
browse the characters.
Use Menu/Enter to step forward and backward through the screen.
To confirm the name, hit Enter at the last character.
The cue is not stored until the last character is confirmed.
35 © 2010 Martin Professional A/S
Ether2DMX8 User Manual
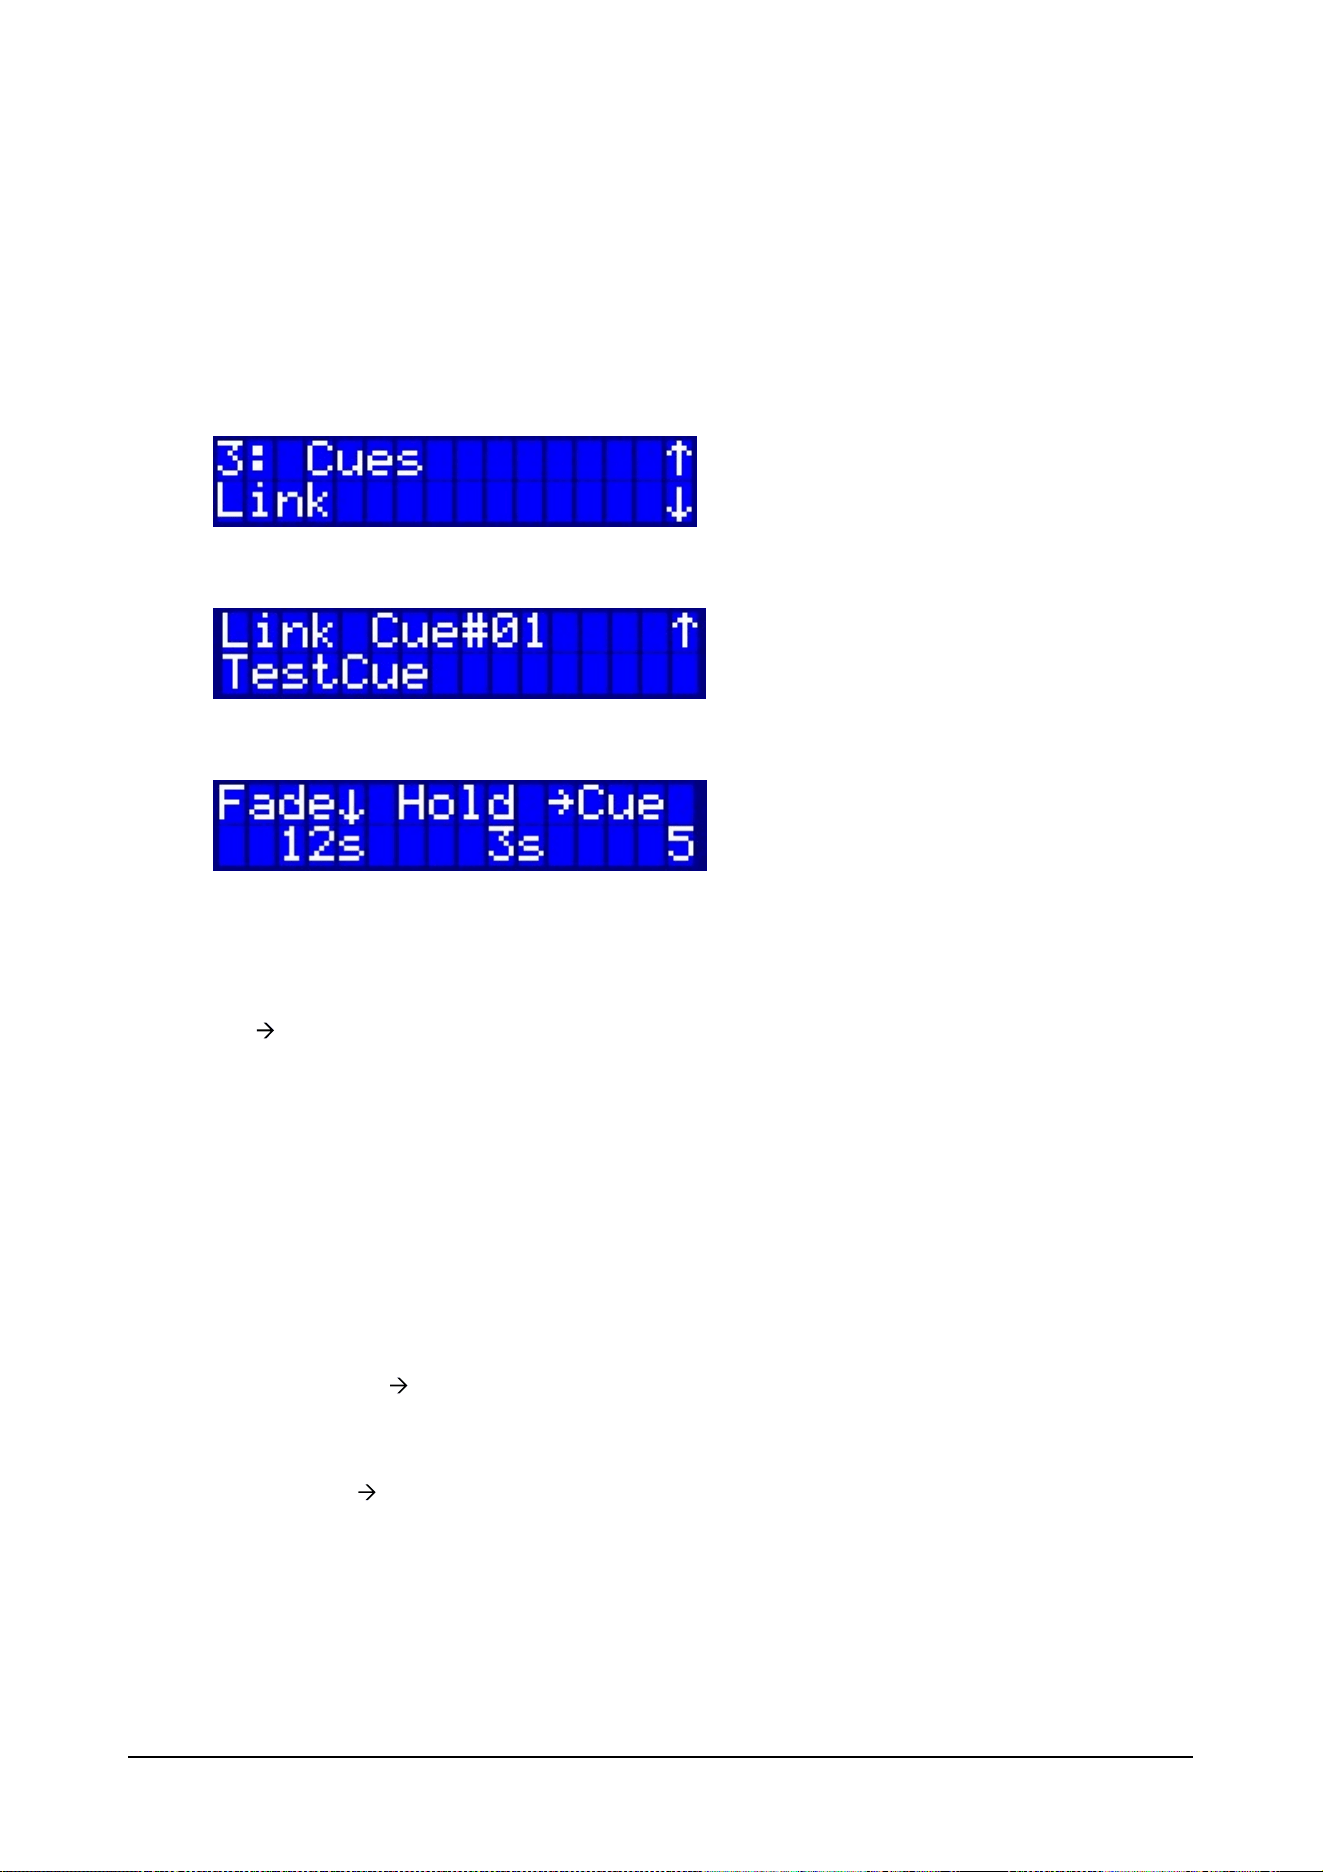
Linking and Timings
Cues can be linked together. A link is a simple way to connect multiple cues into a list that are
executed one by one.
With the Links Menu it is also possible to define the fade time for a cue and the hold time until the
next cue is started.
Links are assigned to the source cue, for example Cue 1 has a link to Cue 5, Cue 5 has a link to Cue
8 and Cue 8 links back to Cue 1 (at which point the list starts from its beginning)
Press Enter to confirm.
Browse to the Cue number that needs to be modified.
The arrow indicates what is being modified.
Fade
Defines the fade time it takes to fade up the current one
Hold
Defines the time a cue waits before the next cue is triggered
Cue
Indicates the next Cue to follow after the current one
--
indicates that no cue will be triggered (ending the cuelist)
Both times are added together:
First the cue fades with the defined time (12s), then the cue holds for the defined time (3s).
This is a total of 15s for the current cue, at which point Cue 5 is triggered.
With linking it is possible to create multiple such loops.
Examples
Cue 1,2,3,4,5 Link back to Cue 1
Cue 5,10,15,16
Cue 51,52 Link back to Cue 1
With some smart linking there are many useful possibilities.
Playing Back Cues
Play back of cues is started from the RUN Menu.

36 © 2010 Martin Professional A/S
Ether2DMX8 User Manual
Press Enter to confirm, then use the arrow keys to browse to the desired Cue number.
Enter will start the cue and a check mark will be placed next to the RUN.
To stop cue playback, arrow up until OFF is shown. Press Enter to stop the cue playback.
37 © 2010 Martin Professional A/S
Ether2DMX8 User Manual
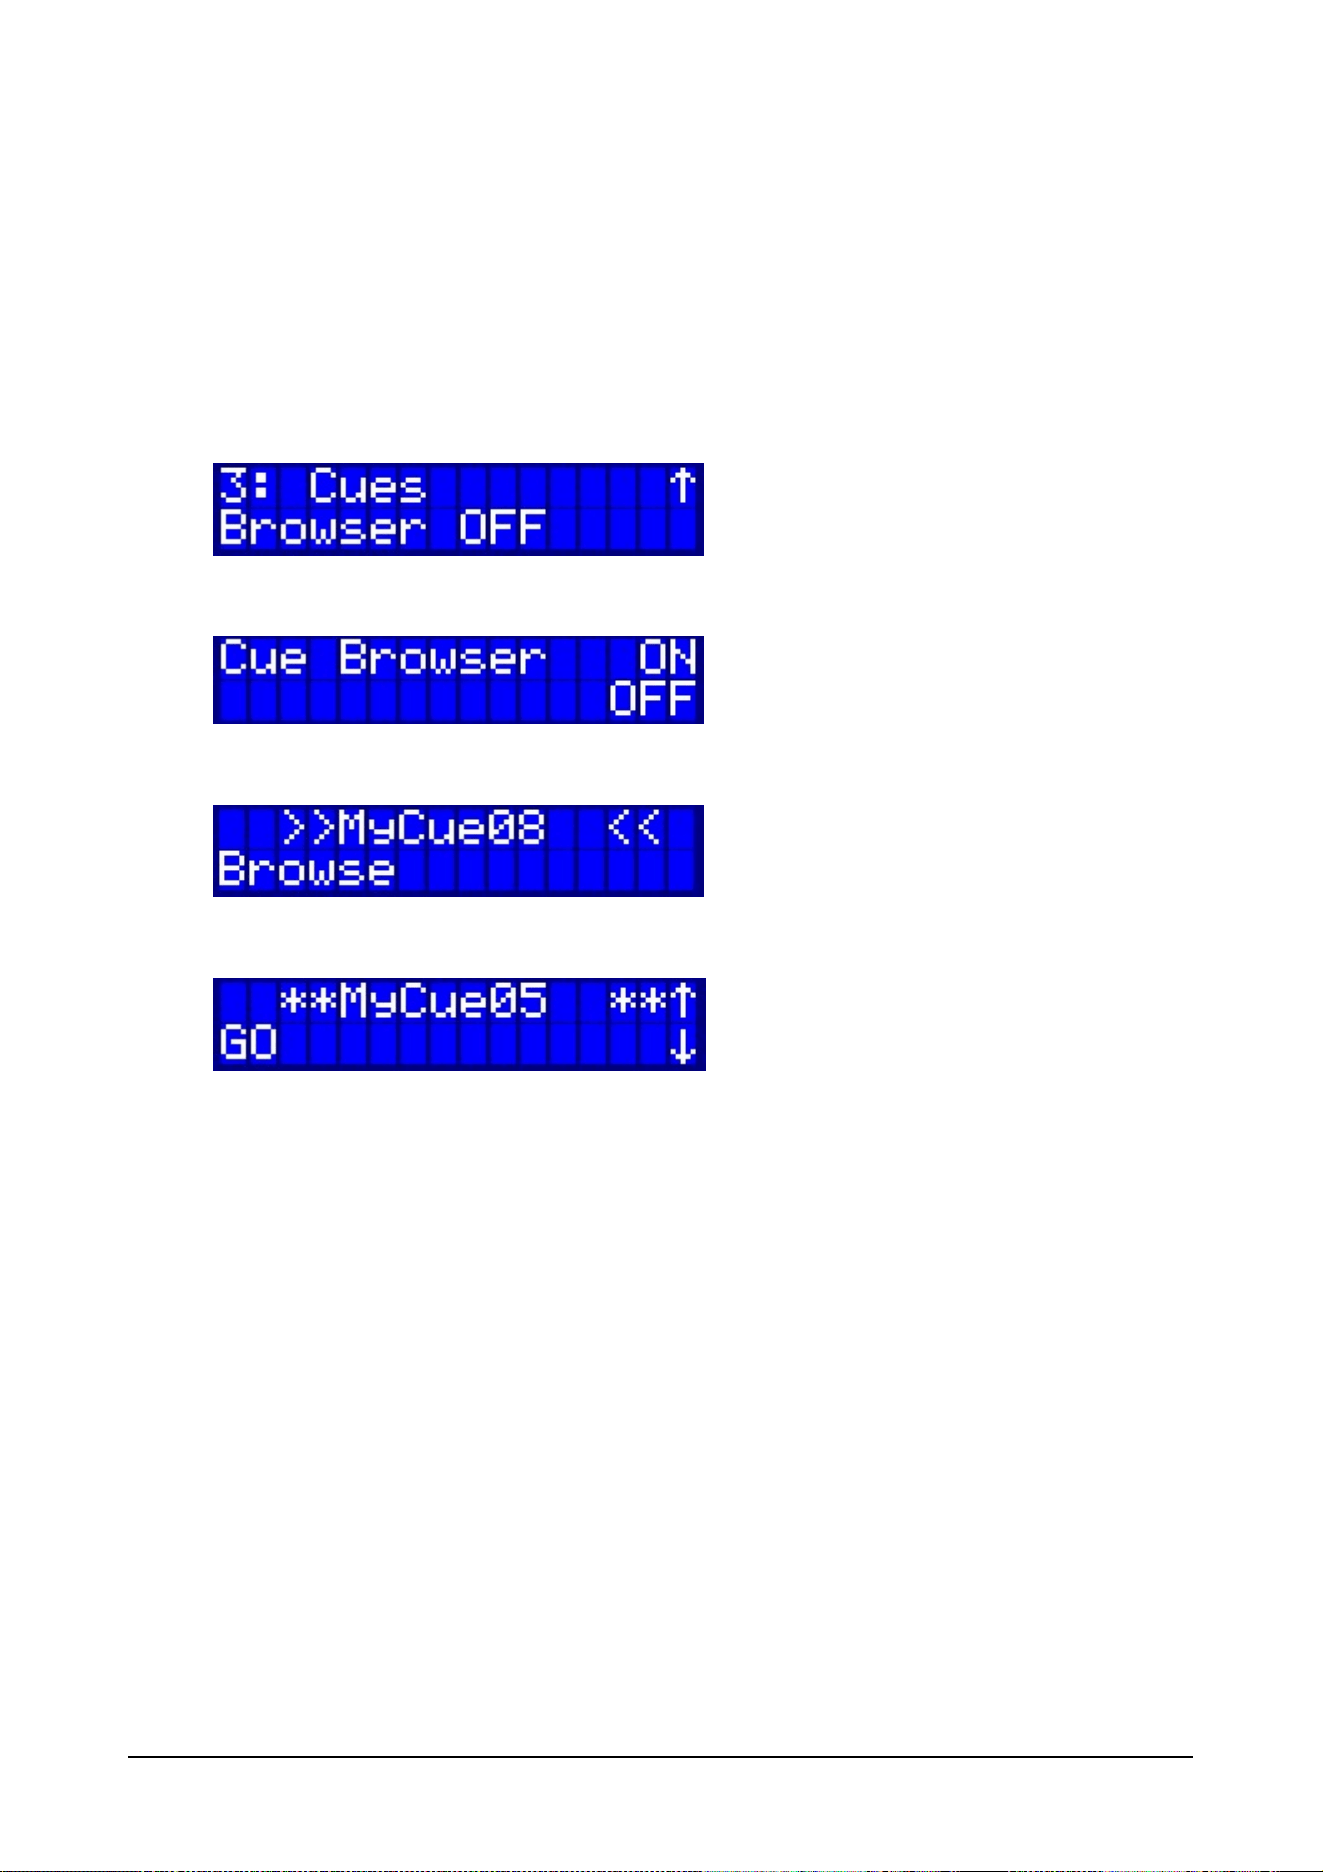
Cue Browser
The cue browser replaces the default home display.
The idea is to have a simple browser menu that allows selecting any cue to be executed without the
need to use the Menu system.
For example the Ether2DMX8 router could be left with a client who then can pick from several
preprogrammed cues for his lighting system.
The cue browser is activated in Menu # 3.
Press Enter, then use the UP arrow to turn the Browser ON and the down arrow to turn it OFF.
With the browser activated, the home display will now look like this:
Press BROWSE to select the desired Cue.
GO will start the Cue and return to the previous display.
Turn the browser off in Menu # 3 to see the normal home display screen again.
38 © 2010 Martin Professional A/S
Ether2DMX8 User Manual
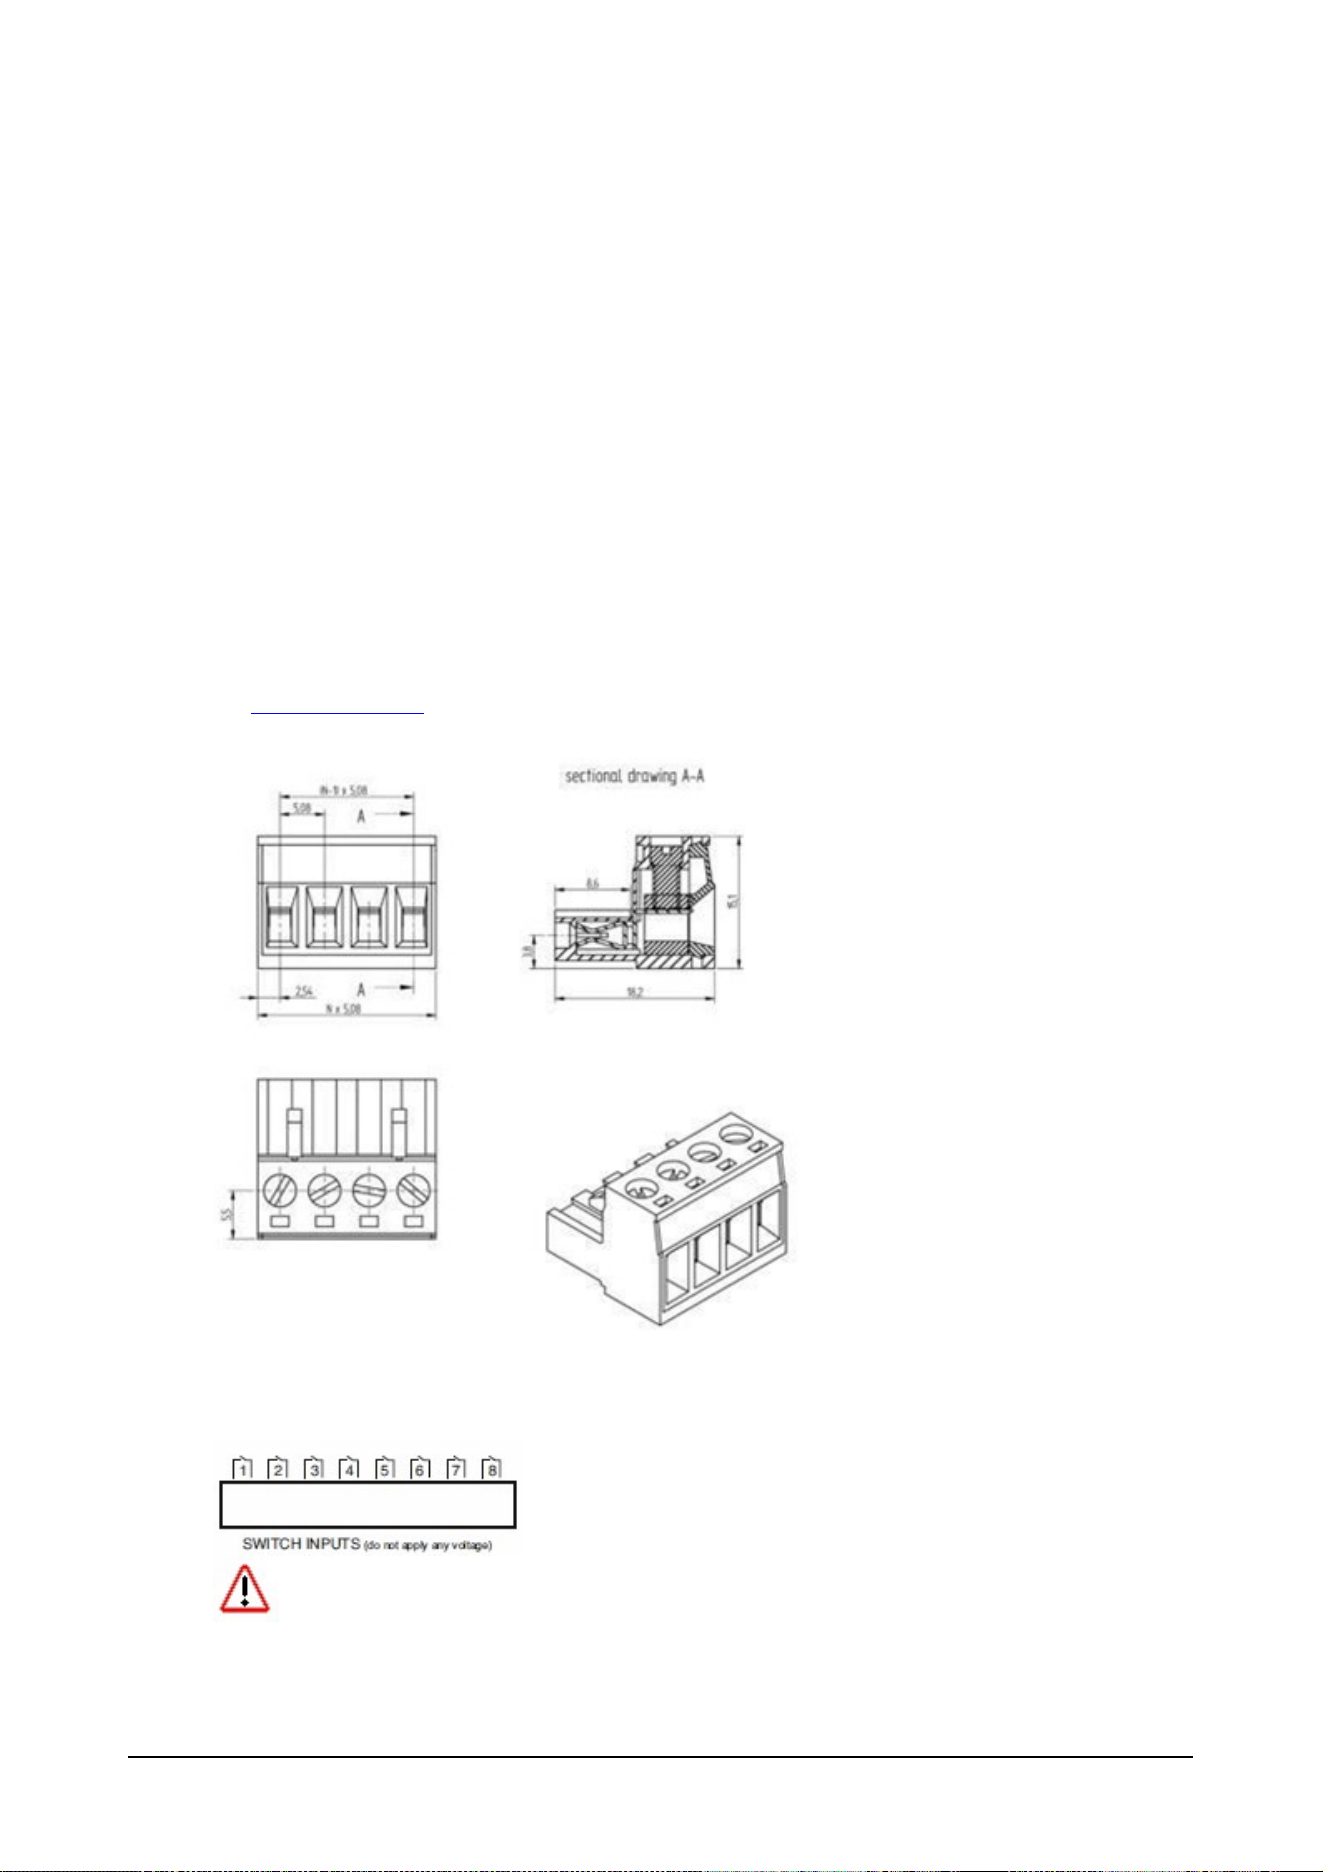
Switch Inputs
On the back of the Ether2DMX8 router are 8 Switch Inputs that are connected with a terminal block.
They are simple contact closures that can be activated with any switch or relay.
Each Switch Input can be assigned one single action to execute.
The higher Input number has the higher priority and only one input can be processed at a time.
This means whenever input 8 is closed, the status of inputs 1-7 is ignored.
Please note that when a cue is assigned to an input it will run as long as the input is closed.
Hardware
Required Terminal blocks are provided with the router.
4x Terminal Block 4 Pin Wuerth Electronics
Type 351 Part Number: 6913S1500004
Manufacturer Link
Connect a switch or temporary switch for the desired contact closure number.
Do not switch to a common ground. Every pair has to be wired separately.
Do not apply any voltage to contacts. Doing so will damage the router and is not covered
under warranty !
39 © 2010 Martin Professional A/S
Ether2DMX8 User Manual
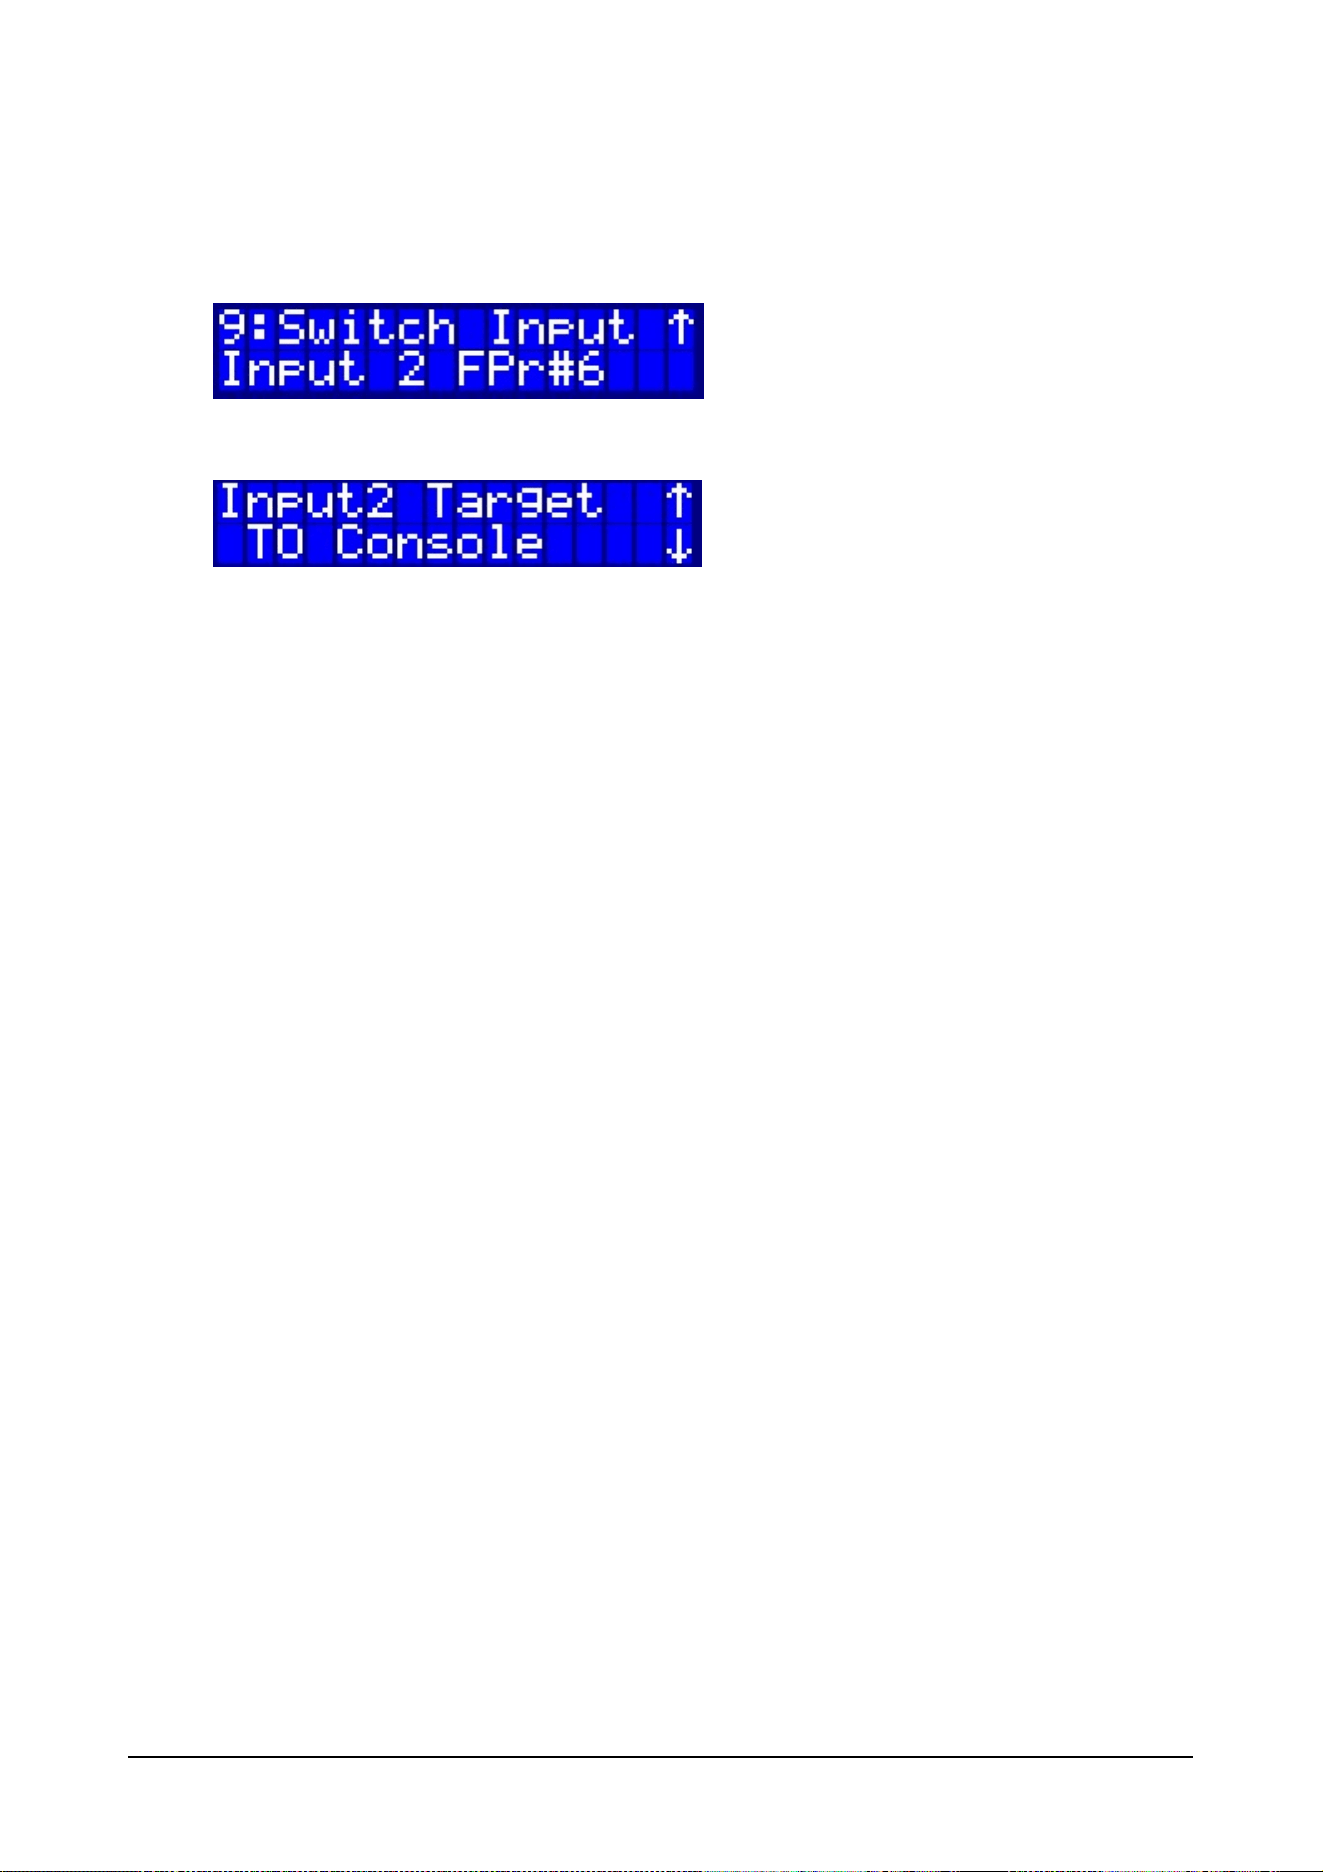
Configuration
Browse to Menu # 9 "Switch Input" and press Enter.
Use the arrow keys to select the input to be modified and confirm with Enter.
The switch input can be assigned the following actions:
OFF
The Input is disabled
To Console
The Input is sent via Artnet to trigger an action on the lighting
controller
Preset
Factory Presets 1-8
User
User Presets 1-10
Cues
Cues 1-99

40 © 2010 Martin Professional A/S
Ether2DMX8 User Manual
System
Device Name
The device name is used to identify the Ether2DMX8 in a larger Artnet System.
The maximum length for the name is 10 characters.
Browse to the "Device Name" entry in the menu and press Enter to see the current name assigned to
the box.
Press Enter again to modify the name.
The arrow above a character indicates the position for adjustment. Use the arrow up and down key to
browse the characters.
Use Menu/Enter to step forward and backward through the screen.
To confirm the name, hit Enter at the last character.
Backup
All system settings including all cue data can be backed up internally or to an external USB flash
device.
Available options are
USB Export
Saves to external USB drive
USB Import
Loads settings from external USB drive
Save to Flash
Saves to internal flash drive
Load from Flash
Loads from internal flash drive
41 © 2010 Martin Professional A/S
Ether2DMX8 User Manual
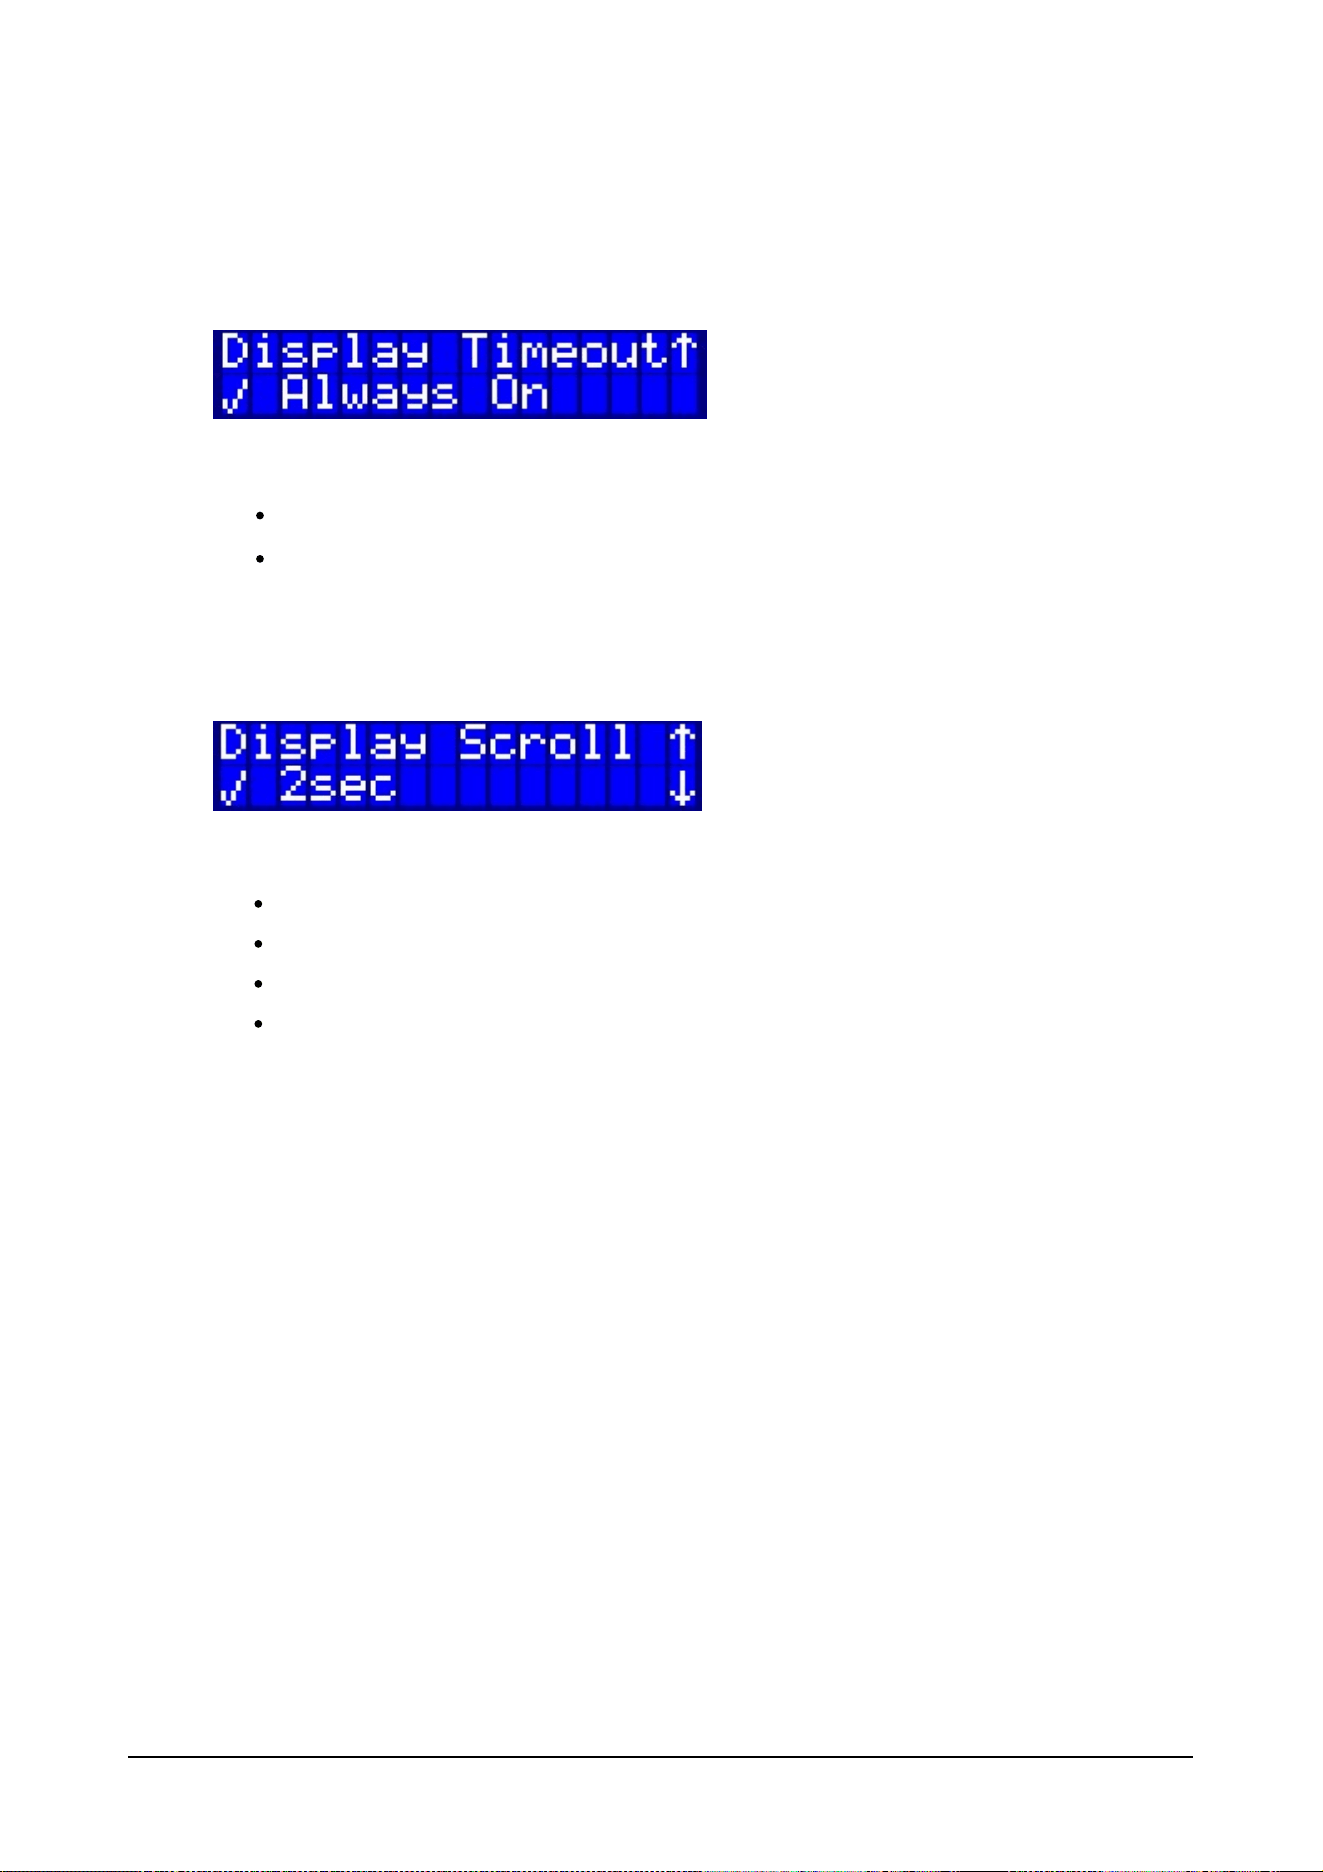
Display Timeout
To preserve the LCD display of the Ether2DMX8 router it is possible to turn off the display after a
certain period of inactivity.
Available options are
Always On
The display never turns off
10sec, 30sec, 1min, 2min
The display turns off after the specified time
Display Scroll
The home display can be set to automatically scroll through the 4 available screens.
The interval can be set to:
OFF
2 seconds
10 seconds
30 seconds
42 © 2010 Martin Professional A/S
Ether2DMX8 User Manual
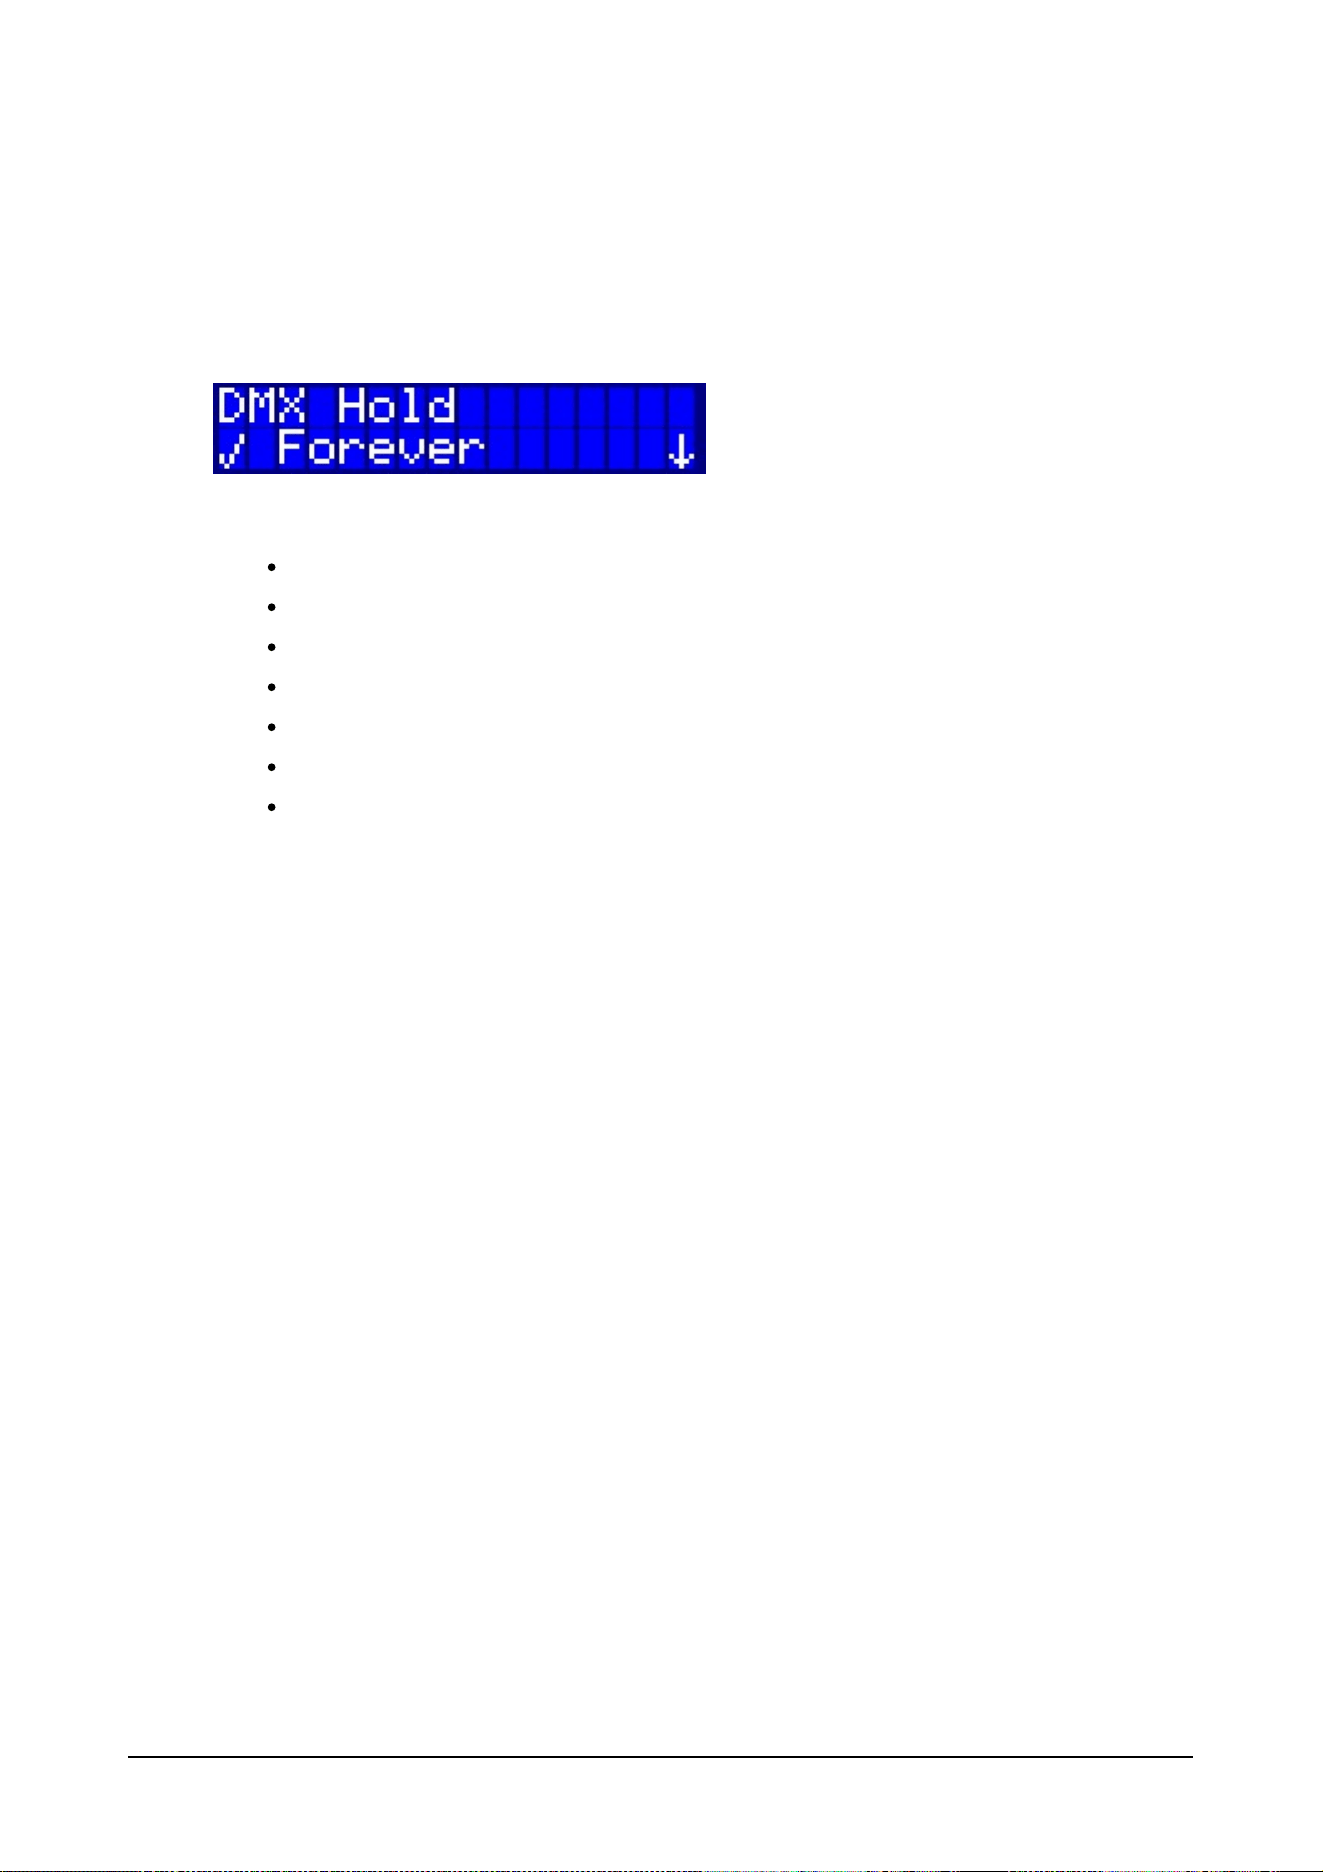
DMX Hold
This defines what happens to the DMX ports if the Artnet Source is no longer sending valid data (e.g.
cable unplugged)
By default the Ether2DMX8 keeps sending the last DMX data until the box is turned off or rebooted.
The timeout for the DMX data can be set to:
Forever
10minutes
5 minutes
60 seconds
30 seconds
10 seconds
OFF
When set to OFF the data will stop immediately when the Artnet stream stops.
43 © 2010 Martin Professional A/S
Ether2DMX8 User Manual
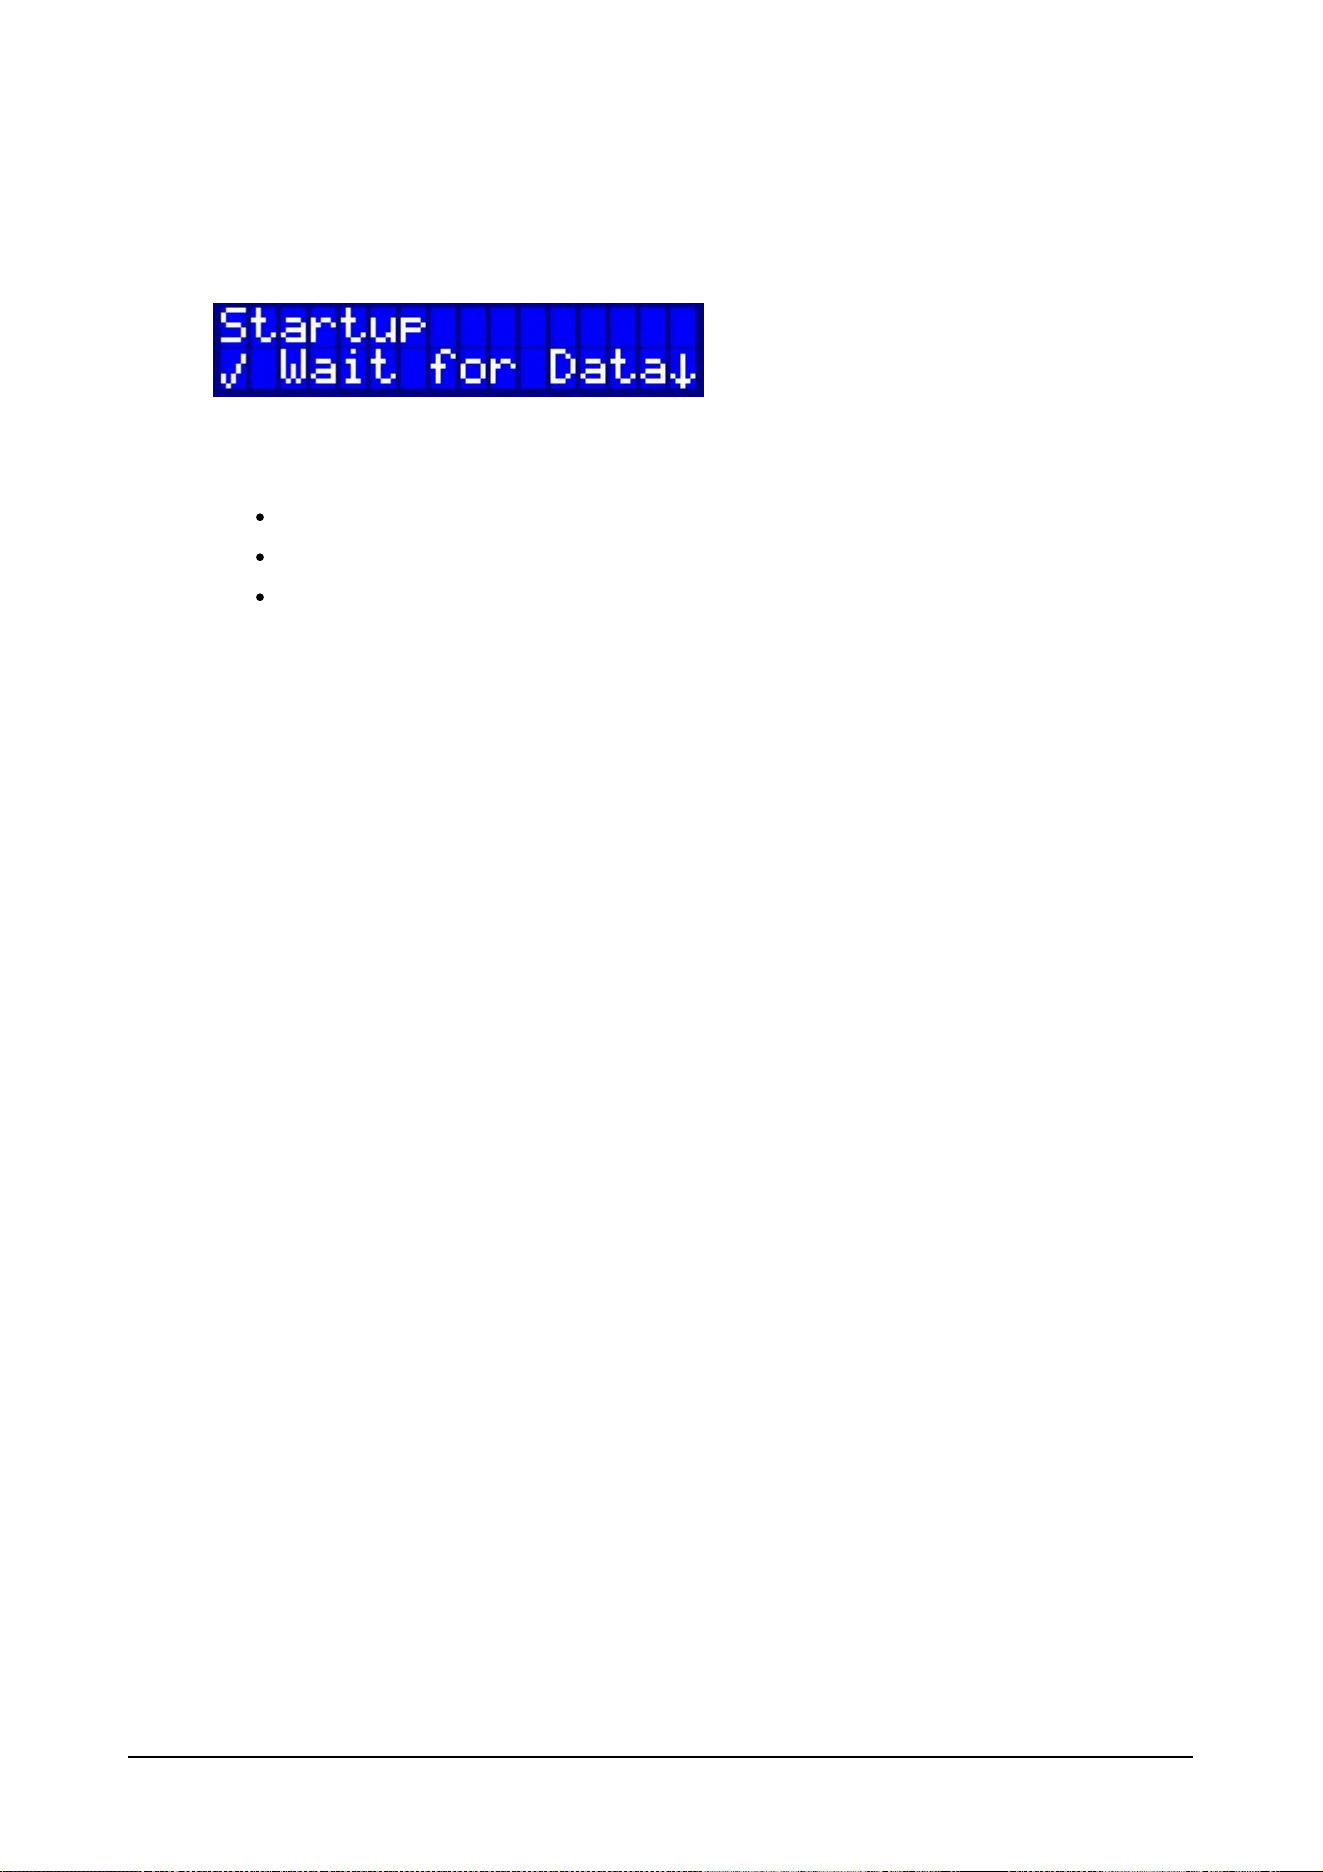
Startup Settings
This defines what is sent to the 8 DMX ports after turning on the Ether2DMX8.
Available Startup Options are:
Wait for Data (no DMX output until DMX traffic is available)
All DMX 0 (a value of 0 is sent to every DMX channel)
Cues 1-99
44 © 2010 Martin Professional A/S
Ether2DMX8 User Manual
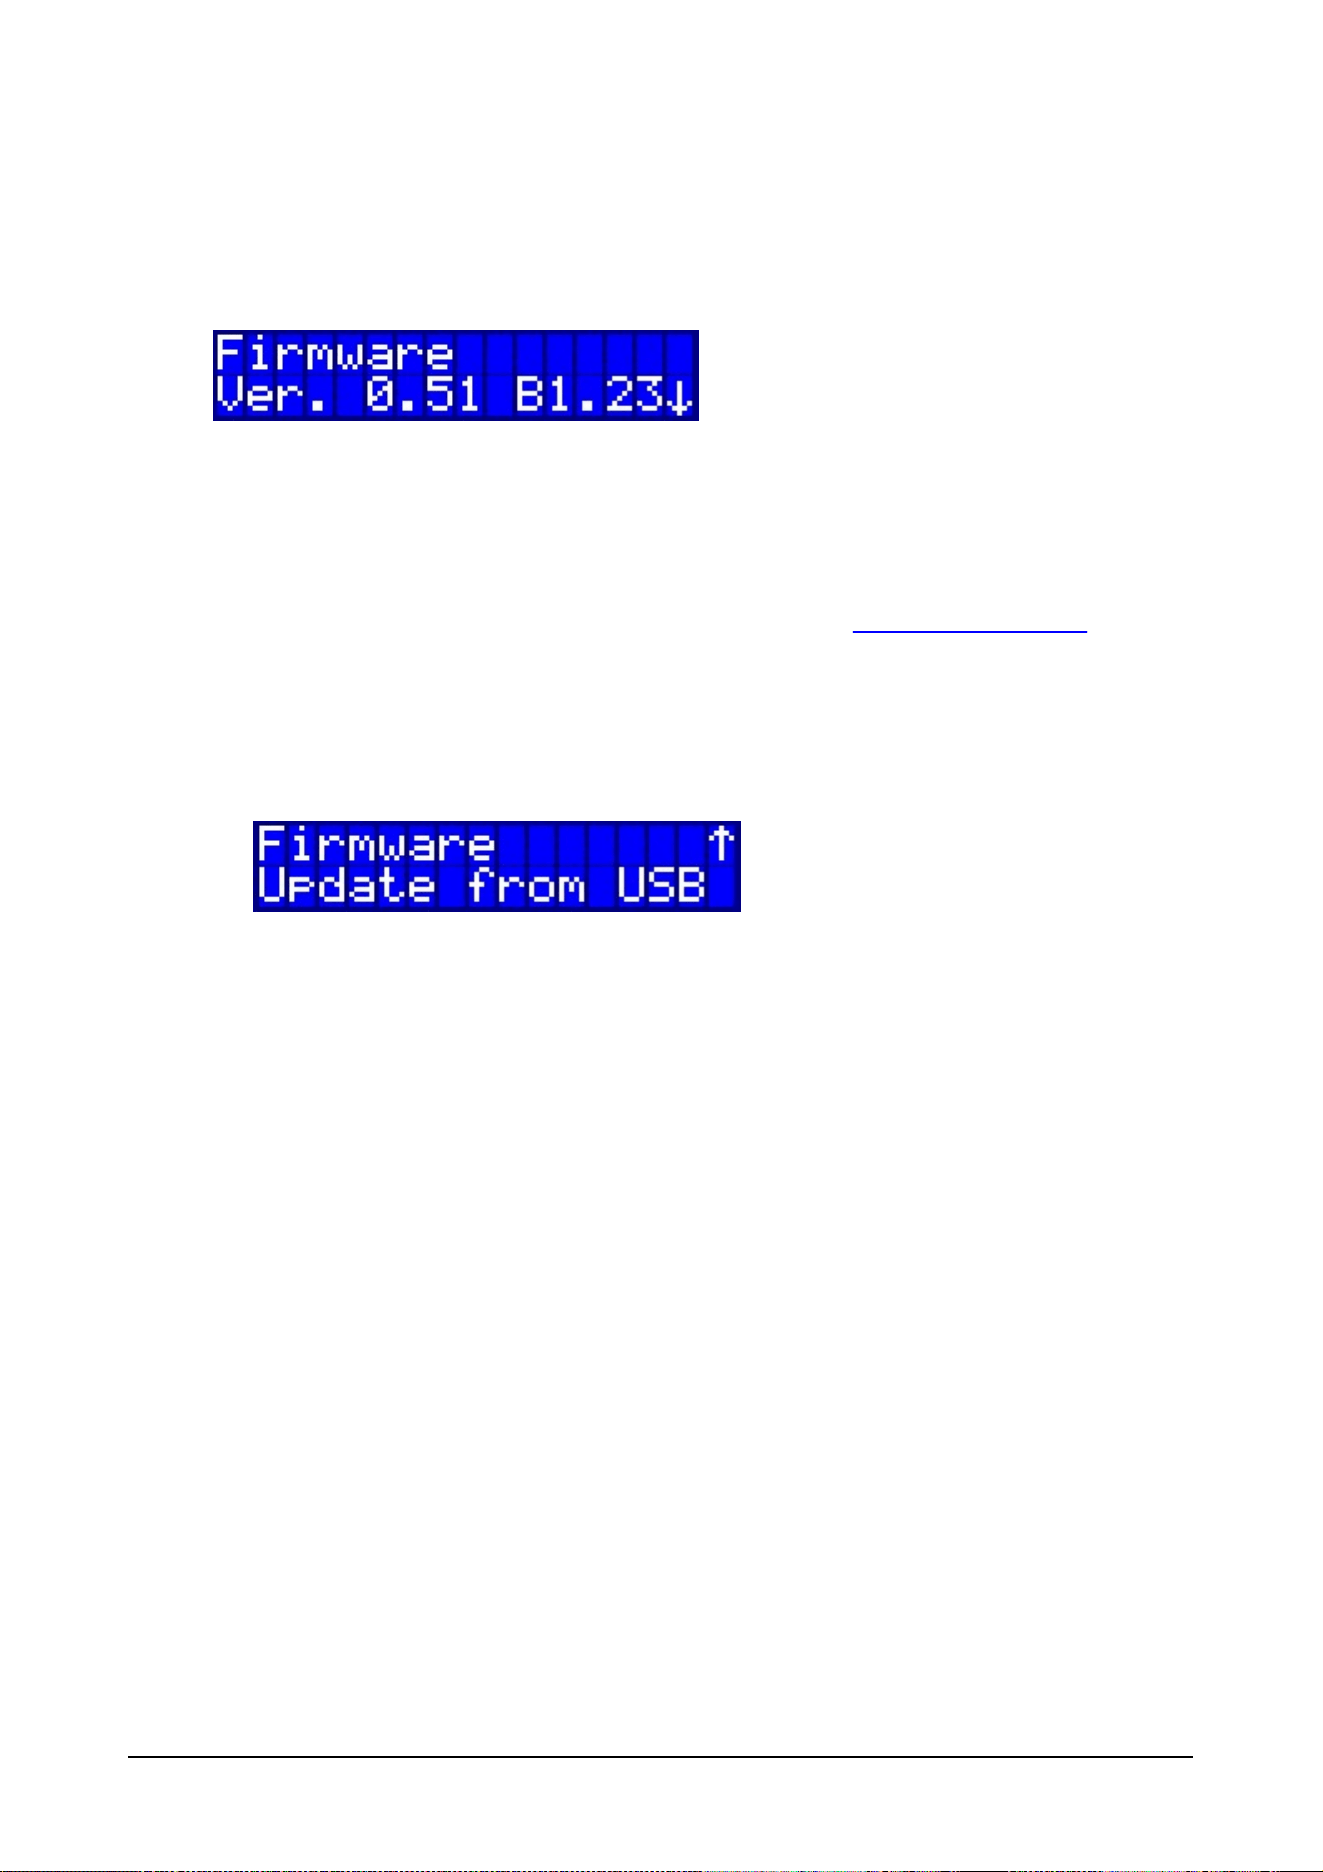
Firmware Update
New firmware can easily be installed from a USB flash drive.
When the menu is entered the current installed firmware is shown.
The current operations firmware is indicated with Ver. 0.51 and the firmware for the DMX ports is
indicated as B1.23
To update the firmware use the following steps:
1. Download the latest firmware from the Martin Service pages www.martin.com/service
2. Copy the firmware to a USB flash drive into a folder with the label "E2DMX8"
3. Insert the drive into the back USB port and enter the firmware menu.
4. Use the arrow down key to access the update menu.
5. Press Enter to start the firmware installation. The box will automatically reboot at the end of
the update.
45 © 2010 Martin Professional A/S
Ether2DMX8 User Manual
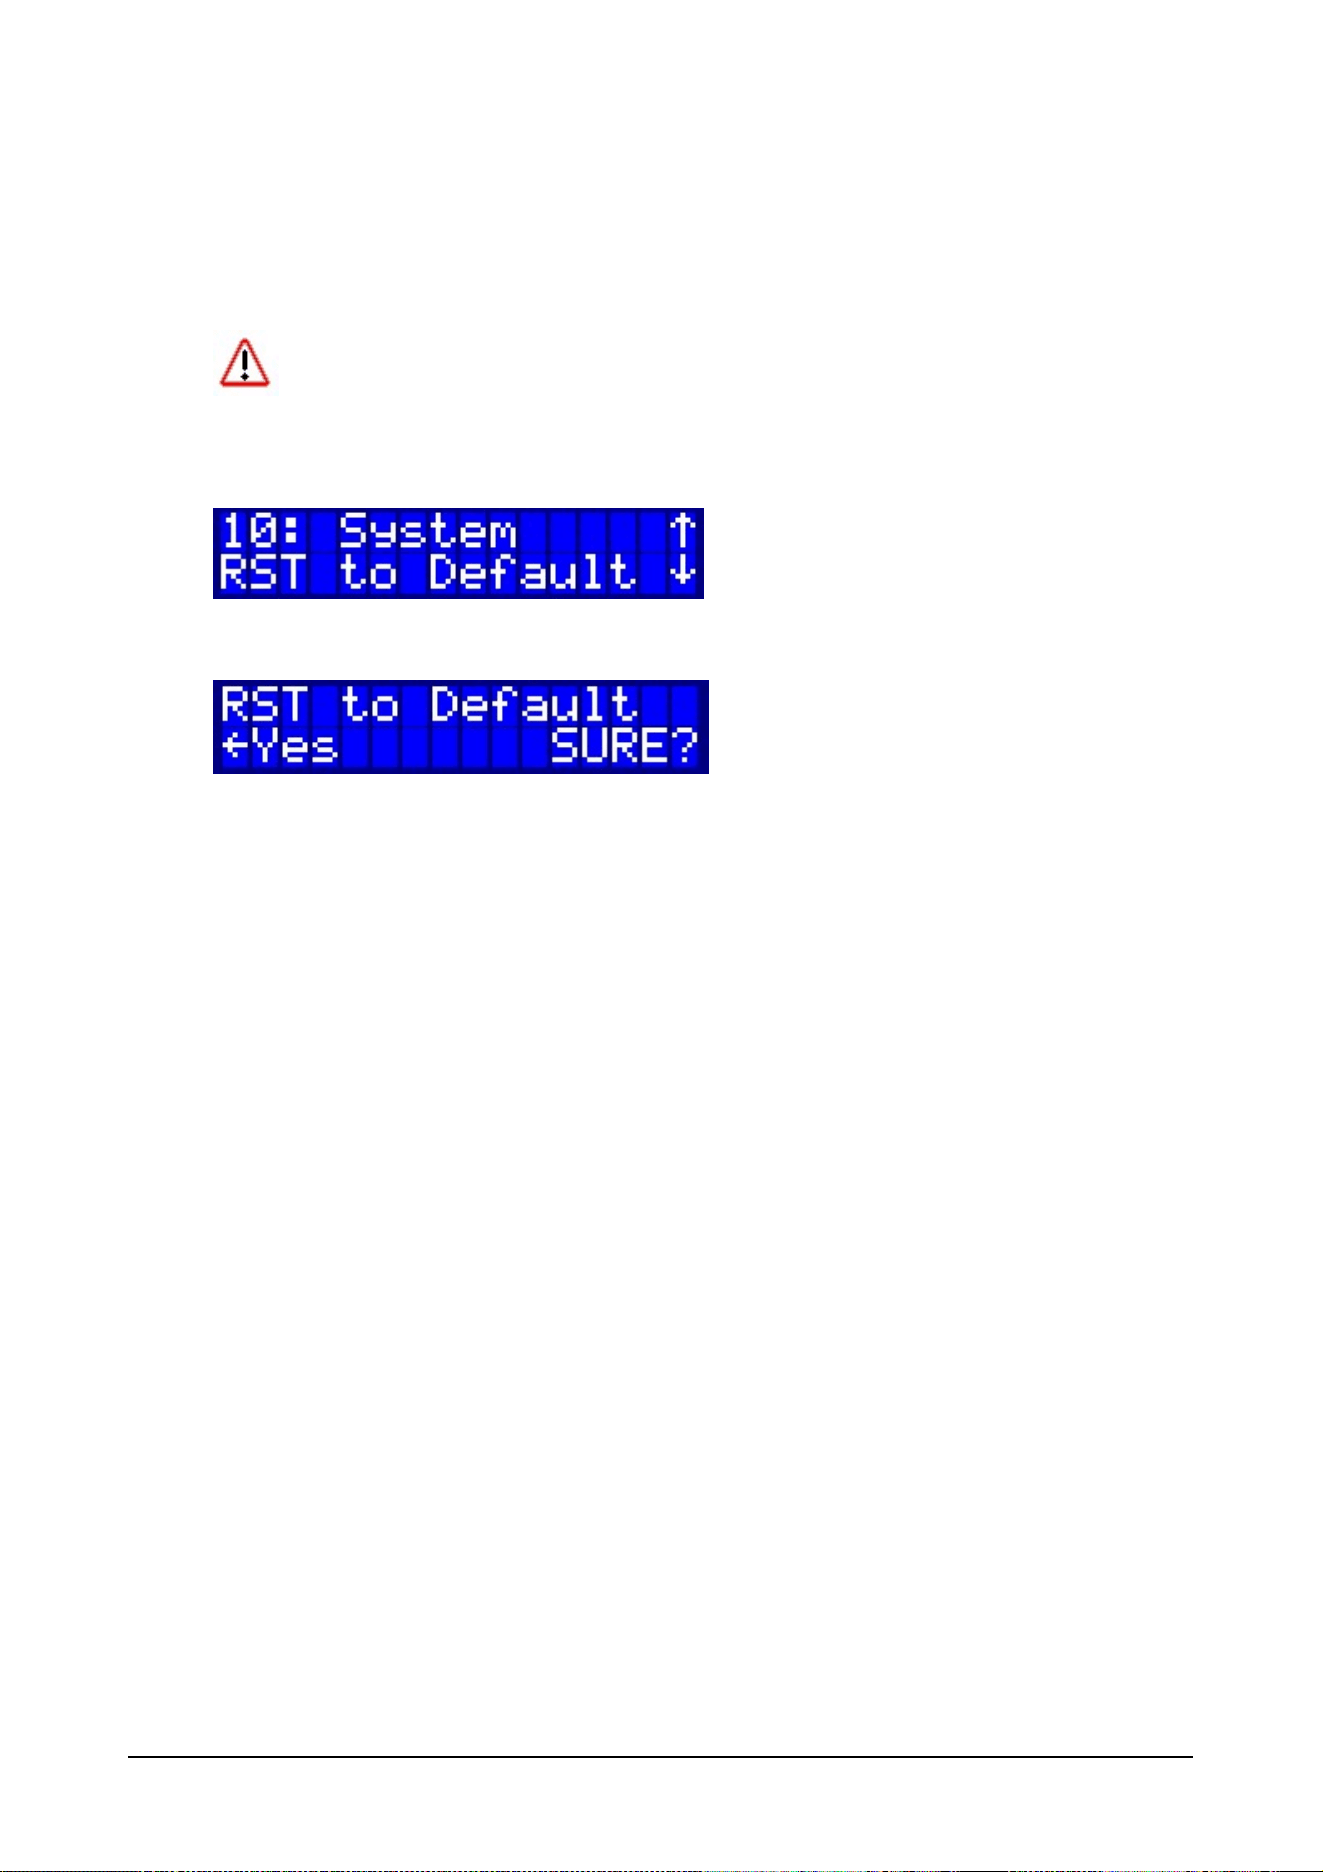
Reset to Default Settings
All custom settings and user data can be removed and the Ether2DMX8 router can be reset to factory
defaults.
Use with caution as the settings can not be restored if they are not backed up externally.
Browse down the system Menu to "RST to Default"
Confirm with Enter:
Press Enter to recall all factory defaults.

46 © 2010 Martin Professional A/S
Ether2DMX8 User Manual
Ether2DMX8 Web Interface
All settings of the router can be accessed from a web interface.
This interface is opened from any standard web browser (Internet Explorer, Firefox or Safari)
Use a RJ45 crossover cable if the computer is connected directly to the Ether2DMX8, or connect to
the ethernet switch used for the Artnet System.
47 © 2010 Martin Professional A/S
Ether2DMX8 User Manual
Assigning a static IP Address in Windows XP
To connect to the Web Interface it is necessary to set a static IP Address of the computer so it can
communicate with the router.
As an example we will show how this is done in Windows XP.
This works similar in Windows 7, Windows Vista and MAC OS.
Refer to documentation of those operating system how to set a static IP address.
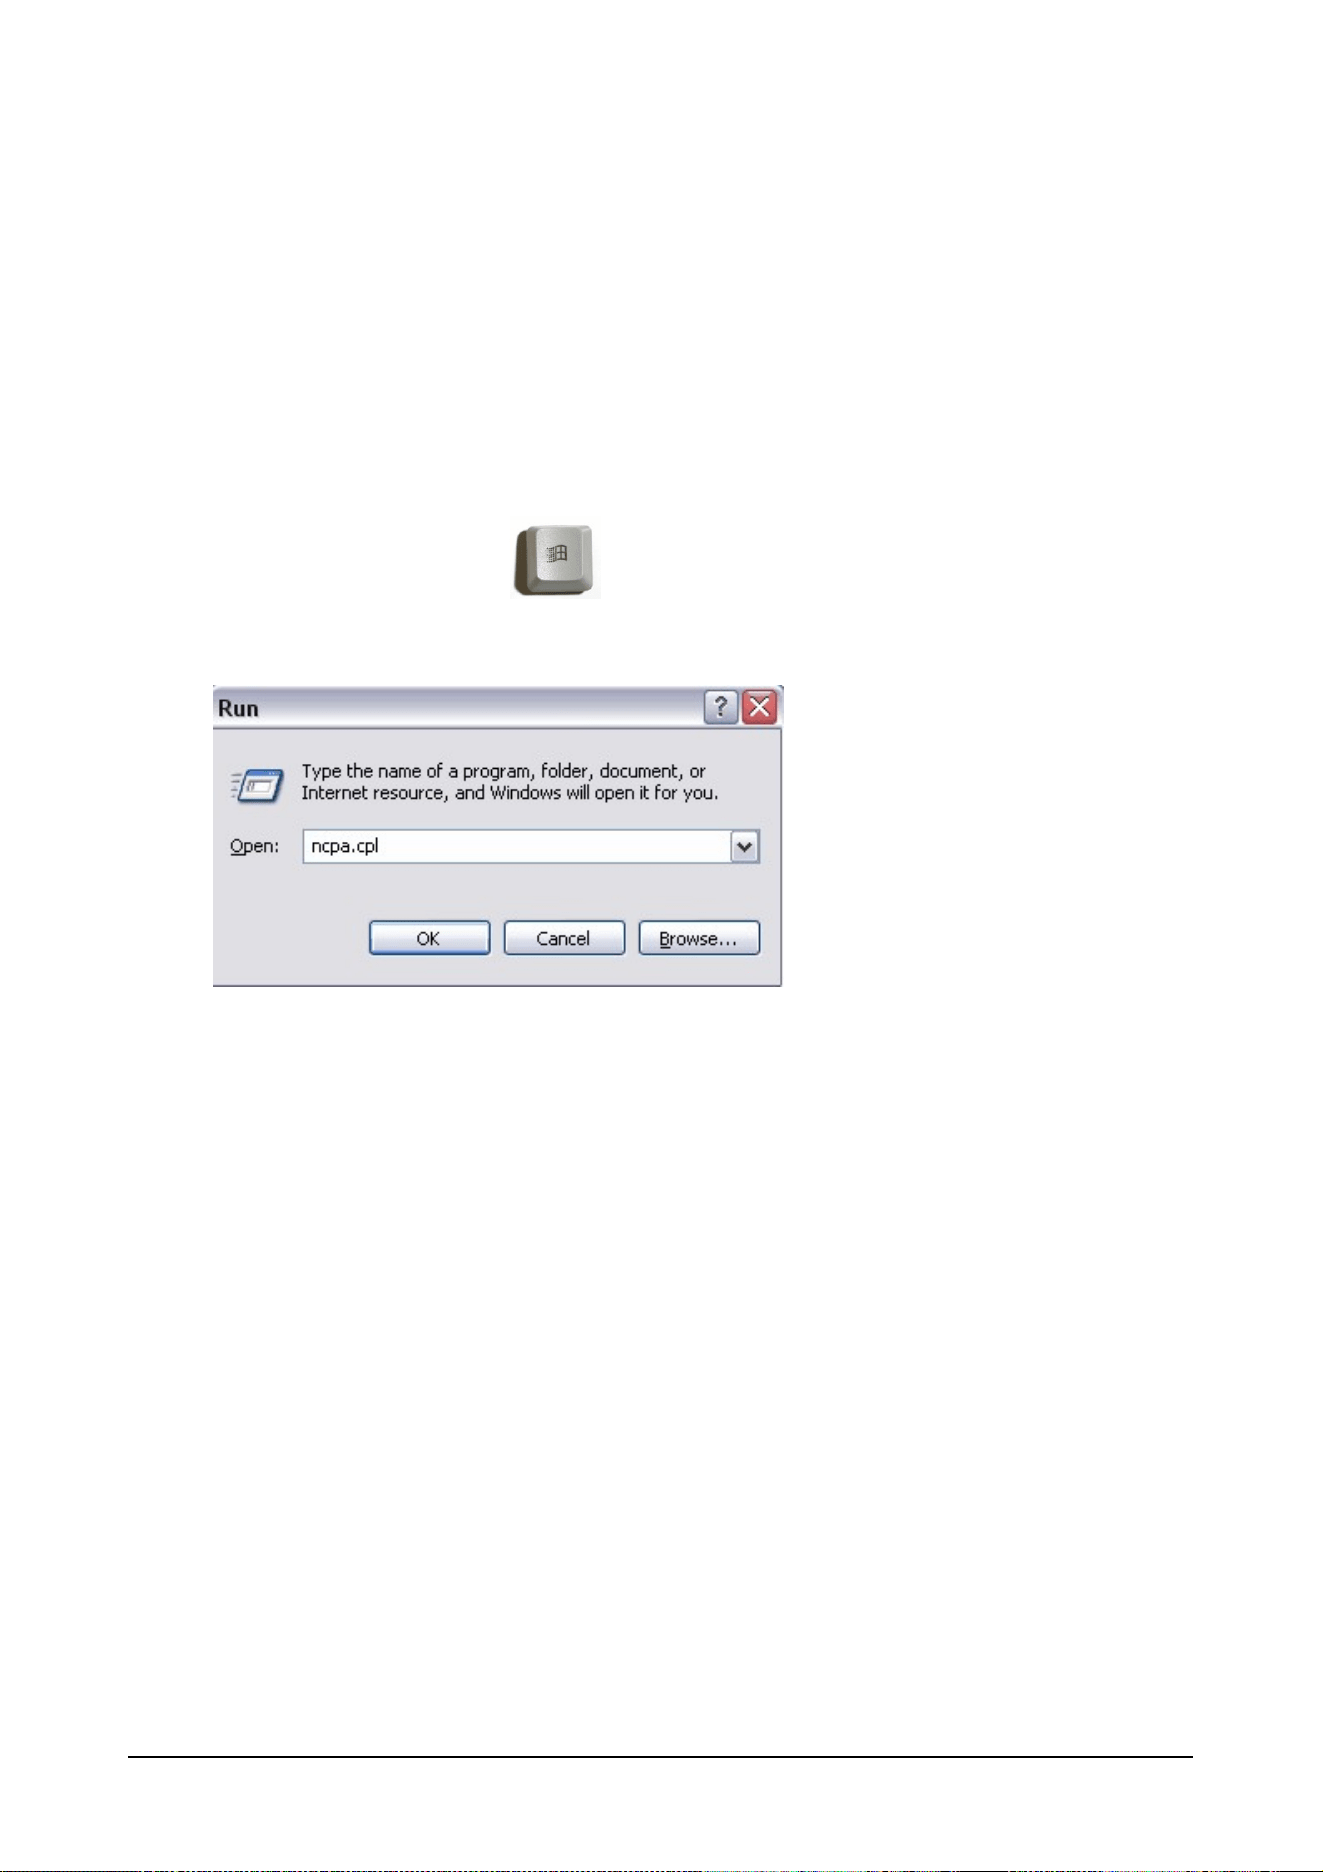
On a Windows XP system follow these steps:
HOLD the Windows Flag Key and hit the "R" key. This will open the RUN command box.
Type "ncpa.cpl" into the RUN box.
This will open the Network Connections Window.
48 © 2010 Martin Professional A/S
Ether2DMX8 User Manual
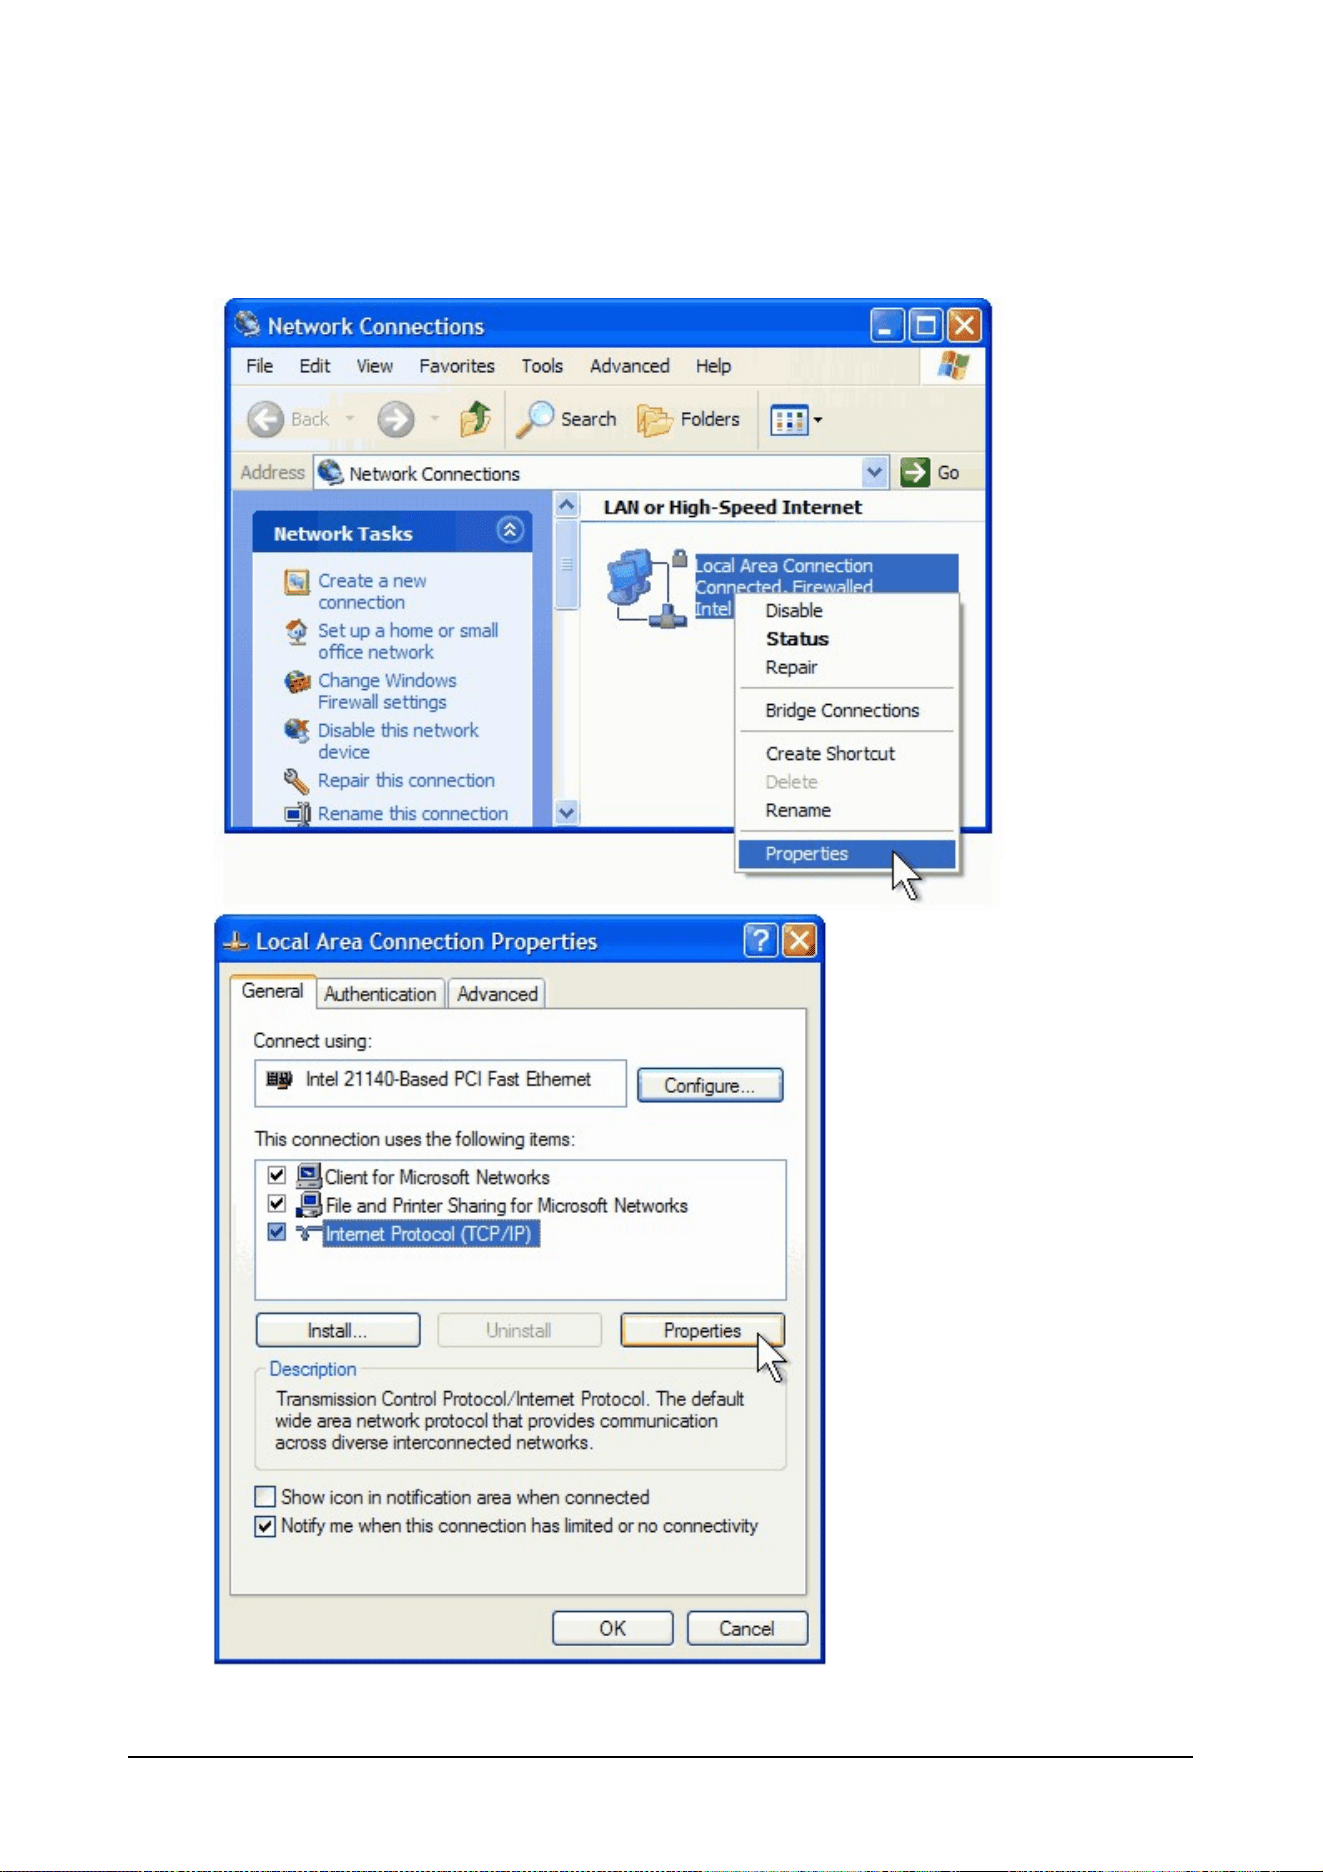
Find the network adapter that is used to connect to the Ether2DMX8 router and right click it.
Select "Properties" and confirm with a left click.
Highlight "Internet Protocol" and click on Properties.
49 © 2010 Martin Professional A/S
Ether2DMX8 User Manual
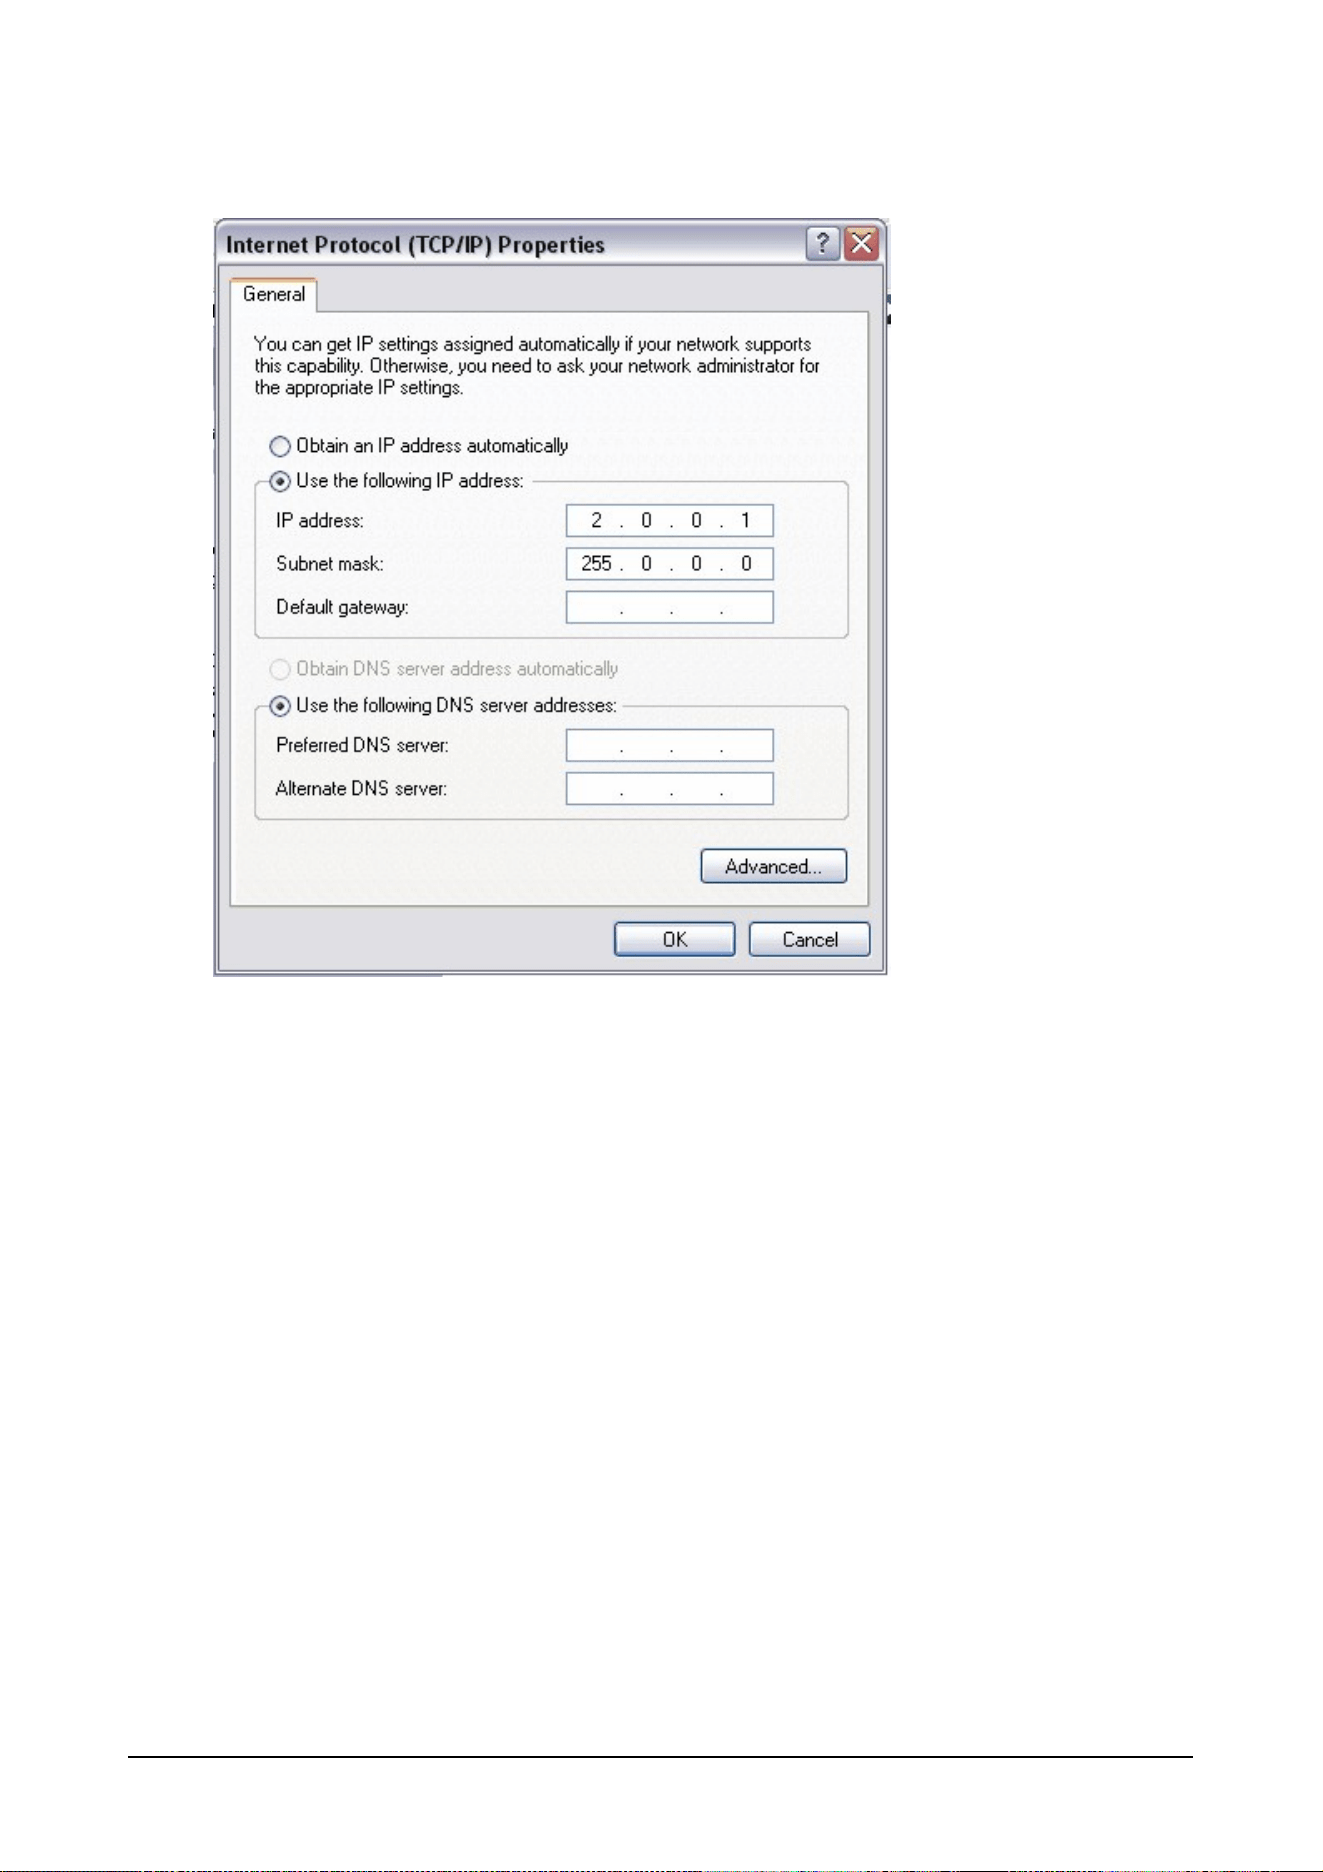
Set the IP address to 2.0.0.1 and the Subnet to 255.0.0.0,
If the router shows a 10.x.x.x address, use 10.0.0.1 for the PC IP instead. The first digit of your PC
and the Ether2DMX8 must match.
Confirm with OK and close all Windows.
50 © 2010 Martin Professional A/S
Ether2DMX8 User Manual
Connecting to the Router
Open a web browser (Internet Explorer, Firefox or Safari)
On the Home Display of the Ether2DMX8 you will find its current IP address.
Type this address as 2.168.17.75 into the address bar of the web browser.
The web browser will open the home page of the web interface.
51 © 2010 Martin Professional A/S
Ether2DMX8 User Manual
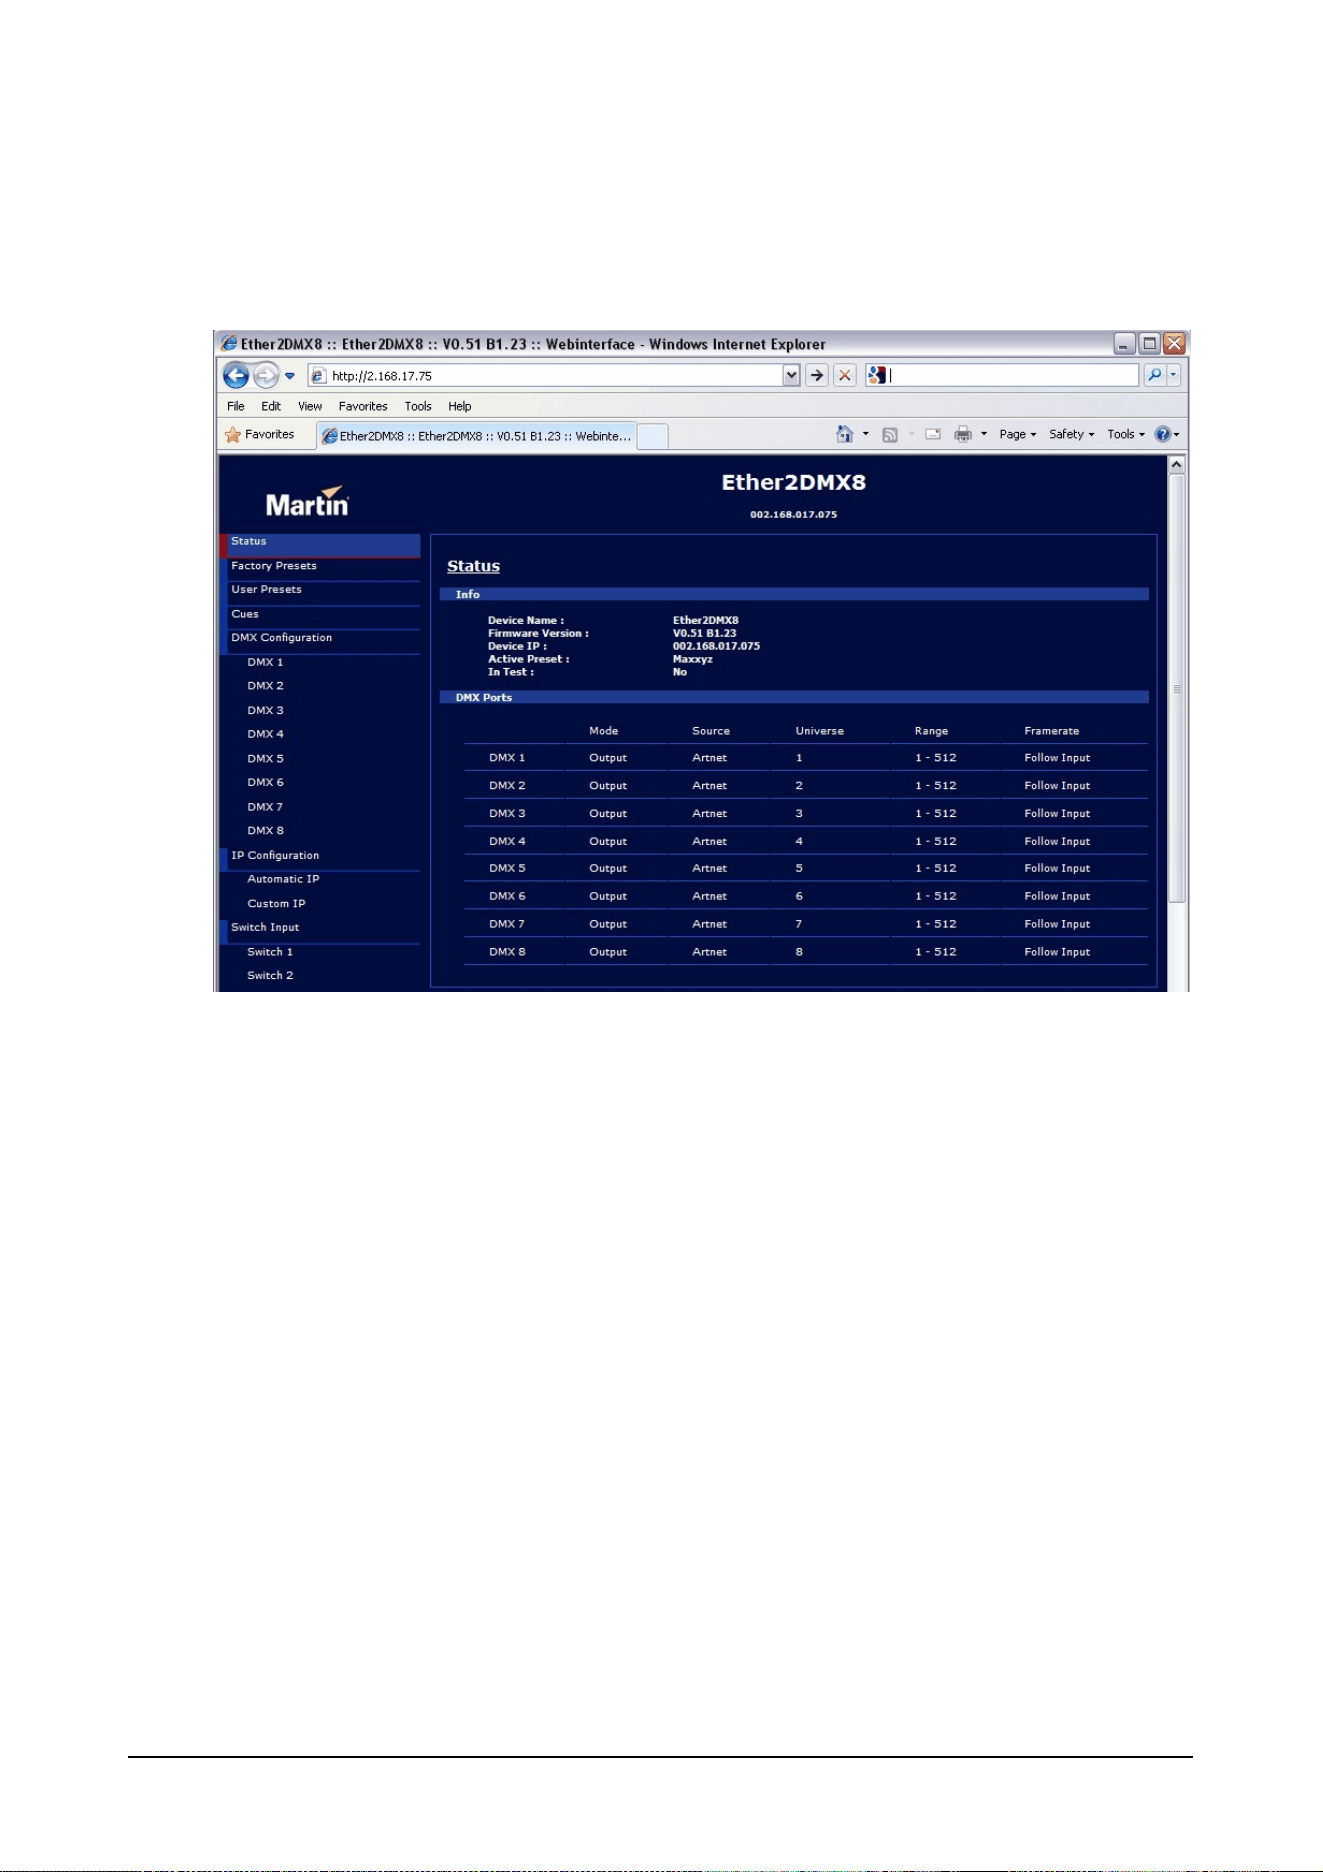
Status Page
The home page of the web interface displays the current status of the router.
It also shows the current firmware version.
52 © 2010 Martin Professional A/S
Ether2DMX8 User Manual
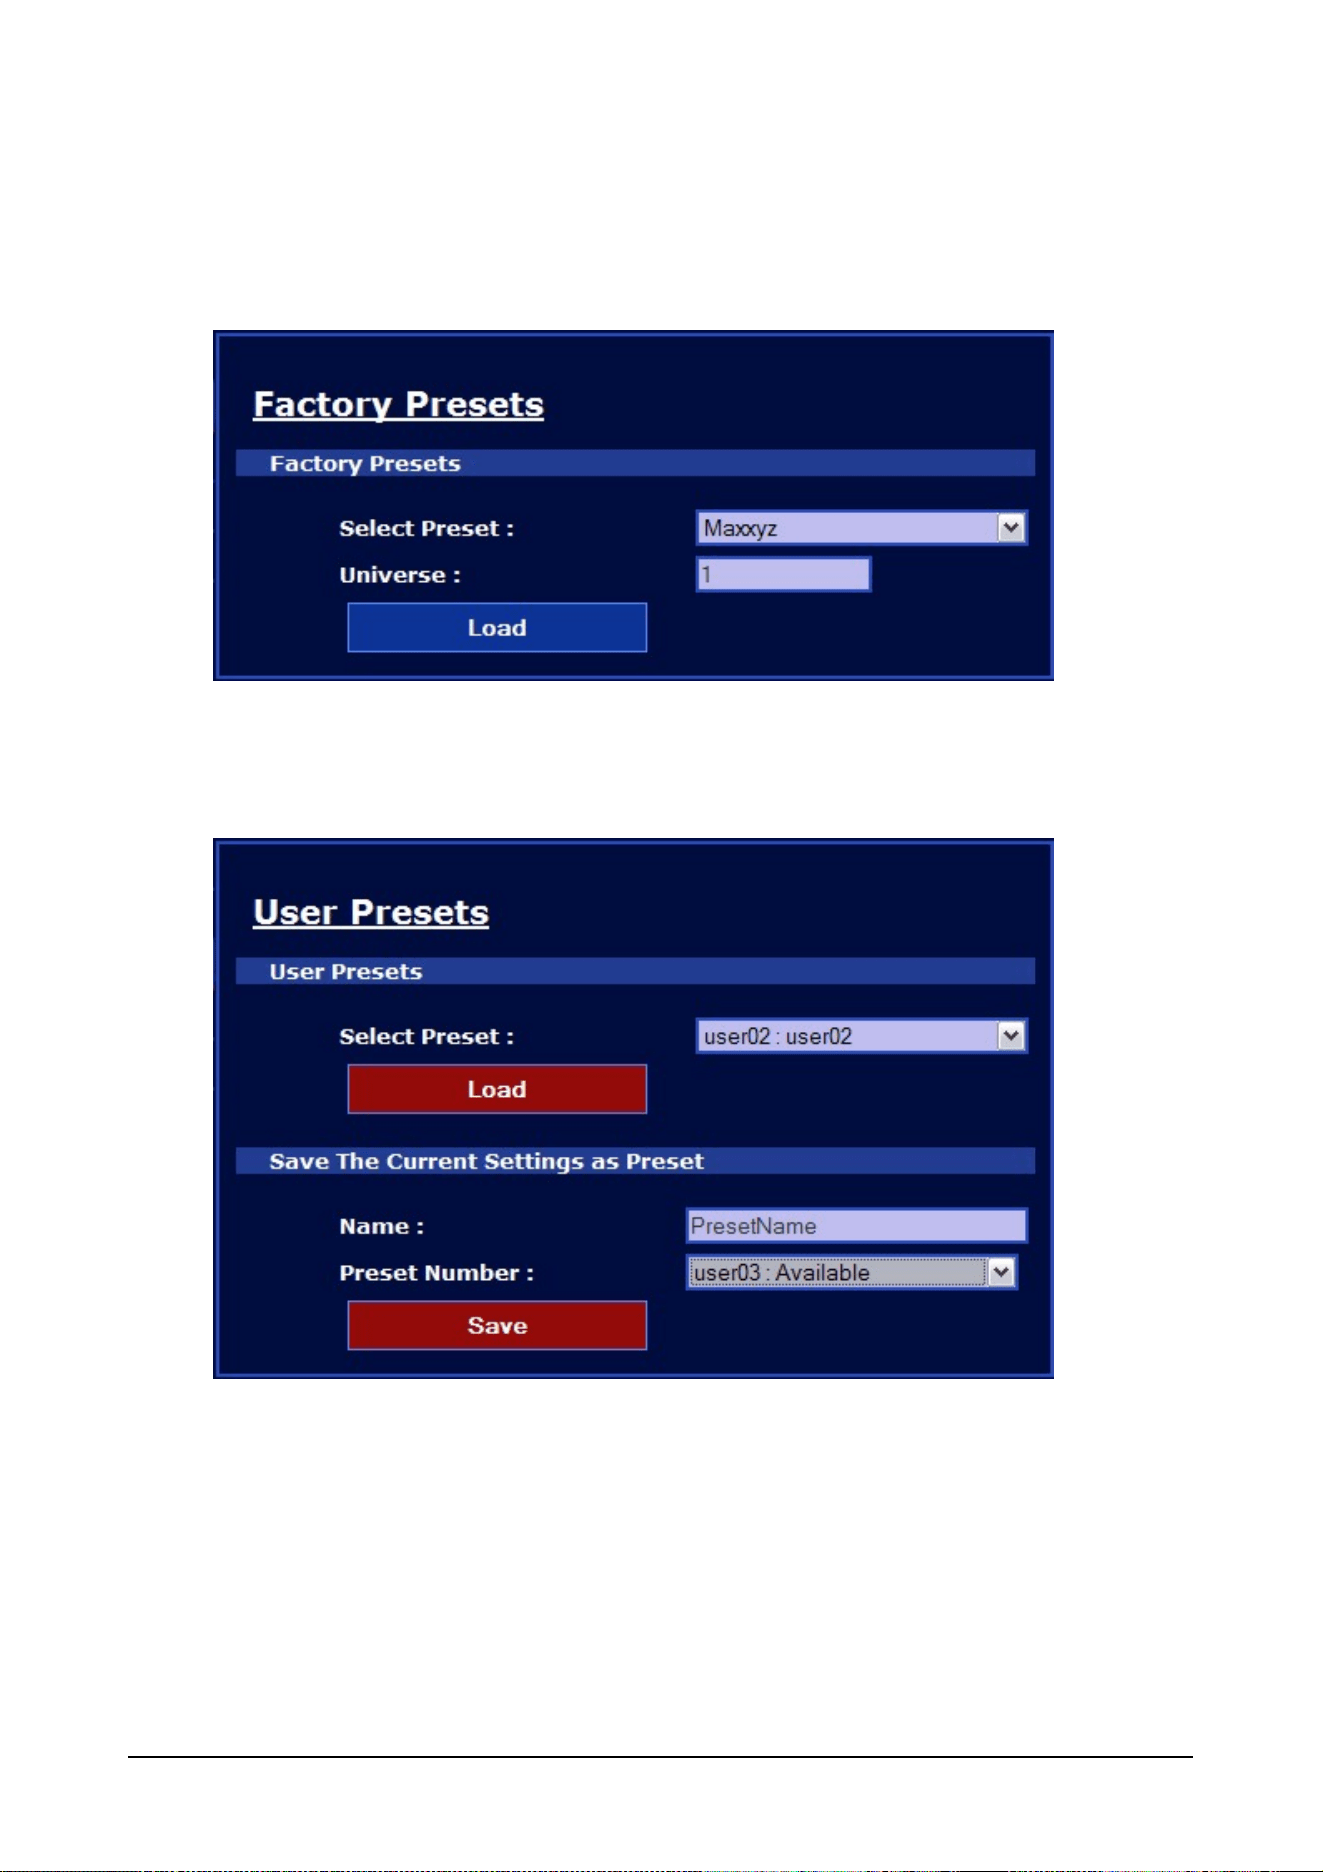
Factory Presets
Select Factory Presets in the menu tree on the left and use the drop down to pick the desired one.
Enter the Universe Number when needed and confirm by clicking on "Load".
User Preset
User Presets can be saved and loaded. Select the desired preset and click "Load".
To save a preset, enter a name and select a preset number from 1-10, then confirm with "Save".
53 © 2010 Martin Professional A/S
Ether2DMX8 User Manual
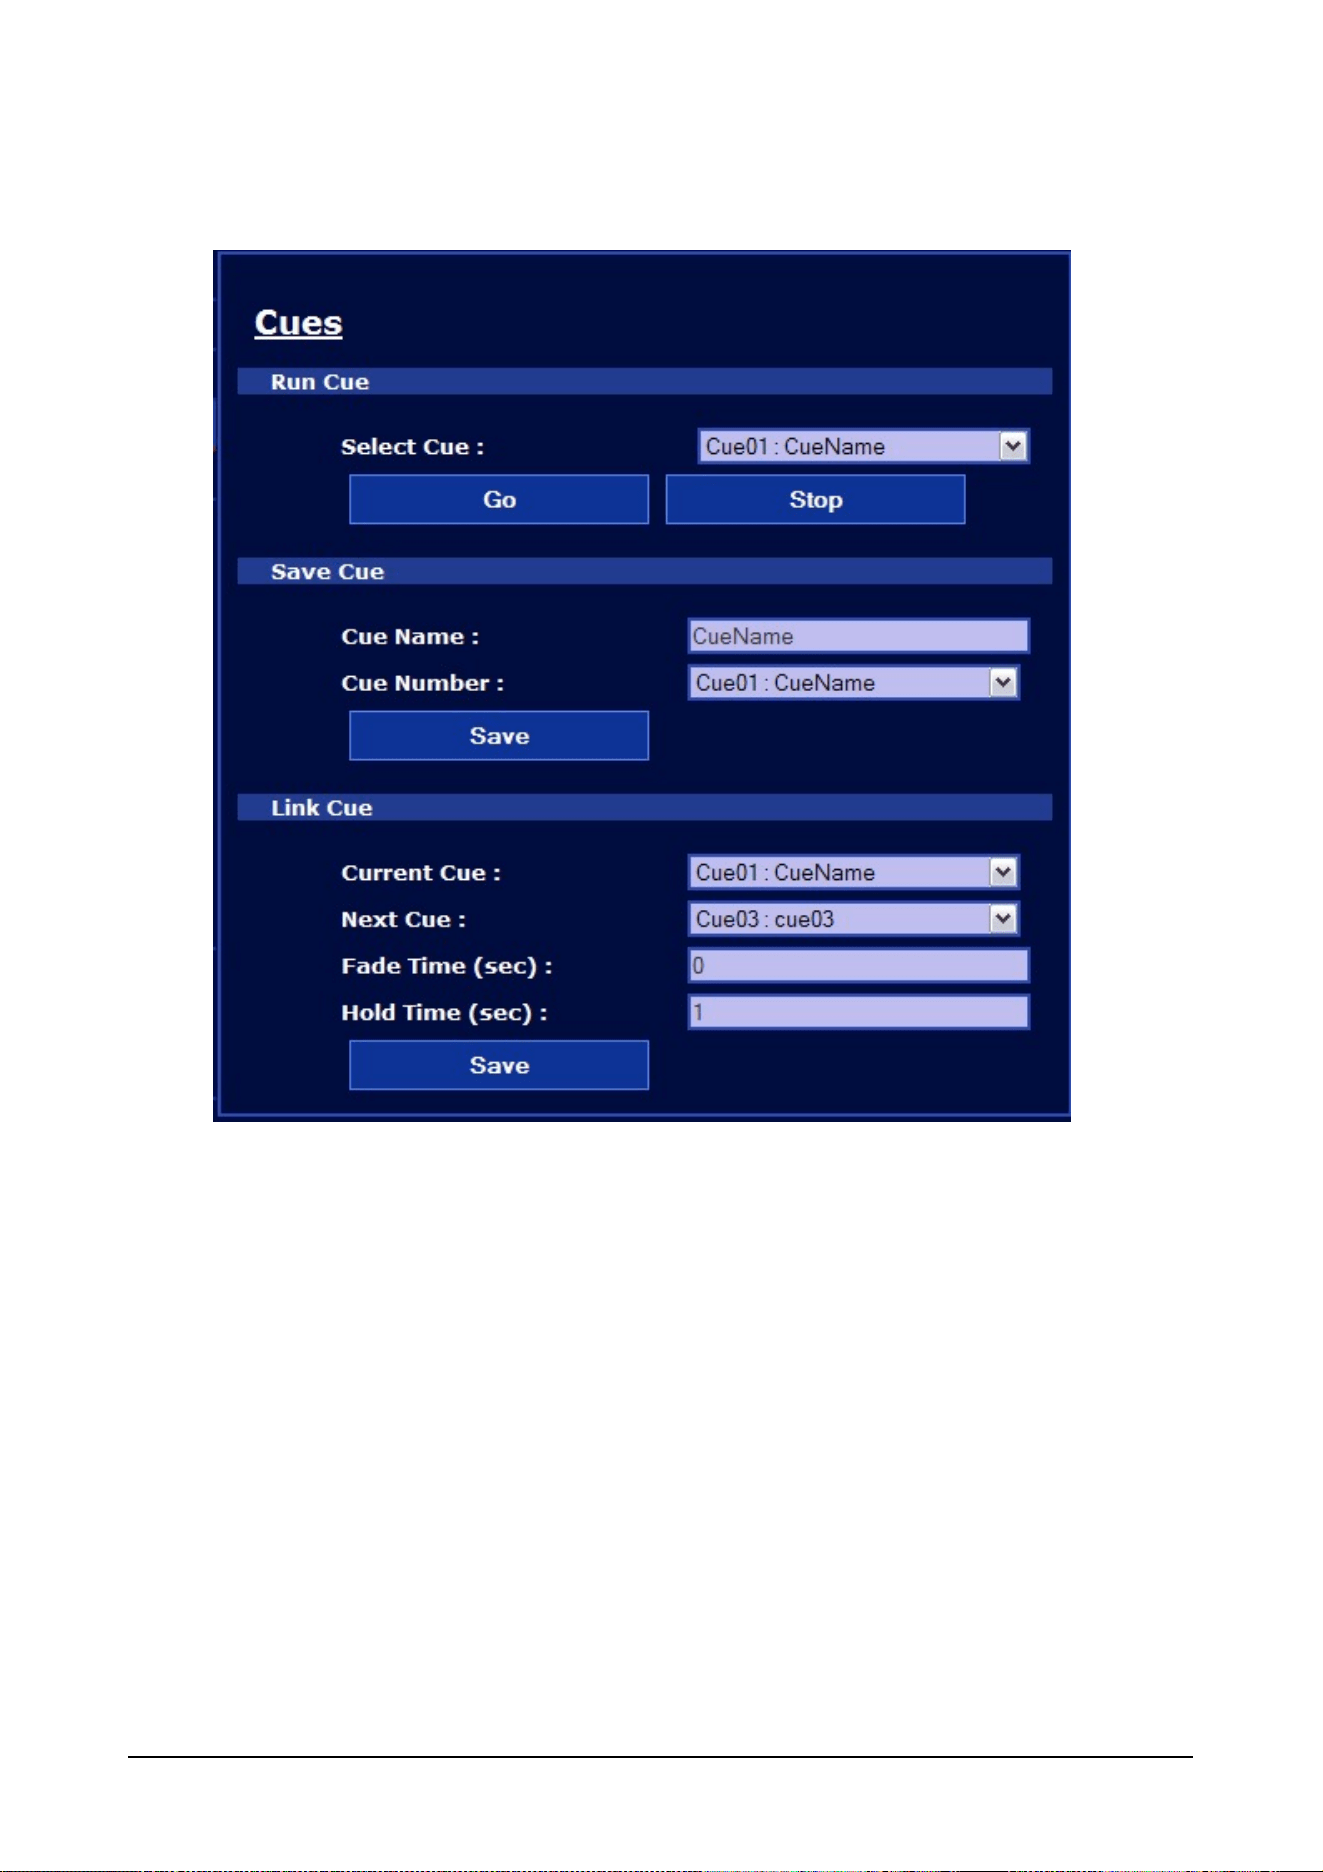
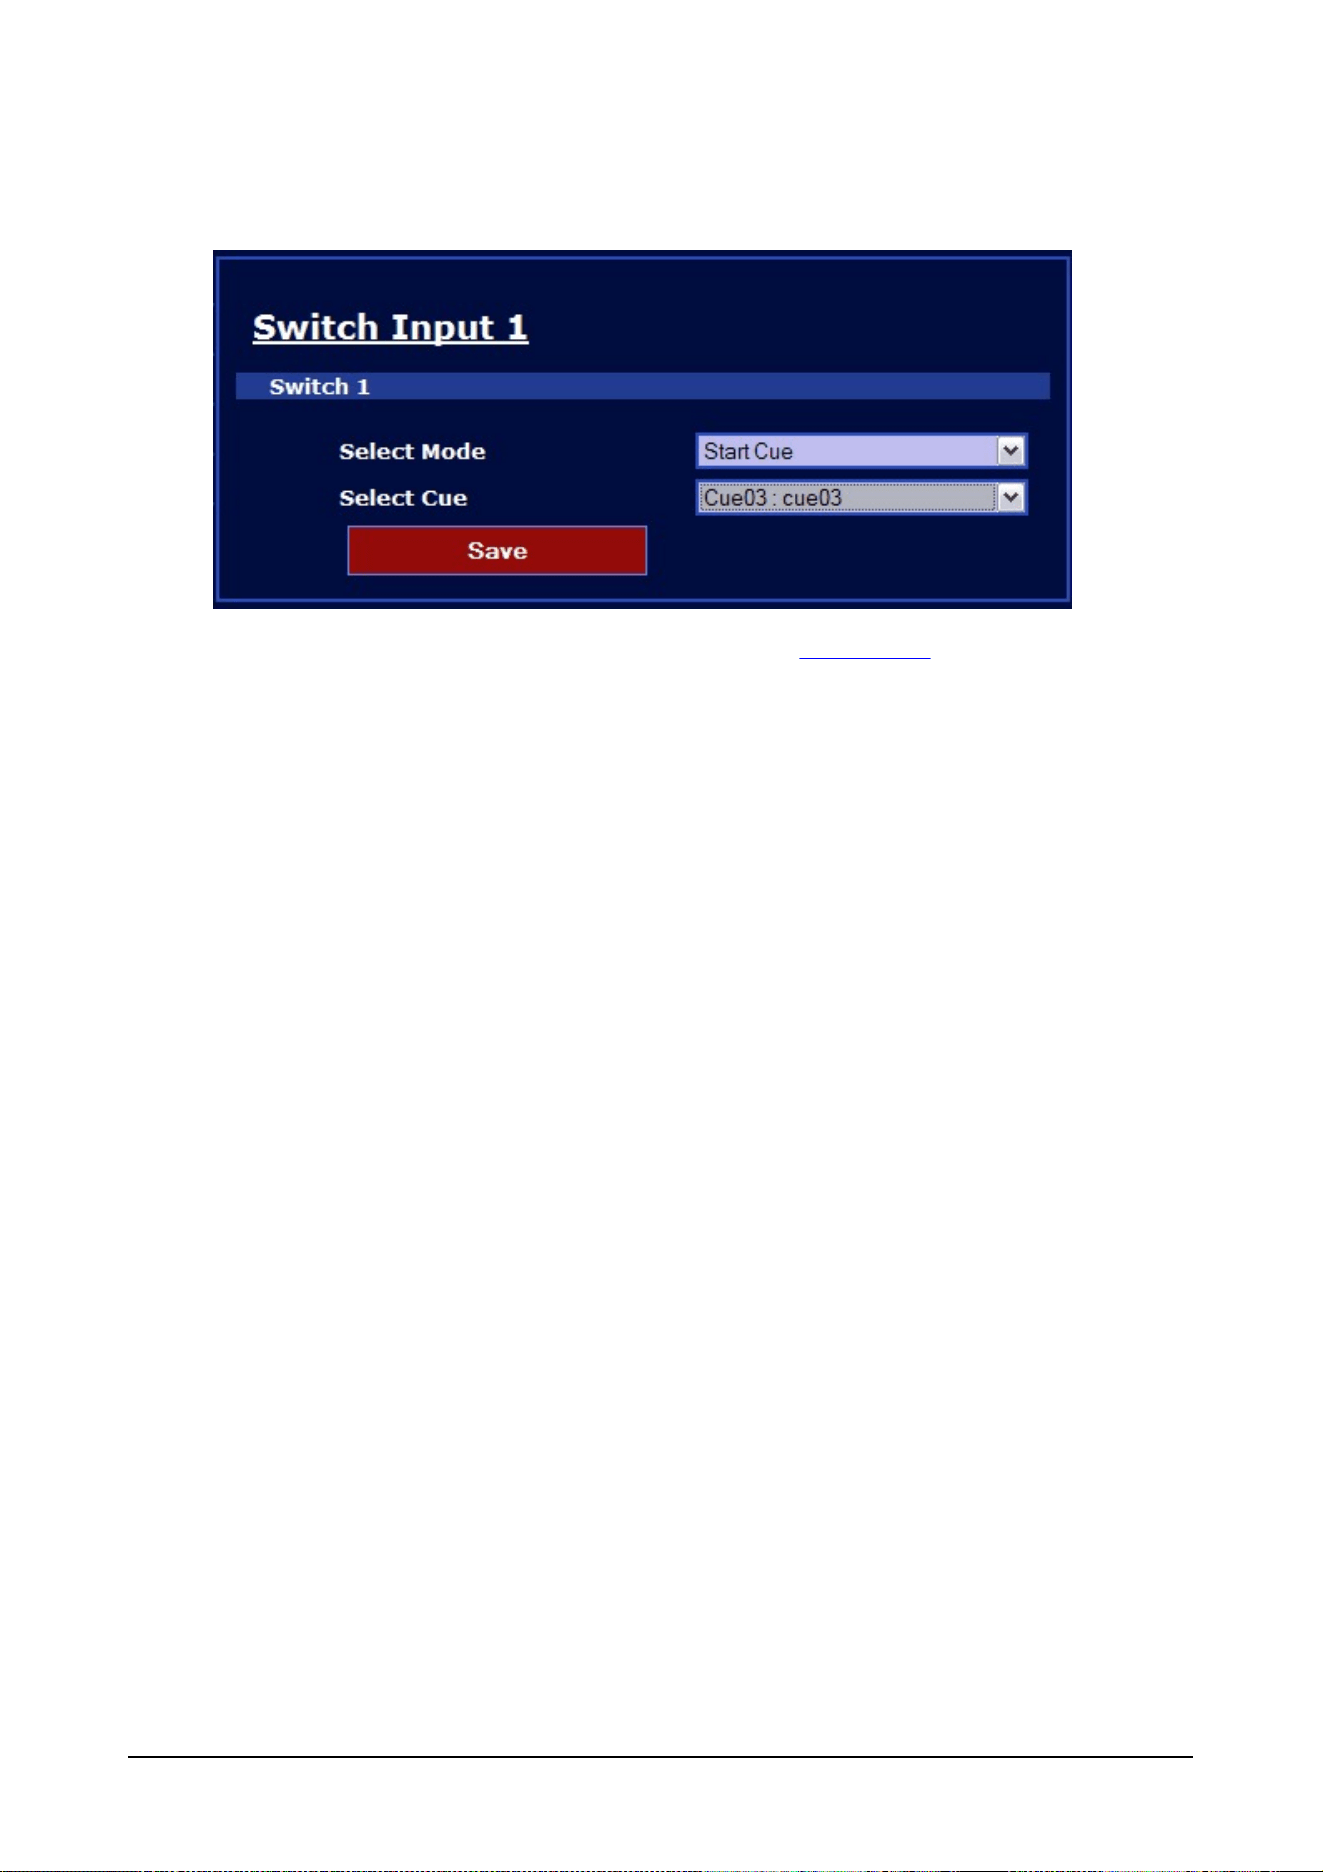
Cues
To trigger a cue choose the cue number with the drop down, then click GO. Use "STOP" to stop
playback of the cue.
To save a cue, enter the cue name and pick a cue number from the drop down. Click "Save" to
confirm.
To Link cues, modify the entries and click "Save" to confirm.
54 © 2010 Martin Professional A/S
Ether2DMX8 User Manual
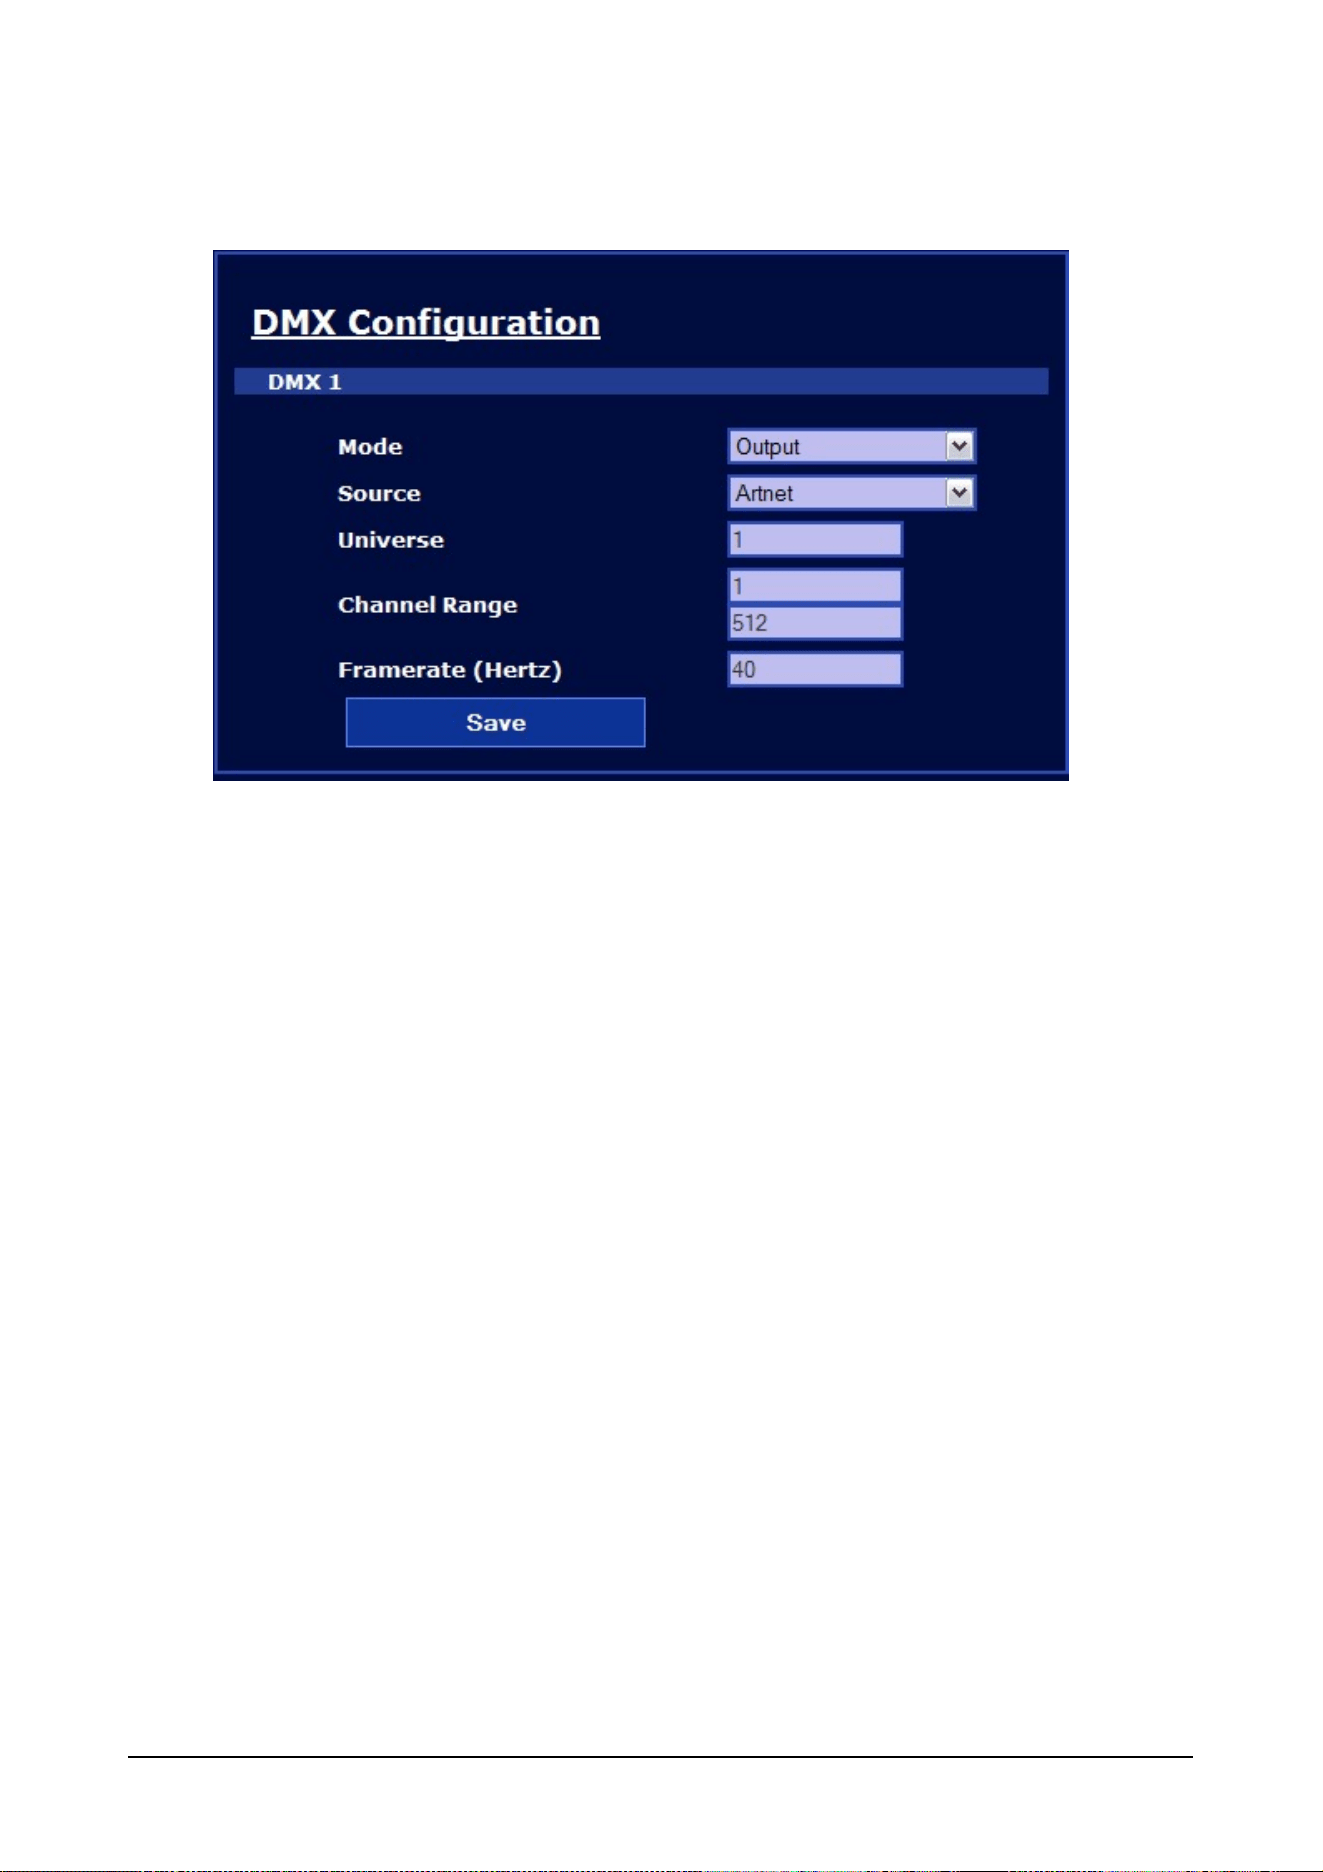
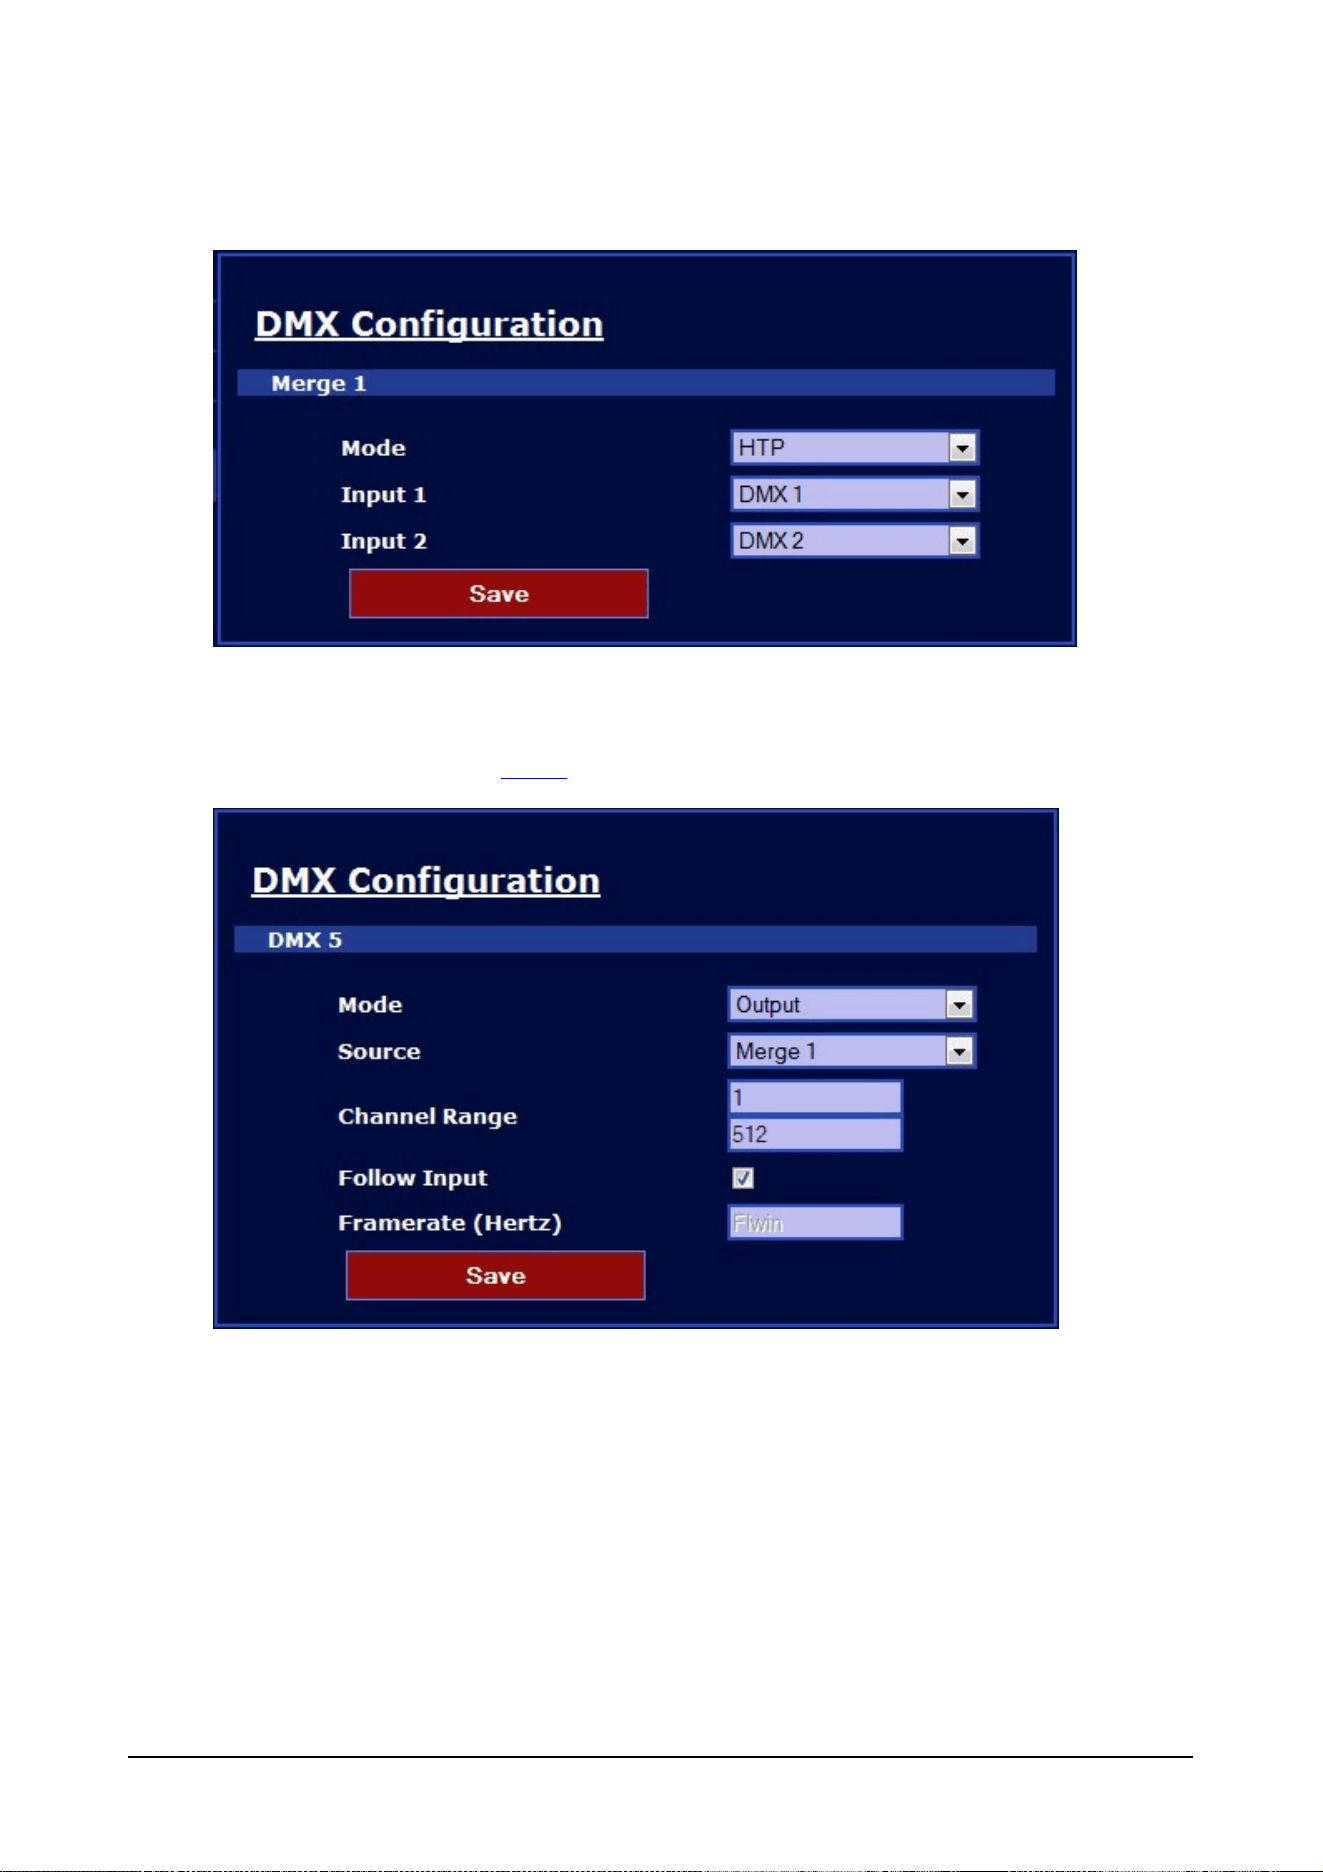
DMX Configuration
Modify the settings a for a specific DMX port as needed, then confirm with "Save".
56 © 2010 Martin Professional A/S
Ether2DMX8 User Manual
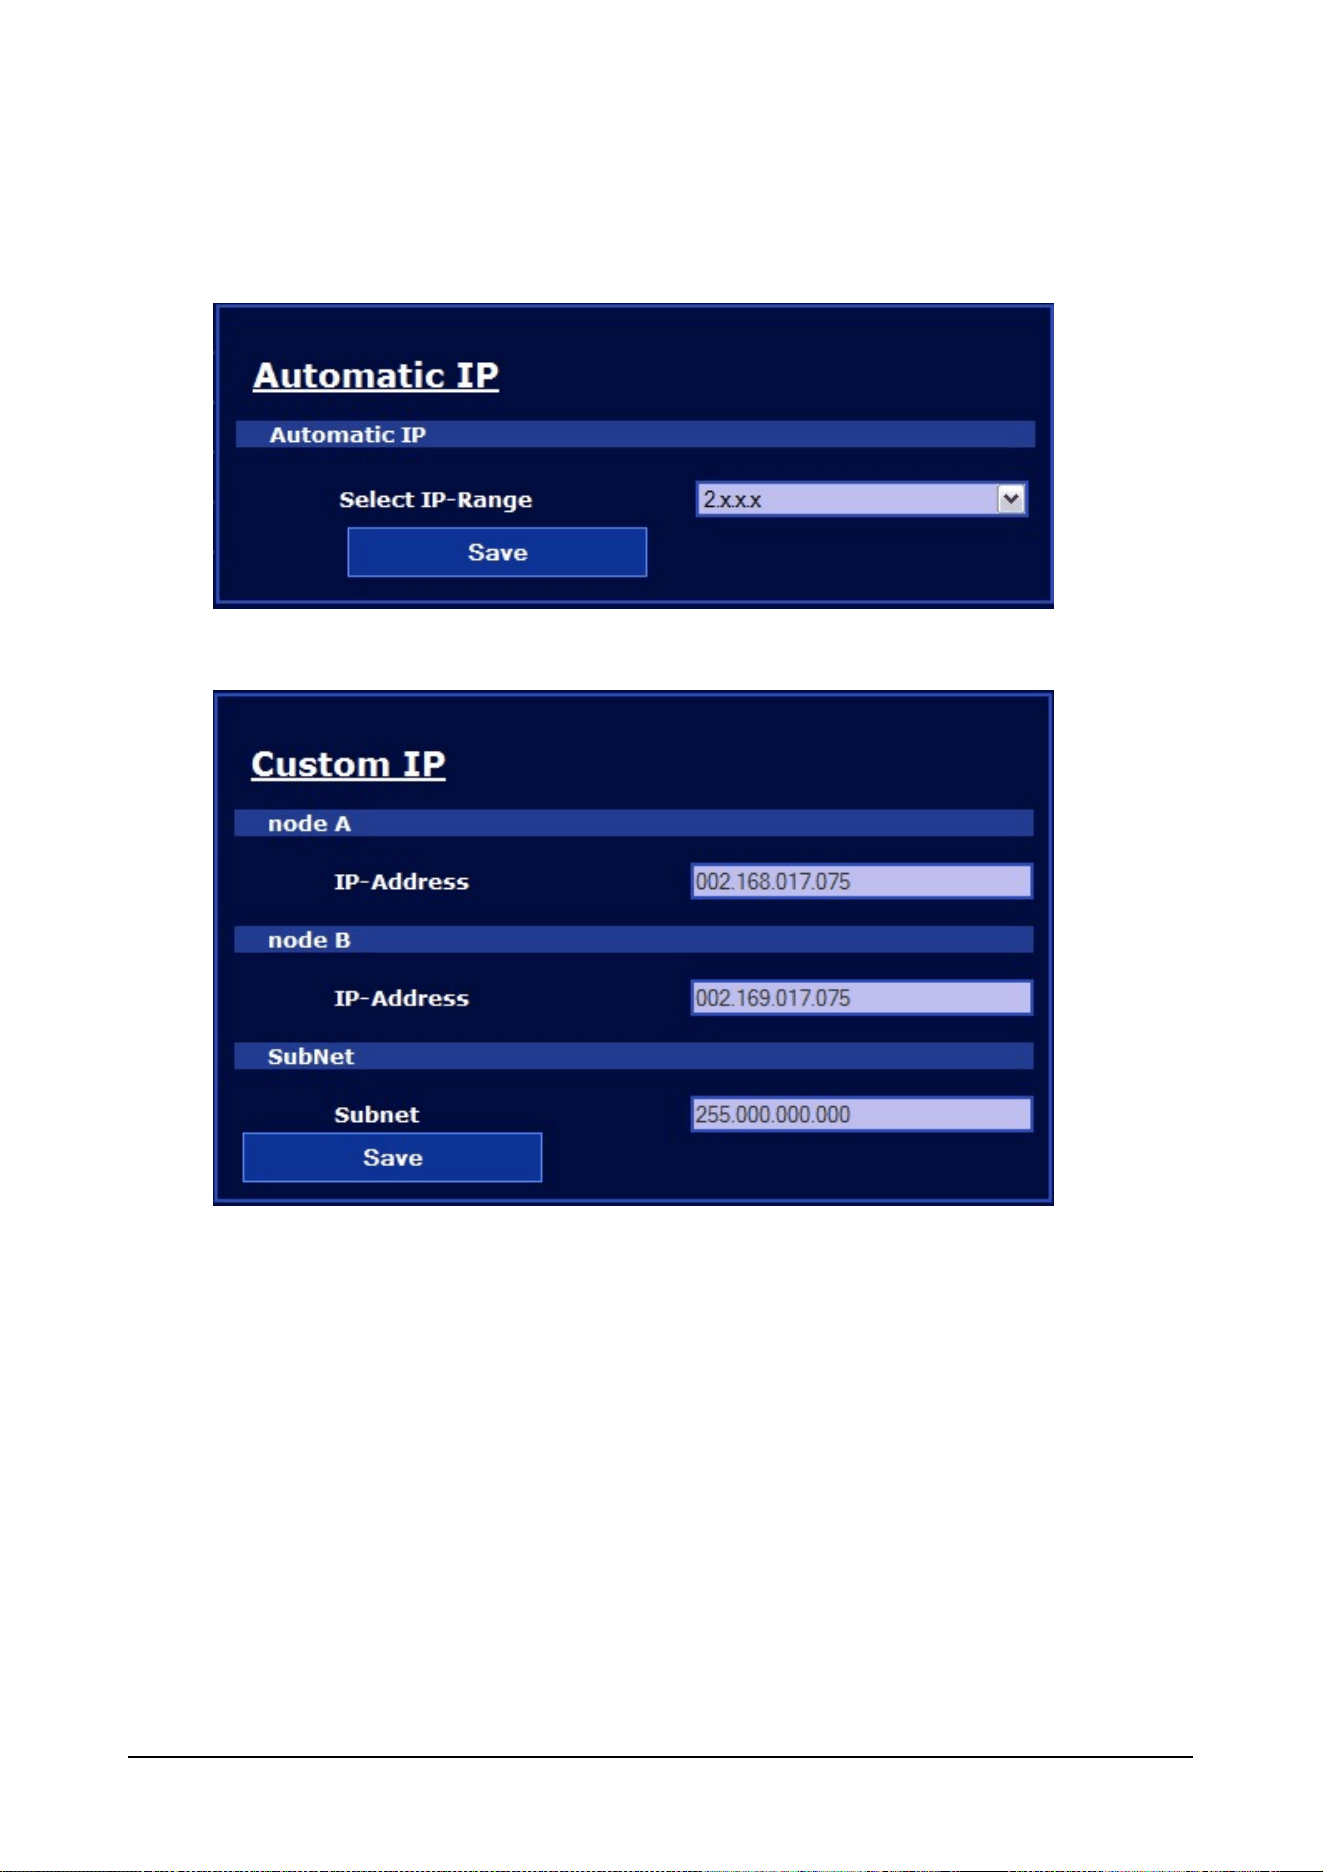
IP Configuration
Use automatic IP to set the 2.x.x.x, 10.x.x.x and 2 /10 combined IP range.
Use the custom IP settings to modify the IP address manually.
58 © 2010 Martin Professional A/S
Ether2DMX8 User Manual
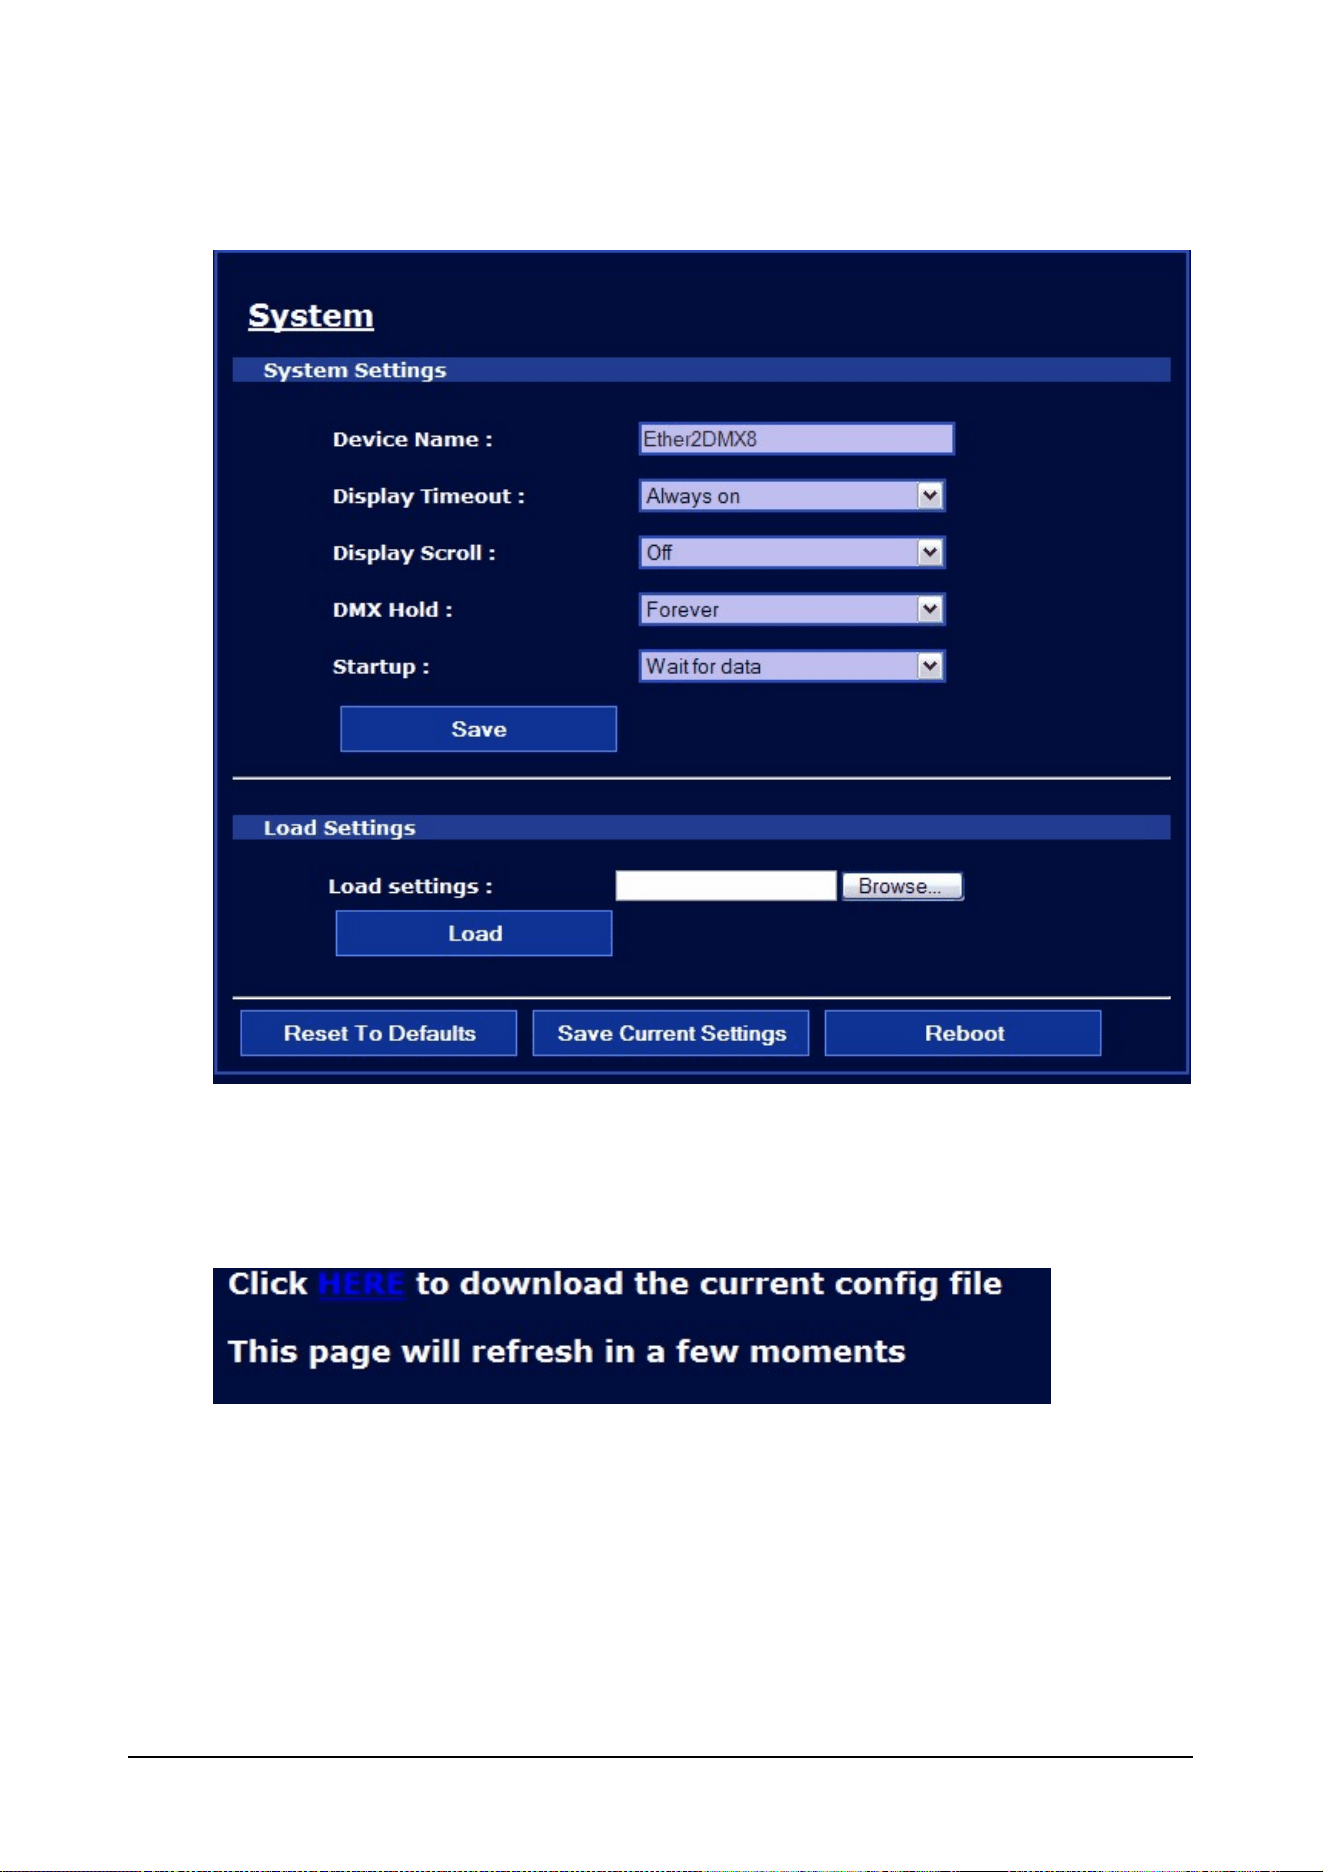
System
Any changes to the System settings have to be confirmed with "Save"
Load Settings allows to remote upload of a backup file to the Ether2DMX8 across the web interface.
Save Current Settings allows backup of the router across the web interface and create a backup file
on the local PC.
59 © 2010 Martin Professional A/S
Ether2DMX8 User Manual
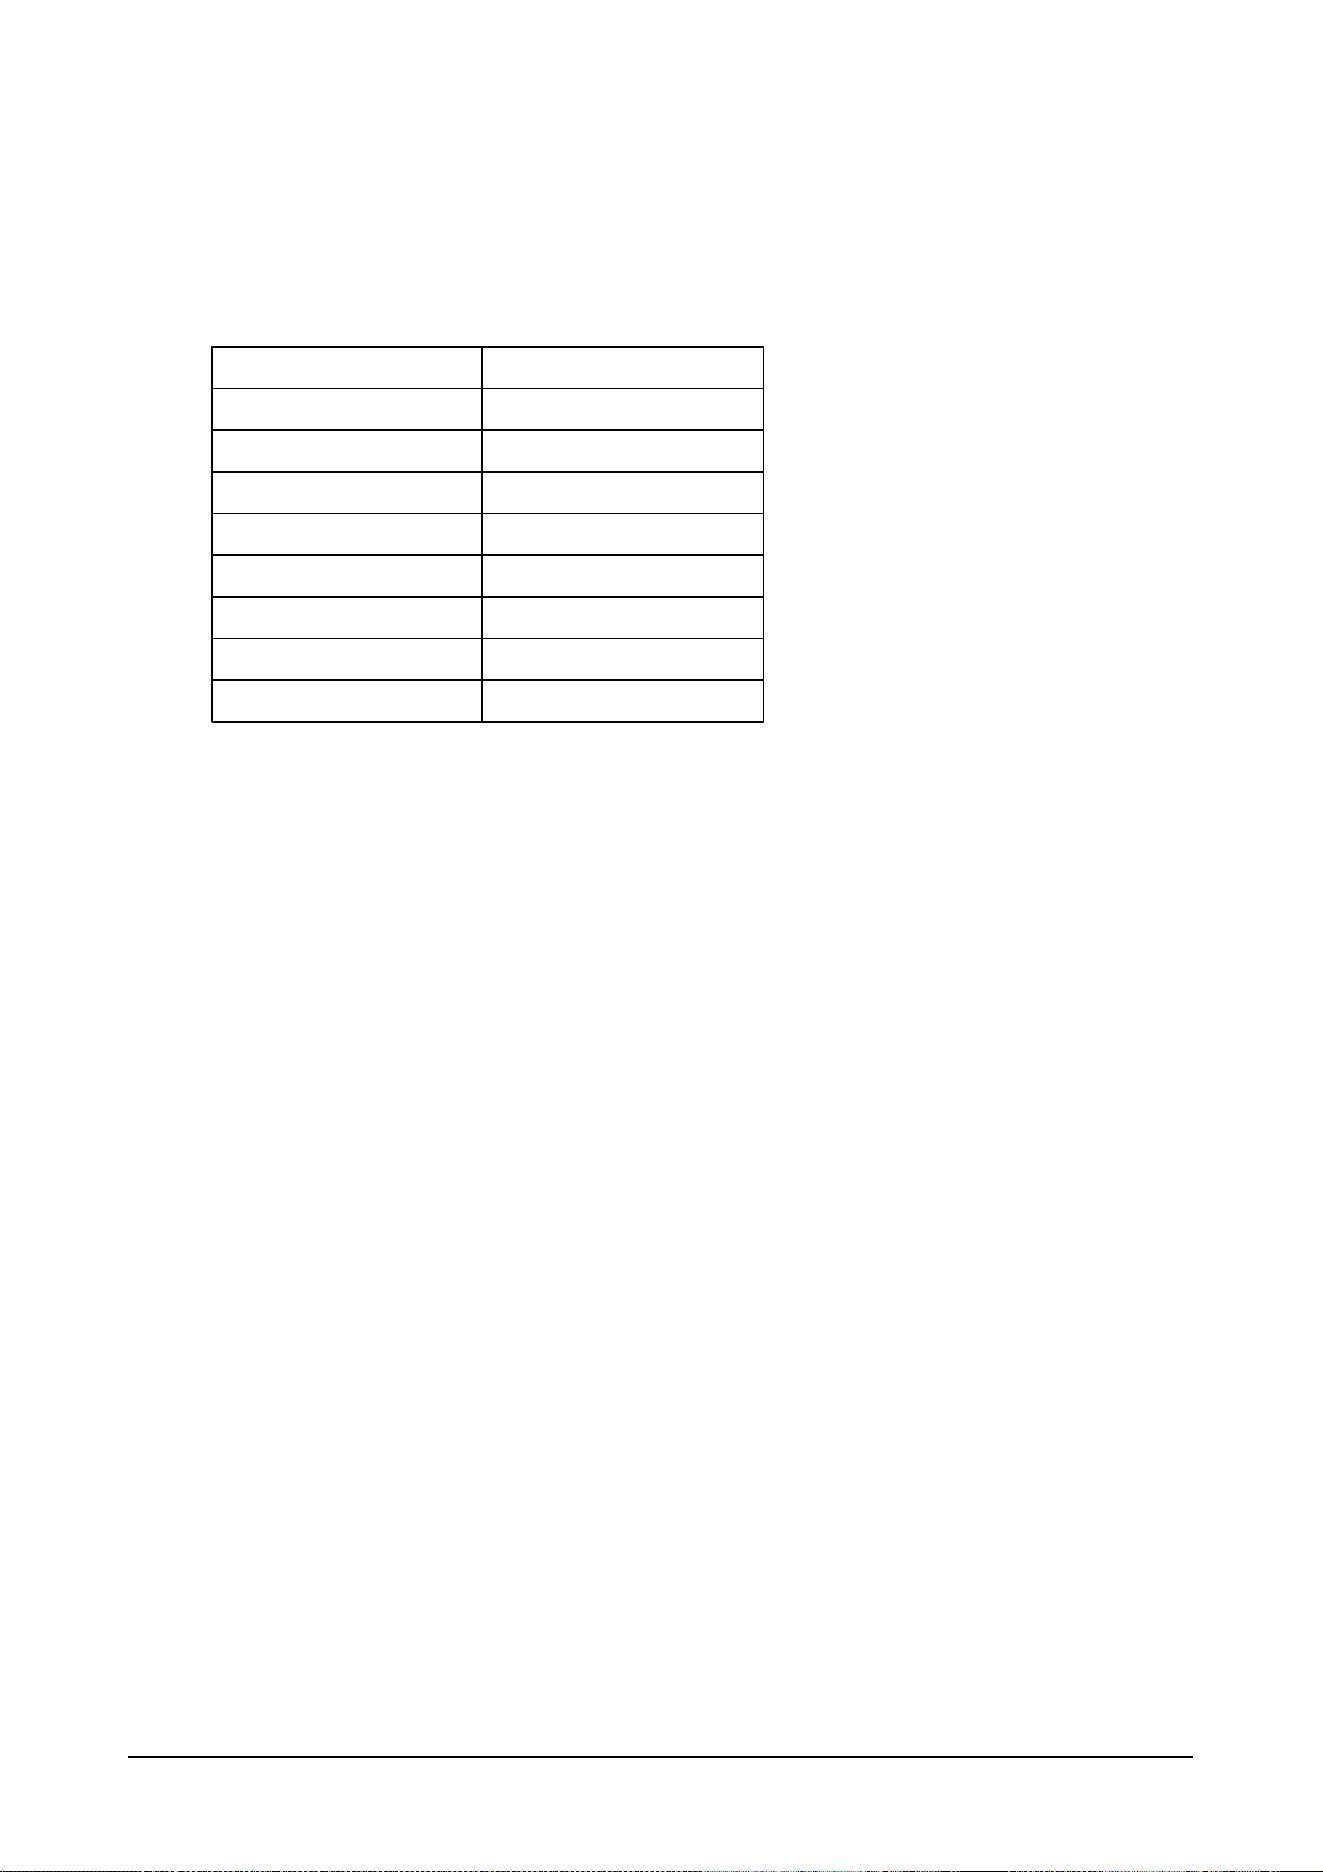
Ether2DMX8 Factory Defaults
This table shows the factory settings for the Ether2DMX8.
Factory Preset
Maxxyz Universe 1-8
Cue
OFF
IP
Automatic 2.x.x.x
Switch Inputs
All OFF
Device Name
Ether2DMX8
Display Timeout
Always On
Display Scroll
Off
DMX Hold
Forever
Startup
Wait for Data

60 © 2010 Martin Professional A/S
Ether2DMX8 User Manual
Decimal to Artnet Conversion Table
Artnet
Artnet
Artnet
Artnet
Dec.
Subnet
Univ.
Dec.
Subnet
Univ.
Dec.
Subnet
Univ.
Dec.
Subnet
Univ.
1
0
0
33
2
0
65
4
0
97
6
0
2
0
1
34
2
1
66
4
1
98
6
1
3
0
2
35
2
2
67
4
2
99
6
2
4
0
3
36
2
3
68
4
3
100
6
3
5
0
4
37
2
4
69
4
4
101
6
4
6
0
5
38
2
5
70
4
5
102
6
5
7
0
6
39
2
6
71
4
6
103
6
6
8
0
7
40
2
7
72
4
7
104
6
7
9
0
8
41
2
8
73
4
8
105
6
8
10
0
9
42
2
9
74
4
9
106
6
9
11
0
A
43
2
A
75
4
A
107
6
A
12
0
B
44
2
B
76
4
B
108
6
B
13
0
C
45
2
C
77
4
C
109
6
C
14
0
D
46
2
D
78
4
D
110
6
D
15
0
E
47
2
E
79
4
E
111
6
E
16
0
F
48
2
F
80
4
F
112
6
F
17
1
0
49
3
0
81
5
0
113
7
0
18
1
1
50
3
1
82
5
1
114
7
1
19
1
2
51
3
2
83
5
2
115
7
2
20
1
3
52
3
3
84
5
3
116
7
3
21
1
4
53
3
4
85
5
4
117
7
4
22
1
5
54
3
5
86
5
5
118
7
5
23
1
6
55
3
6
87
5
6
119
7
6
24
1
7
56
3
7
88
5
7
120
7
7
25
1
8
57
3
8
89
5
8
121
7
8
26
1
9
58
3
9
90
5
9
122
7
9
27
1
A
59
3
A
91
5
A
123
7
A
28
1
B
60
3
B
92
5
B
124
7
B
29
1
C
61
3
C
93
5
C
125
7
C
30
1
D
62
3
D
94
5
D
126
7
D
31
1
E
63
3
E
95
5
E
127
7
E
32
1
F
64
3
F
96
5
F
128
7
F

61 © 2010 Martin Professional A/S
Ether2DMX8 User Manual
Artnet
Artnet
Artnet
Artnet
Dec.
Subnet
Univ.
Dec.
Subnet
Univ.
Dec.
Subnet
Univ.
Dec.
Subnet
Univ.
129
8
0
161
A
0
193
C
0
225
E
0
130
8
1
162
A
1
194
C
1
226
E
1
131
8
2
163
A
2
195
C
2
227
E
2
132
8
3
164
A
3
196
C
3
228
E
3
133
8
4
165
A
4
197
C
4
229
E
4
134
8
5
166
A
5
198
C
5
230
E
5
135
8
6
167
A
6
199
C
6
231
E
6
136
8
7
168
A
7
200
C
7
232
E
7
137
8
8
169
A
8
201
C
8
233
E
8
138
8
9
170
A
9
202
C
9
234
E
9
139
8
A
171
A
A
203
C
A
235
E
A
140
8
B
172
A
B
204
C
B
236
E
B
141
8
C
173
A
C
205
C
C
237
E
C
142
8
D
174
A
D
206
C
D
238
E
D
143
8
E
175
A
E
207
C
E
239
E
E
144
8
F
176
A
F
208
C
F
240
E
F
145
9
0
177
B
0
209
D
0
241
F
0
146
9
1
178
B
1
210
D
1
242
F
1
147
9
2
179
B
2
211
D
2
243
F
2
148
9
3
180
B
3
212
D
3
244
F
3
149
9
4
181
B
4
213
D
4
245
F
4
150
9
5
182
B
5
214
D
5
246
F
5
151
9
6
183
B
6
215
D
6
247
F
6
152
9
7
184
B
7
216
D
7
248
F
7
153
9
8
185
B
8
217
D
8
249
F
8
154
9
9
186
B
9
218
D
9
250
F
9
155
9
A
187
B
A
219
D
A
251
F
A
156
9
B
188
B
B
220
D
B
252
F
B
157
9
C
189
B
C
221
D
C
253
F
C
158
9
D
190
B
D
222
D
D
254
F
D
159
9
E
191
B
E
223
D
E
255
F
E
160
9
F
192
B
F
224
D
F
256
F
F

62 © 2010 Martin Professional A/S
Ether2DMX8 User Manual
Specifications
PHYSICAL
Length
288mm (11.3 in.)
Width
482.2mm (19.0 in.), 19 inch rack mount
Height
43.6mm (1.7 in.). 1U
Weight
3.6kg
Operating Temperature
0° - 40° Celsius
IP Rating
IP 20
ELECTRICAL
AC Power
100-240 VAC nominal, 50-60 Hz
Fuses
2x500 mAT (time delay)
CAUTION: DOUBLE POLE/NEUTRAL FUSING.
CONNECTIONS
DMX In/Out
8x 5pin XLR female
AC Power Input
3-pin IEC male socket
ACPower Output
3-pin IEC female socket (6A max)
USB Out
USB-A
USB In
USB-B
10/100 Base-T Ethernet
Ethercon RJ45
Keyboard
PS2 or USB
Mouse
PS2 or USB
Monitor
VGA 15-pin
Link
Ethercon RJ45
Switch Inputs
Contact Closures
4x Terminal Block 4 Pin
Wuerth Electronics Type 351 PN: 6913S1500004
Manufacturer Link
Ordering Information
Ether2DMX8
P/N 90758130

www.martin.com • Olof Palmes Allè 18 • 8200 Aarhus N • Denmark
Tel: +45 8740 000 • Fax +45 8740 0010
