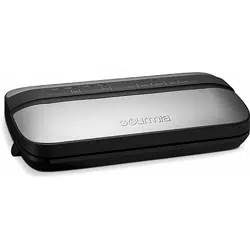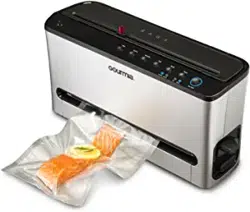
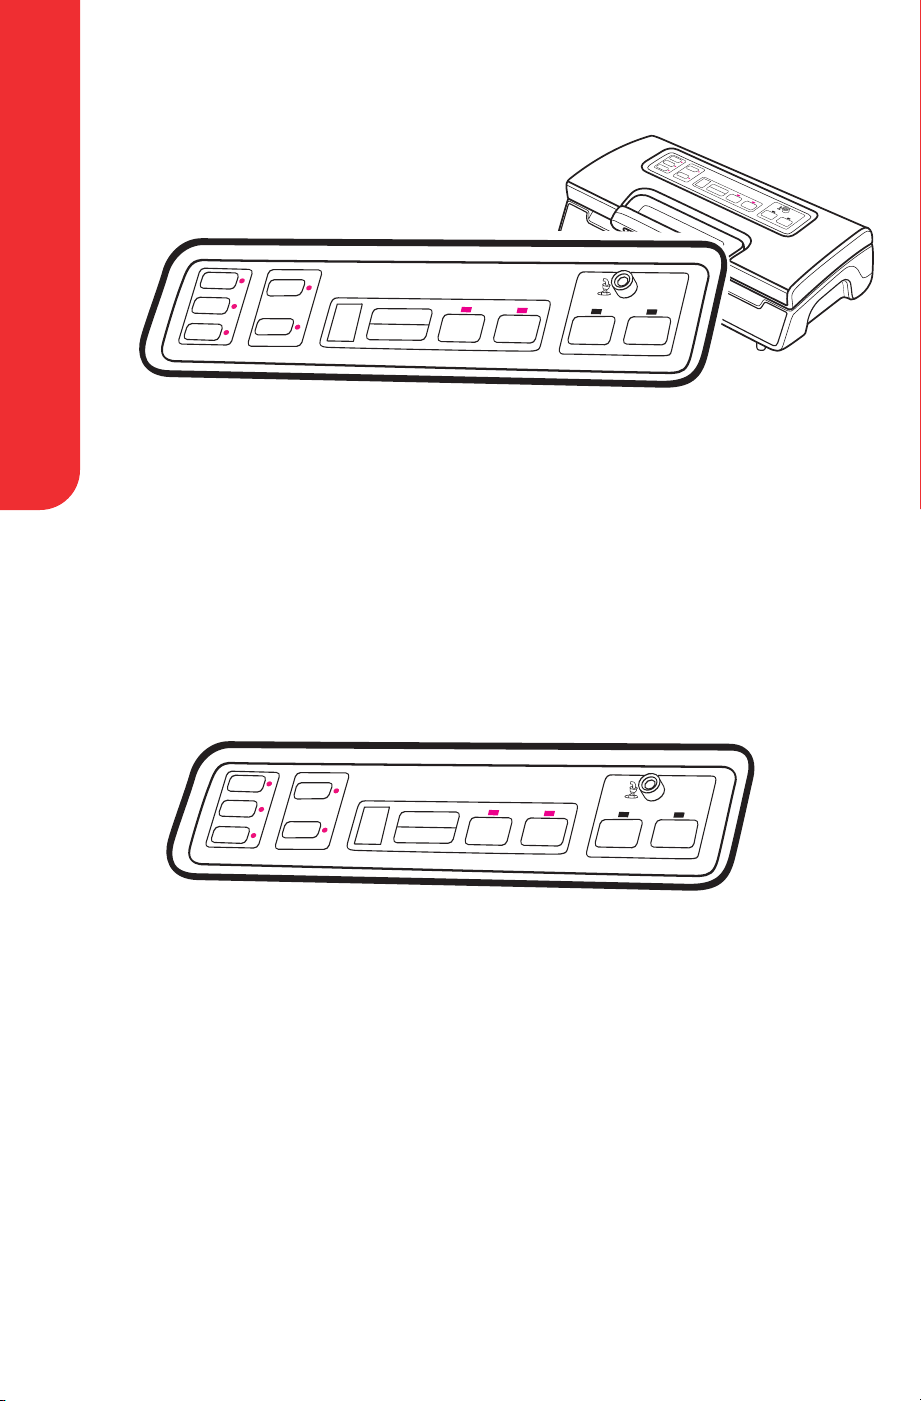
VACUUM SEALER
1User Manual | Vacuum Sealer | GVS1415
User Manual | GVS1415
VACUUM SEALER

VACUUM SEALER
For customer service visit www.gourmia.com or call 888.552.00332 For customer service visit www.gourmia.com or call 888.552.00332
Table of Contents
Important Safeguards . . . . . . . . . . . . . . . . . . . . . . . . . . . . . . . . . . . . . . . 4
Important Instructions . . . . . . . . . . . . . . . . . . . . . . . . . . . . . . . . . . . . . . 5
Using Your Vacuum Sealer. . . . . . . . . . . . . . . . . . . . . . . . . . . . . . . . . . . .6
Cleaning and Maintenance . . . . . . . . . . . . . . . . . . . . . . . . . . . . . . . . . . . 13
Troubleshooting . . . . . . . . . . . . . . . . . . . . . . . . . . . . . . . . . . . . . . . . . 14
Maintenance . . . . . . . . . . . . . . . . . . . . . . . . . . . . . . . . . . . . . . . . . . . 16
Warranty and Service . . . . . . . . . . . . . . . . . . . . . . . . . . . . . . . . . . . . . . 17
All rights reserved. No portion of this manual may be reproduced by any means whatsoever without written permission from e
Steelstone Group, except for the inclusion of quotations in a media review. Although every precaution has been taken in the preparation
of this manual, e Steelstone Group assumes no responsibility for errors or omissions. Nor is any liability assumed for damages
resulting from the use of the information contained herein. Although every eort has been made to ensure that the information
contained in this manual is complete and accurate, e Steelstone Group is not engaged in rendering professional advice or services to
the individual consumer; further, e Steelstone Group shall not be held responsible for any loss or damage allegedly arising from any
information or suggestions in this manual.
Model: GVS1415 © 2024 Gourmia
The Steelstone Group Brooklyn, NY | Gourmia.com
W elcome to the Convenience of V acuum Sealing from Gourmia
3User Manual | Vacuum Sealer | GVS1415 3
@gourmia
Welcome to the Convenience
of Vacuum Sealing from Gourmia
Congratulations on your purchase of the Vacuum Sealer from Gourmia!
e Gourmia Vacuum Sealer is designed to extend the freshness of food longer than
conventional storage methods. Its convenience and versatility will allow you to preserve
food eciently and it will become a frequently used household appliance. With its
thought out design and easy operation you will be able to increase the shelf life of highly
perishable or infrequently used items.
e pages of this manual oer full and comprehensive instructions to guide you through
the functions and features of the Gourmia Vacuum Sealer. In this guide you will also nd
complete step-by- step instructions for the operation, assembly, and maintenance of your
appliance.
Please read all safety instructions thoroughly to ensure safe usage at all times.
ank you for your purchase! We sincerely hope you will enjoy this as well as all the many
innovative products brought to you by our family at Gourmia.

IMPORTANT SAFEGUARDS
For customer service visit www.gourmia.com or call 888.552.00334
IMPORTANT SAFEGUARDS
1. Read All Instructions:
Carefully read all instructions
before using the appliance.
2. Do Not Use- any attachments
other than whats bought with
this appliance.
3. Stop Using the Machine-
immediately if the cord is
damaged.Have it replaced by a
professional.
4. Keep Cord Clear: Do not allow
the cord to hang over the edge
of a table or hot surface.
5. Before plugging/unplugging
cord, Make sure machine is
powered o.
6. Use Recommended
Attachments: Only use accessory
attachments recommended by
the manufacturer to prevent
injuries.
7. Avoid Heat Sources: Do not
place the appliance on or near a
hot gas or electric burner, or in a
heated oven.
8. Use Caution from Moving
Parts: Do not touch any moving
or spinning parts of the machine
while it is operating.
9. Avoid Metal Foils: Do not
insert metal foils or other
materials into the machine to
prevent the risk of re or short
circuit.
10. Keep Out of Reach of Children-
and by persons with reduced
physical, sensory, or mental
capabilities if they are supervised
or instructed on safe use.
11. Use as Intended: Do not use the
appliance for purposes other than
its intended use.
12. Secure Surface: Always use the
appliance on a secure, dry, and
level surface.
13. Indoor Use Only: Do not use
the appliance outdoors.
14. Check Grounding: Ensure
that the wall outlet is properly
grounded as the appliance features
a grounded plug.
15. Intended Use: is appliance
is designed for household and
similar use such as:
• Sta kitchen areas in oces,
and other work environments
• Farmhouses
• In hotels, motels, and other
residential environments
16. No External Timers: Do not
operate the appliance with an
external timer or remote-control
system.

IMPORTANT INSTRUCTIONS:
5User Manual | Vacuum Sealer | GVS1415
IMPORTANT INSTRUCTIONS:
Cord and Plug Safety
1. A short power-supply cord is provided to reduce risk of becoming entangled
in or tripping over a longer cord.
2. Extension cords may be used if used with extreme caution.
3. If an extension cord is used:
• e marked electrical rating of the extension cord should be at least equal
to the electrical rating of the appliance.
• e longer cord should be arranged so that it will not drape over the countertop
or tabletop where it can be pulled by a child or tripped over.
4. Put the cord into the storage box when packing away the vacuum sealer.
Do not wrap around machine.
Electrical Polarized Plug
is appliance has a polarized plug (one blade is wider than the other). To reduce the
risk of electric shock, the plug is intended to be used by inserting it into the electrical
outlet only one way. If the plug does not t securely into the outlet, reverse the plug
and re-insert. If it still does not t, contact a qualied electrician for assistance. Do not
modify the plug in any way.
Note: Aer using the vacuum sealer, keep the sealer cover open.
Power: 120V~ 60Hz 1,700W
USING YOUR VACUUM SEALER
For customer service visit www.gourmia.com or call 888.552.00336
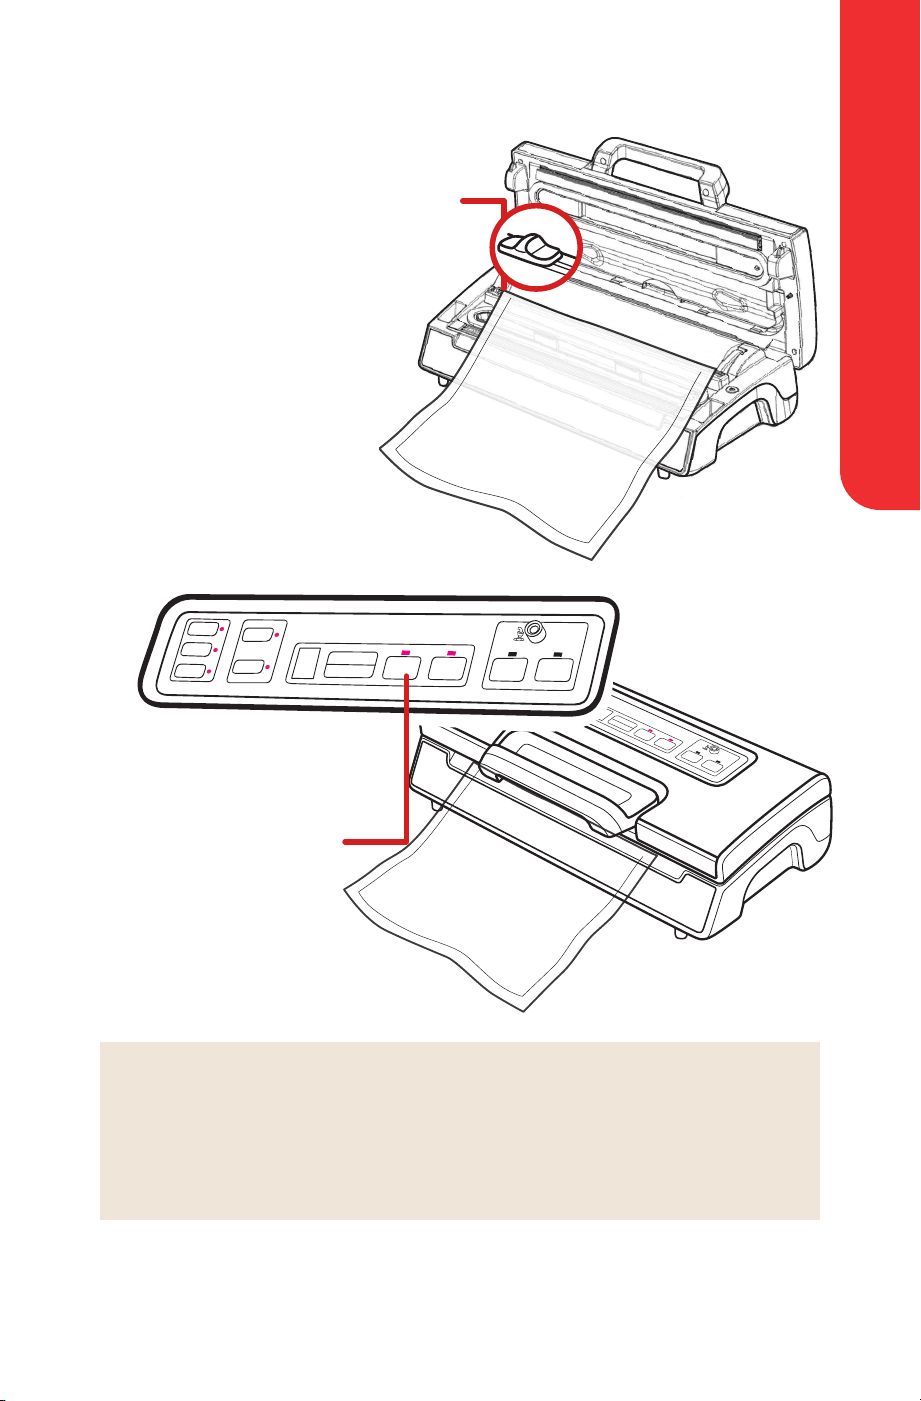
USING YOUR VACUUM SEALER
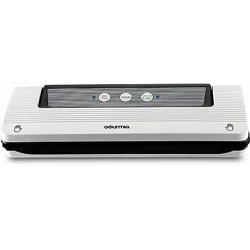
1. Vac & Seal/ Cancel:
is option has two functions:
• On stand-by mode, the vacuum
sealer starts the automatic operation
of vacuuming the bag and then
automatically seals the bag when the
vacuum sealing is completed.
• During the vacuuming and sealing
process, this button can stop the
vacuum sealer.
3.Sealing time:
Sealing time has 3 settings to choose
from according to the bag that needs to
be sealed.
• Dry button- for dry bags and items
without moisture, this has a shorter
heat sealing time.
• Moist button- for wet bags or foods
with a little moisture, this has a moist
heat sealing time.
• Extended button- for wet bags or
foods with a lot of moisture, this has an
extended heat sealing time.
Default setting is Normal, for dry bags
and a shorter sealing time.
4. Pressure:
Pressure has 2 settings with dierent
vacuum pressures:
• Normal button- for storing regular
items in normal vacuum pressure.
• Gentle button- for storing so &
crushable items, where less vacuum
pressure is needed.Default setting
is normal and has a high vacuum
pressure.
2. Pulse Vacuum:
• Press the Pulse vacuum button, the
vacuuming process will start.
• Press Manual Seal when it reaches the
desired pressure.
• Turn to seal.
Dierent pressures can be choosen for
dierent type of foods.
EXTENDED
MOIST
GENTLE
NORMAL
VACUUM
PROGRESS
VACUUM & SEAL
CANCEL
MANUAL
SEAL
PULSE
VACUUM
CANISTER
MARINATE
SEALING
DRY
EXTENDED
MOIST
GENTLE
NORMAL
VACUUM
PROGRESS
VACUUM & SEAL
CANCEL
MANUAL
SEAL
PULSE
VACUUM
CANISTER
MARINATE
SEALING
DRY
EXTENDED
MOIST
GENTLE
NORMAL
VACUUM
PROGRESS
VACUUM & SEAL
CANCEL
MANUAL
SEAL
PULSE
VACUUM
CANISTER
MARINATE
SEALING
DRY
USING YOUR VACUUM SEALER
7User Manual | Vacuum Sealer | GVS1415
5.Canister:
To vacuum canisters, jar lids, wine
stoppers or other accessories - used
through a hose.
7.Marinate:
To marinate food.
8. Tube attachment
hole:
Before using the Marinates
or Canister mode- insert
the hose into the tube hole.
9. Progress:
is button has 2 functions
shown on the LED display.
• e progress of
vacuuming.
• Shows when the device
is on and the lid is closed.
When the LED ashes, wait
until it stops, then the next
mode can be used.
10. Air intake:
Air intake connects with
the vacuum chamber and
pump. Do not cover the
air intake when placing
the bag for the Vacuum &
Seal option.
6. Manual Seal:
is option has two functions:
• To seal the open end of a bag without
vacuuming using air suction. used to
make a bag from a bag roll;
•When the automatic “Vacuum & seal”
function is started, the Manual Seal
button stops the machine and starts to
seal the bag. ere will be less vacuum
pressure inside the bag. e vacuum
pressure can be controlled, to avoid
delicate items from being crushed.
EXTENDED
MOIST
GENTLE
NORMAL
VACUUM
PROGRESS
VACUUM & SEAL
CANCEL
MANUAL
SEAL
PULSE
VACUUM
CANISTER
MARINATE
SEALING
DRY
EXTENDED
MOIST
GENTLE
NORMAL
VACUUM
PROGRESS
VACUUM & SEAL
CANCEL
MANUAL
SEAL
PULSE
VACUUM
CANISTER
MARINATE
SEALING
DRY

USING YOUR VACUUM SEALER
For customer service visit www.gourmia.com or call 888.552.00338
USING YOUR VACUUM SEALER
11.Vacuum chamber:
Position the open end of the bag inside
the vacuum chamber.
e Vacuum Chamber suctions
the air out of the bag,
and catches any liquid
overowing from the bag.
12. Sealing strip:
Place the bag to be sealed over
this strip. Clean and dry
or replace the sealing strip
when distorted
or broken.
13. Lower gasket:
Keep air away by
forming vacuum
chamber with upper
gasket in the vacuum
chamber. Clean and dry
or replace it when it is distorted
or broken.
14. Sealing element:
Is a teon coated heating element
which seals the bag.
15. Upper gasket:
Keep air away by
forming vacuum
chamber with lower
gasket. Clean and dry or
replace it when distorted
or broken.
16. Bag Cutter:
Press and slide in one
direction to cut bags to
the desired size.
17. Cutter rack:
Slide the cutter to cut
the bag.
18. Front handle:
Press down to lock the
cover. And rock to open
the cover.
USING YOUR VACUUM SEALER
9User Manual | Vacuum Sealer | GVS1415
6. Close the top cover and press
tightly till you hear it click on both
sides.
7. Press “Maunal Seal” button
to start sealing the bags
8. Press the handle to open
the cover and take the bag out of
the machine. e bag is ready for
vacuum sealing.
Making a bag with a bag roll
1. Open the top cover.
2. Make sure the bag cutter is on one side
of the cutter strip.
3. Pull out the bag to the desired length
4. Ensure the bag is correctly placed,
under the cutter rack.
en slide across the cutter strip-
to cut the bag.
5. Put one end of the bag on top
of the sealing bar.
EXTENDED
MOIST
GENTLE
NORMAL
VACUUM
PROGRESS
VACUUM & SEAL
CANCEL
MANUAL
SEAL
PULSE
VACUUM
CANISTER
MARINATE
SEALING
DRY
EXTENDED
MOIST
GENTLE
NORMAL
VACUUM
PROGRESS
VACUUM & SEAL
CANCEL
MANUAL
SEAL
PULSE
VACUUM
CANISTER
MARINATE
SEALING
DRY
NOTE: is product provides a very high vacuum pressure during vacuum packaging
with a bag. In order to avoid crushing of a delicate item by the high vacuum pressure,
observe the status of the vacuum pressure inside the bag and switch the “ MANUAL
SEAL” button when the desired vacuum pressure is reached. e pressure will stop
and seal the bag.
USING YOUR VACUUM SEALER
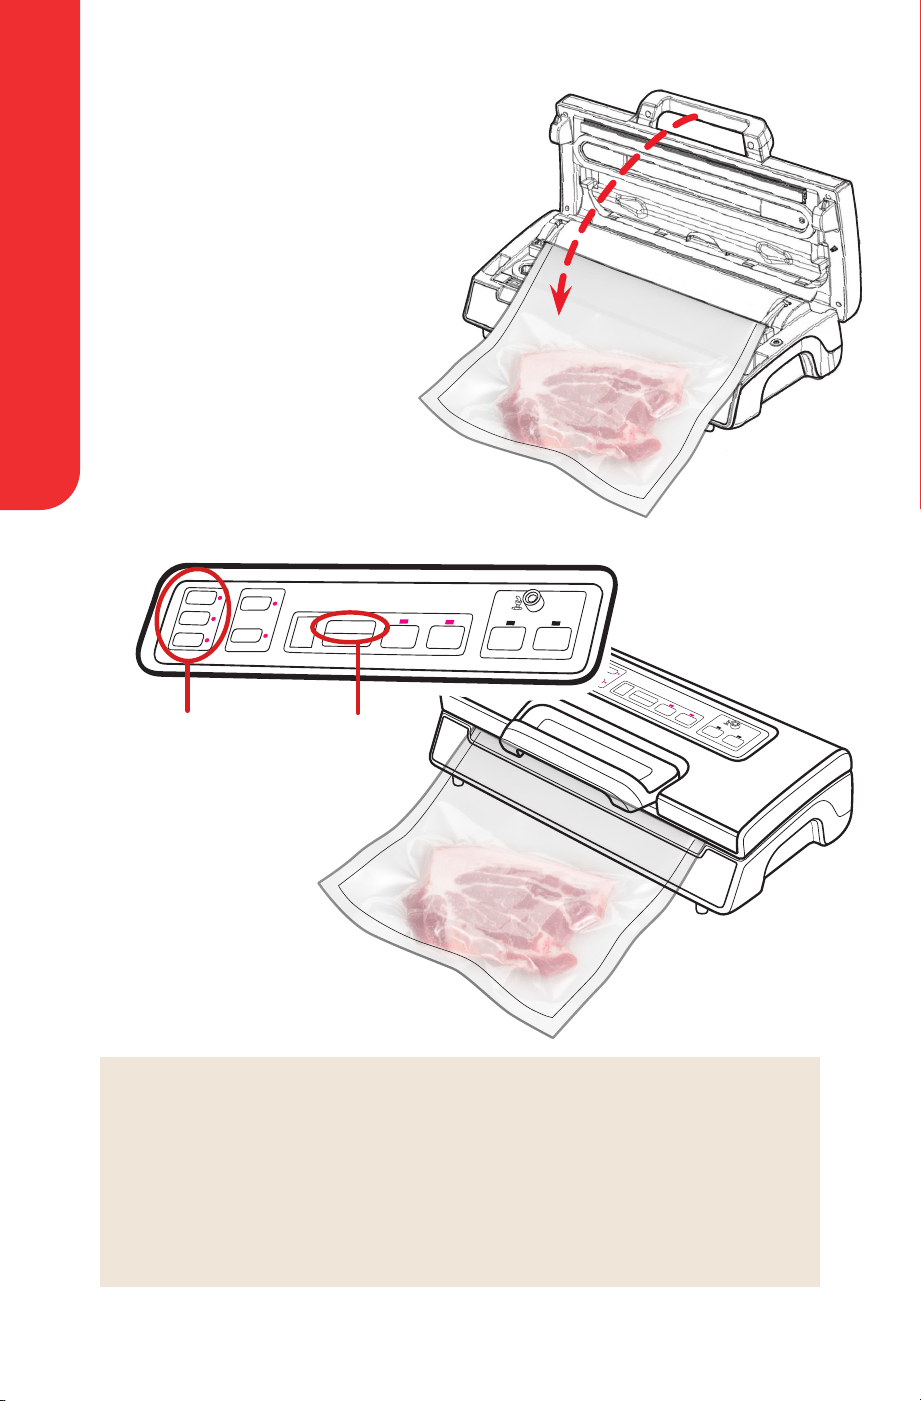
For customer service visit www.gourmia.com or call 888.552.003310
5. Set the “Vac & Seal” and select
sealing option.
• Extended/moist/dry- e
moisture level of the packed items
• Normal/Gentle - e vacuum
pressure according to the
food type.
6. en press "Vac & Seal"
button to start vacuum sealing.
7. When the vacuum packaging is
done, unlock the handle to open the
cover and take out the packed bags.
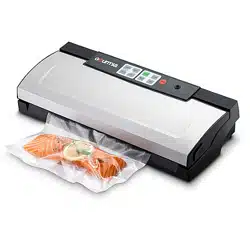
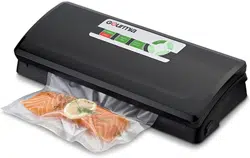
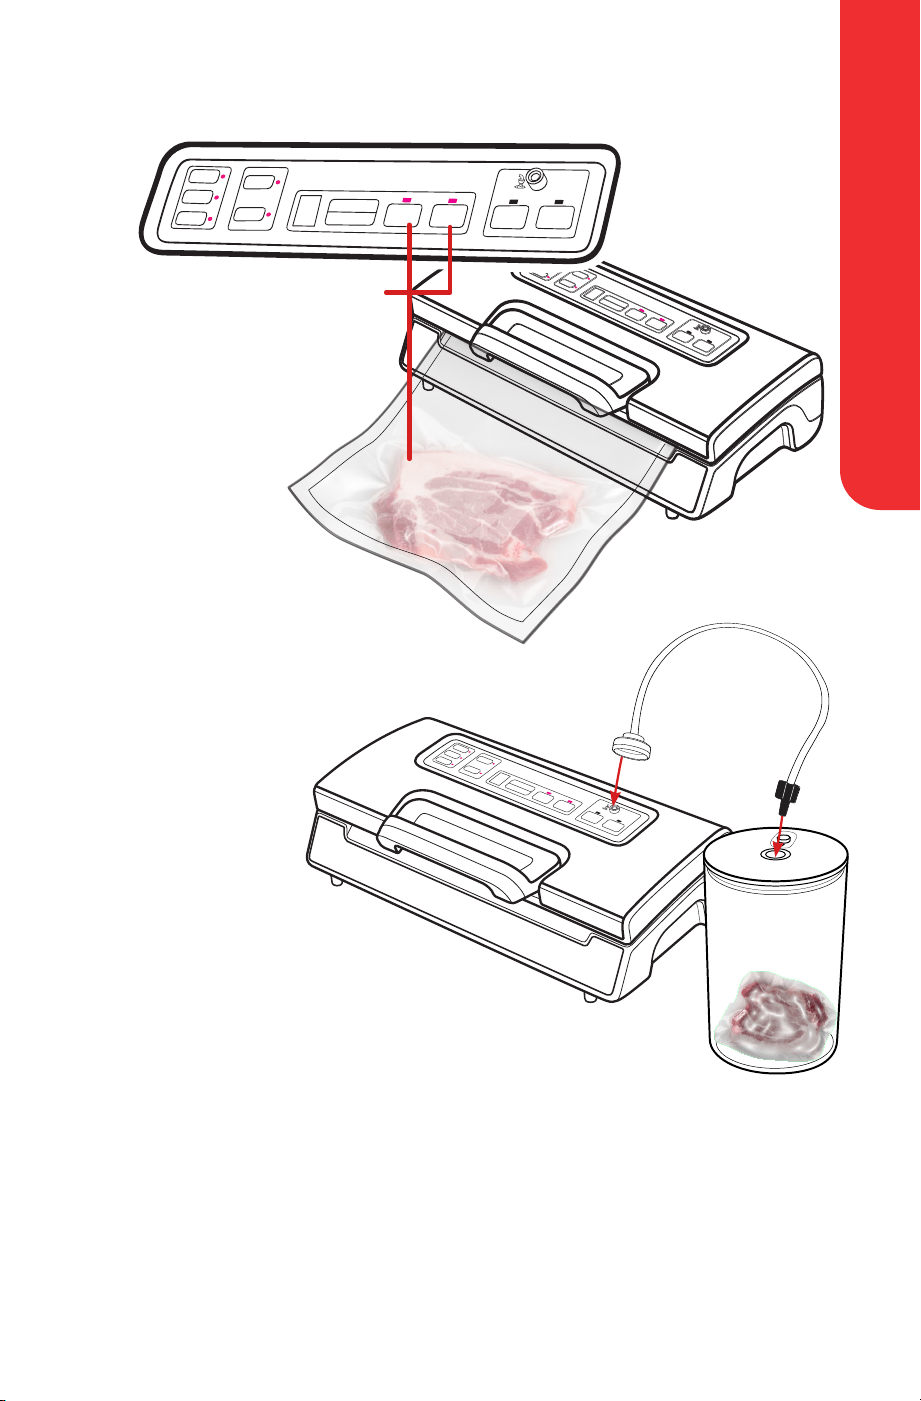
Vacuum packaging with a bag
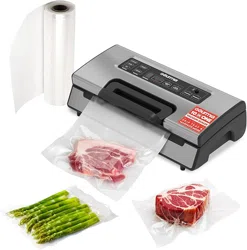
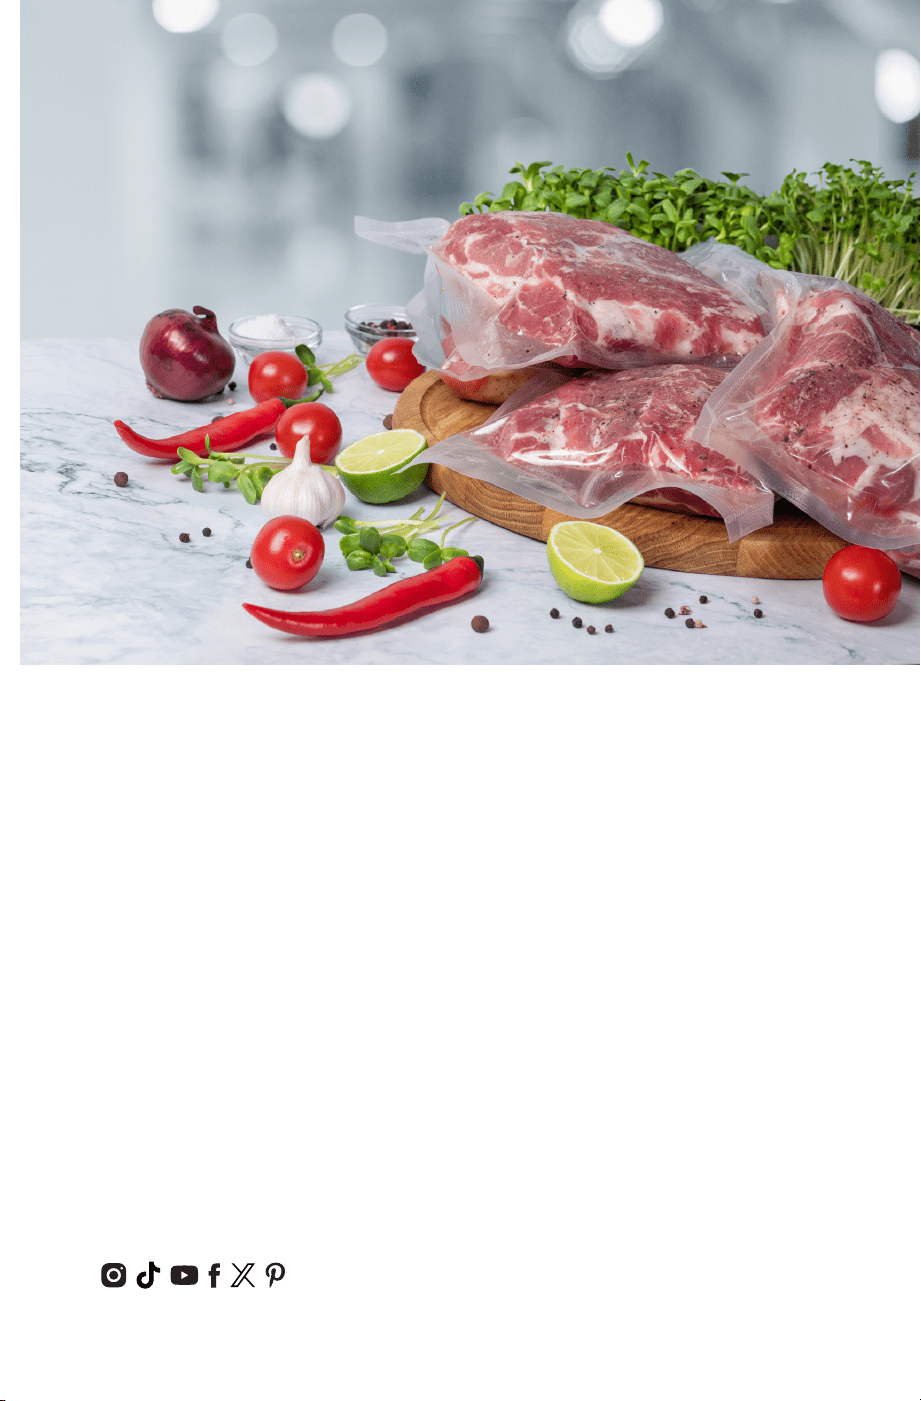
1. Put the items inside the bag.
Only use the special designed vacuum bags
supplied.
2. Clean and straighten the open
end of the bag to ensure
no dust or folds.
3. Place the open end of the bag
within the vacuum chamber area,
making sure the air intake is not
covered by the bag.
4. Pull the top cover down and press the
front handle to lock.
EXTENDED
MOIST
GENTLE
NORMAL
VACUUM
PROGRESS
VACUUM & SEAL
CANCEL
MANUAL
SEAL
PULSE
VACUUM
CANISTER
MARINATE
SEALING
DRY
EXTENDED
MOIST
GENTLE
NORMAL
VACUUM
PROGRESS
VACUUM & SEAL
CANCEL
MANUAL
SEAL
PULSE
VACUUM
CANISTER
MARINATE
SEALING
DRY
NOTE:
• For best sealing eect, it is best to let the appliance cool down for 1 minute before
reusing. Wipe out any excess liquid or food residue in the vacuum chamber aer each
use.
• Wait 20 seconds between each sealing to avoid overheating
• Only use the specic bags provided. Do not use other bags not intended for vacuum
packaging.
• Use scissors to open a sealed bag.
USING YOUR VACUUM SEALER
11User Manual | Vacuum Sealer | GVS1415
1. Press the "Pulse Vacuum" button
to vacuum the bag. Observe the status
of the vacuum pressure in the bag.
Press the Pulse Vacuum button
when the desired vacuum pressure
is reached.
2. Press the "Manual Seal"
button when vacuum
sealing is complete.
Vacuum package in a Canister & Vacuum Bowl
1.Wipe the canister cover
and canister base and ensure
it is clean and dry.
2. Put the items into
the canister. Do not
ll more than the rim of
the canister. Ensure the
cover closes well. Clean the cover
rim of the canister and the bottom seal
gasket of the canister cover.
3. Insert one end of the hose into the air intake
and another end of the hose into the center hole of the canister cover.
4. e LED status of “Vac & Seal” should be on the “Normal” setting.
5. Press the "Canister" button to start vacuuming- To ensure there is no air leaking
between the cover and the canister, use your hand to push down the cover at the
beginning of the vacuuming. e machine will stop automatically when enough vacuum
pressure is achieved.
6. Take out the hose tube from the canister or bowl aer the vacuum is completed.
EXTENDED
MOIST
GENTLE
NORMAL
VACUUM
PROGRESS
VACUUM & SEAL
CANCEL
MANUAL
SEAL
PULSE
VACUUM
CANISTER
MARINATE
SEALING
DRY
EXTENDED
MOIST
GENTLE
NORMAL
VACUUM
PROGRESS
VACUUM & SEAL
CANCEL
MANUAL
SEAL
PULSE
VACUUM
CANISTER
MARINATE
SEALING
DRY
EXTENDED
MOIST
GENTLE
NORMAL
VACUUM
PROGRESS
VACUUM & SEAL
CANCEL
MANUAL
SEAL
PULSE
VACUUM
CANISTER
MARINATE
SEALING
DRY
EXTENDED
MOIST
GENTLE
NORMAL
VACUUM
PROGRESS
VACUUM & SEAL
CANCEL
MANUAL
SEAL
PULSE
VACUUM
CANISTER
MARINATE
SEALING
DRY
Vacuum packaging with a bag using Pulse Vacuum
USING YOUR VACUUM SEALER
For customer service visit www.gourmia.com or call 888.552.003312
Opening the Canister aer vacuum packaging
In order to open the canister, you need to press the "Release" button on the canister cover.
Note:
1. At the beginning of the vacuum packaging in a canister or a vacuum bowl, press the
cover down on the hose adaptor for a few seconds to avoid air leakage between the cover
and the canister top rim.
2. To test if the cover is sealed tightly pull the cover to ensure
its tightly sealed.
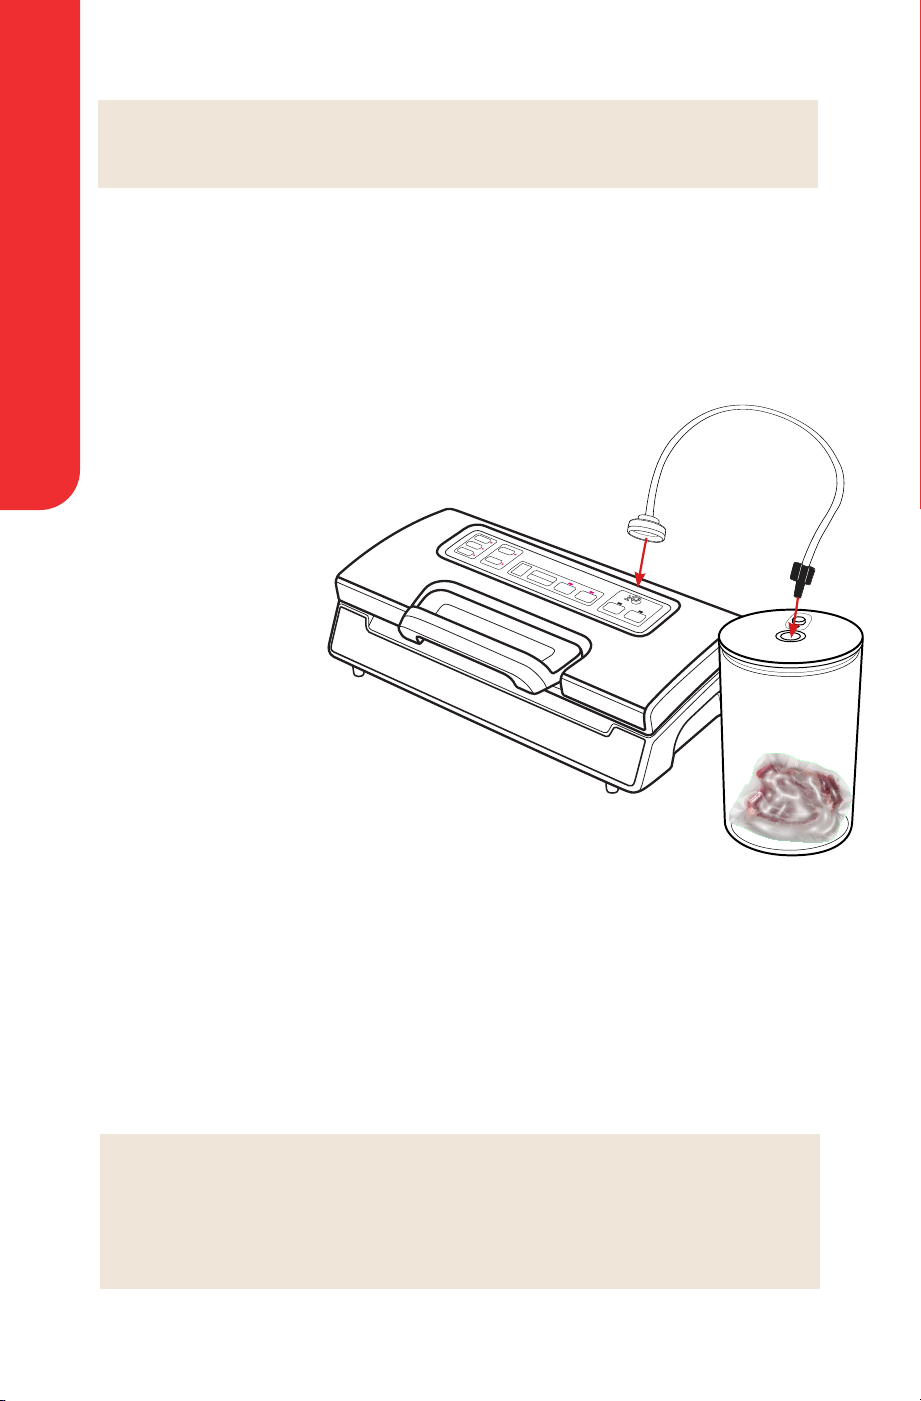
Marinating:
1.Insert the hose into
the hose port on your
vacuum sealer and into
the center hole of
the canister cover.
2. Set the “Vacuum” button to
your desired vacuum pressure
"Normal/Gentle" according to the type
of food you will be vacuuming.
e default option is Normal mode.
3.Press the "Marinate" button to start marinating.
e indicator light will icker during the vacuuming process.
Air will be released automatically aer vacuuming.
is process is for one working cycle.
e machine will continue working for 5 cycles. It takes around 6 minutes to nish the
process.
4.When the indicator light stops, the marinate process is completed. Remove the hose
from the canister port and canister cover.
5. Do not press any button during the vacuuming process.
Note: When moist foods are vacuuming, moisture will be stored in the adaptor.
Remember to clean up the adaptor if there is water before vacumming.
EXTENDED
MOIST
GENTLE
NORMAL
VACUUM
PROGRESS
VACUUM & SEAL
CANCEL
MANUAL
SEAL
PULSE
VACUUM
CANISTER
MARINATE
SEALING
DRY
Note:
• At the beginning of the vacuum packaging in a canister or a vacuum bowl, press the
cover down on the hose adaptor for a few seconds to avoid air leakage between the
cover and the canister top rim.
• To test if the cover is sealed tightly pull the cover to ensure its tightly sealed.

CLEANING & MAINTENANCE
13User Manual | Vacuum Sealer | GVS1415
Cord storage box
1. Store the the power cord in the storage box, located in the back of the vacuum sealer.
Do not wrap cord around the machine.
CLEANING AND MAINTENANCE
Vacuum sealer
• Always unplug the unit before cleaning.
• Do not immerse the machine in water.
• Avoid using abrasive products to clean the unit, it will scratch the surface.
• Use a mild dishwashing soap and a warm, damp cloth to wipe away food residue.
• Dry thoroughly before storing.
Vacuum bags
• Wash bags in warm water with dishwashing soap
• When washing bags in the dishwasher, turn bags inside out and spread them over
the top rack.
• Dry thoroughly before reusing.
Do not reuse bags that raw meat, sh of greasy food were stored in.
Do not reuse bags that have been microwaved or boiled.
Accessories
•Wash all vacuum accessories in warm water with a dishwashing soap.
Do not immerse the machine in water.
• Canister bases (not lids) are top rack dishwasher safe. e cover should be wiped down
with a damp cloth
• All accessories should be completely dried before use.
• Do not place the Canister and cover in the microwave.
Storing Your Vacuum Sealer:
• Keep the unit in a at and safe place, out of the reach of children.
• Make sure the lid of appliance is unlocked when not in use. Keeping the cover locked
will distort the foam gaskets.
Note:
Aer nishing the vacuuming allow the machine to cool o with
the sealer cover open. Do not store away before the machine has cooled o.
Note: e foam gaskets around the vacuum chamber should be dried
thoroughly before storing.

TROUBLESHOOTING
For customer service visit www.gourmia.com or call 888.552.003314
Nothing happens
when I try to vacuum
package
Air is not removed
from the bag
completely
e machine does
not turn to seal aer
vacuuming
Check the power cord if it is rmly plugged into the outlet.
Check the switch to see if it’s set to “O”.
See if the outlet is working by plugging in another appliance.
Untwist the Fuse Cap to check the clear tube. e clear tube
should be clear and not darkened. If the Fuse is darkened,
replace with a standard 10-amp Buss Fuse.
Make sure the bag is placed correctly inside the vacuum
chamber. It should not be covering the air intake.
To seal properly, the open end of the bag should be entirely
inside vacuum chamber area.
Make sure there is nothing on the foam seal gaskets or lid.
Wipe clean, and smooth them back into place.
Vacuum bag may have a leak. To test, seal the bag with some
air, submerge in water, and apply pressure. Bubbles indicate a
leak. Reseal or use another bag.
Use only the specic vacuum bag provided by the manufacturer.
ere may be folds, crumbs, grease or liquids. Reopen the bag,
wipe the top inside and smooth it out along the sealing strip
before resealing.
ere is a built in vacuum pressure sensor. e machine will
not seal automatically if the vacuum pressure inside the bag
is not able to reach to the correct vacuum pressure. Check
sealing strip and foam gasket for debris and correct position.
Wipe clean and smooth them back into place, and try again.
e foam seal gaskets on both the cover and on the base may
not be straight. Take it out of the groove, wash and dry it
thoroughly, or replace with a new foam gasket (at your nearest
service center).
Vacuum bag may have a leak. To test, seal the bag with some
air in it, submerge in water, and apply pressure. Bubbles
indicate a leak. Re-seal it or use another bag.
ere may be leaks along the seal which can be caused by
folds, crumbs, grease or liquids from the bag. Reopen the bag,
wipe the top inside and smooth it out along the sealing strip
before resealing.
TROUBLE SHOOTING

TROUBLE SHOOTING
15User Manual | Vacuum Sealer | GVS1415
Air is in the bag,
aer being sealed
e bag is melting
e canister
does not vacuum
Leaks along the seal which can be caused by folds, crumbs,
grease or liquids. Reopen bag, wipe the top inside of the bag
and smooth it out along the sealing strip before resealing.
e release of natural gases or fermentation form foods
(such as fresh fruits and vegetables) may occur. Open the bag,
if you think the food has begun to spoil, discard the food.
Check the bag for a puncture or hole which may have
released the vacuum. Do not vacuum package hard items
with sharp points (like bones or cracks of nut shell).
If the sealing strip or sealing element overheats and melts
the bag, it may be necessary to li the lid and allow sealing
strip or heating element to cool for a few minutes.
Make sure the adaptor is tightly connected to the appliance
and to the canister.
Check if the knob of the canister is in the “seal” position.
Press the lids on the hose adaptor at the very beginning of
vacuuming to avoid leaking from the cover seal.
Check if there are any damages in the canister or canister lid,
if yes, replace.
Check the function of the vacuum sealer.
Make sure the rim of the canister is clean
If all the above are in place, please contact your local
authorized dealer.

MAINTENANCE KIT INSTRUCTIONS
For customer service visit www.gourmia.com or call 888.552.003316
MAINTENANCE
MAINTENANCE KIT INSTRUCTIONS
Replacing the gasket:
1. Turn the switch to “O” and unplug the Power Cord from the outlet.
2. Make sure the machine is completely cooled o.
3. Open the Vacuum Lid.
4. Remove the gasket from the groove on the underside of the Vacuum Lid.
5. Remove the gasket from the groove in the Vacuum Chamber.
6. Set a new gasket on the groove in the Vacuum Chamber. Place the seal into the groove
with your ngers until its in place.
7. Position a new gasket into the groove in the Acrylic Vacuum Lid. Press the seal into the
groove with your ngers until its in place.
Replacing the Teon tape:
1. Turn the switch to “O” and unplug the Power Cord from the outlet.
2. Make sure the machine is completely cooled o.
3. Open the Vacuum Lid.
4. Peel either end of the Teon Tape covering the Seal Bar- Heating Element with a
ngernail or sharp-edged tool until it lis slightly. Grasp the loose end and slowly pull the
Teon Tape back until its fully removed.
6. Remove the backing from a new wide strip of Teon Tape for the Seal Bar- Heating
Element. make sure nothing attaches itself to the Teon Tape while the adhesive side is
exposed.
7. Stick the le end of the Teon Tape to the at area on the Plastic Vacuum Chamber just
le of the Seal Bar- Heating Element. Apply the Teon Tape from le to right over the Seal
Bar- Heating Element. Make sure there are no wrinkles or folds in the Teon Tape once
applied. e Teon Tape should fully cover the Seal Bar- Heating Element.

WARRANTY & SERVICES
is Limited Warranty is for one full year from the date of purchase
and requires proof of purchase from an authorized seller. It is applicable
to the original purchaser only and is not transferable to a third party
user. Repair or replacement of defective parts is solely at Gourmia’s
discretion. In the event that repair isn’t possible, Gourmia will replace
the product/part. If product repair/replacement won’t suce, Gourmia
has the option of refunding the cash value of the product or component
returned.
Product defects not covered under the Warranty provisions include
normal wear and damage incurred from use or accidental negligence,
misuse of instruction specications or repair by unauthorized parties.
Gourmia is not liable for any incidental or consequential damages
incurred by such circumstances.
Only valid within the United States.
For Customer Service, Questions or Comments
gourmia.com • inf[email protected] • 888.552.0033
Mon-u 9:00 a.m. to 6:00 p.m. Et
Fri 9:00 a.m. to 3:00 p.m. Et
Languages: English, Spanish, French
Register your product at
www.gourmia.com/warranty
Warranty & Services

We’d love to hear from you!
888.552.0033
info@gourmia.com