INTRODUCTION & WARRANTY
WARNING
TECHNICAL DATA
WATTS
LUMENS
BEAM ANGLE
CCT
MATERIAL
IP RATING
DIMENSION
MODEL
VT-84020
48W
5760 Lm
120°
SPHERE360°
3000K/4000K/6000K
Metal+Acrylic
IP20
Ø500xH80mm
INPUT VOLTAGE
AC: 220-260V, 50Hz
CRI
>80
SKU
24185, 24186, 24187
LIFE SPAN
20,000 Hours
ON/OFF CYCLE
>15,000 Times
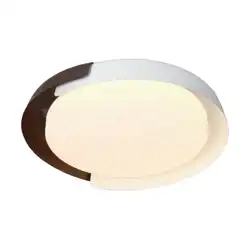
LED CEILING LIGHT
DIMMABLE & 3 IN 1 CCT
INSTRUCTION MANUAL
Thank you for selecting and buying V-TAC product. V-TAC will serve you the best. Please read these instructions careful-
ly before starting the installation and keep this manual handy for future reference. If you have any another query, please
contact our dealer or local vendor from whom you have purchased the product. They are trained and ready to serve you
at the best. The warranty is valid for 2 years from the date of purchase. The warranty does not apply to damage caused
by incorrect installation or abnormal wear and tear. The company gives no warranty against damage to any surface due
to incorrect removal and installation of the product. The products are suitable for 10-12 Hours Daily operation. Usage of
product for 24 Hours a day would void the warranty. This product is
warranted for manufacturing defects only.
• Please make sure to turn o the power before starting the installation.
• Installation must be performed by a qualified electrician.
• The light source contained in this luminaire shall only be replaced by
the manufacturer or his service agent or a similar qualified person.
• Proper grounding should be ensured throughout the installation.
• For Indoor Use only
Replaceable control gear
by a professional
Replaceable (LED Only) light
source by a professional
MULTI-LANGUAGE
MANUAL QR CODE
Please scan the QR code
to access the manual in
multiple languages.
IN CASE OF ANY QUERY/ISSUE WITH THE PRODUCT, PLEASE REACH OUT TO US AT: SUPPORT@V-TAC.EU
FOR MORE PRODUCTS RANGE, INQUIRY PLEASE CONTACT OUR DISTRIBUTOR OR NEAREST DEALERS.
V-TAC EUROPE LTD. BULGARIA, PLOVDIV 4000, BUL.L.KARAVELOW 9B
COLOR
CHANGING
3-IN-1
*This product contains a light source of energy eciency class<E>, where
<E> shall be replaced by the energy class of the contained light source.
REMOTE & BLUETOOTH
CONTROL
Lamp Smart Pro
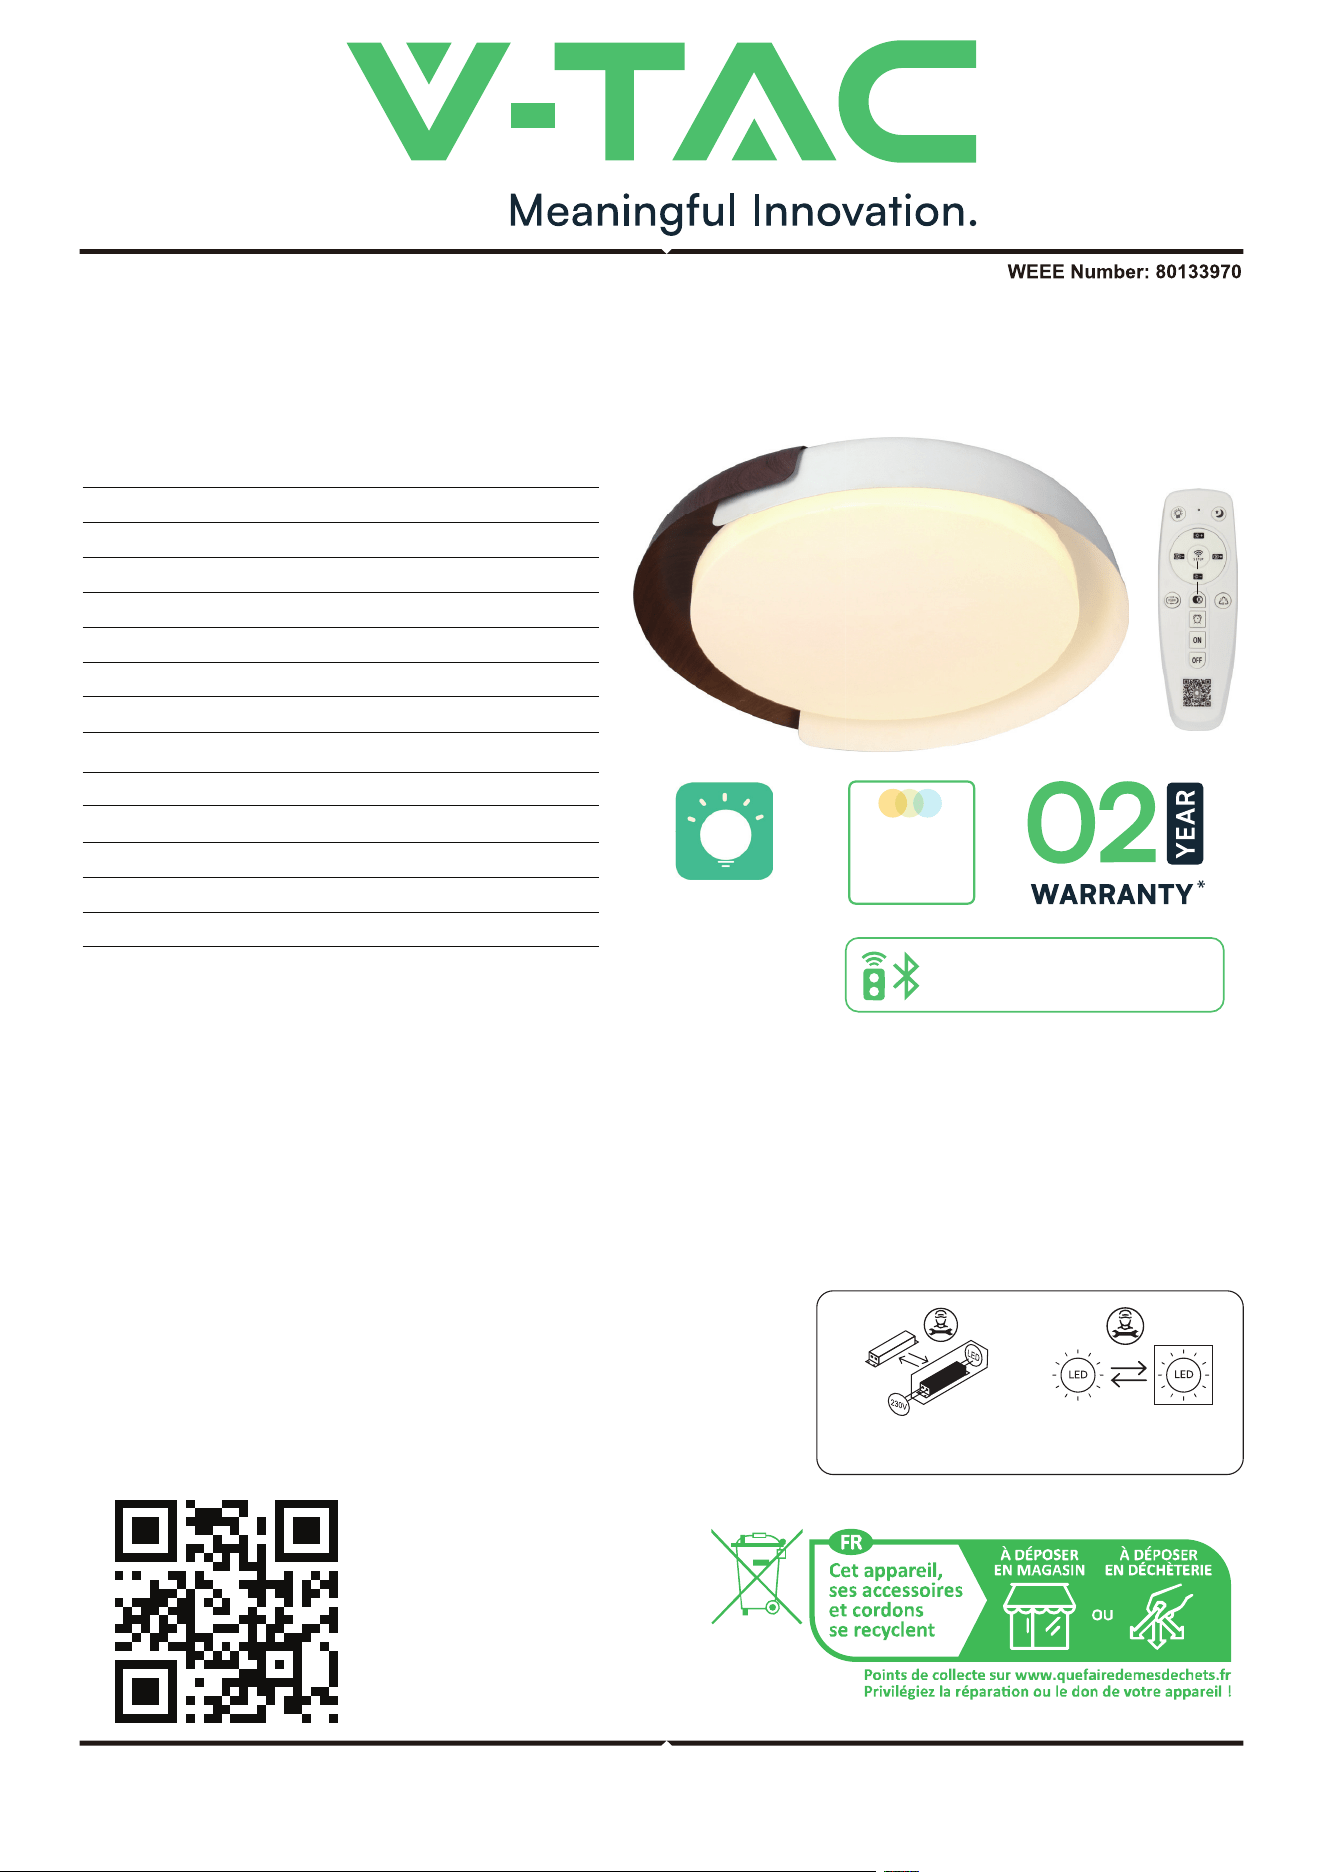
INSTALLATION DIAGRAM
INSTALLATION INSTRUCTIONS
WIRING DIAGRAM
Ground Supply Can be Green-yellow
Live Supply Can be Red or Brown
Neutral Supply can be Blue or Black
L
N
1
2
4
3
This marking indicates that this
product should not be disposed
of with other household wastes.
Caution, risk of electric shock.
1. Switch o the power before starting the installation.
2. Use screws to fix mounting bar to the junction box.
3. Make the wire connections with connectors.
• Connect the live wire (L) from fitting to the live wire from main power supply.
• Connect the neutral wire (N) from fitting to the neutral wire from main power supply.
• Connect the earth wire from fitting to the earth wire from main power supply.
• Please pay close attention and make sure the wires are not exposed outside when wiring connections.
4. Use screws to fix canopy to mounting bar.
5. Check if the installation is completed and turn on the power.
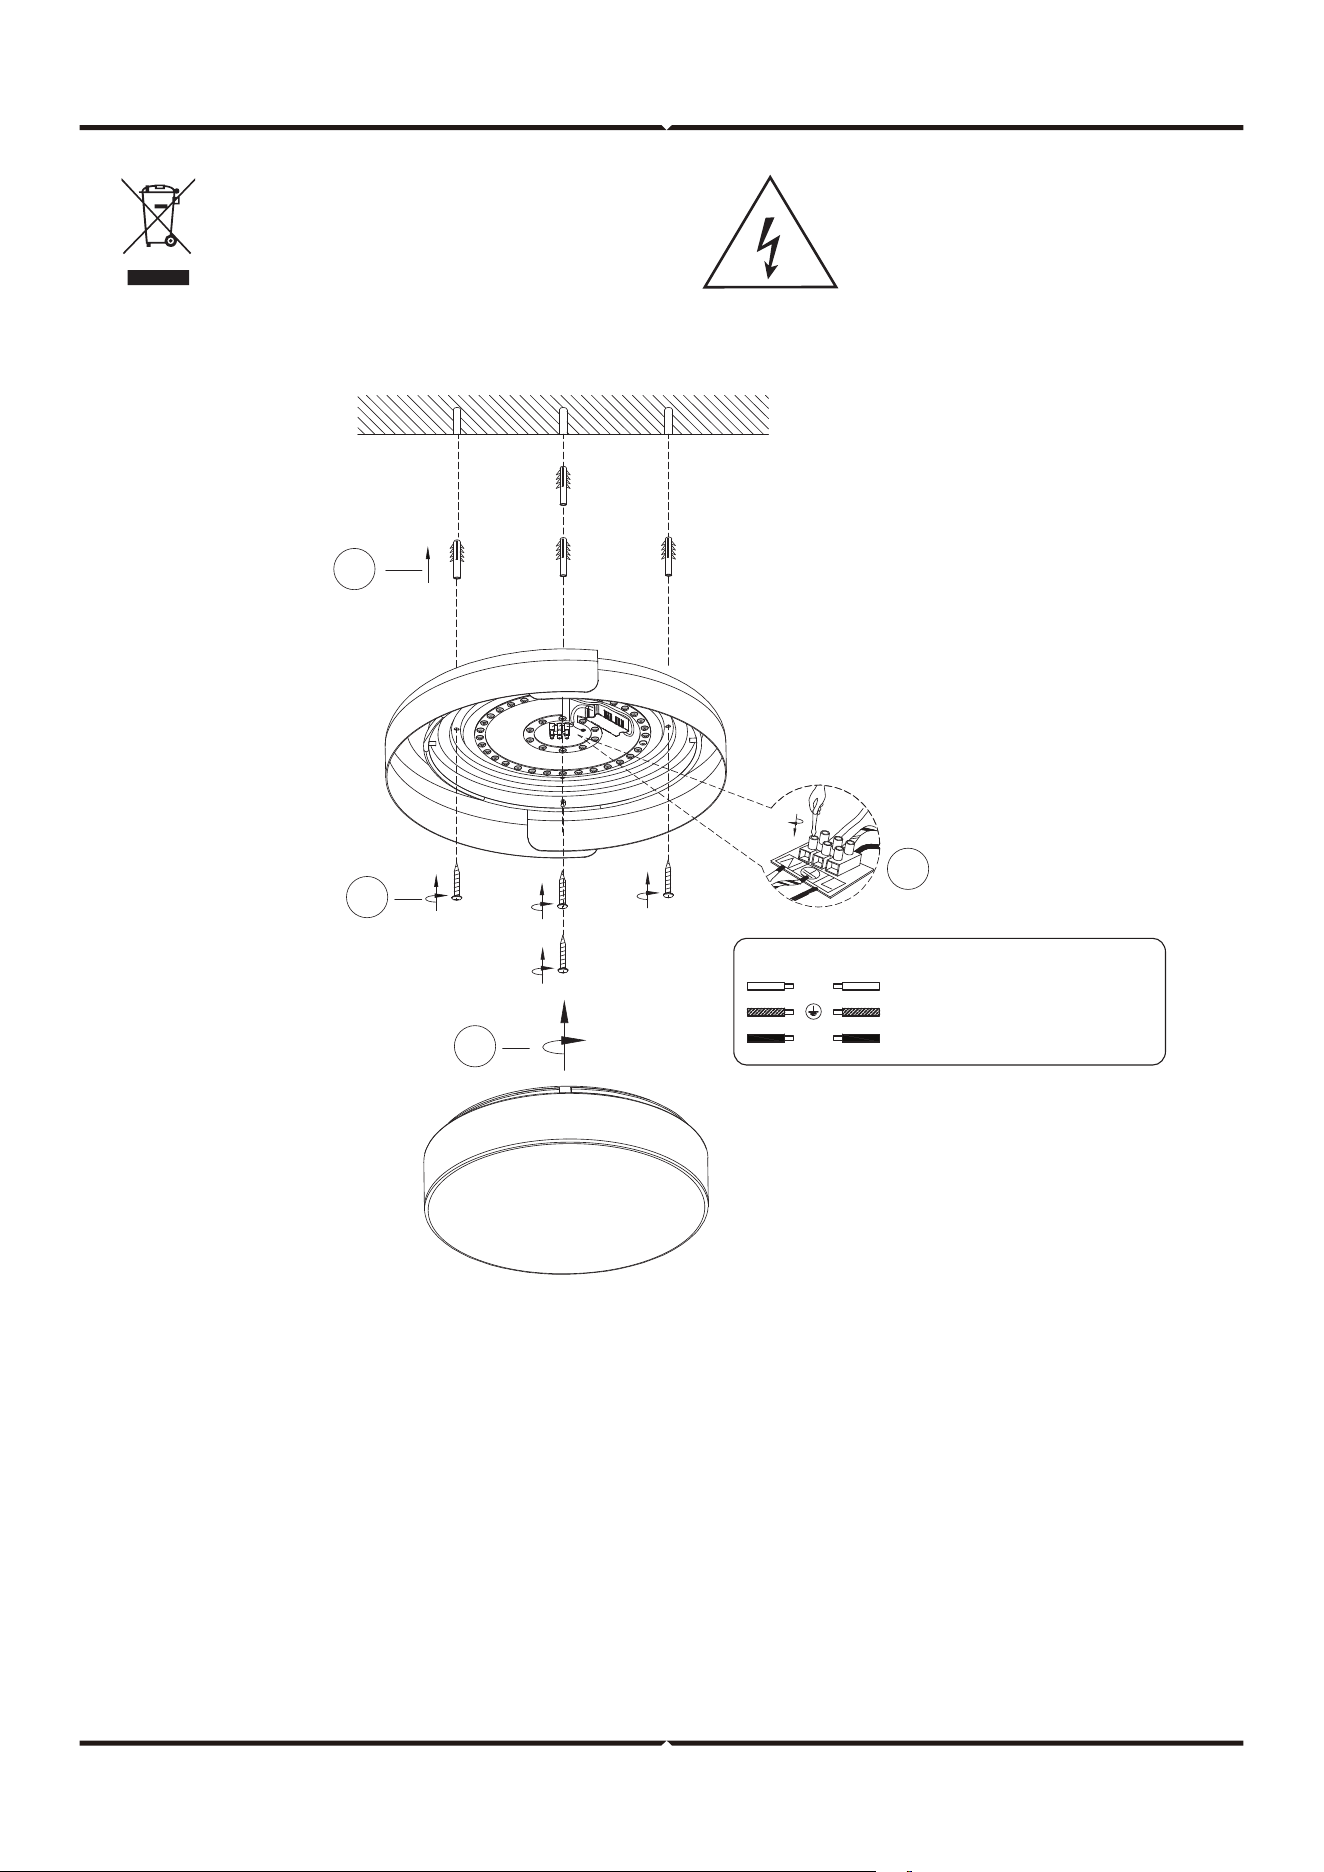
DISMANTLING INSTRUCTIONS
Note: Light source removal will void the warranty
(For Market surveillance team only)
1
2
3
5
4
6
1. Disassemble the lampshade. 2. Remove the SM terminals on the driver and LED strip.
3. Remove the screws of the LED strip.
4. Install a new LED strip and secure it with screws.
5. Connect the SM terminal of the
driver and LED strip.
6. Install the lampshade.
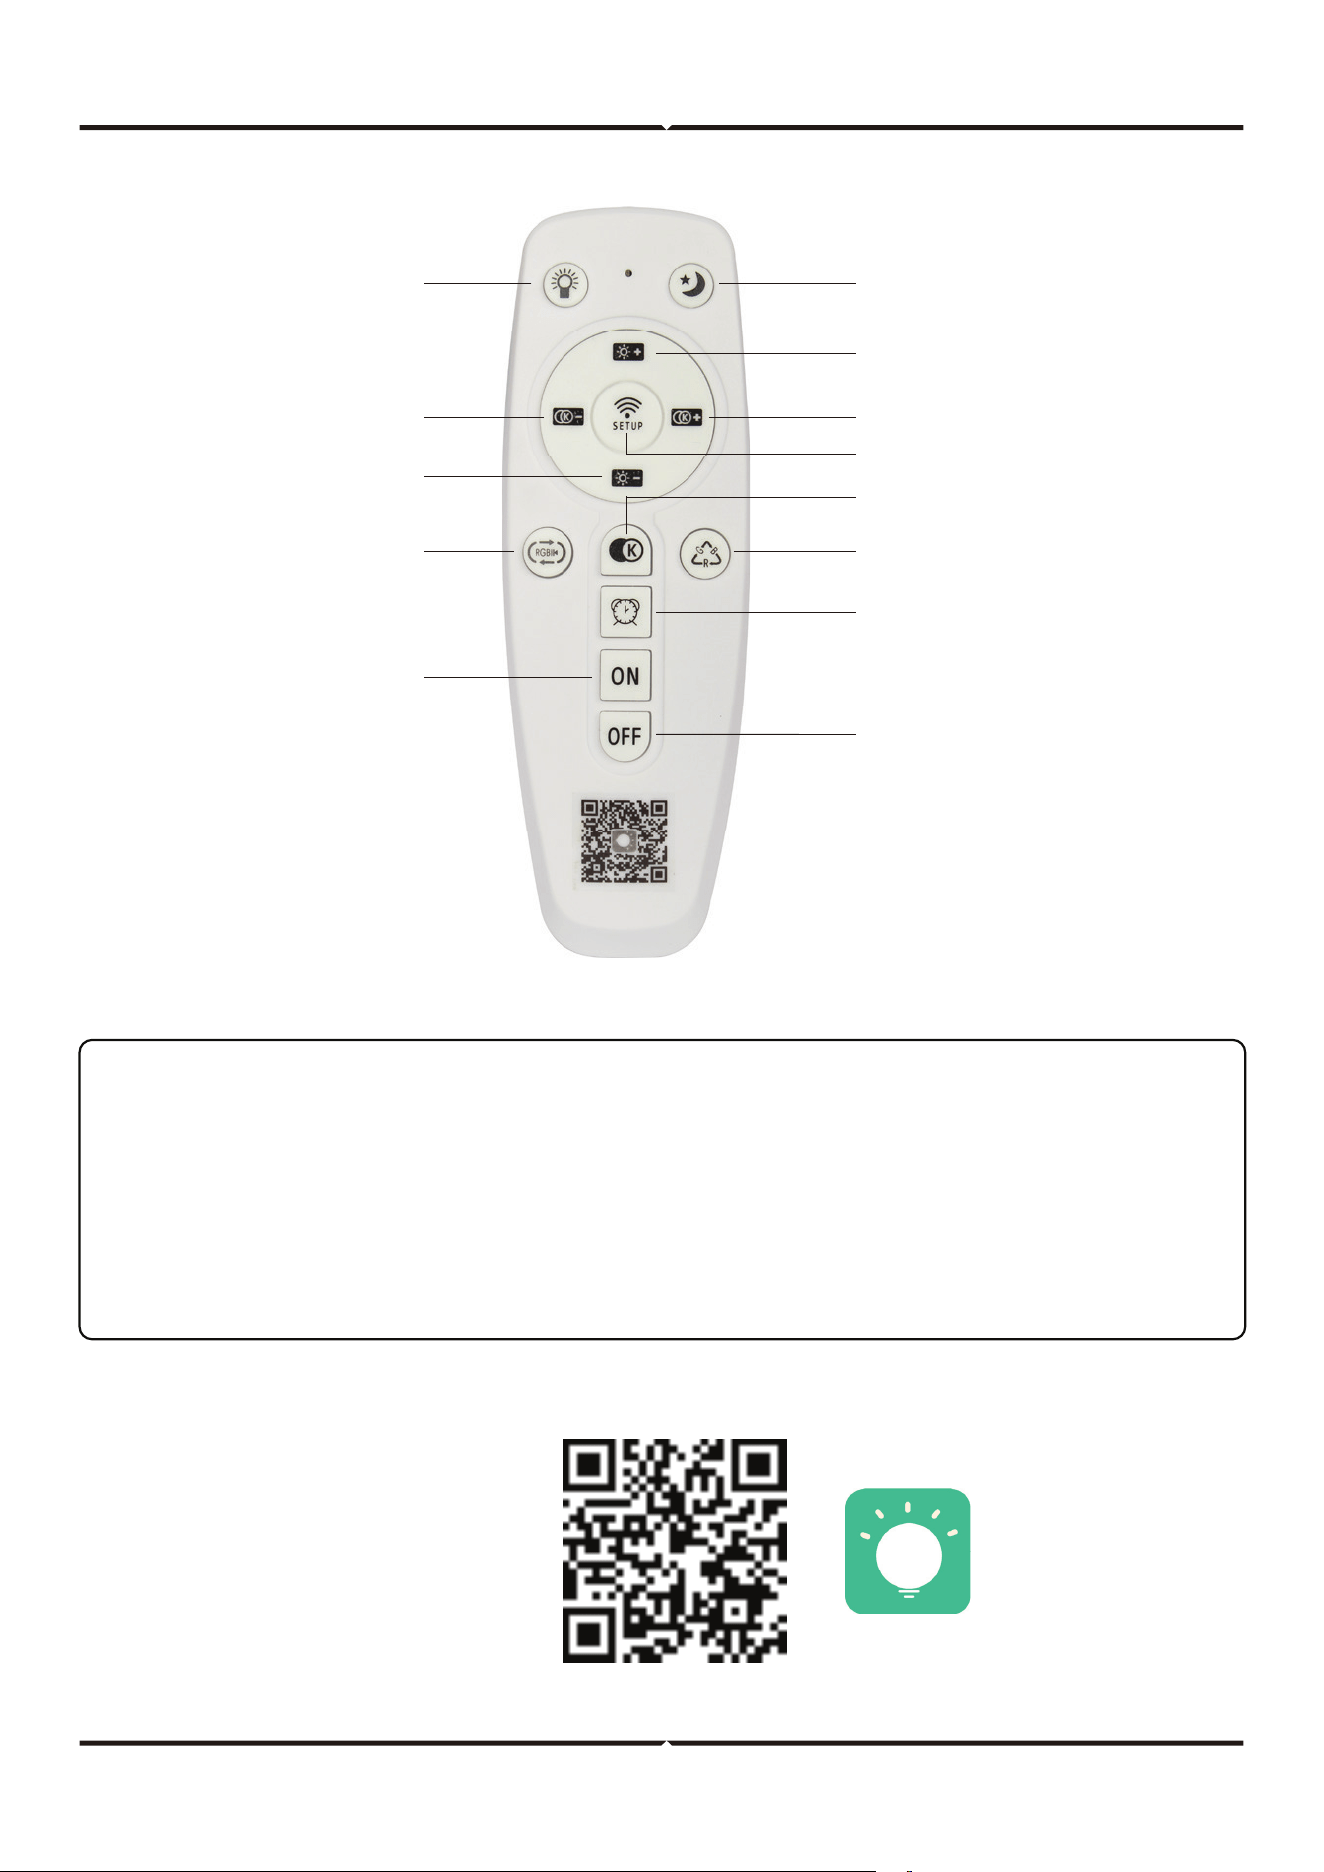
REMOTE CONTROL INSTRUCTIONS
APP INSTALLATION - LAMPSMART PRO
LampSmart
Pro
To install the LampSmart Pro
application, scan the provided
QR code using your mobile
device. Follow the on-screen
instructions to complete the
installation process.
Note: AAA battery required for remote control (battery not included).
REMOTE CONTROL SAFETY INSTRUCTIONS
• Before using this product, make sure that all parts are configured correctly according
to the instructions in the attached instruction.
• The product should not be used by persons under 5 years of age without supervision
by a parent or guardian.
• Ensure that the power batteries are configured correctly and have the appropriate
parameters as specified by the manufacturer.
Assistant light
ON/OFF
Night light
Brightness up
Color Temperature up
Match/Cancel Match
Change color temperature
Manual Change RGB
Timing
Turn O
Turn On
Automatic Change
RGB
Brightness
Color Temperature
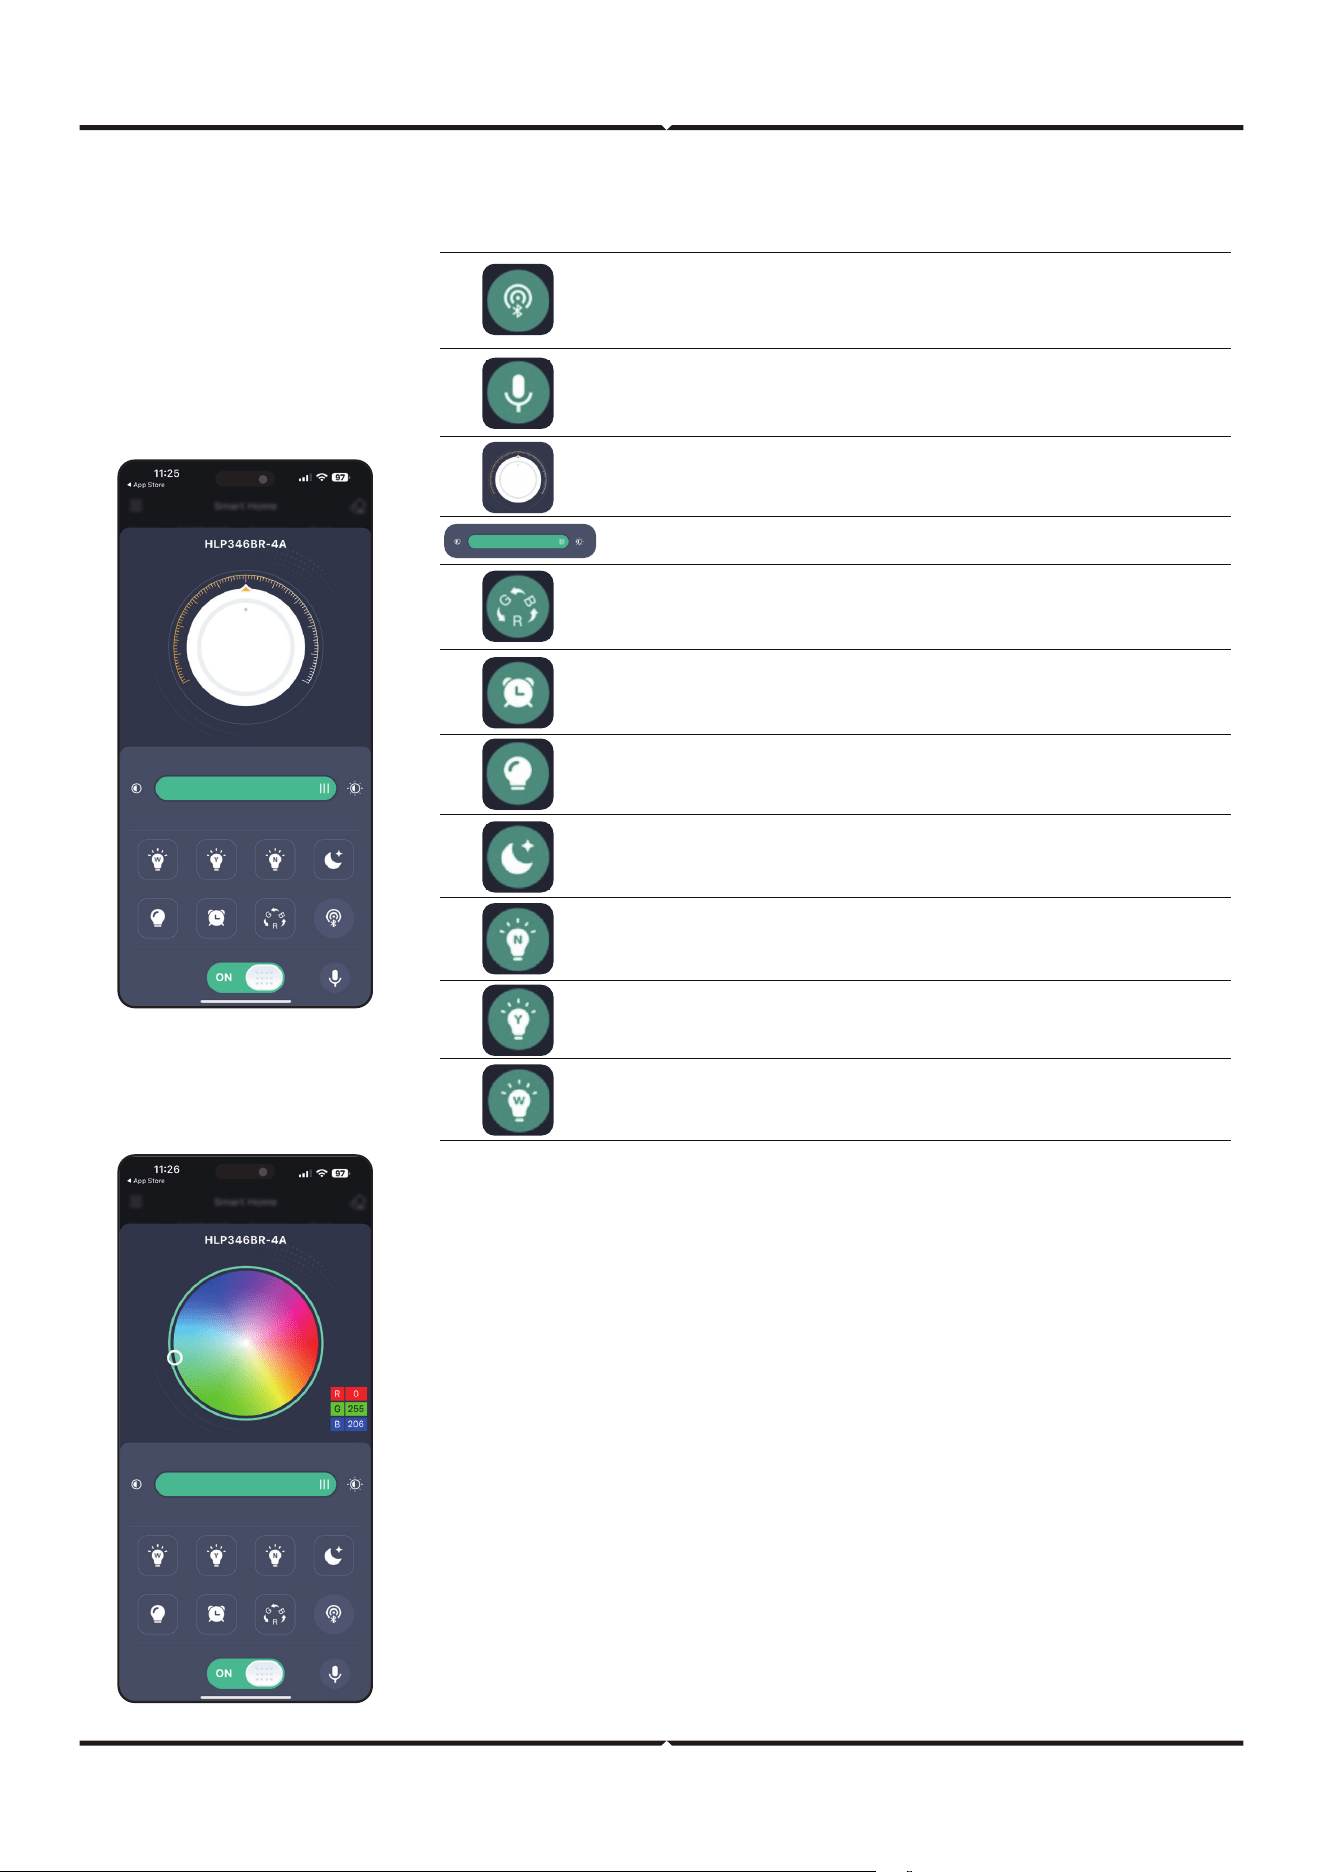
APP CONTROL INSTRUCTIONS
• Swipe the upper part of the page to the le to switch
to the RGB lamp control page. (The RGB feature is not
supported by this product)
• The RGB lamp control page can adjust the color of the
RGB lamp. (Not supported)
• The RGB lamp control page can adjust the brightness
of the RGB lamp. (Not supported)
Pair button. Click this button within 5 seconds aer the device is powered on.
If the device flashes or beeps, it means that the phone has been successfully
paired with the device, and then the device can be controlled through the
application.
The state of the lamp can be adjusted by voice commands. Currently only
Chinese and English are supported.
Change the color temperature of the light.
Change the brightness of the light.
Aer clicking the light color will change in a cycle. (Not supported)
Click to select a time to turn o the device.
Click to turn on the auxiliary light. (Not supported)
Night mode. The white light and the yellow light will light up at the same
time, but only at 10% of the maximum brightness.
When clicked, the white light and yellow light will light up at the same time,
and the brightness will be the maximum brightness.
When clicked, only yellow light will light up, and the brightness will be the
maximum brightness.
When clicked, only white light will light up, and the brightness will be the
maximum brightness.
Unpair Button: Click this button within 5
seconds when the device is powered on. If the
device flashes or beeps, it means that the phone
is unpaired with the device and the phone will
not be able to control the device.
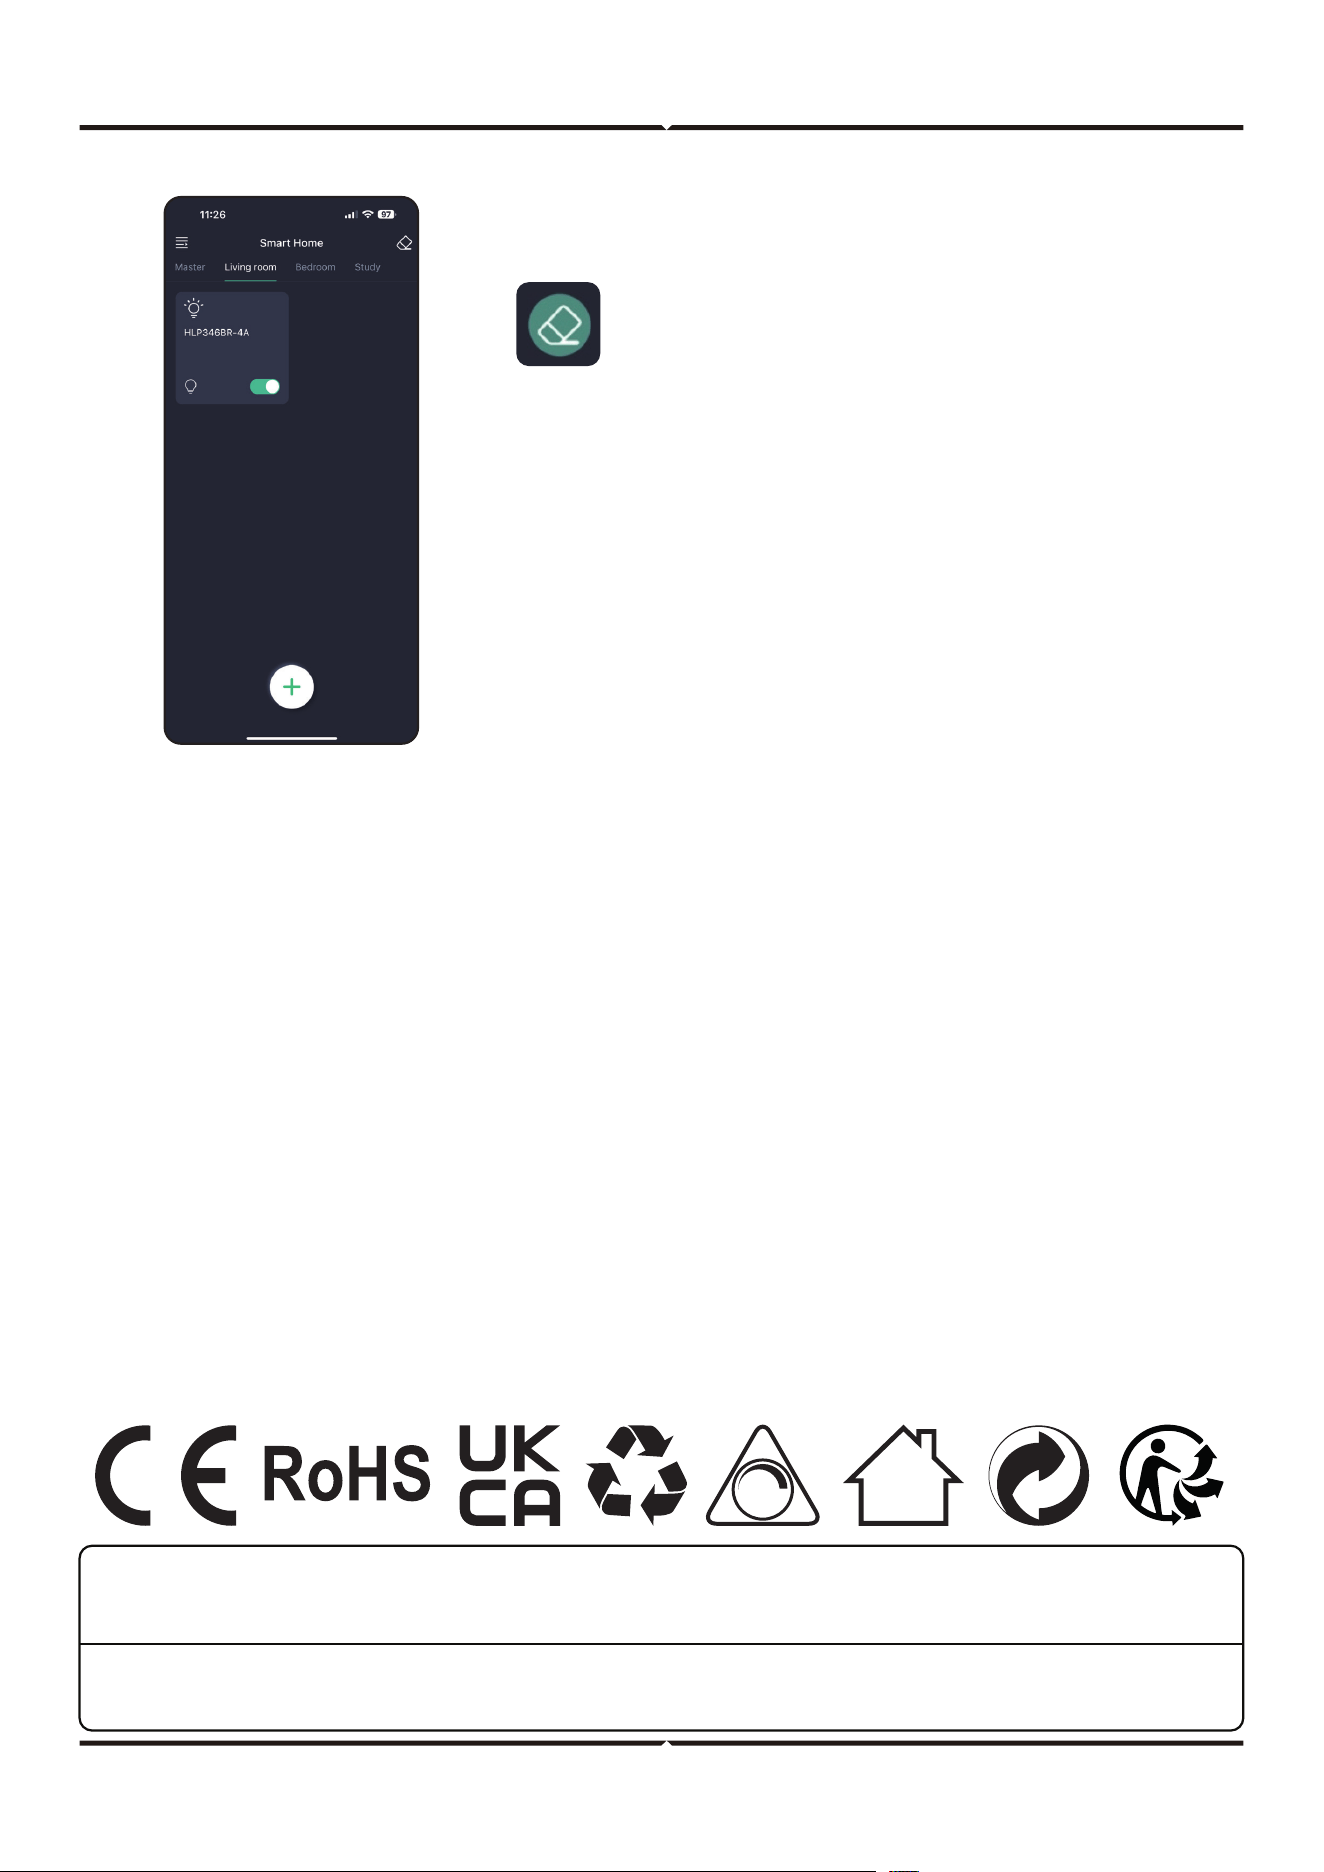
MASTER: Room control page. When there are devices in the
room, all the devices in the room can be controlled in this
page. As the above example, all the device in the living room
can be controlled.
When in the room page, long press the device card you can
delete the device or change the device name.
V-TAC UK LTD. IN CASE OF ANY QUERY/ISSUE WITH THE PRODUCT PLEASE REACH OUT TO US AT:
[email protected] V-TAC, 5A TUNGSTEN PARK, DOWNS ROAD, WITNEY, OXFORDSHIRE, OX29 0AX
V-TAC WEST EUROPE LTD. IN CASE OF ANY QUERY/ISSUE WITH THE PRODUCT, PLEASE REACH OUT TO US AT:
SUPPORT@V-TAC.EU FOR MORE PRODUCTS RANGE, INQUIRY PLEASE CONTACT OUR DISTRIBUTOR OR NEAREST DEALERS.
V-TAC WEST EUROPE LTD. GROUND FLOOR, 71 LOWER BAGGOT STREET, DUBLIN 02, IRELAND DO2 P593
