EN
MOBILE AIR CONDITIONER WI-FI
STRONGPACK
Translation of the original manual
SAC MT9040C
SAC MT9040C
A
B
°C / °F
1 2 3
46
5
8
4
5
2
3
1
6
7
8
9
10
11
12
7
C
D
°C / °F
1
2
6
7
8
9
3
4
5
1 2 4 653
7 8 9 1110 12 13
F
F1 F2 F3
F4 F5
E
2
1
3 4 5
7
6
1
G
G1 G2
I
H
H3
H5
H4
1
1
H1 H2
1
1
- 1 -
01/2024
2024, .
EN Mobile air conditioner Wi-Fi StrongPack
Important safety instructions
READ CAREFULLY AND STORE FOR FUTURE
USE.
This symbol indicates that not adhering to instructions
may result in death or serious injuries.
WARNING:
To prevent the death or injury of the user or other
persons or damage to property, the following
instructions must be adhered to. Incorrect use as a result
of not adhering to instructions may cause death, injuries
or damage.
• This appliance may be used by children 8 years of age and
older and by persons with physical or mental impairments or
by inexperienced persons, if they are properly supervised or
have been informed about how to use the product in a safe
manner and understand the potential dangers. Cleaning and
maintenance performed by the user must not be performed
by unsupervised children. Children must not play with the
appliance.
• If the power cord is damaged, it must be replaced by an
authorised service centre or by another similarly qualified
person, this will prevent the creation of a dangerous situation.
It is forbidden to use the appliance if it has a damaged power
cord.
• The appliance must be stored in a manner that prevents its
mechanical damage.

- 2 -
01/2024
2024, .
• The appliance must be stored in a well-ventilated location,
where the dimensions of the room correspond to the
dimensions specified for its operation.
• The appliance must be stored in a room where an open flame
is not continuously in use (e.g. running gas appliance) or where
there are sources of ignition (e.g. running electrical heating
element).
• Before connecting the appliance to a power socket, check
that the rated voltage on its rating label matches the electrical
voltage in the power socket.
• Connect the appliance only to a properly grounded socket.
• The power socket must be freely accessible so that it is
possible to quickly disconnect the power cord from the power
source if necessary.
• The appliance is designed for use at home, in offices and
similar types of areas. Do not use it in very dusty or humid
rooms such as laundries or bathrooms, in areas where
chemical or explosive substances are stored, in industrial
surroundings or outdoors.
• Do not place the appliance in the vicinity of an open flame or
appliances that are sources of heat.
• Do not place the appliance on unstable surfaces such as
carpets with very long and thick fibres.
• The appliance may only be used on a dry, stable, smooth and
horizontal surface.
• The appliance is equipped with travel wheels, so pay extra
attention when handling it so that it does not fall down stairs or
travel down from sloped areas. If necessary secure the wheels
using the stoppers.
• Only use original parts to assemble the appliance. Before
starting to assemble the appliance, make sure that it is turned
off and disconnected from the power socket.
- 3 -
01/2024
2024, .
• Prior to connecting the appliance to a power socket, make
sure that the appliance is correctly assembled according to the
instructions in this user’s manual.
• Do not touch the appliance with wet or damp hands. This
applies especially when it is connected to a power socket.
• Do not expose the appliance to dripping or spraying water or
submerge it in water or another liquid.
• Do not cover or insert anything into the air inlet or air outlet
openings. Otherwise, this could damage the appliance.
• During operation there needs to be sufficient space for air
circulation of at least 45 cm on all sides of the appliance.
• Do not expose yourself to a cold air current for a long time. This
could have a negative effect on your health.
• To turn the appliance on or off, always use the appropriate
buttons on the control panel or the remote control. Do not turn
off the appliance by disconnecting the power cord from the
power socket.
• Always turn off the appliance and disconnect it from the power
socket when leaving it without supervision, when not using it
and before moving, disassembling or cleaning it.
• Do not attempt to remove the outer case of the appliance.
• Disconnect the appliance from the power socket by pulling on
the plug, never pulling on the power cord. Otherwise, this could
damage the power cord or the socket.
• In the event that the power cord or power plug are damaged in
any way, do not use the appliance.
• Store the appliance in a vertical position. It may be transported
in a vertical position or tilted on the sided. If you have already
used the appliance, check that all the condensate has been
drained. After transporting it, wait at least 1 hour before using
the appliance.

- 4 -
01/2024
2024, .
• Do not use the appliance if it is not working correctly, if it has
been damaged or has been submerged in water. To avoid a
hazardous situation arising, do not repair the appliance yourself
or modify it in any way. Have all repairs performed at an
authorised service centre. By tampering with the appliance,
you risk voiding your legal rights arising from unsatisfactory
performance or quality warranty.
• Installation must be performed in accordance with the
installation instructions. Incorrect installation may result in a
water leak, injury by electrical shock or fire.
• To prevent the risk of fire or injury by electrical shock, do not
use this appliance with a timer or any another similar device
that could spontaneously start this appliance.
• The appliance must be installed in accordance with national
electrical codes.
• Only use this product for the purposes that are described in
this user’s manual. Otherwise, this may result in damage or
excessive noise and vibrations.
• Use only the accessories and components that are supplied
together with the appliance and the tools explicitly intended for
its installation. The use of nonstandard parts and accessories
may result in a water leak, injury by electrical shock, fire, injury
or damage to property.
• DO NOT ADJUST the length of the power cord of the unit and
do not use an extension cord for its power supply.
• DO NOT CONNECT the unit to a power socket to which other
electrical appliances are already connected. The incorrect
selection of an electrical power supply may result in a fire or
injury by electrical shock.
• Do not cover the cable with a carpet. Do not place carpets,
fillets or any other floor coverings on the power cord. Do not
locate the cable underneath furniture or appliances. Lead the
- 5 -
01/2024
2024, .
cable where nothing will ride over it and where nobody can trip
over it. If this occurs, immediately disconnect the unit from the
power socket.
• In the event that the unit is tipped over during use, turn it off
and immediately disconnect it from the main power supply.
Visually check that the unit has not been damaged in any way.
In the event of any doubts that the unit has been damaged
in any way, seek assistance from a technician or customer
service.
• The power supply must be disconnected during a thunder
storm to prevent damage to the appliance in the event of a
lightning strike.
• Disconnect the power supply to the appliance if it makes a
strange noise or if an odour or smoke is emitted.
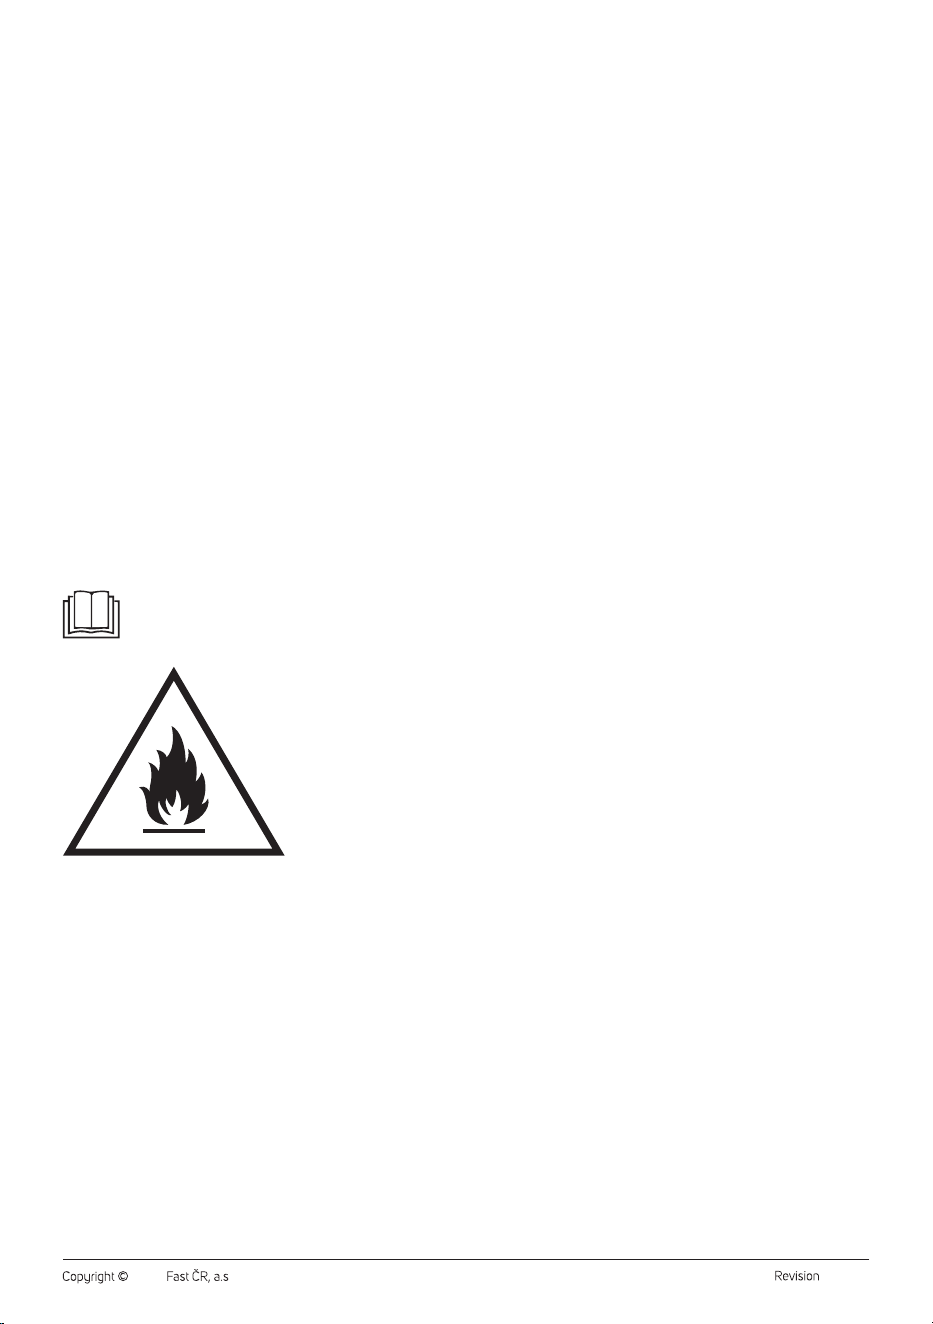
Read this user‘s manual.
Warning:
Fire hazard.
SPECIFIC INFORMATION FOR APPLIANCES USING
REFRIGERANT GAS R290
• Carefully study any warnings.
• For defrosting and cleaning, do not use any other tools than
those recommended by the manufacturer.
• This appliance must be located in an environment that has no
continuously running fire sources (for example an open fire, a
gas appliance or electrical appliances).
• Do not perform any drilling and do not burn it.

- 6 -
01/2024
2024, .
• Refrigerant gases may be odourless.
• This appliance must be located in rooms with an area greater
than 12,5 m
2
.
• This appliance contains approx. 180 g of refrigerant gas R290.
• R290 is a refrigerant gas that meets European environmental
protection directives. Do not make holes or drill into any part of
the cooling circuit.
• The room in which this appliance is installed, operated or stored
must prevent the accumulation of such leaked refrigerants,
that could be the cause of explosion or fire as a result of the
refrigerant igniting following the start-up of electrical heaters,
cookers or other sources of ignition.
• The appliance must be stored in such a manner that its
mechanical damage is prevented.
• Persons working with or repairing cooling circuits must have
appropriate authorisation issued by an authorised institution
that certifies this person’s competence to work with refrigerants
in accordance with the specific assessment of the association
for this sector.
• Maintenance tasks must be performed solely on the basis
of the recommendations of this appliance’s manufacturer.
Maintenance and repair tasks that required the contribution
of other qualified expert personnel may only be performed
under the supervision of specialised experts in the flammable
refrigerants sector.
• Check the rating label for the type of refrigerant gas used in
your appliance.
• Do not cover the vents.
• Follow the national gas regulations.
- 7 -
01/2024
2024, .
Special precautions for the UV-C function
UV-C lamp
Voltage: 12 V
Watt: 2 W
WARNING: This appliance contains UV-C light. Do not look
into the light of the UV-C lamp or point the UV-C lamp into your
eyes.
Warning:
• Read the maintenance instructions before removing
the cover. Only qualified personnel may perform this
operation.
• Under normal operating conditions, the user does not
need to perform any maintenance on the UV-C light.
• If there is a fault with the UV-C light, contact an
authorized service center. Maintenance may only be
performed by qualified personnel.
• The appliance must be disconnected from the power
source before changing the UV-C light.
• The appliance must be disconnected from the power
source before opening or removing access panels
marked with the symbol “ULTRAVIOLET RADIATION
HAZARD for USER MAINTENANCE”.
• Do not use UV-C light outside of the device.
• Unintentional use of the appliance or damage to the
cover can lead to the release of dangerous UV-C
radiation. Even in small doses, UV-C radiation can
cause damage to the eyes and skin.
• An appliance that is obviously damaged must not be
operated.
• Protective elements of UV-C lights bearing the
ULTRAVIOLET DANGER symbol must not be
removed.
- 8 -
01/2024
2024, .
• Thank you for purchasing aSENCOR brand product and we hope that
you will be happy with it.
• Prior to using this appliance, please read the user’smanual
thoroughly, even in cases, when one has already familiarised
themselves with previous use of similar types of appliances. Only use
the appliance in the manner described in this user’smanual. Keep
this user’smanual in asafe place where it can be easily retrieved for
future use.
• We recommend saving the original cardboard box, packaging
material, purchase receipt and responsibility statement of the vendor
or warranty card for at least the duration of the legal liability for
unsatisfactory performance or quality. In the event of transportation,
we recommend that you pack the appliance in the original box from
the manufacturer.
. . . . . . . . . . . . . . . . . . . . . . . . . . . . . . . . . . . . . . . . . . . . . . . . . . . . . . . . . . . . . . . . . . . .
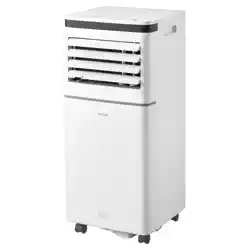
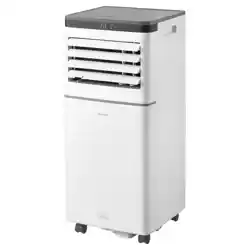
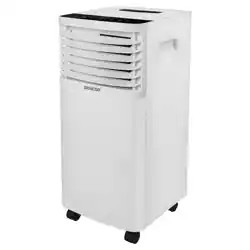
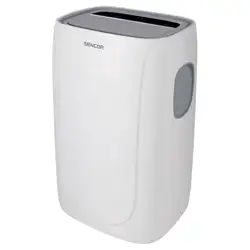
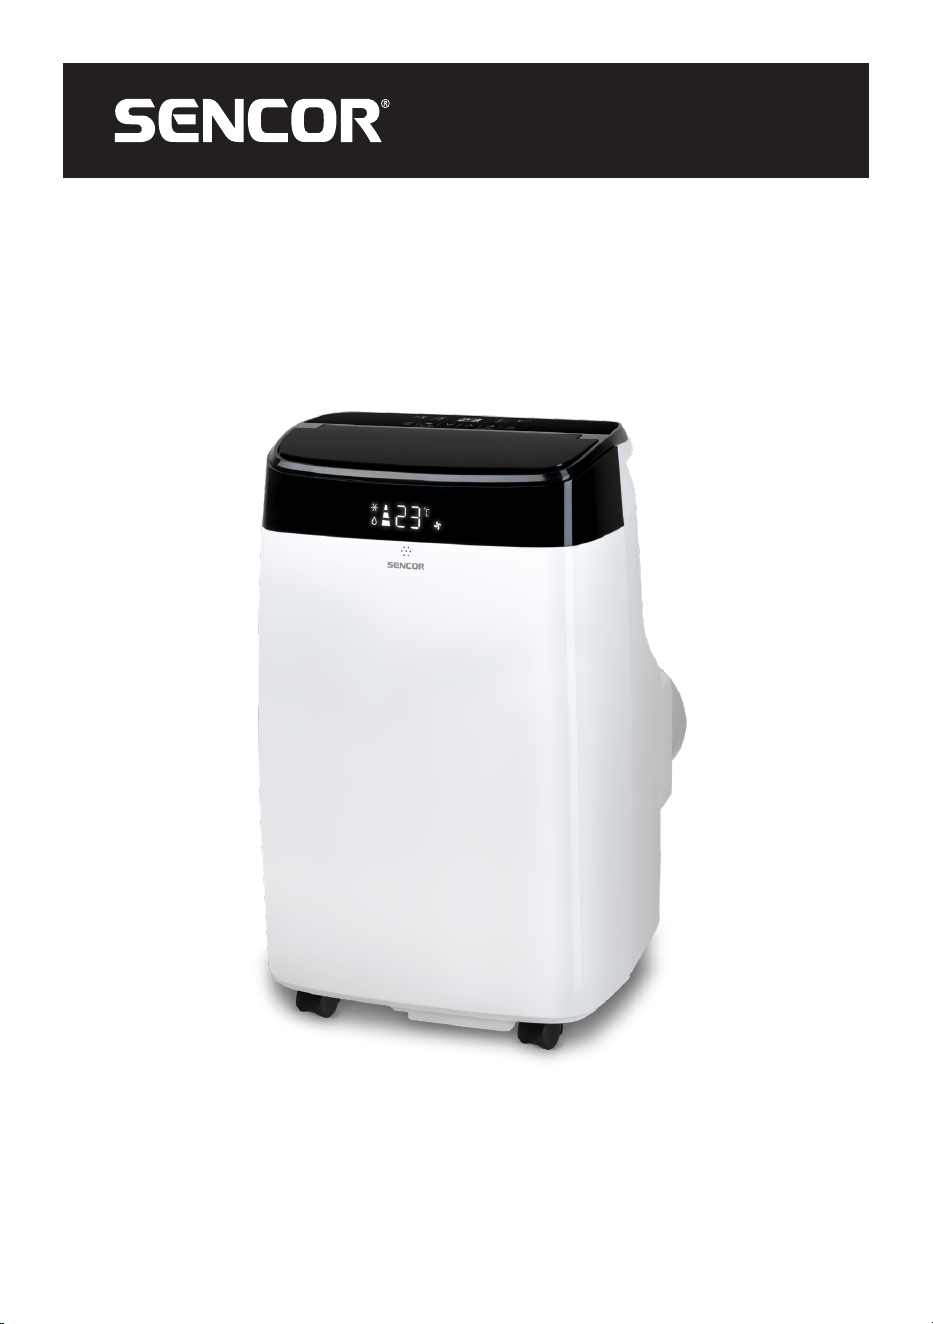
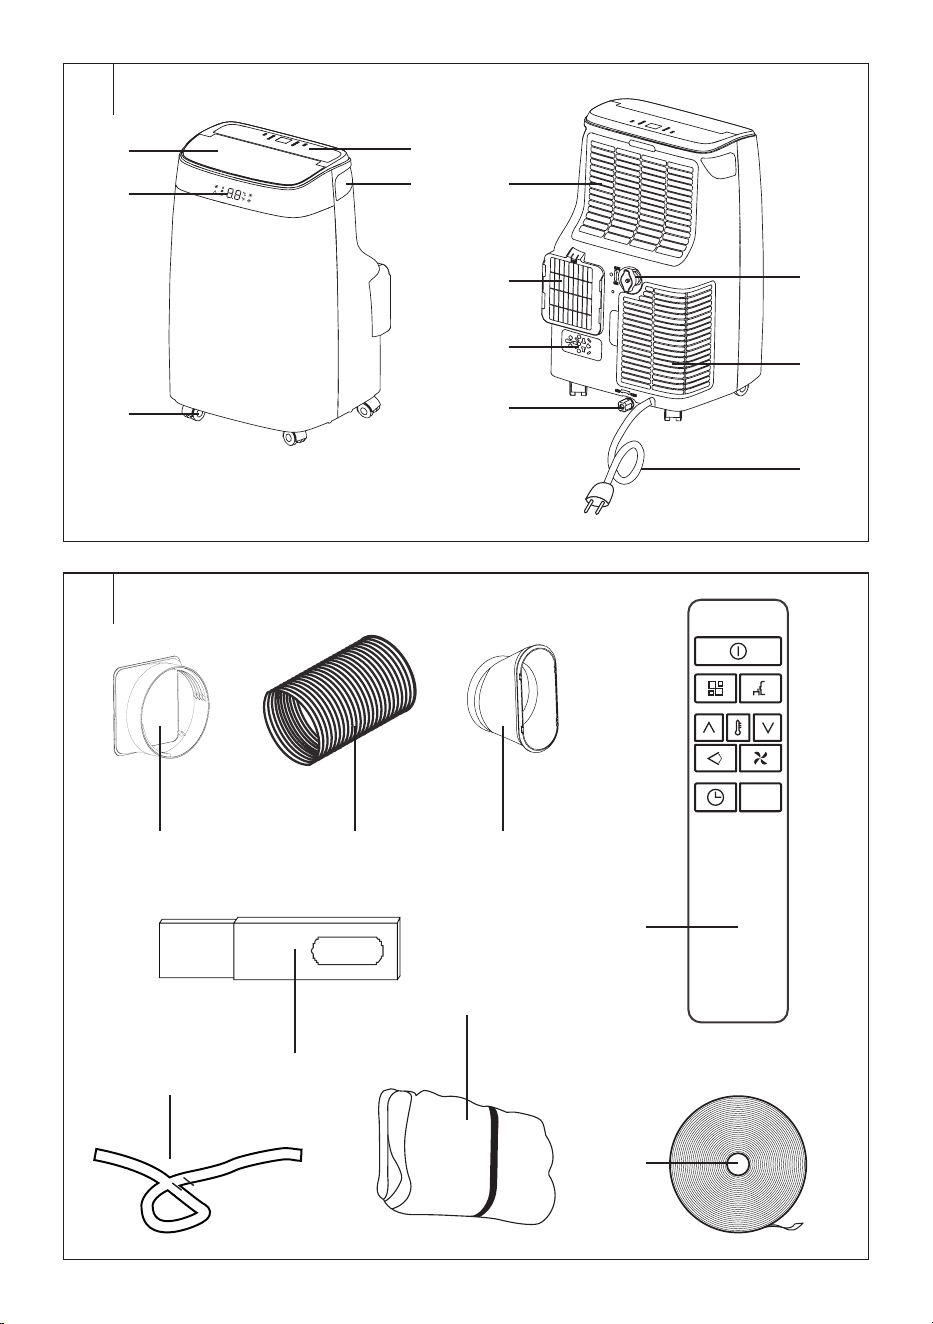
DESCRIPTION OF THE APPLIANCE
A1 Air outlet cover
A2 Display
A3 Castors
A4 Control panel
A5 Protective grille of air inlet with
filter
A6 Protective grille of air outlet
A7 Air outlet for connecting a
flexible hose
A8 Power cord plug holder
A9 Bottom drain outlet
A10 Top drain outlet
A11 Protective grille of air inlet with
filter
A12 Power cord
. . . . . . . . . . . . . . . . . . . . . . . . . . . . . . . . . . . . . . . . . . . . . . . . . . . . . . . . . . . . . . . . . . . .
DESCRIPTION OF ACCESSORIES
B1 Adapter for connection to air
outlet
B2 Flexible air exhaust hose
B3 Window connection adapter
B4 Window insert
B5 Remote control
B6 Drain hose
B7 Textile window seal kit
B8 Velcro
. . . . . . . . . . . . . . . . . . . . . . . . . . . . . . . . . . . . . . . . . . . . . . . . . . . . . . . . . . . . . . . . . . . .
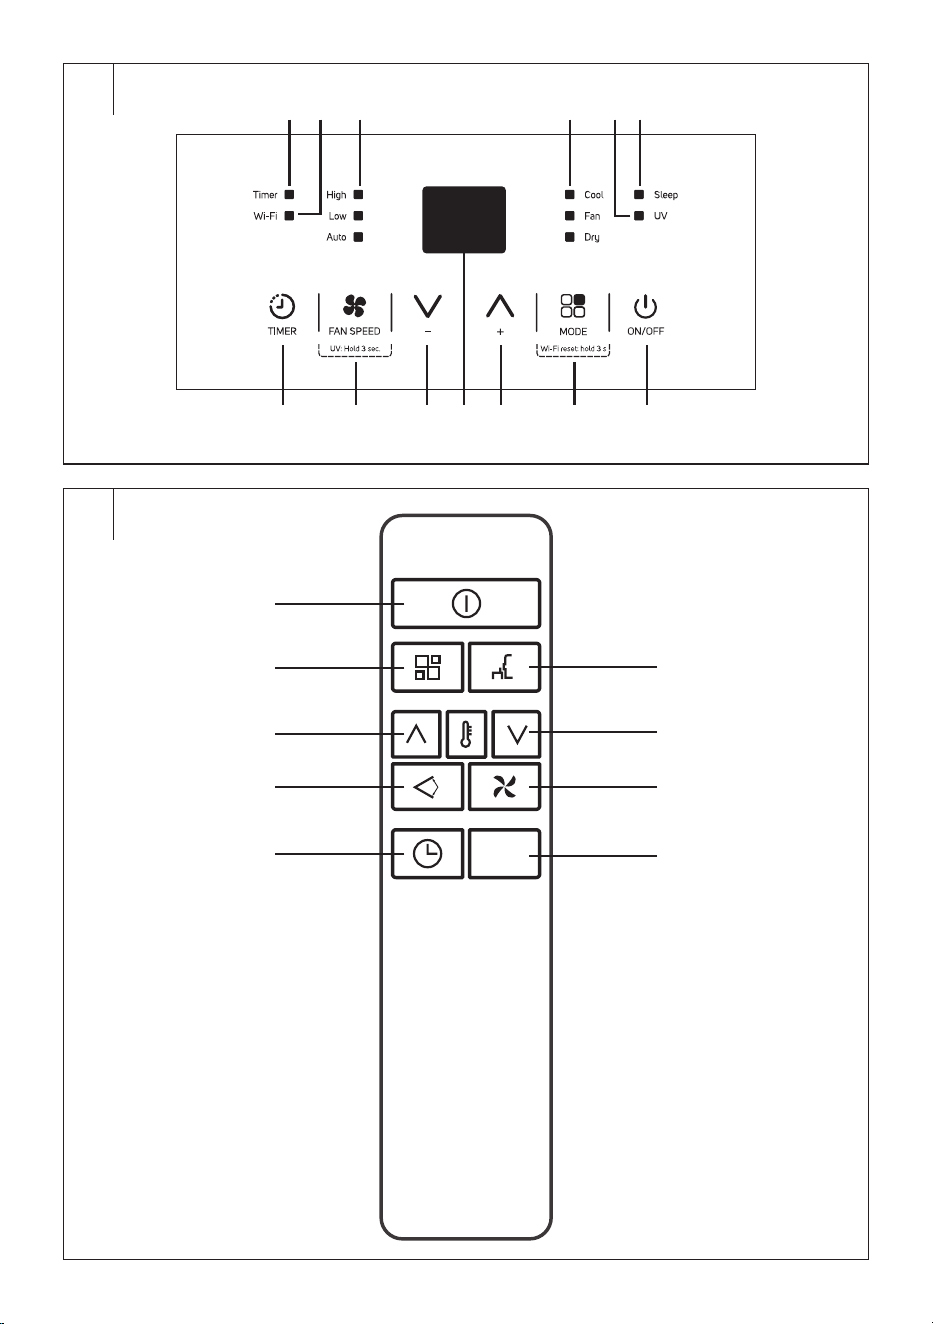
DESCRIPTION OF CONTROL PANEL
C1 Timer indicator
C2 Wi-Fi indicator
C3 Fan speed indicators
C4 Operating mode indicators
(cooling/dehumidification/fan)
C5 UV-C function indicator
C6 Sleep mode indicator
C7 TIMER button for setting the
timer
C8 FAN SPEED button for setting
the fan speed
C9 – button
C10 Numeric display of the control
panel
C11 + button
C12 MODE button for selecting an
operating mode
C13 STAND-BY button for turning
on/off
. . . . . . . . . . . . . . . . . . . . . . . . . . . . . . . . . . . . . . . . . . . . . . . . . . . . . . . . . . . . . . . . . . . .
REMOTE CONTROL
D1 button for turning on/off
D2 button for selecting an
operating mode
D3 button for increasing the
temperature
D4 button for turning on/off
the cover
D5 button for setting the timer
D6 button for turning on/off the
sleep mode
D7 button for decreasing the
temperature
D8 button for setting the fan
speed
D9 °C/°F° button for changing
the temperature units
. . . . . . . . . . . . . . . . . . . . . . . . . . . . . . . . . . . . . . . . . . . . . . . . . . . . . . . . . . . . . . . . . . . .
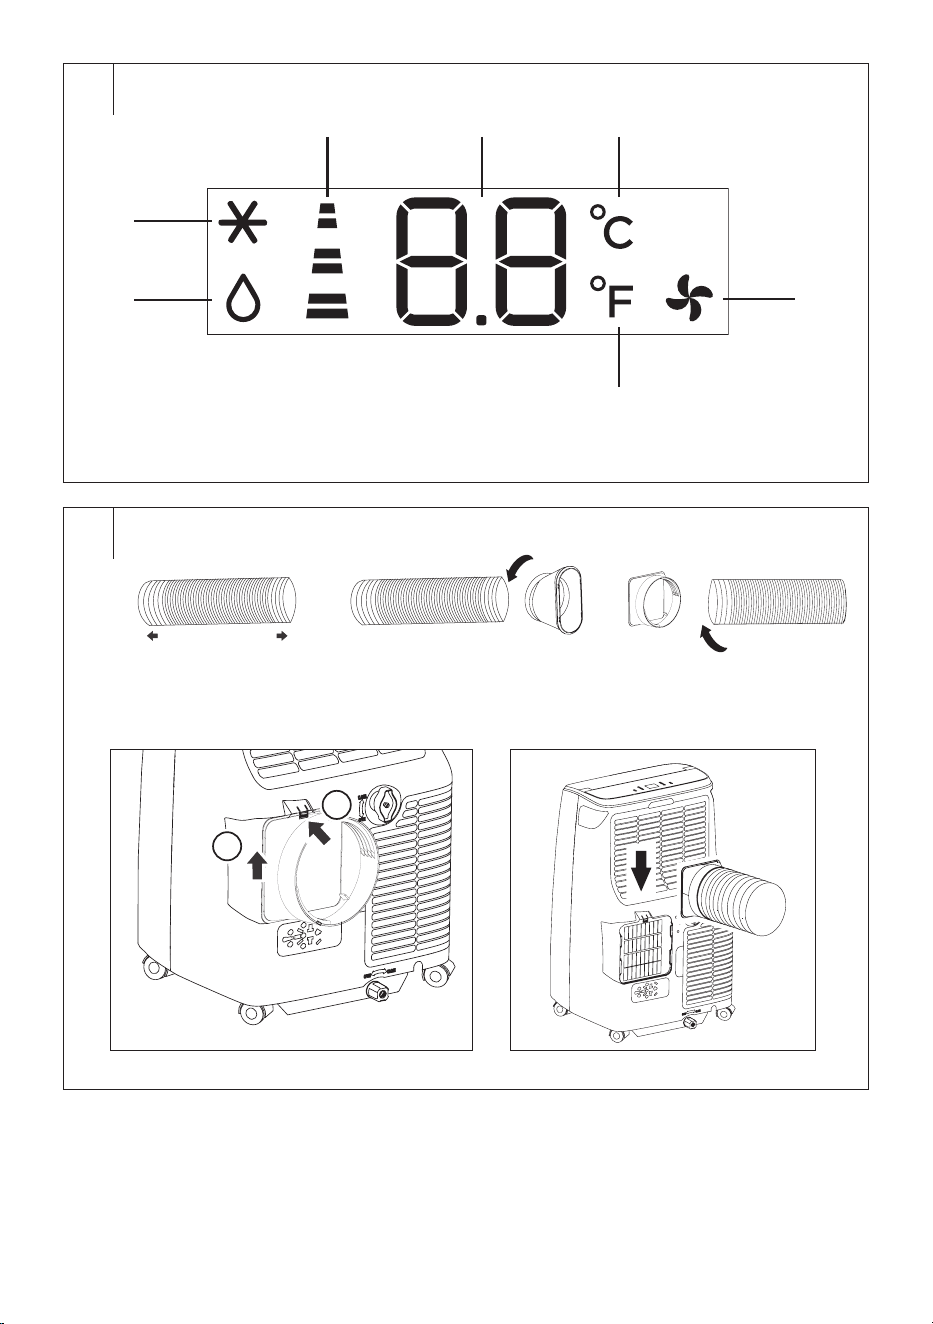
DESCRIPTION OF DISPLAY
E1 Dehumidification indicator
E2 Cooling indicator
E3 Fan speed indicators
E4 Numeric display
E5 °C indicator
E6 Fan indicator
E7 °F indicator
INSTALLATION
Location of the mobile air conditioner
• Remove the mobile air conditioner from the packaging and make sure
you have removed all parts and accessories. We recommend that two
adults remove the air conditioner from the packaging.
• Locate the mobile air conditioner on an even, dry and stable surface
and within reach of a grounded power socket. Do not locate it on
unstable or inclined surface from which the mobile air conditioner
could slide, fall, become damaged or cause injury.
• The mobile air conditioner must be located so that it is not exposed to
the direct sunshine.
• Make sure there are no heat sources (e.g., heating, portable heaters,
stove, etc.) near where the mobile air conditioner will be located.
• For easier handling, the mobile air conditioner is equipped with castors.
Do not use the castors when you need to move the air conditioner over
carpets or similar surfaces. Avoid riding over objects.
• To achieve optimal efficiency, maintain a distance of at least 45 cm
from the wall or other obstacles.
• Locate the mobile air conditioner well away from curtains, drapes, or
blinds.
• Ensure the flexible hose does not touch any objects.
Note:
Do not use the mobile air conditioner to cool a room where
computer servers, etc. are located. Installation, adjustment,
maintenance and repairs must only be performed by a
qualified person.
Installing the flexible hose on to the mobile air conditioner
The flexible hose must be connected to the mobile air conditioner and
installed into a window in accordance with the operating modes that
you wish to set. Install the flexible hose when you wish to select the
operating modes: cooling, heating, dehumidification, or sleep mode. It
is not necessary to install the flexible hose when you wish to select the
fan mode.
1. Extend the flexible hose to the required length – see the figure F1.
2. Attach the adapter for connection to air outlet to one end of the
flexible hose and screw counter clockwise – see the figure F2.
Attach the window connection adapter to the other end of the flexible
hose and screw counter clockwise – see the figure F3.
3. Remove the air outlet cover by pressing the lock on the top, and then
pulling the cover upwards from the opening – see figure F4.
4. Place the flexible hose above the air outlet and move it downwards
to fix it – see the figure F5. Do not excessively bend or deform the
flexible hose.
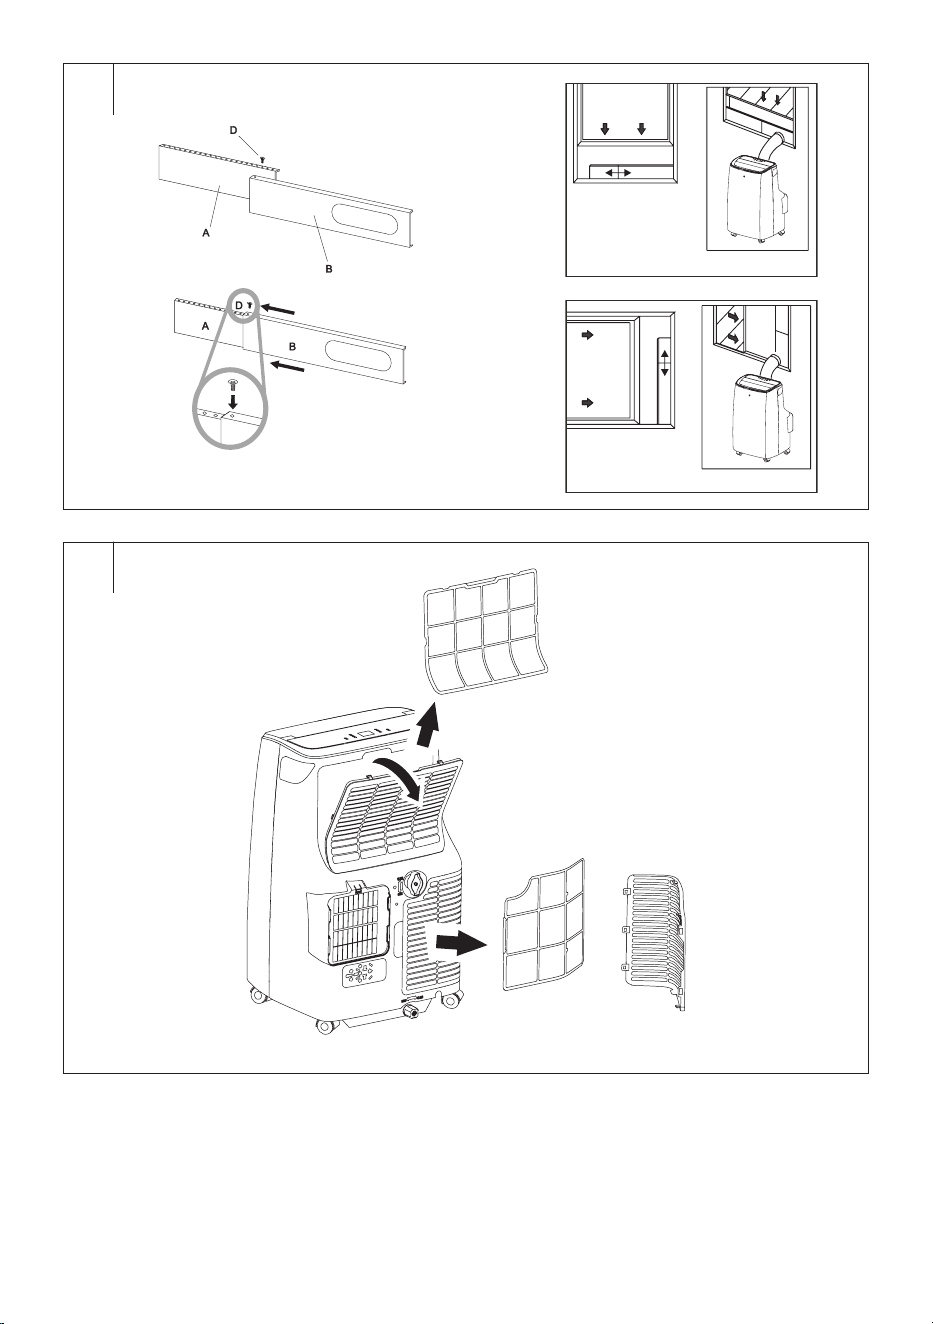
Installing the flexible hose into a slide window (G1+G2)
The window insert is designed to be compatible with the majority of
sliding windows (vertical and horizontal). Nevertheless, for certain types
of slide windows it may be necessary to modify the installation procedure
described below.
1. Slide the supplementary panel (A) into the main panel (B). Adjust the
desired width/length of the window insert according to the window
which it will be installed to. Tighten with a supplied screw.
2. Open the slide window and place the window insert into the space.
3. Carefully close the slide window. Hold the window insert with one
hand to keep it in the place.
4. Install the flexible hose with the attached adapter into the hole in the
window insert.
Note:
If necessary, cut away a part of the window insert if the
window is too small.
EN
Mobile air conditioner Wi-Fi StrongPack
User’smanual
- 9 -
01/2024
2024, .
Installing the flexible hose using the textile seal kit
The textile seal kit is suitable for tilt-open, sash and roof windows. The
textile seal kit is fitted with a Velcro zip tape to make its installation in the
window easier. Open the window and into the created crevice install the
textile seal kit. We recommend that you thoroughly degrease the location
where you will be attaching the textile seal kit using an appropriate
cleaning agent. Remove the protective paper strip and stick the tape on to
the window frame.
In order to be able to insert the flexible hose, the seal kit is fitted with an
integrated zip. Open the zip in such a location that will enable you to
easily insert the flexible hose.
It is not necessary to remove the textile seal kit from the window when
not using the mobile air conditioner. The window can be closed even with
the seal installed.
Note:
Avoid excessive bending of the hose. To ensure proper
operation of the mobile air conditioner, it is important not to
overload the hose or to bend it unnecessarily. Excessive
loading or bending may damage the hose.
. . . . . . . . . . . . . . . . . . . . . . . . . . . . . . . . . . . . . . . . . . . . . . . . . . . . . . . . . . . . . . . . . . . .
PUTTING INTO OPERATION
• Make sure the mobile air conditioner is correctly assembled and the
flexible hose is properly attached in accordance with the instructions
above.
• Make sure the mobile air conditioner is located in a suitable place at a
sufficient distance from the power socket.
• Insert the power plug into a properly grounded power socket.
• Mobile air conditioner is put into the standby mode.
. . . . . . . . . . . . . . . . . . . . . . . . . . . . . . . . . . . . . . . . . . . . . . . . . . . . . . . . . . . . . . . . . . . .
CONTROLS OF THE MOBILE AIR CONDITIONER
A. CONTROL PANEL
Turning the mobile air conditioner on/off
Press shortly the STAND-BY button and the mobile air conditioner will
turn on and start at the setting in which it was last turned off. The display
shows “- -”.
Press the STAND-BY button again the turn the mobile air conditioner off
and switch to the standby mode.
Note:
If you are going to store the mobile air conditioner,
disconnect the plug from the mains socket.
Warning:
Do not turn the mobile air conditioner on straight after
turning off. Wait a few minutes before turning on.
Otherwise, the compressor may be damaged.
Note:
Never turn off the mobile air conditioner by pulling the
power cord out of the power socket. Turn off the mobile air
conditioner using the STAND-BY button, wait a few minutes
and then pull out the power cord.
Operating modes
1. Cooling mode
Press the MODE button repeatedly until the COOL indicator is lit on
the control panel.
Use the +/– buttons to set the desired temperature. The temperature
can be set in the range of 18–32 °C.
Use the FAN SPEED button to set the fan speed. Pressing the FAN
SPEED button repeatedly, you will switch the speed in the following
order: High (high speed) – Low (low speed) – Auto (automatic speed).
The selected fan speed indicator lights up on the control panel.
2. Dehumidification mode
Press the MODE button repeatedly until the DRY indicator is lit on the
control panel. The display shows “dh”.
In this mode, the humidity in the room is reduces. The condensed
humidity accumulates in the tank. For the methods of condensate
drainage, refer to the “CONDENSATE DRAINAGE” section further in
this manual.
It is not possible to set the temperature or fan speed in this mode. The
fan speed is automatically set to a low speed.
3. Fan mode
Press the MODE button repeatedly until the FAN indicator is lit on the
control panel.
In this mode, the fan will circulate the air in the room, but it will not cool
it.
Use the FAN SPEED button to set the fan speed. Pressing the FAN
SPEED button repeatedly, you will switch the speed in the following
order: High (high speed) – Low (low speed) – Auto (automatic speed).
The selected fan speed indicator lights up on the control panel.
Depending on the set fan speed, the corresponding graphics of the
speed will also light up on the numerical display of the control panel
and on the numeric display on the front of the air conditioner.
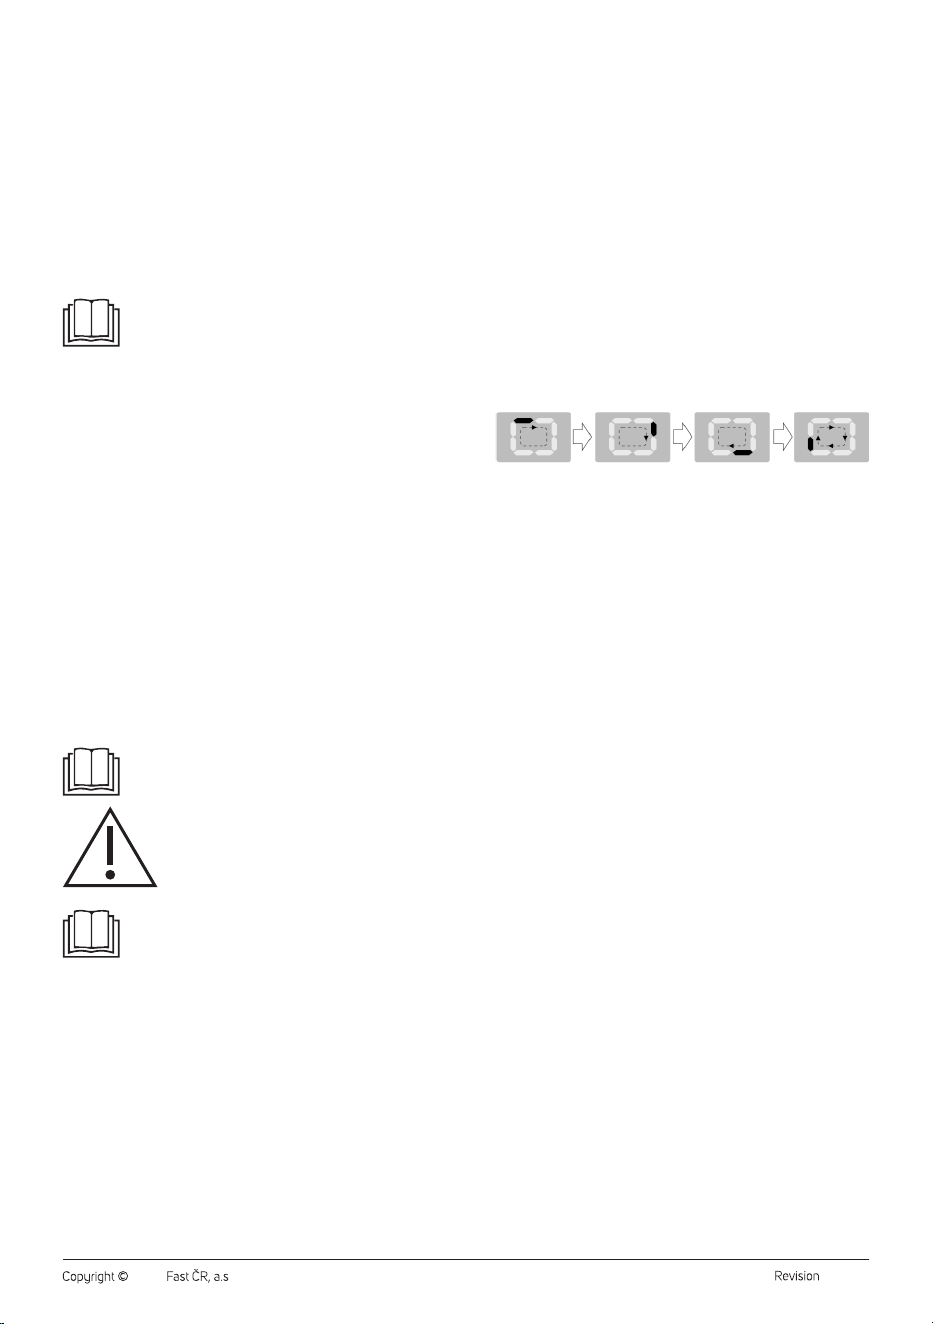
4. Smart mode
Press the MODE button repeatedly, until the following shows on the
display:
That graphic means the mobile air conditioner has switched to smart
mode, in which the mobile air conditioner automatically selects
cooling or fan operation mode based on the evaluation of the ambient
temperature.
If the ambient temperature is lower than 23 °C, the mobile air
conditioner automatically selects the fan operating mode.
If the ambient temperature is higher than 23 °C, the mobile air
conditioner automatically selects the cooling operating mode.
Timer function
The mobile air conditioner enables to set two different timers – turn-on
timer and turn-off timer of the mobile air conditioner.
a) Turn-on timer of the mobile air conditioner
Turn-on timer of the mobile air conditioner allows you to turn on
the mobile air conditioner after a set period. Turn on the mobile air
conditioner, select the operating mode and temperature and turn off
the mobile air conditioner.
When the mobile air conditioner is in standby mode, press the TIMER
button. The numeric display will flash, and the time indicator will be lit.
Use +/- buttons to set the time after which the mobile air conditioner
will turn on. You can set the time in the range from 0.5 to 24 hours.
Wait about 5 seconds till the time is stored in the memory. Then, the
automatic countdown of the set period will start.
Once the set time has elapsed, the mobile air conditioner starts in the
last operating mode.
b) Turn-off timer of the mobile air conditioner
Turn-off timer of the mobile air conditioner allows you to turn off the
mobile air conditioner after a set period.
When the mobile air conditioner is on, press the TIMER button. The
numeric display will flash, and the time indicator will be lit.
Use +/- buttons to set the time after which the mobile air conditioner
will turn on. You can set the time in the range from 0.5 to 24 hours.
Wait about 5 seconds till the time is stored in the memory. Then, the
automatic countdown of the set period will start.
Once the set time has elapsed, the mobile air conditioner turns off and
switches to the standby mode.
When you need to cancel the timer, press the TIMER. The remaining
time will start flashing. Press TIMER button again and the timer will be
cancelled or press STAND-BY.
UV-C function
When the mobile air conditioner is running, hold the FAN SPEED button
about 3 seconds to activate the UV-C function. The UV-C function
indicator will light up on the display.
To cancel the UV-C function, hold the FAN SPEED button about 3
seconds when the mobile air conditioner is running. The UV-C function
indicator will go off on the display.
- 10 -
01/2024
2024, .
Temperature unit change
While the mobile air conditioner is on, long press the +/– simultaneously
for 3 seconds to change the temperature units from °C to °F and vice
versa.
B. REMOTE CONTROL
Inserting and replacing batteries
Slide out the battery compartment cover, which is located on the rear side
of the remote control. Place two AAA/LR03 (2× 1.5V) alkaline batteries
into the battery compartment and close the cover.
When inserting the batteries ensure the correct polarity as shown in the
battery compartment.
When replacing the batteries, always use batteries of the same type,
never combine old and new batteries or batteries of various types.
Note:
Removing the batteries from the remote control will
delete all the settings. After new batteries are inserted the
default remote control settings as programmed by the
manufacturer will be renewed.
If you will not be using the remote control for longer than 2
months, remove the batteries.
Warning:
Dispose the used batteries in accordance with the
locally applicable laws. Do not dispose batteries
in common household waste. Do not use old and
new batteries at the same time. Do not use alkaline,
standard, or rechargeable batteries at the same time.
Do not throw batteries into fire. They may explode,
or leak.
Using the remote control
For the remote control to work correctly, ensure that the maximum
distance of the remote control from the mobile air conditioner is not
greater than 7 m and that there is no obstacle between the remote control
and the mobile air conditioner that could prevent the transmission of the
signal.
Point the remote control directly at the mobile air conditioner. The
transmission of the signal is confirmed by a short sound signal.
Do not expose the remote control to direct sunlight or high temperatures.
Otherwise, the signal may not be transmitted.
Turning the mobile air conditioner on/off
Press shortly the button and the mobile air conditioner will turn on and
start at the setting in which it was last turned off.
Press the button again the turn the mobile air conditioner off and
switch to the standby mode. To turn it off completely, disconnect the
power plug from the power socket.
Warning:
Do not turn the mobile air conditioner on straight after
turning off. Wait a few minutes before turning on.
Otherwise, the compressor may be damaged.
Note:
Never turn off the mobile air conditioner by pulling the
power cord out of the power socket. Turn off the mobile air
conditioner using the button, wait a few minutes and
then pull out the power cord.
Operating modes
1. Cooling mode
Press the button repeatedly until the COOL indicator is lit on the
display.
Use the / buttons to set the desired temperature. The temperature
can be set in the range of 18–32 °C.
Use the button to set the fan speed. Pressing the button
repeatedly, you will switch the speed in the following order: High (high
speed) – Low (low speed) – Auto (automatic speed). The selected fan
speed indicator lights up on the control panel.
2. Dehumidification mode
Press the button repeatedly until the DRY indicator is lit on the
display.
In this mode, the humidity in the room is reduces. The condensed
humidity accumulates in the tank. For the methods of condensate
drainage, refer to the “CONDENSATE DRAINAGE” section further in
this manual.
It is not possible to set the temperature or fan speed in this mode. The
fan speed is automatically set to a low speed.
3. Fan mode
Press the button repeatedly until the indicator is lit on the display.
In this mode, the fan will circulate the air in the room, but it will not cool
it.
Use the button to set the fan speed. Pressing the button
repeatedly, you will switch the speed in the following order: High (high
speed) – Low (low speed) – Auto (automatic speed). The selected fan
speed indicator lights up on the control panel.
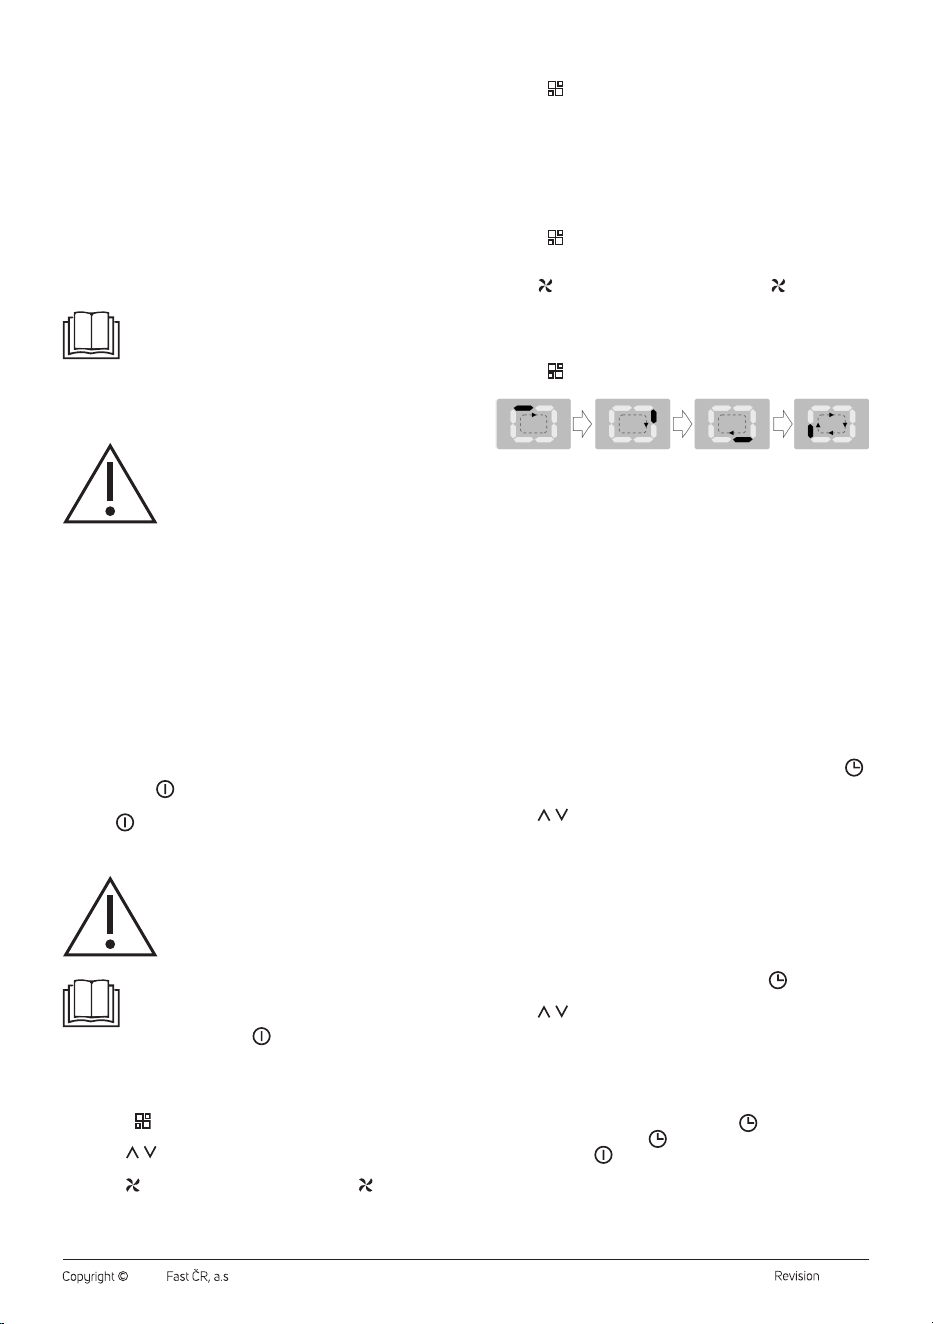
4. Smart mode
Press the button repeatedly, until the following shows on the
display:
That graphic means the mobile air conditioner has switched to smart
mode, in which the mobile air conditioner automatically selects
cooling or fan operation mode based on the evaluation of the ambient
temperature.
If the ambient temperature is lower than 23 °C, the mobile air
conditioner automatically selects the fan operating mode.
If the ambient temperature is higher than 23 °C, the mobile air
conditioner automatically selects the cooling operating mode.
Functions of the mobile air conditioner
1. Timer function
The mobile air conditioner enables to set two different timers – turn-on
timer and turn-off timer of the mobile air conditioner.
a) Turn-on timer of the mobile air conditioner
Turn-on timer of the mobile air conditioner allows you to turn on
the mobile air conditioner after a set period. Turn on the mobile air
conditioner, select the operating mode and temperature and turn
off the mobile air conditioner.
When the mobile air conditioner is in standby mode, press the
button. The numeric display will flash, and the time indicator will
be lit.
Use / buttons to set the time after which the mobile air
conditioner will turn on. You can set the time in the range from 0.5
to 24 hours.
Wait about 5 seconds till the time is stored in the memory. Then,
the automatic countdown of the set period will start.
Once the set time has elapsed, the mobile air conditioner starts in
the last operating mode.
b) Turn-off timer of the mobile air conditioner
Turn-off timer of the mobile air conditioner allows you to turn off
the mobile air conditioner after a set period.
When the mobile air conditioner is on, press the button. The
numeric display will flash, and the time indicator will be lit.
Use / buttons to set the time after which the mobile air
conditioner will turn on. You can set the time in the range from 0.5
to 24 hours.
Wait about 5 seconds till the time is stored in the memory. Then,
the automatic countdown of the set period will start.
Once the set time has elapsed, the mobile air conditioner turns off
and switches to the standby mode.
When you need to cancel the timer, press the . The remaining
time will start flashing. Press button again and the timer will be
cancelled or press .
2. Sleep function
The sleep function is used to reduce the energy consumption
during the night when a constant temperature is not required. The
function also ensures comfort during sleep, as the operation of the air
conditioner is muted, and the display is dimmed.
- 11 -
01/2024
2024, .
Choose the operating mode cooling set the start temperature. Then
press the button to turn on the sleep function.
The fan speed is automatically set to a low speed while the
temperature and relative humidity can be gradually change to ensure
maximum comfort during sleep.
After two hours of the sleep mode operation, the temperature will
increase by 1 °C for one hour. The mobile air conditioner will maintain
this new temperature for next 6 hours and then, the mobile air
conditioner will turn off.
The sleep function can be cancelled at any time by pressing the
button, selecting the operating mode or setting the fan speed.
The sleep function is not available for fan mode.
Temperature unit change
Press the °C/°F button to change the temperature units from °C to °F and
vice versa.
Swing of the air outlet cover
Press the button to turn on the swing of the air outlet cover. It will start
to move up and down.
Press the button again to cancel the swing function.
C. CONTROL VIA THE SENCOR HOME APPLICATION
This mobile air conditioner can be controlled via the Sencor HOME
application.
Download the application to your smart phone, register yourself and
control the mobile air conditioner via the application.
If you already have the application installed, add the mobile air conditioner
to your devices.
Adding the mobile air conditioner to the list of appliances via Bluetooth
You can add the mobile air conditioner to the Sencor HOME application
by pairing it via Bluetooth.
1. Turn on the Bluetooth function on your mobile phone.
2. Turn on the mobile air conditioner.
3. Open the application and on the home screen of the application,
click on the icon »+«.
4. The appliance will automatically offer the options »Do not add / Go
to Add«.
5. Click on »Go to Add« and the application will automatically guide
you through the addition.
Note:
If the Bluetooth connection fails or is not possible, check
that there are no solid obstacles between your phone and
the mobile air conditioner and that both devices are close
to each other.
Adding the mobile air conditioner to the list of appliances via a QR code
The mobile air conditioner can also be added to the Sencor HOME
application using the QR code provided below. On the home screen of the
application, click on the “+” icon and on the Add device screen, click on
the [–] icon in the top right hand corner.
QR code for adding the control panel of the mobile air conditioner to the
application Sencor HOME
Manually adding the mobile air conditioner to the device list
On the main screen, click on “Add device” or on the “+” in the top right
hand corner.
A screen with appliance categories will appear together with a list of
appliances.
Click on “Cooling” and select the mobile air conditioner model from the
list of products.
On the next screen, you will be asked to select a Wi-Fi network. Select a
network, enter the password and click on “Next”.
Ensure that the mobile air conditioner is ready for pairing. It is important
that the mobile air conditioner is connected to a power source and is
in stand-by mode. The Wi-Fi indicator will start to flash quickly on the
control panel. If the indicator does not start flashing, hold down the TIMER
button for 3 seconds until the Wi-Fi indicator starts flashing quickly. In the
application, confirm that the Wi-Fi indicator is quickly flashing and click
on “Next”.
The mobile air conditioner will automatically be added to the device list.
The Wi-Fi indicator will be lit.
In the device list on the main screen, click on the icon of the mobile air
conditioner to enter its control interface.
Wi-Fi reset
There are three ways to reset Wi-Fi:
1. Press the FAN SPEED button on the control panel 6 times within
4seconds;
2. Hold the STAND-BY button on the control panel for about
5seconds;
3. Hold the MODE button on the control panel for about 3 seconds.
. . . . . . . . . . . . . . . . . . . . . . . . . . . . . . . . . . . . . . . . . . . . . . . . . . . . . . . . . . . . . . . . . . . .
CONDENSATE DRAINAGE
The mobile air conditioner is equipped with a drain outlet. In the case of
a frequent use of the mobile air conditioner, it is necessary to regularly
check the quantity of condensate and drain it. If you choose the
dehumidification mode, we recommend draining the condensate using
a drain hose.
Note:
In cooling and fan operating mode (provided low humidity
in the room), it may not be necessary to drain the
condensate. The mobile air conditioner is designed to
increase the efficiency with a small amount of water in the
condensate tank.
Manual condensate drainage
When the water level in the tank reaches the preset level, the operation
of the mobile air conditioner will stop, a beep will sound, and the display
will show “Ft” (full tank). To drain the condensate from the air conditioner,
proceed as follows:
1. Disconnect the power plug from the power socket.
2. Carefully re-locate the mobile air conditioner to a location where the
water may be drained.
3. Underneath the bottom drain outlet, place a container into which
the condensate will flow – see the figure H1. Carefully remove the
plug of the drain outlet. Connect the drain hose if needed and allow
the condensate to flow out. You may tilt the mobile air conditioner
slightly backwards while draining the condensate.
4. Once the water tank is empty (condensate has stopped flowing),
disconnect the drain hose if used, and put the plug back into the
drain outlet. Before turning on the mobile air conditioner again, make
- 12 -
01/2024
2024, .
sure that plug of the drain outlet is correctly inserted, and seals will.
Otherwise, condensate could leak during the operation, and it could
damage the floor or carpet.
5. Insert the power plug into a power socket and turn on the mobile air
conditioner.
Note:
If you turn off the mobile air conditioner by STAND-BY
button, the operation will not be restored automatically, and
it will be necessary to set it again.
Note:
If the mobile air conditioner is added to the list of devices in
the Sencor HOME application, a full tank warning will also
be displayed directly in the application, as well as other
warning messages.
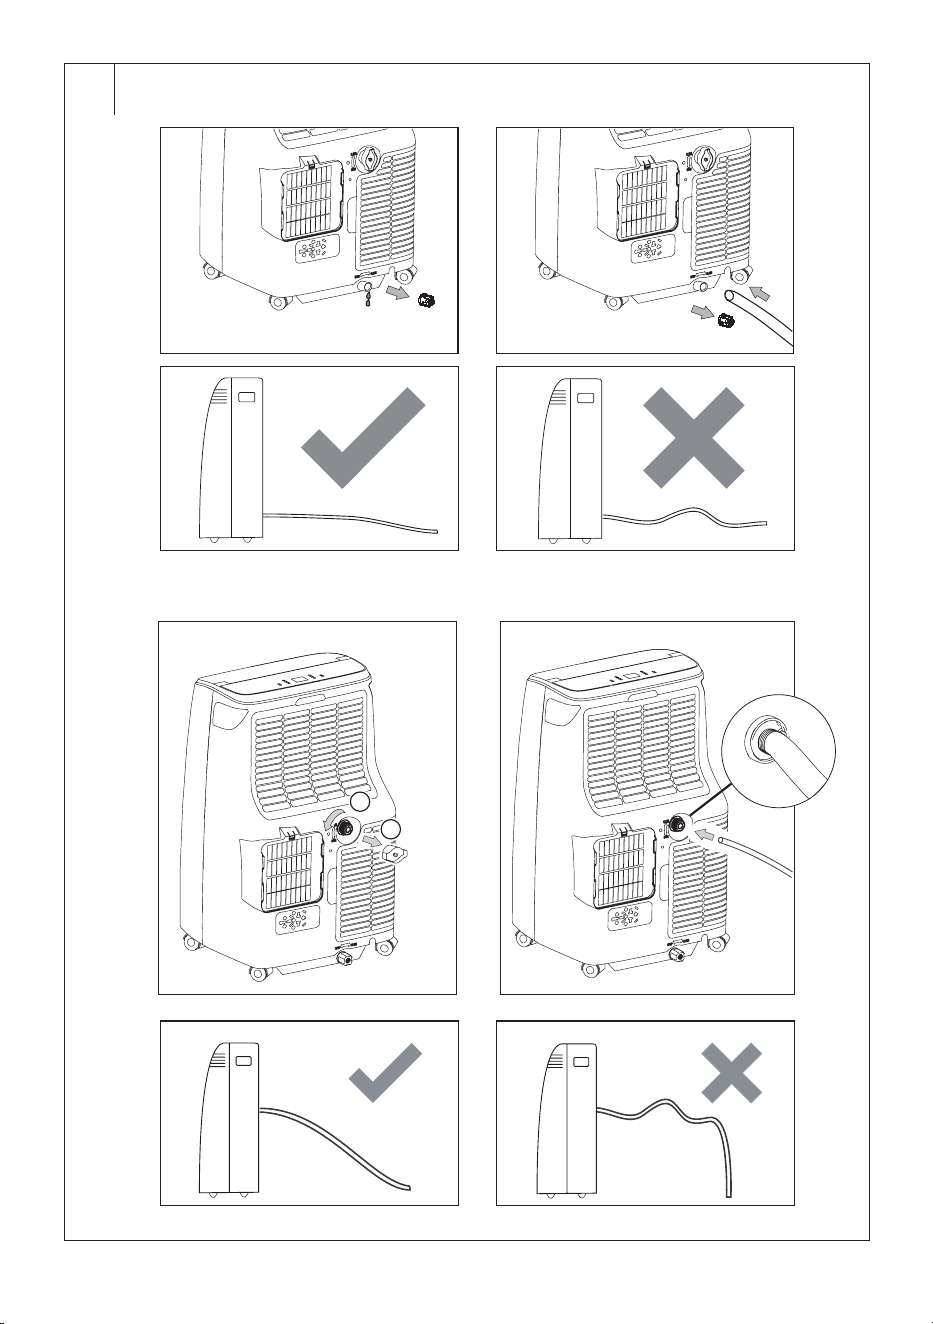
Continuous condensate drainage – bottom drain outlet
Connect the drain hose for continuous draining.
1. Disconnect the power plug from the power socket.
2. Remove the plug of the bottom drain outlet. Connect the drain hose
– see the figure H2. If the length of the drain hose is insufficient, then
it is necessary to purchase a longer hose of the same type. Never
extend the length of the drain hose using extensions.
3. Connect the end of the drain hose to the waste water drain.
4. Insert the power plug into a power socket and turn on the mobile air
conditioner.
Note:
The drain hose should be installed at the same height or
lower than the top drain outlet. Otherwise, the condensate
will not be properly drained from the water tank – see the
figure H3.
Continuous condensate drainage – top drain outlet
Connect the drain hose for continuous draining.
1. Disconnect the power plug from the power socket.
2. Remove the plug of the top drain outlet. Connect the drain hose –
see the figure H4. If the length of the drain hose is insufficient, then
it is necessary to purchase a longer hose of the same type. Never
extend the length of the drain hose using extensions.
3. Connect the end of the drain hose to the waste water drain.
4. Insert the power plug into a power socket and turn on the mobile air
conditioner.
Note:
The drain hose should be installed at the same height or
lower than the top drain outlet. Otherwise, the condensate
will not be properly drained from the water tank – see the
figure H5.
. . . . . . . . . . . . . . . . . . . . . . . . . . . . . . . . . . . . . . . . . . . . . . . . . . . . . . . . . . . . . . . . . . . .
SAFETY PROTECTION FEATURES
Acoustic warning and shutdown when tank is full (Ft)
When the water level in the tank reaches the preset level, the operation of
the mobile air conditioner will stop, a beep will sound, and the display will
show “Ft” (full tank).
The tank must be emptied. Follow the instructions in the “CONDENSATE
DRAINAGE” section.
COMPRESSOR PROTECTION
The compressor is equipped with time protection against damage when
it is switched on again, lasting 3 minutes. If the mobile air conditioner is
switched on shortly after it has been switched off, the compressor will
only start running after 3 minutes.
Room temperature sensor and coil (PF) failure
1. Detects sensor failure during power-up or operation.
2. When a power-on fault is detected, it will immediately put the mobile
air conditioner into an error state and display “PF”. If operation
returns to normal at this time, the mobile air conditioner will switch to
standby mode. If the problem persists, contact an authorized service
centre.
. . . . . . . . . . . . . . . . . . . . . . . . . . . . . . . . . . . . . . . . . . . . . . . . . . . . . . . . . . . . . . . . . . . .
TIPS FOR CORRECT USAGE
To ensure the correct usage of the mobile air conditioner, we recommend
that you observe the following:
– Close all windows and doors of the room where you are using
the mobile air conditioner. If you have installed the mobile air
conditioner in the room only temporarily, you can leave the door
slightly ajar (about 1 cm) to ensure proper ventilation.
– Avoid direct sunlight entering the room. Close the curtains or blinds
to ensure economical operation of the air conditioner.
– Do not block the air outlet and inlet openings.
– Make sure that no heat source is turned on in the room.
– Never use the mobile air conditioner in a very humid environment,
such as laundry rooms.
– Never use the mobile air conditioner outdoors.
– Make sure the mobile air conditioner is placed on a flat surface. If
necessary, install special brakes on the travel wheels.
. . . . . . . . . . . . . . . . . . . . . . . . . . . . . . . . . . . . . . . . . . . . . . . . . . . . . . . . . . . . . . . . . . . .
MAINTENANCE AND CLEANING
Before cleaning the mobile air conditioner, turn it off and wait a few
minutes, and then pull the power cord out of the power socket.
Cleaning the protective grilles and air filters
When the mobile air conditioner is used regularly, it is necessary to clean
the protective grilles and air filters at least once every 14 days to prevent
the fan from being clogged by dust.
Carefully remove the protective grilles and remove the filters – see the
figure I. To remove the dust, use a vacuum cleaner.
In the event of greater soiling, wash the filters in a solution of lukewarm
water (max. 40 °C) and neutral detergent. Then thoroughly rinse under
running water and allow to dry naturally. Do not dry it in a clothes dryer
or in direct sunlight. Once the filters are dry, you can install them back in
their place.
In the event of greater soiling, you can wipe the protective grilles with a
slightly damp cloth and wipe dry with a clean cloth.
Note:
Do not use the mobile air conditioner without the air filters
and protective grilles properly installed and do not use it
with wet or damp air filters.
Cleaning the outer case
To clean the outer case, use a soft wiping cloth dipped in a solution of
lukewarm water and neutral detergent. Then wipe the surface dry.
When cleaning it, do not spray the mobile air conditioner with water or
any other liquid, do not pour water on it or submerge it in water or in any
other liquid.
Do not use abrasive cleaning products, solvents, petrol, etc. for cleaning.
Storing the mobile air conditioner
In order to dry it and to prevent the formation of moulds, leave the mobile
air conditioner running in a warm room in the fan mode for approximately
12 hours.
Disconnect the flexible hose and store it in a safe place out of the reach
of children.
Drain all the condensate from the water tank – see chapter
„CONDENSATE DRAINAGE“.
Clean the air filters and reinstall them. Wipe the outer case of the mobile
air conditioner. Remove the batteries from the remote control.
Store the air conditioner in a cool, dry and dark location.
Putting into operation again
Check that the power cord and plug are not damaged and that the air
filters are clean. Insert a new set of batteries into the remote control.
Proceed according to the instructions in section „Inserting and replacing
batteries“. Install the mobile air conditioner according to the instructions
contained in the preceding part of this user‘s manual „Installation“.
. . . . . . . . . . . . . . . . . . . . . . . . . . . . . . . . . . . . . . . . . . . . . . . . . . . . . . . . . . . . . . . . . . . .
- 13 -
01/2024
2024, .
TROUBLESHOOTING
Before contacting an authorised service centre, please check the
appliance according to the following instructions:
Problem Possible cause Solution
The mobile air
conditioner does not
turn on.
The power cord is not
plugged in the power
socket, or the power
socket is energised.
Connect the power
plug correctly to the
power socket, or check
the power socket is
energised.
The water tank is full. Empty the water
tank according to
the instruction in
the “CONDENSATE
DRAINAGE” section.
The room temperature
is too low or high.
We recommend
using the mobile
air conditioner at
temperature range from
5 °C to 35 °C.
The room temperature
is lower than the set
temperature (cooling
mode).
Adjust the set
temperature.
The internal safety
device has been
tripped.
Wait about 30 minutes
and then try to turn on
the air conditioner again.
If the problem persists,
contact the authorised
service centre.
The mobile air
conditioner does not
cool enough.
The mobile air
conditioner is exposed
to the direct sunshine.
Re-locate the mobile air
conditioner or dim it.
Room windows and
doors of the room are
open and warm air
flows into the room, or
heat sources are on in
the room.
Ensure all windows and
doors are closed, or turn
off heat sources.
The air filter is dirty. Turn off the air
conditioner and clean
the air filter according
to the instructions in the
“Cleaning air filters”
section.
The air inlets or outlets
are blocked.
Remove the cause of the
blockage.
The mobile air
conditioner works
for a short time only.
The flexible hose is
excessively bended.
Straighten the flexible
hose so that there are
no bends.
Air outlet is blocked. Unblock the air outlet.
The mobile air
conditioner is too
noisy.
The air conditioner is
located on an uneven
surface.
Turn off the air
conditioner, unplug from
the power outlet and
move it to flat and level
surface.
Compressor does
not work.
The compressor
protection has been
activated.
Wait 3 minutes. Then,
the operation will
automatically start. It is a
normal phenomenon.
During operation,
there is unpleasant
smell in the room.
The air filter is soiled. Turn off the air
conditioner and clean
the air filter according
to the instructions in the
“Cleaning air filters”
section.
Problem Possible cause Solution
The remote control
does not work.
The distance between
the remote control and
mobile air conditioner
is too big.
Approach the mobile
air conditioner and
make sure there are no
obstacles between the
control and the mobile
air conditioner.
The remote control
does not point at the
signal sensor.
Batteries are
discharged.
Change the batteries.
Error messages
Error messages
on the display
Meaning Solution
PF Probe failure Wait, and if the operation returns to
normal at this time, the mobile air
conditioner will switch to standby
mode. If the problem persists, contact
an authorized service centre.
Ft Condensate
tank is full.
Empty the condensate tank according
to the instructions in “CONDENSATE
DRAINAGE” section.
Note:
In the event that one of the aforementioned faults occurs,
turn off the mobile air conditioner and check for the cause
of the fault. Turn it on again, and if the fault reoccurs, turn it
off, disconnect the power cord from the power socket and
contact the manufacturer, an authorised service centre
or a person with relevant qualifications and have the unit
repaired.
. . . . . . . . . . . . . . . . . . . . . . . . . . . . . . . . . . . . . . . . . . . . . . . . . . . . . . . . . . . . . . . . . . . .
TECHNICAL SPECIFICATIONS
Power supply 220-240 V~ / 50 Hz
Cooling power 2600 W
Cooling power input 1000 W
El. Current draw (cooling) 4.5 A
Rated power 1220 W
Rated current 6.2 A
GWP cooling factor 3
Dehumidification capacity 21.6 l/day
Capacity of the built-in
condensate tank
0.45 l
Refrigerant type and weight R290/180 g
Air flow volume 400/290 m
3
/hour (high/low)
Acoustic power value 65/63dB (A) (high/low)
Sound pressure value 53/50 dB (A) (high/low)
Maximum permitted value of
operating pressure (low/hig)
1.2/2.3 MPa
Dimensions of the mobile air
conditioner (w × d × h)
388 × 356 × 630 mm
Weight 23.4 kg
Operating temperature (cooling) 18 to 32 °C
Recommended room area
(Central Europe)*
31-35 m
2
Recommended room size (Central
Europe)*
80-91 m
3
(ceiling height 2.6 m)
*Applies for the calculated climatic conditions value typical for Central
Europe. For standard rooms with ceilings at standardised heights. The
provided values may differ when the appliance is used in sectioned
areas, in areas with multiple heat sources, heavily glazed or/and poorly
insulated areas.
If you know that you are purchasing the air conditioner for an area with
the above-described characteristics, select a model with a higher power
output for the given area
- 14 -
01/2024
2024, .
The declared noise emission level of the appliance is 65 dB(A), which
represents a level A of sound power with respect to a reference sound
power of 1 pW.
Note:
The efficiency of the mobile air conditioner may be reduced
in the event that it is used outside the above-described
operating temperature range.
We reserve the right to change text and technical specifications.
. . . . . . . . . . . . . . . . . . . . . . . . . . . . . . . . . . . . . . . . . . . . . . . . . . . . . . . . . . . . . . . . . . . .
DISPOSAL OF USED BATTERIES
Batteries contain environmentally damaging compounds
and, therefore, do not belong in standard communal waste.
Hand over used batteries for proper disposal at locations
intended for their collection.
SENCOR hereby declares that radio device model number
SACMT9040C is in compliance with directive 2014/53/ EU. The full
wording of the EU Declaration of Conformity is available at the website:
www.sencor.eu.
INSTRUCTIONS AND INFORMATION REGARDING THE DISPOSAL OF
USED PACKAGING MATERIALS
Dispose of used packaging material at asite designated for waste in your
municipality.
DISPOSAL OF USED ELECTRICAL AND ELECTRONIC EQUIPMENT
This symbol on products or original documents means that
used electric or electronic products must not be added to
ordinary municipal waste. For proper disposal, renewal and
recycling, hand these products over to determined
collection points. Alternatively, in some European Union
states or other European countries you may return your
products to the local retailer when buying an equivalent
new product. Correct disposal of this product helps save
valuable natural resources and prevents potential negative effects on the
environment and human health, which could result from improper waste
disposal. Ask your local authorities or collection facility for more details. In
accordance with national regulations penalties may be imposed for the
incorrect disposal of this type of waste.
For business entities in European Union states
If you want to dispose of electrical or electronic equipment, ask your
retailer or supplier for the necessary information.
Disposal in other countries outside the European Union.
This symbol is valid in the European Union. If you wish to dispose of this
product, request the necessary information about the correct disposal
method from the local council or from your retailer.
This product meets all the basic requirements of EU
directives related to it.

FAST ČR, a.s.
U Sanitasu 1621
CZ-251 01 Říčany
www.sencor.eu