GB
DDR-75BT
Revision 1
02
Magnetic base
W
m
l
c
e
d
b
a
u
v
s
q
t
p
n
o
f
g
h
i
j
k
1
5
6
7
8
9
10
16
15
14
13
12
11
22 23
17 18 19 20
1
3
2930 28 27 26 25 24
2
4
31
2
21
3
r
03
GB
Contents
1. Important safety instructions……………………04
2. Introduction ....................................................04-06
Overview of the main unit and the remote
control .............................................................04-06
3. Getting started ................................................06-07
Finding a suitable location for the radio……….06
Preparing the remote control…………………….06
Connecting the radio to the mains power supply
………………………………………………………...06
Performing the radio's initial setup ..............06-07
Turning the radio on / off………………………….07
Selecting the operating mode …………………...07
4. Controlling the radio using the UNDOK app……
…………………………………………………….07-08
Using the UNDOK app to control the radio..07-08
Configuring the radio's settings using the
UNDOK app………………………………………….08
5. Listening to Internet radio ............................. 08-09
The Internet radio menu…………………………..09
Storing Internet radio stations as presets……..09
Recalling Internet radio station presets………..09
Showing Internet radio information on the
display……………………………………………….09
6. Listening to Podcasts…………………………09-10
The Podcast menu……………………………..09-10
Storing and recalling preset Podcasts…………10
Showing Podcast information on the display…10
7. Listening to streaming services ...................….10
Listening to Spotify………………………………..10
Listening to Amazon Music ........................... ….10
Listening to Deezer………………………………..10
8. Listening to DAB radio ..................................10-11
Tuning into DAB stations……………………...10-11
The DAB radio menu ...........................................11
Showing DAB information on the display……...11
9. Listening to FM radio ..................................... 11-12
Tuning into FM stations ...................................... 11
The FM radio menu…………………………….11-12
Showing FM information on the display……….12
Presetting stations in DAB and FM modes……12
Recalling a preset in DAB and FM modes……...12
10. Listening to Bluetooth audio ........................12-13
Pairing your Bluetooth device for the first
time……………………………………………….12-13
Audio playback in the Bluetooth mode…………13
Audio playback from a previously-paired
Bluetooth device…………………………………...13
The Bluetooth menu ......................................….13
Disconnecting your Bluetooth device………….13
Showing Bluetooth information on the display
………………………………………………………...13
11. Listening to audio from CD…………………..13-14
Audio playback in the CD mode……………..13-14
Showing CD information on the display………..14
12. Listening to audio from or recording audio to a
USB device or SD card ..................................….14
Playing files from a USB device or SD card…...14
Recording audio files to a USB device or SD card
………………………………………………………...14
Showing track information on the display……..14
13. Listening to audio using the Aux in socket..14-15
14. Using the System settings menu .................. 15-16
Manually setting the time and date…………15-16
15. Using the Main menu .....................................16-17
Setting the alarms………………………………….16
Setting the sleep timer………………………...16-17
16. Headphone socket / Line out socket / Optical S/
PDIF output socket / Aerial removal……………17
17. Specifications………………………………………18
The Bluetooth
®
word mark and logos are registered trademarks owned by Bluetooth SIG, Inc. and any use of such marks
by SANGEAN ELECTRONICS INC. is under license.
04
GB
1. Important safety instructions
1.
Read these instructions.
2.
Keep these instructions.
3.
Heed all warnings.
4.
Follow all instructions.
5.
Do not use this apparatus near water.
6.
Clean only with dry cloth.
7.
Do not block any ventilation openings. Install in
accordance with the manufacturer’s instructions.
8.
Do not install near any heat sources such as
radiators, heat registers, stoves, or other apparatus
(including ampliers) that produce heat.
9.
Do not defeat the safety purpose of the polarized or
grounding-type plug. A polarized plug has two blades
with one wider than the other. A grounding type plug
has two blades and a third grounding prong. The
wide blade or the third prong are provided for your
safety. If the provided plug does not fit into your
outlet. Consult an electrician for replacement of the
obsolete outlet.
10.
Protect the power cord from being walked on
or pinched particularly at plugs, convenience
receptacles, and the point where they exit from the
apparatus.
11.
Only use attachments / accessories specied by the
manufacturer.
12.
Use only with the cart, stand, tripod,
bracket, or table specified by the
manufacturer, or sold with the apparatus.
When a cart is used, use caution when
moving the cart / apparatus combination to avoid
injury from tip-over.
13.
Unplug this apparatus during lightning storms or
when unused for long periods of time.
14.
Refer all servicing to qualified service personnel.
Servicing is required when the apparatus has been
damaged in any way, such as power-supply cord or
plug is damaged. Liquid has been spilled or objects
have fallen into the apparatus, the apparatus has
been exposed to rain or moisture, does not operate
normally, or has been dropped.
15.
To Reduce the Risk of Fire or Electric Shock, Do not
Expose This Appliance to Rain or Moisture.
16.
The Shock Hazard Marking and Associated Graphical
Symbol is provided on the rear of unit.
17.
Apparatus shall not be exposed to dripping or
splashing and no objects lled with liquids, shall be
placed on the apparatus.
18.
Excessive sound pressure on ears and headphones
could impair the hearing ability. Higher setting that
idle on the equalizer leads to higher signal voltages
on the output for ear and headphones.
19.
The power plug should be close to the radio, and
easy to be approached that during the emergency, to
disconnect the power from the radio, just unplug the
power plug from the AC power slot.
20.
Where the MAINS plug or an appliance coupler is
used as the disconnect device, the disconnected
device shall remain readily operable.
21.
To prevent possible hearing damage, do not
listen at high volume levels for long periods.
22.
The marking information is located at the
bottom of apparatus.
CAUTION:
Risk of explosion if battery is replaced by
an incorrect type.
The symbol indicates class II equipment.
The symbol indicates AC voltage.
The symbol indicates DC voltage.
The lightning flash with arrowhead symbol,
within an equilateral triangle, is intended to
alert the user to the presence of uninsulated
“dangerous voltage” within the product's
enclosure that may be of sufficient magnitude
to constitute a risk of electric shock to
persons.
The exclamation point within an equilateral
triangle is intended to alert the user to
the presence of important operating and
maintenance (servicing) instructions in the
literature accompanying the appliance.
CAUTION:
These servicing instructions are for use by
qualied service personnel only.
To reduce the risk of the electric shock, do not perform
any servicing other than that contained in the operating
instructions unless you are qualied to so.
2. Introduction
Thank you for purchasing the DDR-75BT radio. We hope
you will be satisfied with your new radio and enjoy using it.
This user manual will guide you through all the necessary
steps to set up your DDR-75BT and will explain how to
get the most out of your new radio.
The DDR-75BT is a very versatile radio that allows you to:
● Listen to FM, DAB and Internet radio.
● Enjoy audio from several streaming services, compact
disc, USB devices, SD card, Bluetooth devices and
other devices that feature an audio output.
● Set alarms in order to use the radio as an alarm clock.
● Fall asleep listening to audio using a sleep timer.
Before using this device, please make sure to read and
understand all parts of the manual.
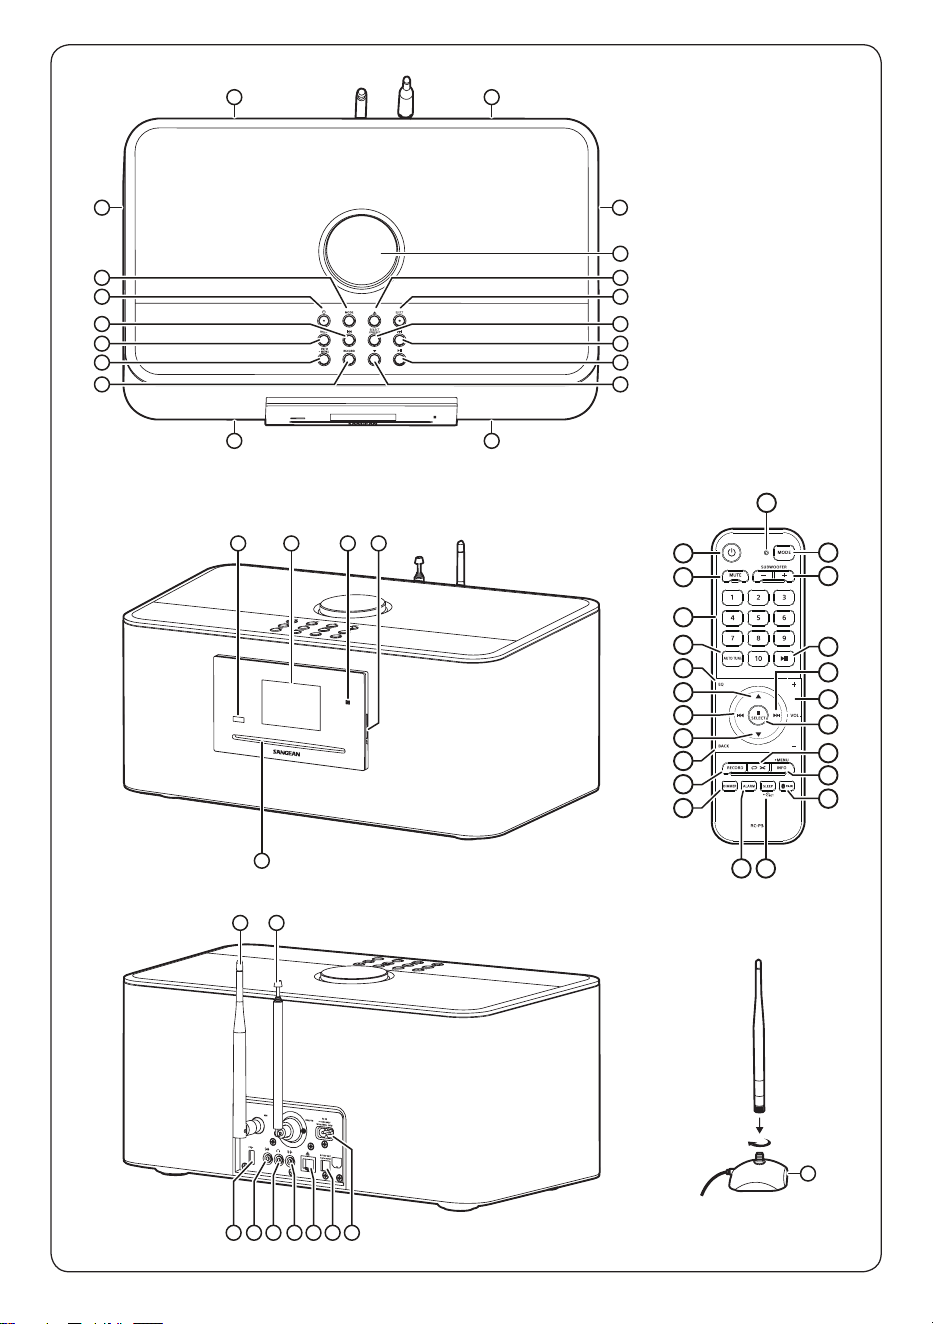
Overview of the main unit and the remote
control
1
Bass speaker x 2
2
Passive bass radiator x 2
3
Treble / Mid-range speaker x 2
4
Volume control
5
Folder up button
6
CD eject button
7
Select / Stop / Preset button
8
Tuning up / Next track / Fast forward button
05
GB
9
Play / Pause button
10
Folder down button
11
Record button
12
Info / Menu button
13
Back / Bluetooth pair button
14
Tuning down / Previous track / Rewind button
15
Power / Sleep button
16
Mode button
17
Remote control sensor
18
LCD display
19
NFC detection area
20
SD card slot
21
CD slot
22
WiFi antenna (removable see item 31)
23
Telescopic aerial for DAB and FM (antenna cable
socket behind)
24
AC IN socket
25
Optical output socket (Toslink)
26
Ethernet socket (RJ-45)
27
Line output socket
28
Headphone socket
29
Auxiliary input socket
30
USB playback socket
31
WiFi antenna base (this allows the WiFi antenna to
be placed away from the unit to improve reliability of
the WiFi connection)
Remote control
a
Power button
● Press to turn the radio on / o.
b
Mute button
● Press to mute / unmute the radio
'
s audio output.
c
Numeric buttons / Preset buttons
● Press to select a track number or preset number.
● Press and hold to store the currently playing radio
station as a preset.
d
Auto tune button
● Press to perform a full scan in the DAB radio
mode.
● Press to scan for the next station in the FM radio
mode.
e
EQ button
● Press to enter the equaliser menu setting.
f
Folder up button
● Press to navigate in menus.
● Press to go to the next folder in the USB, SD, CD
modes.
● Press to go to the next preset in the FM mode.
● Press to go to the station list in the DAB mode.
g
Tuning down / Previous track / Rewind button
● Press to decrease the frequency in the FM radio
mode.
● Press to go to the start of the track or the previous
track in the USB, SD, CD, Bluetooth, Spotify
modes.
● Press to navigate in menus.
● Press and hold to auto scan to the next station
with a lower frequency in the FM radio mode.
● Press and hold to fast rewind in the USB, SD, CD,
Bluetooth modes.
h
Folder down button
● Press to navigate in menus.
● Press to go to the previous folder in the USB, SD,
CD modes.
● Press to go to the next preset in the FM mode.
● Press to go to the station list in the DAB mode.
i
Back button
● Press to go back one step in the radio
'
s menus.
● If a DAB broadcast provides a slideshow image,
this may be viewed full-screen by pressing and
holding the Back button.
j
Record button
● Press to record the radio
'
s audio output to a USB
device or SD card.
k
Dimmer button
● Press repeatedly to adjust the brightness of the
radio
'
s backlight.
l
Alarm button
● While the radio is powered on, press to go to the
radio
'
s alarm menu.
● While the radio is in standby mode, press
repeatedly to enable / disable the radio
'
s alarms.
m
Sleep / Clock set button
● Press repeatedly to set the radio
'
s sleep timer.
● Press and hold to enter the date and time setting.
n
Bluetooth pair button
● Press to switch to the Bluetooth pairing mode.
o
Info / Menu button

06
GB
● Press to cycle through information from the
playback source on the radio
'
s display.
● Press and hold to enter the menu for the current
mode.
p
Repeat / Shuffle button
● Press repeatedly to select the repeat mode (repeat
one, repeat all, repeat folder, repeat intro) or
shue mode in the CD, USB, SD modes. The icon
of the selected repeat or shue mode is shown at
the bottom of the radio
'
s display.
q
Select / Stop / Preset button
● Press to stop playback in the USB, SD, CD
modes.
● Press to open / select an item in the radio
'
s menu.
● Press to enter the “Recall from Preset” menu in
the DAB / FM radio, Internet radio and Podcasts
playback modes.
● Press and hold to enter the “Save to Preset” menu
in the DAB / FM radio, Internet radio and Podcasts
playback modes.
r
Volume up / down button
● Press VOL. + to increase volume.
● Press VOL. - to decrease volume.
s
Tuning up / Next track / Fast forward button
● Press to increase the frequency in the FM radio
mode.
● Press to go to the next track in the USB, SD, CD,
Bluetooth, Spotify modes.
● Press to navigate in menus.
● Press and hold to auto scan to the next station
with a higher frequency in the FM radio mode.
● Press and hold to fast forward in the USB, SD,
CD, Bluetooth modes.
t
Play / Pause button
● Press to pause or resume playback.
u
Subwoofer up / down button
● Press + to increase subwoofer level.
● Press - to decrease subwoofer level.
v
Mode button
● Press repeatedly to select the desired mode.
w
Infrared LED
● Lights up when the remote control is sending a
command to the radio.
Note:
All instructions in the manual use the controls on the radio
itself. If you would want to use the remote control instead,
use the corresponding buttons on the remote control
instead. Some features, such as the mute feature and
setting the repeat / shuffle mode can only be controlled
using the remote control.
3. Getting started
Follow the instructions in this chapter to get your DDR-
75BT up and running in no time.
Finding a suitable location for the radio
After unpacking the radio from the box, take the following
guidelines into account when finding a suitable location
for the radio:
● Place the radio on a at, even surface such as a table.
● Do not place the radio near heat sources.
● Make sure there is sufficient space available around
the radio for proper ventilation.
● If you are planning to connect the radio to your Wi-
Fi network, make sure to place the radio in a location
where Wi-Fi reception is good.
● Avoid placing the radio near appliances that can
interfere with Wi-Fi reception, such as microwaves.
Preparing the remote control
The radio
'
s remote control requires two AAA batteries to
operate. To place the batteries:
1.
Open the battery compartment on the back of the
remote control.
2.
Insert two AAA batteries in the battery compartment
with polarities as shown in the diagram inside the
battery compartment.
3.
Close the battery compartment again.
Connecting the radio to the mains power
supply
The DDR-75BT can be powered using the supplied AC
power cord. Before connecting the plug of the AC power
cord to a wall socket, please ensure that the voltage that
the wall socket supplies is within the supported range
printed at the back of the radio (100-240 V ~ 50/60 Hz).
If this is the case, first connect the connector of the power
cord to the radio and then insert the plug of the power
cord into the wall socket.
Performing the radio
'
s initial setup
After your DDR-75BT has been supplied with power
for the first time, it will automatically turn on. When
the software is loaded the radio
'
s Setup Wizard will
automatically be started.
The radio
'
s Setup Wizard will give you a link to the privacy
policy and guide you through the configuration of the radio
time format and the radio
'
s network connection.
1.
When the Setup Wizard is displayed, it will rst show
a link to the privacy policy in relation to the use of the
radio. Before using the radio, make sure to read the
privacy policy and use the radio
'
s online functionality
only if you agree to the privacy policy. Press the
Select
button
if you agree to the privacy policy.
2.
Next the radio will ask if you want to start the Setup
Wizard now. Use the
Tuning up
or
Tuning down
button
to select
[Yes]
or
[No]
and press the
Select
button
to conrm your choice. Select
[Yes]
to proceed
07
GB
with the Setup Wizard or select
[No]
to directly go to
the radio
'
s Main menu without conguring the radio
'
s
time format and network connection.
3.
After selecting
[Yes]
, the radio
'
s display will show "12
/ 24 hour format". Use the
Tuning up
or
Tuning down
button
to select the desired time format and press the
Select button
to conrm your choice.
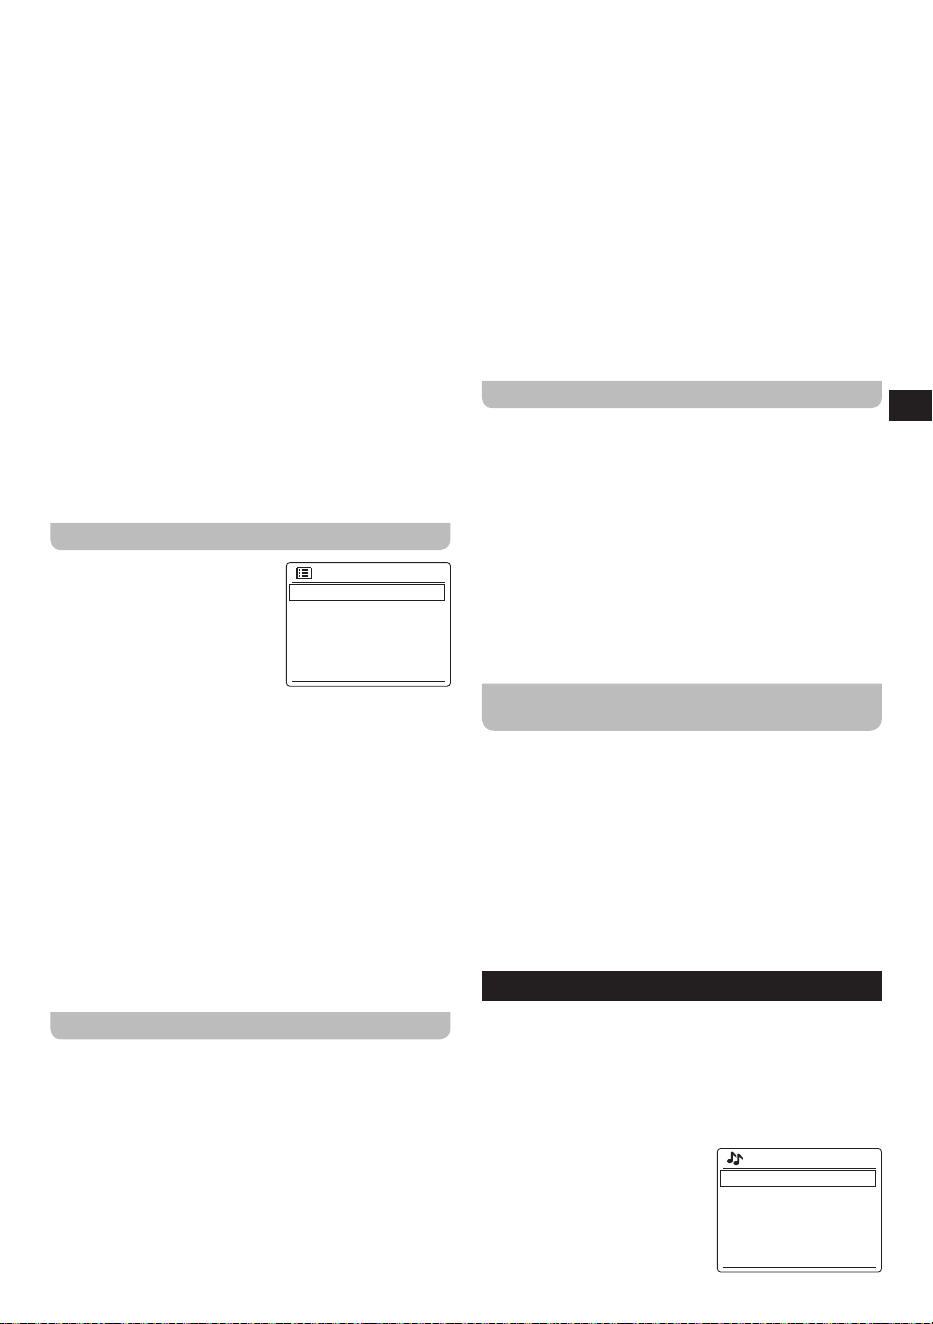
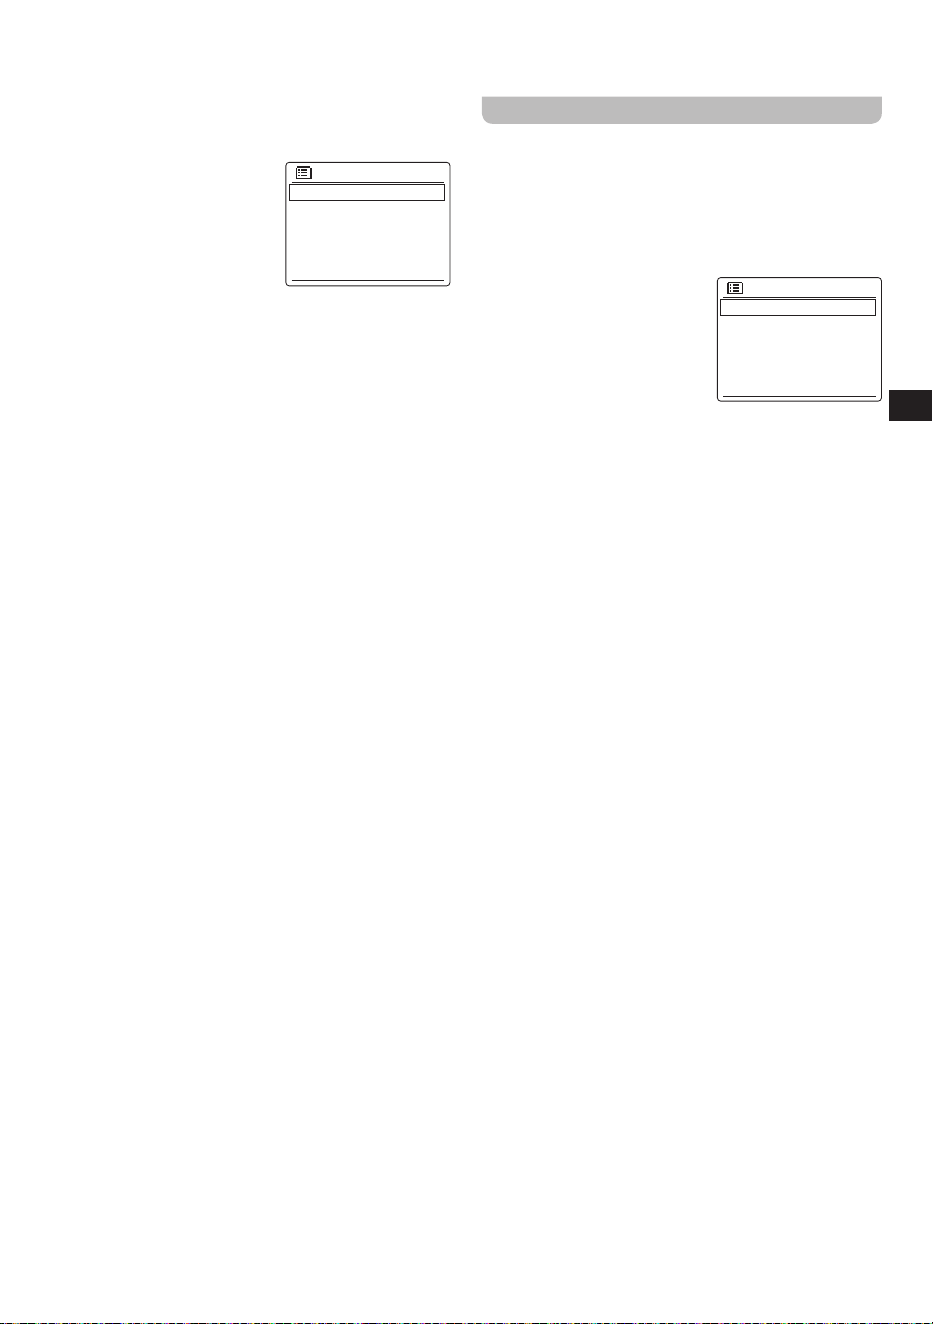
4.
Next, the auto update list is
shown on the radio
'
s display.
Use the
Tuning up
o r
Tuning down button
and
Select button
to select one
of the 4 following options:
●
[Update from DAB]:
Synchronize the radio
'
s time
and date using DAB stations.
●
[Update from FM]:
Synchronize the radio
'
s time
and date using FM stations.
●
[Update from Network]:
Synchronize the radio
'
s
time and date using a network connection.
●
[No update]:
Time and date will not be synchronized
and has to be set manually.
The default is to auto update from the network. If you
choose
[No update]
you will need to set the time
and date manually later (see the section of "Manually
setting the time and date"). The default of
[Update
from Network]
will be the best option for most users.
You will first need to select the correct time zone and
daylight savings setting, see steps 5 and 6.
5.
Press the
Tuning up
or
Tuning down button
to
highlight the time zone which is applicable to your
location. Press the
Select button
to confirm the
setting.
6.
You will then need to set the Daylight savings option
according to your location (Daylight savings is also
known as Summer / Winter time or BST / GMT
adjustment). Press the
Tuning up
or
Tuning down
button
to highlight
[ON]
to turn on daylight savings
if required or
[OFF]
if you do not wish to use daylight
savings then press the
Select button
to confirm the
setting.
7.
The radio will ask if you want to keep the radio
connected to the network. Use the
Tuning up
or
Tuning down button
to select
[Yes]
to activate this
function or select
[No]
to deactivate this function. Press
the
Select button
to conrm your choice.
Note:
If you select the
[No]
option, when the radio is
switched to an operating mode that does not require a
network, the connected network will be automatically
disconnected after a short period of time. When the
radio is off, the network will not connect to the radio.
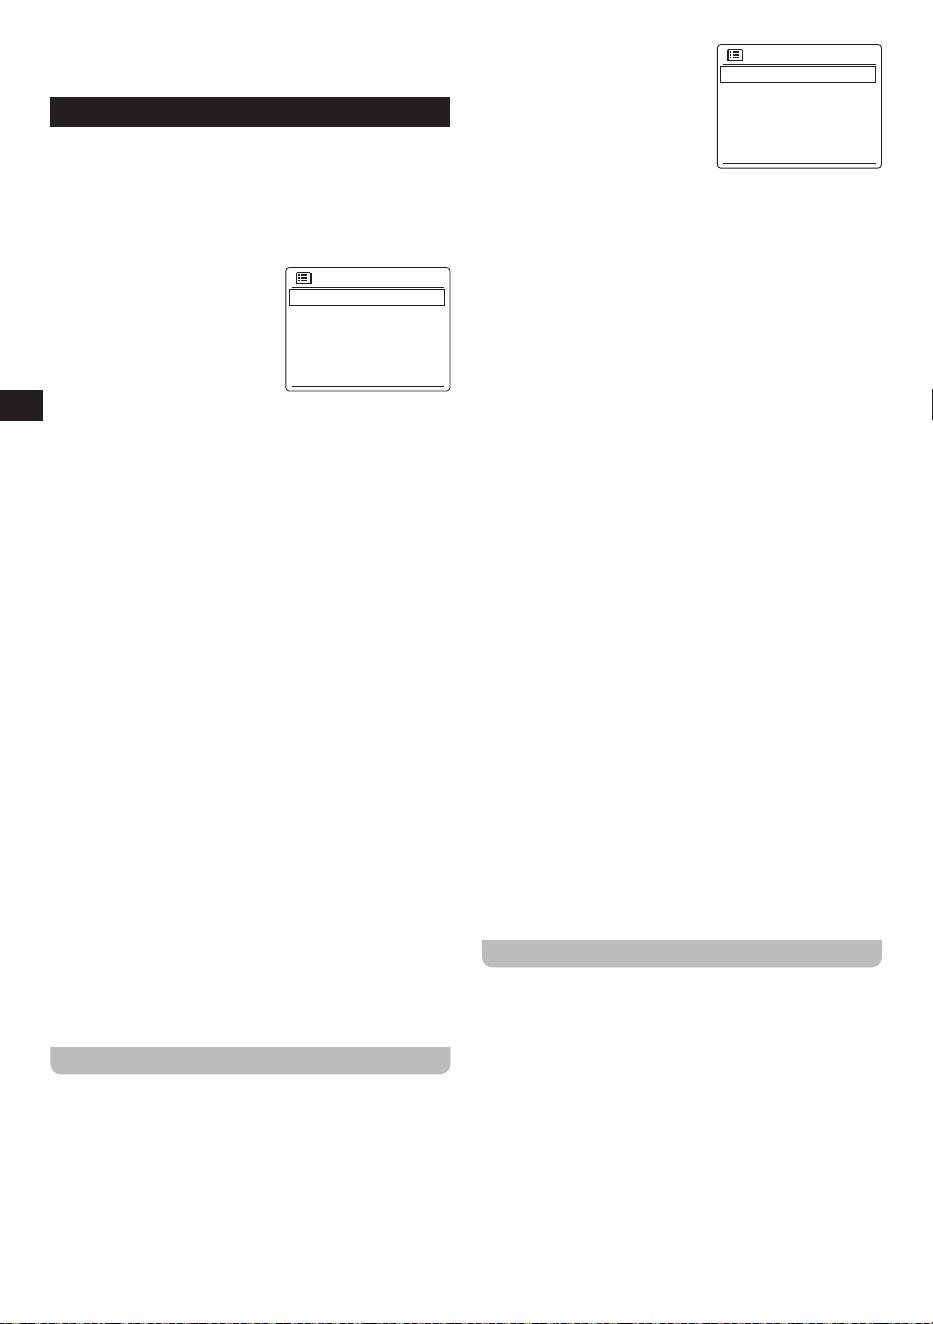
8.
The Network Wizard will now
scan for networks and show a
list of Wi-Fi networks that are
detected by the radio along
with several other options.
Use the
Tuning up
or
Tuning
down button
(alternatively,
the
Folder up
or
Folder down button
) to select one
of the options and then press the
Select button
to
confirm.
●
[Name of a Wi-Fi network]:
Select the name of
a Wi-Fi network to proceed to the password entry
screen for the selected network.
●
[Rescan]:
Select this option to scan for Wi-Fi
networks again.
●
[Wired]:
Select this option if you have connected
the radio to a LAN using an Ethernet cable (not
included).
●
[Manual config]:
Select this option to manually
configure the radio
'
s internet connection (wired /
wireless, DHCP enabled / disabled, IP address /
subnet mask, SSID, authentication method and
password).
9.
You have now completed the Setup Wizard and are
ready to start using your DDR-75BT. After completing
the Setup Wizard, the radio
'
s Main menu will be shown
on the display.
Notes:
● All of the radio's menus can be navigated by selecting
an option using the
Tuning up
or
Tuning down button
(alternatively, the
Folder up
or
Folder down button
)
and by pressing the
Select button
to open or select an
item.
● During the Setup Wizard, the radio's default and
recommended settings are indicated using an asterisk.
● In order to use any of the radio's internet features or to
control the radio using the UNDOK app, the radio must
be connected to a network that has internet access.
Turning the radio on / off
The DDR-75BT can be switched on or off by pressing
the
Power button
. After the radio is turned on, it will
automatically select the last used source.
Selecting the operating mode
There are two ways to select the operating mode:
● Press the
Mode button
, then press the
Tuning up
or
Tuning down button
(alternatively, the
Folder up
or
Folder down button
) to select the desired operating
mode. Press the
Select button
to conrm your choice.
● Select from the main menu of the radio. (Refer to
chapter 15 "Using the Main menu" for details regarding
the radio
'
s Main menu).
4. Controlling the radio using the UNDOK
app
Aside from controlling your DDR-75BT with the
buttons on the radio or the remote control, it can
also be controlled from a smart device using the
UNDOK app. The UNDOK app offers an intuitive
and easy to use user interface, allows you to
configure many of the radio
'
s settings and is available for
Android and iOS.
Using the UNDOK app to control the radio
Follow these steps to use the UNDOK app to control the
radio:
Auto update
Update form DAB
Update form FM
Update form Network *
No update
SSID
youmib1919
youmib1925
[Rescan]
[Wired]
[Manual config]
UNDOK
08
GB
I
n
te
r
n
e
t
r
a
d
i
o
1
4
:
50
N
P
O
3
F
M
A
M
Y
W
I
NE
H
OU
S
E
-
B
E
S
T
F
R
IE
ND
S
RIG
H
T
S
p
o
ti
f
y
1
2
8
8
Sangean DDR-75BT 9d9328
Internet radio
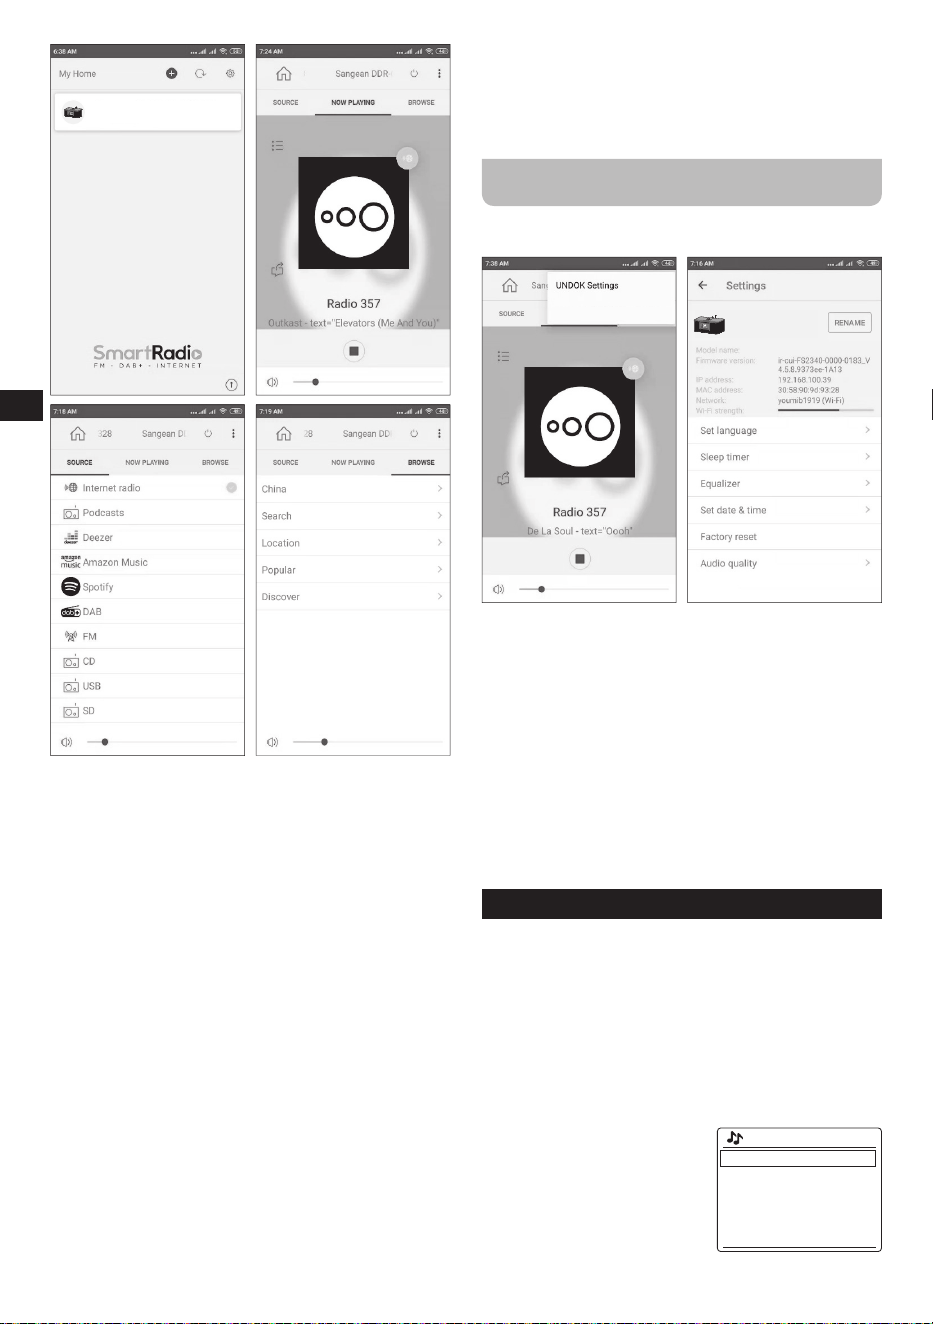
1.
Download and install the UNDOK app for your device
by searching for "UNDOK" in Apple
'
s App Store or the
Google Play Store.
2.
Make sure the radio and your smart device are
connected to the same network. Instructions for
connecting the radio to your network can be found
in the "Performing the radio
'
s initial setup" section of
chapter 3 "Getting started".
3.
Open the UNDOK app on your smart device.
After starting the UNDOK app, your DDR-75BT should
appear on the home screen of the app with the name "
DDR-75BT xxxxxx" (the 6 digit alphanumeric code are
the last 6 digits of your radio
'
s MAC address).
4.
Connect to the radio by tapping on it.
5.
Select the "Source" tab in the upper left corner to select
the radio
'
s playback source.
6.
Select the "Browse" tab in the upper right corner to
browse through content for the selected source.
7.
Playback, tuning and volume can be controlled using
the controls in the app.
Notes:
● If your DDR-75BT is not connected to your network
before starting the UNDOK app, the app itself can also
be used to connect your radio to the network. Follow
the on-screen instructions to complete connecting the
radio to the network.
● These instructions and screenshots are based on the
Android version of the UNDOK app for smartphones.
If you are using a dierent type of device, the screen
layout and / or icons may be slightly dierent.
Configuring the radio
'
s settings using the
UNDOK app
Follow these steps to configure the radio
'
s settings using
the UNDOK app:
I
n
t
e
r
n
e
t
ra
d
i
o
1
4
:
5
0
N
P
O
3
F
M
AMY
W
I
N
E
H
O
U
S
E
-
B
E
S
T
F
R
I
E
N
D
S
R
I
G
H
T
S
p
o
ti
f
y
1
2
8 8
Sangean DDR-75BT
9d9328
Sangean DDR-75BT... Settings
DDR-75BT
1.
Start the UNDOK app on your smart device and
connect to the radio as previously described.
2.
Tap the three dots icon in the upper right corner of the
screen and select "Sangean DDR-75BT… Settings".
3.
The radio
'
s settings that can be congured using the
UNDOK app now appear on the smart device
'
s screen.
To congure any setting, simply tap it and set it to the
desired value.
Note:
These instructions and screenshots are based on the
Android version of the UNDOK app for smartphones. If
you are using a different type of device, the screen layout
and / or icons may be slightly different.
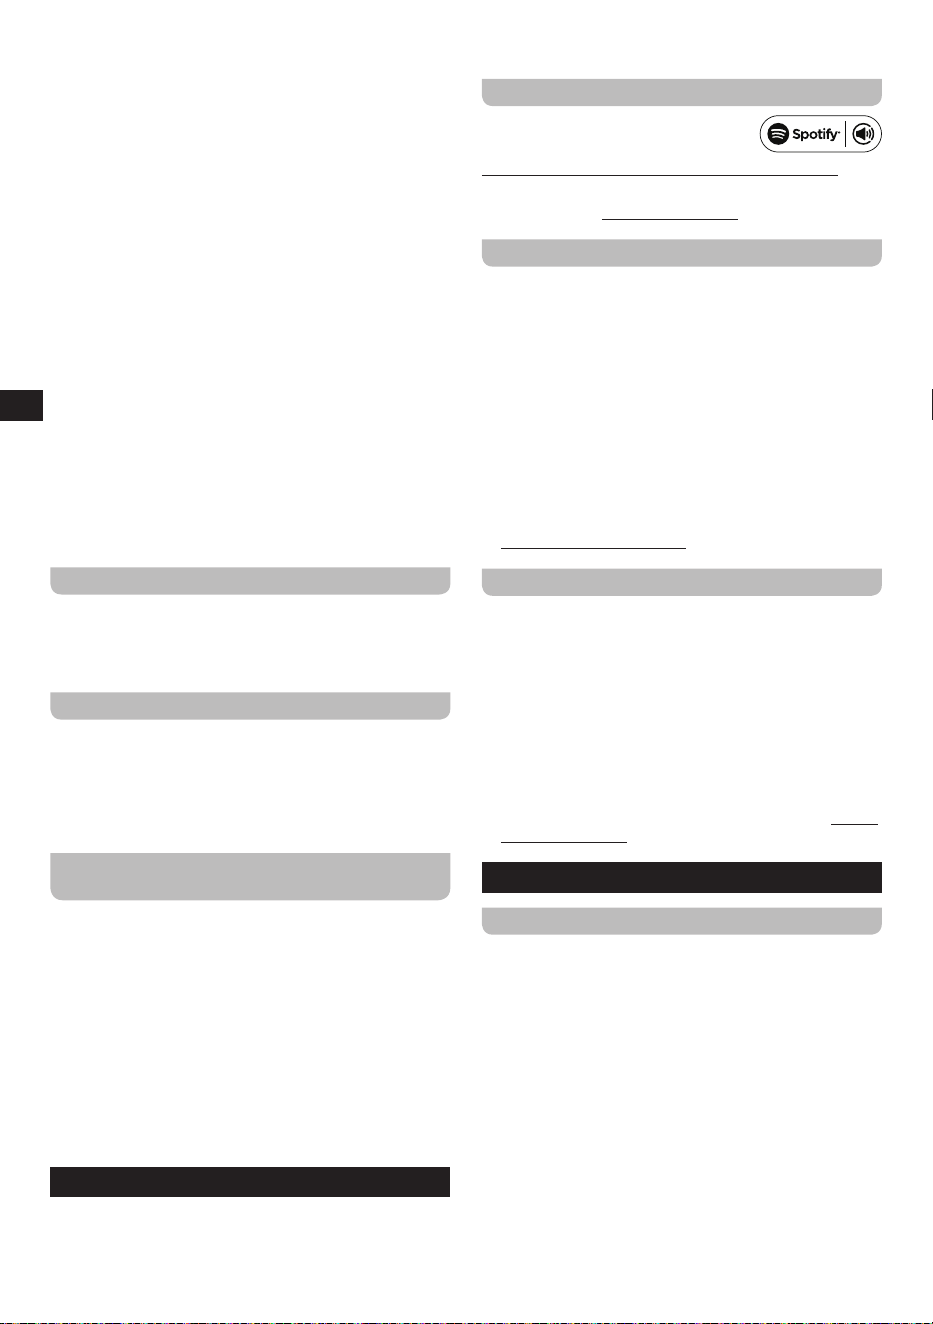
5. Listening to Internet radio
The DDR-75BT is capable of receiving tens of thousands
of internet stations from around the world when the radio
is connected to the internet via Wi-Fi or an Ethernet
connection.
To listen to Internet radio, follow these steps:
1.
Turn on the radio using the
Power button
.
2.
Select the Internet radio mode using the
Mode, Tuning
up / down
and
Select buttons
or using the radio
'
s
Main menu.
3.
If the Internet radio mode is
being used for the rst time,
the Internet station selection
menu is displayed on the
radio
'
s display.
Select one of the options to
tune into an Internet radio
station:
Internet radio
Germany
Search
Location
Popular
Discover
>
>
>
>
>
09
GB
●
[Your country]:
Select this option to tune into
Internet radio stations from your country (“Germany”
in the image above). After selecting this option, you
can choose to tune into local Internet radio stations
or popular radio stations from your country, or to
search for Internet radio stations from your country
based on a genre or a city.
●
[Search]:
Select this option to search for an Internet
radio station by name. After selecting this option, use
the
Tuning up, Tuning down
and
Select buttons
to input the search keyword.
●
[Location]:
Select this option to nd and tune into
Internet radio stations by location. Locations from all
around the world can be selected in this submenu.
●
[Popular]:
Select this option to tune into popular
Internet radio stations from around the world.
●
[Discover]:
Select this option to lter Internet radio
stations by origin, genre and language.
4.
After selecting a radio station using one of the options
described above, the radio will tune into and start
playing the selected station.
5.
When listening to an Internet radio station, press the
Play / Pause button
to pause or resume playback.
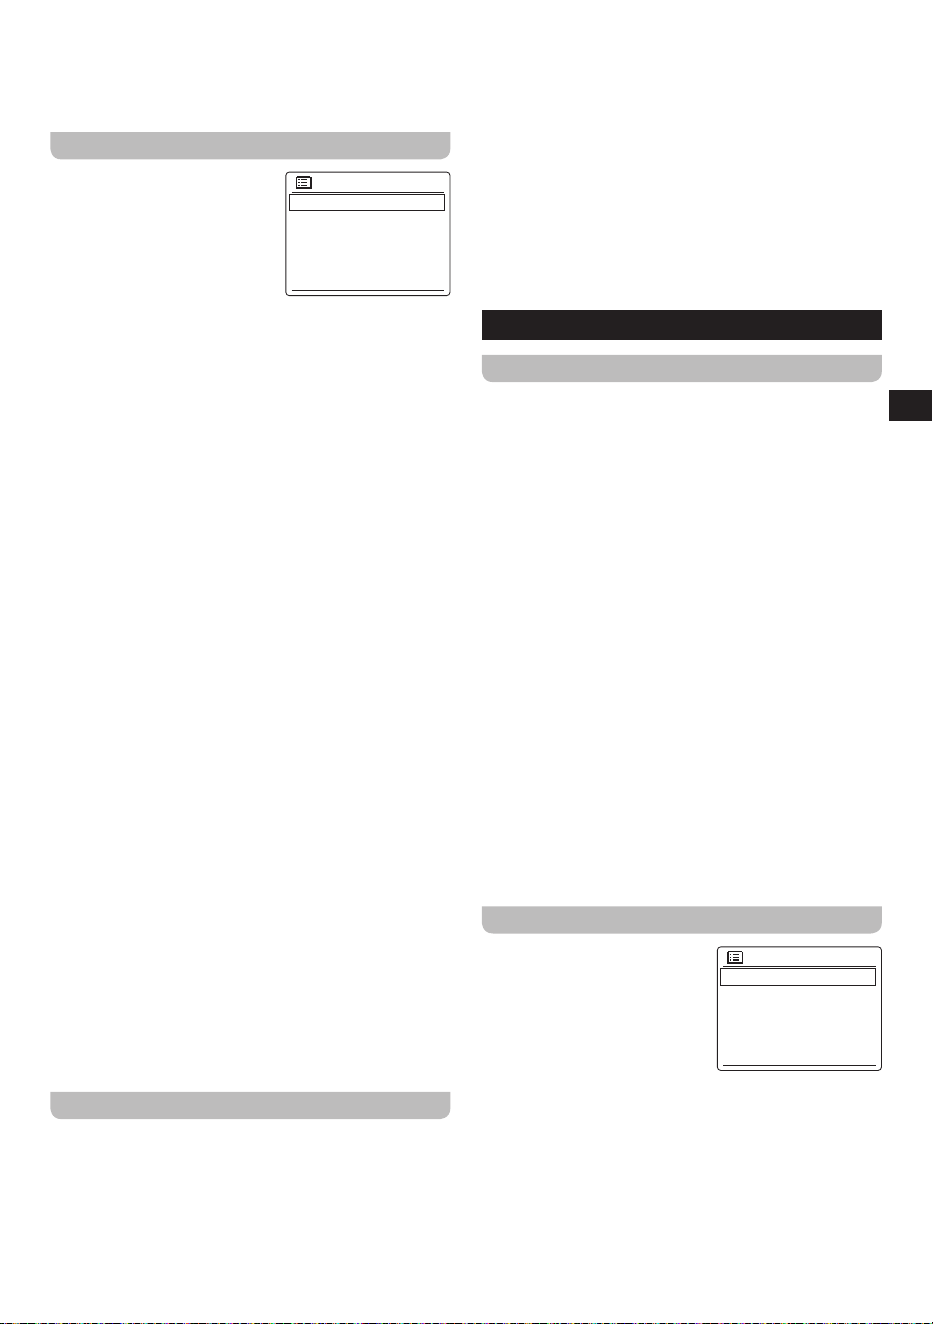
The Internet radio menu
You can open the Internet radio
menu by pressing and holding
the
Info / Menu button
while
the radio is in the Internet radio
mode.
The Internet radio menu offers
the following options:
●
[Last listened]:
Select this option to view a list of the
last Internet radio stations and Podcasts you
'
ve tuned
into previously.
●
[Station list]:
Select this option to go to the internet
station selection menu described in the previous
section.
●
[System settings]:
Select this option to go to the
System settings menu and configure the radio (refer
to chapter 14 "Using the System settings menu" for
details).
●
[Main menu]:
Select this option to go back to the
Main menu, where you can switch to any of the radio
'
s
modes or set the radio
'
s alarms or sleep timer or go to
the System settings menu (refer to chapter 15 "Using
the Main menu" for details).
Storing Internet radio stations as presets
Your DDR-75BT can store up to 10 Internet radio stations
or Podcasts as presets. Presets can be recalled quickly
without having to go through most of the radio
'
s menus.
Follow these steps to store an Internet radio station as a
preset station:
1.
Turn on the radio, select the Internet radio mode
and tune into an Internet radio station as previously
described.
2.
Press and hold the
Select / Preset button
.
3.
The “Save to Preset” screen appears. Select the
preset under which you want to save the Internet radio
station using the
Tuning up
or
Tuning down button
and press the
Select button
to save the station under
the chosen preset number. If another Internet radio
station or Podcast has already been stored under the
chosen preset number, that station or Podcast will be
overwritten.
4.
After pressing the
Select button
, the display will show
the message "Preset stored" to indicate the preset
has been successfully stored under the chosen preset
number.
5.
Alternatively, to store the currently playing radio station
as a preset, press and hold the required
Preset
button (1-10)
on the remote control until the display
shows “Preset stored”. The station will be stored under
the chosen preset button. Repeat this procedure as
needed for the remaining presets.
Recalling Internet radio station presets
While the radio is in the Internet radio or Podcast mode
and the menu is not being displayed:
1.
Press the
Select / Preset button
.
2.
Select a preset number using the
Tuning up
or
Tuning
down button
and press the
Select button
to conrm
your choice.
3.
The radio will now tune into the selected preset.
4.
Alternatively, momentarily press the required
Preset
button (1-10)
on the remote control. Your radio will
then tune to the station stored in the selected preset
memory. The preset used will be shown at the bottom
of the display screen.
Showing Internet radio information on the
display
When listening to an Internet radio station, repeatedly
press the
Info / Menu button
to cycle through the
following information on the radio
'
s display:
● Artist & track name
● Slogan & Description of station
● Language & Location
● Bit rate &Codec& Sampling rate
● Playback buer
● Today
'
s date
6. Listening to Podcasts
The DDR-75BT is also capable of tuning into many
different Podcasts from around the world.
To listen to Podcasts, follow these steps:
1.
Turn on the radio using the
Power button
.
2.
Select the Podcasts mode using the
Mode, Tuning up
/ down
and
Select buttons
or using the radio
'
s Main
menu.
3.
If the Podcasts mode is
being used for the rst time,
the Podcast selection menu
is displayed on the radio
'
s
display.
Internet radio
Last listened
Station list
System settings
Main menu
>
>
>
>
Podcasts
Germany
COVID-19
Search
Location
Discover
>
>
>
>
>
10
GB
Select one of the options to tune into a Podcast:
●
[Your country]:
Select this option to tune into
Podcasts from your country (“Germany” in the image
above). After selecting this option, you can choose
to tune into local Podcasts, popular Podcasts or
search for Podcasts from your country by genre.
●
[A hot topic]:
Select this option to tune into
Podcasts related to a topic that is currently popular
("COVID-19" in the image above). This topic will
change from time to time, depending on what
'
s hot
at the moment and your time zone / region.
●
[Search]:
Select this option to search for a Podcast
by name. After selecting this option, use the
Tuning
up, Tuning down
and
Select buttons
to input the
search keyword.
●
[Location]:
Select this option to nd and tune into
Podcasts by location. Locations from all around the
world can be selected in this submenu.
●
[Discover]:
Select this option to lter Podcasts by
origin, genre and language.
4.
After selecting a Podcast using one of the options
described above, the radio will tune into and start
playing the selected Podcast.
5.
When listening to a Podcast, press the
Play / Pause
button
to pause or resume playback.
The Podcast menu
The Podcast menu is identical to the Internet radio menu
described previously, but instead of the option
[Station
list]
it has the option
[Podcast list]
, which takes you back
to the Podcast selection menu.
Storing and recalling preset Podcasts
As mentioned previously, both Internet radio stations
and Podcasts can be saved in the same preset list
and recalled in the same manner. Refer to the sections
"Storing Internet radio stations as presets" and "Recalling
Internet radio station presets " in the previous chapter for
details.
Showing Podcast information on the
display
When listening to a Podcast, repeatedly press the
Info /
Menu button
to cycle through the following information
on the radio
'
s display:
● Track name
● Track description
● Artist
● Album
● Bit rate &Codec& Sampling rate
● Playback buer
● Today
'
s date
7. Listening to streaming services
The DDR-75BT can also be used to listen to audio
from the streaming services Spotify, Amazon Music and
Deezer. If you have a premium account for any of these
services, follow the instructions below to connect the radio
to the audio steaming service of your choice.
Listening to Spotify
The Spotify Software is subject to third
party licenses found here:
https://www.spotify.com/connect/third-party-licenses
Use your phone, tablet or computer as a remote control
for Spotify. Go to spotify.com/connect to learn how.
Listening to Amazon Music
If you want to play Amazon Music audio through the radio,
follow these steps:
1.
Turn on the radio using the
Power button
.
2.
Select the Amazon Music mode using the
Mode,
Tuning up / down
and
Select buttons
or using the
radio
'
s Main menu.
3.
Use the UNDOK app (refer to chapter 4 "Controlling
the radio using the UNDOK app" for more information)
to connect to and log in to Amazon Music.
4.
Control playback using the control app or the buttons
on the radio.
More information about Amazon Music can be found at
https://music.amazon.com.
Listening to Deezer
If you want to play Deezer music through the radio, follow
these steps:
1.
Turn on the radio using the
Power button
.
2.
Select the Deezer mode using the
Mode, Tuning up
/ down
and
Select buttons
or using the radio
'
s Main
menu.
3.
Login to Deezer by entering your username and password
using the
Tuning up, Tuning down
and
Select buttons
.
4.
Use the radio
'
s menu and buttons to control playback.
More information about Deezer can be found at https://
www.deezer.com/.
8. Listening to DAB radio
Tuning into DAB stations
To tune into DAB radio stations, follow these steps:
1.
Turn on the radio using the
Power button
.
2.
Select the DAB radio mode using the
Mode, Tuning
up / down
and
Select buttons
or using the radio
'
s
Main menu.
3.
If this is the first time the DAB radio mode is being
used, the radio will automatically perform a full scan in
order to find all available DAB radio stations. During
the scanning process, as new stations are detected
the station counter will increase and the stations will be
added to the list which is stored in the radio. The bar
graph indicates the progress of the scan.
4.
When scanning is completed, the radio will list all
stations that were found. Use the
Tuning up
or
Tuning
down button
to scroll through the list of stations and
press the
Select button
to tune into a station.
11
GB
Note:
Before selecting the DAB radio mode and performing a
scan, make sure the DAB / FM antenna at the back of the
radio is fully extended and the radio's reception is good.
The DAB radio menu
You can open the DAB radio
menu by pressing and holding
the
Info / Menu button
while
the radio is in the DAB radio
mode.
The DAB radio menu offers the
following options:
●
[Station list]:
Select this option display all DAB radio
stations that were found and tune into one of the
stations. If no stations were previously found, the radio
will perform a new full scan.
●
[Scan]:
Select this option to perform a full scan and
store all DAB radio stations that were found in the
station list.
●
[Manual tune]:
Select this option to manually tune into
a DAB channel / frequency.
●
[Prune invalid]:
Select this option to delete all
unavailable stations from the station list.
●
[DRC]:
Dynamic Range Control (also known as DRC)
can make quieter sounds easier to hear when your
radio is used in a noisy environment by reducing the
dynamic range of the audio signal.
Select this option and then use the
Tuning up
or
Tuning down button
to highlight the required DRC
setting:
[DRC high]:
DRC is set as sent by broadcaster.
[DRC low]:
DRC level is set to 1/2 that sent by
broadcaster.
[DRC off]:
DRC is switched off. Broadcast DRC will be
ignored. This is the default setting.
Press the
Select button
to confirm the setting.
●
[Station order]:
Select this option and subsequently
[Alphanumeric]
to sort the station list alphanumerically
or select
[Ensemble]
to sort the station list by DAB
multiplex.
●
[System settings]:
Select this option to go to the
System settings menu and configure the radio (refer
to chapter 14 "Using the System settings menu" for
details).
●
[Main menu]:
Select this option to go back to the
Main menu, where you can switch to any of the radio
'
s
modes or set the radio
'
s alarms or sleep timer, or go to
the System settings menu (refer to chapter 15 "Using
the Main menu" for details).
Showing DAB information on the display
When listening to a DAB radio broadcast, repeatedly
press the
Info / Menu button
to cycle through the
following information on the radio
'
s display:
● Text
● Program type
● Multiplex name & Frequency
● Signal error & Strength
● Bit rate &Codec& Audio type
● Today
'
s date
If the broadcast being received is in stereo, then the
stereo speaker icon will be shown at the bottom of the
radio
'
s display. If the currently tuned station has been
stored as a preset, then the preset number will also be
shown.
If a DAB broadcast provides a slideshow image, this may
be viewed full-screen by pressing and holding the
Back
button
. To exit the slideshow image, press and hold the
Back button
again.
9. Listening to FM radio
Tuning into FM stations
To tune into FM radio stations, follow these steps:
1.
Turn on the radio using the
Power button
.
2.
Select the FM radio mode using the
Mode, Tuning up
/ down
and
Select buttons
or using the radio
'
s Main
menu.
3.
Press and hold the
Tuning up
or
Tuning down
button
to automatically tune into an FM station with
a higher or lower frequency respectively. Your radio
will stop scanning when it finds a station of sufficient
strength. The display will show the frequency of the
signal which has been found and at the bottom of the
display a signal strength icon will be shown to indicate
the strength of the signal received. If RDS information
is available, the RDS icon will also be shown at the
bottom of the radio
'
s display and after a few seconds
the display will show the radio station name.
4.
Press the
Tuning up
or
Tuning down button
to ne-
tune the frequency with steps of 0.05MHz if needed.
5.
Repeat the steps 3 and 4 to tune into other radio
stations.
Note:
Before selecting the FM radio mode and tuning into
stations, make sure the DAB / FM antenna at the back
of the radio is fully extended and the radio's reception is
good.
The FM radio menu
You can open the FM radio
menu by pressing and holding
the
Info / Menu button
while
the radio is in the FM radio
mode.
The FM radio menu offers the
following options:
●
[Scan setting]:
Select this option to configure if the
radio should only look for strong signals or all signals
when using the automatic tuning feature (by holding the
Tuning up
or
Tuning down button
).
●
[Audio setting]:
Select this option to congure if the
radio should only play FM stations in mono. Forcing the
radio to play FM broadcasts in mono can help reduce
noise when listening to FM broadcasts.
DAB
Station list
Scan
Manual tune
Prune invalid
DRC
>
>
>
FM
Scan setting
Audio setting
System settings
Main menu
>
>

12
GB
●
[System settings]:
Select this option to go to the
System settings menu and configure the radio (refer
to chapter 14 "Using the System settings menu" for
details).
●
[Main menu]:
Select this option to go back to the
Main menu, where you can switch to any of the radio
'
s
modes or set the radio
'
s alarms or sleep timer or go to
the System settings menu (refer to chapter 15 "Using
the Main menu" for details).
Showing FM information on the display
When listening to a FM radio station that is also
broadcasting RDS data (the RDS icon is shown on the
radio
'
s display), repeatedly press the
Info / Menu button
to cycle through the following information on the radio
'
s
display:
● Text message
● Program type
● Frequency
● Today
'
s date
If no RDS information is available, the radio will be unable
to display the text message and program type. If the
stereo speaker icon is shown at the bottom of the radio
'
s
display, this indicates that the radio is receiving a stereo
broadcast.
Presetting stations in DAB and FM modes
There are 10 memory presets each for DAB and FM radio.
They are used in the same way for each operating mode.
1.
Turn on the radio, then select the DAB or FM radio
mode and Tune to the required radio station as
previously described.
2.
Press and hold the
Select / Preset button
. The display
will show a “Save to Preset” menu.
3.
Press the
Tuning up
or
Tuning down button
to select
the required Preset number. Then press the
Select
button
to store the preset station. "Preset stored" will
be shown on the display indicating the station is stored
under the selected preset number. If another station
has already been stored under the chosen preset
number, that station will be overwritten.
4.
Alternatively, to store the currently playing radio station
as a preset, press and hold the required
Preset
button (1-10)
on the remote control until the display
shows “Preset stored”. The station will be stored under
the chosen preset button. Repeat this procedure as
needed for the remaining presets.
Recalling a preset in DAB and FM modes
1.
Turn on the radio and then select the DAB or FM radio
mode using the
Mode, Tuning up / down
and
Select
buttons
or using the radio
'
s Main menu.
2.
Press the
Select button
to display the “Recall from
Preset” menu.
3.
Select a preset number using the
Tuning up
or
Tuning
down button
and press the
Select button
to conrm
your choice. The radio will now tune into the selected
preset. The chosen preset number is also shown in the
lower area of the radio display.
4.
Alternatively, momentarily press the required
Preset
button (1-10)
on the remote control. Your radio will
then tune to the station stored in the selected preset
memory.
10. Listening to Bluetooth audio
In order to stream Bluetooth music to your radio, you need
to pair your Bluetooth device with the DDR-75BT. Pairing
creates a ‘bond’ so two devices can recognize each other.
Pairing your Bluetooth device for the first
time
1.
Turn on the radio using the
Power button
.
2.
Select the Bluetooth mode using the
Mode, Tuning up
/ down
and
Select buttons
or using the radio
'
s Main
menu. After selecting the Bluetooth mode, the radio
'
s
display will show "No connect".
3.
Activate Bluetooth on your Bluetooth device (refer to
the manual of the Bluetooth device if you are unsure
about how to active Bluetooth).
4.
Go to the Bluetooth list on your Bluetooth device and
select the device named “DDR-75BT” (if you have
changed the name of the radio in the radio
'
s System
settings menu, search for the name you have given the
radio instead).
Note:
On some Bluetooth devices with Bluetooth version 2.1
or earlier, you might be requested to enter a passcode.
If this is the case, enter the passcode “0000”.
5.
After the devices have paired and connected, a
conrmation tone will be played on the radio and the
radio
'
s display will show the name of the connected
Bluetooth device and the playback status. You can now
play music on your Bluetooth device and stream the
music through the radio
'
s speakers.
Notes:
● If your Bluetooth device is equipped with NFC, it is
also possible to pair the device by enabling NFC and
tapping the Bluetooth device's NFC area against the
NFC area on the radio.
● If 2 Bluetooth devices are pairing for the rst time, both
must search for your radio, it will show its availability on
both devices. However, if one device links with this unit
rst, then the other Bluetooth device won’t nd it on the
list.
● If you take your Bluetooth device out of range, the
connection between your device and the radio will be
temporarily disconnected. Your radio will automatically
reconnect if the Bluetooth device is brought back
into range. Be aware that during the period of
disconnection, no other Bluetooth device can pair or
link with your radio.
● If "DDR-75BT" shows up in your Bluetooth device
list, but your Bluetooth device cannot connect with
it, please delete the item from your list and pair the
Bluetooth device with the radio again following the
steps described previously.
● The effective operation range between the radio and
the paired Bluetooth device is approximately 10 meters
(30 feet). Any obstacle between the system and the
device can reduce the operational range.
13
GB
● Bluetooth connectivity performance may vary
depending on the connected Bluetooth device. Please
refer to the Bluetooth capabilities of your device before
connecting it to your radio. Not all features may be
supported, depending on the Bluetooth device used.
● With some mobile phones, making / receiving calls,
text messages, e-mails or any other activities unrelated
to audio streaming may mute the Bluetooth audio
streaming or even temporarily disconnect from your
device. Such behavior is a function of the Bluetooth
device and does not indicate a problem with your DDR-
75BT.
Audio playback in the Bluetooth mode
When you have successfully connected your radio with
the chosen Bluetooth device you can start to play your
music using the controls on the radio or your connected
Bluetooth device.
1.
Once playback has started, the updated playback
status "Playing" will be shown on the display.
2.
The volume can be adjusted both on the radio using
the
VOLUME +
and
- buttons
and on the Bluetooth
device using the volume control of the device.
3.
Playback can be controlled both on the radio and on
the Bluetooth device as well. Press the
Play / Pause
button
to start playing audio or pause / resume
playback. Press the
Previous button
or
Next button
to go to the previous or next track and hold the
Next
button
or
Previous button
to fast forward or fast
rewind within a track.
Note:
Not all player applications or devices may respond to all
of these controls.
Audio playback from a previously-paired
Bluetooth device
The DDR-75BT can memorize up to 8 sets of paired
Bluetooth devices, when the memory exceed this amount,
the earliest device with which the radio was paired will be
overwritten in the radio
'
s memory.
If your Bluetooth device has previously paired with the
DDR-75BT previously, the radio will still remember your
Bluetooth device and attempt to reconnect with the device
that was last connected. If the last connected Bluetooth
device is not available, the radio will try to connect to the
second last Bluetooth device.
The Bluetooth menu
You can open the Bluetooth
menu by pressing and holding
the
Info / Menu button
while
the radio is in the Bluetooth
mode.
The Bluetooth menu offers the
following options:
●
[Connect device]:
Select this option to disconnect
from the currently connected Bluetooth device and
switch the radio back to the Bluetooth pairing mode.
●
[Forget devices]:
Select this option to have the radio
forget all devices it has previously paired with.
●
[System settings]:
Select this option to go to the
System settings menu and configure the radio (refer
to chapter 14 "Using the System settings menu" for
details).
●
[Main menu]:
Select this option to go back to the
Main menu, where you can switch to any of the radio
'
s
modes or set the radio
'
s alarms or sleep timer, or go to
the System settings menu (refer to chapter 15 "Using
the Main menu" for details).
Disconnecting your Bluetooth device
To disconnect your Bluetooth device, either turn off
Bluetooth on the Bluetooth device, press and hold the
Back / Bluetooth pair button
on the radio, open the
Bluetooth menu and select
[Connect device]
to switch
back to the Bluetooth pairing mode or switch to another
mode on the radio using the
Mode, Tuning up / down
and
Select buttons
or using the radio
'
s Main menu. If
you disconnect the Bluetooth device when the radio is
in the Bluetooth mode, the radio
'
s display will show "No
connect" and the radio will be available for pairing again.
Showing Bluetooth information on the
display
When listening to Bluetooth audio, repeatedly press
the
Info / Menu button
to cycle through the following
information on the radio
'
s display:
● Album
● Artist
● Title
11. Listening to audio from CD
The DDR-75BT is capable of playing CDs, CD-Rs and
CD-RWs and can play both normal audio CDs and CDs
with MP3 and WMA files (with the exception of files
encoded using WMA lossless, WMA Voice, WMA 10
professional and files with DRM protection).
Audio playback in the CD mode
1.
Turn on the radio using the
Power button
.
2.
Select the CD mode using the
Mode, Tuning up /
down
and
Select buttons
or using the radio
'
s Main
menu. After selecting the CD mode, the radio
'
s display
will show "No disc".
3.
Insert a CD with the label side facing up. The radio
'
s
display will show "Reading" and a bar indicating the
progress while the CD is being read.
4.
After the CD is read, press the
Play / Pause button
to
pause or resume playback.
5.
Press the
Tuning down button
to go to the start of
the current track or the previous track when the current
track is at the start. If the current track is the rst track
of a folder on a CD with MP3 or WMA les, the radio
will switch back to the last track of the previous folder.
Press and hold the
Tuning down button
to fast rewind
within a track.
6.
Press the
Tuning up button
to go to the next track.
If the current track is the last track of a folder on a CD
with MP3 or WMA les, the radio will switch to the rst
track of the next folder. Press and hold the
Tuning up
button
to fast forward within a track.
Bluetooth
Connect device
Forget devices
System settings
Main menu
>
>

14
GB
7.
Press the
Select / Stop button
to stop playback. The
radio
'
s display will now show the total number of folders
and tracks on the CD.
8.
To skip to another folder, press the
Folder up
or
Folder
down button
. The first file of the next or previous
folder will be played.
9.
To take out the CD, press the
CD eject button
.
Showing CD information on the display
When playing audio CDs with MP3 and / or WMA files,
repeatedly press the
Info / Menu button
to cycle through
the following information on the radio
'
s display:
● Status
● File name
● Album
● Artist
● Title
12. Listening to audio from or recording
audio to a USB device or SD card
The DDR-75BT is capable of playing MP3 and WMA files
(with the exception of files encoded using WMA lossless,
WMA Voice, WMA 10 professional and files with DRM
protection) from USB devices or SD cards.
Playing files from a USB device or SD card
To play audio files from a USB device or SD card, follow
these steps:
1.
Turn on the radio using the
Power button
.
2.
Insert the USB device in the USB port or SD card in de
SD card slot.
3.
Select the USB or SD mode using the
Mode, Tuning
up / down
and
Select buttons
or using the radio
'
s
Main menu. After selecting either of these two modes,
the radio
'
s display will show "Reading" and a progress
bar to indicate the radio is reading the content of the
USB device or SD card.
4.
After the content of the USB device or SD card has
been read, playback of the rst track of the rst folder
will automatically start. The display will show "F01
T001 00:00". This represents the folder number, track
number and play time respectively.
5.
Press the
Play / Pause button
to pause or resume
playback.
6.
Press the
Tuning down button
to go to the start of
the current track or the previous track when the current
track is at the start. If the current track is the rst track
of a folder, the radio will switch back to the last track of
the previous folder. Press and hold the
Tuning down
button
to fast rewind within a track.
7.
Press the
Tuning up button
to go to the next track. If
the current track is the last track of a folder, the radio
will switch to the first track of the next folder. Press
and hold the
Tuning up button
to fast forward within a
track.
8.
Press the
Select / Stop button
to stop playback. The
radio
'
s display will now show the total number of folders
and tracks on the USB device or SD card.
9.
To skip to another folder, press the
Folder up
or
Folder
down button
. The first file of the next or previous
folder will be played.
Recording audio to a USB device or SD card
To record audio that is being played by the radio to a USB
device or SD card, follow these steps:
1.
Turn on the radio using the
Power button
.
2.
Insert the USB device in the USB port or SD card in de
SD card slot.
3.
Select the desired mode and playback the audio that
you want to record.
4.
Press the
Record button
. The radio will now initialize
recording to the USB device or SD card.
Note:
If both a USB device and SD card have been inserted,
the radio will record to the storage device that is
selected under
[Rec. default dest.]
in the System
settings menu (refer to chapter 14 "Using the System
settings menu" for more information about this feature).
The top right corner of the radio's display shows the
storage device that the recording is saved to.
5.
Press the
Record button
again to stop the recording.
6.
Recordings are saved as MP3 les named "RECXXX"
(XXX being the number of the recording, so the first
recording is named "REC001", the second "REC002",
etc.) in a folder named "REC" on the storage device.
Showing track information on the display
When listening to audio from a USB device or SD card,
repeatedly press the
Info / Menu button
to cycle through
the following information on the radio
'
s display:
● Filename
● Album
● Artist
● Title
13. Listening to audio using the Aux in
socket
You can listen to the sound of an external device (such as
an iPod or MP3 player) through the speakers of the DDR-
75BT. To do this, follow these steps:
1.
Connect the external device to the radio
'
s Aux in socket
using a 3.5mm audio cable (not included).
2.
Make sure both the radio and the external device are
turned on.
3.
Select the AUX in mode using the
Mode, Tuning up
/ down
and
Select buttons
or using the radio
'
s Main
menu.
4.
The audio output of the external device will now
be played through the speakers of the DDR-75BT.
Playback must be controlled on the external device,
while the volume can be controlled both on the radio
and on the external device.
14. Using the System settings menu
The System settings menu can be used to configure the
15
GB
DDR-75BT. Follow these steps to access the System
settings menu:
1.
Turn on the radio using the
Power button
.
2.
Press and hold the
Info / Menu button
to open the
menu for the current mode.
Use the
Tuning up
or
Tuning
down button
to
select
[System settings]
and press the
Select button
to open the menu.
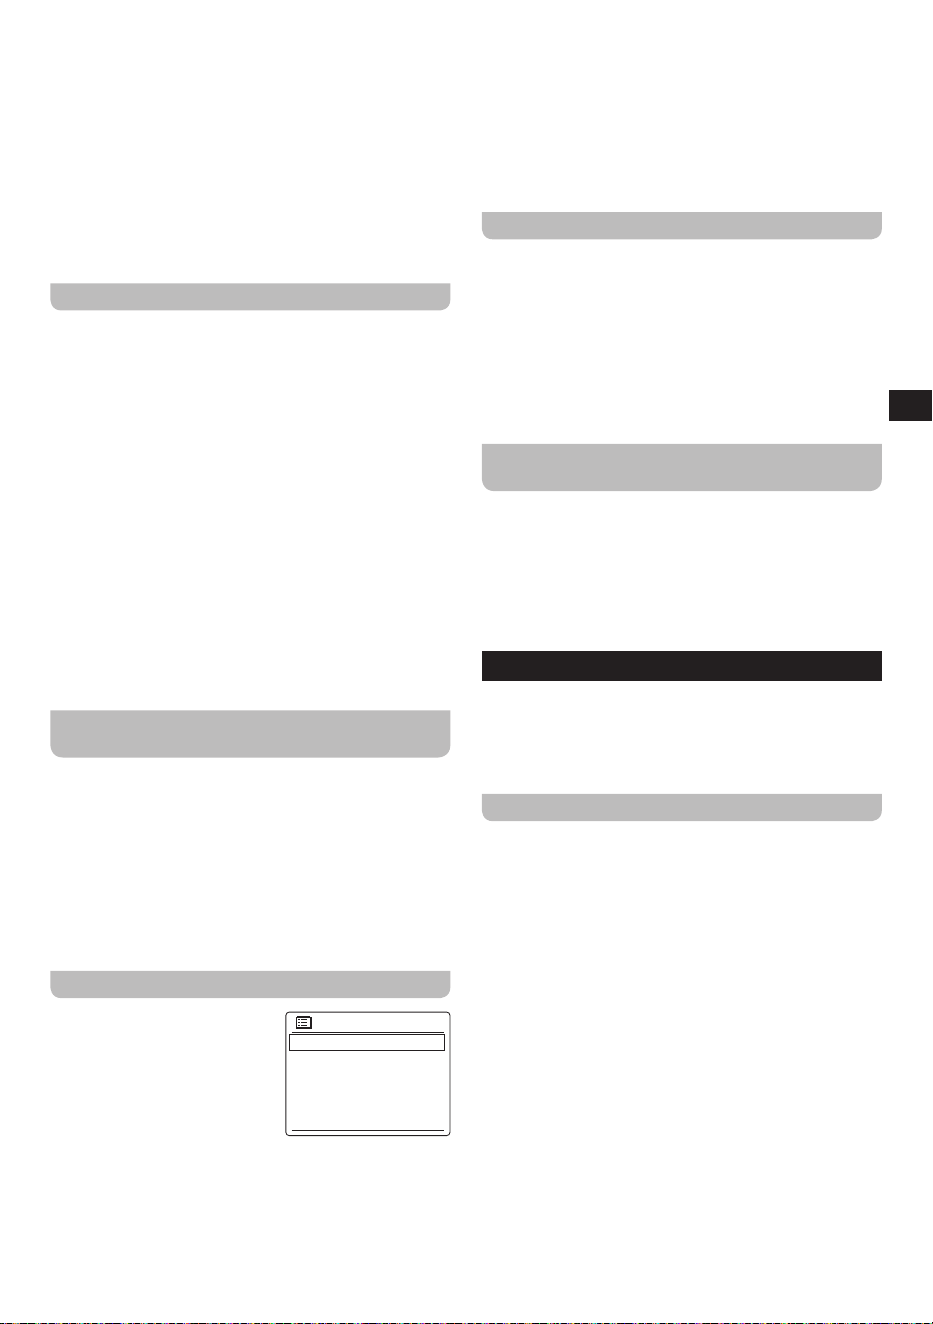
The System settings menu
offers the following options:
●
[Backlight]:
Select this option to configure the
brightness of the radio
'
s backlight. The subsequent
option
[Normal]
allows you to set the backlight
brightness when the radio is powered on, while
[Standby]
allows you to set the backlight brightness
for when the radio is in standby mode.
●
[Equaliser]:
Select this option to configure the
radio
'
s equaliser mode. The subsequent option
[My
EQ profile setup]
option allows you to manually
configure the bass, mid, treble and width level for
the radio
'
s
[My EQ]
equaliser mode.
●
[Subwoofer]:
Select this option to adjust the
subwoofer level of the radio.
●
[Streaming audio quality]:
Select this option to
congure the streaming audio quality.
●
[Network]:
Select this option to congure the radio
'
s
network connection, view and select available
network proles, run PBC setup or view the network
settings.
●
[Time / Date]:
Select this option to set the time and
date manually, to set the source for automatically
updating the time and date and set the time format.
●
[Inactive Standby]:
Select this option to congure
the time after which the radio automatically switches
to the standby mode when not being used.
By
default this period is set to 8 hours but you may
change it if you wish.
Setting Inactive Standby to
[O]
will disable this feature.
●
[Language]:
Select this option to configure the
language in which the radio
'
s menus are shown.
●
[Rec. default dest.]:
Select this option to congure
the default destination for recording les. When both
a USB device and SD card are inserted into the
radio and recordings are being made, the les will
be stored on the storage device that is configured
here.
●
[Factory reset]:
Select this option to reset the radio
to the default factory settings. After conrmation, all
user settings and preset stations will be erased.
●
[Software update]:
Select this option to configure
whether the radio should occasionally check for
available software updates or to check for available
software updates.
●
[Setup wizard]:
Select this option to perform the
Setup wizard again, either right away or at the next
startup. Refer to chapter 3 "Getting started" for more
information on using the Setup wizard.
●
[Info]:
Select this option to view the radio
'
s Spotify
version, Radio ID and Friendly Name.
●
[Privacy policy]:
Select this option to display the
link to the radio
'
s privacy policy.
Manually setting the time and date
Setting the radio
'
s date and time works slightly different
from configuring most of the other radio
'
s options and
features. If you would be unable to automatically update
the time and date using the DAB, FM or network, follow
these steps to manually set the time and date:
1.
Open the System settings menu using the three steps
previously described.
2.
Select
[Time / Date]
.
The Time / Date submenu
offers the following options:
●
[Set Time / Date]:
Select
this option to manually
configure the time and
date.
●
[Auto update]:
Select this option to select a
source for automatically updating the time and
date. If the current setting is
[Update from
Network]
, the
[Set timezone]
and
[Daylight
savings]
options will appear in the Time / Date
submenu.
●
[Set format]:
Select this option to select the 12 or
24 hour format.
●
[Set timezone]:
Select this option to set the time
zone which is applicable to your location.
●
[Daylight savings]:
Select this option to set
whether to use Daylight savings according to your
location.
3.
Select
[Set Time / Date]
and press the
Select button
to manually set the radio
'
s time and date.
4.
The radio
'
s display will show the date and time and
the day digits are blinking on the display.
5.
Use the
Tuning up
or
Tuning down button
to select
the current day and press the
Select button
to
conrm.
6.
Next, the month digits will blink on the display.
7.
Use the
Tuning up
or
Tuning down button
to select
the current month and press the
Select button
to
conrm.
8.
Next, the year digits will blink on the display.
9.
Use the
Tuning up
or
Tuning down button
to select
the current year and press the
Select button
to
conrm.
10.
Next, the hour digits will blink on the display.
11.
Use the
Tuning up
or
Tuning down button
to select
the current hour and press the
Select button
to
conrm.
12.
Next, the minute digits will blink on the display.
13.
Use the
Tuning up
or
Tuning down button
to select
the current minutes and press the
Select button
to
confirm. If the radio has been set to use a 12 hour
format, there will be an option here for setting AM
or PM for the clock time. Press the
Tuning up
or
Tuning down button
to select AM or PM. Press the
Select button
to conrm the setting.
System settings
Backlight
Equaliser
Subwoofer
Streaming audio quality
Network
>
>
>
Time/Date
Set Time/Date
Auto update
Set format
Set timezone
Daylight savings
>
>
16
GB
14.
Manually setting the time is now completed and the
radio will return to the Time / Date submenu.
15. Using the Main menu
The Main menu can be used to select the radio
'
s mode
or to set the alarms and sleep timer of the radio. Follow
these steps to access the Main menu:
1.
Turn on the radio using the
Power button
.
2.
Press and hold the
Info / Menu button
to open the
menu for the current mode.
Use the
Tuning up
or
Tuning
down button
to select
[Main
menu]
and press the
Select
button
to open the menu.
The Main menu offers the
following options:
●
[FM]:
Select this option to
switch to the FM radio mode.
●
[DAB]:
Select this option to switch to the DAB radio
mode.
●
[Bluetooth]:
Select this option to switch to the
Bluetooth mode.
●
[Spotify]:
Select this option to switch to the Spotify
mode.
●
[Internet radio]:
Select this option to switch to the
Internet radio mode.
●
[Podcasts]:
Select this option to switch to the
Podcast mode.
●
[Amazon Music]:
Select this option to switch to the
Amazon Music mode.
●
[Deezer]:
Select this option to switch to the Deezer
mode.
●
[AUX in]:
Select this option to switch to the AUX in
mode.
●
[CD]:
Select this option to switch to the CD mode.
●
[USB]:
Select this option to switch to the USB mode.
●
[SD]:
Select this option to switch to the SD mode.
●
[Sleep]:
Select this option to set the radio
'
s sleep
timer.
●
[Alarms]:
Select this option to set the radio
'
s
alarms.
●
[System settings]:
Select this option to go to the
System settings menu (refer to chapter 14 "Using
the System settings menu" for more information on
this menu).
Setting the alarms
The radio
'
s alarms can be set by pressing the
Alarm
button
on the remote control while the radio is powered
on or using the
[Alarms]
option in the Main menu. Follow
these steps to set the radio
'
s alarms:
1.
Turn on the radio using the
Power button
.
2.
Press the
Alarm button
on the remote control or open
the Main menu, select
[Alarms]
and press the
Select
button
.
3.
Both alarms and their settings will be shown on the
display. Select the alarm that
you want to set.
The submenu for configuring
an alarm offers the following
options:
●
[Enable]:
Select this
option to configure the
alarm frequency, the available settings here are
[O]
,
[Daily]
,
[Once]
,
[Weekends]
and
[Weekdays]
.
●
[Time]:
Select this option to set the alarm time. This
can be done in the same way as setting the time and
date in the previous chapter.
●
[Mode]:
Select this option to set the mode that is
used for the alarm.
●
[Preset]:
Select this option to select a preset or the
last listened station as the alarm source.
●
[Volume]:
Select this option to set the alarm volume.
●
[Save]:
Select this option to save the alarm settings.
4.
Set all the first five of the above options using the
Tuning up
or
Tuning down button
and
Select
button
.
5.
Select
[Save]
and press the
Select button
.
6.
To congure the other alarm, select the other alarm in
step 2 and repeat steps 3 and 5.
Notes:
● When an alarm sounds, press the
Power button
to
turn off the alarm and switch the radio back to the
standby mode. If the radio cannot connect to the
specied radio station, the buzzer alarm will be used
instead. Repeatedly press any of the other buttons on
the radio (Except for the
Power button
and Volume
control) to snooze the alarm for the number of minutes
displayed on the radio's display. While the snooze timer
is active the remaining snooze time is shown next to
the ashing alarm icon on the clock display. In order to
cancel the Snooze timer while the alarm is suspended,
press the
Power button
. The display will briey show
an “Alarm OFF” message.
● Alarms will stop sounding after 60 minutes have
elapsed since the start of the alarm.
● Alarms can be quickly enabled and disabled by
repeatedly pressing the
Alarm button
in the standby
mode.
Setting the sleep timer
The sleep timer allows you to automatically turn off the
radio after a preset time has elapsed. It can be set from
15 to 120 minutes using by pressing and holding the
Power / Sleep button
on the radio and then using the
Tuning up
or
Tuning down button
to select the desired
sleep time or by using the
[Sleep]
option from the Main
menu.
Follow the steps below to set the sleep timer using the
radio
'
s Main menu:
1.
Open the Main menu using the three steps previously
described.
2.
Select
[Sleep]
and press the
Select button
.
3.
Press the
Tuning up
or
Tuning down button
to select
the desired sleep time.
Main menu
Internet radio
Podcasts
Spotify
Amazon Music
Deezer
Alarm 1
Enable: Off
Time: 00:00
Mode: Internet radio
Preset: Last listened
Volume: 24
17
GB
4.
After the sleep time has elapsed, the radio will
automatically switch to the standby mode. An active
sleep timer is shown using a small sleep timer icon
at the bottom of the playback displays. This icon also
shows the sleep time remaining before the radio
switches to the standby mode.
5.
To cancel the sleep time before the preset time has
elapsed and to turn off the radio, press the
Power
button
to turn the unit o manually. To cancel the sleep
timer and leave the radio playing, go back into the
sleep timer settings (steps 1 to 3 above) and select the
"Sleep OFF" option in step 3.
16. Headphone socket / Line out socket /
Optical S/PDIF output socket / Aerial
removal
Headphone socket
A 3.5mm Headphone Socket located on the rear of your
radio is provided for use with headphones. Inserting a
plug automatically mutes the internal loudspeaker.
Please be aware that the sensitivity of headphones can
vary widely. We therefore recommend setting volume to
a low level before connecting headphones to the radio.
It is also recommended to reduce the volume before
unplugging your headphones.
Important:
Excessive sound pressure from earphones and
headphones can cause hearing loss.
To prevent possible hearing damage, do not
listen at high volume levels for long periods.
Line out socket
A 3.5mm Line out socket located on the rear of your radio
is provided for connecting the audio signal to an external
amplifier. Inserting an audio cable into this socket will not
mute the internal loudspeaker. Set the volume control on
the radio to minimum if desired.
Optical S/PDIF output socket
A digital output socket providing an S/PDIF signal is
provided on the rear of your radio for connection to an
amplifier, mini-disc or other equipment with a digital optical
input.
Aerial removal
The fitted telescopic aerial is suitable for most
applications. The telescopic aerial may be removed to
allow connection to an external aerial using a coaxial
cable.
First remove the two small screws holding the antenna
connector cover in place (use a small cross-head screw
driver). Then using the spanner, remove the telescopic
aerial by rotating in an anti-clockwise direction when
viewed from the rear of the product.
This will expose an F-type connector to which an external
aerial may be connected.
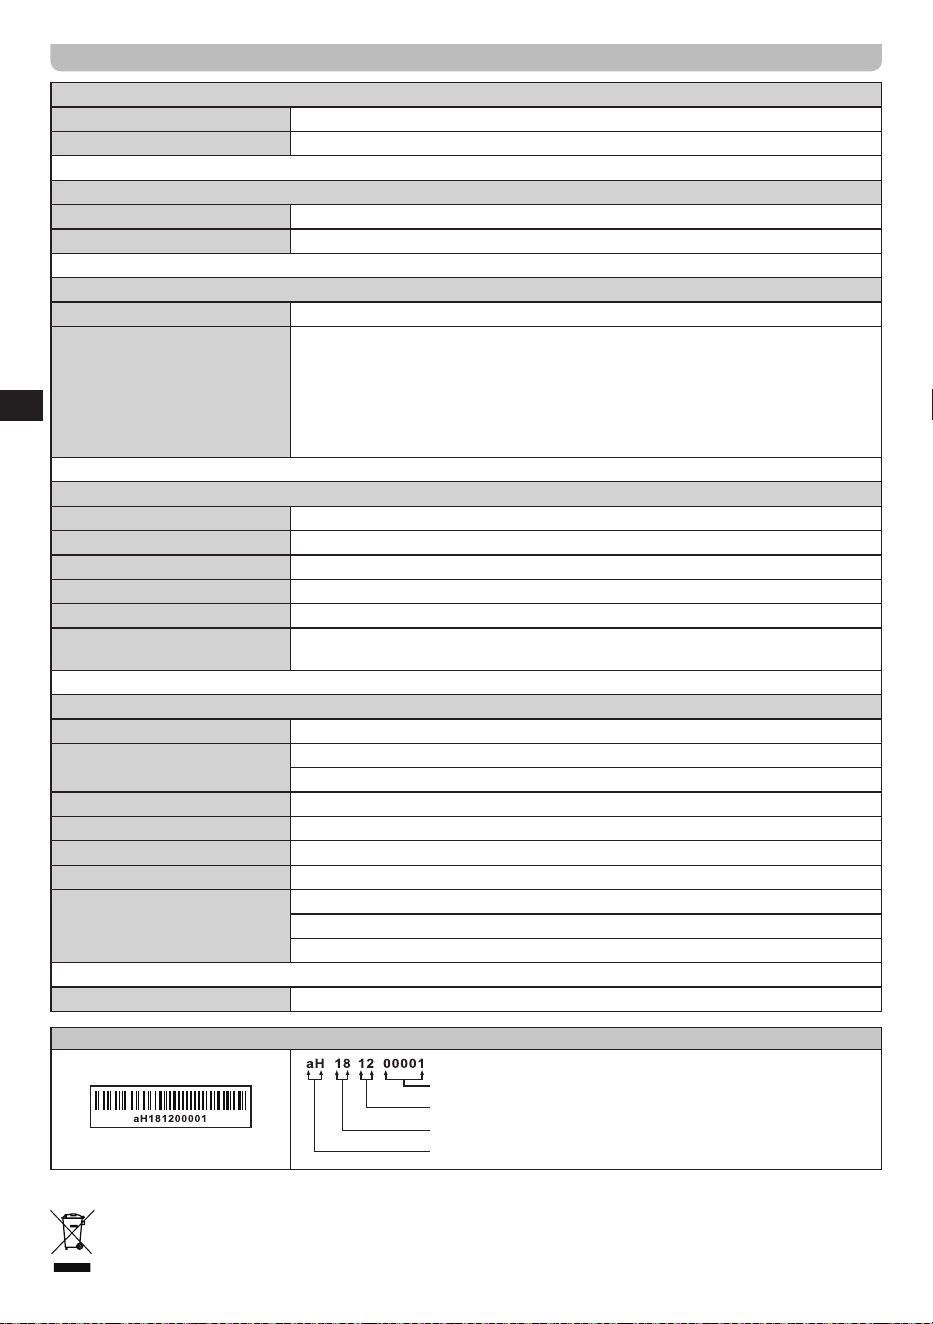
18
GB
Specifications
Power Requirements
Mains Power Supply AC 100-240V, 50/60 Hz / 66W
Remote Control Battery 2 x AAA
Frequency Coverage
FM 87.5-108 MHz
DAB 174.928-239.200 MHz
Connectivity
Wired Ethernet 10 / 100M bits / sec via RJ-45 socket
WiFi
802.11 b, g, n or a supported with WEP and WPA / WPA2 encryption. Compatible
with 2.4GHz and 5GHz WiFi bands.
The frequency and maximum transmitted power:
WiFi:
2412MHz ~ 2472MHz, EIRP= 16.63dBm
5180MHz ~ 5240MHz & 5745MHz ~ 5825MHz, EIRP= 12.36dBm
Operations in the 5.15-5.35GHz band are restricted to indoor usage only.
Bluetooth
Bluetooth version 5.0
Supported Bluetooth proles A2DP, AVRCP
Supported Bluetooth codecs SBC and AAC
Transmitting Power Power Class 2
Bluetooth range approx. 10m (30feet)
The frequency and maximum
transmitted power
2402MHz ~ 2480MHz: 3.51dBm (Bluetooth EDR)
Circuit features
Loudspeaker 2 x 3inch + 2 x 4inch
Output power
10W x 2 + 25W (peak)
6W x 2 + 18W (continuous)
Headphone socket 3.5mm diameter, stereo
Aux In socket 3.5mm diameter, stereo
Line Out socket 3.5mm diameter, stereo
Digital optical output socket Toslink
Aerial System
Wi-Fi antenna
DAB Telescopic aerial
FM Telescopic aerial
Operating temperature range
0°C to +40°C
※
The barcode label on the product is defined as below:
Serial number
Production month
Production year
Product code
Sangean reserves the right to amend the specifications without notice.
RECYCLING This product bears the selective sorting symbol for Waste electrical and electronic equipment
(WEEE). This means that this product must be handled pursuant to European directive 2012/19/EU in order to
be recycled or dismantled to minimize its impact on the environment.
