

© 2022 Garmin Ltd. or its subsidiaries
All rights reserved. Under the copyright laws, this manual may not be copied, in whole or in part, without the written consent of Garmin. Garmin reserves the right to change
or improve its products and to make changes in the content of this manual without obligation to notify any person or organization of such changes or improvements. Go to
www.garmin.com for current updates and supplemental information concerning the use of this product.
Garmin
®
, the Garmin Logo, and Tacx
®
are trademarks of Garmin Ltd. or its subsidiaries, registered in the USA and other countries. These trademarks may not be used without the
express permission of Garmin.
Campagnolo
®
is a registered trademark of Campagnolo S.r.l. Shimano
®
is a registered trademark of Shimano, Inc. SRAM
®
is a registered trademark of SRAM LLC.
This product is ANT+
®
certified. Visit www.thisisant.com/directory for a list of compatible products and apps.
M/N: T2980, T2900S


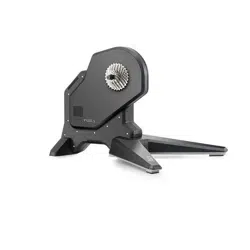
Tacx FLUX 2/S Instructions
WARNING
See the Important Safety and Product Information guide in the product box for product warnings and other
important information.
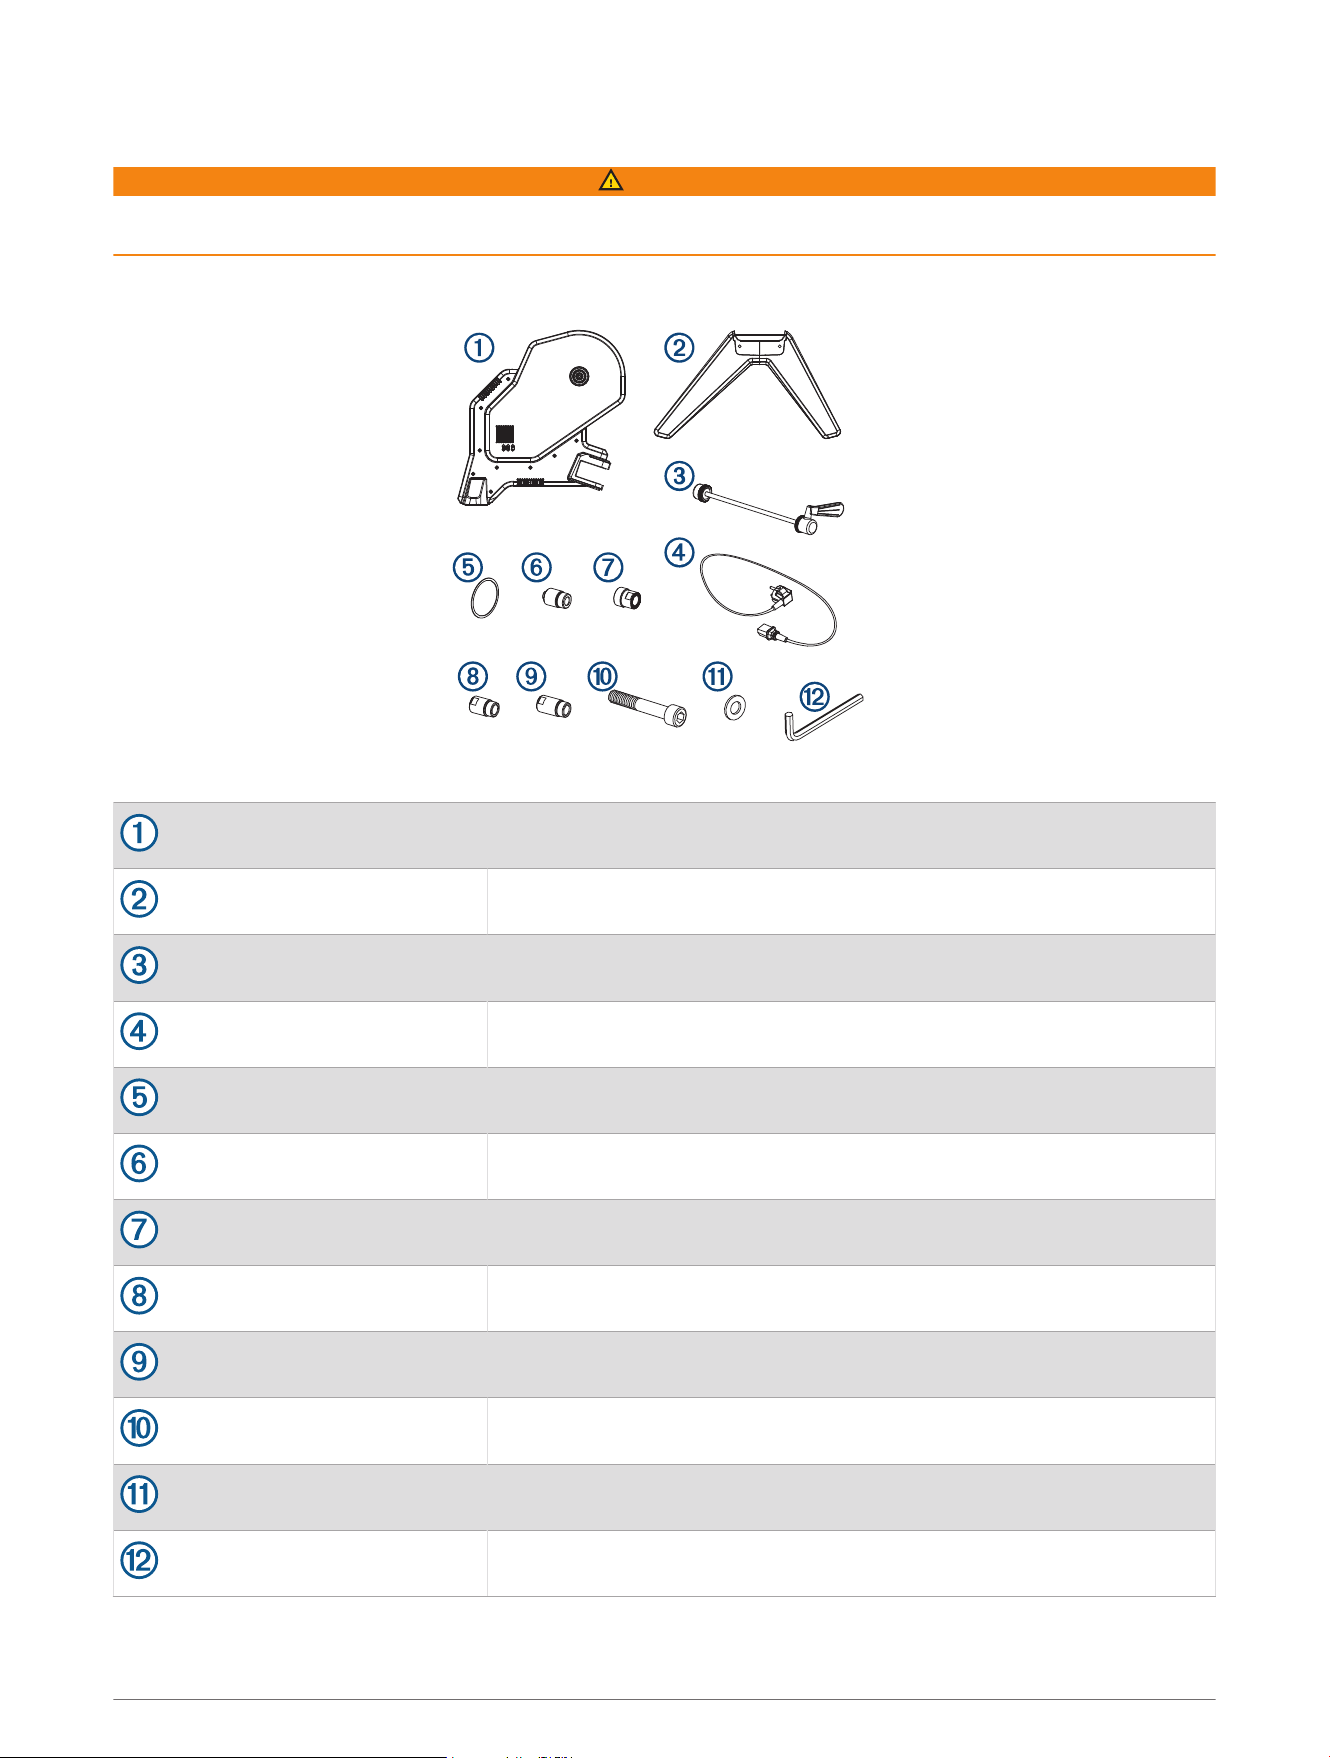
Trainer Parts
You should check the package for all the required parts.
011-05424-02, 011-05424-01
Tacx FLUX 2/S trainer
011-05450-01, 011-05450-02
Front legs
013-00928-02
Standard quick release skewer
Country-specific
Power cable
213-00169-02
Cassette spacer ring
117-01575-02
Quick release end cap and 135 mm axle (QR x 135 NDS)
117-01575-10
12 mm thru-axle, drive-side end cap (12 DS)
117-01575-12
12 mm x 142 mm thru-axle, non-drive-side end cap (12 x 142 NDS)
117-01575-14
12 mm x 148 mm thru-axle, non-drive-side end cap (12 x 148 NDS)
211-04965-37
Bolts (2)
212-00150-00
Washers (2)
013-00936-00
8 mm hex key
Tacx FLUX 2/S Instructions 1
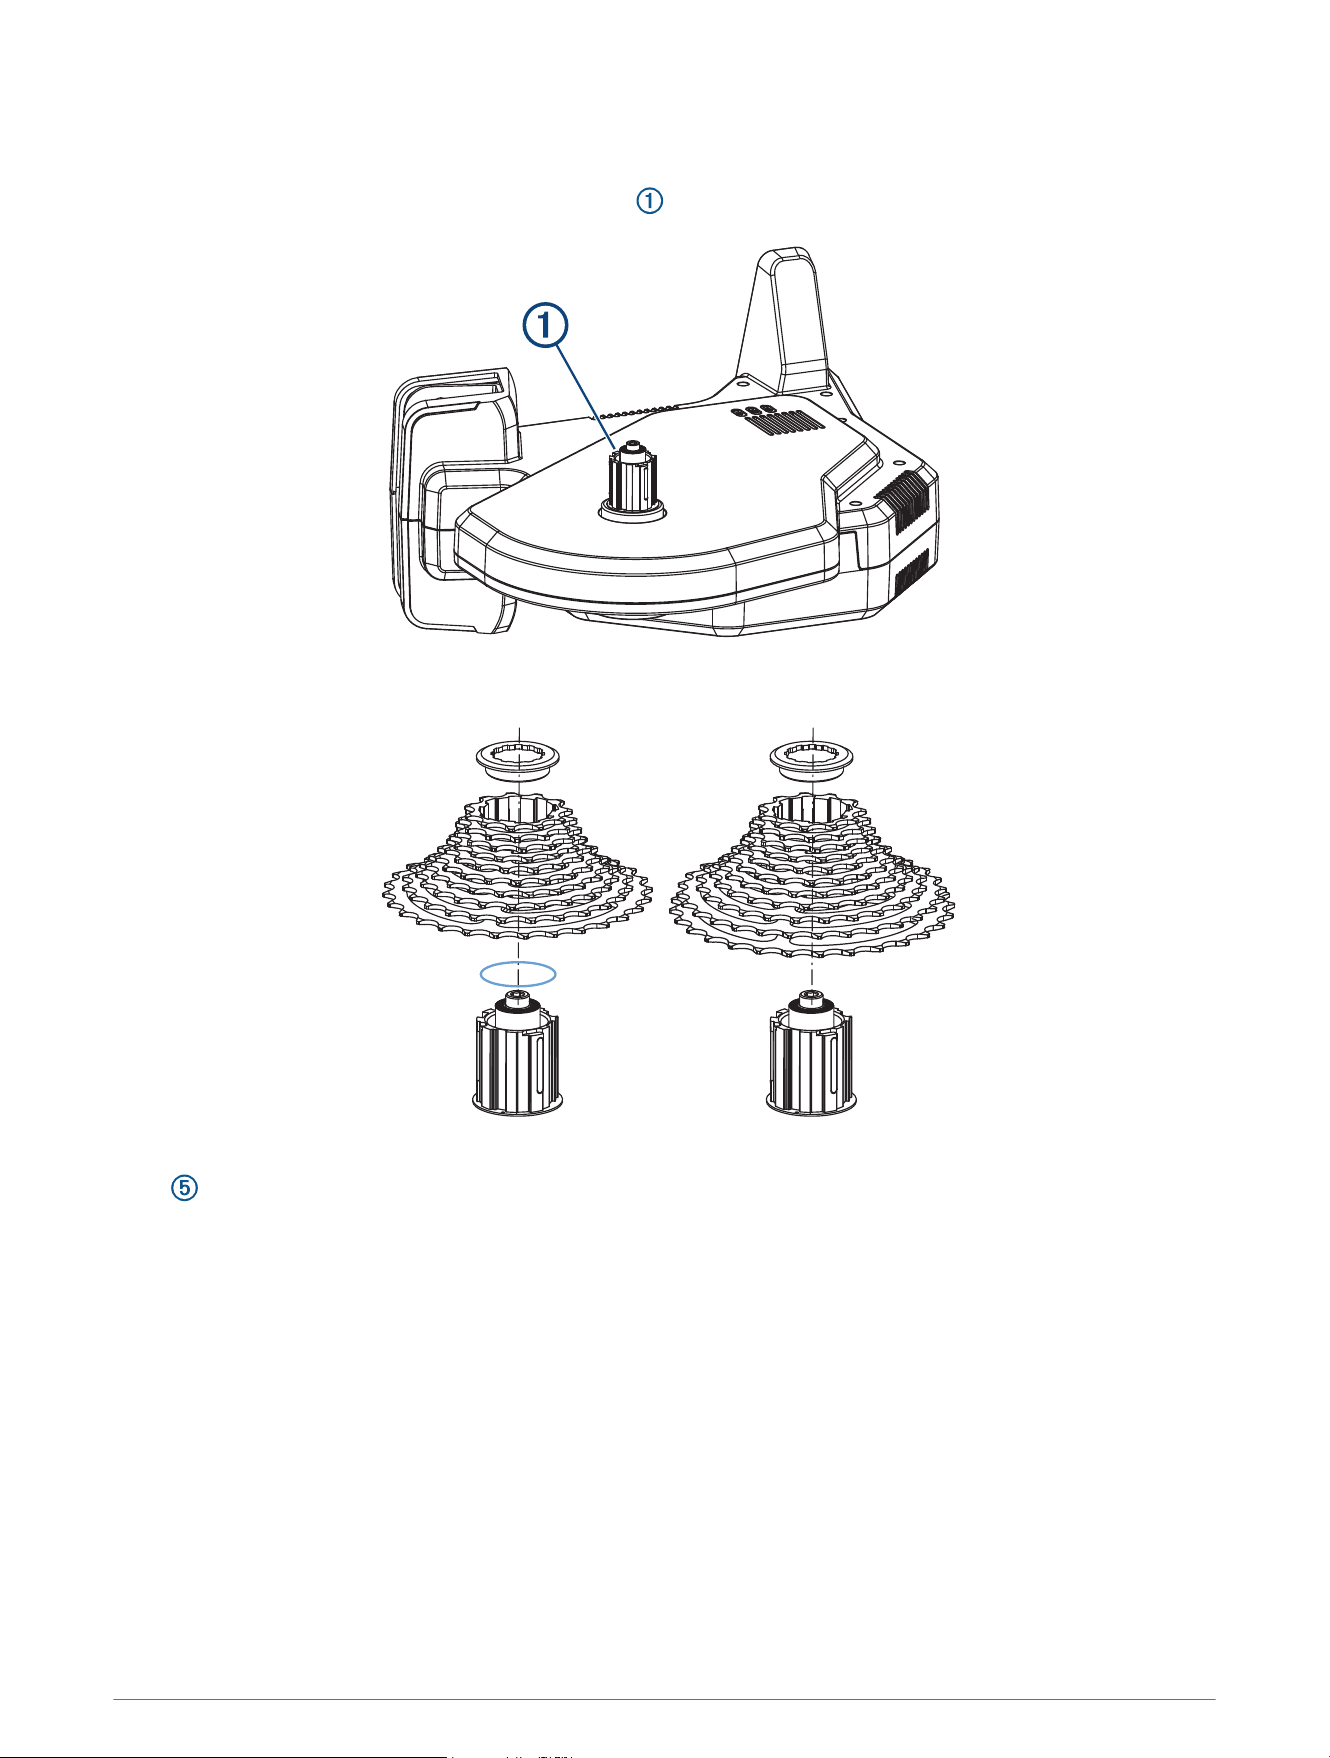
Mounting the Cassette
NOTE: A cassette is not included with the trainer.
1 Place the trainer on its side with the freehub body facing up.
2 Select an option:
• If you have a Shimano
®
or SRAM
®
8, 9, or 10 speed cassette, use the standard freehub body with a spacer
.
• If you have a Shimano or SRAM 11 or 12 speed cassette, use the standard freehub body with no spacer.
• If you have a different cassette style, such as Campagnolo
®
, SRAM XD, or XD-R, go to buy.garmin.com to
purchase the compatible freehub body.
3 Mount the cassette to the trainer.
You should refer to the owner's manual provided with your cassette.
2 Tacx FLUX 2/S Instructions

Installing End Caps for a Thru Axle
Standard 130 mm quick release end caps are mounted on the trainer. If you have a 135 mm quick release end
cap or thru axle, you can swap the end caps.
1 On the drive side, use a hex key to remove the end cap.
2 Install the end cap .
3 On the non-drive side, select an option:
• If the axle is 12 x 142 mm, use the end cap .
• If the axle is 12 x 148 mm, use the end cap .
4 Insert the end cap into the trainer, and hand tighten.
5 Use a 17 mm bike wrench to tighten completely.
Tacx FLUX 2/S Instructions 3
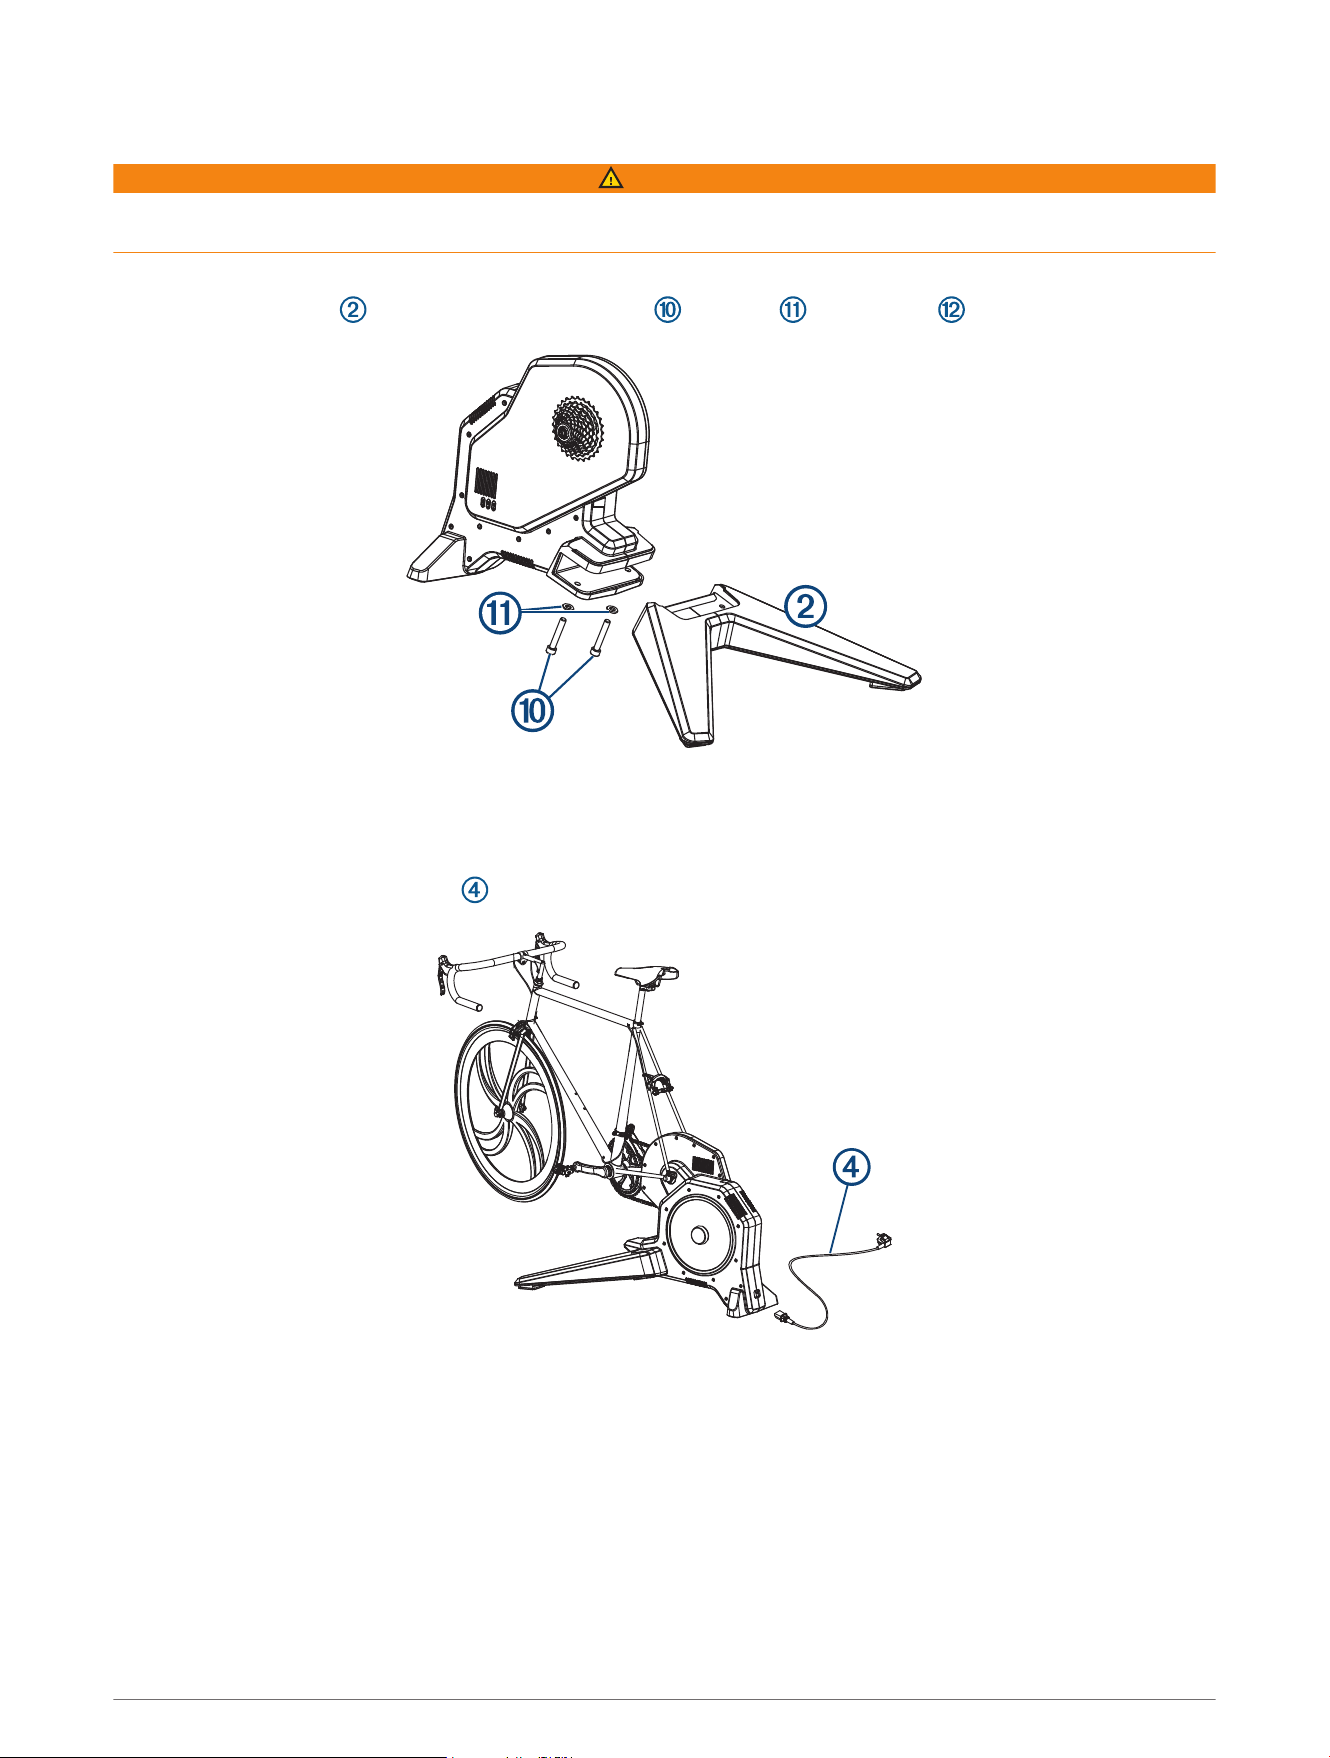
Attaching Your Bike to the Trainer
WARNING
For direct-drive trainers, the rear axle must be installed properly. Failure to tighten and firmly close the quick
release lever may result in injury or property damage. To see a video, go to www.garmin.com/tacx/axle.
1 Place the trainer on a firm and level surface.
2 Attach the front leg to the trainer using the bolts , washers , and hex key .
3 Remove the rear wheel from your bike.
4 Align the rear axle of the bike with the trainer frame.
5 Tighten and close the quick release skewer or thru axle.
6 Plug the power cable connector into the Tacx FLUX 2/S port.
7 Plug the power cable into a standard wall outlet.
The power LED is green during normal operation.
8 Rotate the crank arm to check for clearance.
4 Tacx FLUX 2/S Instructions

Tacx Training App
You can download the Tacx Training app to your compatible phone, tablet, or computer.
• Ride exciting courses without leaving your home.
• Create your own rides, workouts, and more.
• Manage your training, customize the default settings, and diagnose issues.
• Sync your indoor training data with your Garmin Connect
™
account.
• Update your trainer software.
Device Information
Device Care and Storage
• Unplug the trainer when it is not in use.
• Wipe off the trainer after every use.
• Clean the trainer before storing it.
Specifications
Power supply
Use the included power cable.
100 to 240 v @ 50/60 Hz, 40 W
Operating temperature range From -20º to 55ºC (from -4º to 131ºF)
Wireless frequency 2.4 GHz @ 3 dBm maximum
Water rating
IEC 60529 IP21
The device withstands incidental exposure of vertically falling water droplets.
Garmin
®
Support Center
Go to support.garmin.com for help and information, such as product manuals, frequently asked questions,
videos, and customer support.
Device Information 5

support.garmin.com
GUID-51949190-2A33-4BC3-94BE-16520334F98A v3November 2022