
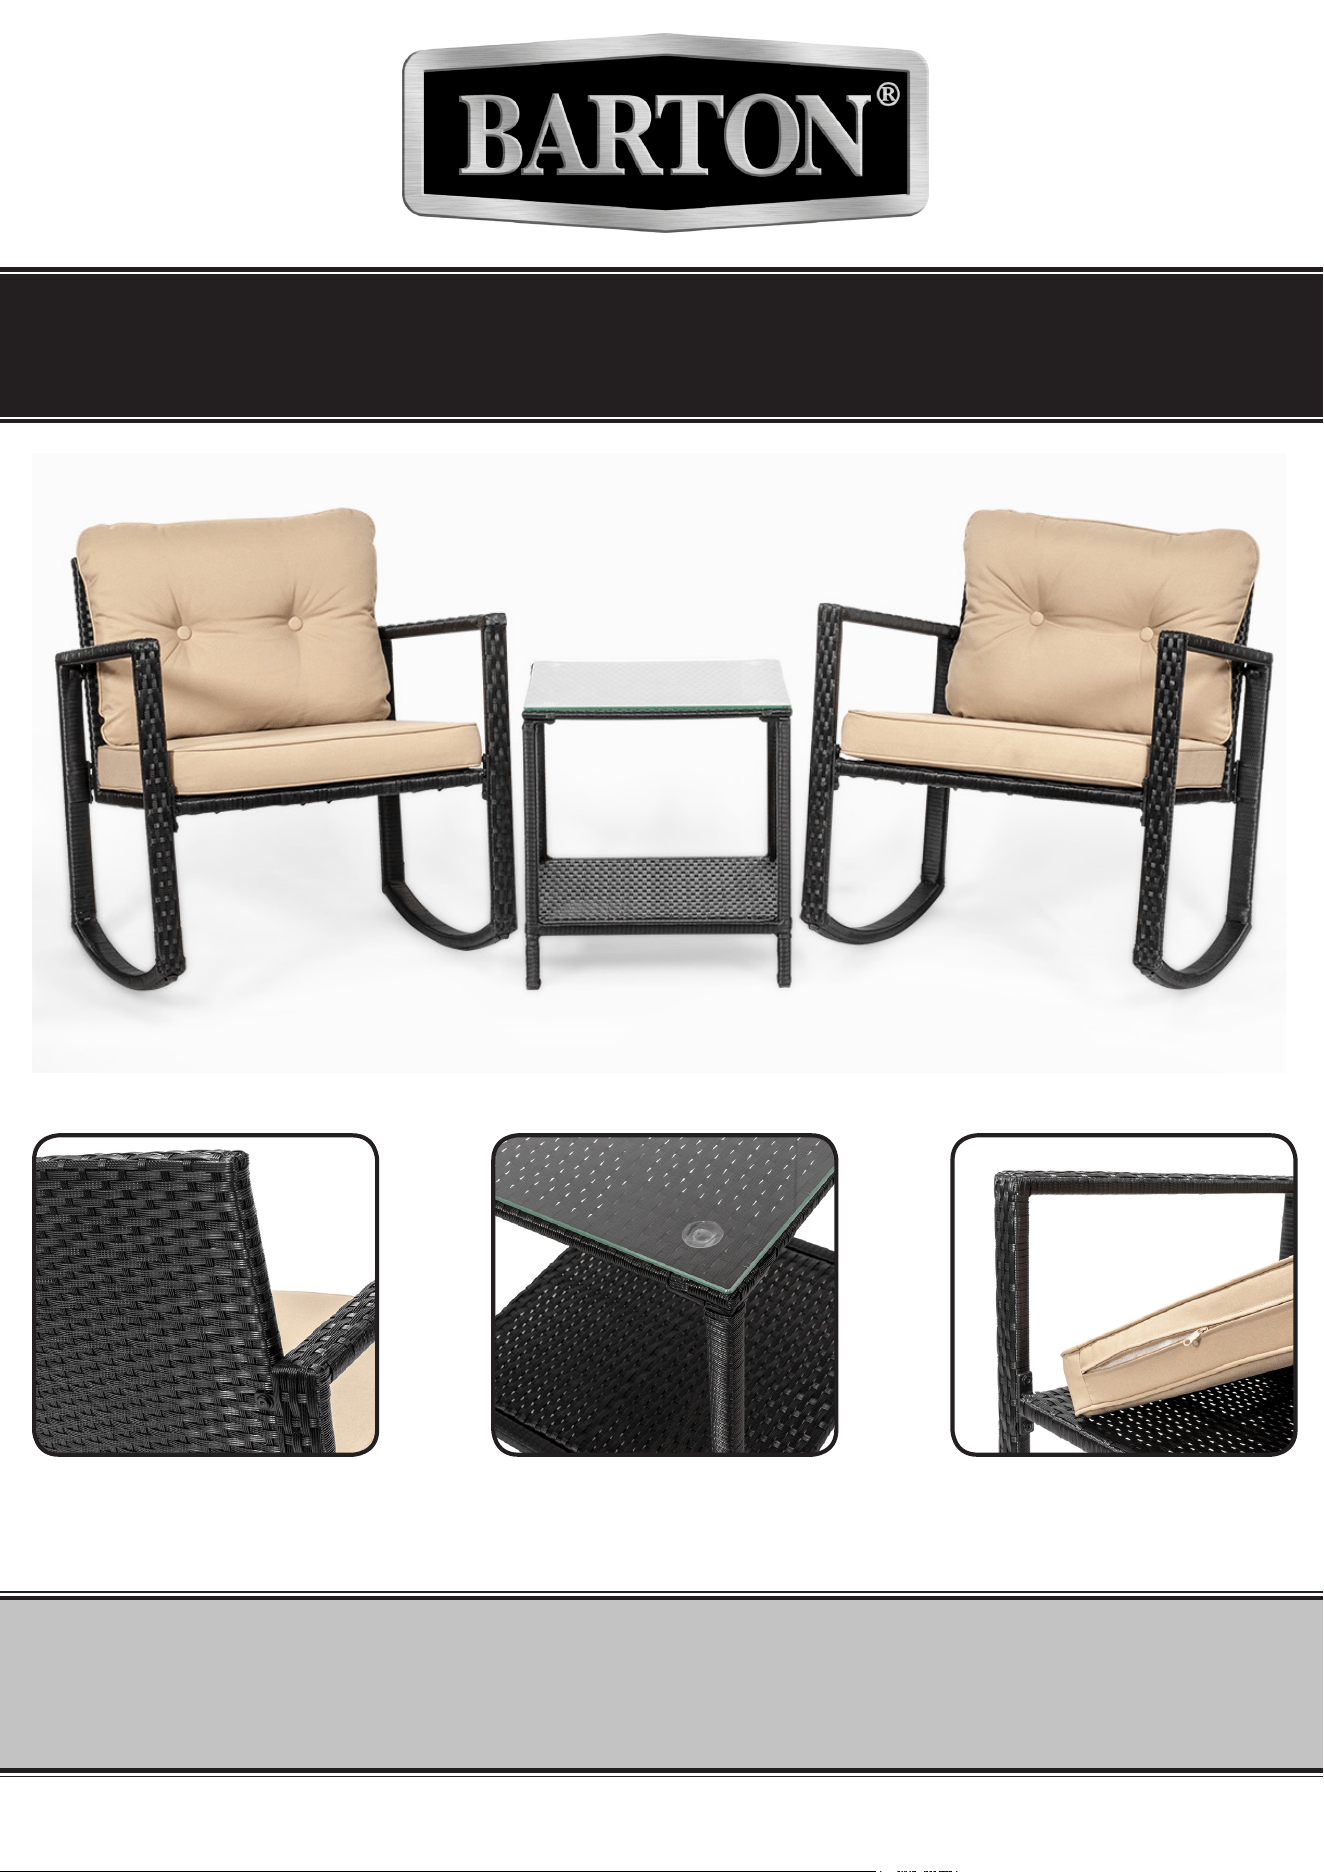
3PC ROCKER WICKER PATIO SET
SAVE THIS MANUAL: KEEP THIS MANUAL FOR SAFETY WARNINGS, PRECAUTIONS, ASSEMBLY,
OPERATING, INSPECTION, MAINTENANCE AND CLEANING PROCEDURES. WRITE THE PRODUCT’S
SERIAL NUMBER ON THE BACK OF THE MANUAL NEAR THE ASSEMBLY DIAGRAM (OR MONTH
AND YEAR OF PURCHASE IF PRODUCT HAS NO NUMBER)
OWNER’S MANUAL AND SAFETY INSTRUCTIONS
ITEM: 93503
FOR QUESTIONS PLEASE CALL OUR CUSTOMER SUPPORT: 909.628.0880 MON-FRI 9AM TO 3PM PST

1
IMPORTANT PRODUCT INFORMATION
Thank you for your purchase! Your new Barton patio set and accessories are designed for many years
of enjoyment with proper care. Please adopt the following practices to ensure the longevity of your
purchase.
General Cleaning
Regular cleaning should be done with a damp, non-colored, non-abrasive cloth soaked in clear water.
Use mild soap as necessary. Avoid the use of abrasive cleaners and power washers. Clean spills
immediately with a damp, non-colored, non-abrasive cloth and mild soap solution to avoid staining.
Using the product in a coastal environment places higher demand on the surface nish due to the
eects of salty/corrosive air. More frequent cleaning (weekly or biweekly) is necessary to remove
any buildup of salt residue. Quarterly application of a clear coat is necessary to maintain a strong
surface nish in this type of environment.
For all items, avoid exposure, especially prolonged exposure to harsh environments including rain,
snow, or other wet conditions, direct sunlight, extremely high or low temperatures, and salty or
corrosive air. Products should be covered or brought indoors when not in use, especially when not in
use for prolonged periods of time, or when otherwise exposed to harsh weather such as winter. Do
not put hot items directly on furniture surface. Always use coasters, placemats, trivets, or hot pads.
Do not clean with harsh cleaners or polish. Do not place near heating or cooling vents.
WICKER CLEANING
An eective all-purpose cleaning solution for outdoor wicker furniture is 1/4 cup of liquid dish soap
and two cups of warm water. Wipe the wicker with a soft cloth or sponge, then rinse away the soapy
suds with a garden hose. For mold and mildew removal, add one cup of white vinegar to the solution.
• Remove any cushions and clean them separately, according to the manufacturer’s instructions, as
proper care varies by fabric type.
• Regular dusting with a soft cloth, microber duster, or feather duster helps keep any type of wicker
looking great.
• For heavier dust, use a small soft-bristled paintbrush; to remove dirt from those crevices where
wicker meets the furniture frame, switch to an old toothbrush.
• Regularly clean wicker furniture with the brush attachment of your vacuum, being sure to set the
suction to its lowest level to avoid causing damage.
Strategies for drying wicker include using a hairdryer, a fan, or the open air.If your wicker is synthetic,
it can dry in the sun outside.If your wicker is natural, spot-drying with a hair dryer (on a cold air
setting), or with a fan will work wonders.Do not let wet natural wicker stand for too long without
drying, as it might grow mould or develop mildew.A regular clean keeps wicker furniture looking
great and remaining strong; with these tips, you can handle the task with ease.
KEEP THESE INSTRUCTIONS
2
ASSEMBLY
ASSEMBLY
3
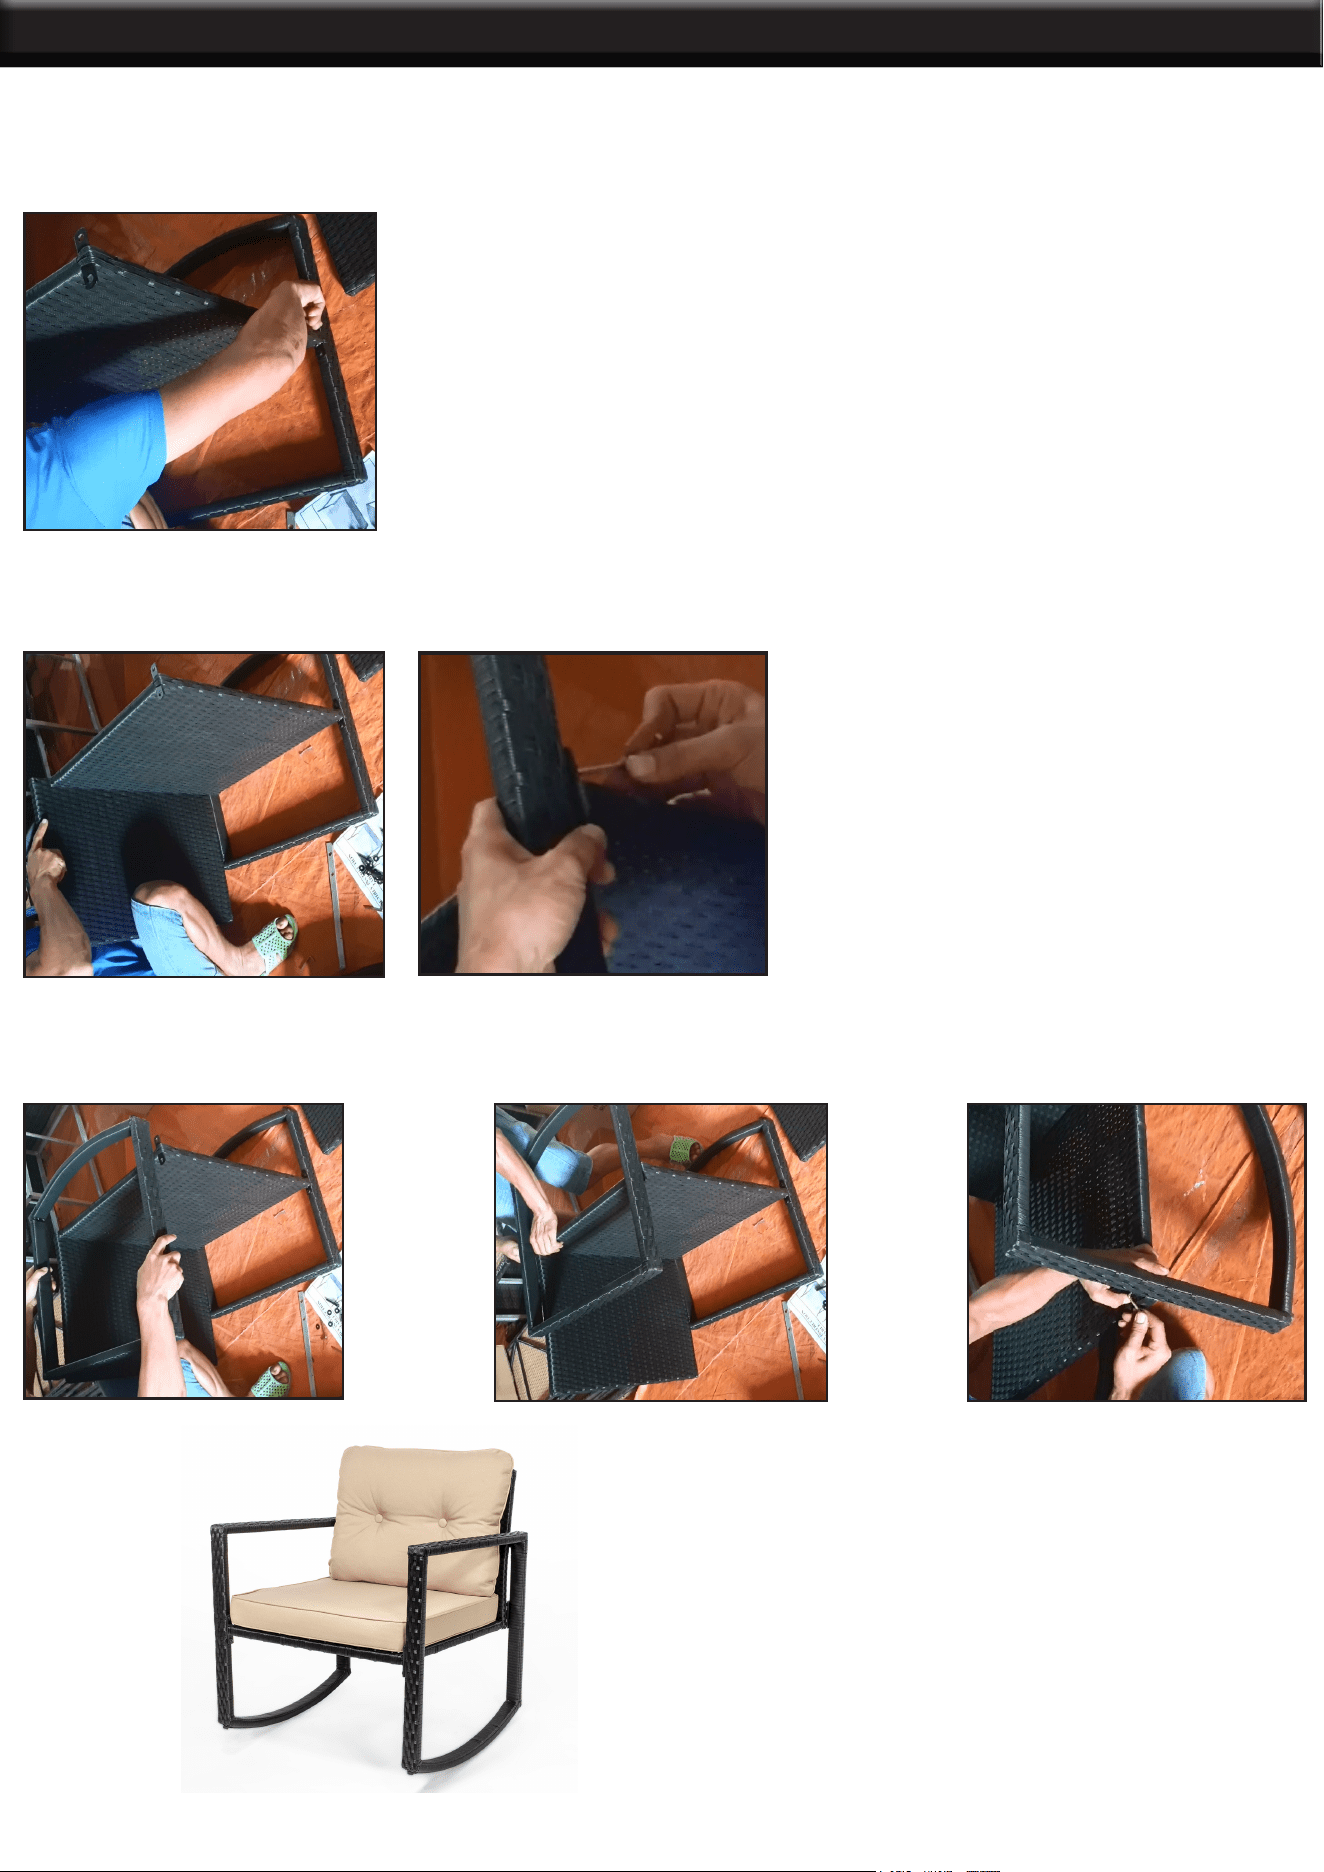
Step 1: Place arm of the chair at on the oor and line up the seat of the chair and ax the seat to the
arm using a M16 x 15 bolt.
Step 2: Attach the back of the chair onto the backside of the seat portion of the chair using a M6 x 15
bolt.
CHAIR ASSEMBLY
Step 3: Place the other arm of the chair on top of the other side of the chair and line up to the seat of
the chair and ax the seat to the arm using a M16 x 15 bolts.
The nished chair should look like this.
ASSEMBLY
4
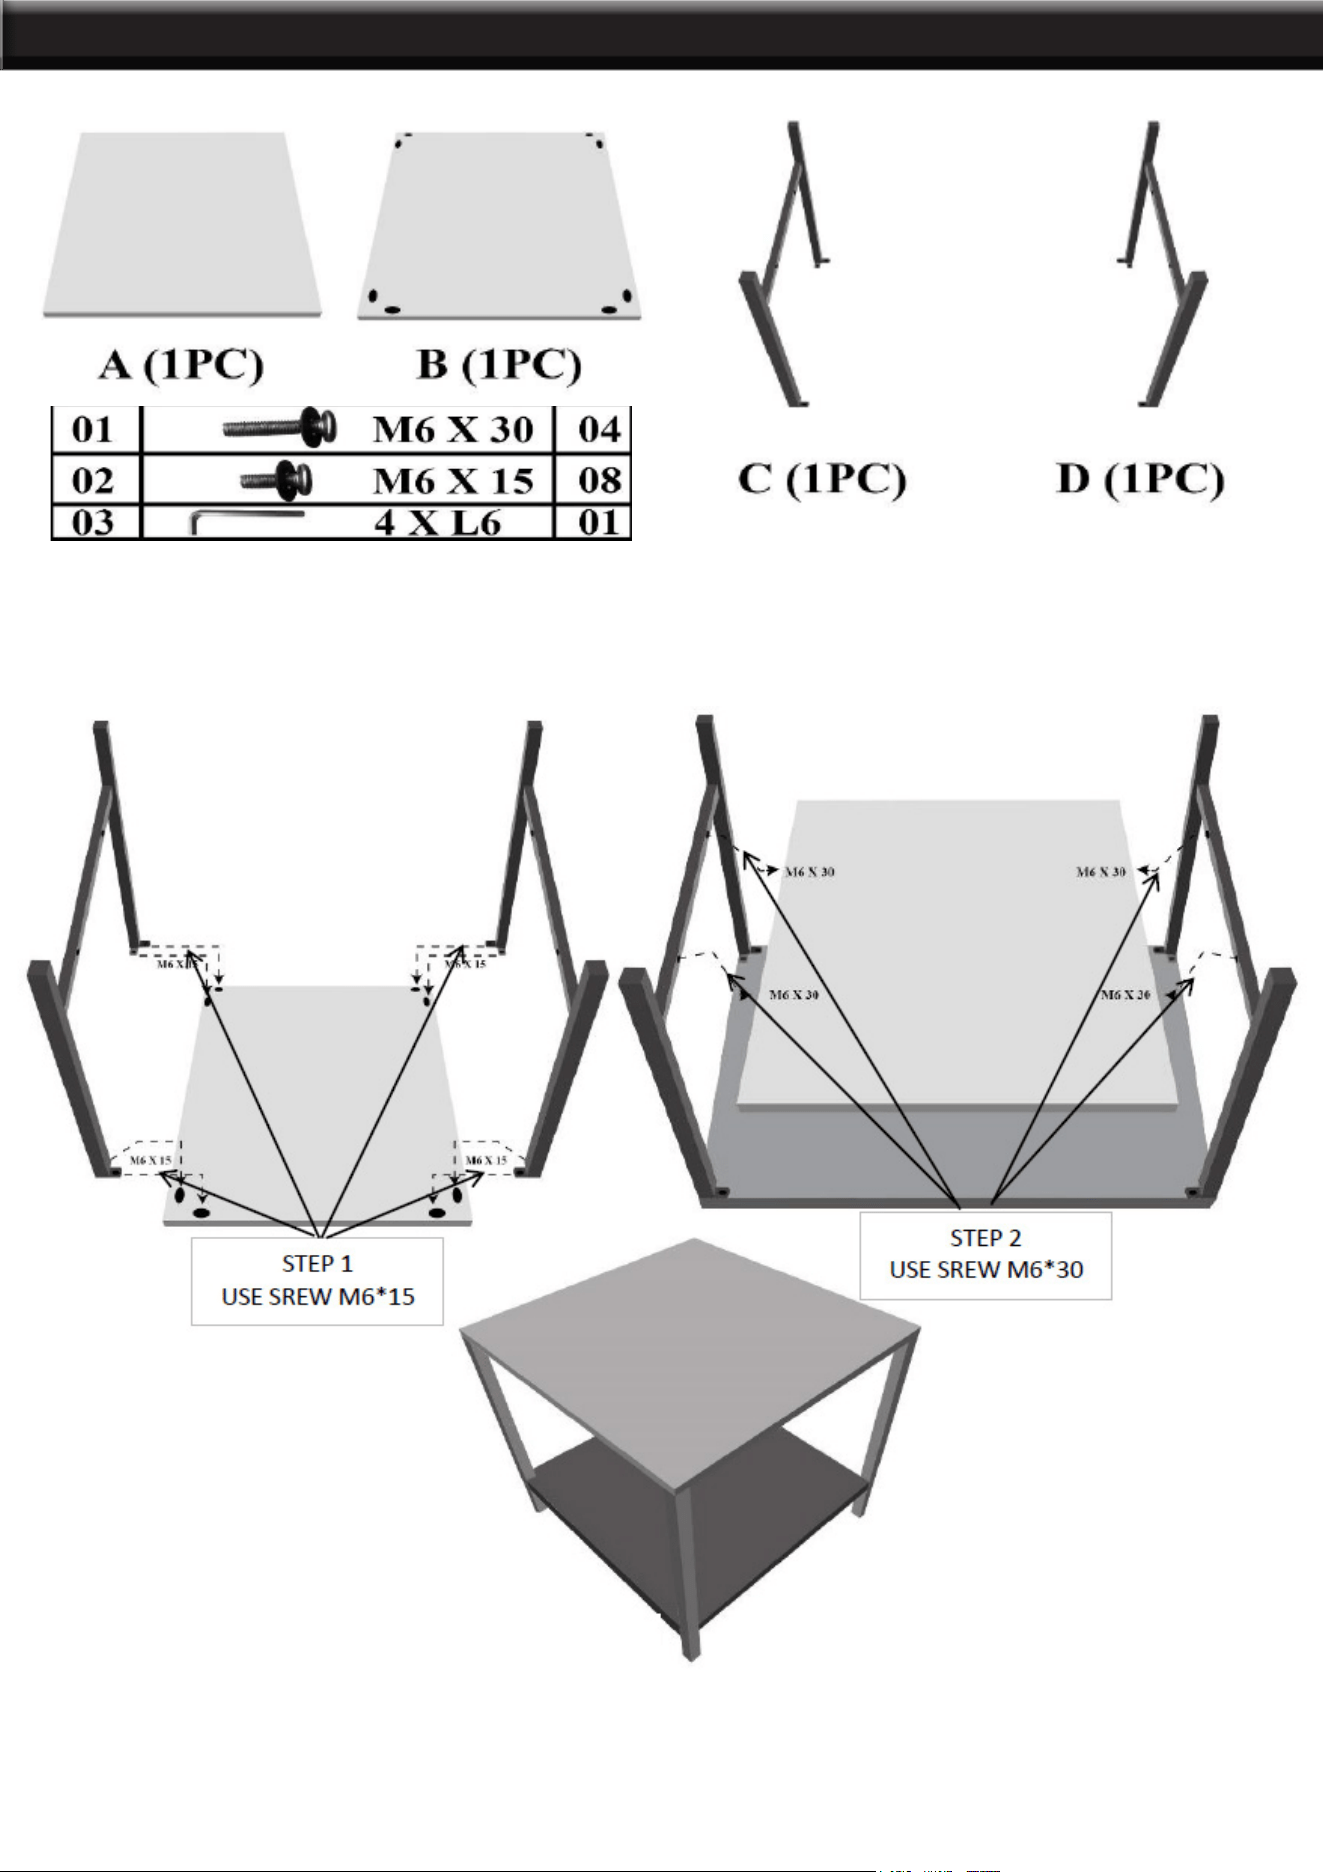
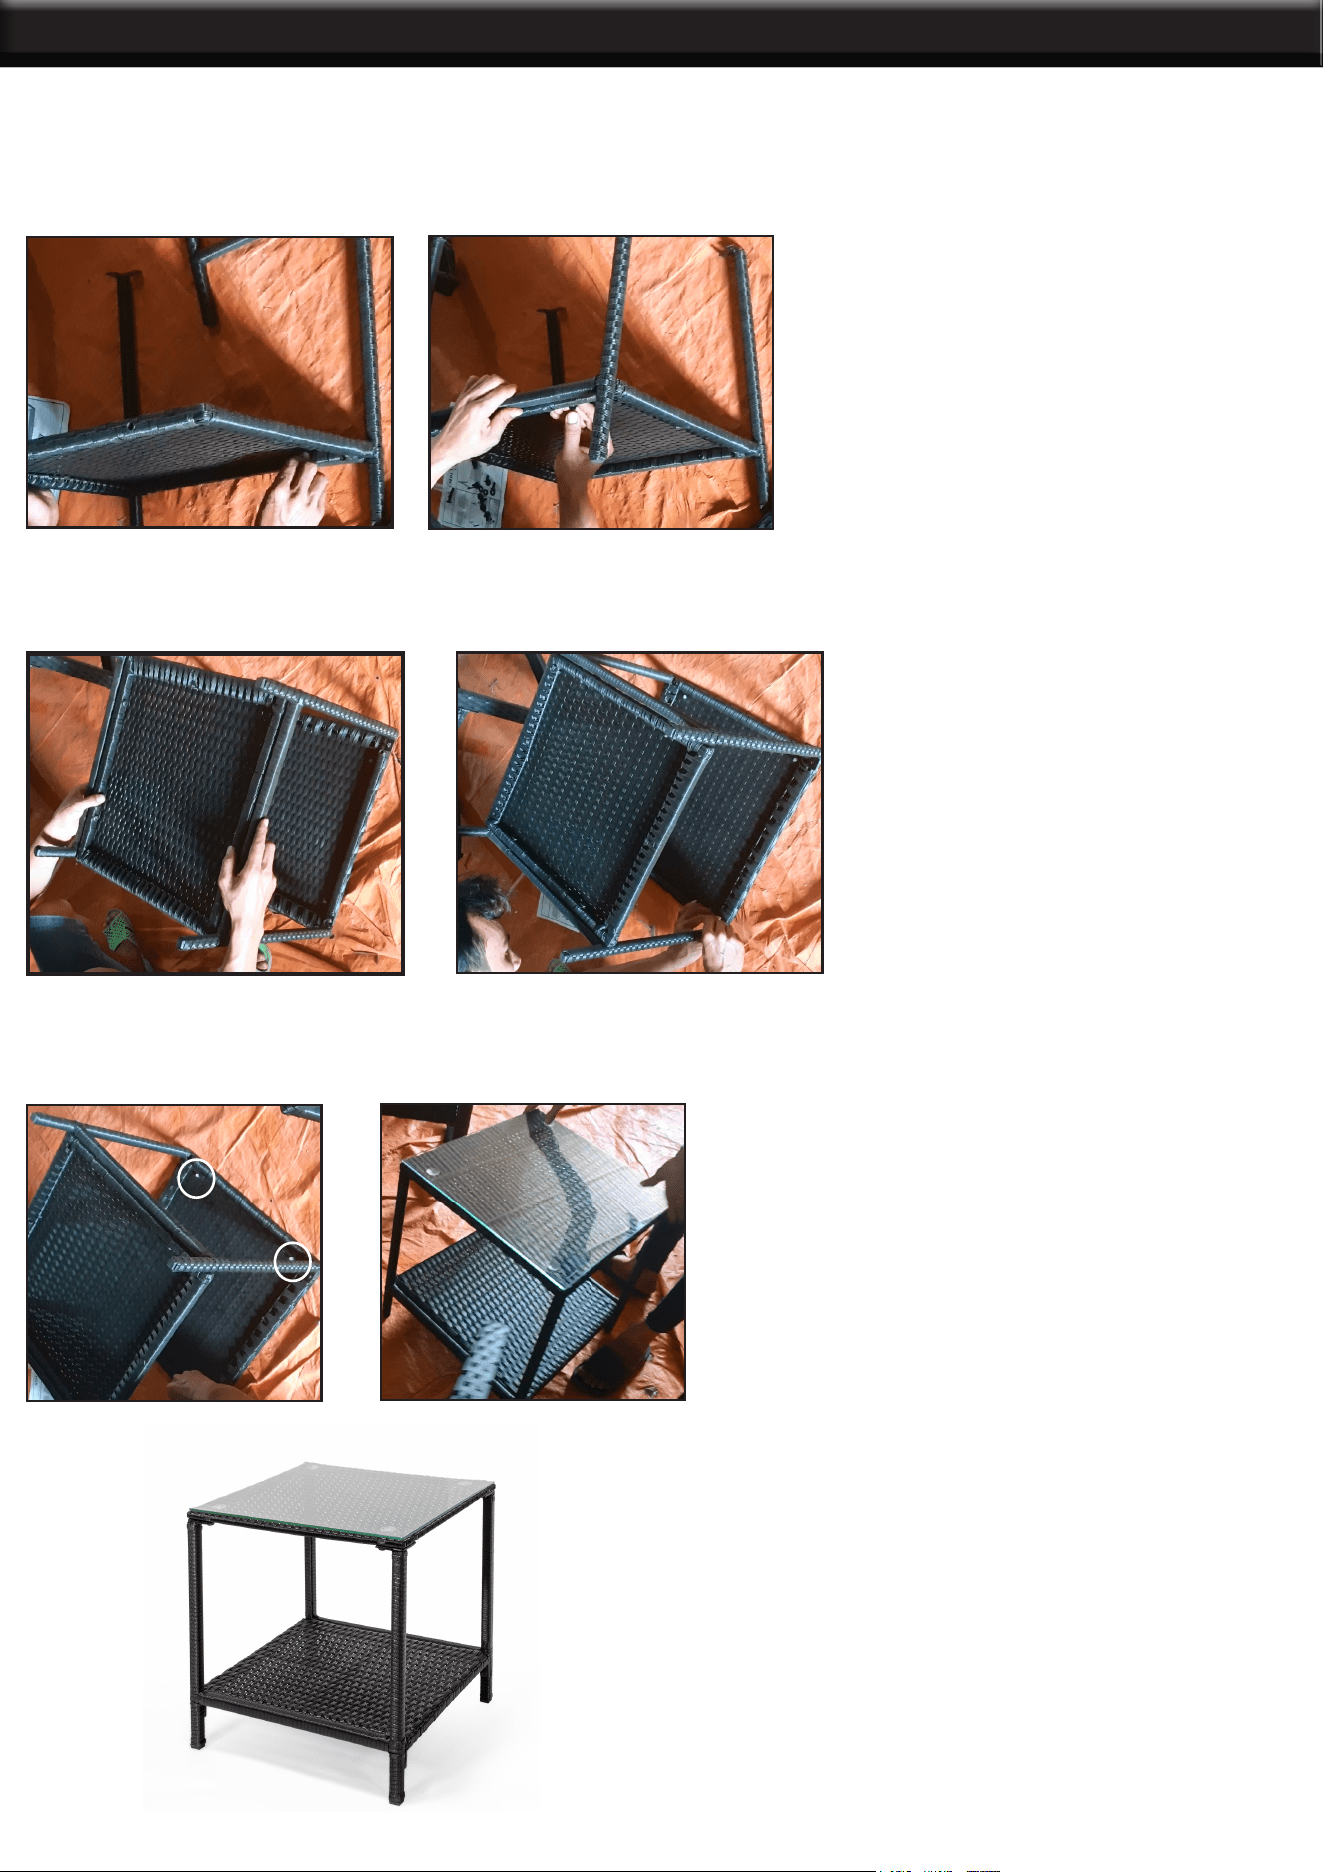
TABLE ASSEMBLY
Step 1: Lay the table side panel at on a level surface and line up the bottom panel of the table to the
side panel. Ax with bolts and tighten. Repeat this step with the other side panel and attach to the
panel.
Step 2: Lay the table top panel at on a level surface and line up the assembled portion of the table
to the top panel. Ax with bolts and tighten.
Step 3: Screw in 4 pieces of rubber table top bumpers into the top four corners of the table. Flip the
table upright and carefully place the glass on top of the table. Lined up with the bumpers.
The nished chair should look like this.
DISCLAIMER
THE MANUFACTURER AND/OR DISTRIBUTOR HAS PROVIDED THE PARTS LIST AND ASSEMBLY
DIAGRAM IN THIS MANUAL AS A REFERENCE TOOL ONLY. NEITHER THE MANUFACTURER OR
DISTRIBUTOR MAKES ANY REPRESENTATION OR WARRANTY OF ANY KIND TO THE BUYER THAT
HE OR SHE IS QUALIFIED TO MAKE ANY REPAIRS TO THE PRODUCT, OR THAT HE OR SHE IS
QUALIFIED TO REPLACE ANY PARTS OF THE PRODUCT. IN FACT, THE MANUFACTURER AND/OR
DISTRIBUTOR EXPRESSLY STATES THAT ALL REPAIRS AND PARTS REPLACEMENTS SHOULD BE
UNDERTAKEN BY CERTIFIED AND LICENSED TECHNICIANS, AND NOT BY THE BUYER. THE BUYER
ASSUMES ALL RISK AND LIABILITY ARISING OUT OF HIS OR HER REPAIRS TO THE ORIGINAL
PRODUCT OR REPLACEMENT PARTS THERETO, OR ARISING OUT OF HIS OR HER INSTALLATION
OF REPLACEMENT PARTS THERETO.
Record Product’s Serial Number Here:
Note: If product has no serial number, record month and year of purchase instead.
Note: Some parts are listed and shown for illustration purposes only and are not available individually
as replacement parts.
PLEASE READ THE FOLLOWING CAREFULLY
SAVE THESE INSTRUCTIONS
5
PRODUCT MADE IN CHINA
