STOP
DO NOT RETURN TO STORE!
HAVE QUESTIONS OR NEED SERVICE?
1-800-776-3538
Read the instructions carefully and keep for
future reference. Information maybe updated
from time to time so please refer to the
website for the latest version of the manual.

Chat-AI
1. Scan Chat-AI
Open Smart Phone
Open Camera
Click the Link
2. Register online at ApplianceDesk.com/Warranty
3. Chat-AI is also used to obtain Product Information, Manuals and Updates
This warranty is given by:

10
Note: The washer is designed to be used with a full and balanced load. If a small or half load
of clothes is put in the washer, it will be unbalanced causing the drum to rotate slowly during
the spin cycle and will not extract sufficient water. This will result in wet clothes at the end of
the cycle and will not be ready to put in the dryer.
Load clothes of the selected type loosely into the drum. Ensure to put in a full load of clothes.
For small items use a mesh bag.
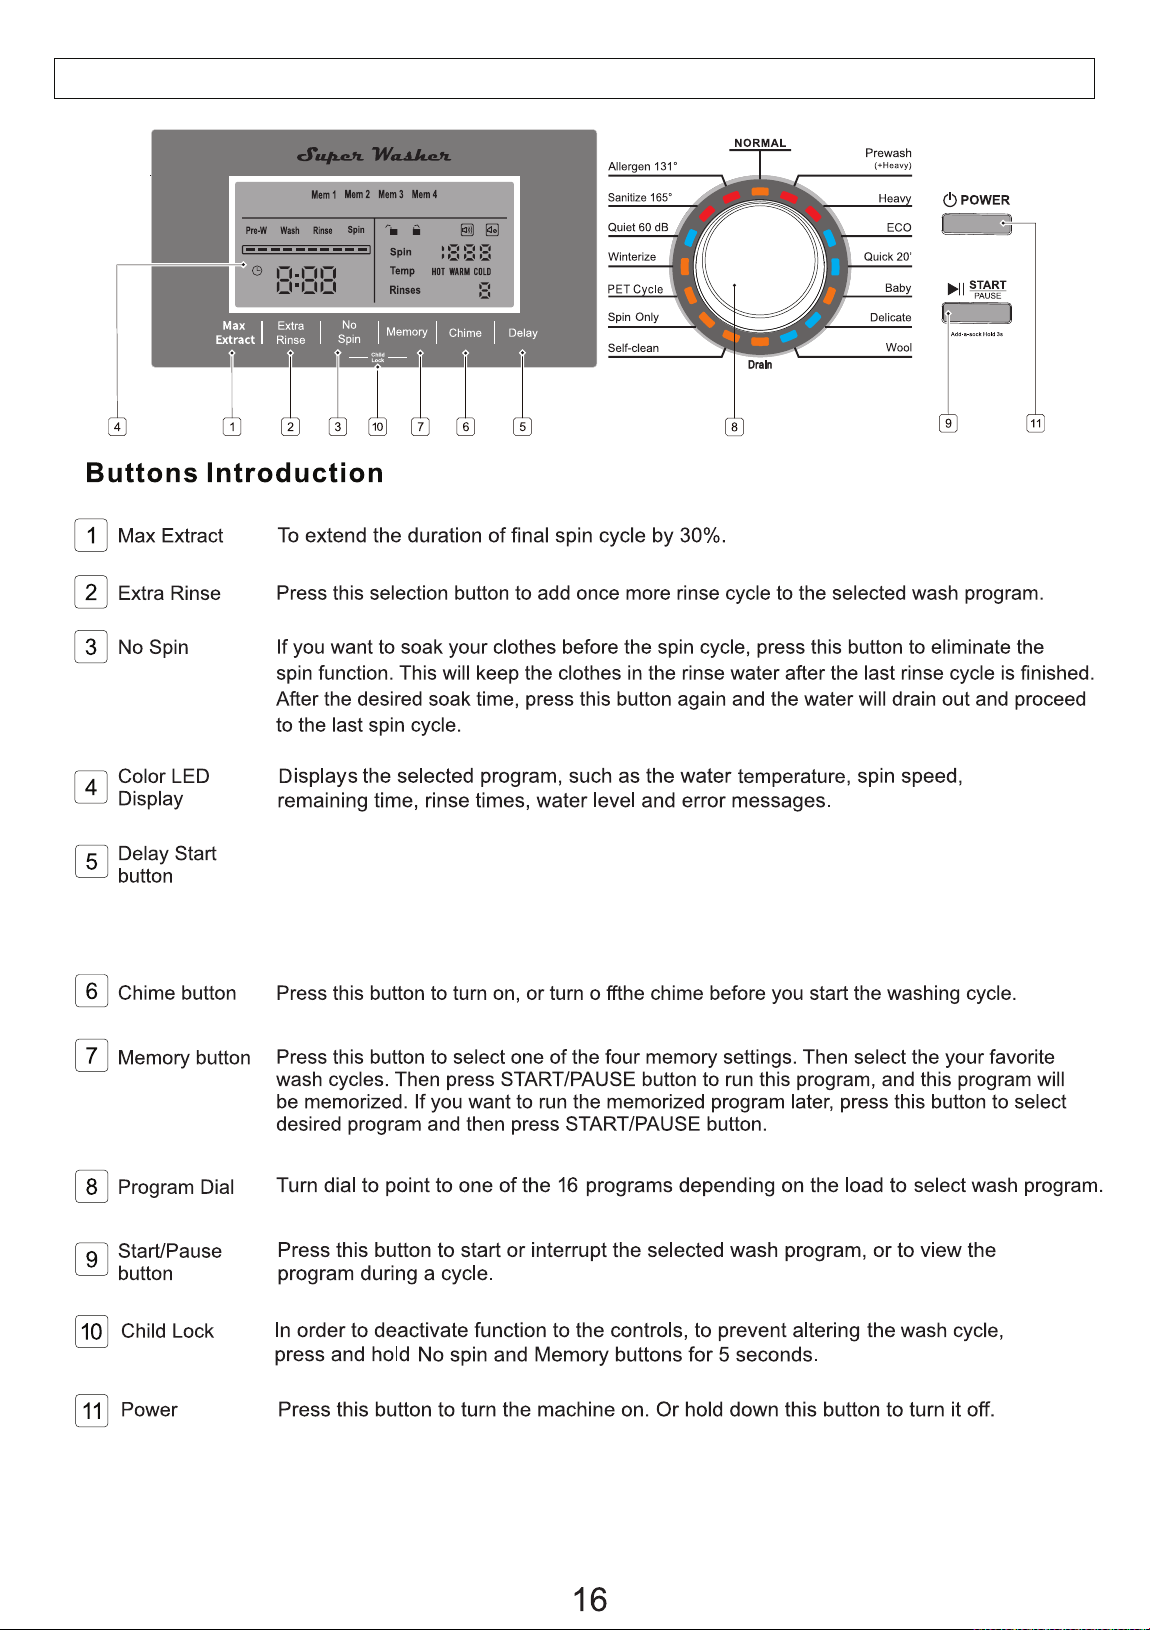
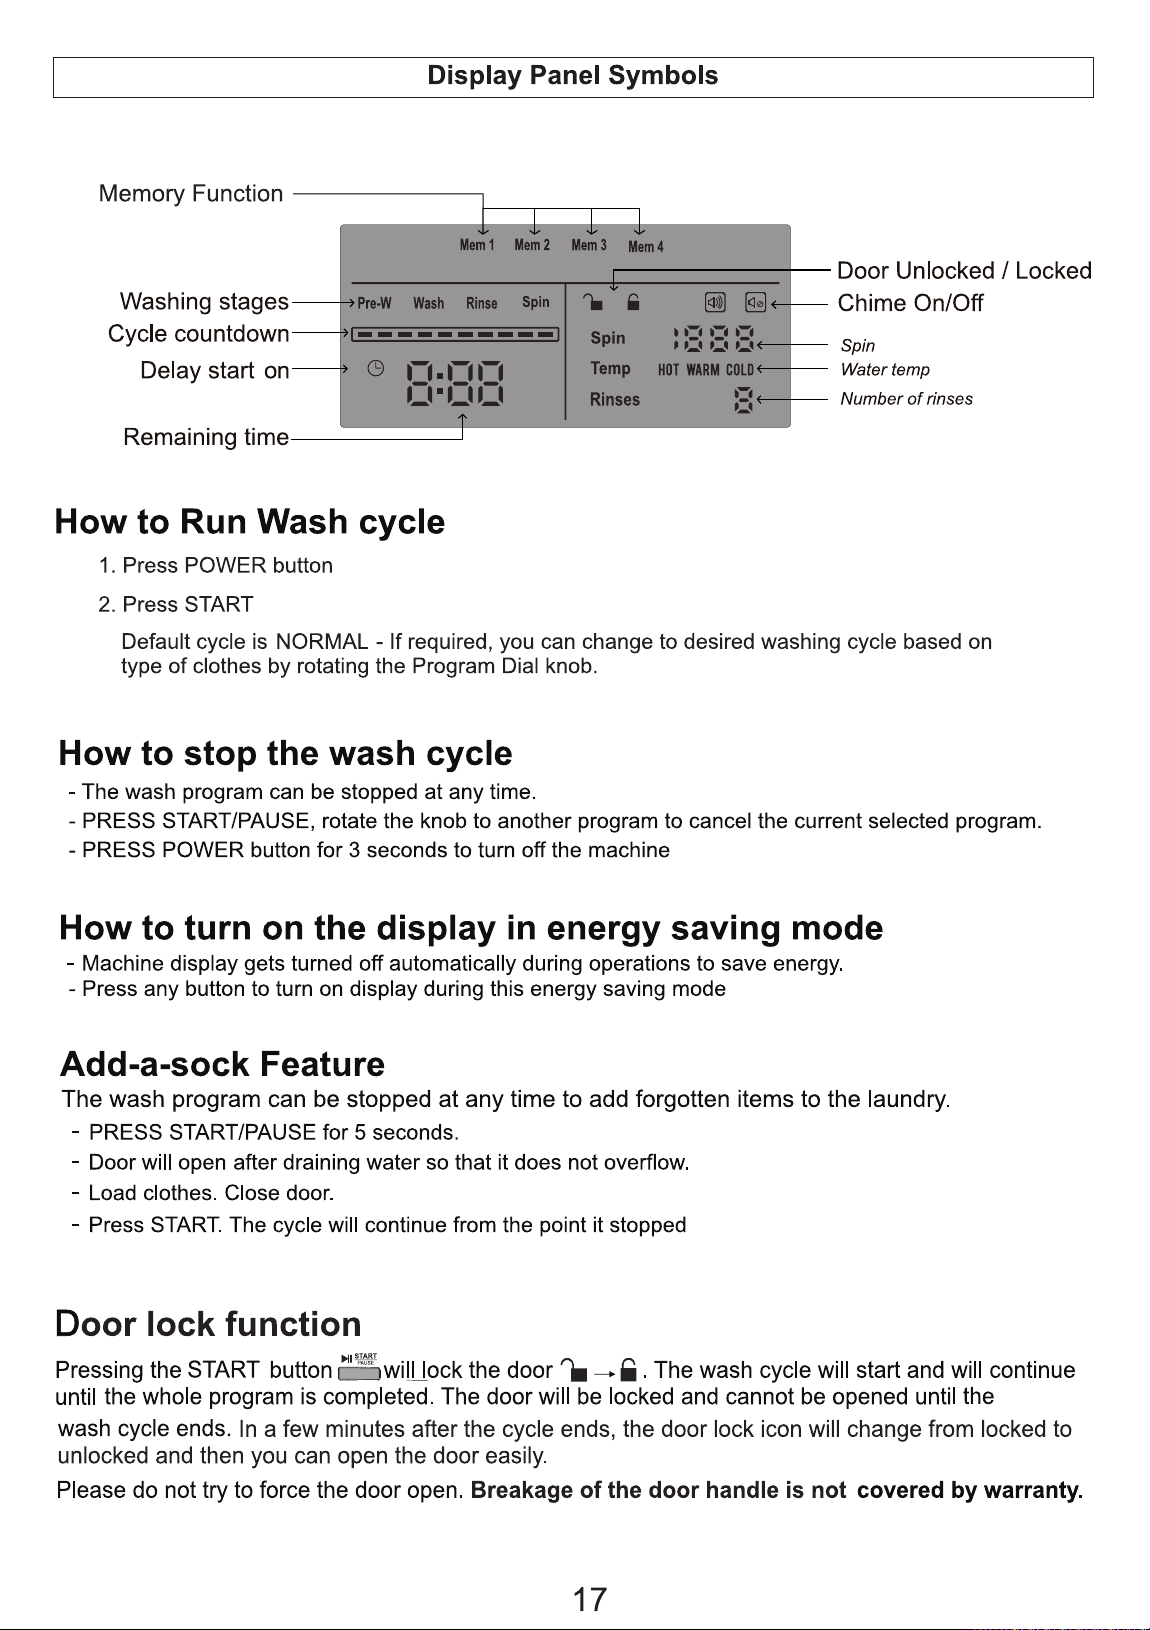
CONTROL PANEL
To delay the start of the wash cycle, touch this button to select the delay time from
1 to 24 hours. Each time the Delay button is pressed, the time increases in one-hour
increments. The delay time will show on the Display Panel. Then press Start and the
cycle will start after the selected delay time has elapsed.

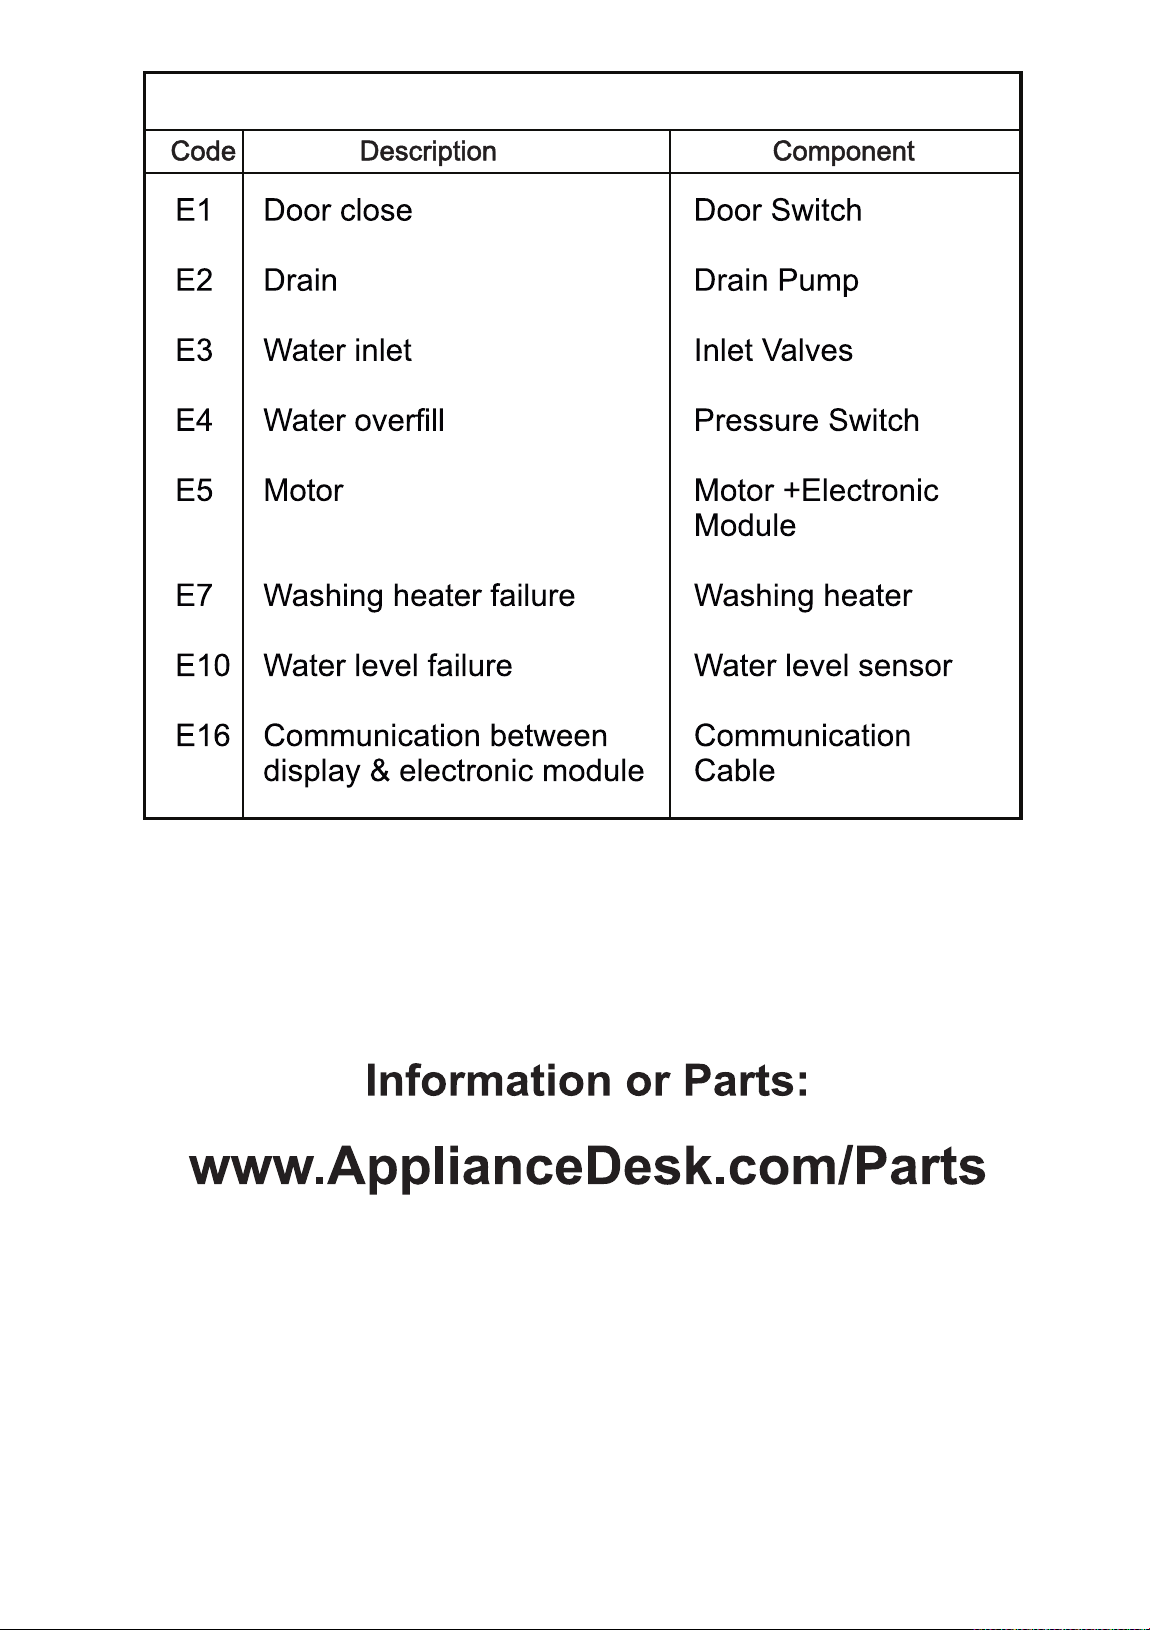
ERROR CODES
25


1. Scan QR Code
Open Smart Phone
Open Camera
Click the Link
2. Register online at ApplianceDesk.com/Warranty
3. QR Code is also used to obtain Product Information, Manuals and Updates

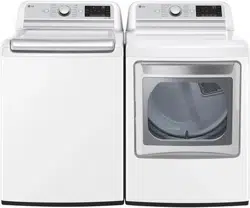
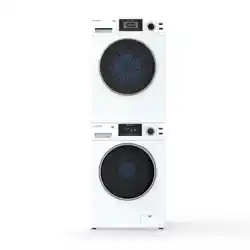
Congratulations on your new Vented Dryer!
Here are some of the best reasons for buying your Dryer:
Options for Sensor and Time Dry programs
Sanitize and Allergen programs for ultimate clean clothes
Refresh program and Auto Wrinkle Guard for perfectly dry clothes
Delay time to operate dryer at your convenience
110V lets you plug it in anywhere
Reversible door option as preferred
Safety Lock
In addition to its contemporary design, this is a highly sophisticated engineered product
that will give you many years of satisfaction.
1
Safety
Use the appliance indoors. It is not intended to be used outdoors.
Ensure that open flame sources, such as candles are not placed on top of the dryer.
Do not place items in the dryer that are soiled with flammable liquids, oils and other
chemicals. These items should be washed thoroughly before placing them in the dryer.
Ensure fabric softeners or products to eliminate static are not used inside the dryer,
unless recommended by manufacturers of these products.
Do not dry items containing rubber, plastic or similar materials.
Ensure the dryer and electrical cord are not placed near heat sources, such as
radiators, heaters, air ducts or in direct sunlight.
Ensure vents and ventilation openings are not blocked.
Ensure the power cord is not bent or twisted, and not exposed in an area where is
could be a tripping hazard.
Do not use the dryer if the cord is damaged.
To disconnect the dryer, press the power button to turn it off, then grasp the plug of
the power cored firmly and pull straight out of the outlet.
Do not open the dryer and reach into the drum while it is rotating.
Ensure the dryer is not overloaded.
Do not tamper with controls.
Perform regular maintenance and cleaning of lint filter after each use. Ensure periodic
cleaning of exhaust duct is done by a qualified technician.
Check that foreign objects are not in the drum.
This appliance is not intended for use by persons, including children, with reduced
physical, sensory or mental capabilities, or lack of experience and knowledge, unless
they have been given supervision or instruction concerning use of the appliance by a
person responsible for their safety.
Do not allow children to play on or in the appliance. Close supervision of children is
necessary when the appliance is used near children.
In order to reduce the risk of fire, electric shock, and/or injury, please follow safety
precautions. Read all instructions carefully and save for future reference.
Safe Disposal
Before discarding the appliance, please remove the door to prevent risk of
child entrapment.
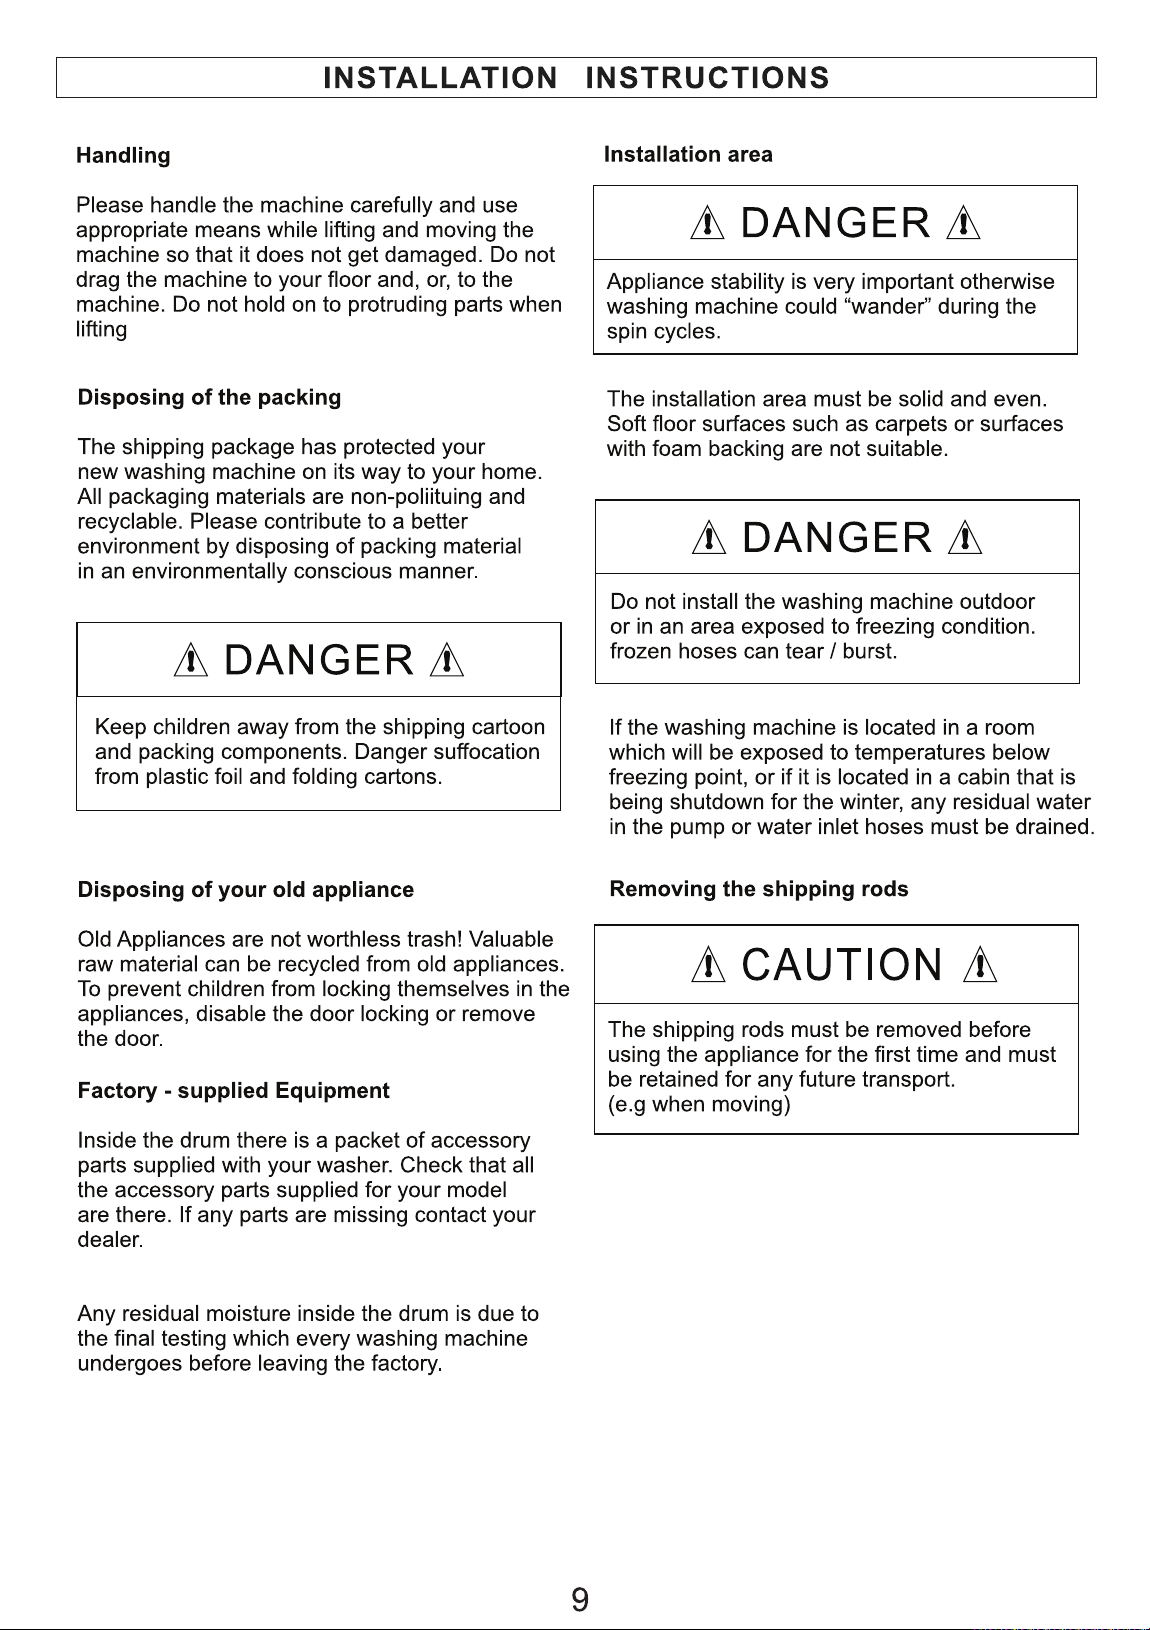
Keep children away from the shipping carton and packing components.
local regulations.
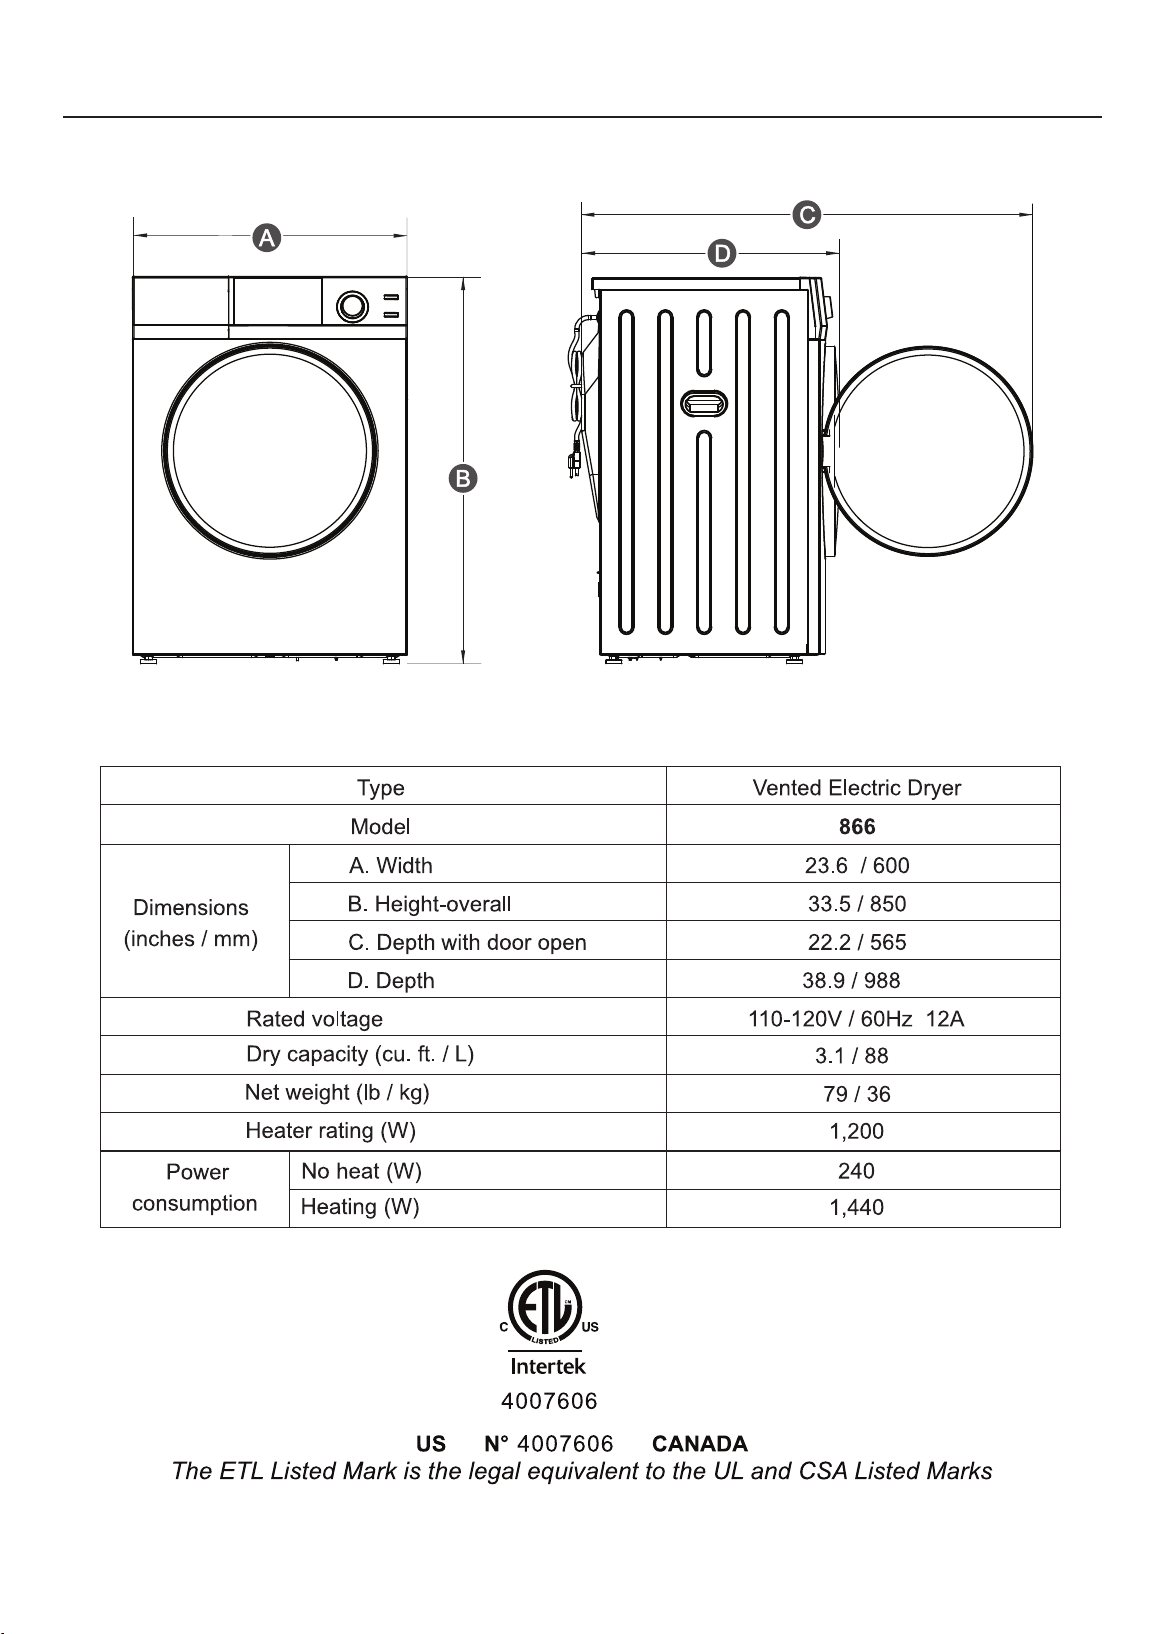
Technical Data
2
3
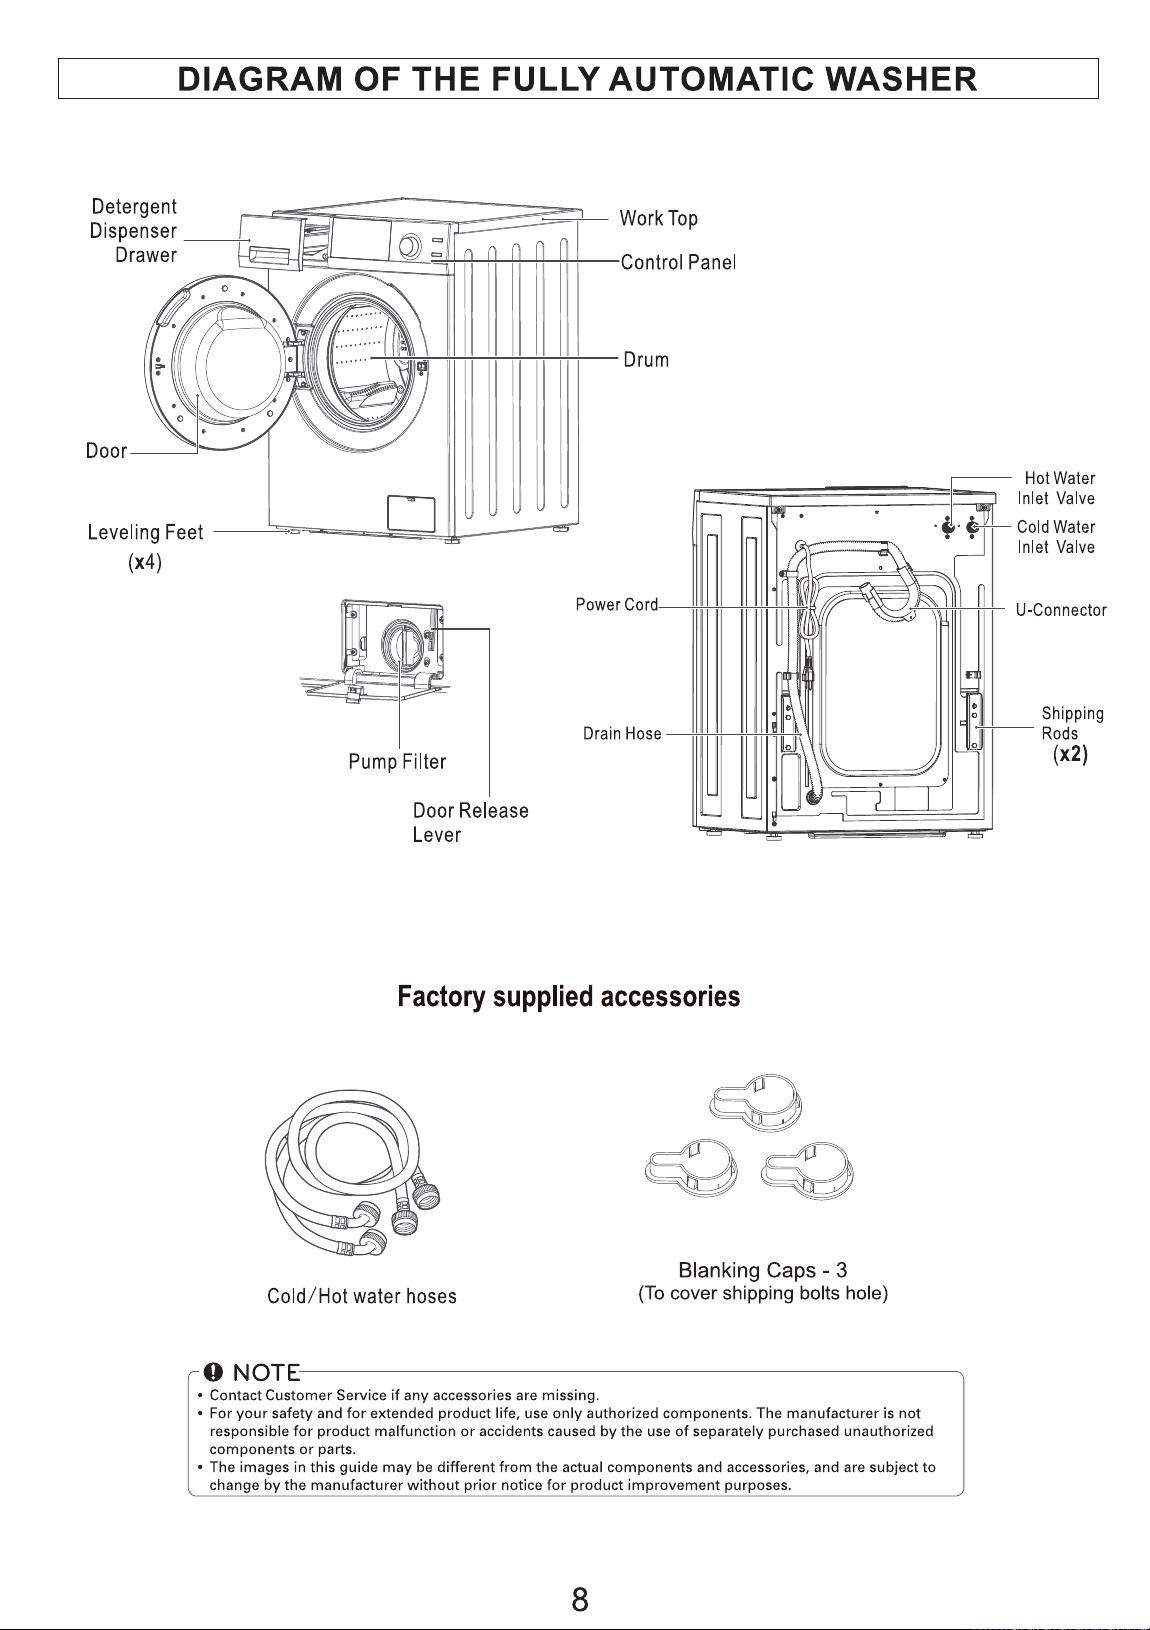
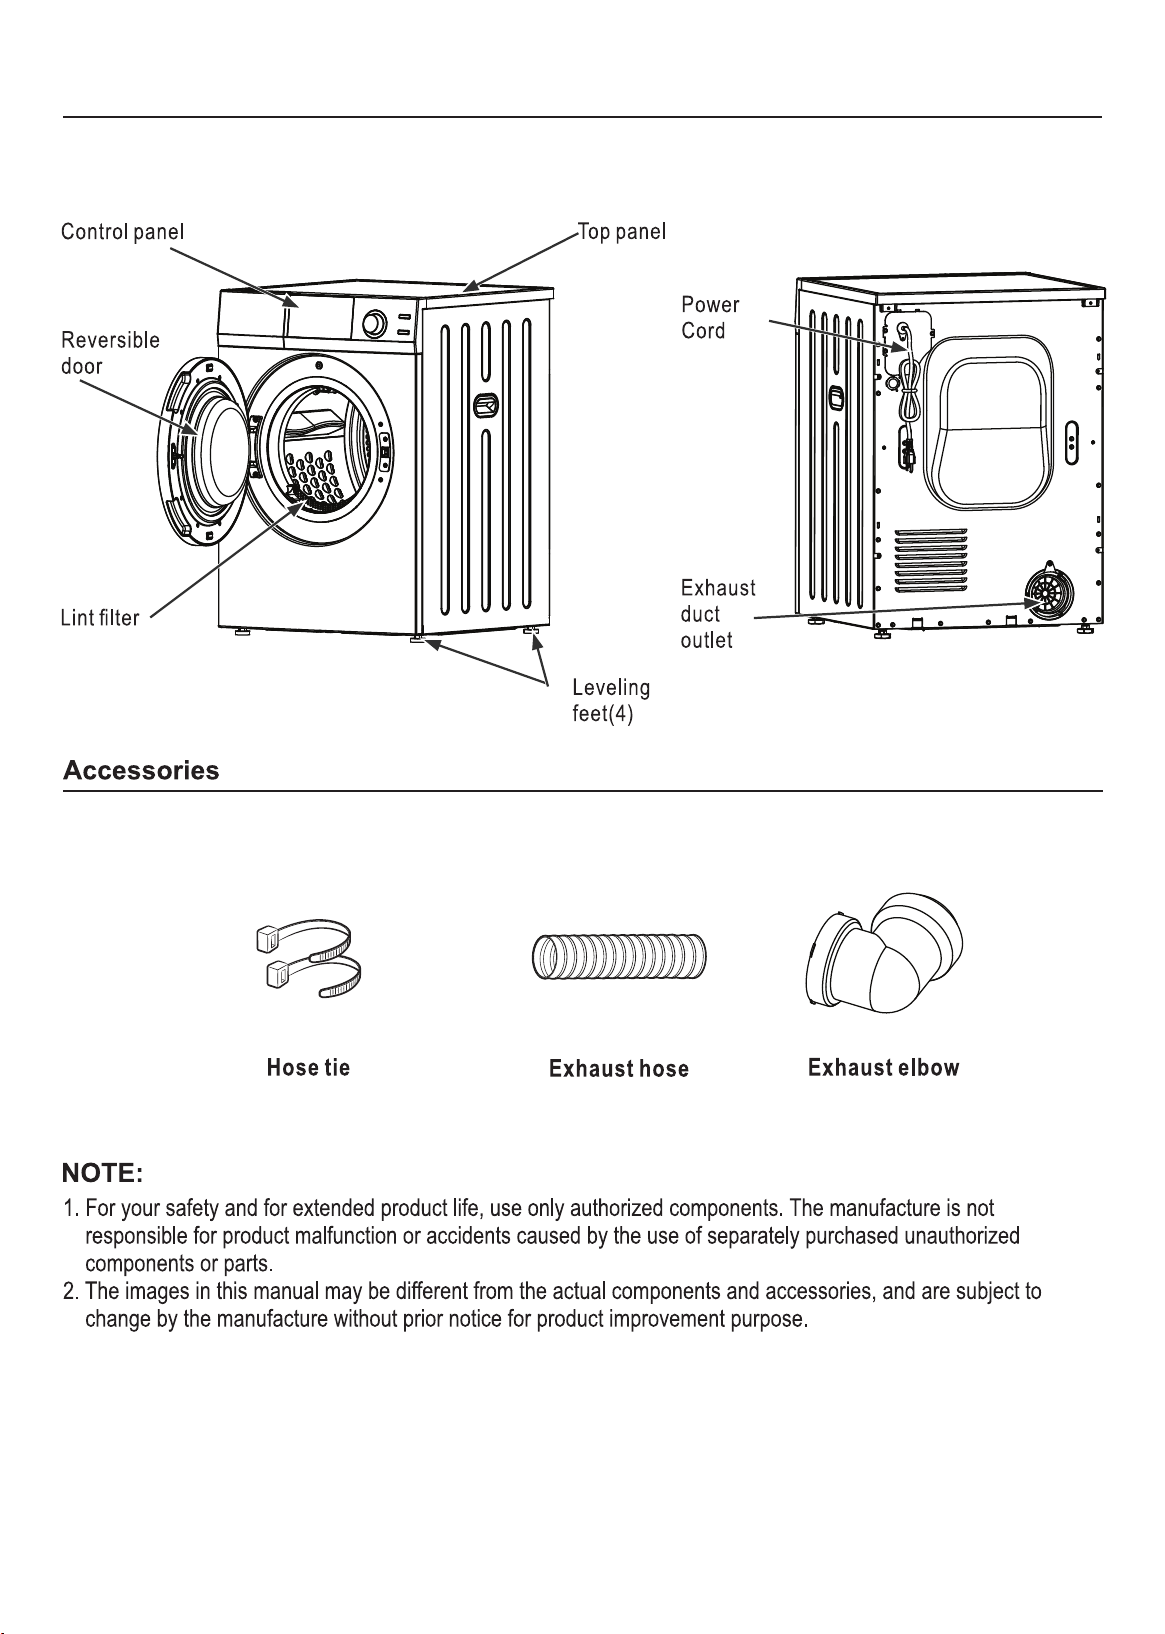
Diagram of the Dryer

4
Installation
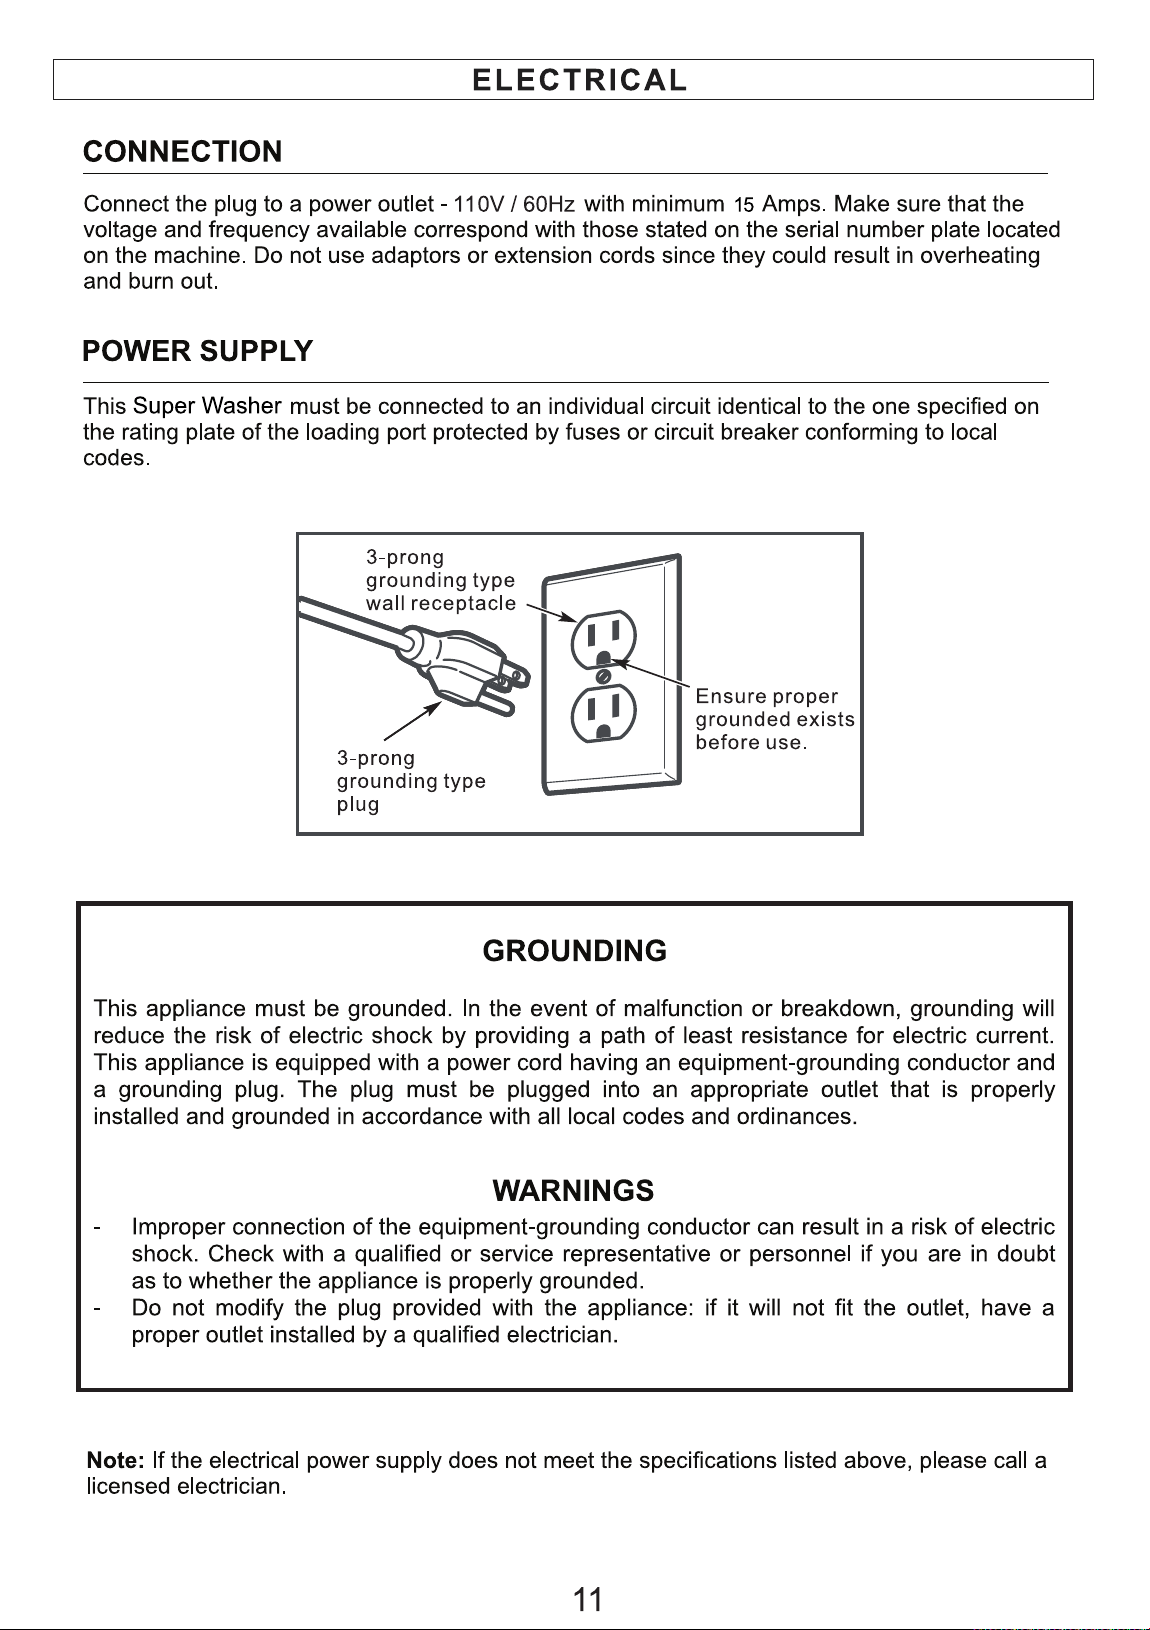
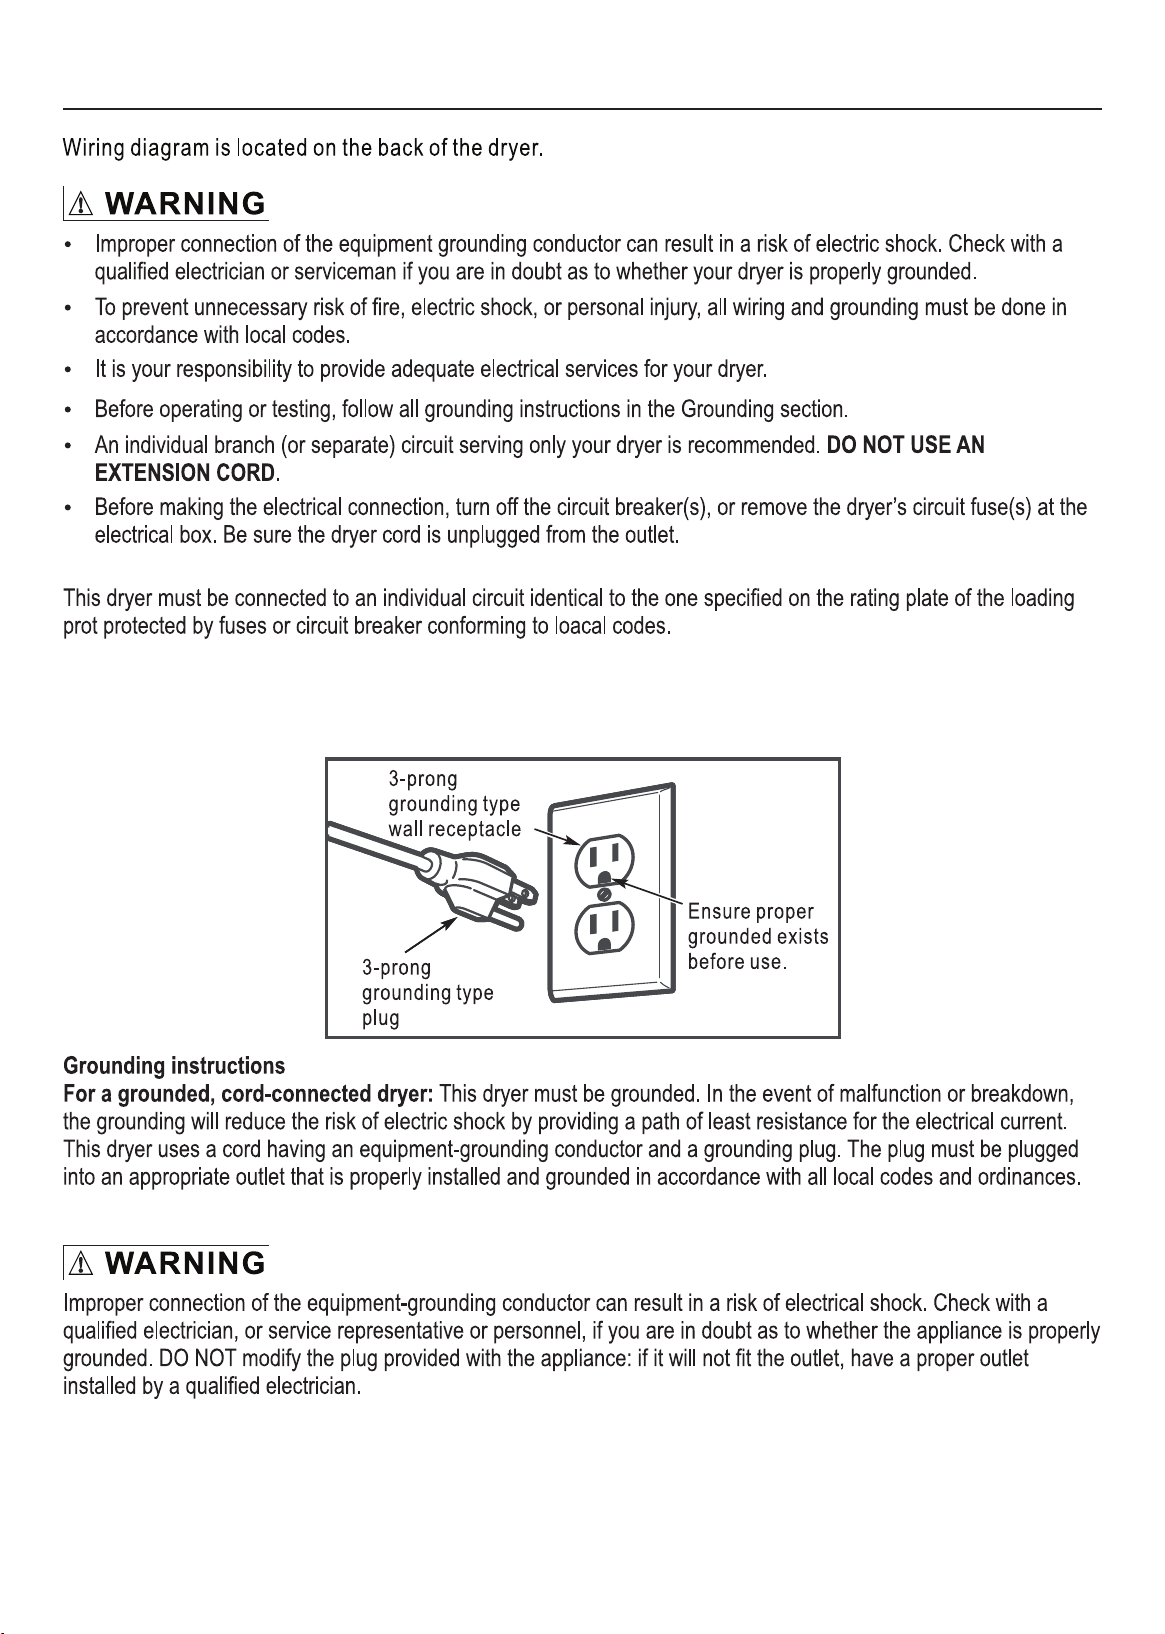
The dryer must be properly grounded. Do not modify the plug.
Do not install the dryer in a tight-fitting cabinet. Ensure there is adequate ventilation space all around the
dryer (please see detailed installation instructions).
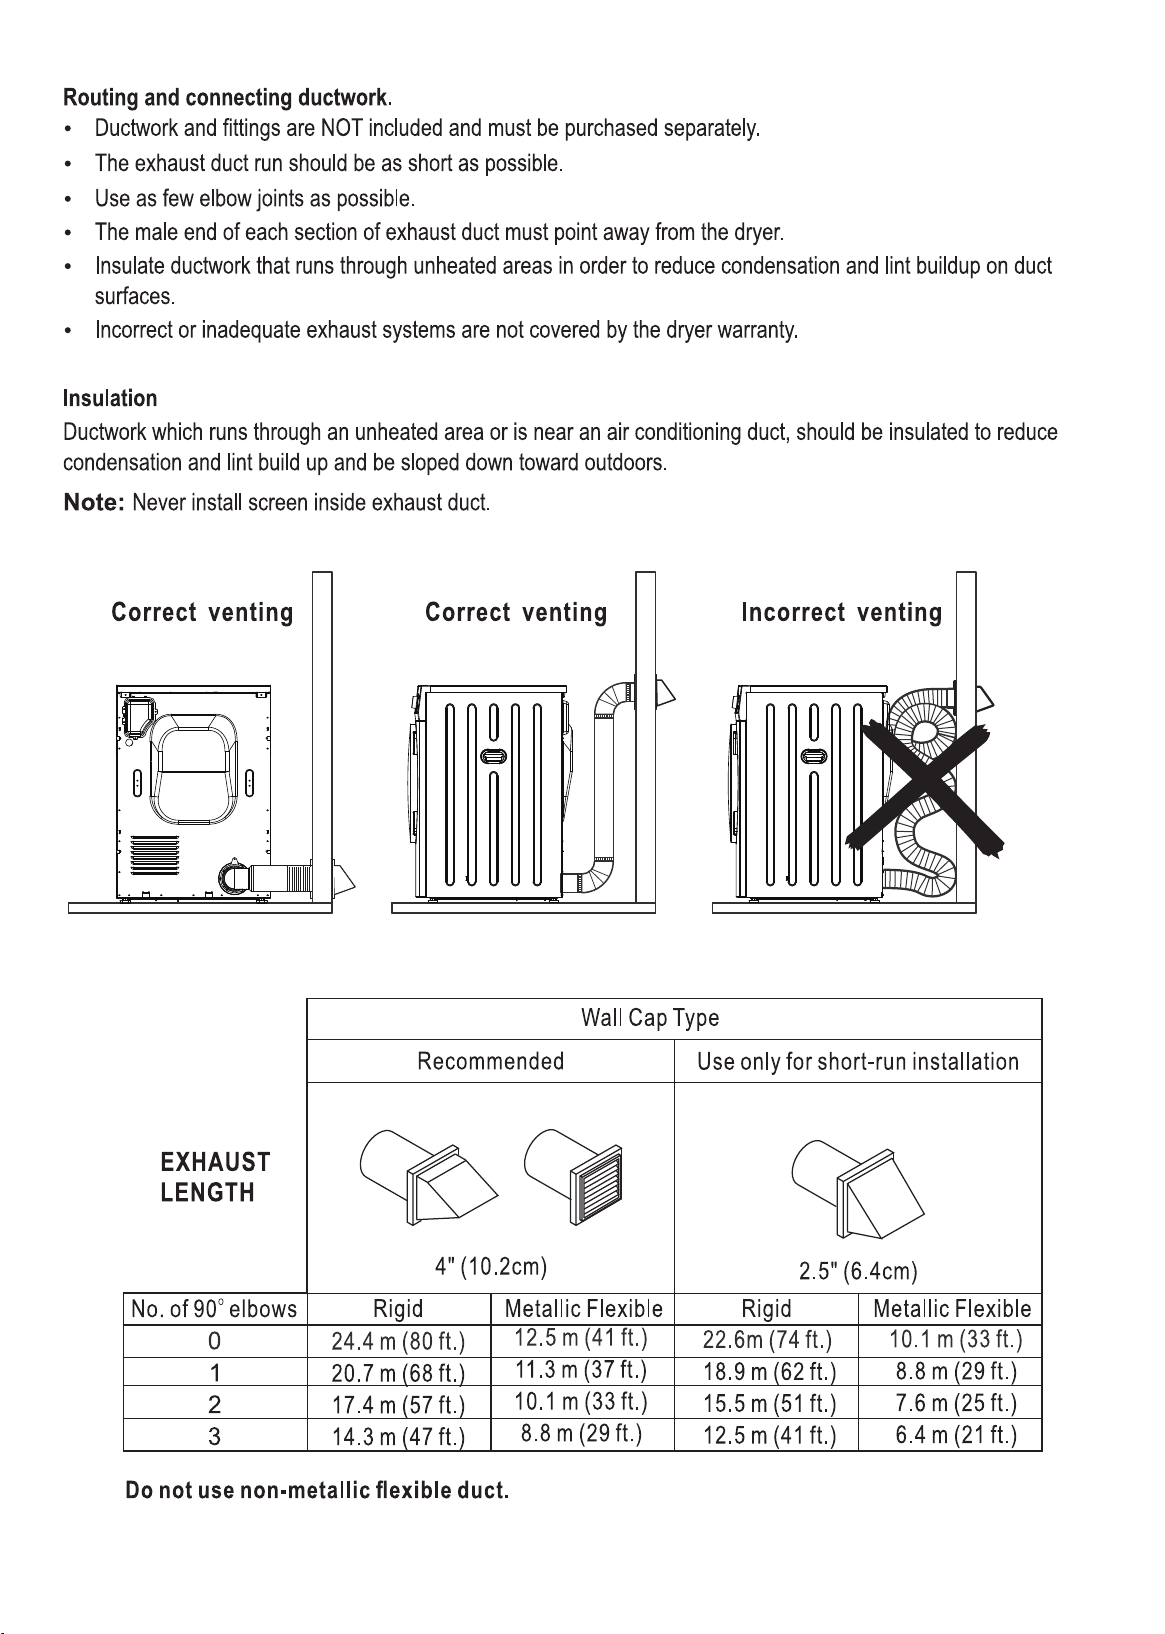
Do not use flexible plastic venting materials which may collapse. Use only vent hoses that are approved
by the manufacturer.
In Canada and the United States, only those foil-type flexible ducts, if any, specifically identified for use
with the appliance by the manufacturer shall be used and that comply with the outline for the
Clothes Dryer Transition Duct, subject to 2158A, shall be used.
In Canada, the exhaust duct shall be 4” (10.2 cm) in diameter.
In the United States, the exhaust duct shall be 4” (10 cm) in diameter.
The total length of flexible metal duct shall not exceed 8 feet (2.4 m).
The duct shall not be assembled with screws or other fastening means that extend into the duct and
catch lint.
The appliance shall no be exhausted into a chimney, wall, ceiling, attic, crawl space, or a concealed
space of a building.
The dryer must be installed and serviced by a qualified technician.
Install the dryer according to manufacturer's instructions and local codes.
5
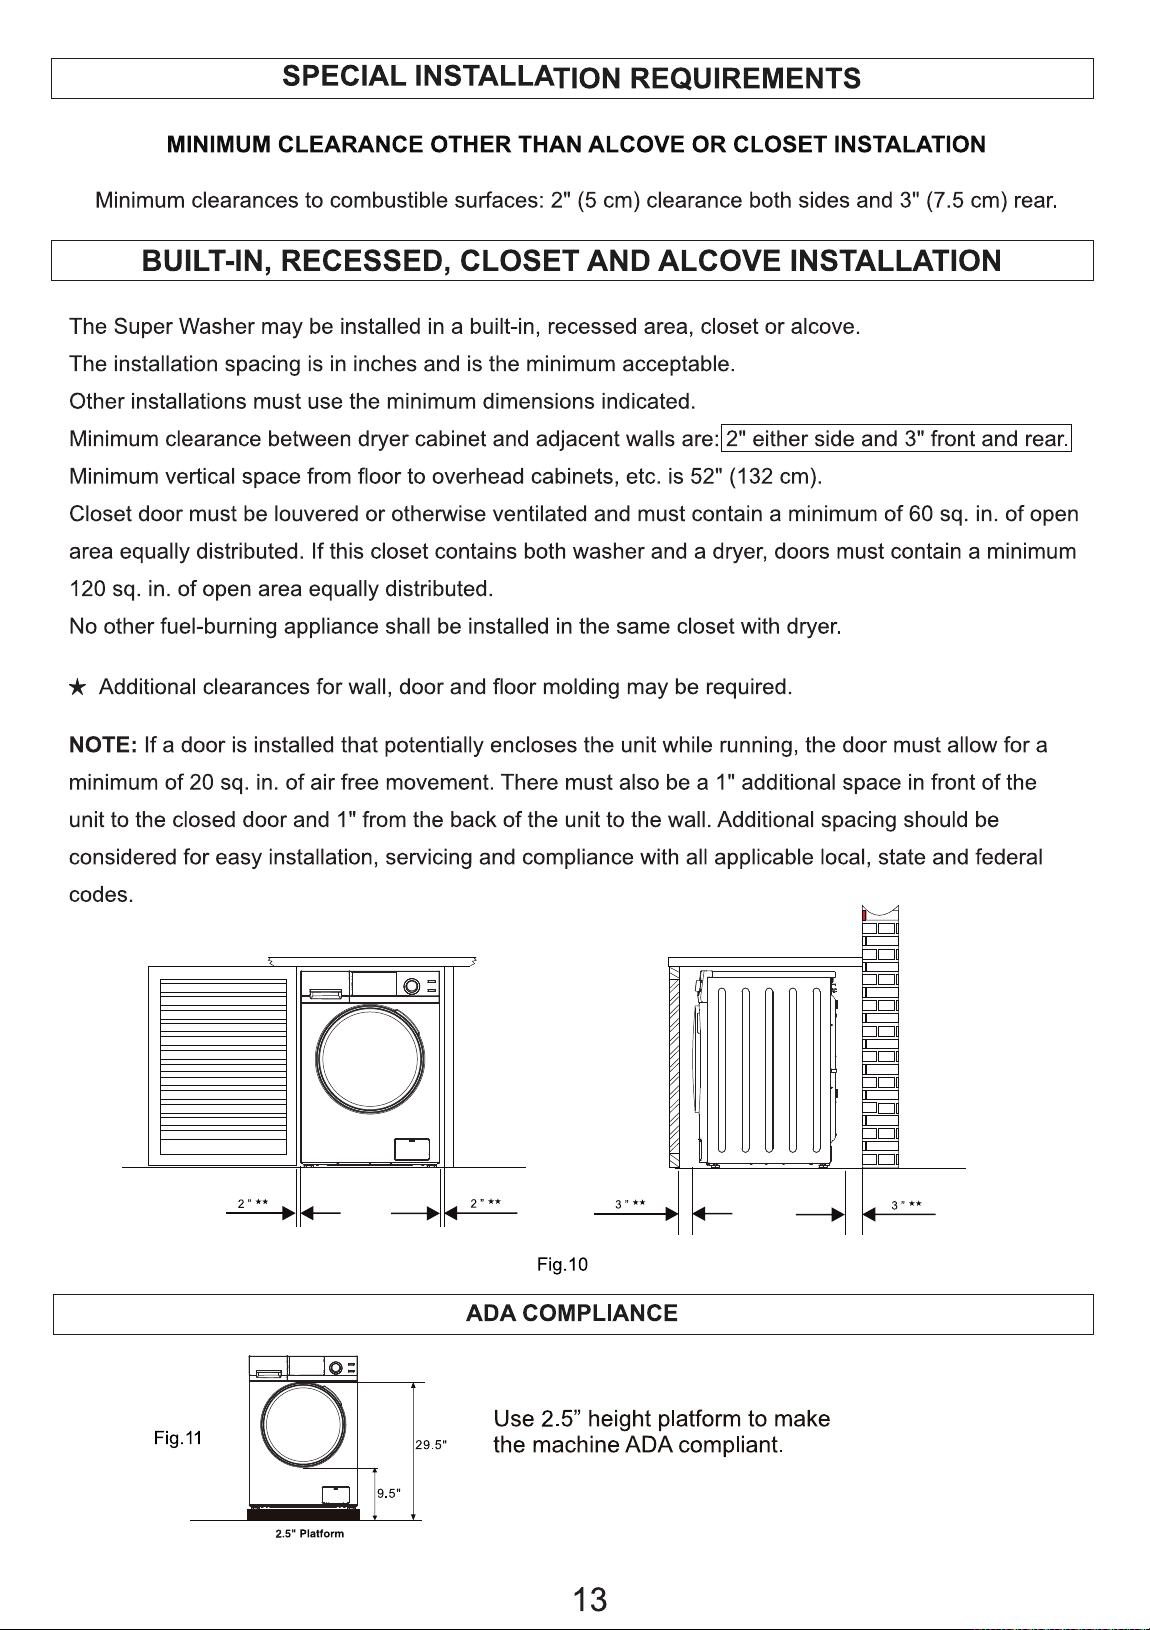
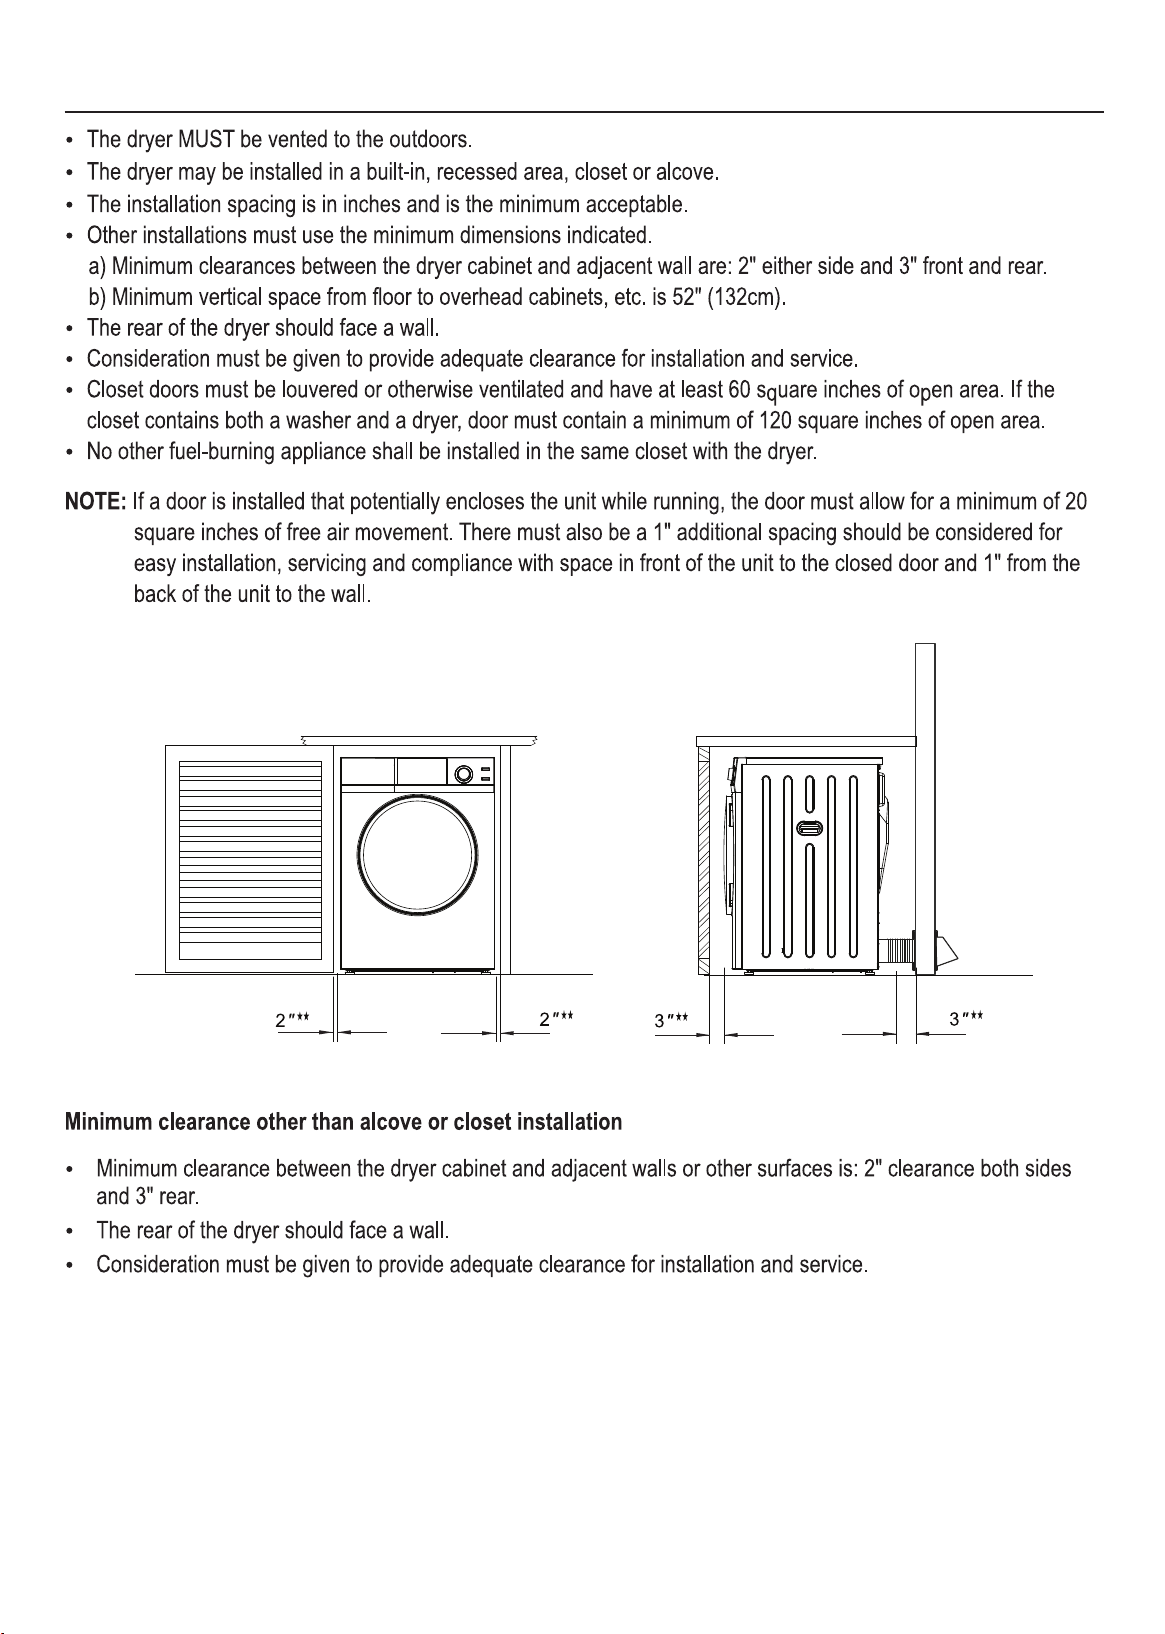
Built-In, Recessed, Closet and Alcove Installation
6
7
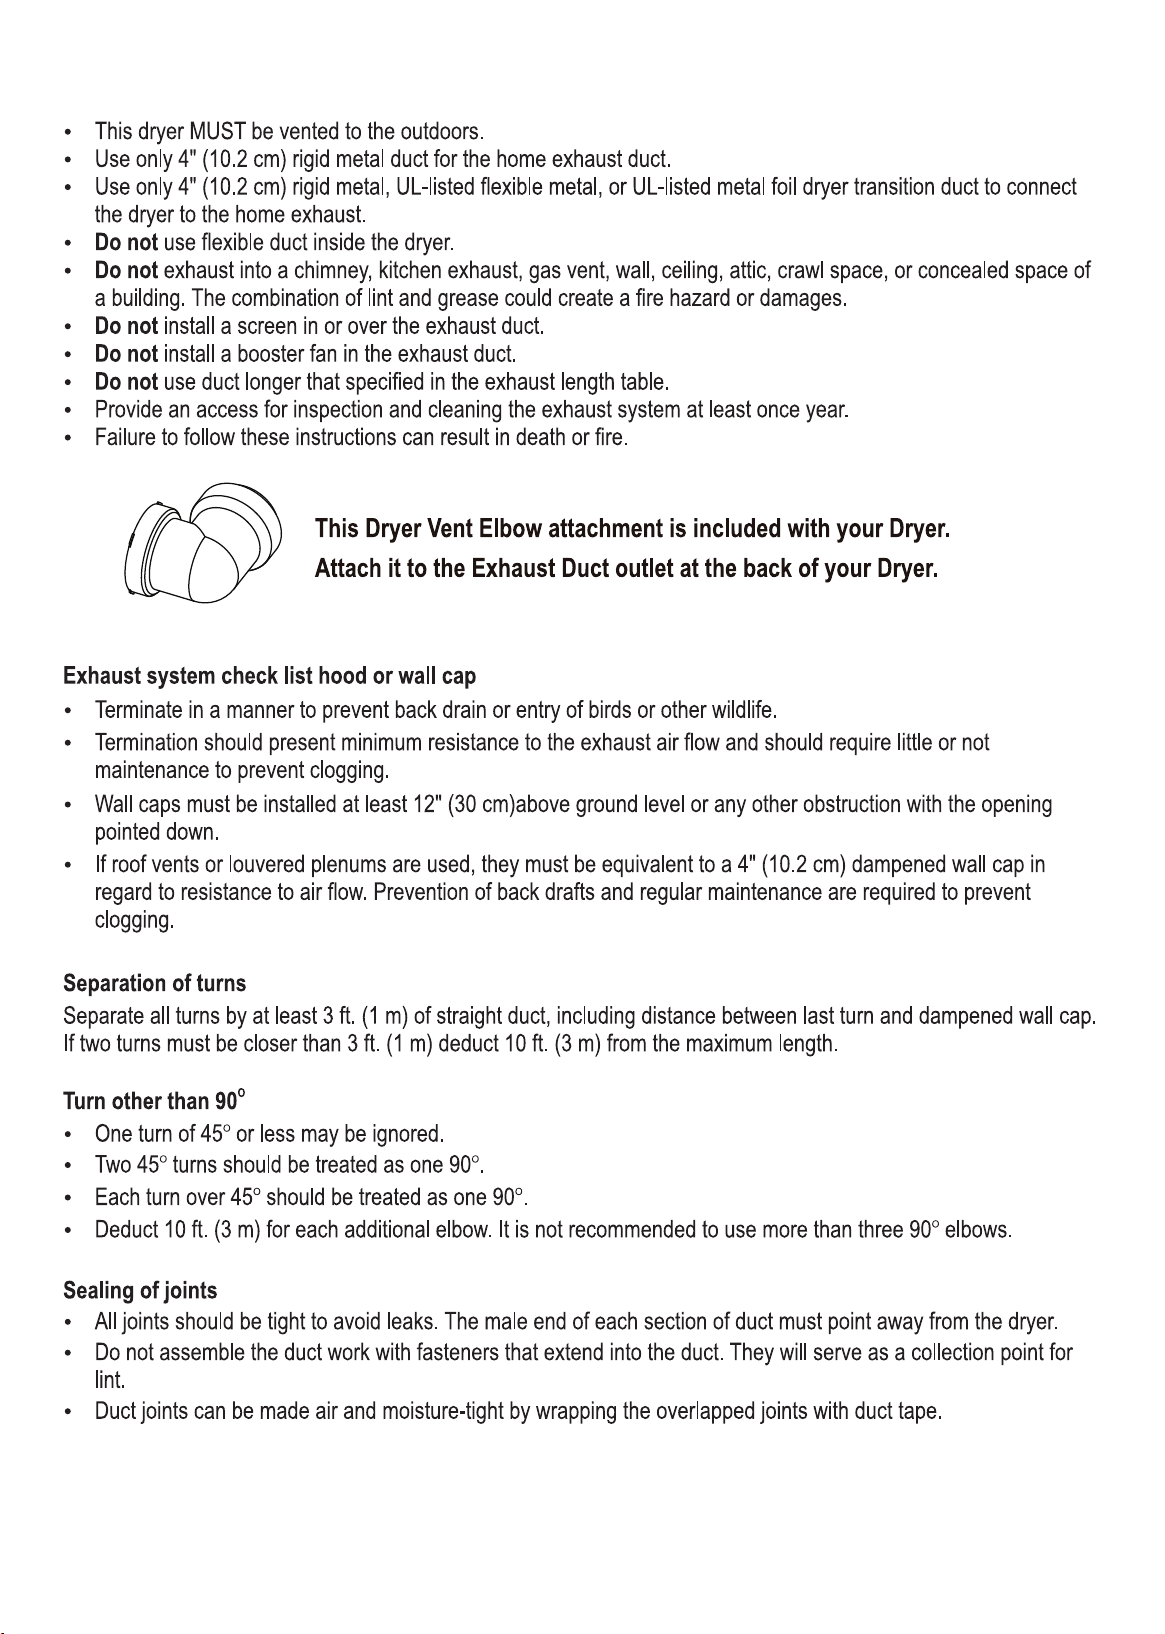
Venting Connections
8
9
Electrical
10
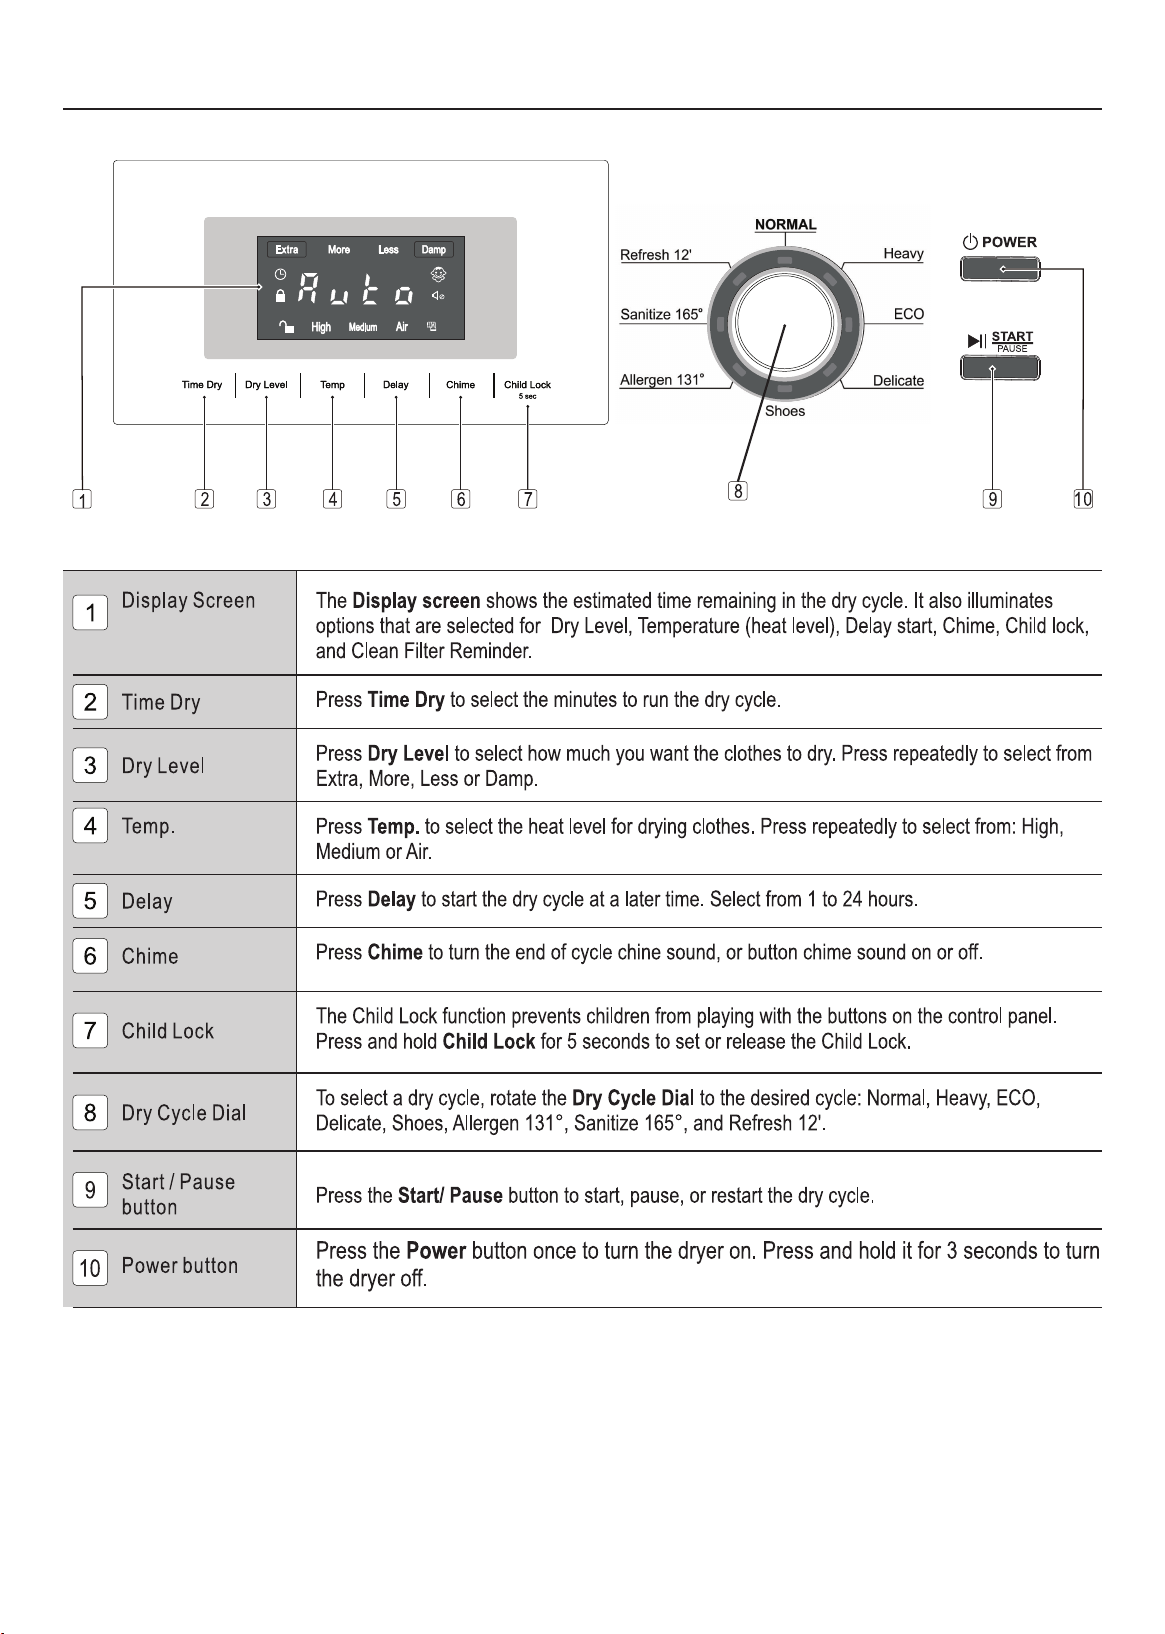
Control Panel
11
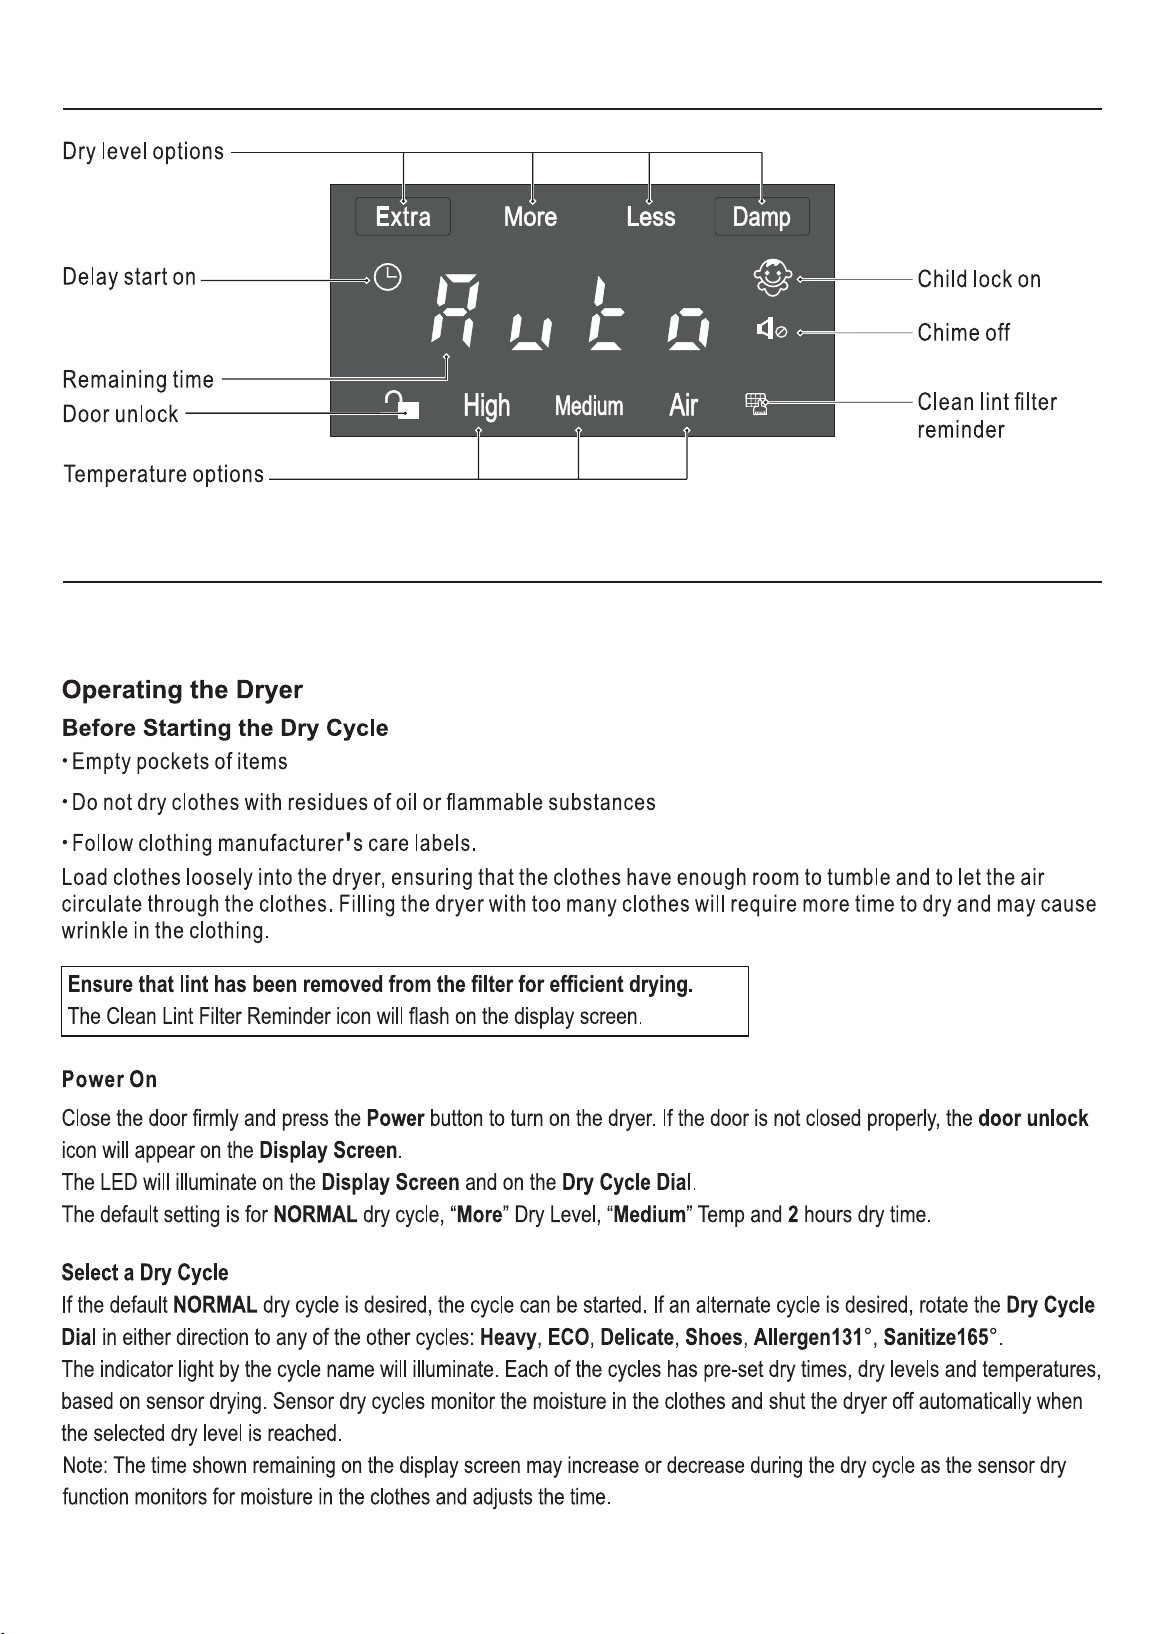
Display Panel
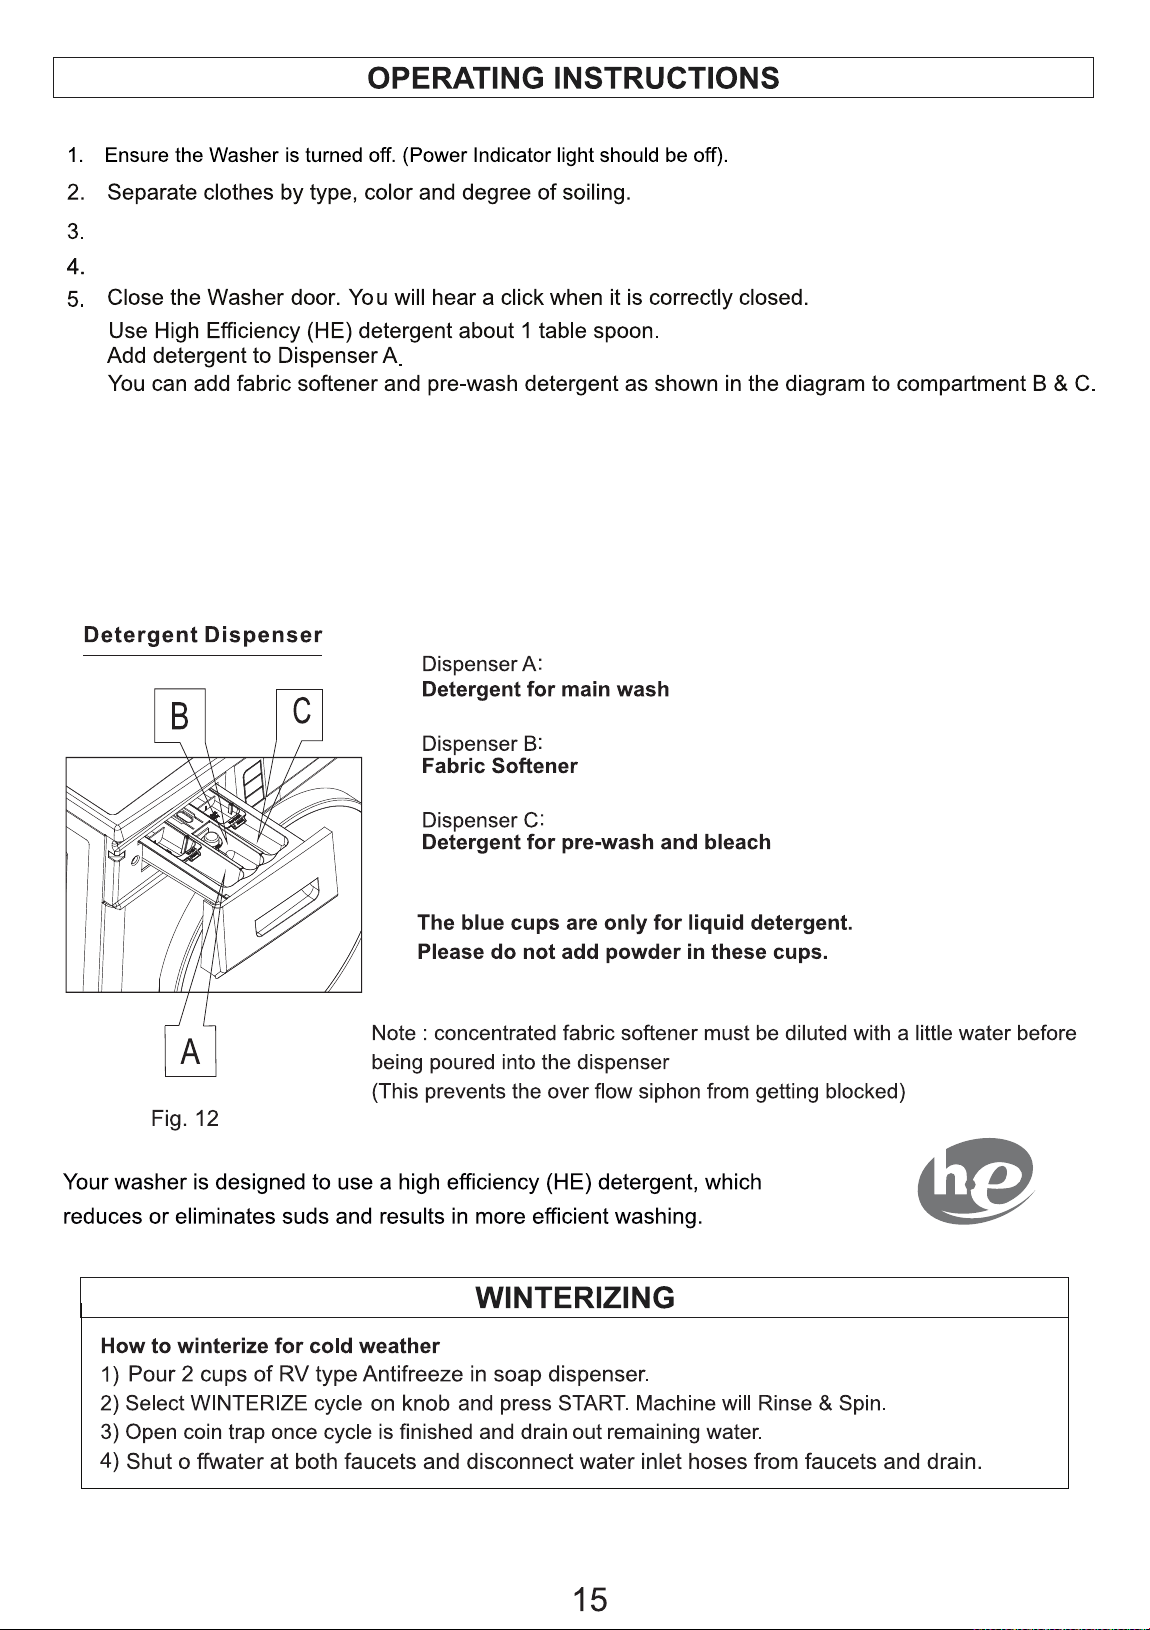
OPERATING INSTRUCTIONS
Before using the Dryer, please check the inside of the drum to ensure that children or pets have not climbed
into the appliance.
12
13
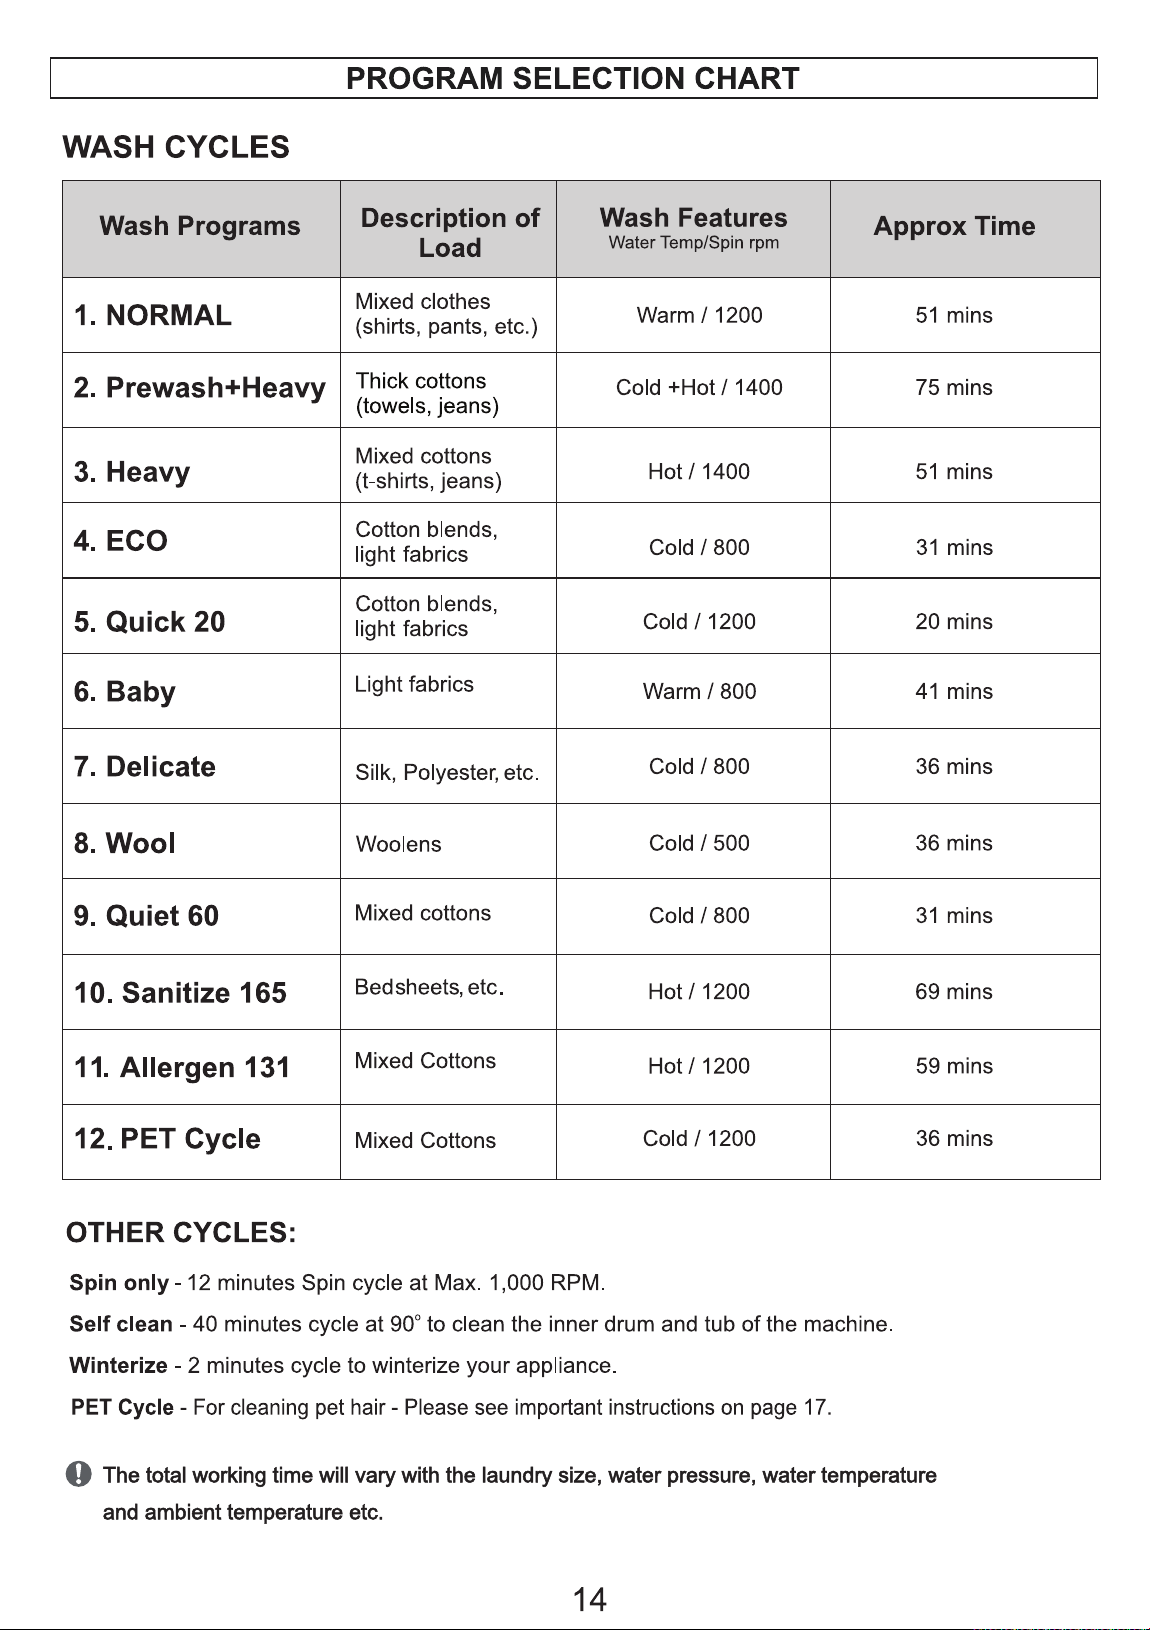
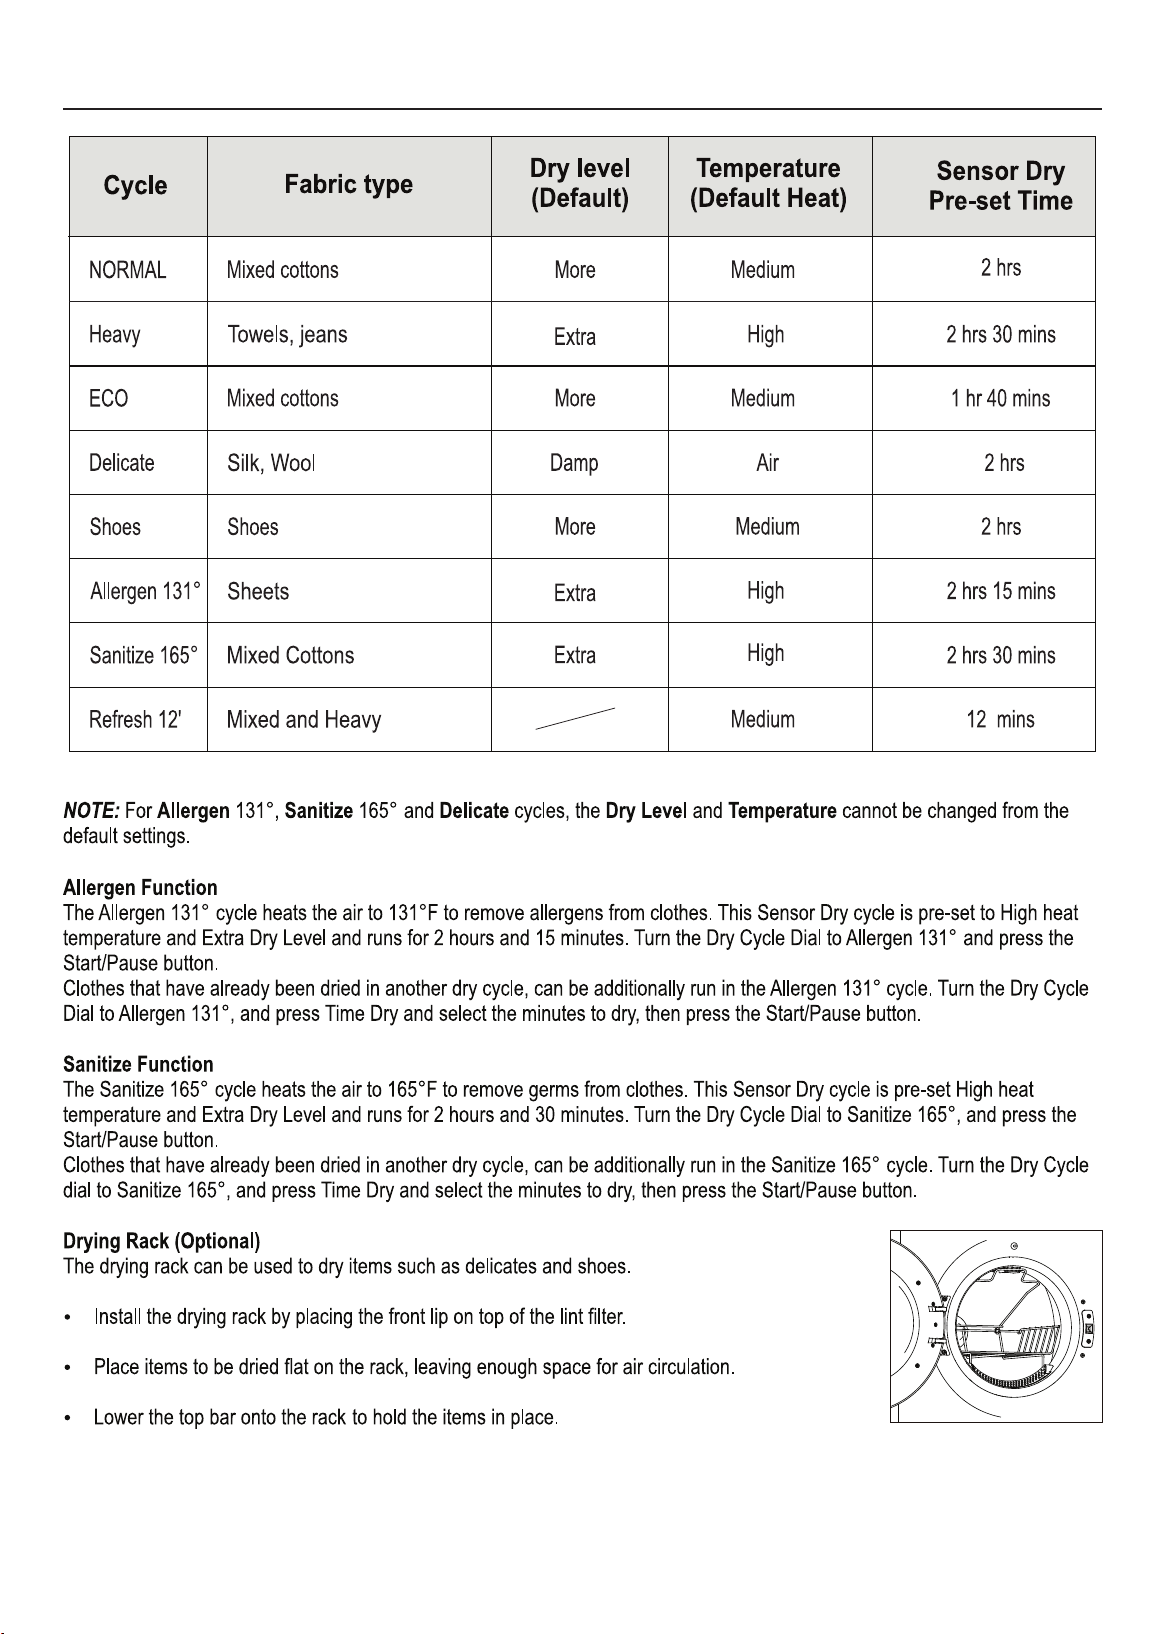
Program Selection Chart
14
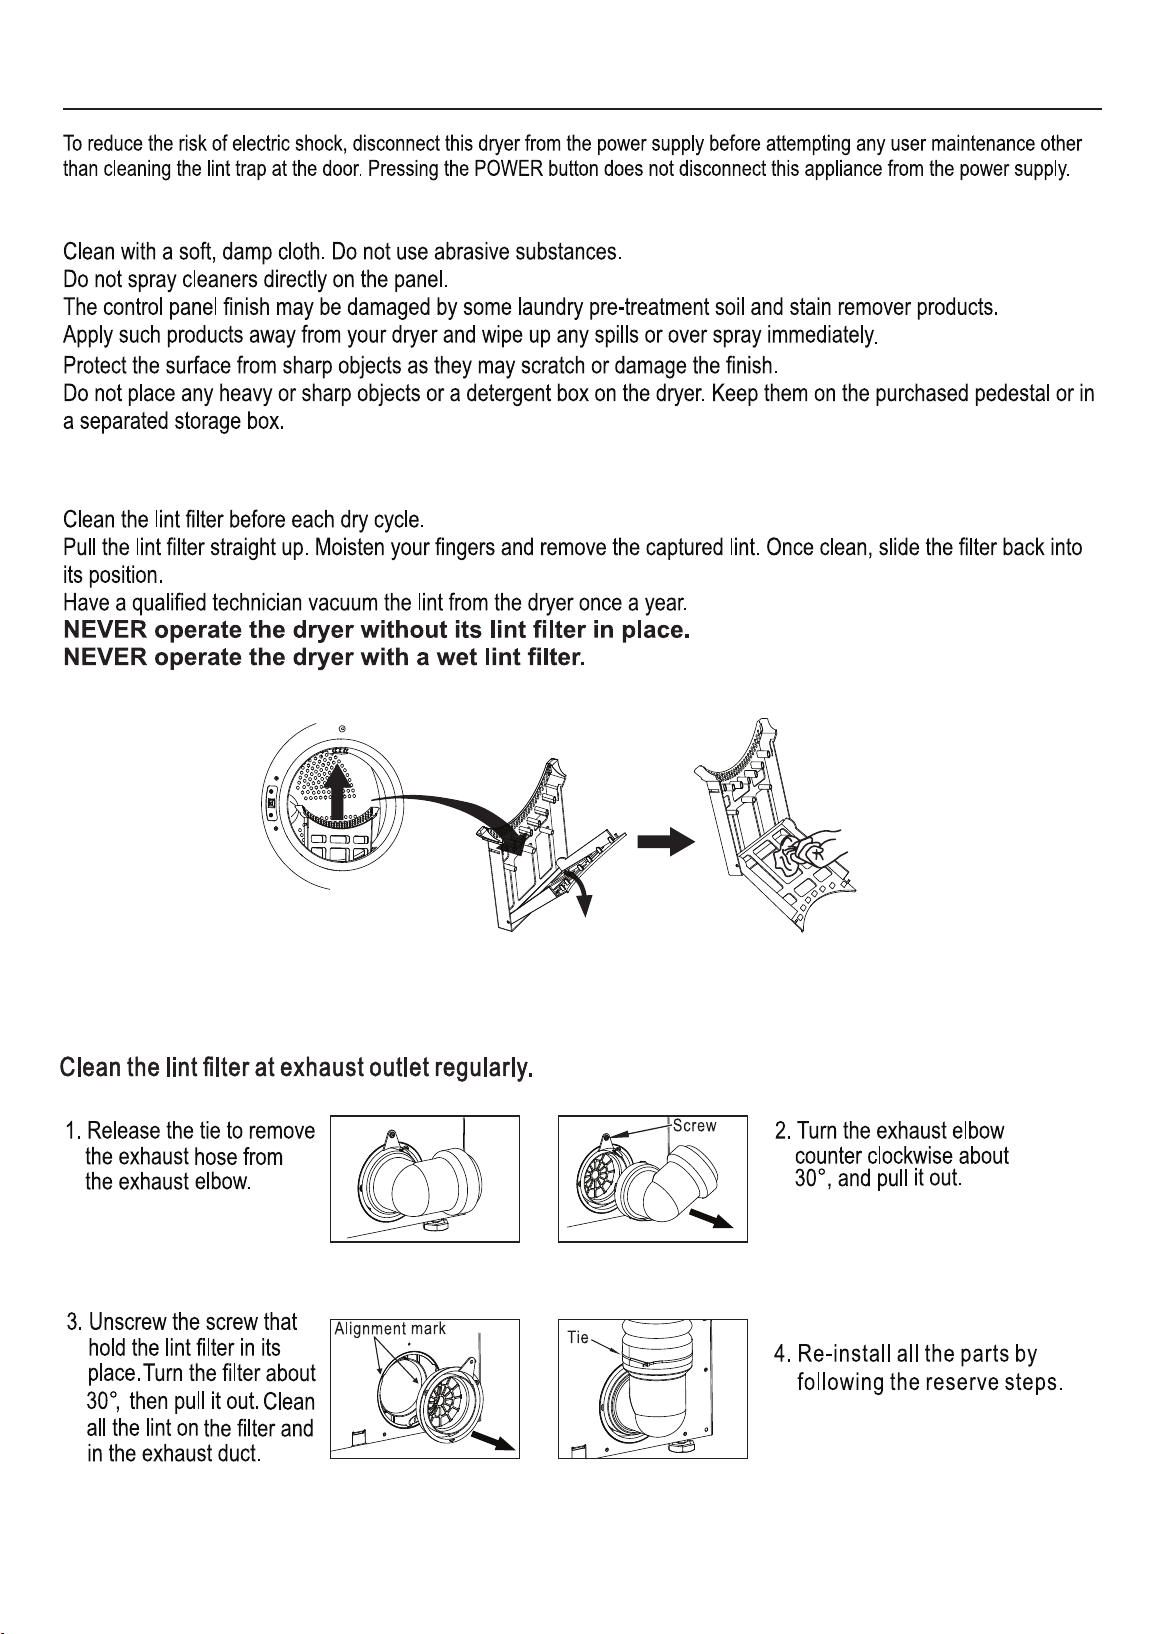
Maintenance
Cleaning
Lint Filter
15
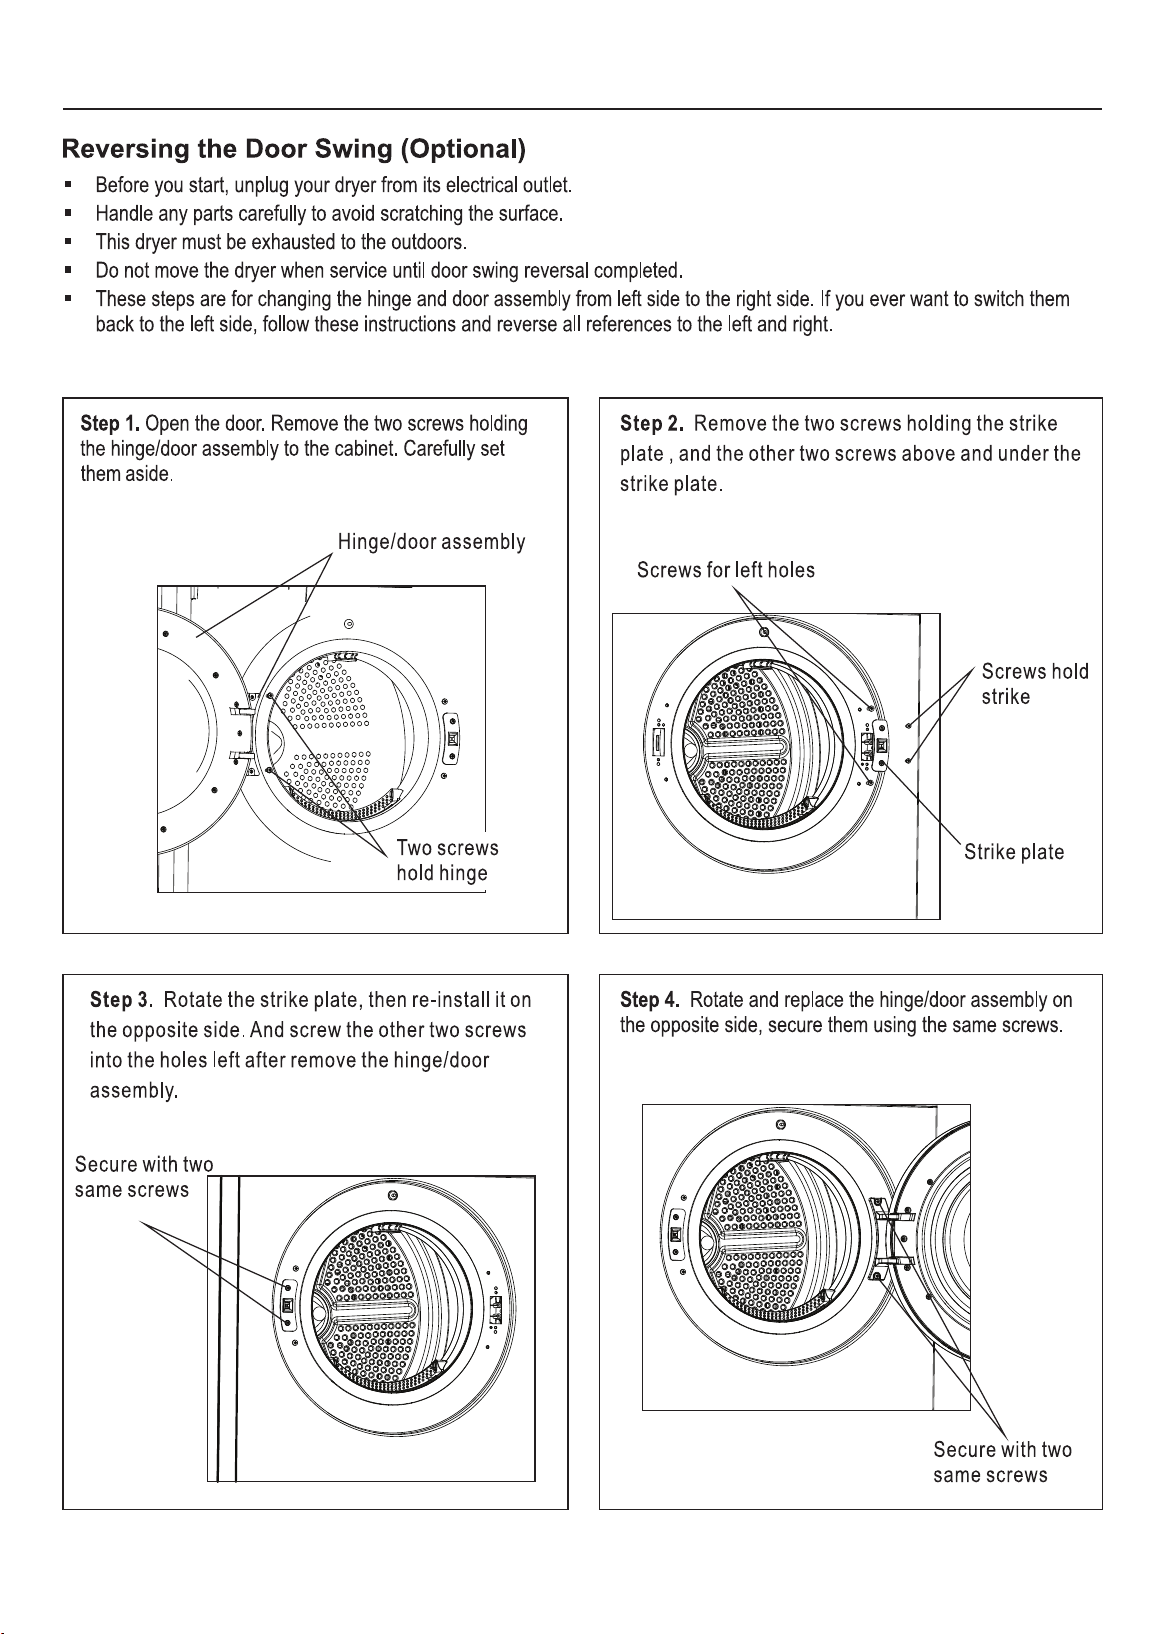
Door Reversal
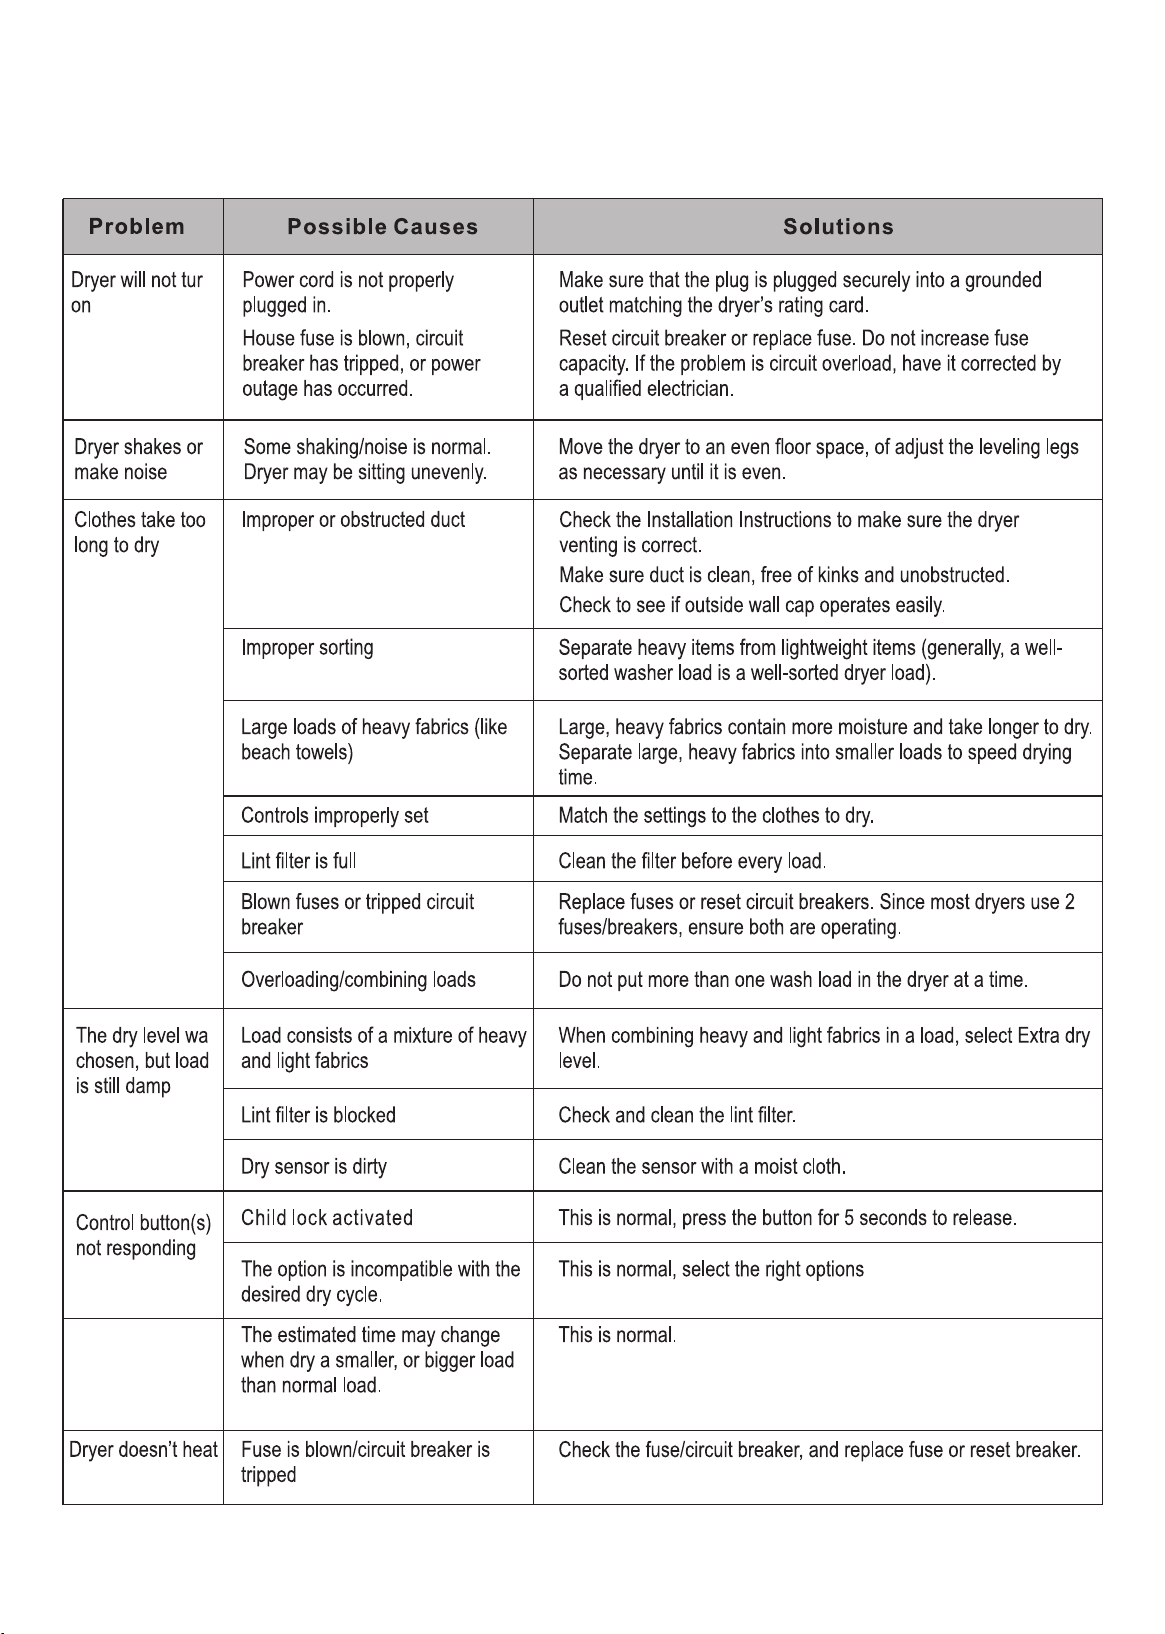
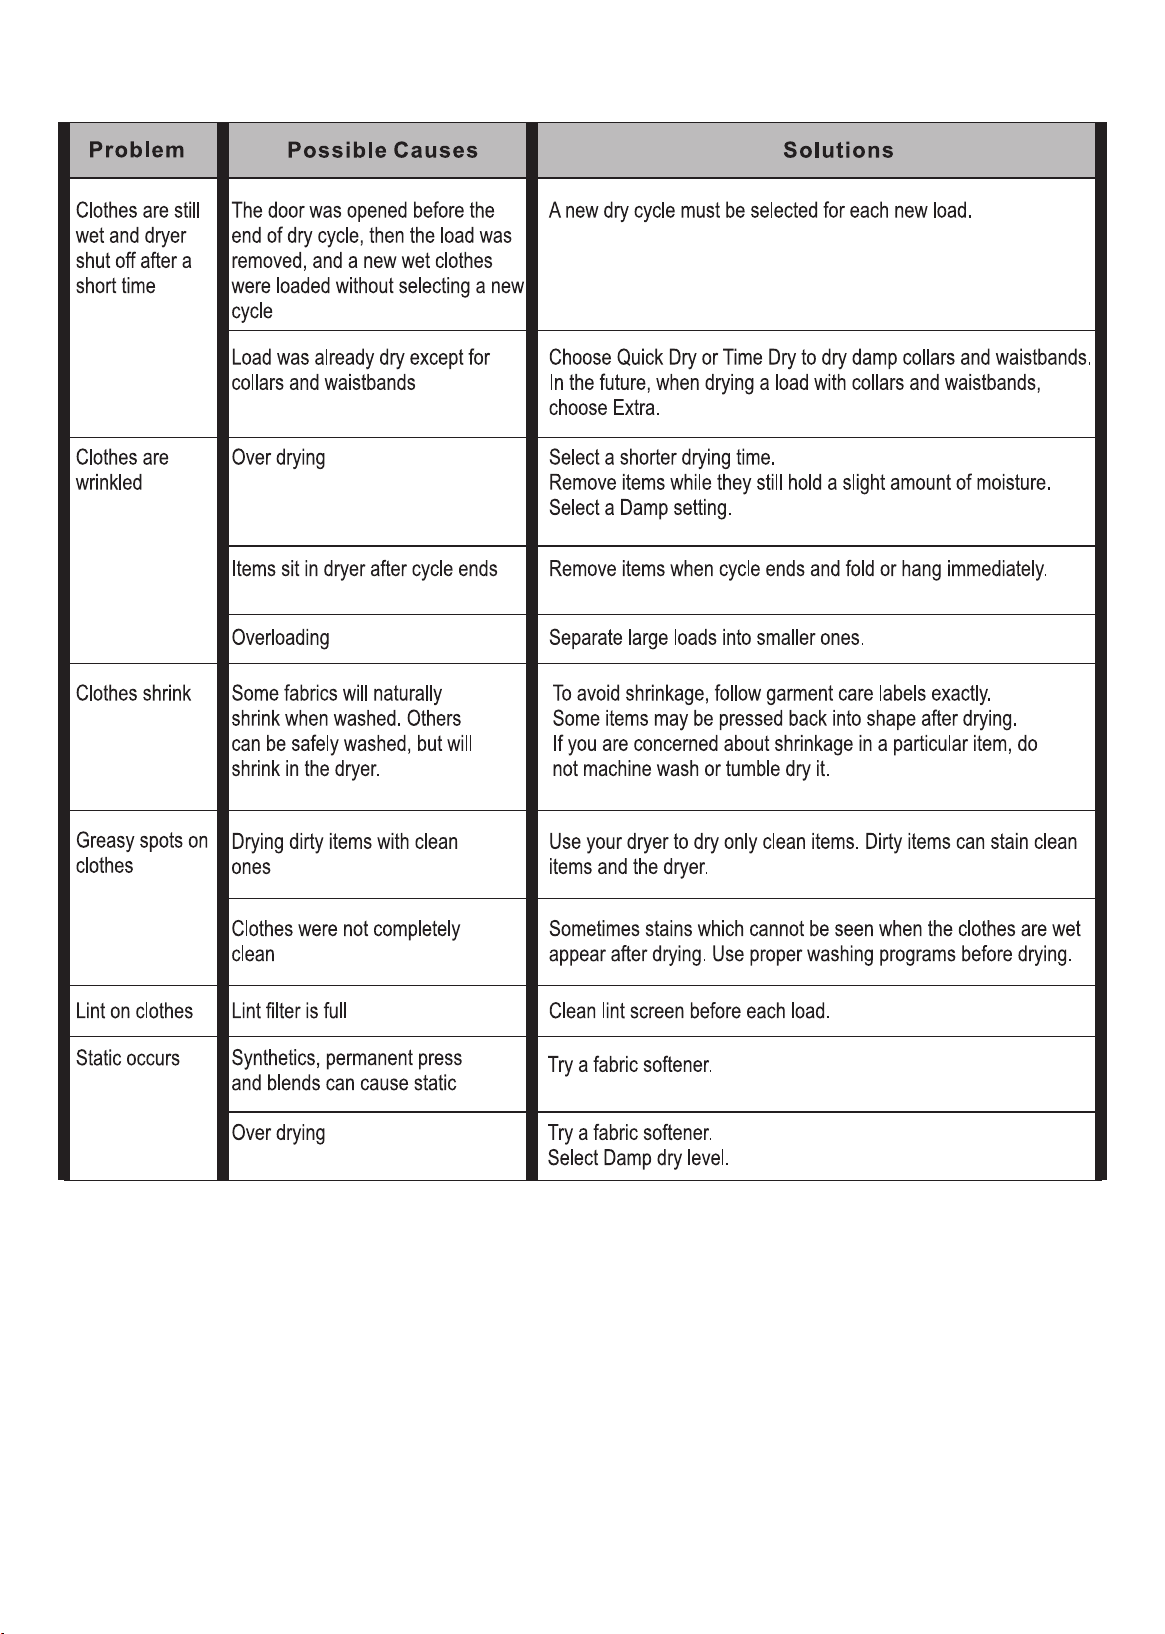
Troubleshooting
for your dry cycle.
Remaining time
changed to a
lower or a
greater number
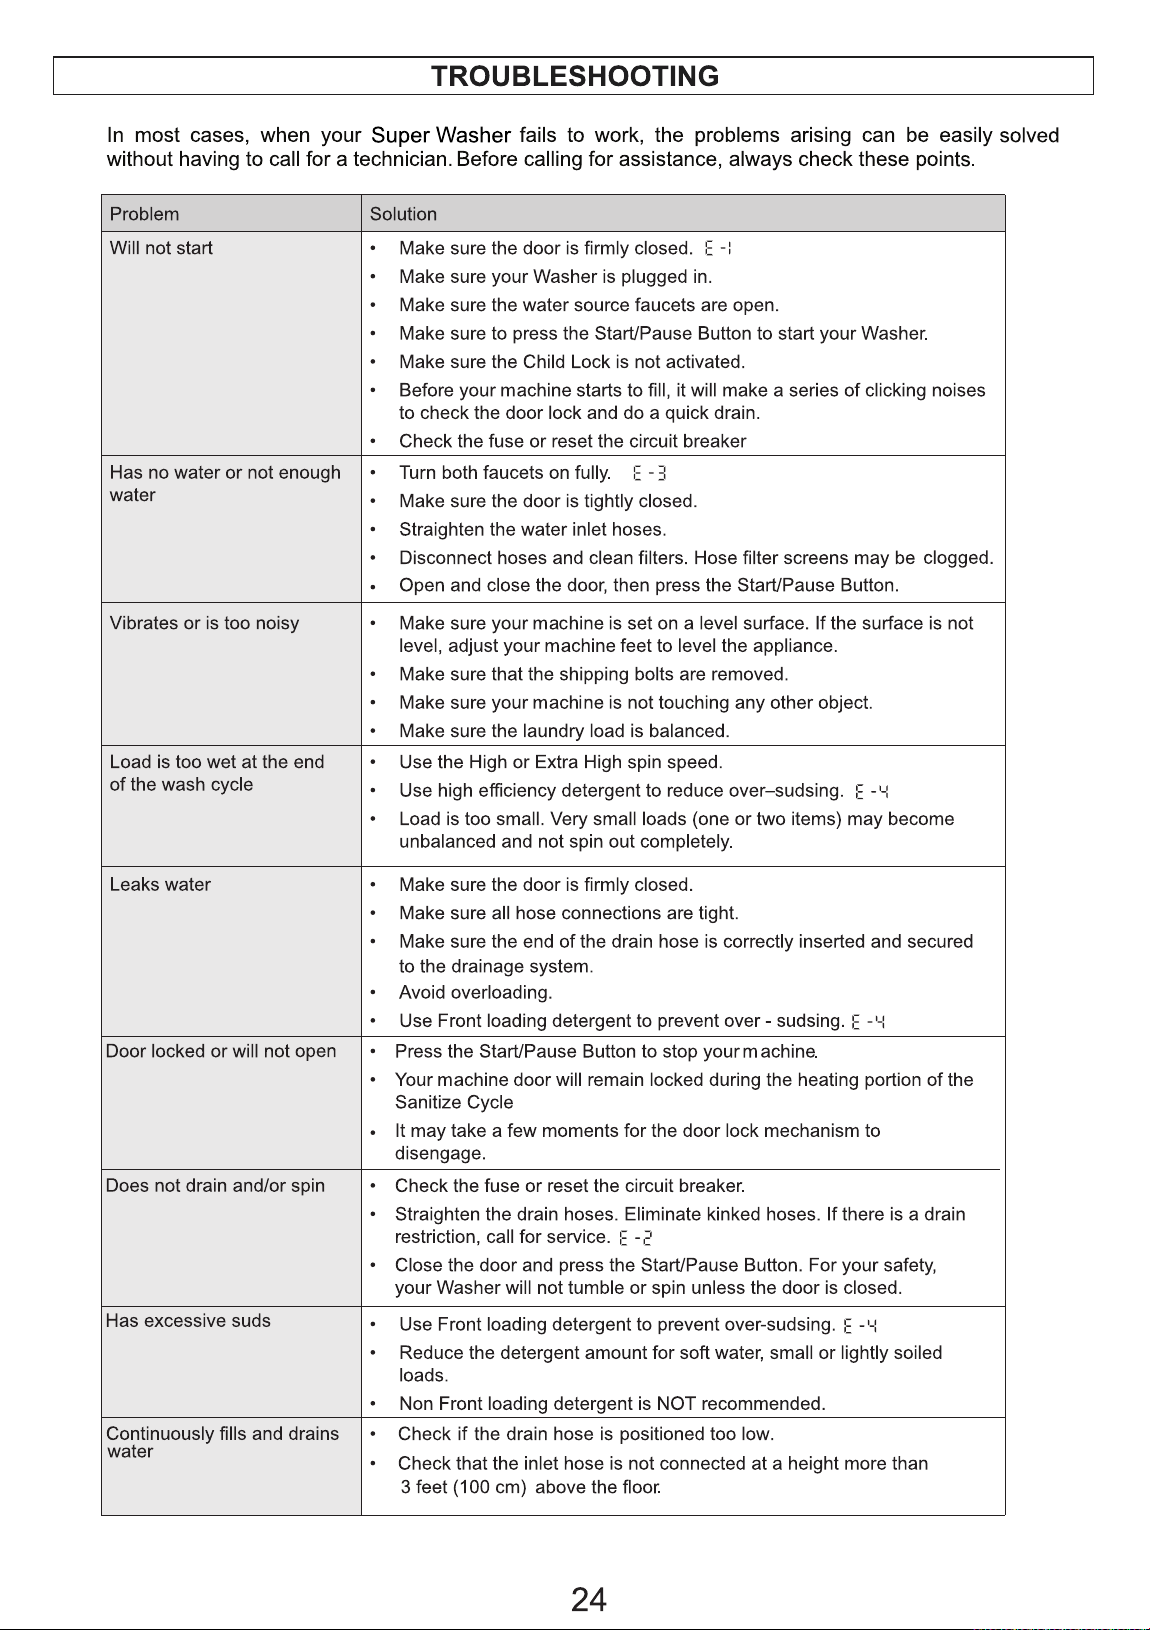
In most cases, when your Dryer fails to work, the problems arising can be easily solved without having to
call for a technician. Before calling for assistance, always check these points.
16
17
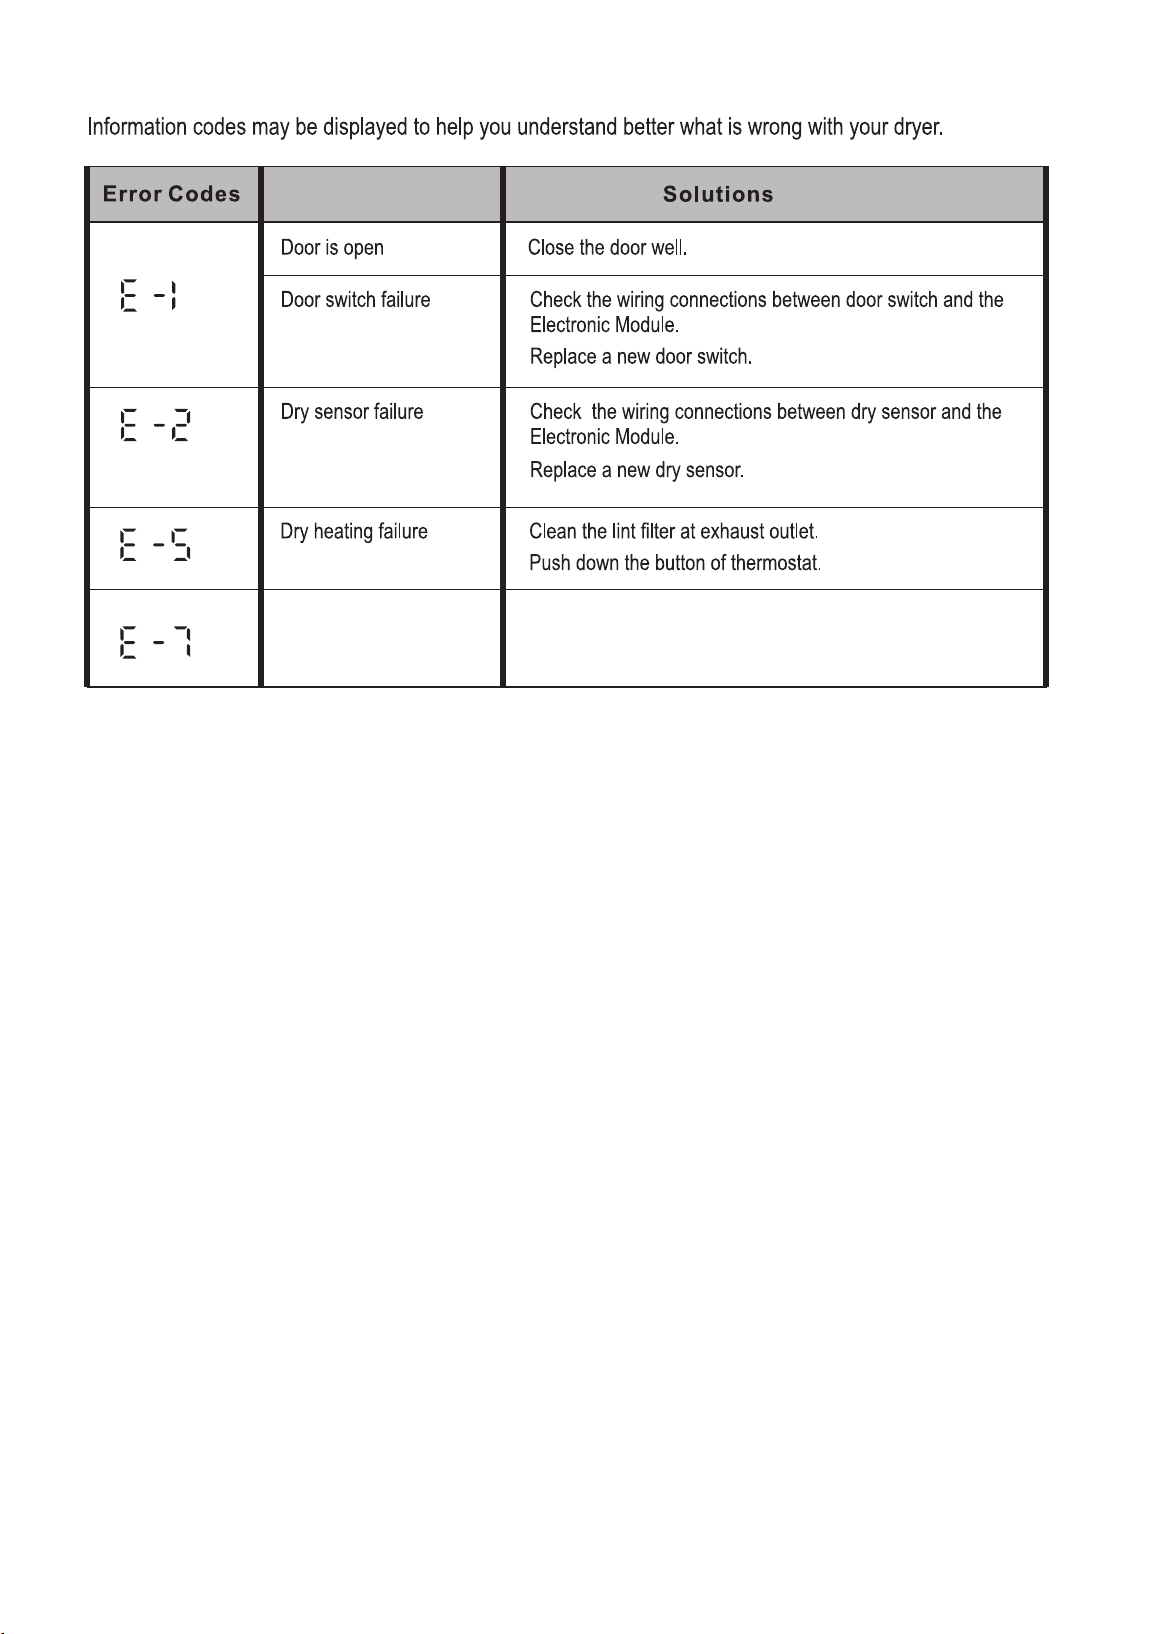
Error Codes
Drum does not rotate
Problem
Belt has fallen off or broken.
Replace belt.
If Error Codes display that are other than the ones listed in the table, please contact Customer Service.
18