

8000 Series
Register your product and get support at
www.philips.com/TVsupport
User Manual
43PUS8000
50PUS8000
55PUS8000
65PUS8000

2
50
51
51
51
52
53
54
55
55
55
55
56
57
57
57
57
57
58
58
58
18 Google Assistant
19.1 Update Software
19.2 Software Version
19.3 Automatic Software Update
19.4 View Software Update History
19.Software
20.1 European Energy Label
20.2 End of Use
20 Environmental
17.1. About Alexa
17.3.Alexa Voice commands
17.2. Using Alexa
17. Alexa
29
29
29
29
30
30
31
31
31
47
9.2. From a Computer or NAS
9.5. Music
9.3. Photos
9.4. Videos
9
0
0
0
9
11 Universal Access
11.1. Universal Access Settings
11.2. More Access Settings
48
48
48

3
59
60
61
61
61
61
61
62
62
63
63
64
64
64
65
65
66
67
68
68
68
68
68
68
68
69
69
69
73
59
59
59
60
21.7 Connectivity
22.5 Satellite
22.6 Picture
22.7 Sound
22.9 USB
22.10 Wi-Fi and internet
22.11 Wrong Menu Language
22.8 HDMI - UHD
59
59
21.1 Power
21.2 Reception
21.4 Supported input Resolution
21.5 Sound
21.6 Multimedia
21.3 Display Resolution
22.1 Tips
22.2 Switch On
22.3 Remote Control
22.4 Channels
22 Troubleshooting
23.1 Safety
23.2 Screen Care
23 Safety and Care
24 Terms of Use
25.1 HDMI
25.2 HEVC Advance
25. DTS:X
25.
Dolby ATMOS
25.
Wi-Fi Alliance
25.
Other Trademarks
25 Copyrights
26.1 Open Source Software
26.2 Open Source License
26 Open Source
27 Disclaimer
68
68
1. Home Screen
Overview
:
4
2. Get Support
>
•
•
•
•
•
•
•
•
•
•
1 -
> >
2 -
3 -
4 -
5 -
1 -
> >
2 -
•
•
•
•
5

6
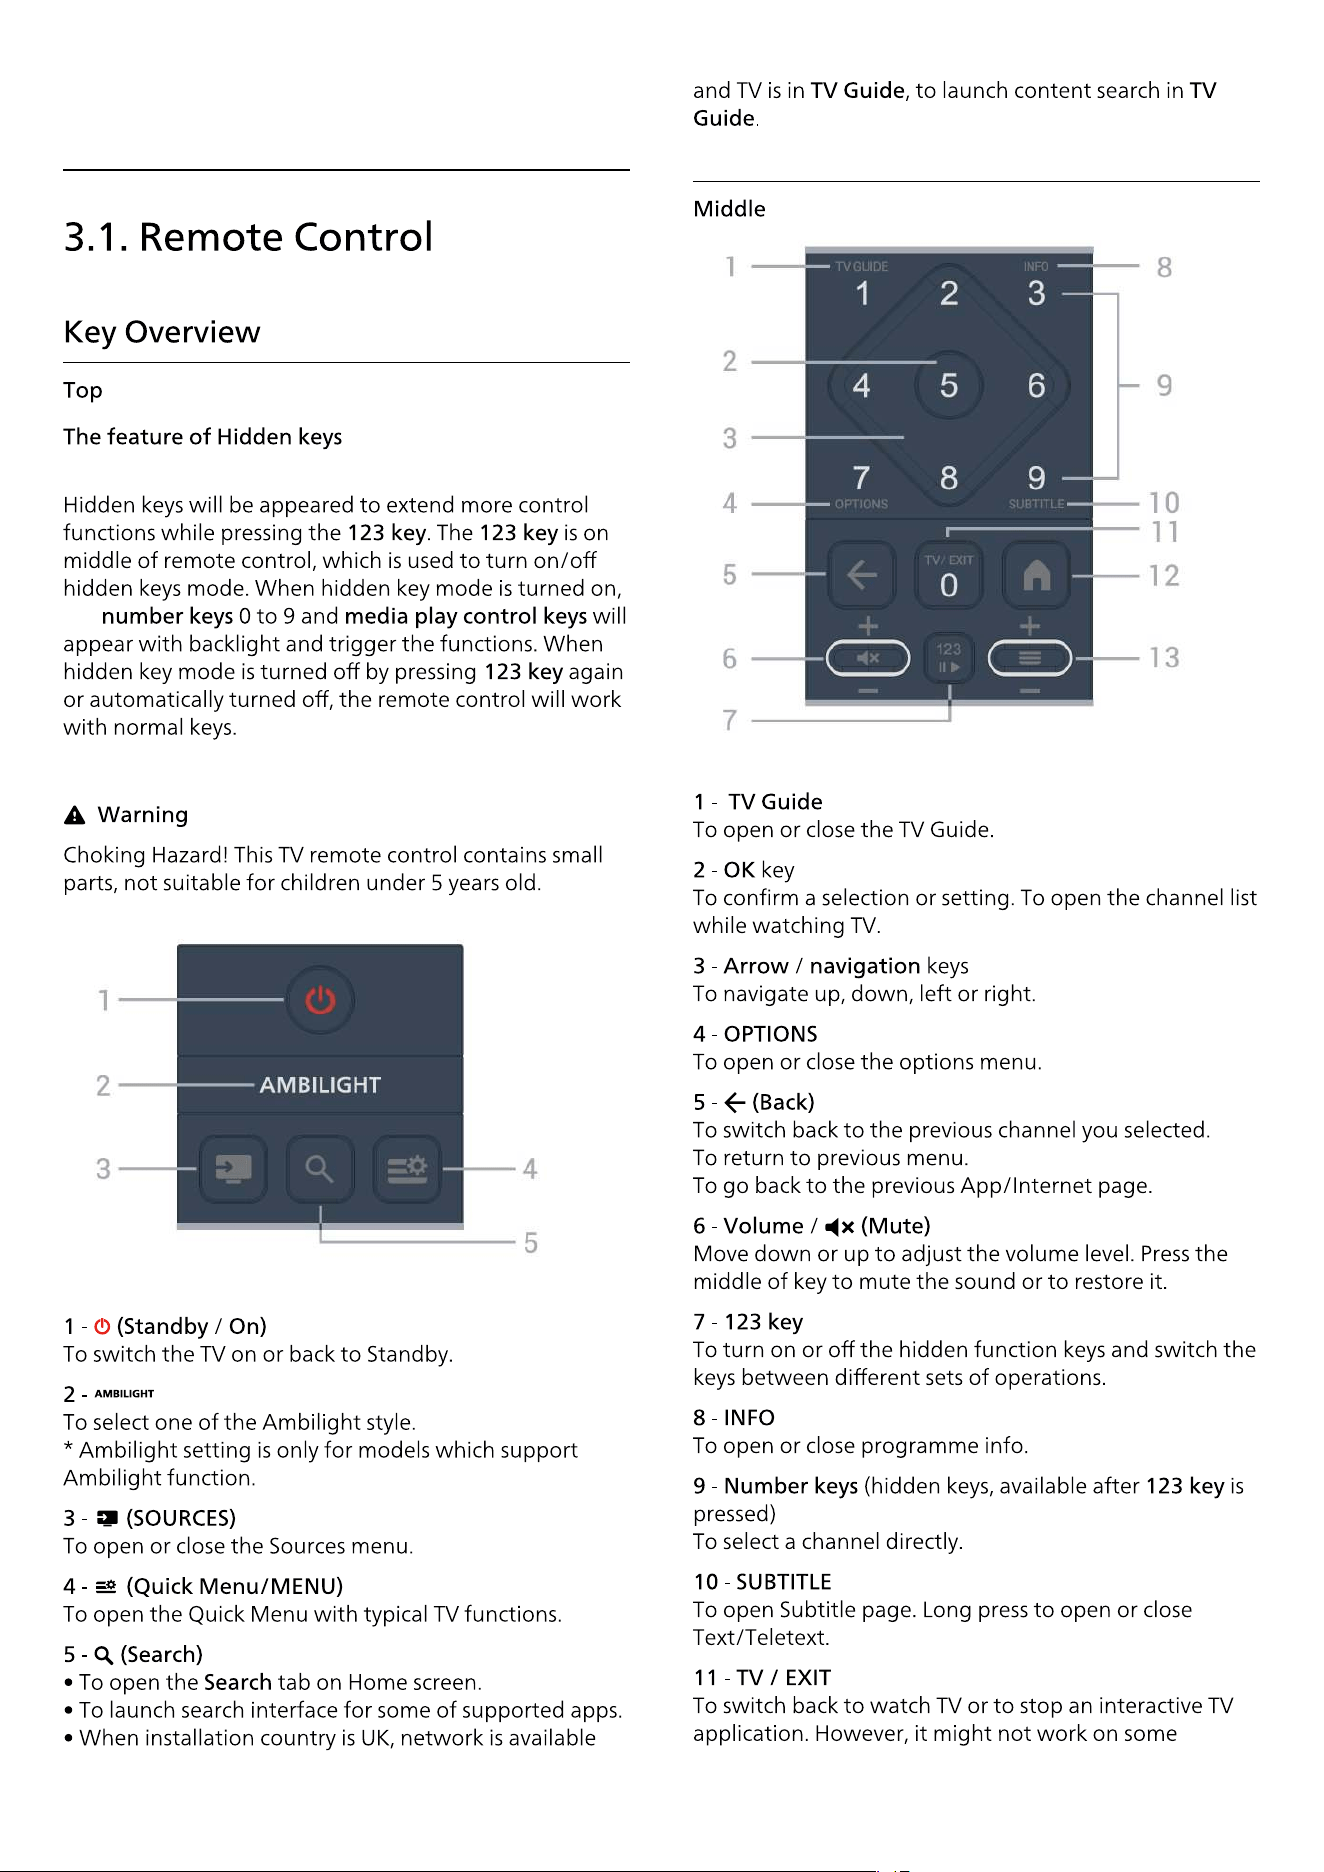
3. Quick Guide
the
7
1 -
2 -
3 -
> >
8

9
4. Setting Up
> >
:
10
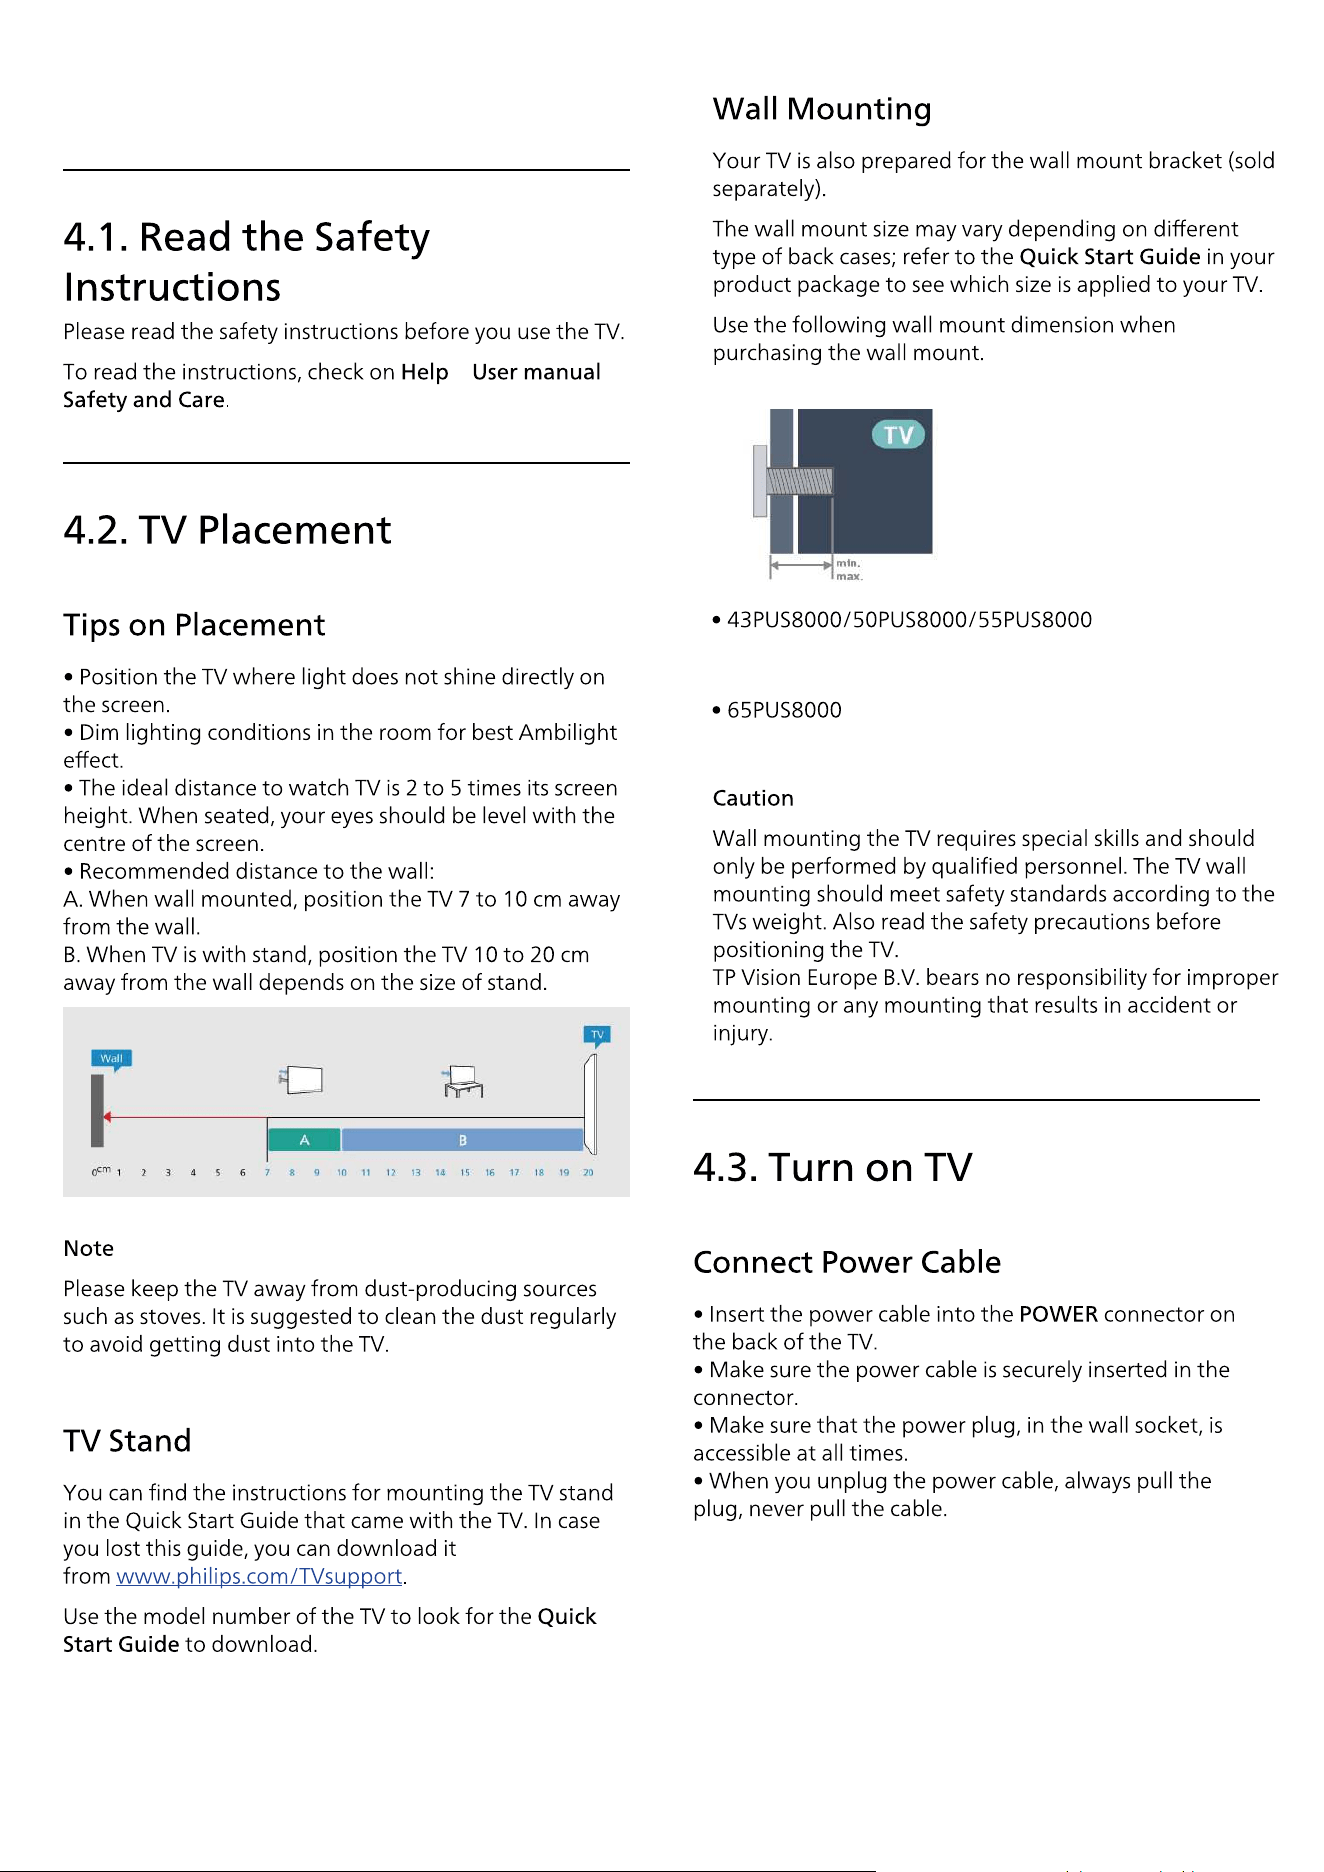
200x100 mm, M6 (TOP min.:8 mm, max.:25 mm)
(DOWN min.:8 mm, max.:10 mm)
400x300 mm, M8 (min.:20 mm, max.: 35 mm)
11
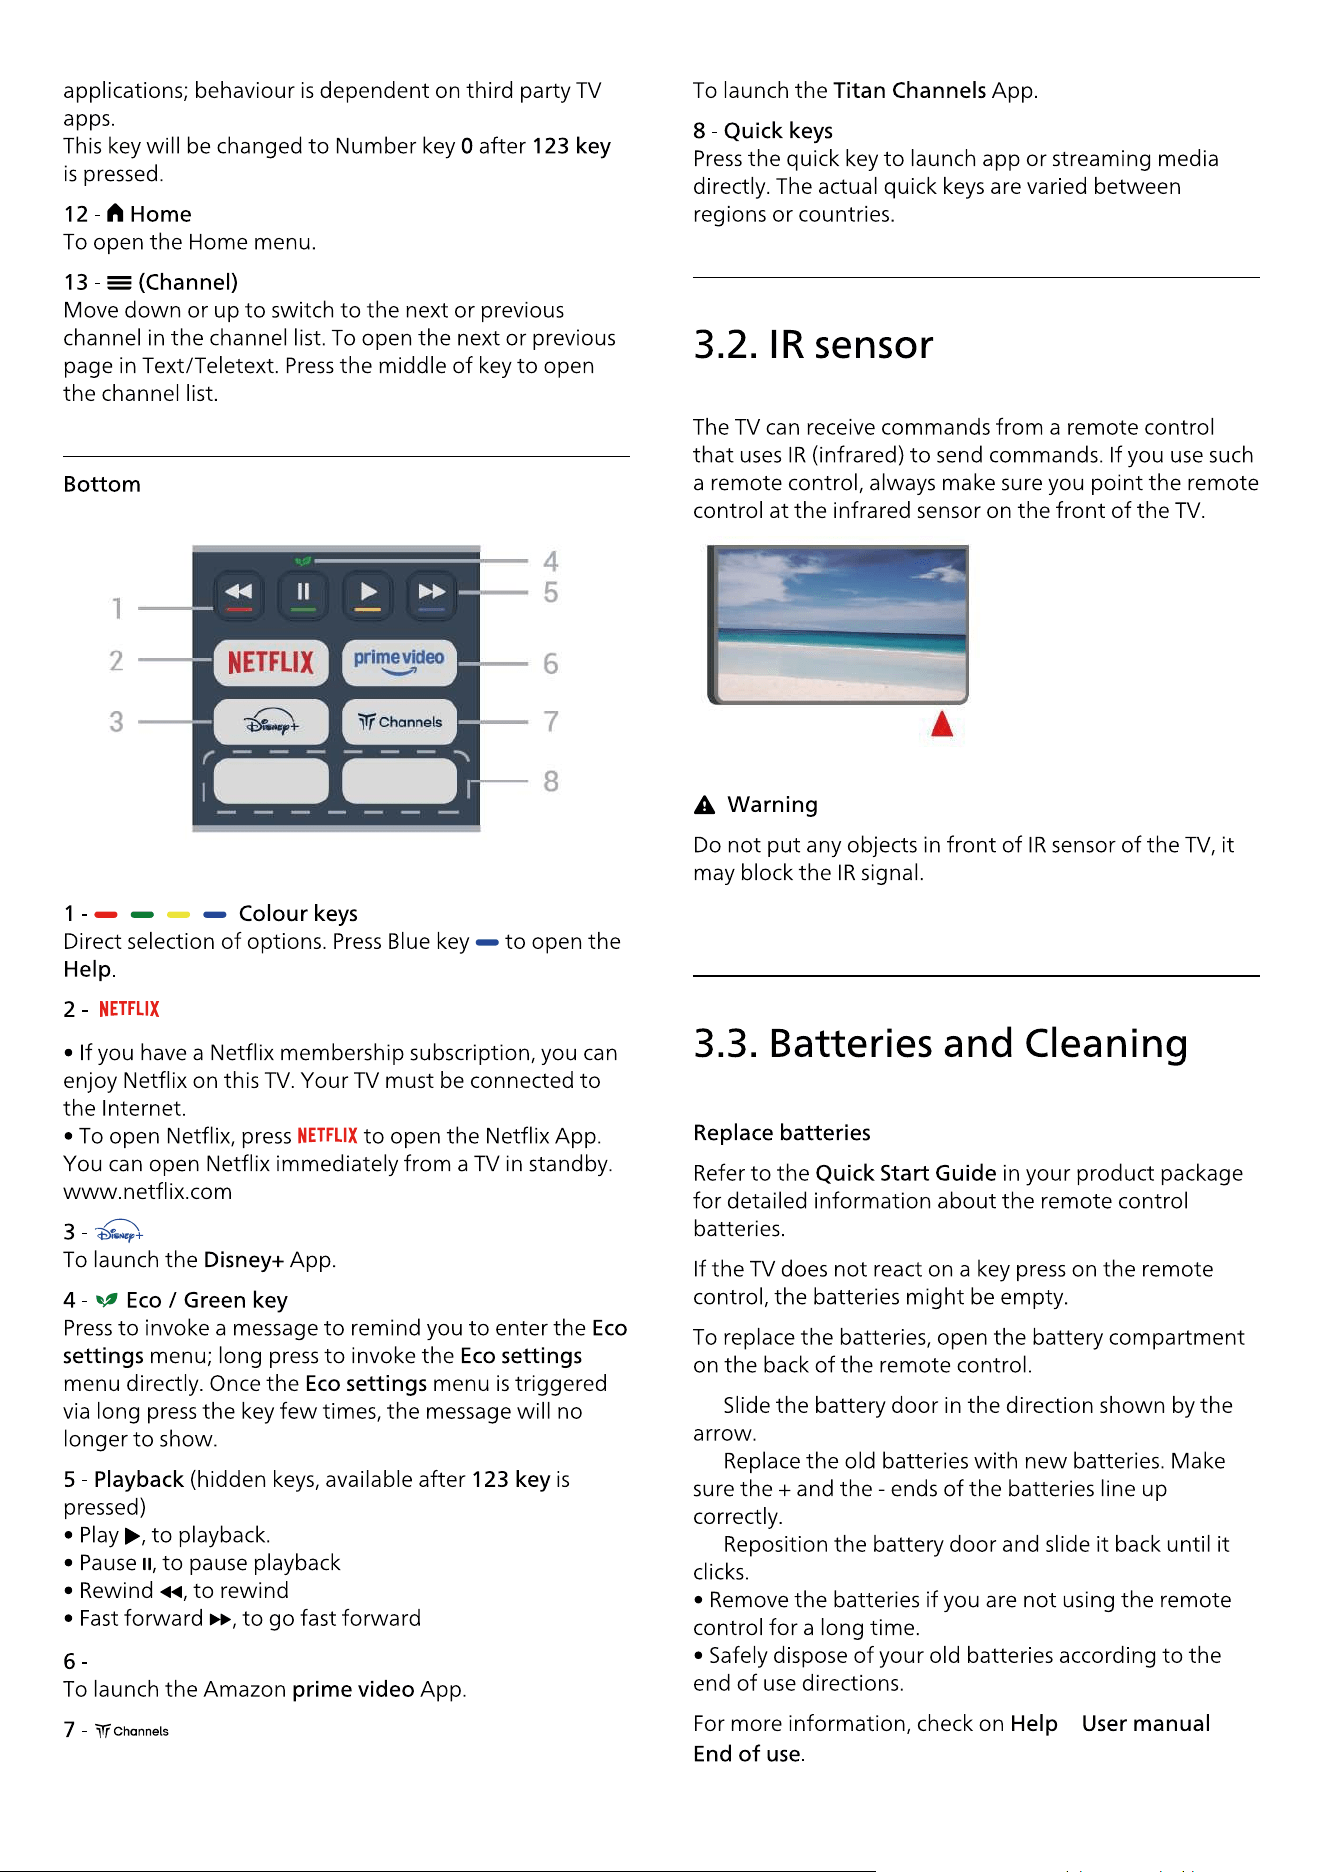
5. Connections
12
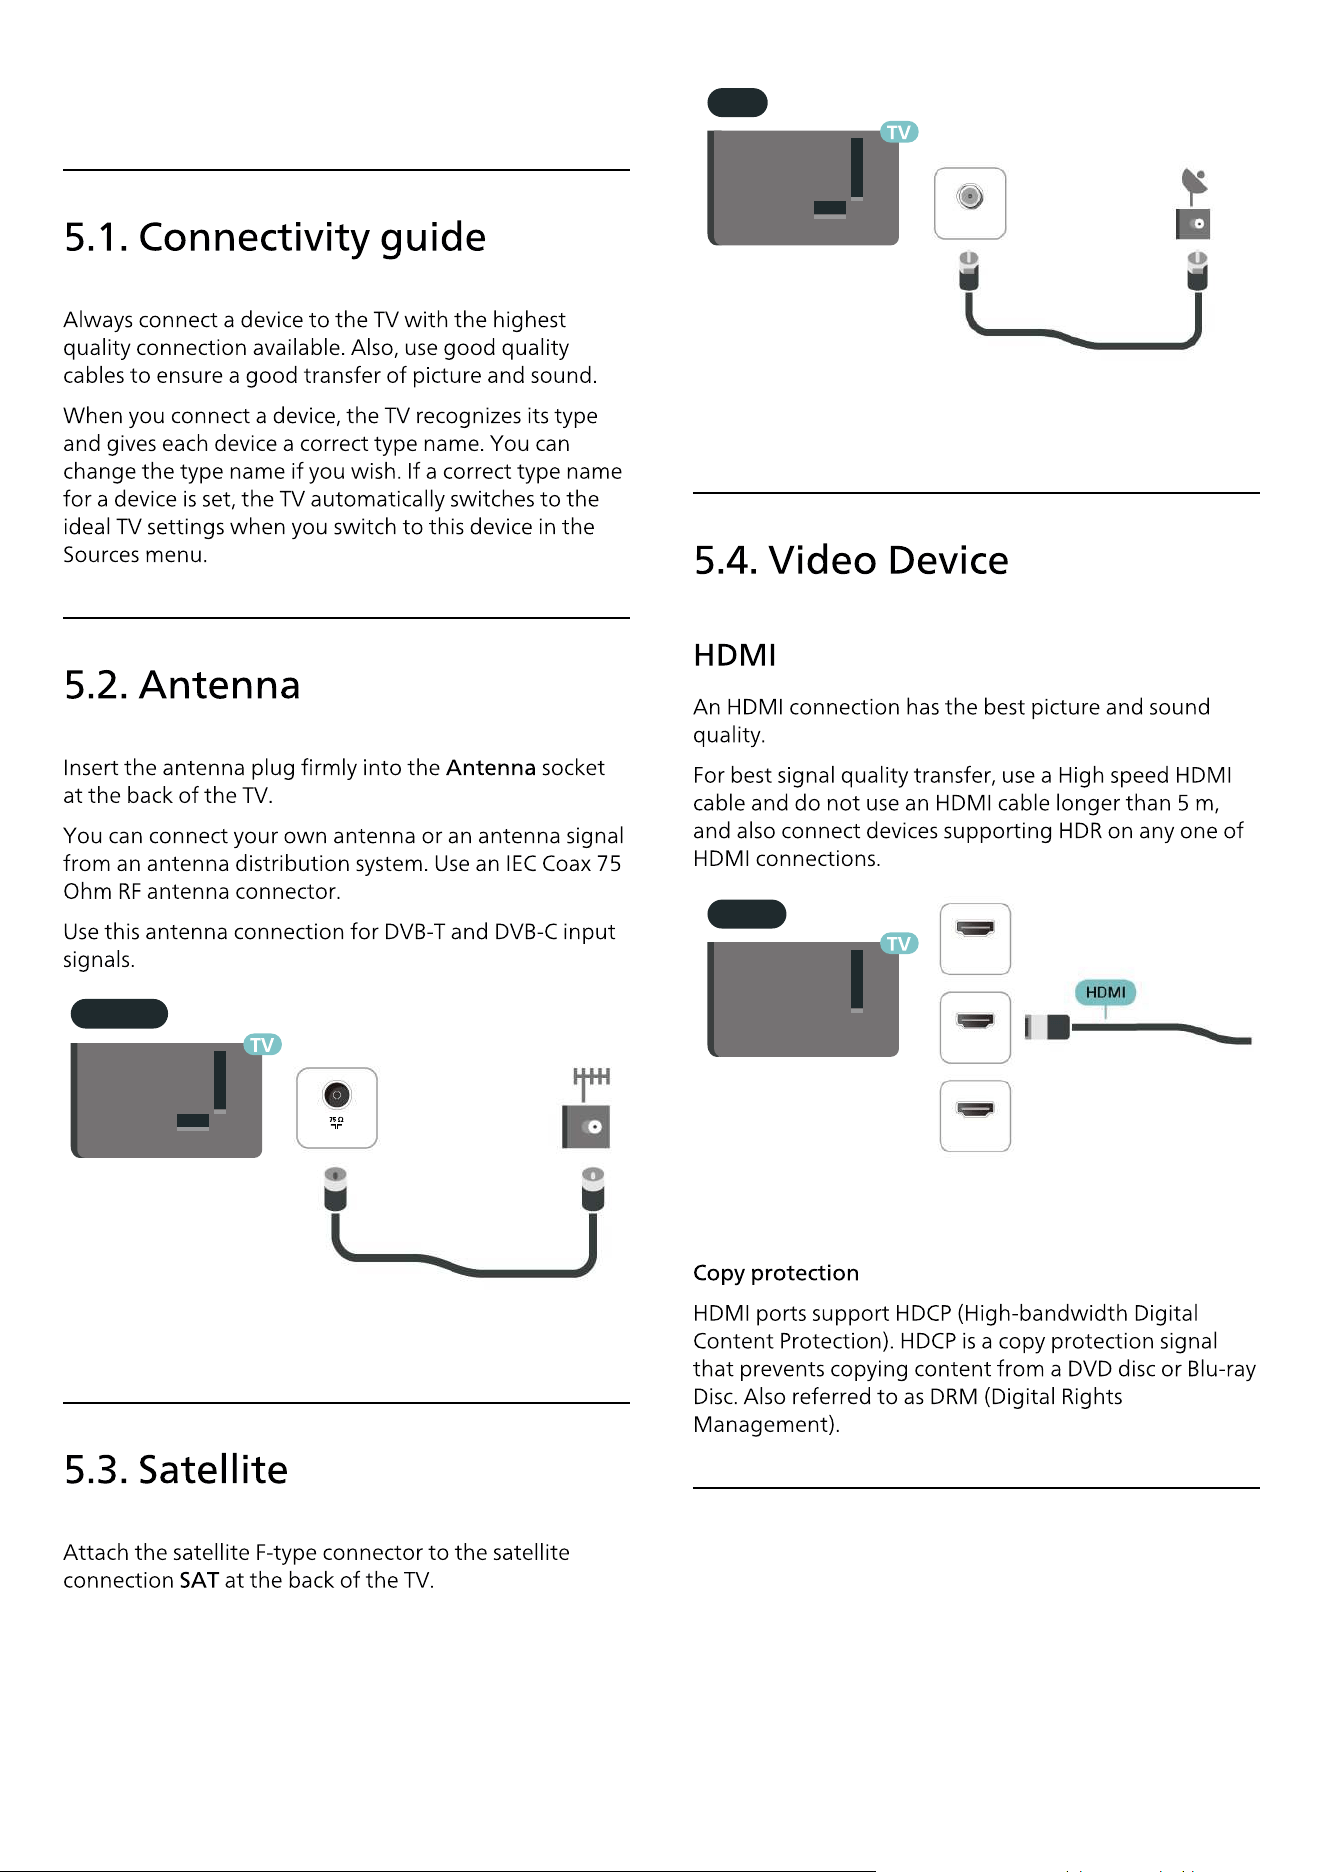
ANTENNA
TV ANTENNA
SAT
SAT
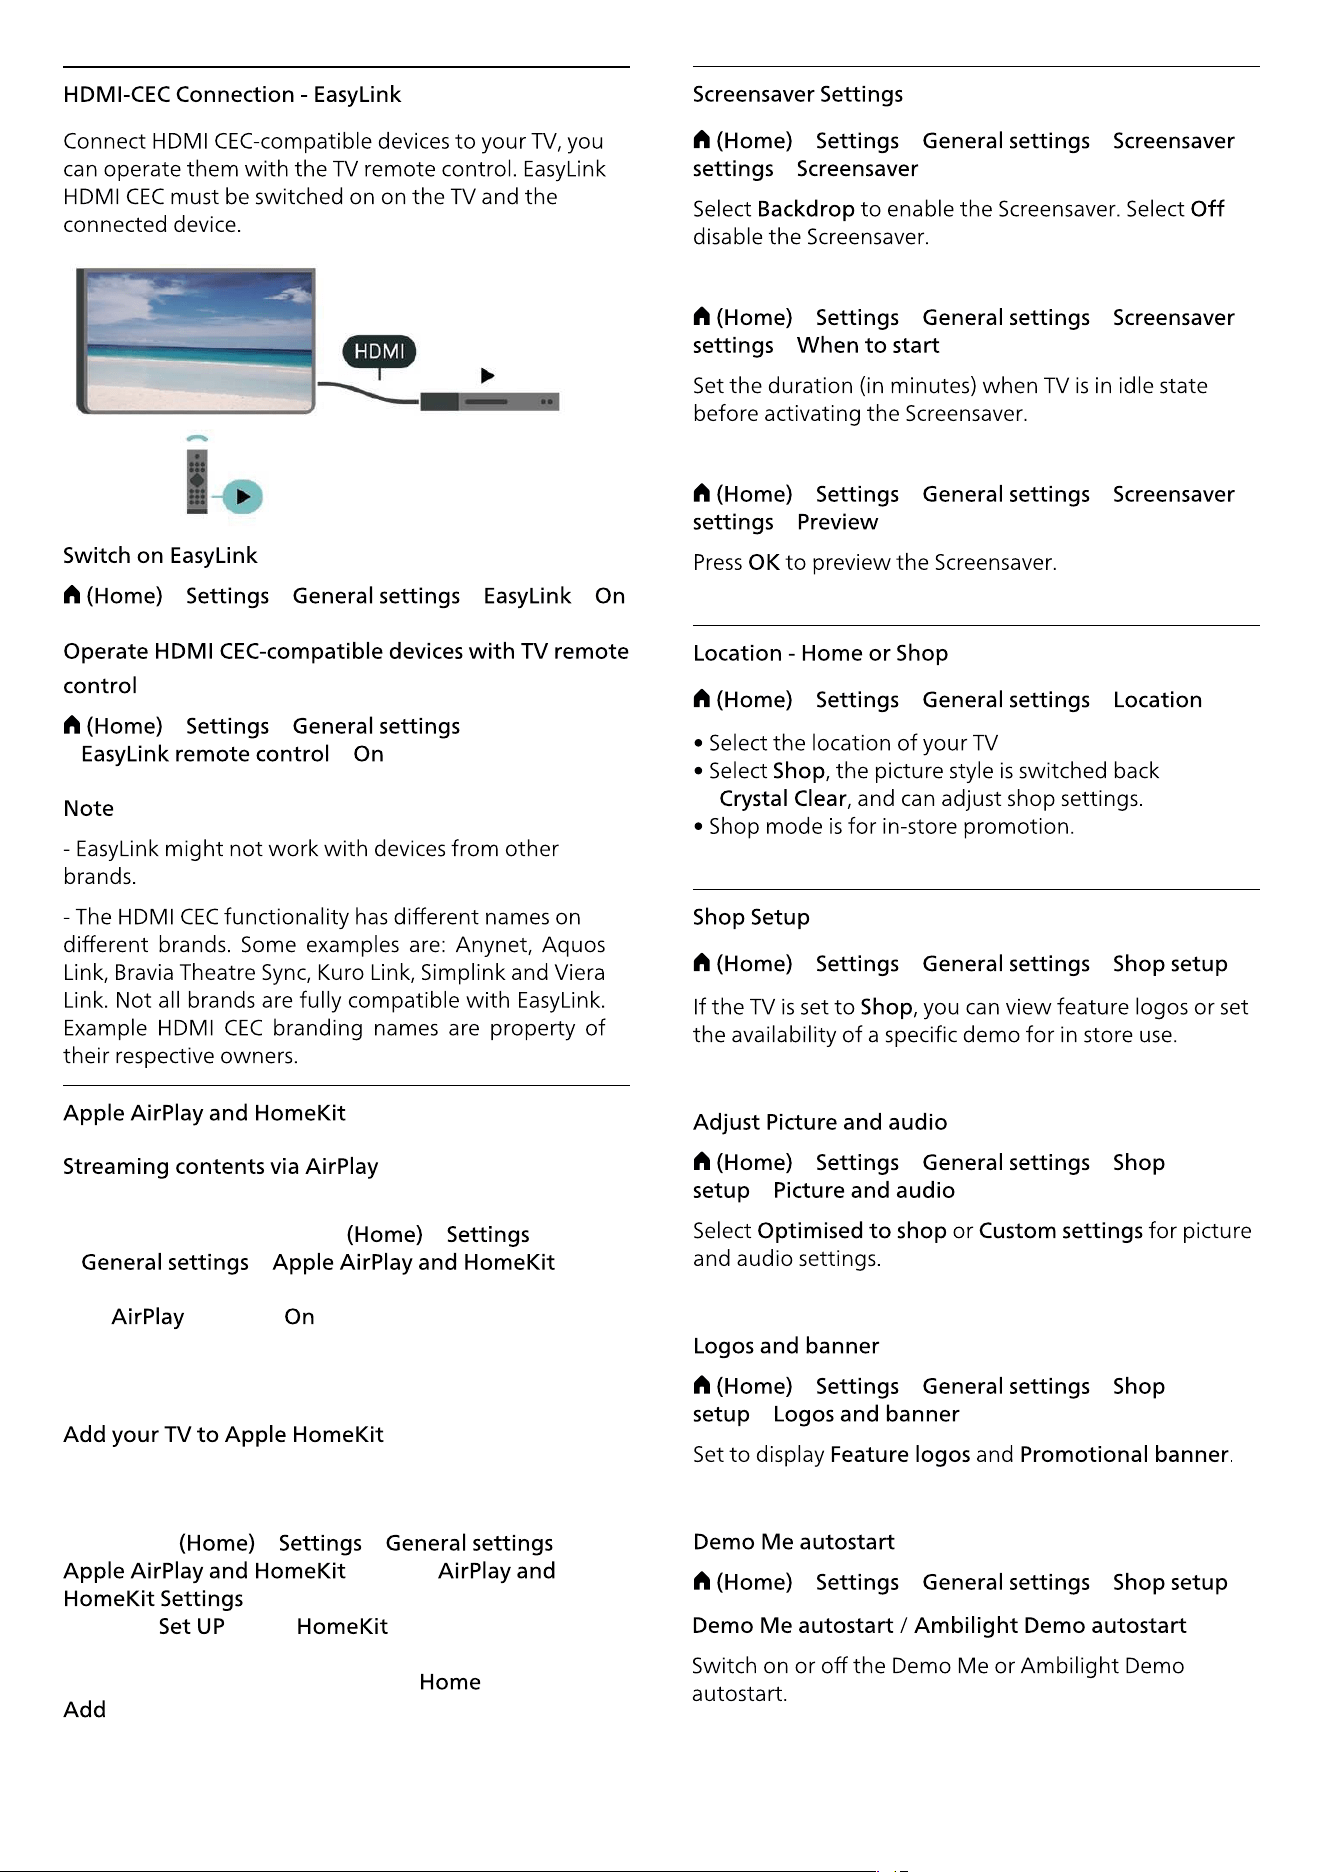
HDMI
ARC/eARC
HDMI 1
HDMI 2
HDMI 3
the
1 -
2 -
3 -
The
> >
> >
13
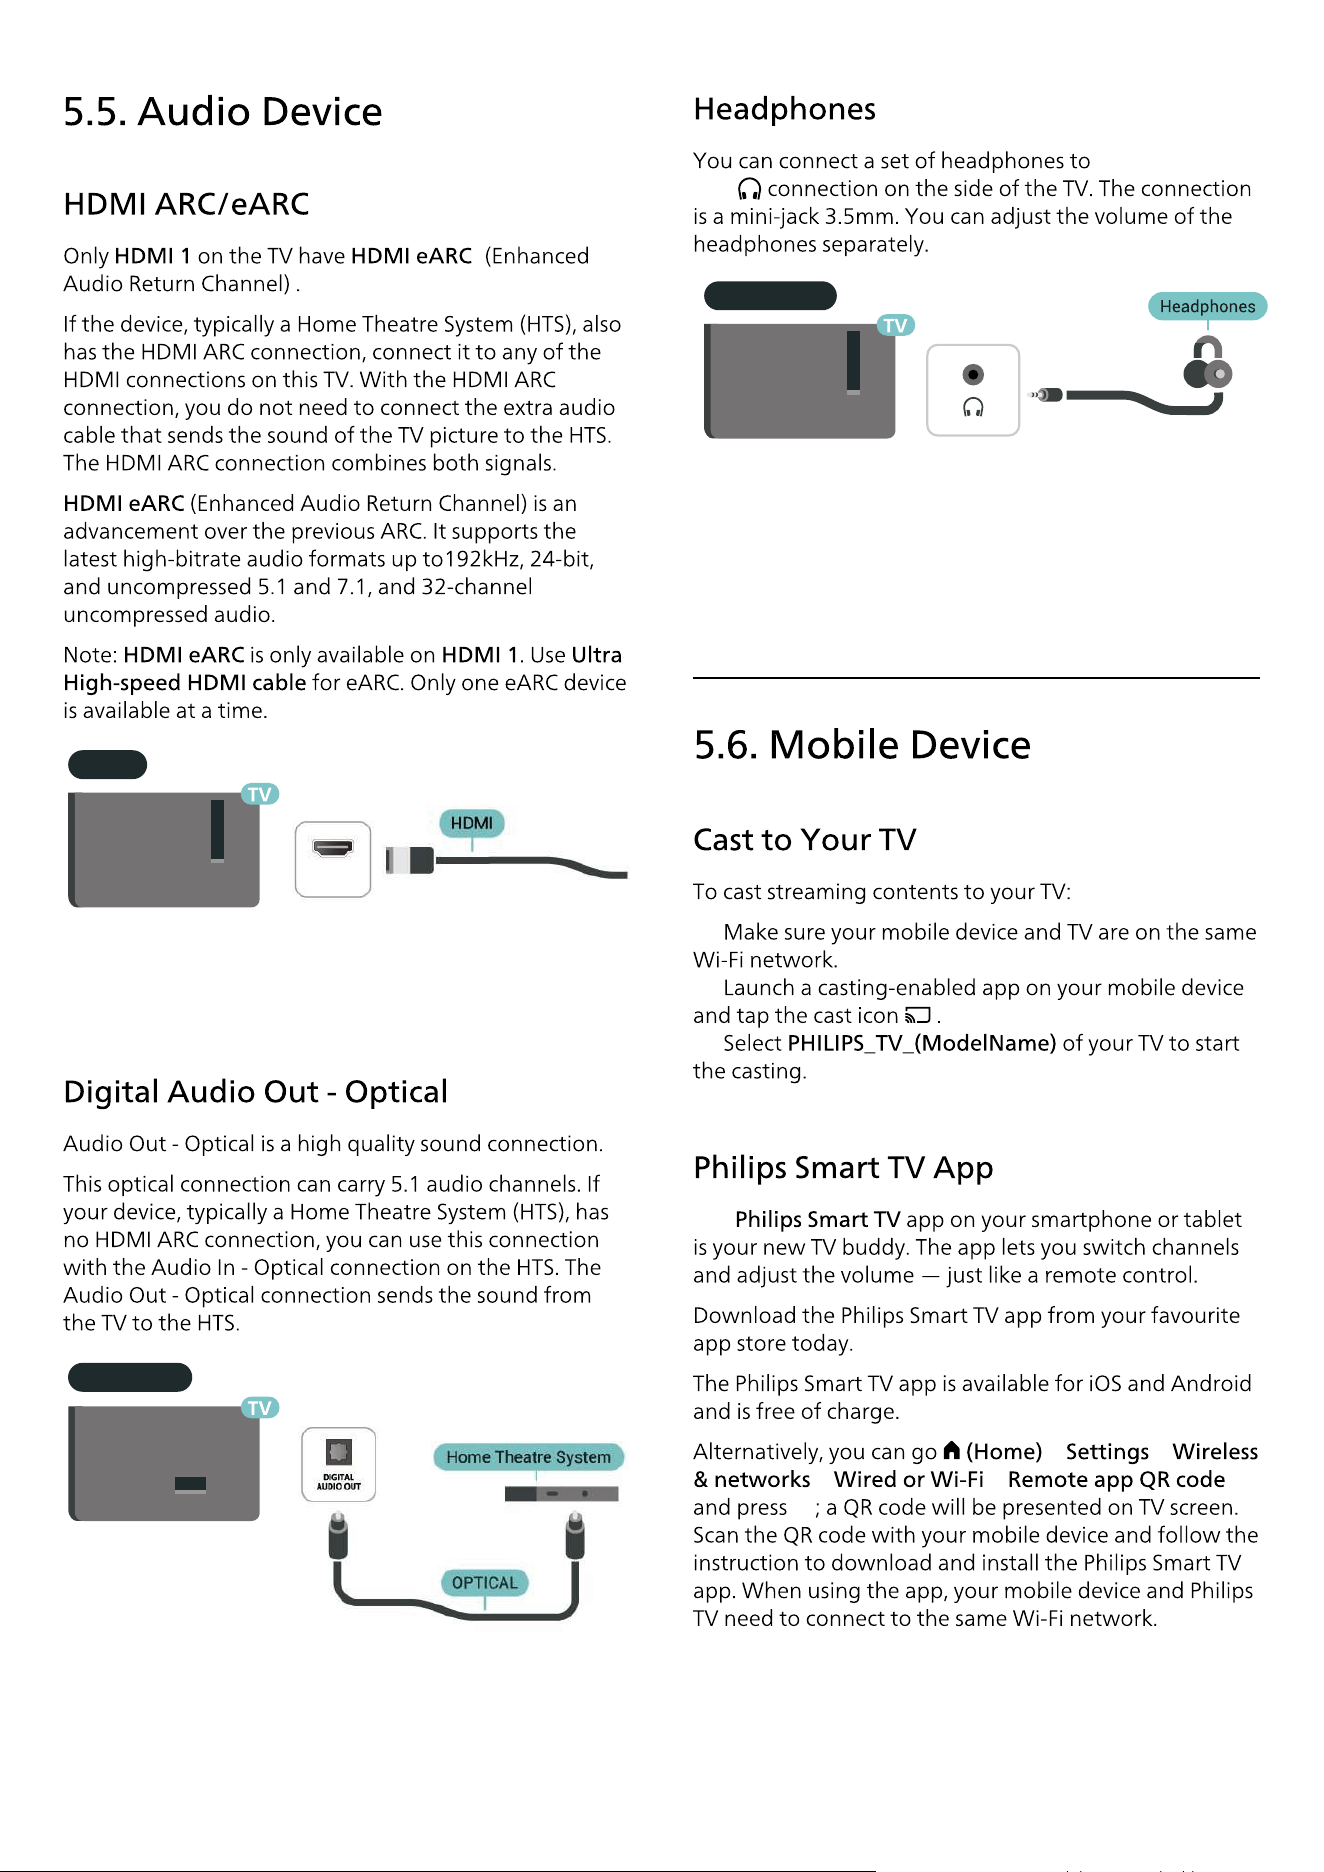
HDMI
ARC/eARC
HDMI 1
AUDIO OUT
Headphones

14
COMMON INTERFACE
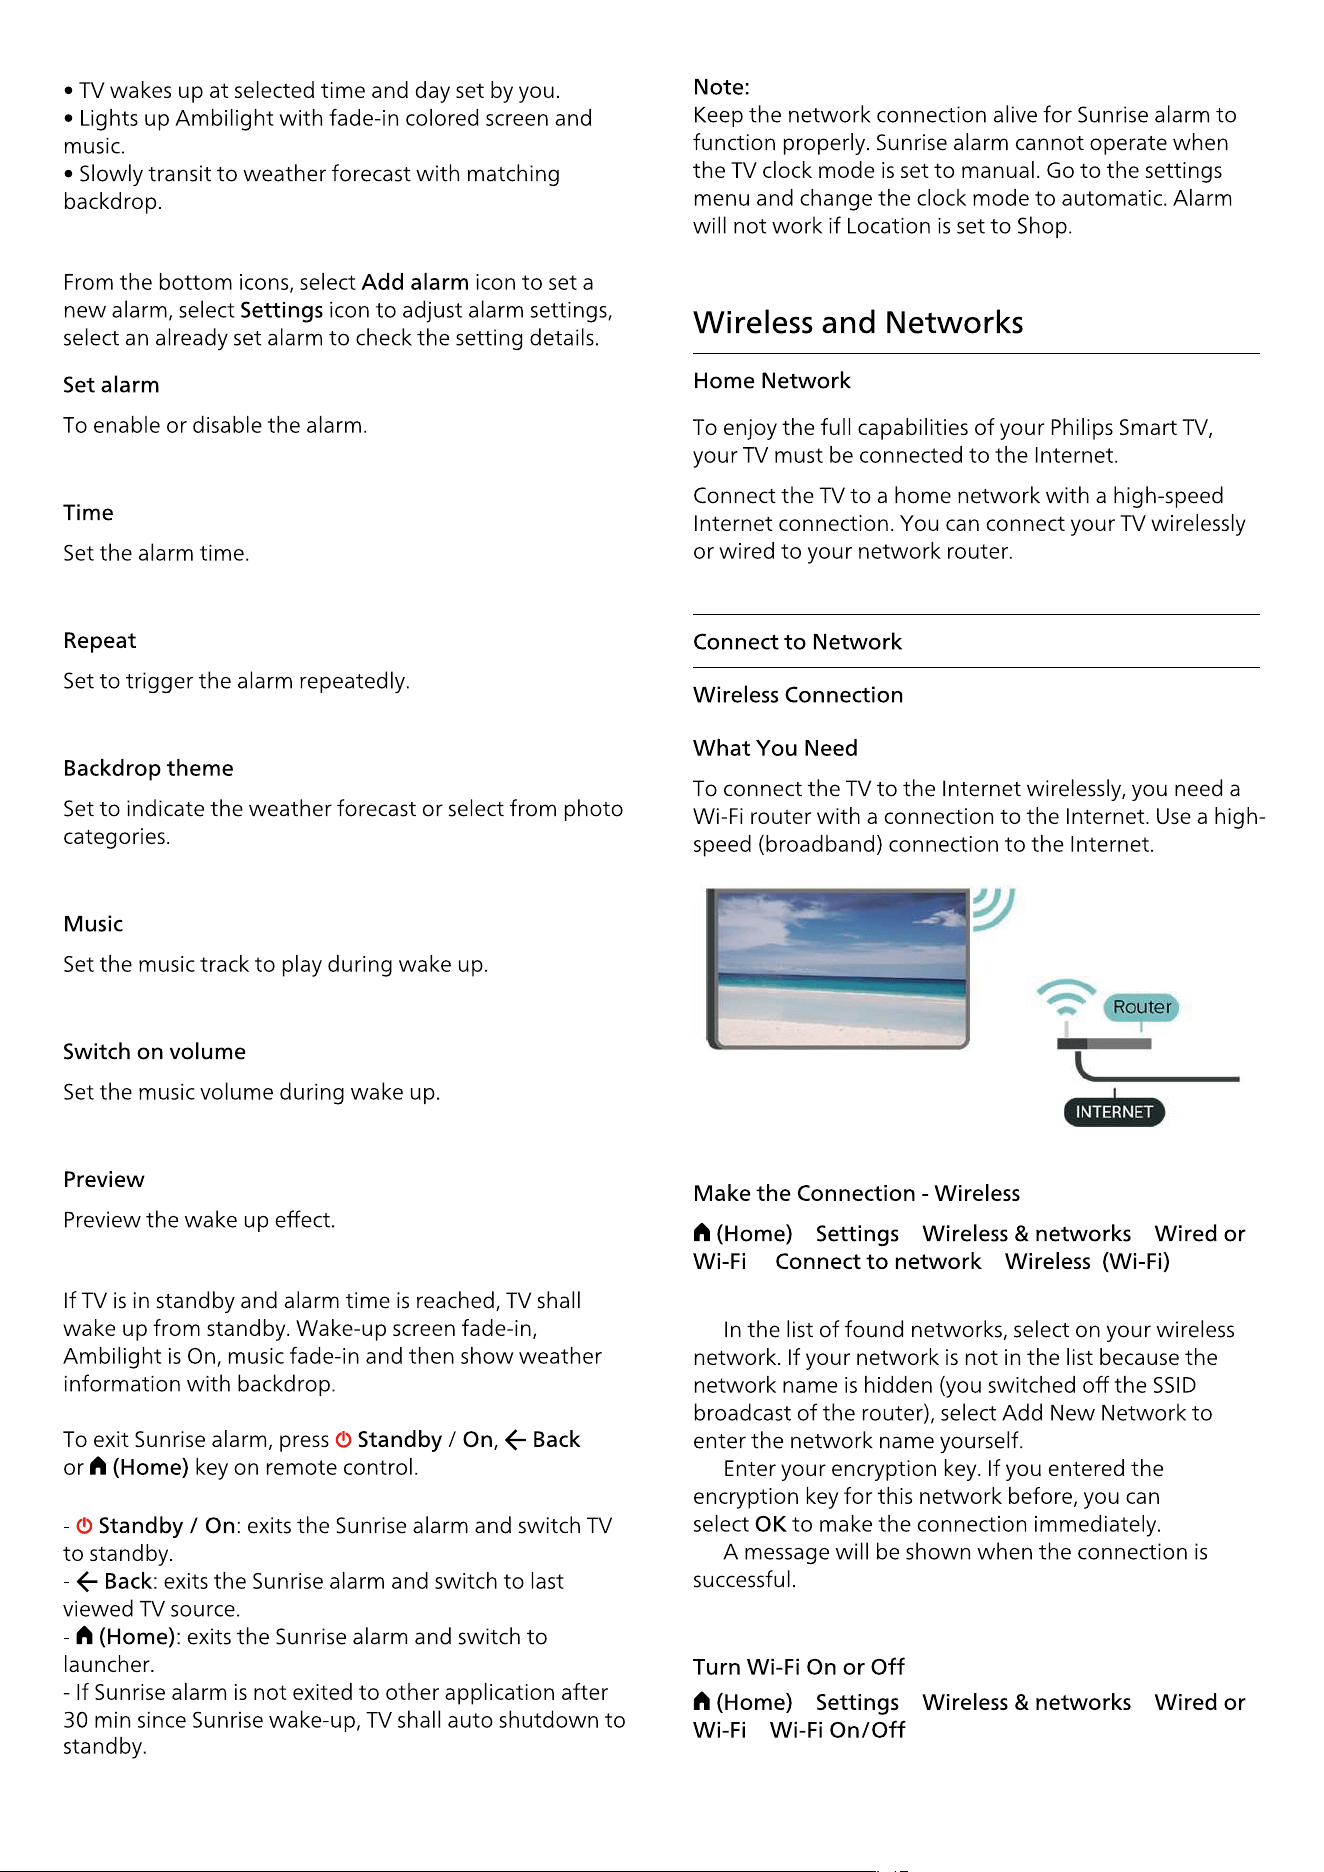
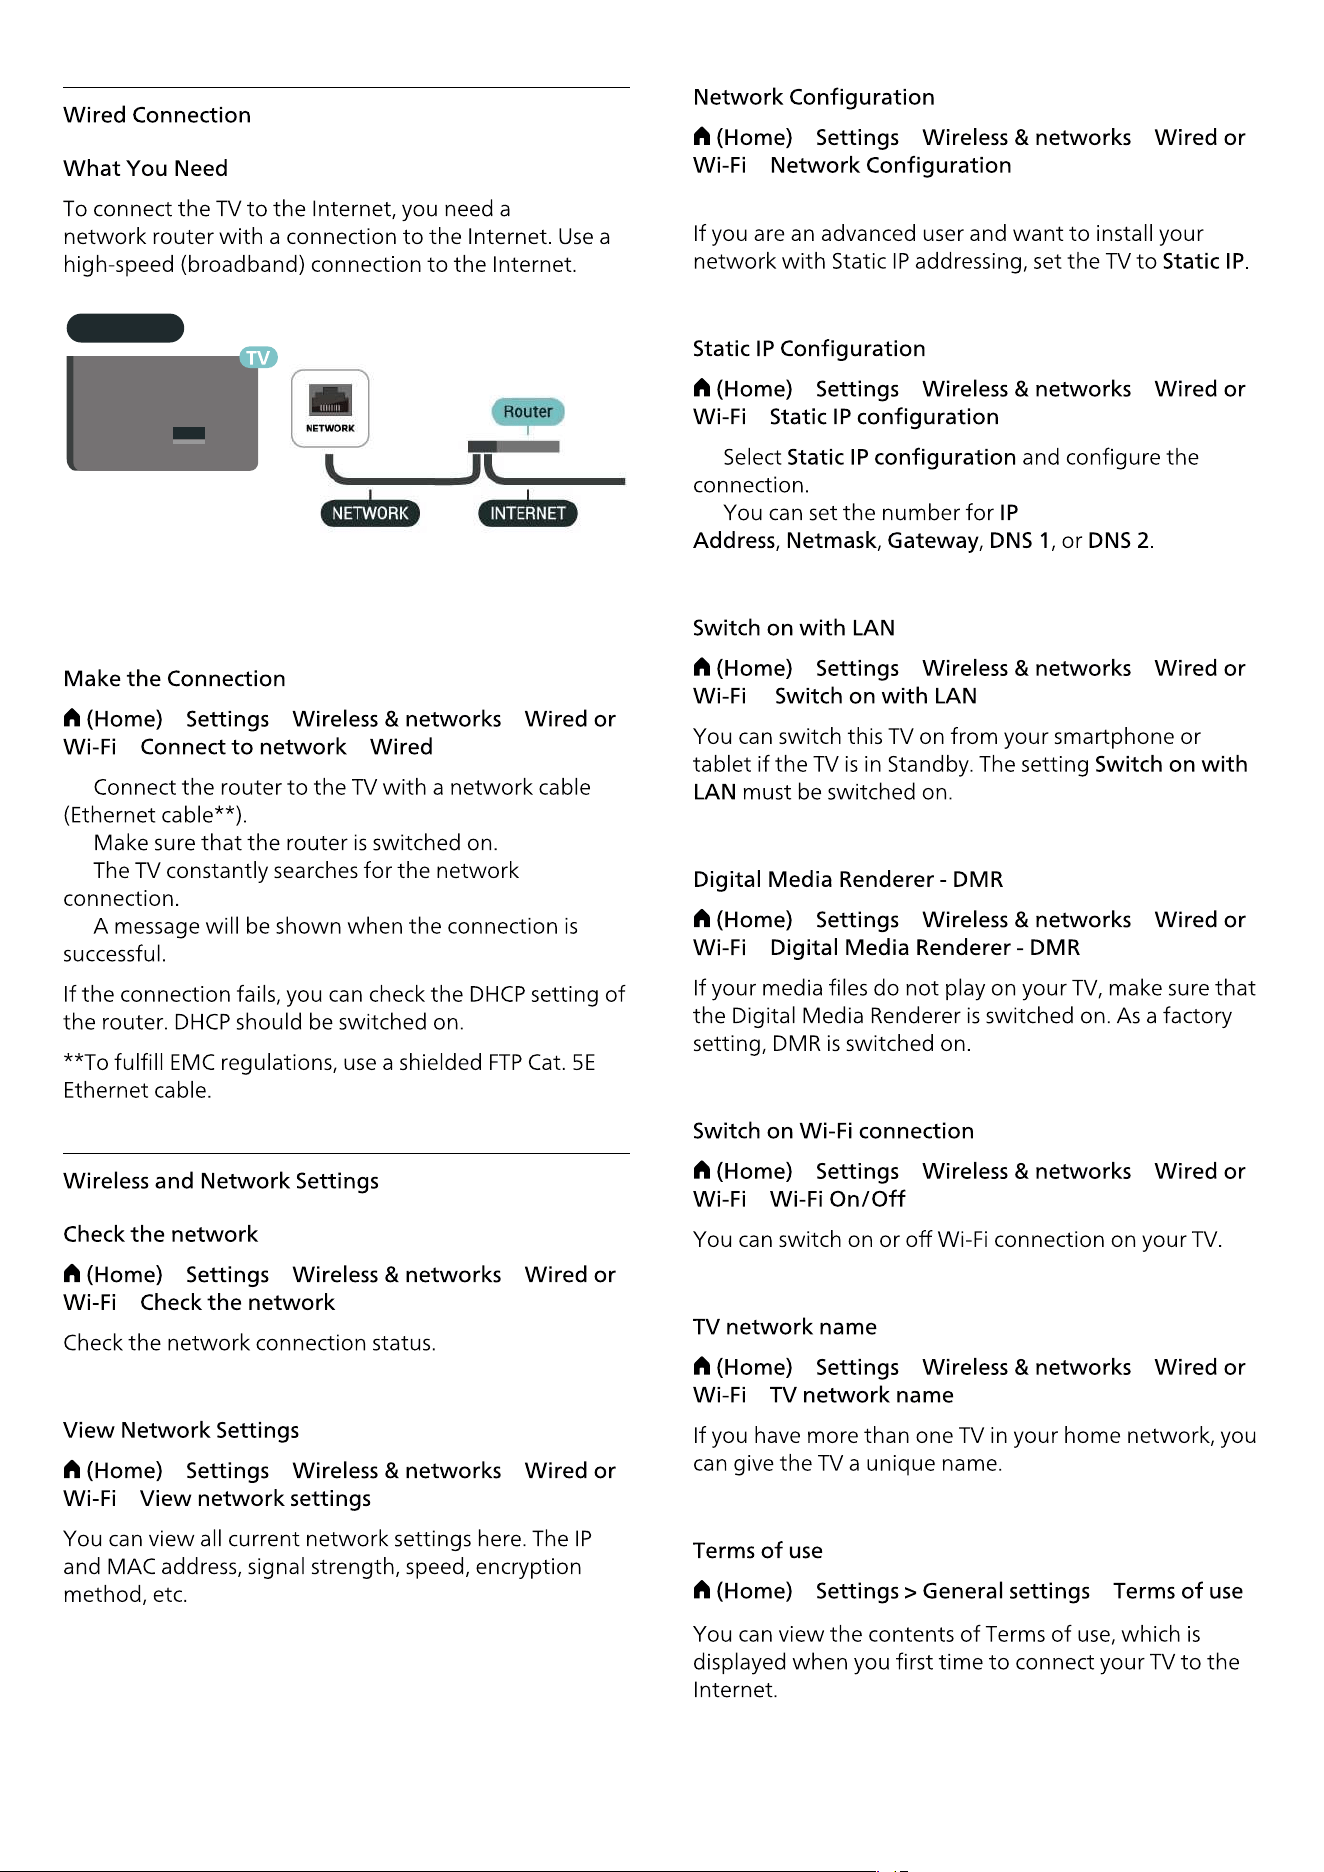
Get connected
> >
1 -
2 -
> >
3 - >
4 -
5 -
6 -
1 - > >
2 - >
3 -
4 -
1 - > >
2 - >
3 -
4 -
5 -
6 -
1 -
2 -
3 -
4 -
15
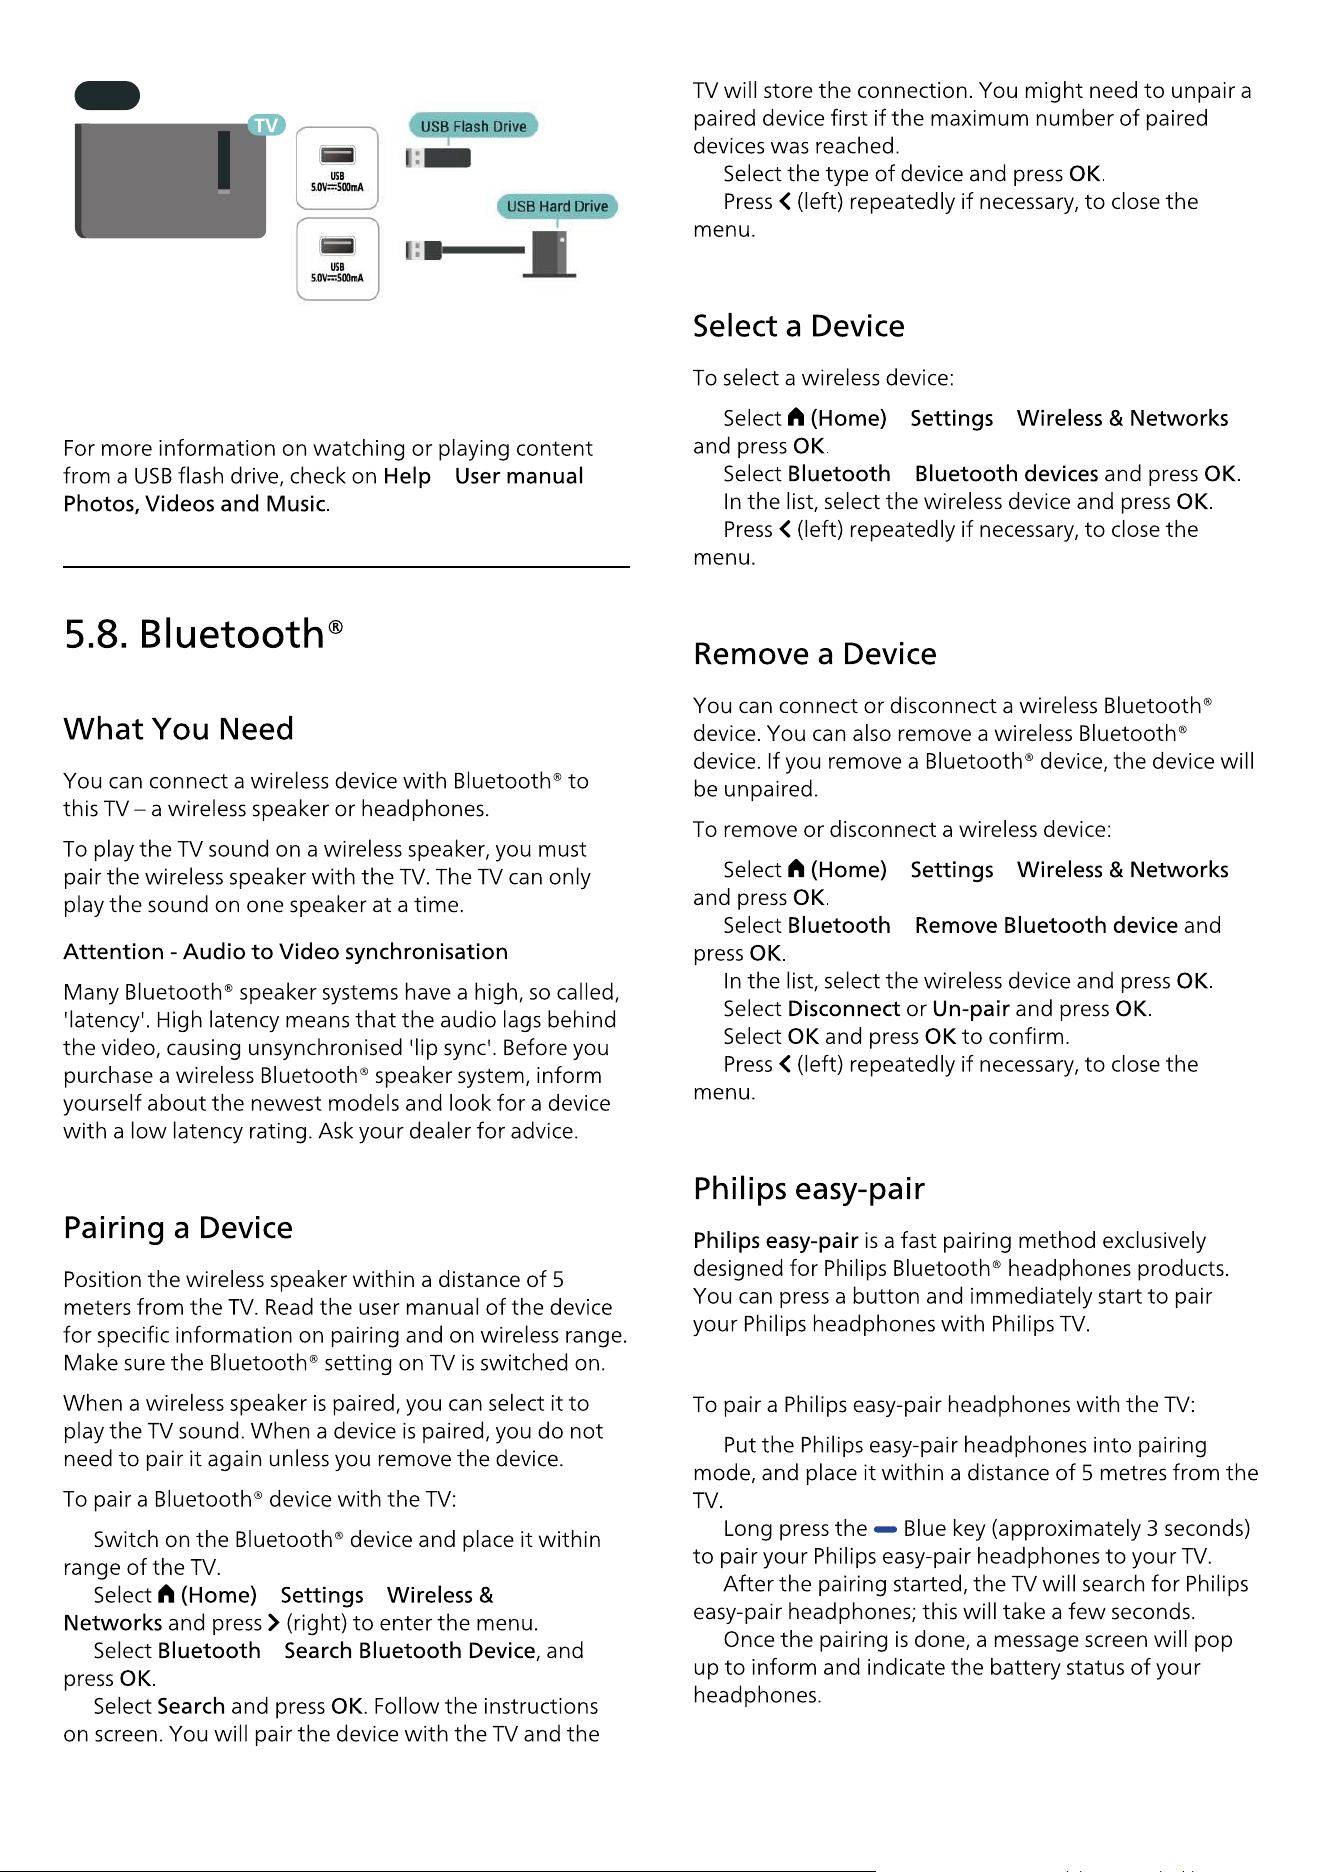
USB
> >
>
to
16
6. Switch Source
the
> > >
>
1 -
2 -
3 -
4 -
17
7. Channels
>
> > >
>
1 -
2 -
3 -
> > >
>
1 -
2 -
3 -
> > >
>
1 -
2 -
3 -
> > >
> >
1 -
2 -
3 -
4 -
5 -
6 -
7 -
•
•
•
18
> > >
>
> > >
>
> > >
>
> > >
>
•
•
•
•
19
> > >
>
> >
•
•
> > >
>
20
> > >
>
> > >
>
> > >
>
21
1 -
2 -
3 - > > >
4 -
5 -
> > >
>
1 -
2 -
3 -
> > >
>
4 -
Depending on whether your TV is already installed or
not, you must use a different method to upload a
channel list.
1 - Plug in the USB �ash drive that holds the channel list
of the other TV.
2 - To start the channel list upload, select
> > > or
> and press . Enter
your PIN code if necessary.
3 - The TV noti�es you if the channel list is copied to the
TV successfully. Unplug the USB �ash drive.
* Note: The country of the TV will changed to that of
the source (USB) after the cloning has completed.
> > >
>
1 - Select and press .
2 - Select to only add new
digital channels.
Select to install all channels
again with default settings.
Select to do a full re-
installation which takes you through each step.
3 - Press to search channels. This can take a few
minutes.
> > >
>
Turn on to set the TV to automatically update the
Internet channels.
Once a day, at 6 AM, the TV updates the channels and
stores new channels. New channels are stored in the All
channels list but also in the New channels list. Empty
channels are removed.
If new channels are found or if channels are updated or
removed, a message is shown at TV start up. The TV
must be in standby to automatically update channels.
Freely App
** Note: Internet channels is only available when th
country setting is UK.
*
22
Operator Apps
23
1 -
2 -
3 -
1 -
2 -
to
3 -
1 -
2 -
3 -
4 - to
> > >
> >
> > >
>
>
>
1 -
2 -
1 -
2 -
3 -
4 -
24
> > >
>
> > > >
> > > >
> > >
> > >
When
> > >
1 -
2 -
3 - >
4 -
5 -
1 -
2 -
3 -
4 - > to
5 -
6 -
7 -
1 -
2 -
3 - >
4 -
> > >
> > >
>
> > >
>
> > >
> > >
to
> > >
> > >
1 -
2 -
3 - > to
4 -
5 -
6 -
> > >
> > >
1 - to
2 -
3 -
4 -
1 -
>
>
2 -
3 -
4 -
5 -
25
1 -
>
>
2 -
3 -
1 -
2 -
3 -
1 -
2 -
3 -
26
•
•
•
•
•
•
•
•
> >
> >
1 -
2 -
3 - >
1 -
2 -
3 -
4 -
5 -
> > >
to
27
8. TV Guide
28
9. Videos, Photos
and Music
29
1 -
2 -
3 -
to get
9.2. From a Computer or NAS
9.3. Photos
1 -
2 -
3 -
4 -
9
30
1 -
2 -
3 -
9.4. Videos
1 -
2 -
3 -
9.5. Music

•
•
•
•
•
•
•
•
•
•
•
•
•
•
•
•
•
•
•
•
•
•
•
•
•
•
> > >
•
•
•
31
10. Open TV setting
Venus
10.1. Quick Menu and
Frequent Settings
10.2. All Settings
•
•
•
•
•
•
•
•
•
•
•
to
> >
> > > > >
> > > >
>
> > > >
>
> > > >
>
> > > >
>
> > > >
>
> > > >
>
32
> > > >
>
> > >
> > > >
> > > >
> > > >
>
> > > >
>
> > > >
33
> > > >
> > > >
> > > >
> > >
> > >
•
•
•
•
> > >
>
•
•
•
•
> > >
> > >
•
•
34
•
When
> > >
> > >
•
•
•
•
When
> > >
> > > >
> > > >
> > > >
> > > >
> > > >
> > > >
When
> > > to
> > > >
to
> > > >
> > > >
> > > >
> > > >
When
> > > to
> > > >
> > > >
> > > >
When
> > > to
> > > >
> > > >
35
Equaliser
Equaliser
Equaliser
Equaliser
Equaliser
Equaliser
> > > >
> > > >
> > > >
> > > >
> > >
>
>
> > > >
to
> > > >
> > > >
to
> > > >
> > > >
> > > >
> > > >
36
Equaliser
Custom Equaliser
Equaliser
Equaliser
> > > >
> > > >
> > > >
> > > >
> > > >
> > > >
> > > >
> > >
> > > >
> > > >
> > > >
37
> > > >
> > > >
•
•
•
> > > >
> > > >
> > > >
> > >
> > >
>
38
> > >
> > >
to
•
•
•
•
•
•
•
> > >
>
> > >
•
•
•
•
•
When
> > >
•
•
When
> > >
:
•
•
•
> > >
>
> > > >
> > > >
39
40
to
> > >
The
> > > >
> > >
> >
1 -
2 -
3 -
41
> > >
>
> > >
>
> > >
>
1 -
2 -
> > >
>
> > >
>
> > >
>
> > >
>
> >
42
> > >
> >
1 -
2 -
3 -
4 -
> > >
>
> > >
>
NETWORK
> >
> > >
>
> > >
>
> > >
>
> > >
>
> > >
> > >
> > >
>
> > >
>
> > >
>
> > >
>
43
> > >
>
> > > >
> >
> >
:
> > >
>
to
> > >
>
> > >
>
> > >
to
> > >
> > >
>
> > >
>
> > > >
44
You can stream the media �les from Apple devices to
your TV via AirPlay. Go to
>
> > to
enter AirPlay and HomeKit Settings page and make
sure is turned . Your Apple device must be
connected to the same Wi-Fi home network as your TV
to stream contents.
To add your TV to HomeKit and control your TV via
Apple devices:
1 - Go to
>
> >
to enter
page.
2 - Select under section to generate a
QR code on your TV.
3 - On your Apple device, open the
app and tap
and then scan the QR code on TV.
4 - Follow the instructions on your Apple device and
join your TV to HomeKit.
> > > >
> > >
>
to
> > >
to
to
> > >
> > > >
> > > >
> > >
>
> > >
>
> > >
>
45
46
> > > >
to
> > > >
> > >
> > >
> > >
> > >
> > >
> >
>
> >
> >
> >
> >
> >
> >
> >
> >
> > >
> >
> >
to
47
> >
> > >
> >
> >
:
> >
> >
> >
> >
> >
10.3. Eco Settings
> >
48
11. Universal Access
> >
With switched on, the TV is prepared
for use for the deaf, hard of hearing, blind or partially
sighted people.
> > >
> .
> > >
>
• Some digital TV channels broadcast special audio and
subtitles adapted for the hard of hearing or deaf
people.
• Switched on, the TV automatically switches to the
adapted audio and subtitles, if available.
> > >
> >
Digital TV channels can broadcast special audio
commentary describing what is happening on screen.
> > >
> , ,
• Select , you can mix the volume of the
normal audio with the audio commentary. Press
the arrows (Right) or (Left) to adjust the value.
• Set to for extra audio effects in the
commentary audio, like stereo or fading sound.
• Select to set speech
preference, or .
> > >
Increase the intelligibility of dialogue and commentary.
Only available when sound setting
is
and audio stream is AC-4.
> > >
Switch on to enable Voice guidance feature using the
text to speech engine. The feature is only available in
selected languages.
> > > /
When > > >
is switched on, select or
to set the speed or volume at which the text is
spoken.
> > >
Turn on to magnify texts on the screen.
> > >
To install the USB keyboard, switch on the TV and
connect the USB keyboard to one of
the USB connections on the TV. When the TV detects
the keyboard for the �rst time, you can select your
keyboard lay-out and test your selection.
> > >
Adjust the motion speed of the USB mouse.
You can connect a set of headphones to
the connection on the side of the TV. The
connection is a mini-jack 3.5mm. You can adjust the
volume of the headphones separately.
To play the TV sound on Bluetooth® wireless
headphones, you must pair the device with the TV.
To pair a Bluetooth® device with the TV:
1 - Switch on the Bluetooth® device and place it within
range of the TV.
2 - Select
> >
49
and press (right) to enter the menu.
3 - Select > , and
press .
4 - Select and press . Follow the instructions
on screen. You will pair the device with the TV and the
TV will store the connection. You might need to unpair
a paired device �rst if the maximum number of paired
devices was reached.
5 - Select the type of device and press .
6 - Press (left) repeatedly if necessary, to close the
menu.
You can select where you want to hear the TV sound
and how you want to control it.
• If you select
, the TV speakers are always
on. All the sound related settings are applicable to this
mode.
• If you select , the sound will be
played through headphones.
• If you select , the
sound will be played through TV speakers and
headphones.
To switch on Subtitles, press
and select
.
You can switch subtitles
or .
Alternatively you can select .
If language information is part of the digital broadcast
and the broadcasted programme is not in your
language (the language set on TV), the TV can show
subtitles automatically in one of your preferred subtitle
languages.
You can select your preferred subtitle languages
in
. If none of the preferred subtitle
languages are available, you can select another subtitle
language if available. If no subtitle languages are
available, you cannot select this option.
12. Game Bar
>
50
>
go to >
13. Smart TV and
Apps
51
13.1. Setup Smart TV
13.2. Store of Apps

52

15. Amazon Prime
Video
53

16. YouTube
54
1 -
2 -
3 -
4 -
5 - to
55
17.1. About Alexa
17.2. Using Alexa
17.3. Alexa Voice Commands
18. Google Assistant
1 -
2 -
3 -
4 -
5 -
6 -
56
19. Software
> > >
>
> >
>
1 -
> >
2 -
3 -
4 -
19.1. Update Software
> > >
> >
> > >
> > >
> > >
19.2. Software Version
19.3. Automatic Software
Update
19.4. View Software Update
History
57
20. Environmental
The
58
20.1. European Energy Label
20.2. End of Use
43PUS8000/12 EPREL Registra on No. 2230851
50PUS8000/12 EPREL Registra
on No. 2229834
55PUS8000/12 EPREL Registra
on No. 2229857
65PUS8000/12 EPREL Registra
on No. 2233341

59
21.1. Power
21.2. Reception
21.4. Supported Input
Resolution
21.3. Display Resolution
21.5. Sound
21.6. Multimedia
60
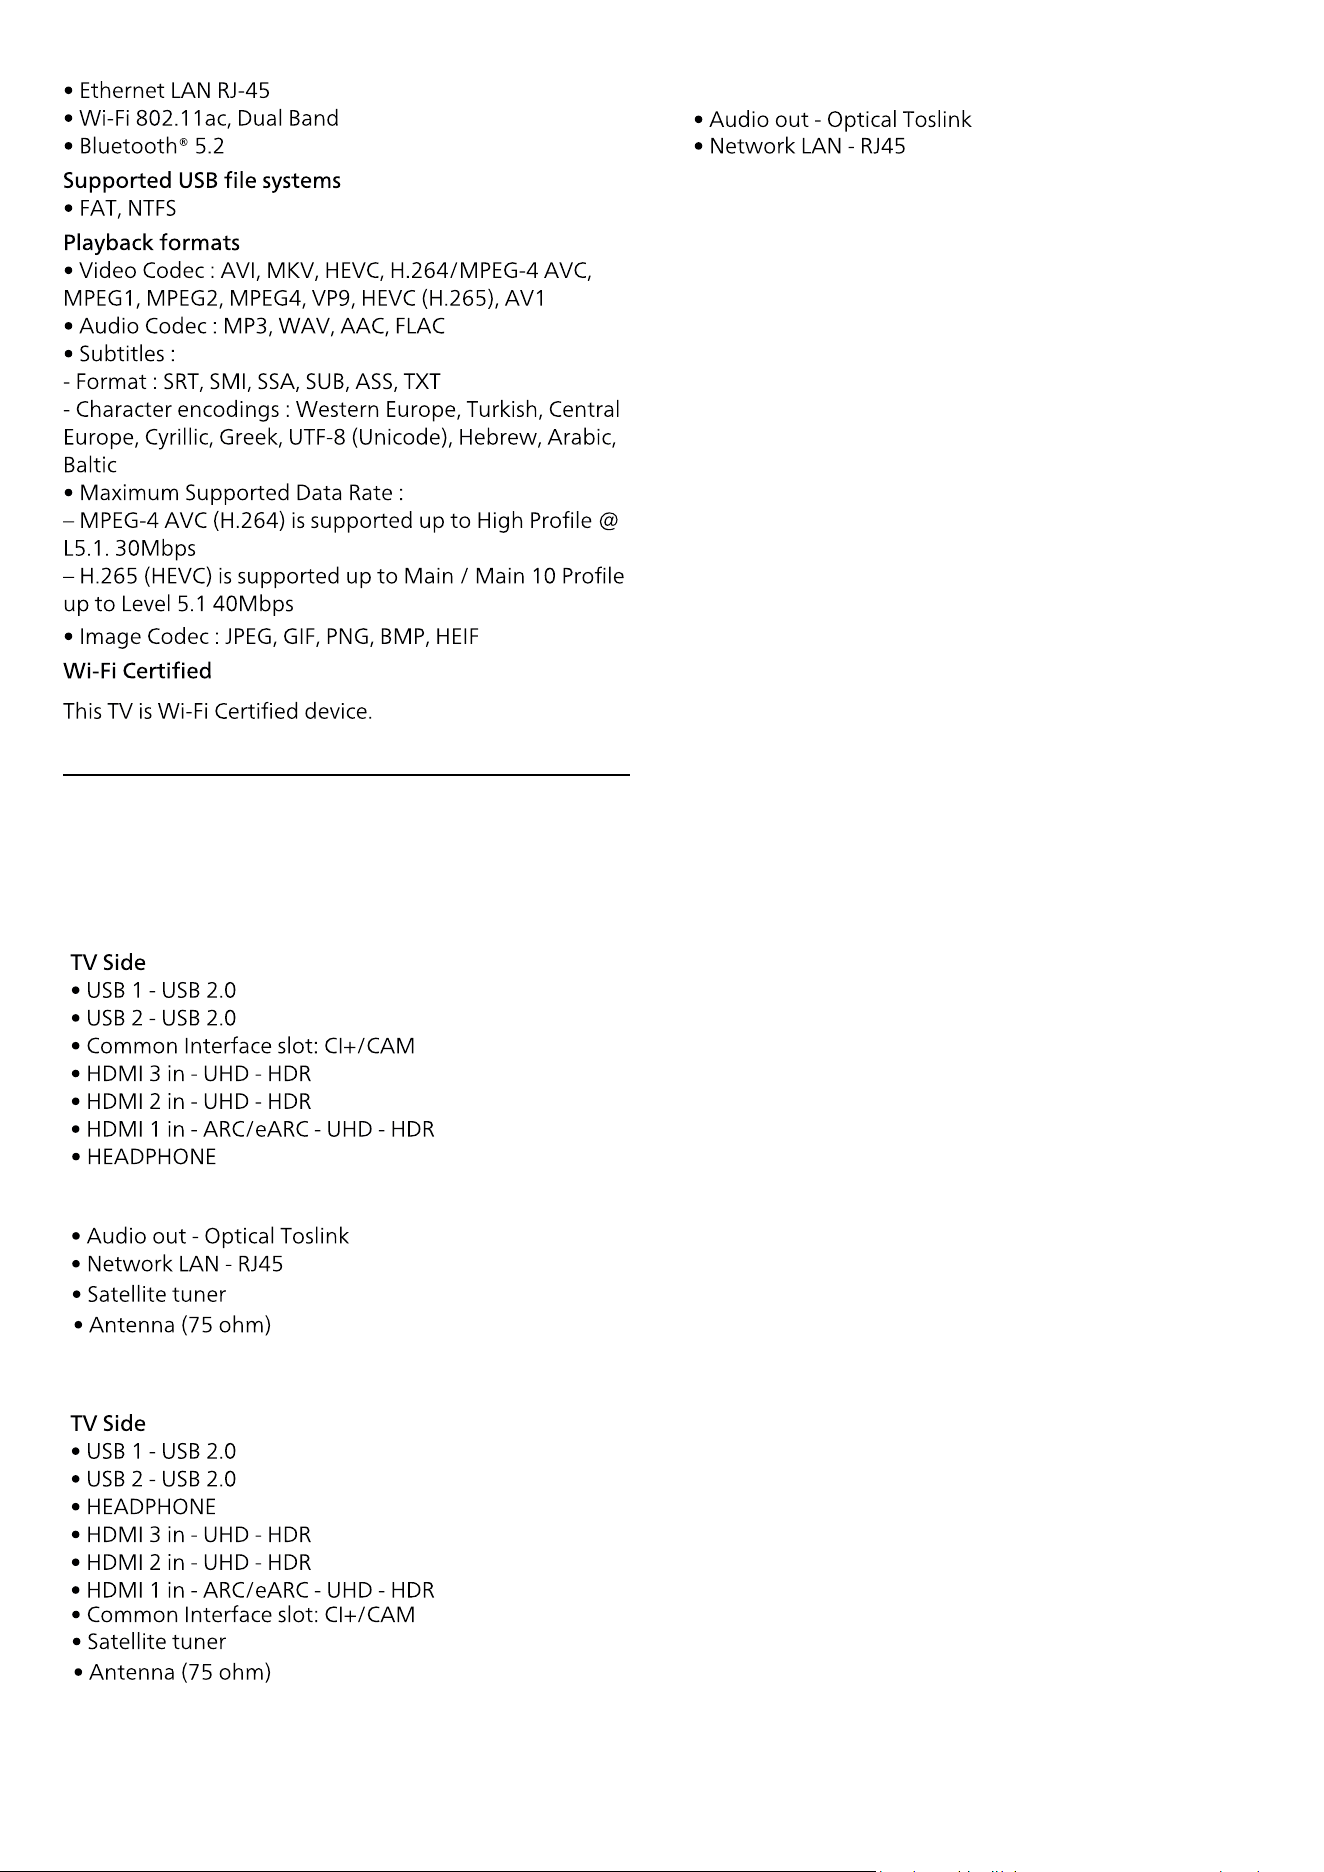
21.7. Connectivity
TV Rear
Above Side
• 43PUS8000 / 50PUS8000 / 55PUS8000
• 65PUS8000
22. Troubleshooting
> to
to
>
the
61
22.1. Tips
22.2. Switch On
22.3. Remote Control
22.4. Channels
> > >
>
> > >
>
> >
62
22.5. Satellite
22.6. Picture
the
> > >
> > >
>
> > >
> > >
>
> > >
>
the
to
>
> > >
> > >
63
22.7. Sound
22.8. HDMI - UHD
> > >
1 -
2 -
3 -
4 -
64
22.9. USB
22.10. Wi-Fi and internet
22.11. Wrong Menu
Language
23. Safety and Care
65
23.1. Safety
66
23.2. Screen Care

24. Terms of Use
67

25. Copyrights
68
25.1. HDMI
25.2. HEVC Advance
25.
. DTS:X
25. Dolby ATMOS
25. . Wi-Fi Alliance
25.
Other Trademarks
Apple, AirPlay and Apple Home, HomeKit and iOS are
trademarks of Apple Inc., registered in the U.S. and other
countries and regions.
Apple, AirPlay and Apple Home, HomeKit and iOS are
trademarks of Apple Inc., registered in the U.S. and other
countries and regions.
26. Open Source
69
26.1. Open Source Software
26.2. Open Source License

70
71
72

27. Disclaimer
73

All registered and unregistered trademarks are property of their
respective owners.
the warrantor in relation to this product.
www.philips.com/welcome
