INSTALLATION MANUAL
TRUFIG VX-VXQ ROUND SOLID SURFACE
page 1 of 3
336-0150 REV CS
TRUFIG
INTRODUCTION
This installation guide will provide instructions to install a VX-VXQ Round speaker into a routable solid surface.
TOOLS NEEDED:
Plunge Router
Amana 45464-S router bit (see illustration on last page)
1/2 inch top bearing router bit.
3/8 drill bit
Power drill
Jig saw
Double sided tape
Clamps
SETTING UP THE PLUNGE ROUTER
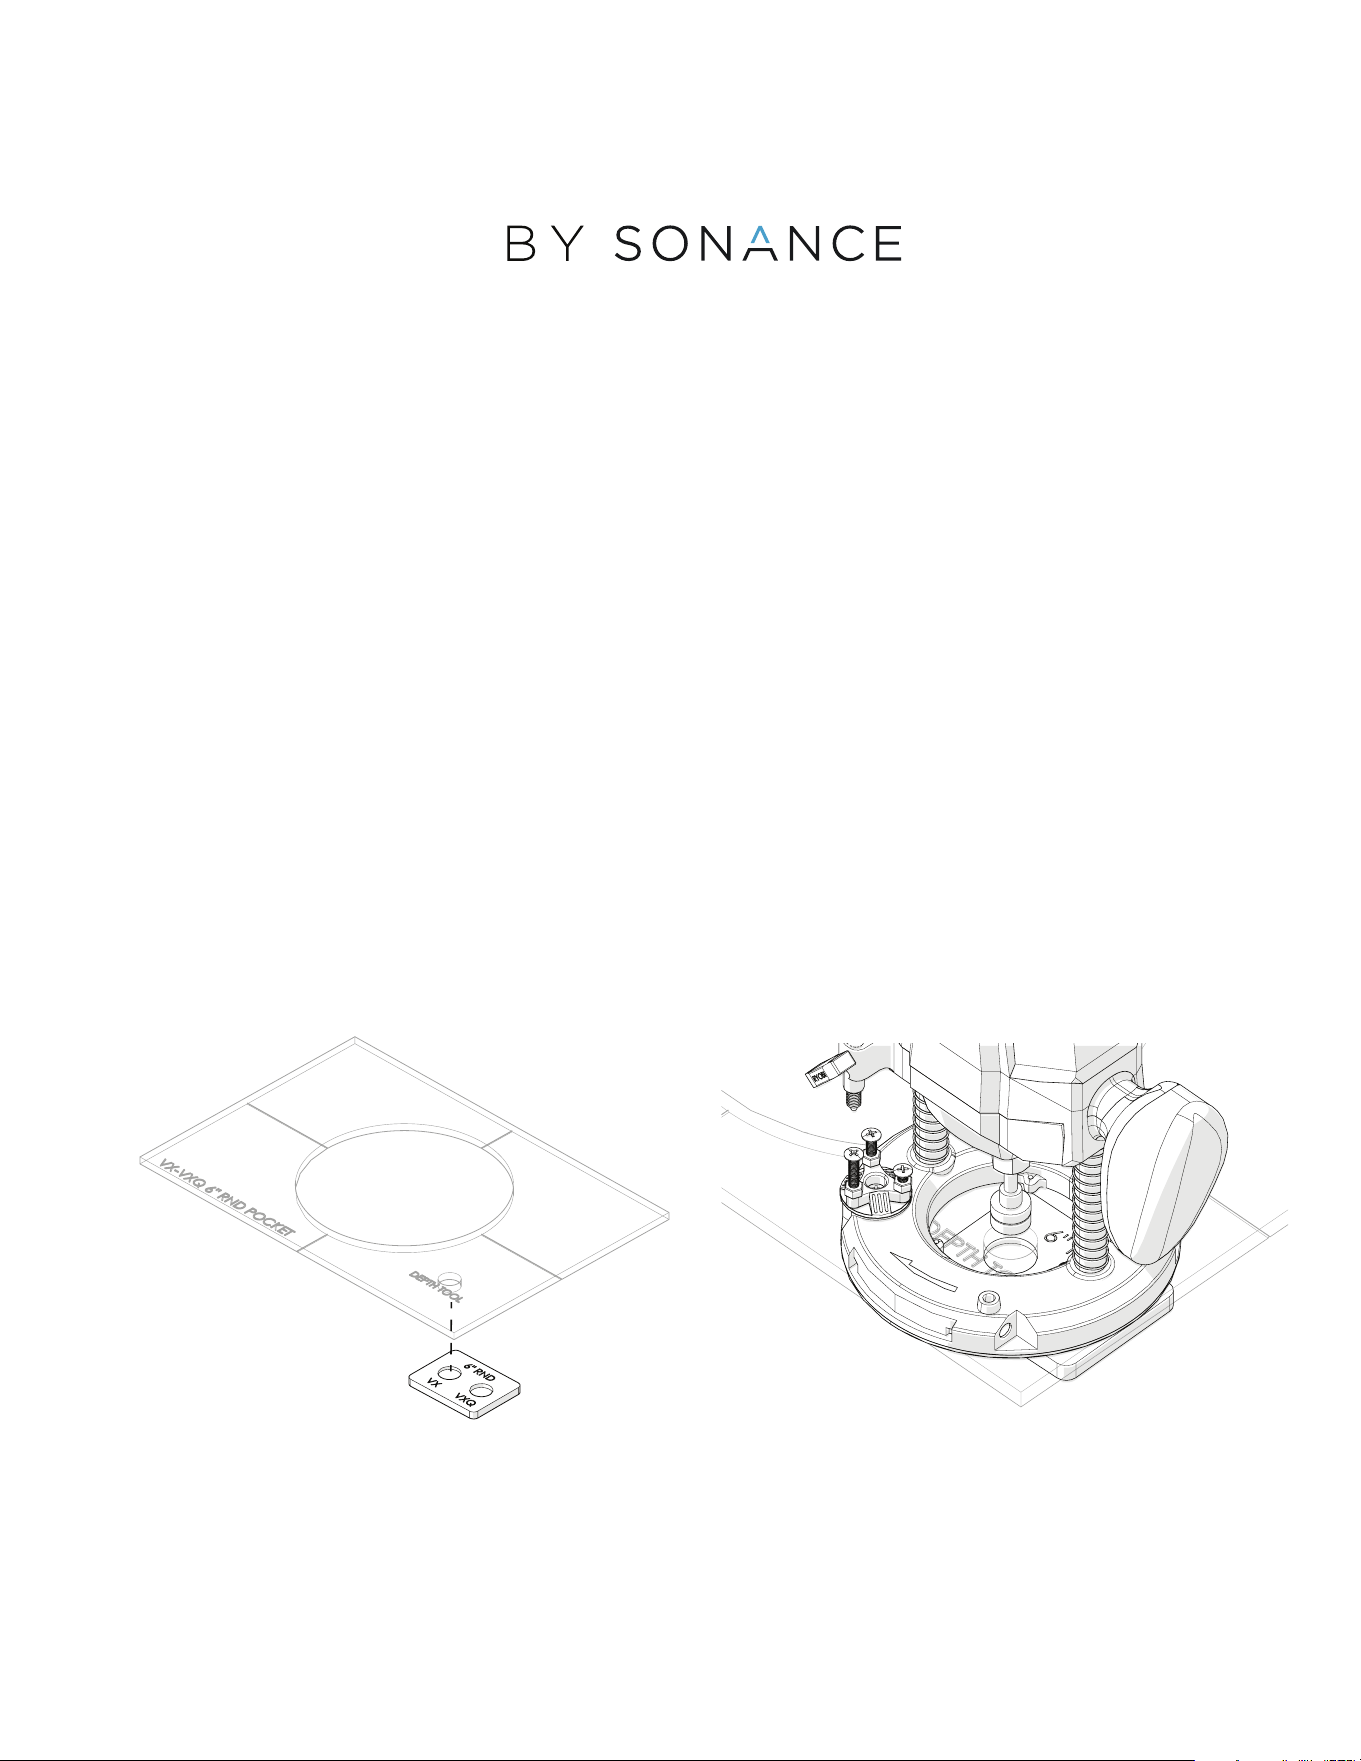
1. Locate the RND Depth Tool and Pocket Template.
Place the appropriate pocket (VX or VXQ; based
on speaker model to be installed) under the Pocket
Template Depth Tool Opening. Center it with the
Depth Tool hole.
2.
With the Amana 45464-S bit installed in the plunge
router, set the depth of the plunge router tool.
POSITIONING
1.
Locate where the speaker is to be installed.
2.
Create center lines on the speaker location long enough
so the Router Template Center Lines can be matched.
Note: to avoid marking the finished surface, apply
masking tape where the lines are to be drawn. Draw
lines on the tape.
RND Pocket Template
RND Depth Tool

page 2 of 3
PLUNGING & CUTTING THE POCKET
1. Locate the Center Support Template and Pocket Template.
Apply double-sided tape to the back of the Center Support
Template.
2.
Align the Center Lines of the Center Support Template
with the lines on the surface to be cut.
3. Secure the Center Support Template in place.
4. Apply double-sided tape to the back of the
RND Pocket Template.
5. Align the Center Lines of the RND Pocket Template with
the lines in the surface to be cut.
6. Secure the RND Pocket Template in place. Clamps
can also be used.
7. Align the Plunge Router between the Pocket Template
and the Center Support Template. Plunge the router
bit to remove material between the Center Support and
the Pocket Template inner edge.
Note: in hard woods more than 1 pass may be needed
8. Once all the material is removed, drill a 3/8 inch
hole about 1/8 of an inch from the center support
template edge.
9.
Using a jigsaw, cut through the material along the edge
of the round Center Support Template. Maintain
approximately 1/8 inch from the center support.
Blue Tape
Working surface
not shown
page 3 of 3
10.
Remove the Pocket Router Template.
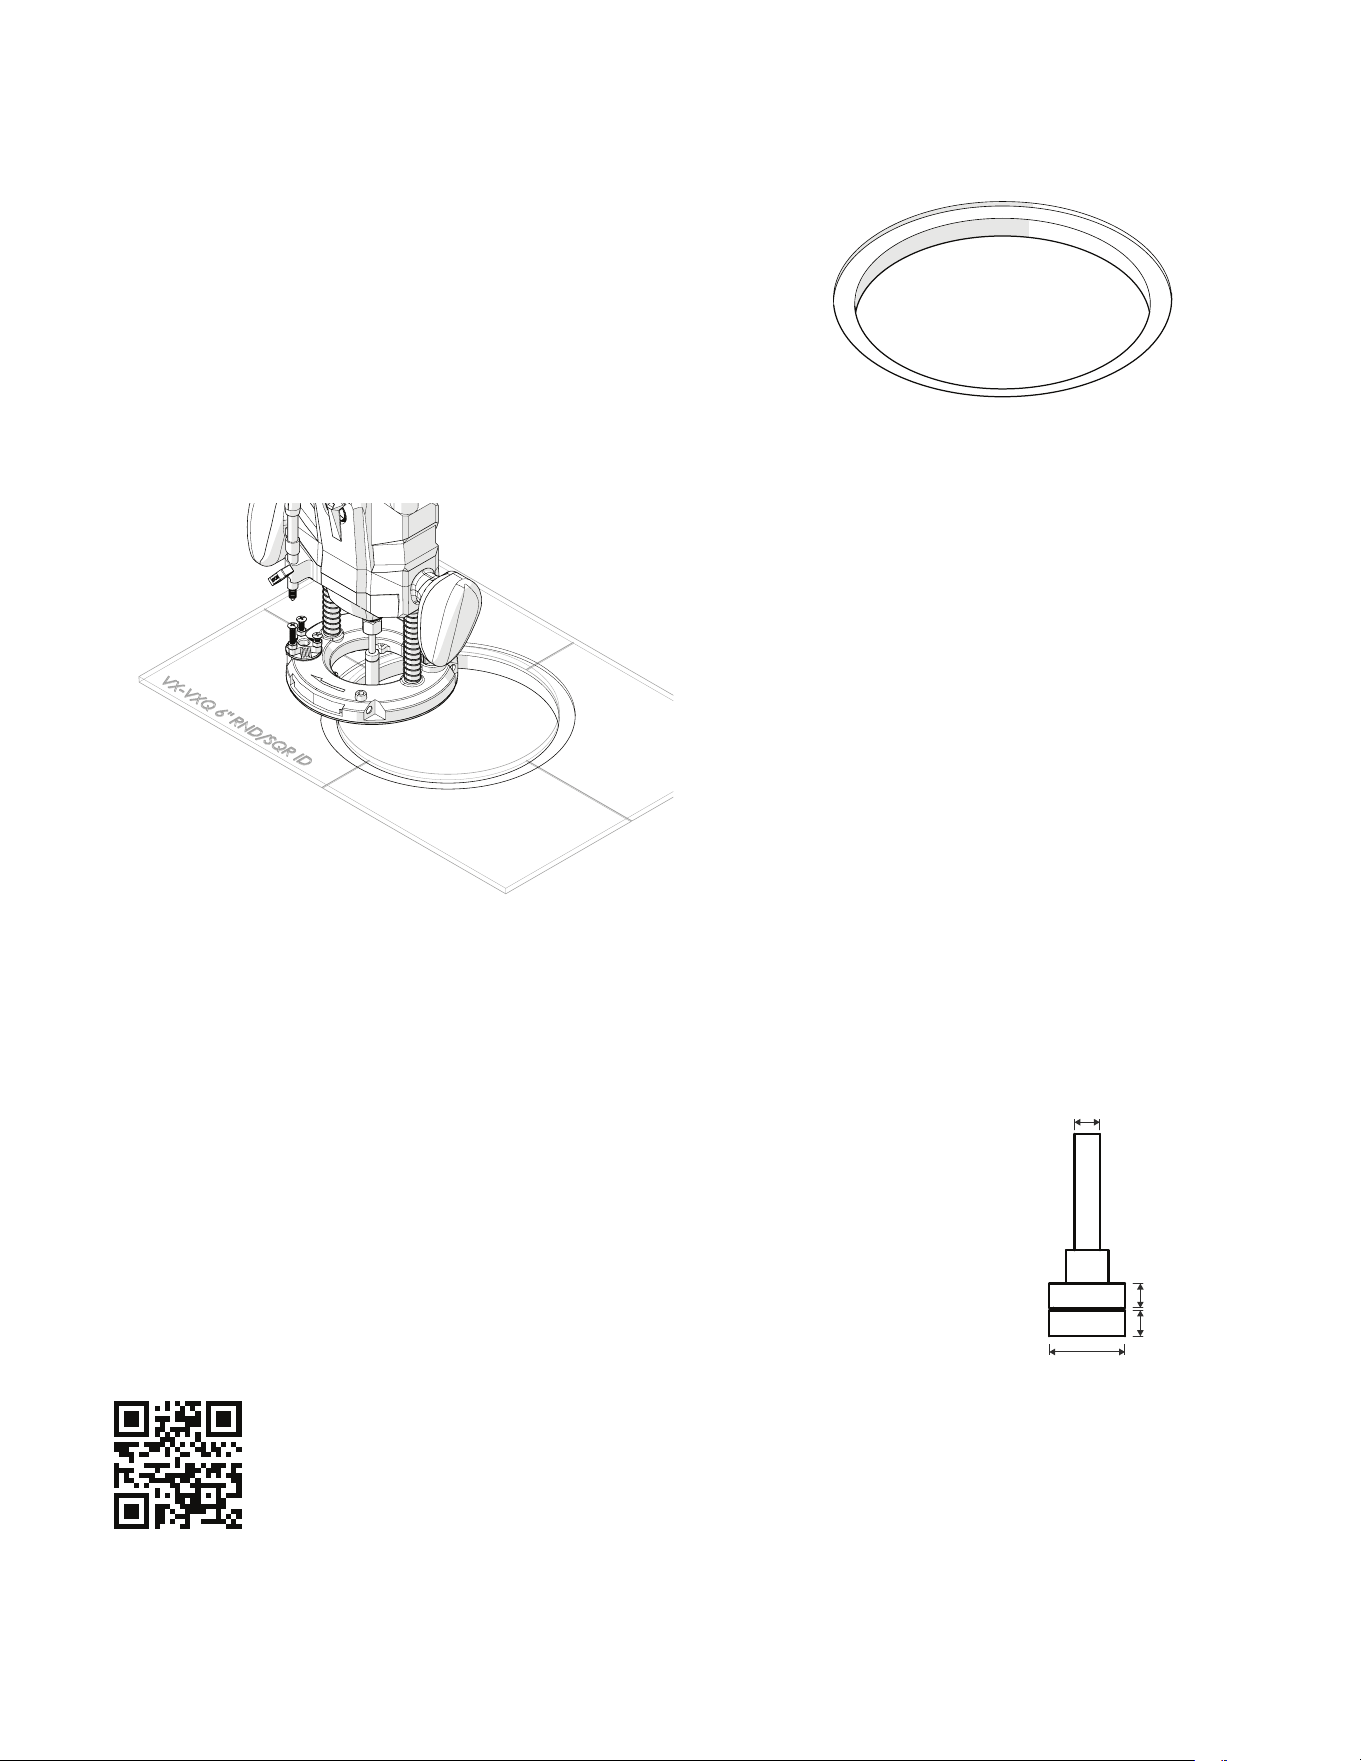
CREATING AN OPENING FOR THE
SPEAKER BODY
1.
Retrieve that ID Template and apply double sided tape
to the back of it.
2.
Center the ID Template using the center lines on the
surface to be cut.
3.
Withe the 1/2 inch top bearing bit installed in the
plunge router, remove the leftover material.
Note: this step is important to have both openings
concentric.
4.
Remove the ID template.
5. Test fit the loudspeaker, and if needed Recenter the
Pocket Router Template to deepen the pocket for the
speaker flange.
Note: attention must be paid when recentering the
router template pocket so not to damage the outside
edge of the pocket.
Scan QR code for additional information and resources. For technical
support call (949) 492-7777 or visit www.trufig.com/support/#visual
®
2024 SONANCE All rights reserved. TRUFIG is a registered trademark of Dana Innovations. Due to continuous product improvement, all features and specifica
tions are subject to change without notice. For the latest SONANCE and TRUFIG product specification information visit our website at www.trufig.com or www.
sonance.com.
991 Calle Amanecer - San Clemente, CA 92673 USA • Phone: 949.492.7777 • Fax: 949.361.5151 • Technical Support: 949.492.7777 • www.sonance.com
1
⁄
4
1
⁄4
1
⁄4
3
⁄4
Amana 45464-S
