
INSTRUCTION MANUAL
EN
AIR FRYER
AR
ةيئاوه ةيق
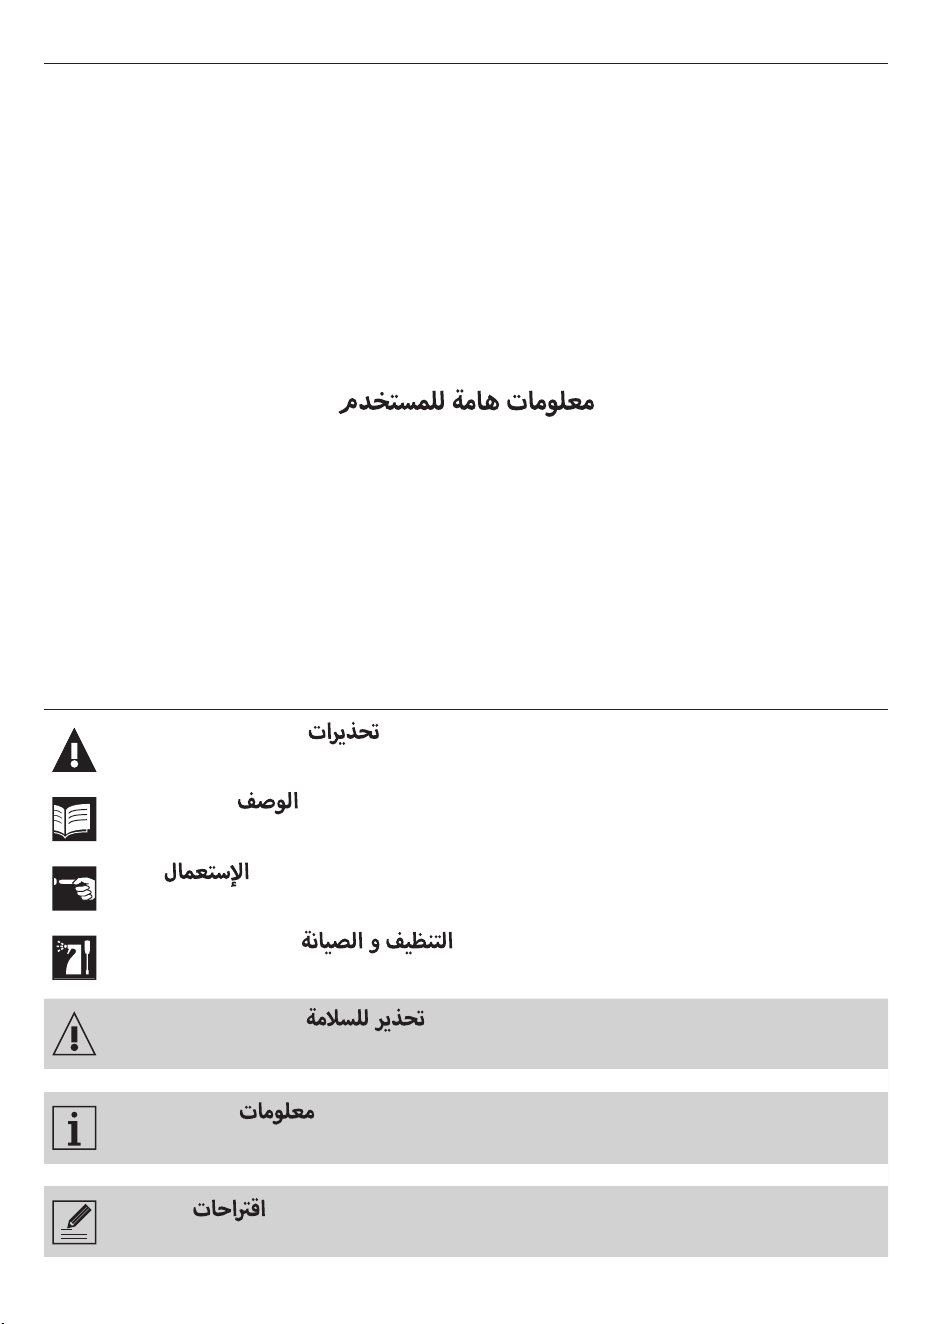
Important information for the user
Recommendations /
Description /
Use /
Cleaning and care /
Safety instructions /
Information /
Advice /
Dear Customer, Thank you for purchasing one of our appliances. Our products are unique because they combine
iconic style with innovative technical solutions. They match perfectly with other products in our range and work
equally well as a standalone design objects in your kitchen. We hope you enjoy using your new appliance! Best
regards.
SMEG S.p.A.
Model: AFC01
1
2
7
8
3
4
6
5
A
B
1
11 15
52
12 16
63
13 17
74 10
14
8 9
B

5
EN
Instructions
1 Instructions
This user manual is an integral part of the
appliance and must therefore be kept in its
entirety and within the user’s reach for the
whole working life of the appliance.
1.1 Intended use
Failure to comply with the safety instructions
and failure to read the instructions for air
fryer may lead to the appliance being used
incorrectly and cause personal injury.
• Do not use the appliance for purposes
other than those for which it was
designed. Improper use could cause
injury.
• The appliance is not designed to operate
with external timers or with remote-
control systems.
• Use the appliance indoors, protected
from weather conditions.
• This appliance is intended for cooking food
in domestic and similar environments,
such as:
- staff kitchen areas in shops, ofces
and other working environments
- by guests in hotels, motels and other
residential accommodation
- bed and breakfast facilities / farm
accommodation
- any other use, for example in
restaurants, bars and coffee shops is
considered improper.
1.2 General safety instructions
Follow all safety instructions in order to use
the appliance safely:
• The appliance and its accessible parts
become very hot during use. Keep small
children away from the appliance. Never
touch the heating elements during use.
• Protect your hands by wearing oven
gloves when moving food inside the oven.
• Never attempt to put out a re or ames
with water: turn off the appliance and
smother the ames with a re blanket or
other appropriate cover.
• This appliance may be used by children
aged at least 8 and by people of reduced
physical, sensory or mental capacity,
or lacking in experience in the use of
electrical appliances, provided that they
are supervised or instructed by adults
who are responsible for their safety.
• Children must not play with the appliance.
• Keep children under the age of 8 away
from the appliance and power cable
unless they are constantly supervised.
• Keep children under the age of 8 away
from the appliance when it is in use.
• Cleaning and maintenance must not be
carried out by unsupervised children.
• The cooking process must always be
monitored. A short cooking process must
be continuously monitored.
• Never leave the appliance unattended
during cooking operations where fats
or oils could be released, as these could
then heat up and catch re.
• Be very careful.
• Do not pour water directly onto a very hot
rack.
• Keep the lid closed during cooking.
• Allow the appliance to cool down after
use. Do not touch the inside surfaces
of the air fryer or its heating elements.
Danger of burns or scalds!

6
Instructions
• Switch off the appliance immediately
after use.
• Do not use or store ammable materials
near the appliance.
• Do not use aerosols in the vicinity of this
appliance whilst it is in use.
• Do not modify this appliance, as this will
invalidate the warranty.
• Installation and servicing should be
carried out by qualied personnel in
accordance with current standards.
• Do not try to repair the appliance yourself
or without the assistance of a qualied
technician.
• Insert the plug into a compliant, earthed
socket.
• Do not remove the earth prong.
• Do not pull the cable to unplug the
appliance.
• Children aged at least 8 can carry out
cleaning or maintenance tasks, but only
under adult supervision.
1.3 Caution when using this
appliance
• Do not use abrasive or corrosive
detergents (e.g. powder products, stain
removers and metallic sponges), rough
materials or sharp metal scrapers on
glass parts as they may scratch the
surface and cause the glass to shatter.
Use wooden or plastic utensils.
• Do not sit on the appliance.
• Do not spray any spray products near the
appliance.
• Do not obstruct ventilation openings and
heat dispersal slots.
• Fire hazard: Do not leave objects inside
the appliance.
• Do not use the appliance to heat rooms
for any reason.
• Do not use plastic cookware or containers
that are not suitable for cooking food.
• Do not put sealed tins or containers in the
oven.
• Do not exert too much pressure on the lid.
• Do not lean or sit on the lid.
• Do not install / use the appliance outdoors.
• Do not place the appliance on hot
surfaces or near operating gas or electric
burners.
• Do not immerse the appliance, its power
cable, plug or base in water or any other
liquid.
• Avoid spilling liquids onto the power plug
and base.
• Do not use an adapter.
• Do not use an extension cord.
• If the power cable becomes damaged,
contact technical support immediately to
arrange for it to be replaced in order to
avoid possible hazards.
• Before performing any work on the
appliance, switch off the power supply.
7
EN
Instructions
1.5 Manufacturer liability
The manufacturer declines any liability for
damage to persons or property caused by:
• Use of the appliance other than the one
envisaged
• Not having read the user manual
• Tampering with any part of the appliance
• Use of non-original spare parts
• Failure to comply with the safety
instructions
Please store these instructions
carefully. If the appliance is
transferred to others, they should
also be given this instructions
booklet.
These instructions can be downloaded from
the Smeg website “www.smeg.com”.
1.6 Disposal
Electrical appliances must not be disposed
of together with household waste.
Devices marked with this symbol
are subject to European Directive
2012/19/EU requirements.
• All waste electrical and electronic
appliances must be disposed of
separately from household waste and
taken to authorised waste disposal
facilities. Disposing of the used appliance
correctly will help to safeguard the
environment and human health. For
further information regarding the
disposal of used appliances, please
contact your local authority waste
disposal department or the shop where
the appliance was purchased.
• Allow the appliance to be disconnected
after installation, via an accessible plug.
• This appliance can be used up to a
maximum altitude of 4,000 metres above
sea level.
Hot surface
The temperatures of accessible
surfaces can be high during
appliance operation.
Information on power consumption in
off/stand-by mode
Technical data on the appliance's power
consumption in off/stand-by mode can be
found at “www.smeg.com” under the page
corresponding to the product in question.
1.4 Connecting the appliance
Make sure that the voltage and frequency
of the power supply correspond to those
indicated on the data plate on the bottom
of the appliance.
If the plug of the appliance is not compatible
with the socket, contact our Technical
Assistance service for a replacement.
• Children must not play with this appliance.
• Keep the appliance and its power cable
out of the reach of children.
• Always unplug the appliance from the
power socket if it is to be left unattended
and before assembly, disassembly or
cleaning.
8
Description
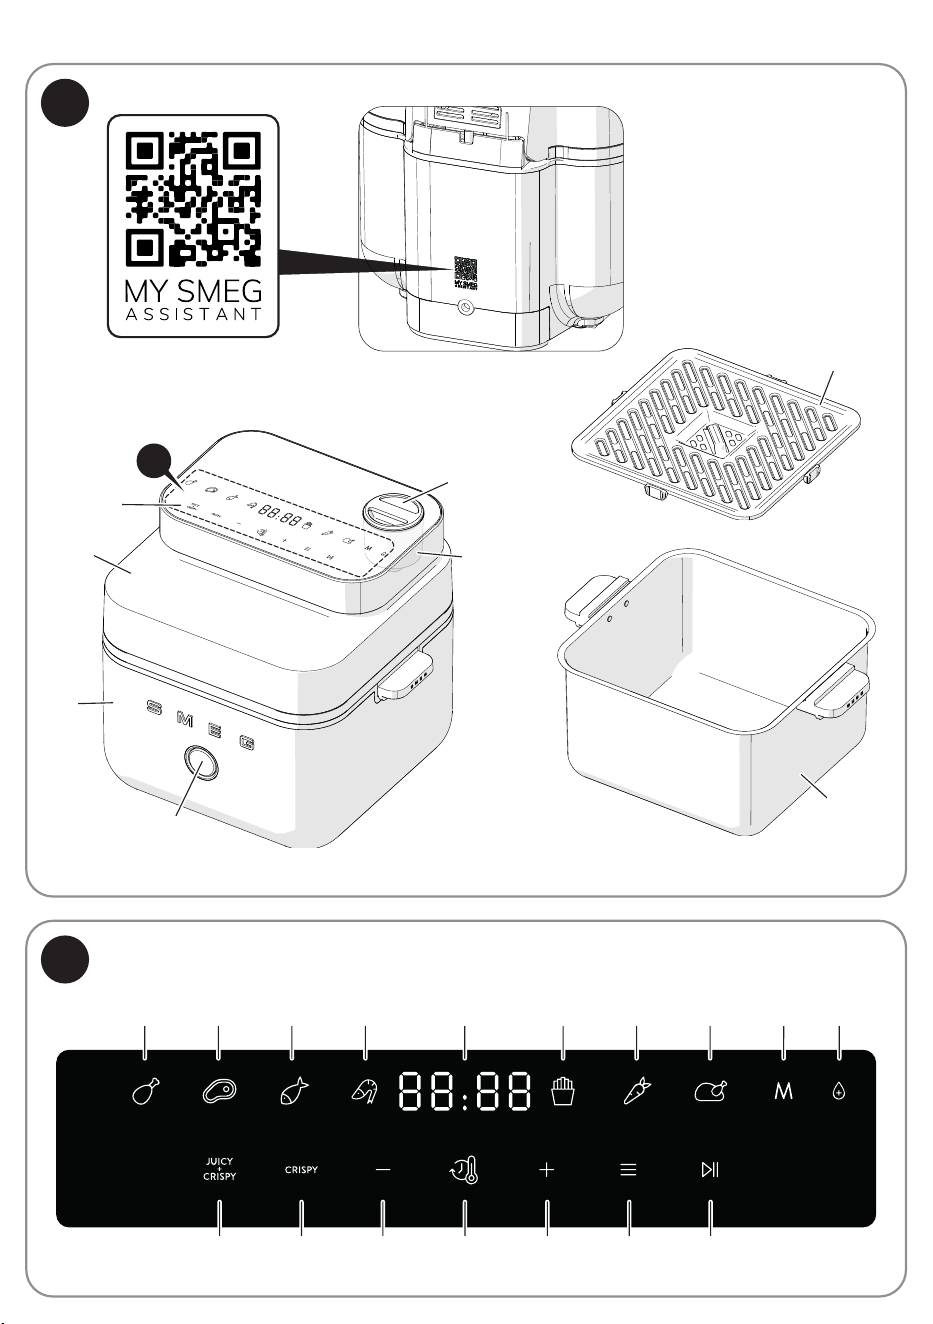
2 Appliance description
(Fig. A)
1) Body
2) Lid
3) Water container cap
4) Water container
5) Open button
6) Control panel
7) Rack
8) Removable basket
2.1 Before rst use
Danger of burns
High appliance temperature
• Failure to follow these
instructions may result in re,
burns or scalds.
• Remove any protective lm from the
outside or inside of the appliance,
including accessories.
• Remove any labels (apart from the
technical data plate).
• Remove all items and wash them (see
section “4 Cleaning and maintenance”).
• It is normal for some components (e.g.
handles) to have viscose residues on
them when unpacked, and these can
easily be removed with a damp cloth.
Before use, make sure that all the
components are intact.
2.2 Description of the parts
Water container (4)
Water container used for the JUICY+CRISPY
function.
Open button (5)
Lid opening button.
Control panel (6)
It allows you to start cooking and set the
mode, functions and parameters.
Rack (7)
Rack to be inserted into the basket (8) and
used as a food support surface.
Removable basket (8)
Basket tted with two handles to make it
easy to remove, ensuring you won’t come
into contact with hot surfaces.
The accessories intended to come
into contact with food are made
of materials that comply with the
provisions of current legislation.
9
EN
Description
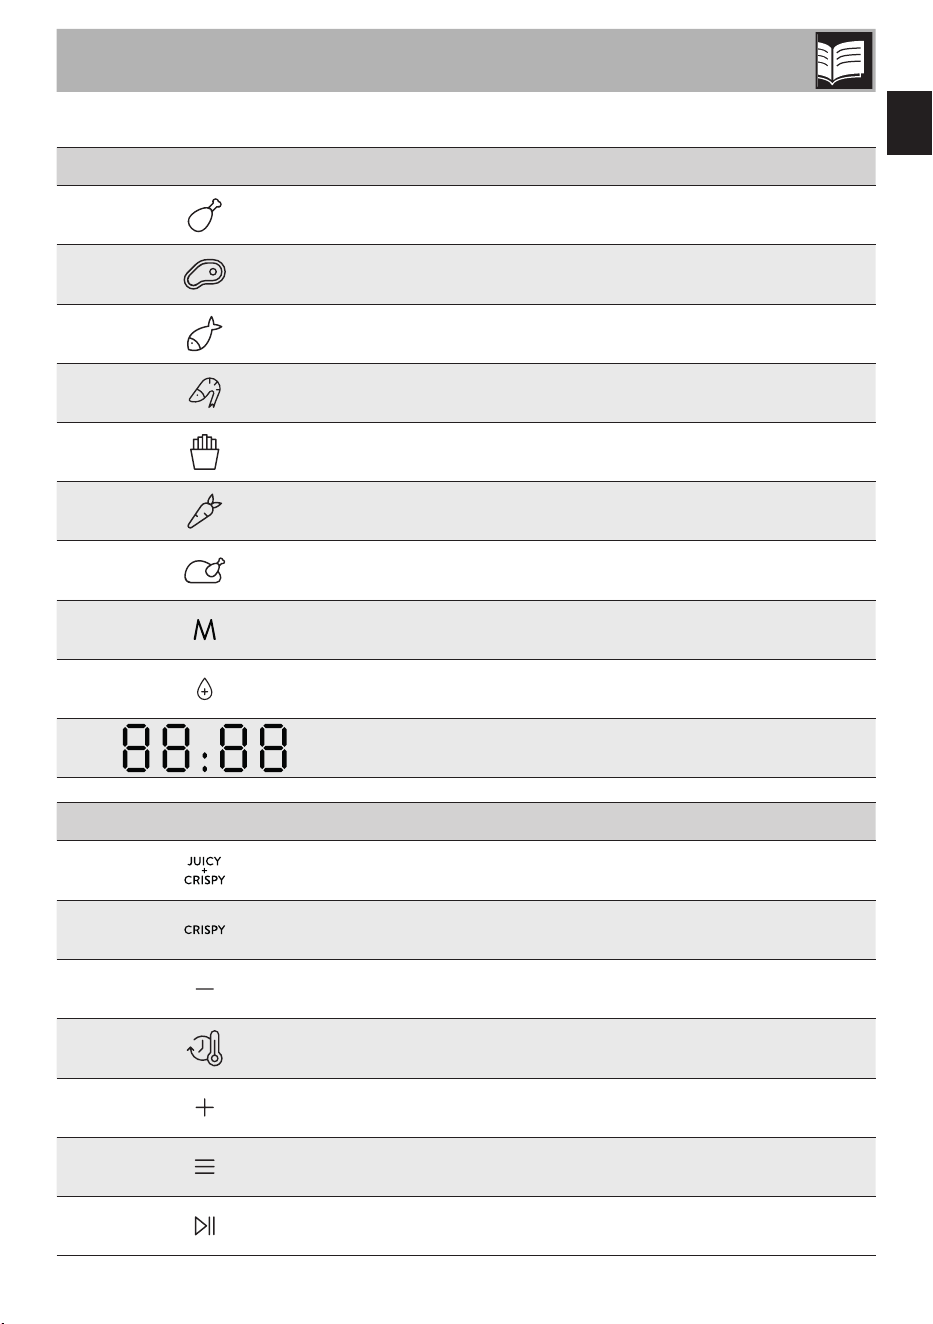
2.3 Description of the display (Fig. B)
Icon Meaning
1 Chicken wings / legs
2 Meat (chops, steaks)
3 Fish (whole, llets)
4 Shrimps
5 Chips
6 Vegetables
7 Roast chicken
8 Manual mode
9 Water container to be lled
10 Displays the time and/or temperature
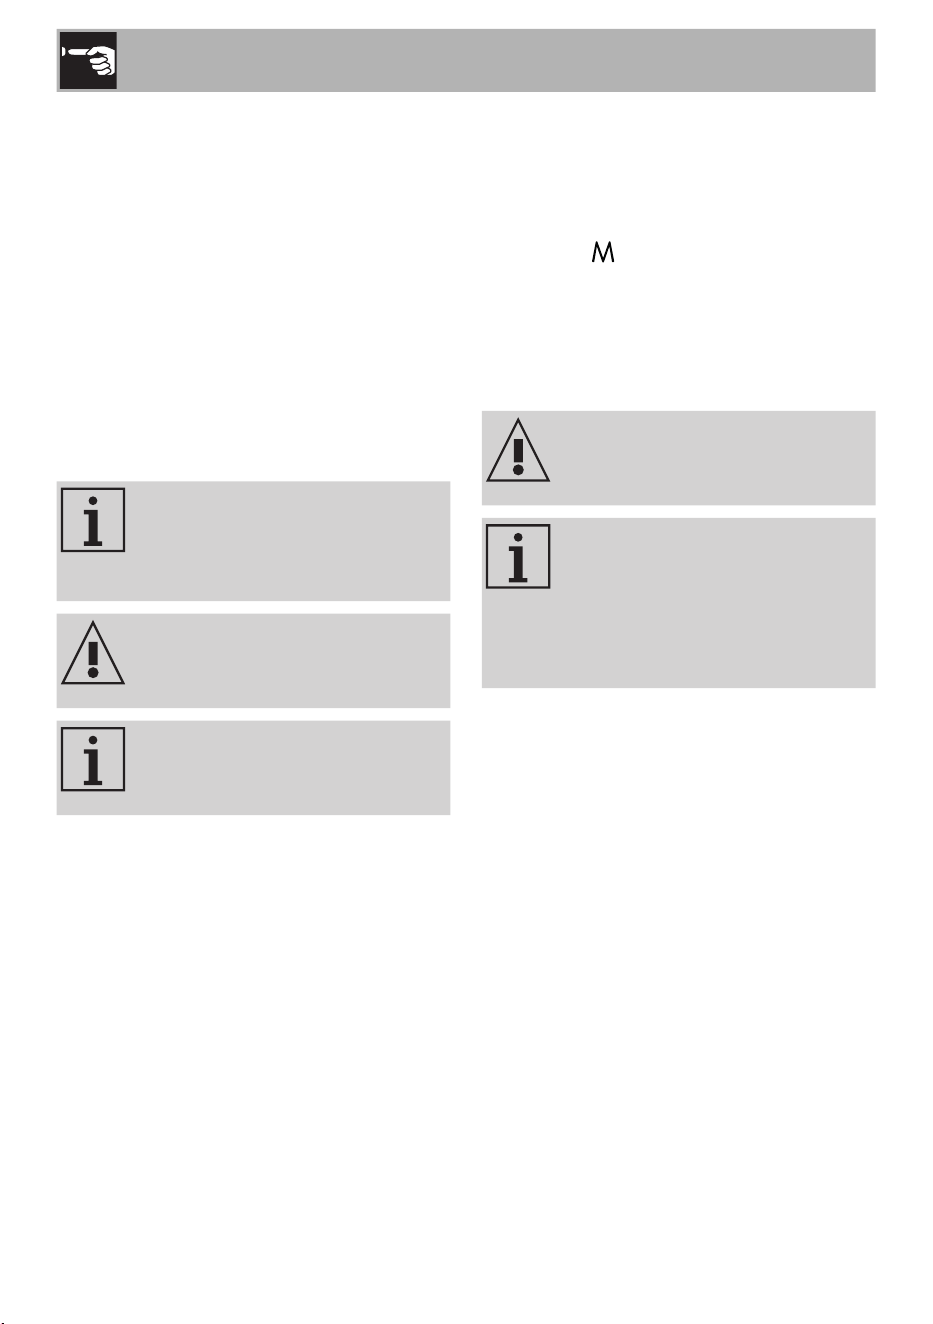
Button Action
11 Enable the JUICY+CRISPY function
12 Enable the CRISPY function
13 Decreases the time and/or temperature
14
Allows you to switch between setting the temperature and
setting the cooking time (and vice versa)
15 Increases the time and/or temperature
16 Menu presets
17 Start / Stop / Pause cooking
10
Use
3 Use
3.1 First use
• Place the appliance on a stable, horizontal
and at surface.
• Do not place the appliance on non-heat
resistant surfaces.
• Place the rack in the basket.
• Do not ll the basket with oil or other
liquids.
• Do not place anything above the fryer as
this could obstruct the airow and affect
the hot air frying result.
Clean the rack before using it
for the rst time to remove any
residues left by the manufacturing
process.
Never touch the basket during or
immediately after use, as it will
be very hot.
It is recommended to use the rack
supplied, placed in the internal
basket during cooking.
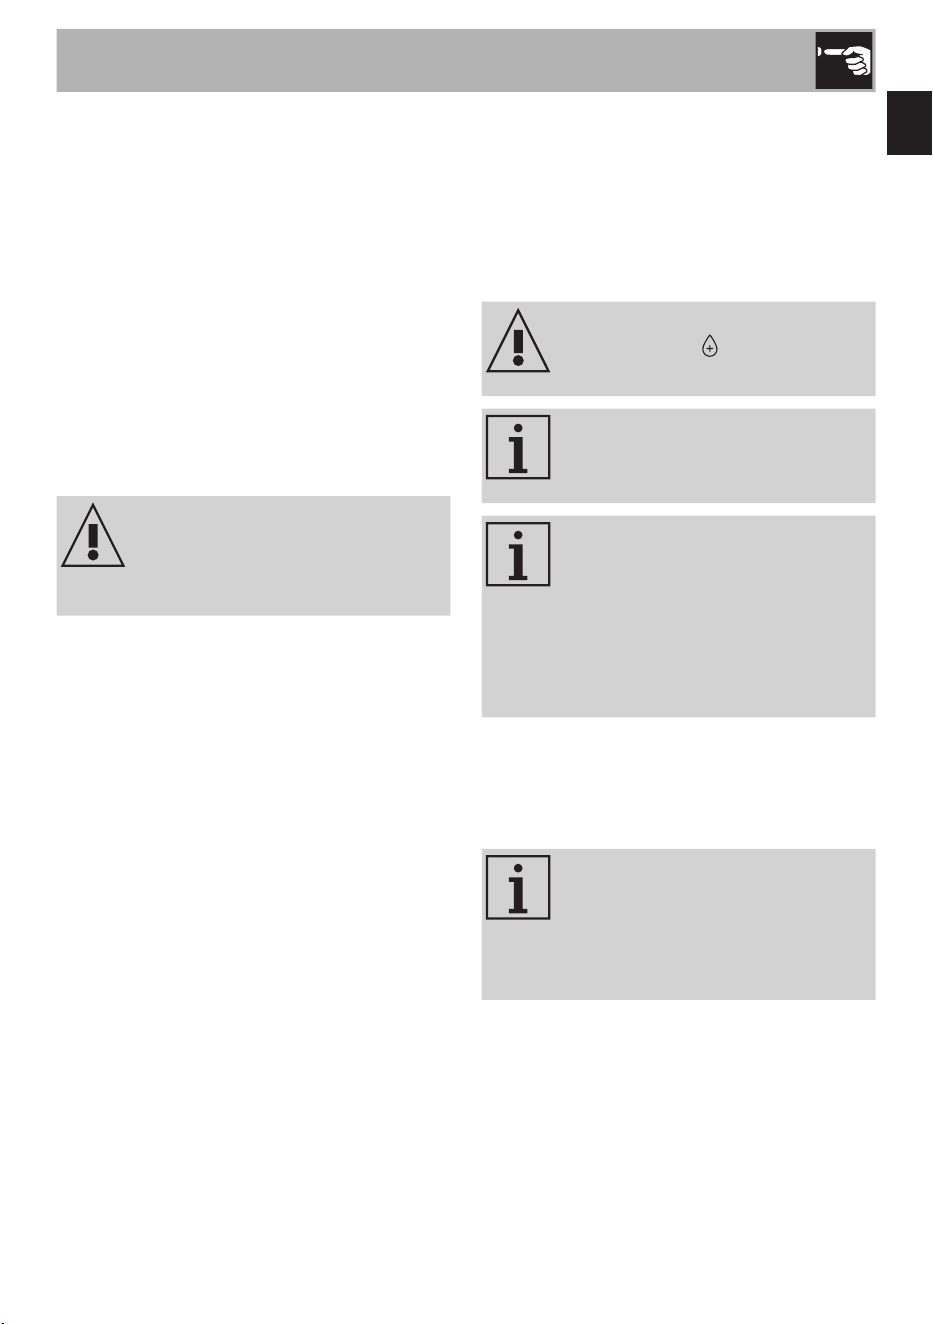
3.2 Switching on
At each switch-on:
When you switch the appliance on, all the
buttons and icons on the control panel light
up and the icon ashes to indicate that
the cooking mode is set to Manual (the
default setting).
The appliance has two cooking modes:
• Manual (see section “3.4 Manual mode”).
• Preset (see section “3.5 Preset mode”).
Do not operate the product
without food: use while empty
may impair its performance.
During cooking, the cooking
window inner light turns on and
off automatically. This behaviour
is completely normal and
predictable during correct use of
the product.
11
EN
Use
3.3 JUICY+CRISPY and CRISPY
functions
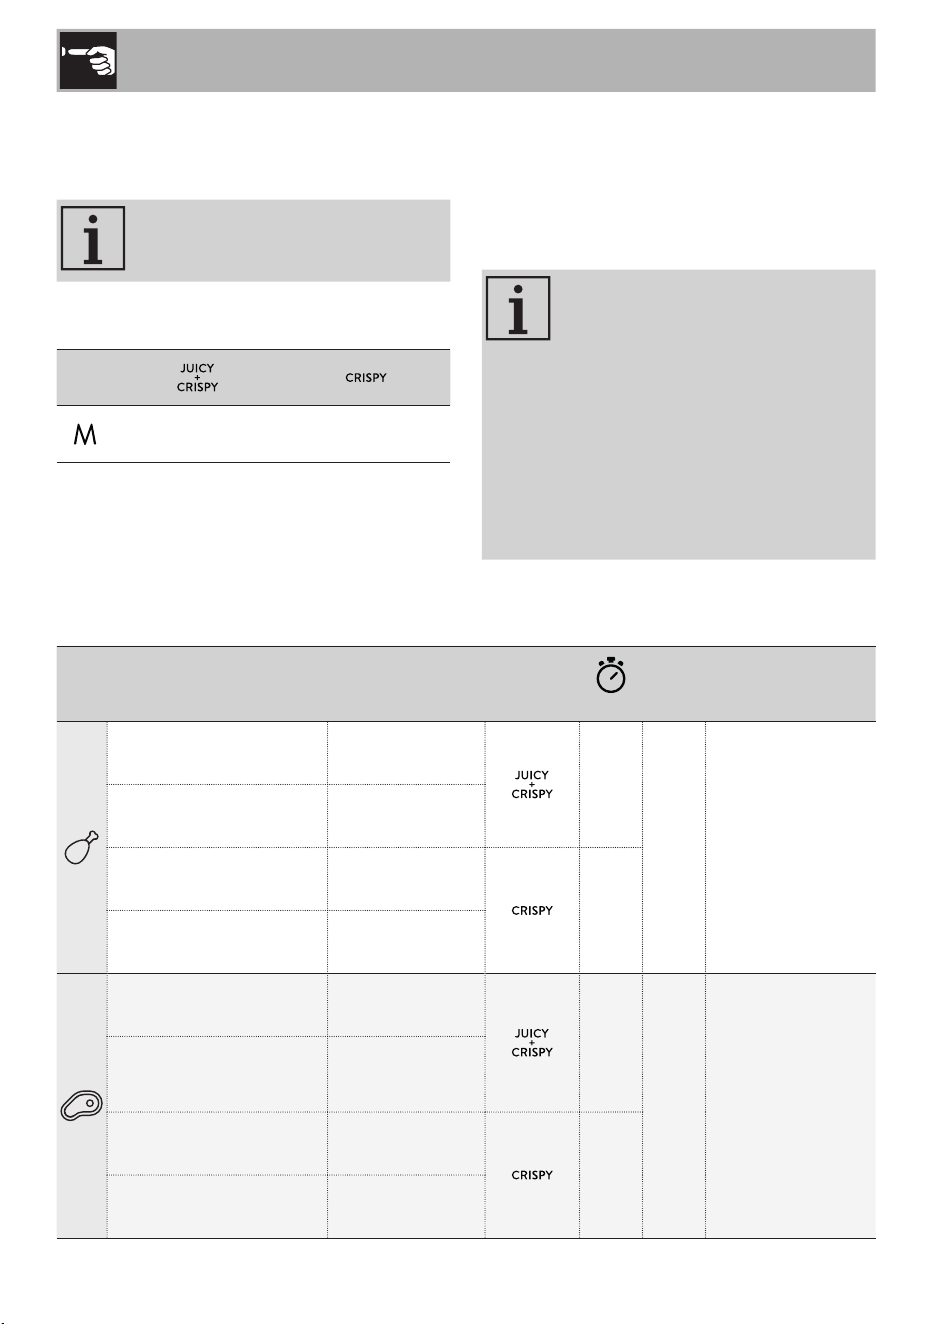
The device has with two alternative cooking
functions:
• JUICY+CRISPY: This keeps food soft
and juicy on the inside while making it
crunchy on the outside, which is ideal for
meats and other dishes that require a
tender texture.
• CRISPY: This enhances crispiness and is
perfect for chips, snacks, and dishes that
need to be golden and fragrant.
The two functions cannot be activated at
the same time.
The JUICY+CRISPY function is
not available for all presets. In
this case, you can only use the
CRISPY function.
If the selected preset supports both
functions, both the JUICY+CRISPY and
CRISPY buttons will be visible.
Press the corresponding button to select
your preferred function. It will ash until
cooking starts.
JUICY+CRISPY function
The JUICY+CRISPY function automatically
draws water from the dedicated container
(4 - Fig. A) and releases it inside the cooking
compartment it in the form of micro-drops.
This process stops food drying out, resulting
in tender dishes with a crunchy exterior.
When the JUICY+CRISPY function
is selected, the icon lights up to
remind you to ll the container.
The temperature and the cooking
time cannot be adjusted in the
JUICY+CRISPY function.
During cooking, when the
JUICY+CRISPY function is
activated, a small amount of
steam may leak from the top of
the lid. This is part of the product's
normal operation and is related
to its standard ventilation.
CRISPY Function
The CRISPY function enables homogeneous
browning without the need for excess oil,
resulting in a crisp, golden surface.
The CRISPY function is available
in both manual mode and in
preset mode (on all presets).
You can adjust the temperature
and cooking time in this function.
12
Use
Ingredients
Recommended
Min.- Max.
Quantity
Function
(min.)
°C Notes
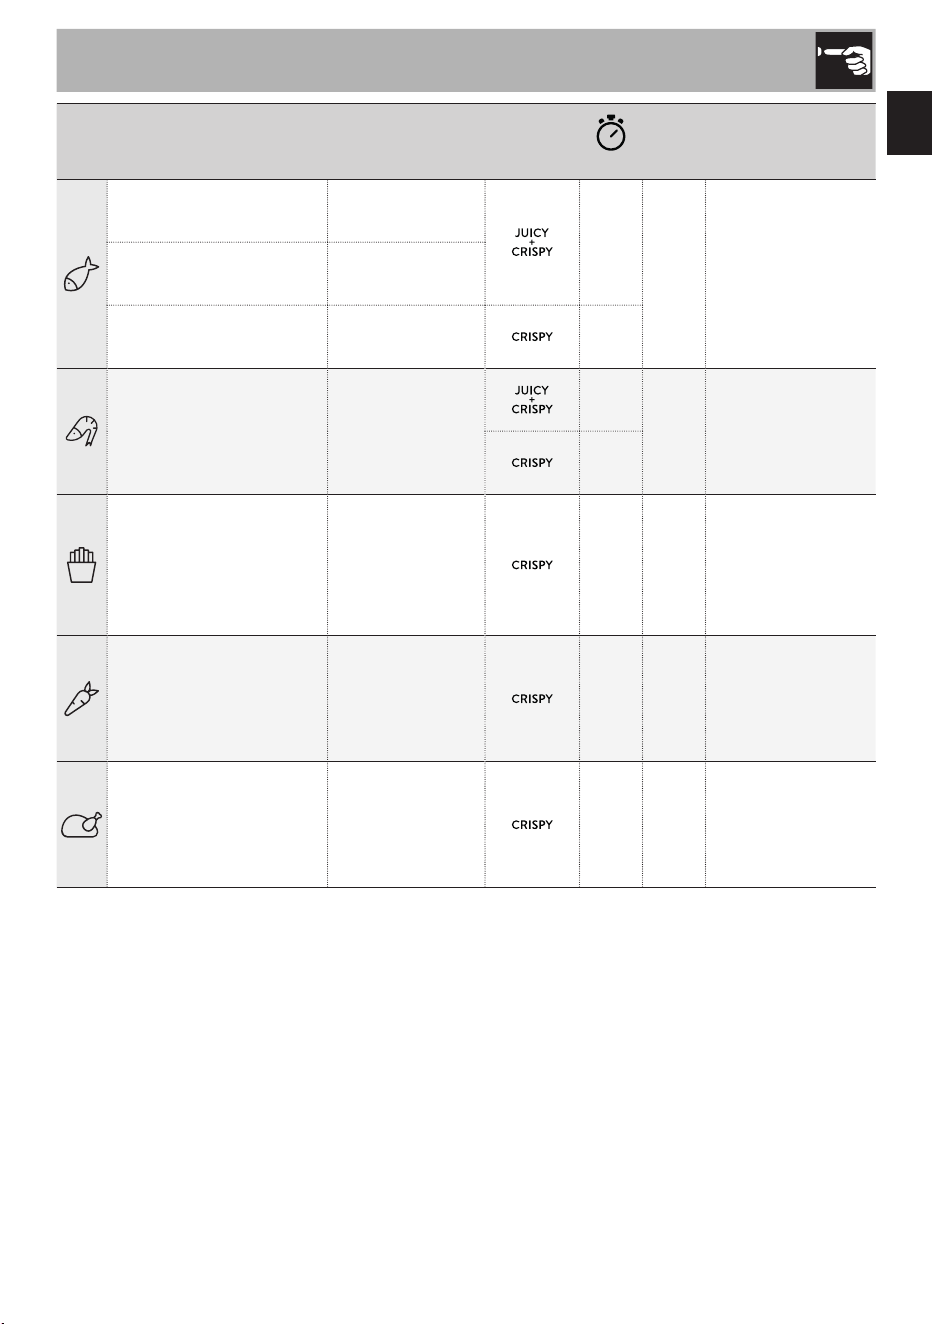
Chicken wings,
125 g each
1-10 pcs
35
200
For best results,
initially place the
side with the skin in
contact with the grill
and turn halfway
through cooking.
Chicken legs,
300 g each
1-9 pcs
Chicken thighs,
190 g each
1-8 pcs
30
Whole chicken breast,
850 g
half - one whole
breast
Beef sirloin,
250g per slice
2-4 slices
25
200
Recommended
settings for cooking
meat until it is well
done.
Pork chops,
180 g each,
at least 2 cm thick
2-5 pcs
Pork sausages,
150 g each
2-8 pcs
30
Pork ribs,
115 g each
4-12 pcs
3.4 Manual mode
Manual mode is the default setting each
time the fryer is switched on.
Only the CRISPY function is
available in this mode.
Default settings
- 10 min. - 200°C
To start cooking, see section “3.9 Start
cooking”.
3.5 Preset mode
In preset mode you can choose from a range
of preset parameters (presets) depending
on the type of food you are cooking.
Default settings
• Suggested temperatures and
times are intended for fresh
ingredients. The thickness,
quantity and moisture of the
food can affect the result. Adjust
the time and temperature as
needed.
• If you cook large amounts of
food, remember to stir several
times to obtain uniform cooking
results.
13
EN
Use
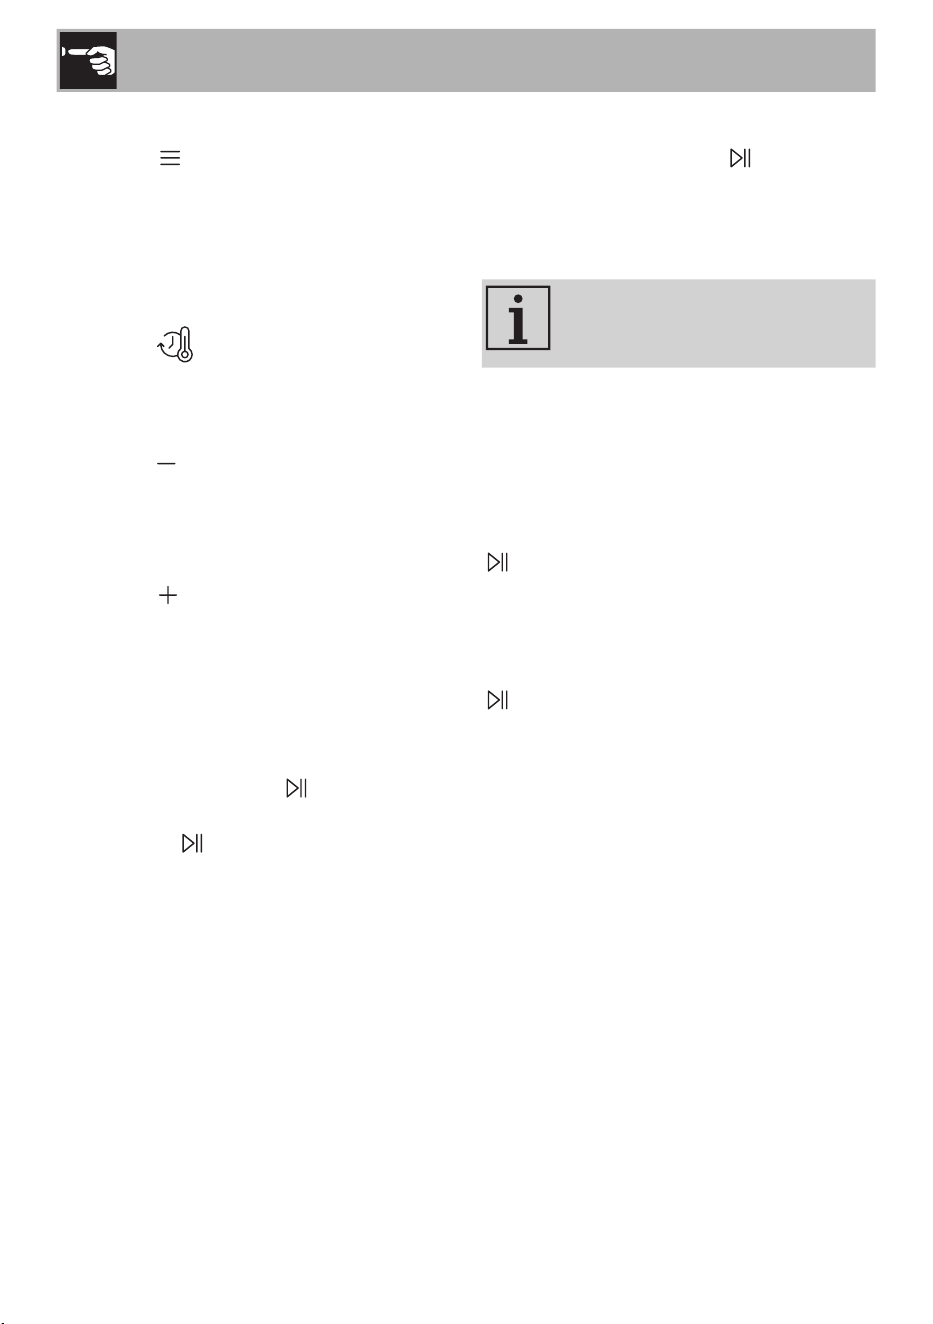
Ingredients
Recommended
Min.- Max.
Quantity
Function
(min.)
°C Notes
Steak,
200 g each
1 - 4 mins max.
15
180
-
Fillets,
150 g each
1 - 4 mins max.
Whole,
450 g
1 llet 20
- 100-600 g
10
180 -
15
- 250-600 g 27 180
If cooking the
maximum weight,
shake or stir several
times during
cooking for the best
results.
- 250-600 g 20 180
The settings may
need to be adjusted
depending on the
type of vegetable.
- 1 kg 45 200 -
14
Use
3.6 Browsing presets
Press the button repeatedly until you
reach the required preset. The preset will
ash once it is selected.
3.7 Modifying the cooking time and
temperature
Press the button to switch between
time and temperature, and vice versa.
Decreasing the Time / Temperature
Press the icon to decrease the time or
temperature.
Increasing the Time / Temperature
Press the icon to increase the time or
temperature.
3.8 Standby mode
The product enters standby mode after
2 minutes of inactivity.
The display shows the button with a
steady light.
Pressing the button returns the display
to manual mode (see section “3.4 Manual
mode”).
3.9 Start cooking
To start cooking, press the button.
During cooking, a sound will be emitted
halfway through the total cooking time
to remind you to turn the food inside the
basket.
No sound will be emitted if the set
timer is less than 3 minutes.
At the end of the countdown, the fryer
switches off automatically.
3.10 Pause cooking
You can pause cooking by pressing the
button during cooking.
3.11 Stop cooking
To stop cooking, press and hold the
button. The 'Menu presets' display will
then appear (see section “3.6 Browsing
presets”).
15
EN
Use
3.12 Changing the settings
Units of measurement
To change the unit of measurement, from °C
(EU) to °F (US) or vice versa, press and hold
the and icons simultaneously.
The display will show UNIT.
After 3 seconds, the screen will show the
current selection (EU/US).
To change the unit of measurement press
or .
Conrm the unit by pressing the button.
The menu navigation screen will then
appear.
Sound
To turn the sound setting from ON to OFF or
vice versa, press and hold the and
icons simultaneously.
The display will show SND.
After 3 seconds, the screen will show the
current selection (ON/OFF).
To set the sound unit, press or .
Conrm the unit by pressing the button.
The menu navigation screen will then
appear.
3.13 Delayed start cooking
To schedule delayed start cooking:
1) Press and hold the icon.
The display will show the default delayed
start timer (5 minutes).
2) Set the timer for an interval between
5 minutes and 24 hours.
To set the time:
• press or to increase or decrease
the timer by 10 minutes.
• press and hold or to increase or
decrease the timer by 30 minutes.
3) Press the start icon .
The countdown will start, and the display
will show the timer at 50% brightness.
To cancel the timer, press and hold the start
icon and the 'Menu presets' display will
appear (see section “3.6 Browsing presets”).
If the user presses the ‘Open’ button
(5 - Fig. A) while the delayed start cooking
function is active, the timer pause until the
lid of the air fryer is closed. While paused,
the digit area displays “--:--” at 50%
brightness.
16
Cleaning and maintenance
4 Cleaning and maintenance
The instructions manual contains cleaning
and maintenance instructions and
recommendations from the manufacturer to
the customer. Any other intervention should
be carried out by an authorised service
centre.
Before cleaning, ALWAYS remove the plug
from the mains power supply and allow the
appliance to cool down.
Caution
• Do not use steam jets to clean
the appliance.
• Do not use cleaning products
containing chlorine, ammonia,
bleach or alcohol on steel parts
or parts with a metallic surface
nish (e.g. anodised, nickel-
plated or chrome-plated).
• Do not use abrasive or corrosive
detergents.
• Do not use rough or abrasive
materials or sharp metal
scrapers.
Ordinary daily cleaning
To keep the surfaces in good condition, they
should be cleaned regularly after use. Let
them cool rst.
Food stains or residues
Clean the rack and basket after each use to
prevent damage to the coating caused by
food residue and grease build-up.
Do not allow residues to fry inside the
basket, as this could damage the enamel
lining of the appliance.
Do not use steel sponges and sharp
scrapers as they will damage the surface.
Use normal, non-abrasive products and a
wooden or plastic tool, if necessary. Rinse
thoroughly and dry with a soft cloth or a
microbre cloth.
Cleaning the accessories
• Cleaning the basket and rack
Wash the basket and rack in a dishwasher
or in warm soapy water with a soft sponge
or a soft cloth. Rinse and dry thoroughly.
• Cleaning the fryer
Pour the product onto a damp cloth
and wipe the surface of the fryer. Rinse
thoroughly and dry with a soft cloth or a
microbre cloth.
Do not wash the fryer in a dishwasher.
• Cleaning the cooking window
It is recommended to keep the window
clean at all times. Use absorbent kitchen
roll. In case of stubborn dirt, wash with a
damp sponge and an ordinary detergent.
17
EN
What to do if...
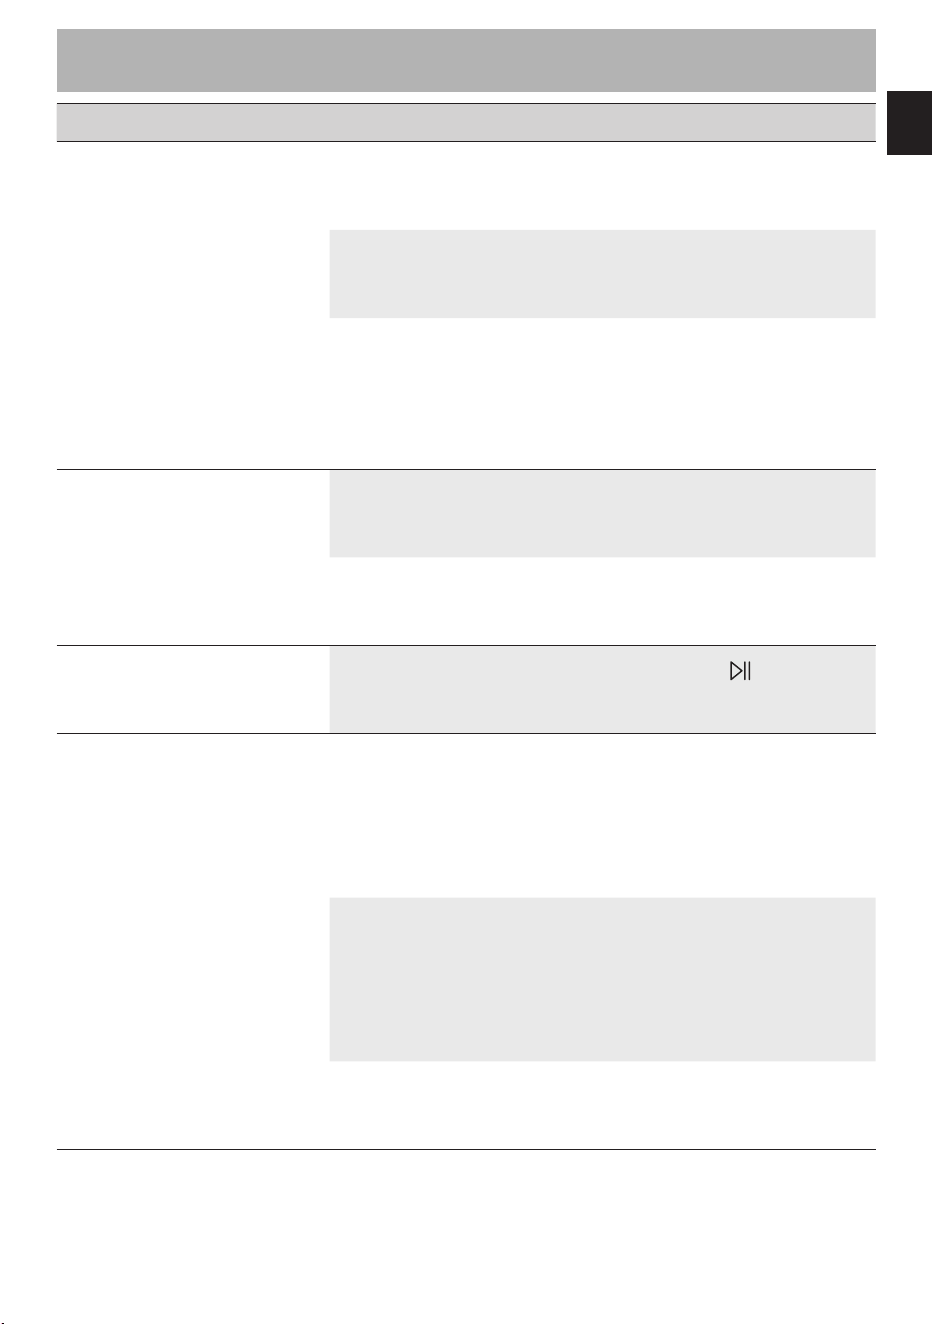
Problem Cause Solution
The air fryer will not switch
on.
The plug has not been
properly inserted into the
power socket.
Make sure the plug has
been inserted properly into
the power socket.
The cable is defective.
Contact your local service
centre.
No power.
Make sure that the power
supply is working properly.
If the problem persists,
contact a qualied
electrician.
The display does not turn
on.
The plug has not been
properly inserted into the
power socket.
Make sure the plug has
been inserted properly into
the power socket.
Possible electronic board
failure.
Contact your local service
centre.
The touch controls on the
display are not responding.
The product may enter
standby mode after
2 minutes of inactivity.
Press the button to
reactivate the display and
return to Manual Mode.
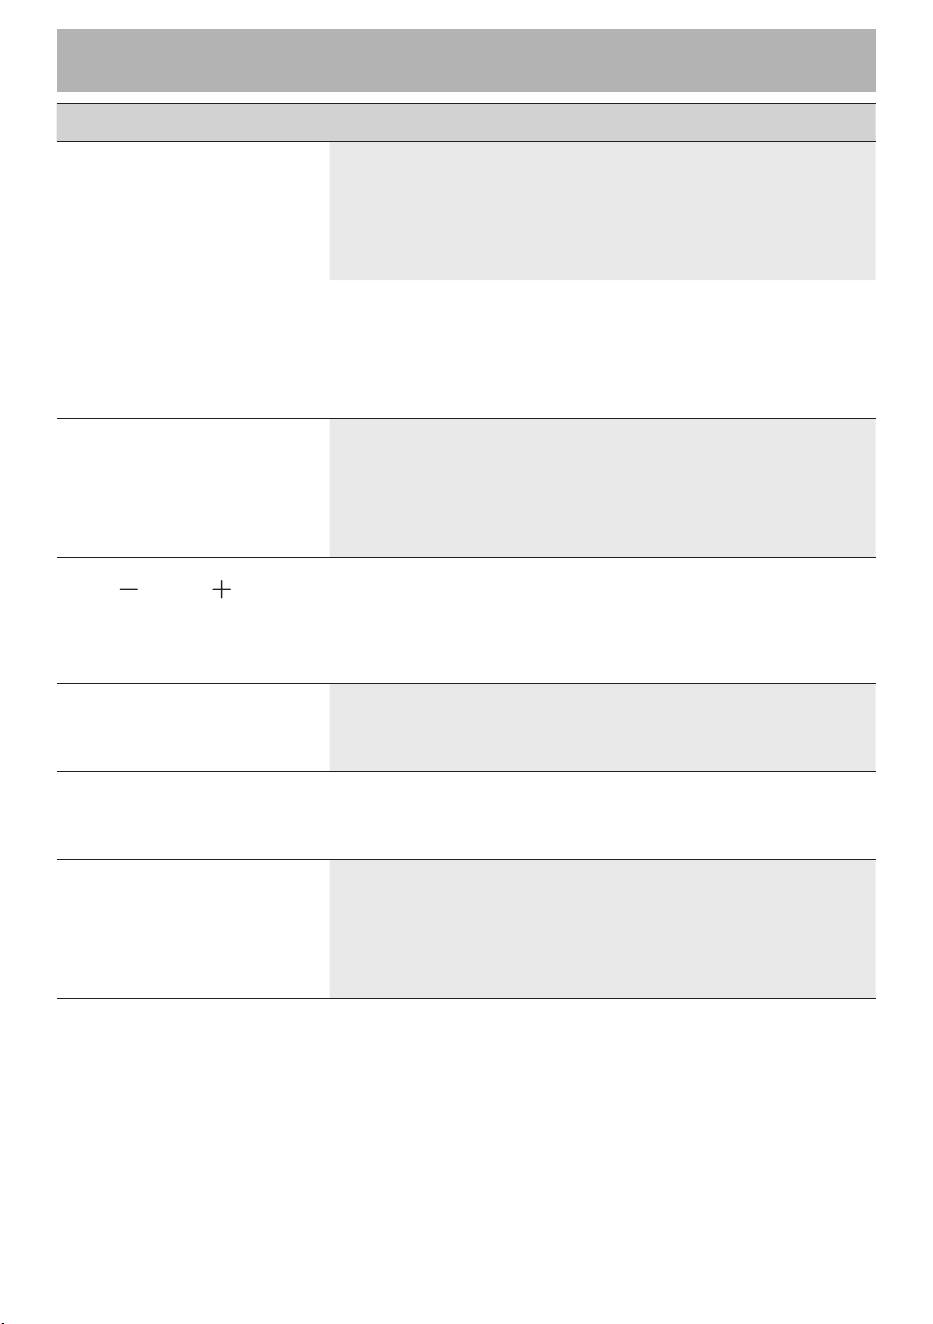
The dishes prepared with
the air fryer are not cooked.
The temperature is too low.
Try increasing the
temperature for better
results. To increase the
temperature, see section
“3.7 Modifying the cooking
time and temperature”.
The timer is set for too short
a time.
For better results, try setting
the timer for a longer time.
To increase the timer, see
section “3.7 Modifying
the cooking time and
temperature”.
The amount of food in the
basket is excessive.
18
What to do if...
Problem Cause Solution
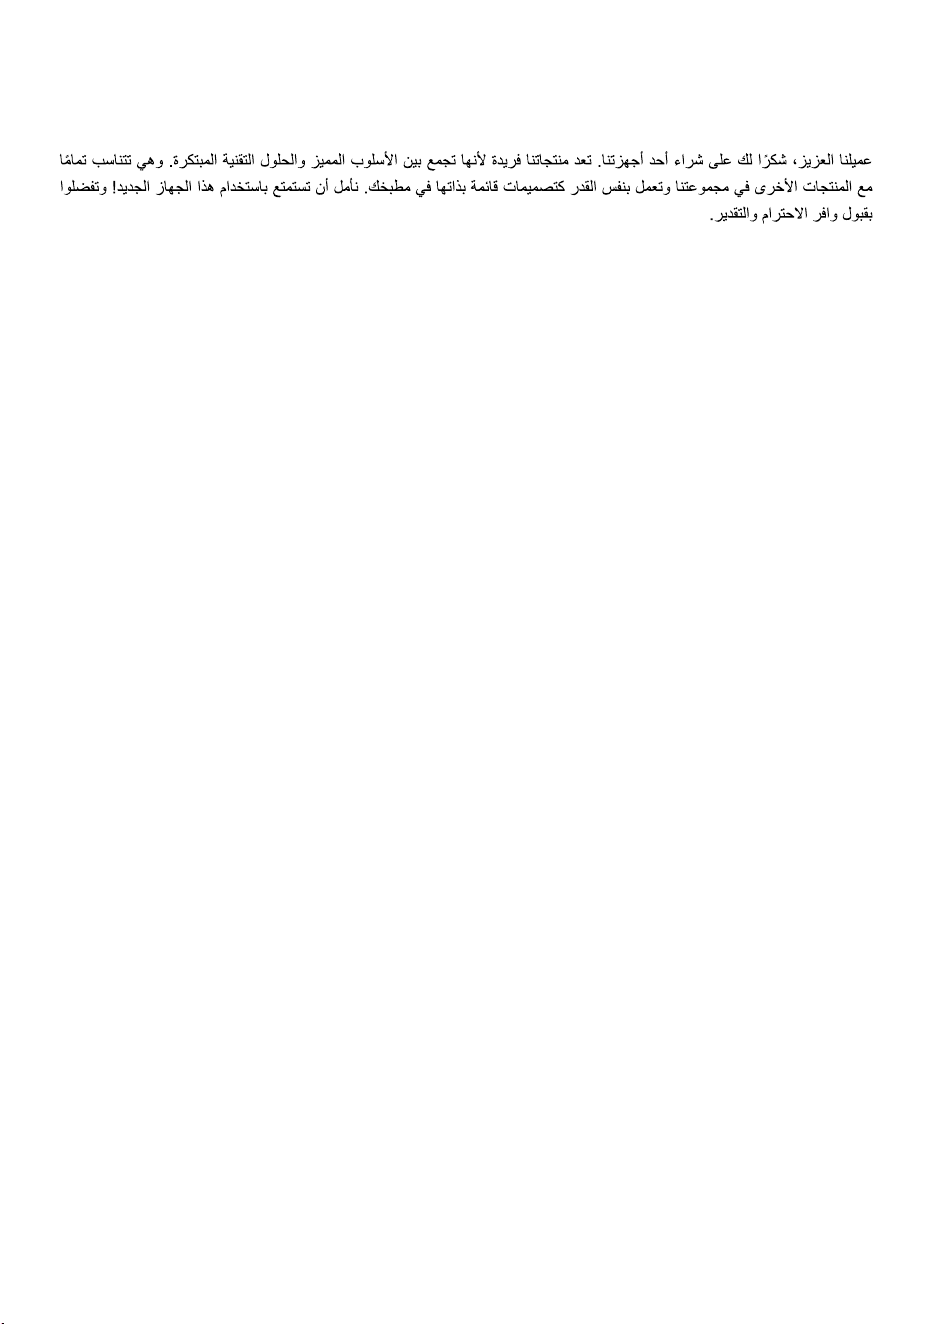
There is a burning smell
when the oven is in
operation.
There may be a burning
smell when using the
appliance for the rst time.
Make sure you have
followed the instructions
when using the appliance
for the rst time (see section
“3.1 First use”).
There may be food residues
left inside the appliance.
Make sure you follow the
cleaning and maintenance
instructions correctly (see
section “4 Cleaning and
maintenance”).
The JUICY+CRISPY function
is not activated.
The selected preset does
allow you to set the
JUICY+CRISPY function.
Make sure you have selected
a preset that allows you
to set the JUICY+CRISPY
function (see section
“3.5 Preset mode”).
The and buttons
do not adjust the time
or temperature in the
JUICY+CRISPY function.
The time and temperature
are not adjustable in the
JUICY+CRISPY function.
Select the CRISPY function
to adjust the time and
temperature.
It is not possible to set a
timer of more than 1 hour.
If selected temperature is
above 80°C, the maximum
timer is limited to 1 hour.
Reduce the temperature to
80°C or below to set a time
for more than 1 hour.
The display shows one of
the following error codes:
E1, E2, C4
-
Contact your local Technical
Assistance Service.
The display shows C4 Internal basket not detected.
Reposition the internal
basket. If the absence
exceeds 10 minutes, the
device goes into standby
and turns off the display.
The manufacturer reserves the right to make any changes deemed necessary for the improvement of its products
without prior notice. The illustrations and descriptions contained in this manual are therefore not binding and are
merely indicative.