User Guide

2
(1.0) Introduction .......................................................... 4
(1.1) Box Contents ..................................................................................... 4
(1.2) Support ............................................................................................... 4
(1.3) Setup ................................................................................................... 4
(1.3.1) Connection Diagram ...................................................................................................... 6
(2.0) Features ................................................................. 7
(2.1) Top Panel ........................................................................................... 7
(2.2) Rear Panel ....................................................................................... 10
(2.3) Bottom Panel ................................................................................. 10
(3.0) Basic Operation ................................................... 11
(3.1) Voices ................................................................................................. 11
(3.2) Metronome ....................................................................................... 11
(3.3) Split Mode ........................................................................................ 12
(3.4) Layer Mode ..................................................................................... 13
(3.5) Rhythm Mode ................................................................................ 14
(3.6) Lesson Mode ................................................................................... 15
(3.7) Demo Song Mode .......................................................................... 15
TABLE OF CONTENTS

3
(4.0) Advanced Operation .......................................... 16
(4.1) Keybed Functions ......................................................................... 16
(4.1.1) Aux In ................................................................................................................................. 16
(4.1.2) Transpose ........................................................................................................................ 16
(4.1.3) Touch ................................................................................................................................ 17
(4.1.4) MIDI Channel .................................................................................................................. 17
(4.1.5) Local MIDI ........................................................................................................................ 17
(4.1.6) Click ................................................................................................................................... 17
(4.1.7) Eco Mode ......................................................................................................................... 18
(4.1.8) Factory Reset ................................................................................................................ 18
(5.0) Troubleshooting ................................................. 19
(6.0) Appendix ............................................................ 20
(6.1) Voices .............................................................................................. 20
(6.2) Rhythms ......................................................................................... 20
(6.3) Technical Specifications ............................................................. 21
(6.4) Trademarks & Licenses .............................................................. 22
4
(1.0) Introduction
(1.1) Box Contents
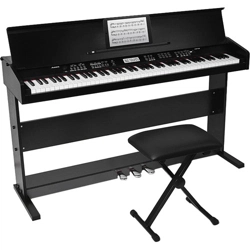
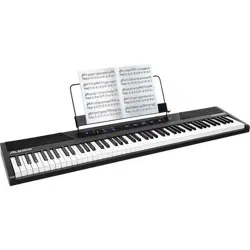
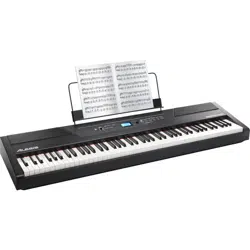
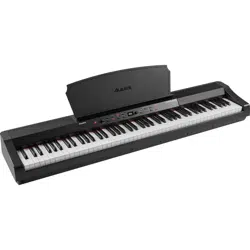
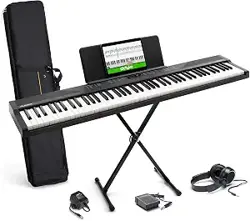
Recital Play Digital Piano Carry Case
Keyboard Stand Power Adapter
Music Rest Quickstart Guide
Sustain Pedal Safety & Warranty Manual
Headphones
(1.2) Support
For the latest information about this product (system requirements, compatibility
information, etc.) and product registration, visit alesis.com.
For additional product support, visit alesis.com/support.
(1.3) Setup
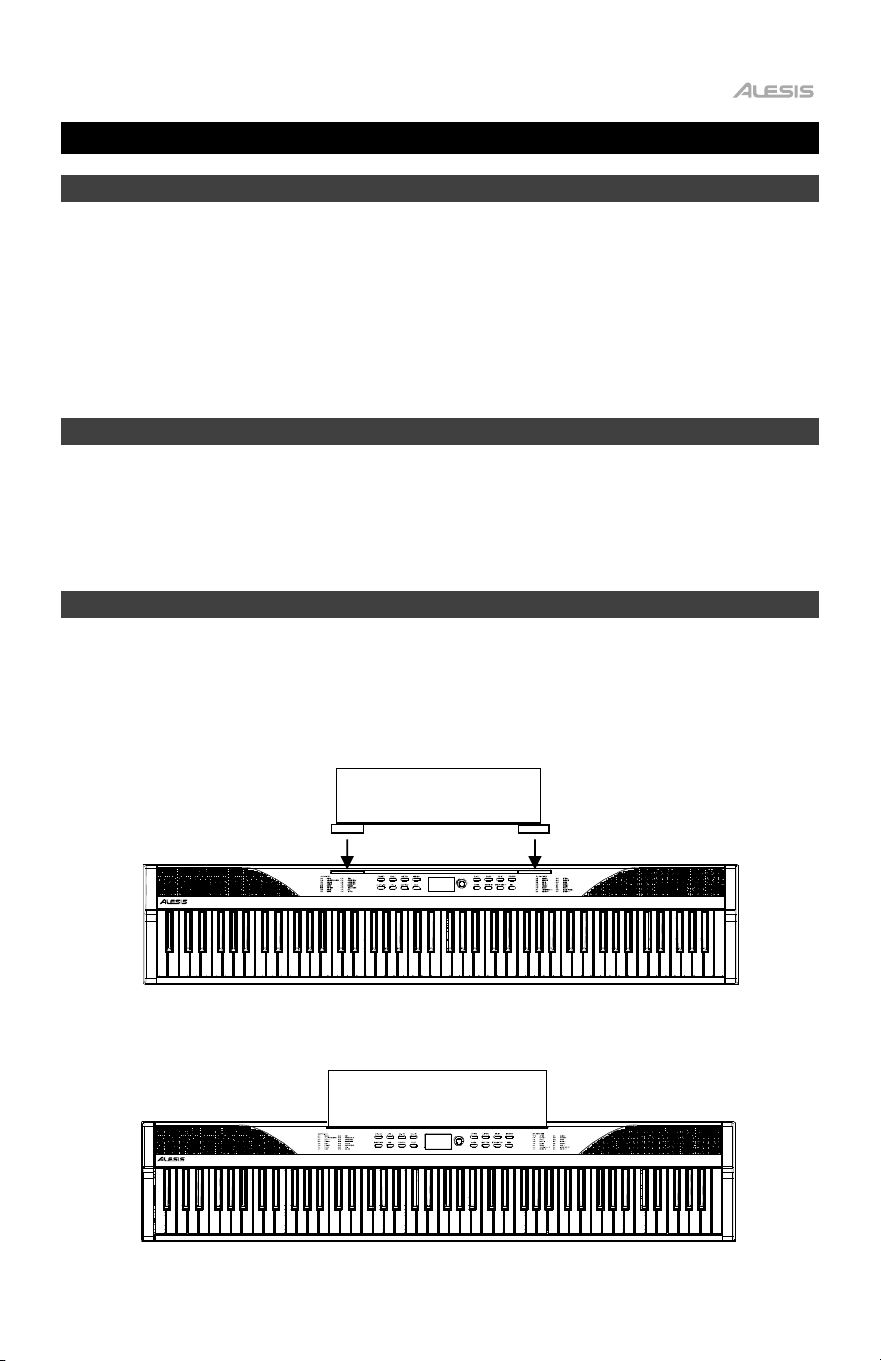
Music Rest:
Insert the music rest’s tabs into the top of Recital Play until they fit securely, as seen
in the images below:
5
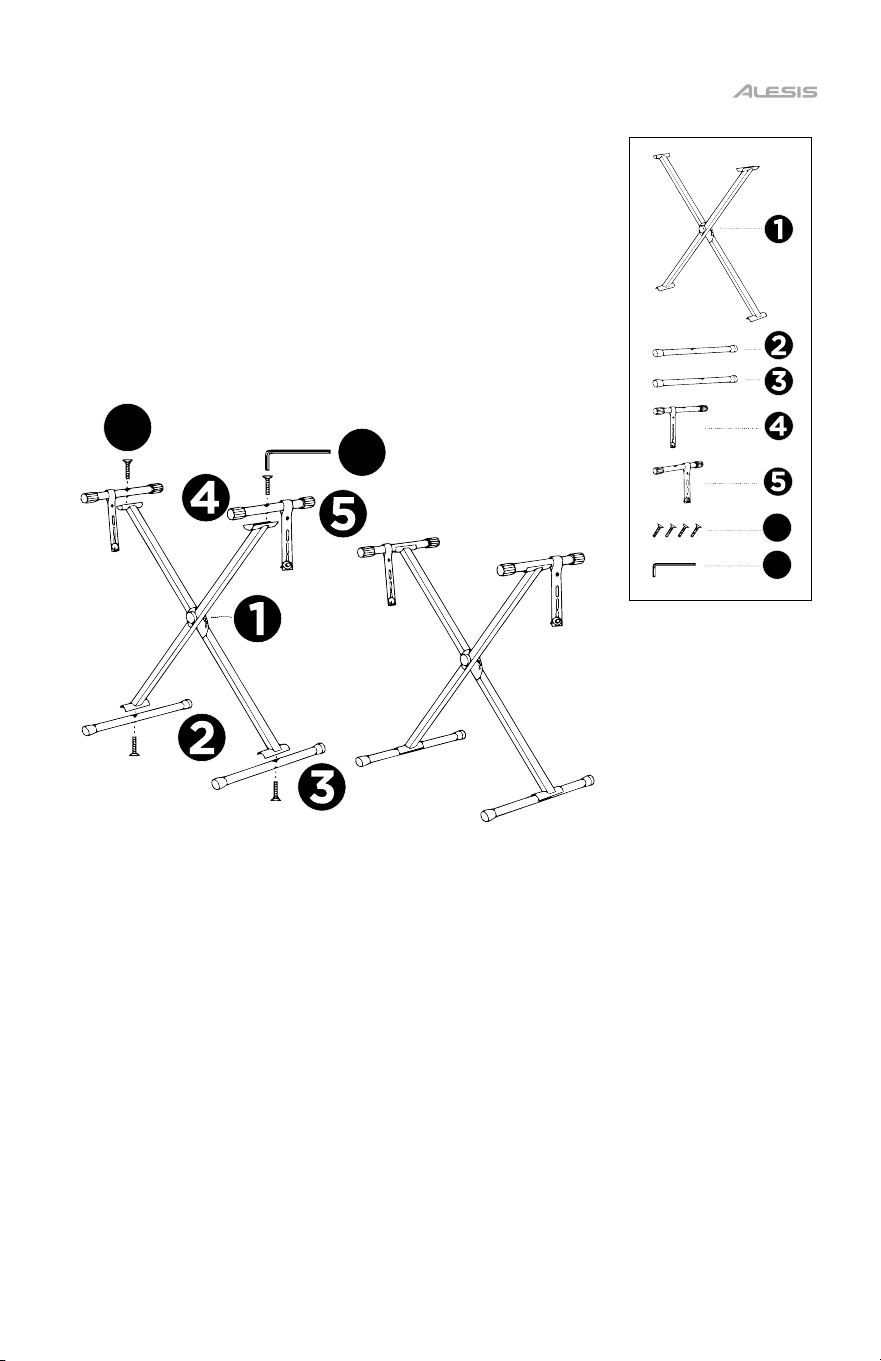
Keyboard Stand:
1. Attach the two stand feet (2 & 3) onto the bottom of the
cross stand (1) using the screws (6) and wrench (7).
2. Attach the keyboard supports (4 & 5) to the top of the
cross stand (1) using the remaining screws (6) and
wrench (7).
3. Screw the safety straps attached to the keyboard
supports (4 & 5) to the bottom of the keyboard.
6
7
6
7
7
(2.0) Features
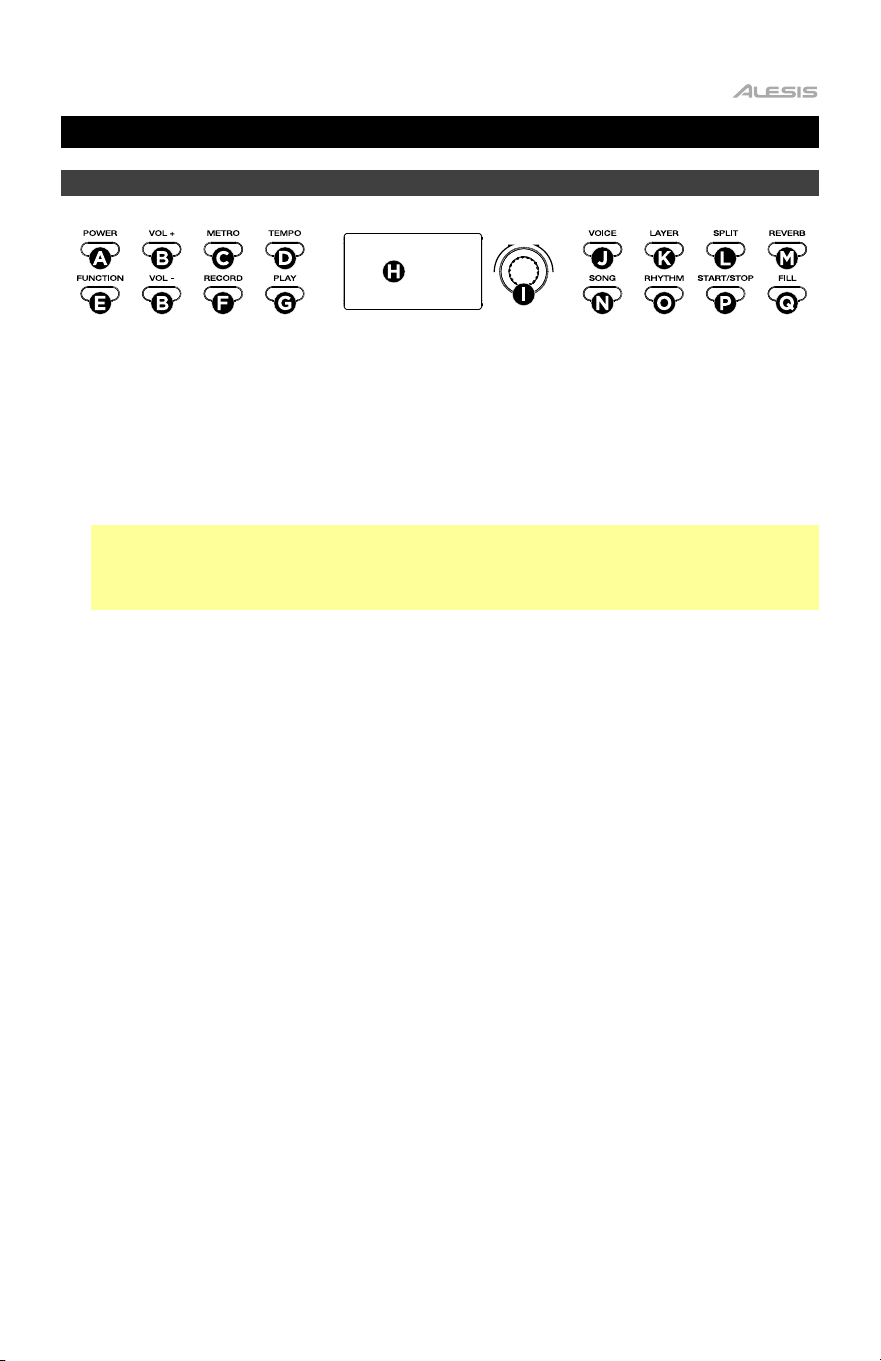
(2.1) Top Panel
A. Power Switch
Turns the piano’s power on or off.
B. Volume +/-
Press these buttons to increase or decrease the main volume, including the
voices, songs, and rhythms.
Note: If the internal speakers do not produce any sound, check that the volume is
not set too low or if headphones are plugged into the Phones / Output. The
speakers will be muted if there are headphones plugged into the Phones /
Output.
C. Metronome
Press this button to turn the metronome on or off. See the Metronome
section for
more details.
D. Te m po
Press this button to show the current internal tempo setting on the display (005-
280 BPM). Turn the Encoder to adjust the internal tempo used for the
metronome, song, and accompaniment rhythm features. Press this button several
times at a consistent pace to set the tempo via tap.
E. Function
Press this button and then press a key on the keybed to perform a function, such
as Transpose -/+. See the Keybed Functions
section for more details.

8
F. Record
Press this button to record a user song, then press it again to stop recording. If a
user song already exists, it will be deleted. When Recital Play is recording a user
song, the screen will show “rEC”.
G. Play
Press this button to play back a stored user song. If this button is pressed during
recording, recording will stop and the user song will start playback. When Recital
Play is playing a user song, the screen will show “PLY”.
H. Display
This display screen shows relevant info for settings while they are being changed.
I. Encoder Knob
Turn this to adjust settings.
J. Voice
Press this button to show the currently selected voice (sound) and turn the
Encoder to select a new voice. See the Voices section for more information.
K. Layer
Press this button to enable Layer Mode and use the Encoder to select the layer
voice. Press the button again to disable Layer Mode. See the Layer Mode section
for more information.
L. Split
Press this button to enable Split Mode and use the Encoder to select the split
voice. Press the button again to disable Split Mode. See the Split Mode section
for more information.
M. Reverb
Press this button to enable or disable the reverb effect. Turn the Encoder to
adjust the depth level of the reverb effect.

9
N. Song
Press this button to access Song Mode. See the Demo Song Mode section for
more details on this function.
O. Rhythm
Press this button to enable the Rhythm Mode and then turn the Encoder to select
an accompaniment rhythm for playback. Press and hold this button and then turn
the Encoder to adjust the volume level of the rhythm. See the Rhythm Mode
section for more information.
P. Start/Stop
Press this button to start and stop an accompaniment rhythm in Rhythm Mode, or
start and stop a song in Demo Song Mode. You can also press this button to stop
a currently playing metronome or user song.
Q. Fill
Press this button during accompaniment rhythm playback to have a short fill play.
10
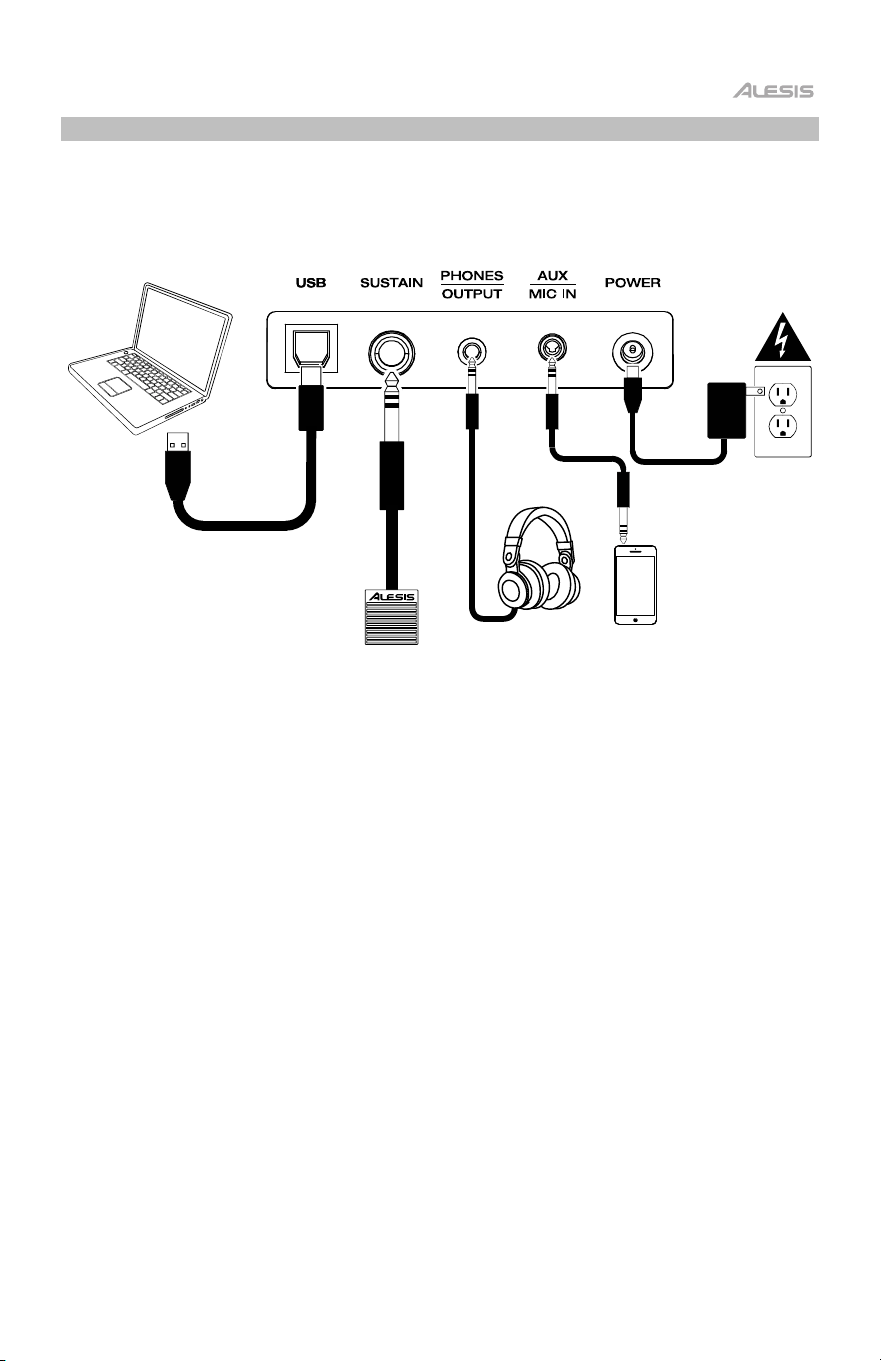
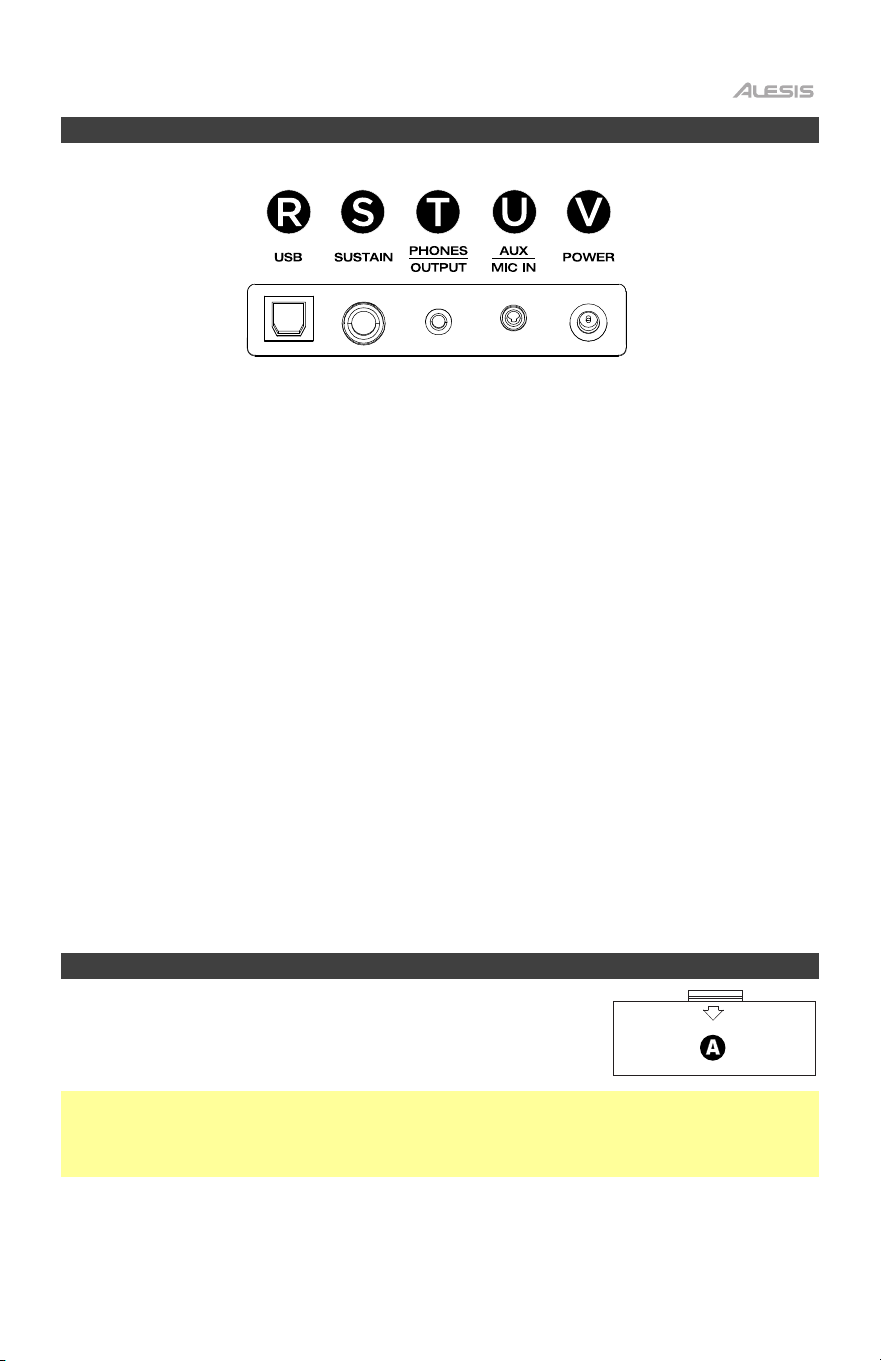
(2.2) Rear Panel
R. USB Port
Use a standard USB cable to connect this port to a computer to send and receive
MIDI data or apply firmware updates.
S. Sustain Pedal Input
Connect the included 1/4” (6.35 mm) sustain pedal here.
T. Phones / Output
Connect the included headphones or another output device (such as an amplifier
or PA system) to this 1/8” stereo output.
U. Aux / Mic In
Connect an auxiliary device (such as a smartphone or MP3 player) or microphone
to this 1/8” (3.5 mm) stereo input.
V. Power
Use the included power adapter to connect this input to a power outlet. Use the
Power button on the top panel to turn Recital Play on or off.
(2.3) Bottom Panel
A. Battery Compartment
Install 6 “AA” batteries (not included) here to power
Recital Play if you are not using the power adapter.
Tip: To help save battery life, use the Eco Mode feature (auto-power off) by holding
the Function button and then press the Eco (B6) key. Continue to hold the Function
button and press Eco to toggle between off (“OFF”), 30 minutes (“030”) and 60
minutes (“060”).
11
(3.0) Basic Operation
(3.1) Voices
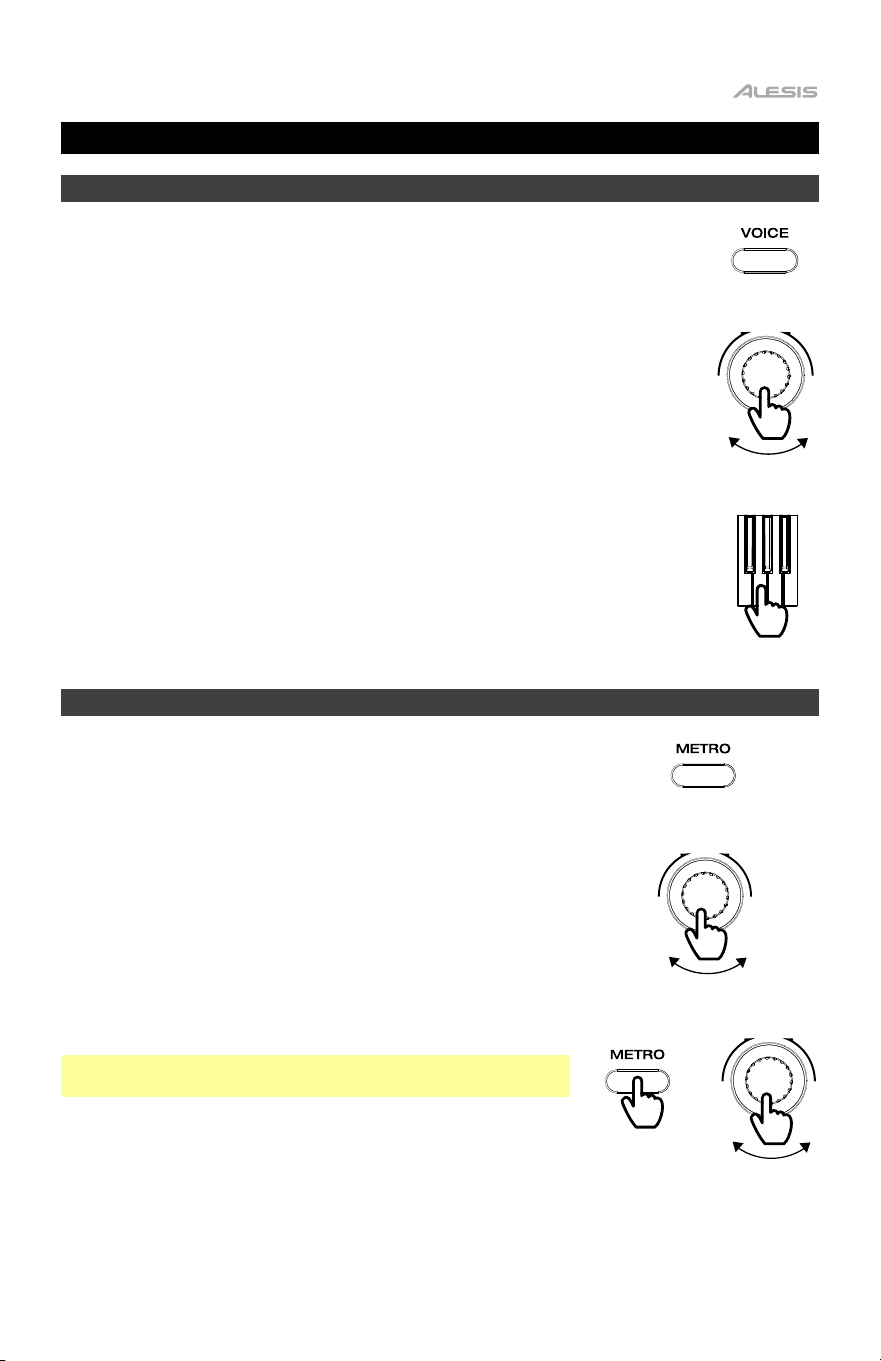
To select and play a voice:
1. Press the Voice button.
2. Turn the Encoder to select a voice.
3. Play the keys to hear the voice.
(3.2) Metronome
The metronome feature provides a steady beat to aid in
practicing at a consistent tempo.
To use the metronome:
1. Press the Metronome button to turn the metronome
on. The time signature (beat) will be shown on the
display screen.
2. Turn the Encoder to select the time signature to be
played (0, 2-9).
3. Press and hold the Metronome button and turn the
Encoder to adjust the volume level of the
metronome.
Note: The metronome cannot be used during Rhythm,
Demo Song, or User Song playback.
PRESS
TURN
PLAY
PRESS
HOLD
+
TURN
TURN
12
(3.3) Split Mode
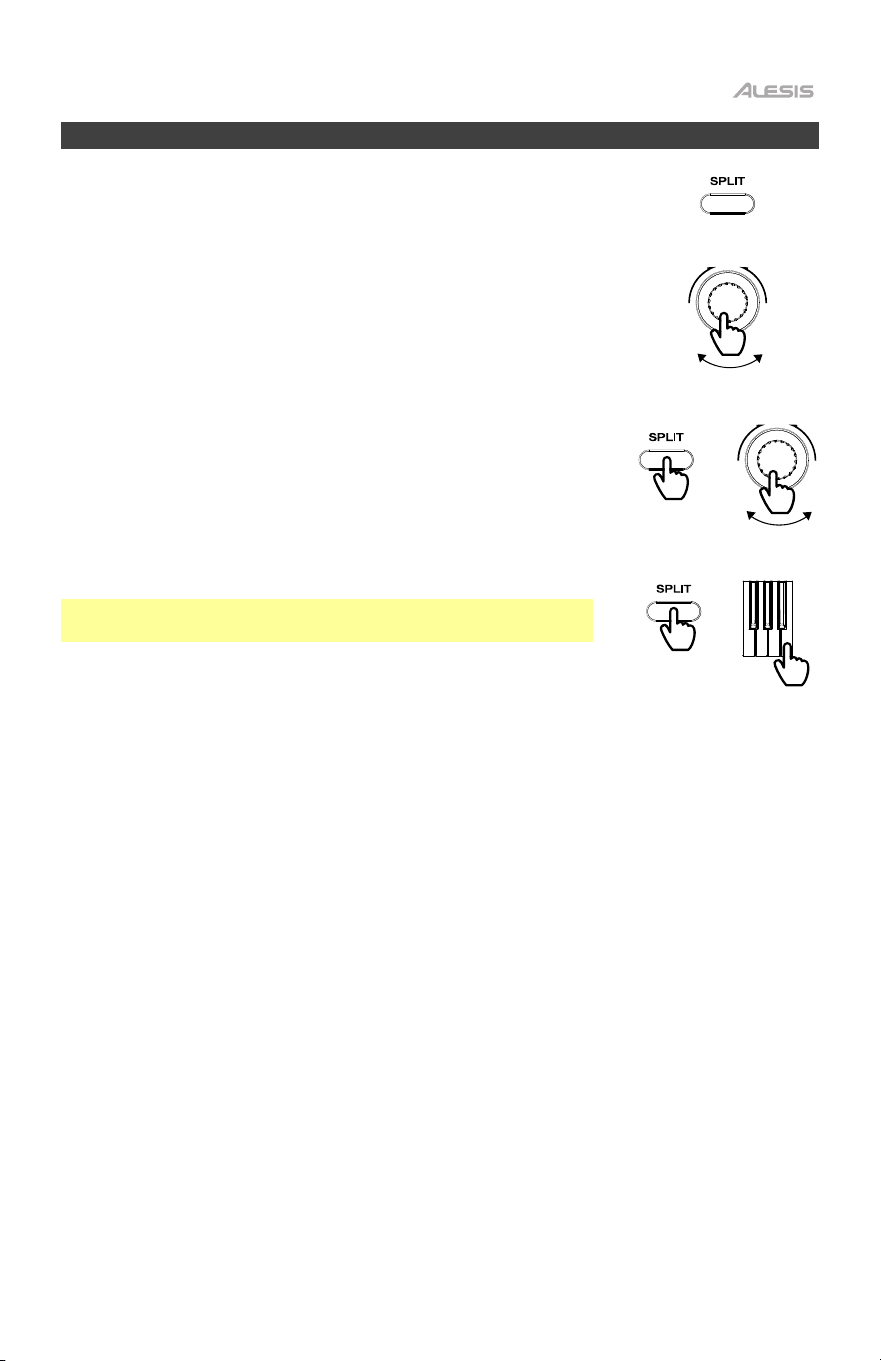
Split Mode allows you to split the 88 keys into two zones
so that you can have two different voices for each of your
hands. For example, you may want the Piano voice for your
right hand, and the Bass voice for your left hand. When
Split Mode is enabled, the left-hand voice is referred to as
the Split voice.
To split the keyboard into 2 zones:
1. Press the Split button.
2. Turn the Encoder to select the split voice (L1) to be
played.
3. Press and hold the Split button and then turn the
Encoder to adjust the volume level of the split voice.
4. Press and hold the Split button and then press a key on
the keybed to set the split point.
To enable/disable Split Mode, press the Split button.
Note: Split Mode cannot be enabled at the same time as
Layer Mode or Lesson Mode.
HOLD
+
HOLD
+
PRESS
TURN
TURN
PLAY
13
(3.4) Layer Mode
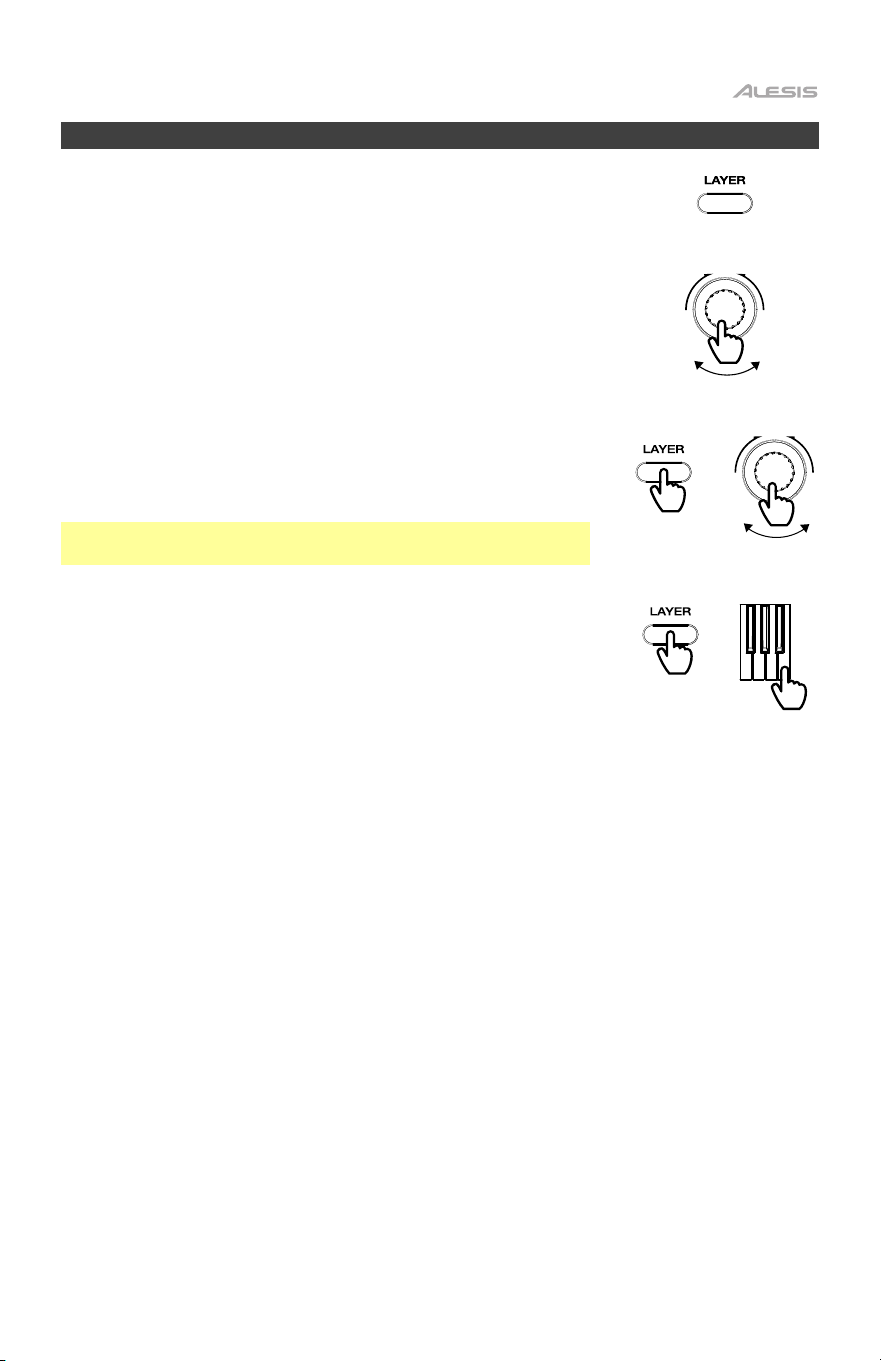
Layer Mode allows for two different voices to be layered
together for a more full and rich sound.
To enable/disable Layer Mode, press the Layer button.
To layer two voices:
1. Press the Layer button.
2. Turn the Encoder to select the layer voice (R2) to be
played.
3. Press and hold the Layer button and then turn the
Encoder to adjust the volume level of the layer voice.
4. Press and hold the Layer button and then press a key
on the keybed to set the split point.
Note: Layer Mode cannot be enabled at the same time as
Split Mode or Lesson Mode.
PRESS
HOLD
+
HOLD
+
TURN
TURN
PLAY
14
(3.5) Rhythm Mode
Recital Play features 160 accompaniment rhythms that you can play along with and
create your own songs.
To enable Rhythm Mode and select an accompaniment rhythm, press Rhythm and
then turn the Encoder.
To start or stop an accompaniment rhythm, press the Start/Stop button while in
Rhythm Mode.
To have the rhythm play a short fill, press the Fill button on the top panel.
To start the rhythm with an intro or end a currently playing rhythm ending, press
and hold the Function button and then press the key labeled “Intro/End”.
To start the rhythm with a fade-in or end a currently playing rhythm with a fade-
out, press and hold the Function button and then press the key labeled “Fade”.
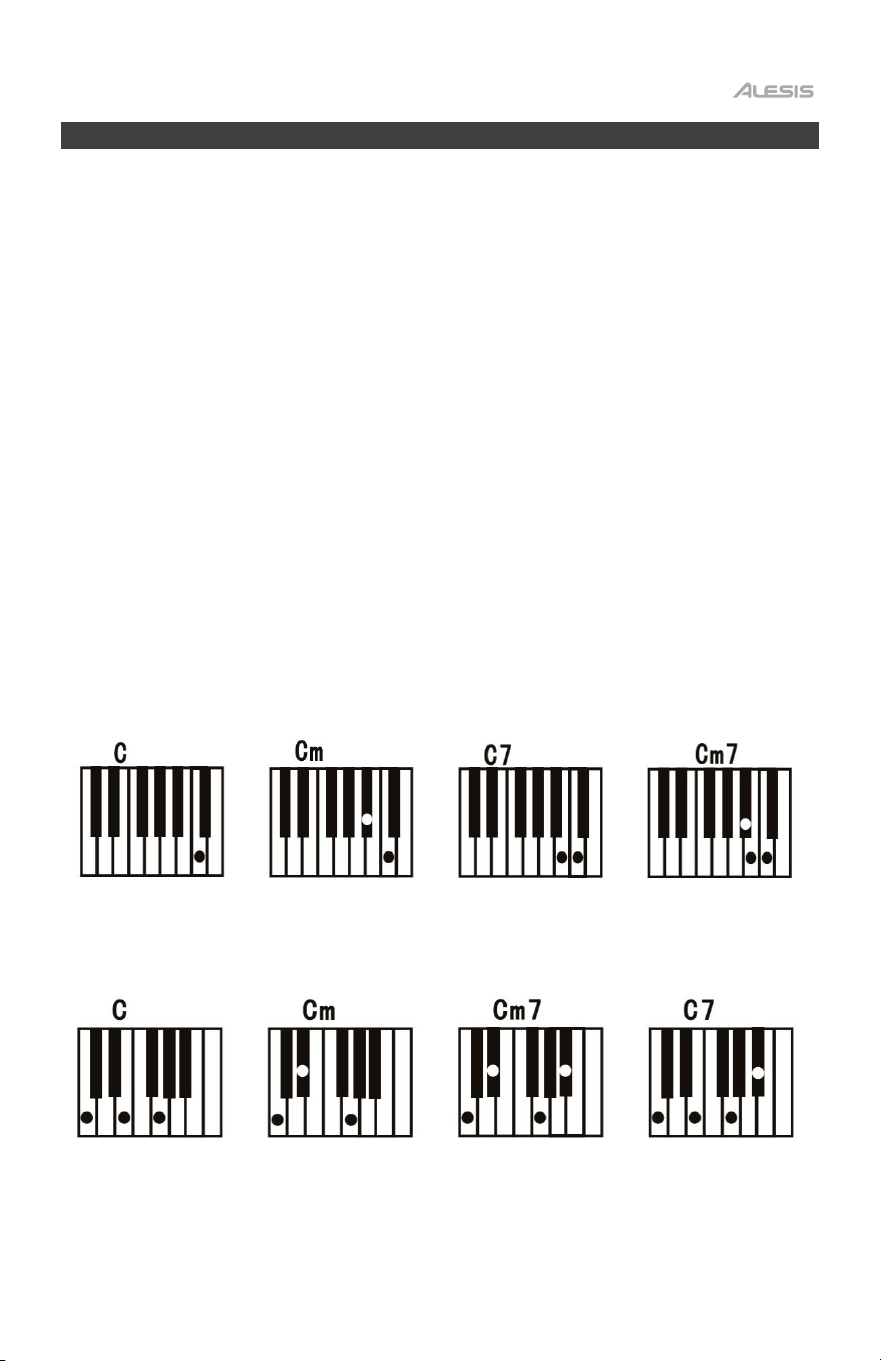
The Rhythm Mode feature also features auto-chord accompaniment that can be
triggered by playing keys in the lower range (the second lowest F# key or lower) of
the keyboard. There are two different settings for this feature, Single Chord and
Fingered Chord.
Single Chord:
When using the Single Chord feature you can use the abbreviated chord shapes
shown below starting on any note to play major, minor, seventh, or minor seventh
chords.
Fingered Chord:
When using the Single Chord feature you can use the full chord shapes shown below
starting on any note to play major, minor, seventh, or minor seventh chords.
15
To add or remove auto-chord accompaniment for the rhythm, press and hold the
Function button and then press the keys labeled “Single”, “Fingered”, or “Off”
accordingly.
To configure whether the rhythm’s playback should start when a key is played in
the chord range, press and hold the Function button and then press the key labeled
“Sync”.
(3.6) Lesson Mode
The Lesson Mode feature divides the 88 keys into two zones with the same pitch
and voice. This enables both the student and teacher to easily watch and/or play
together during instruction without having to move away from the piano and take
turns or having to reach over each other to play the same pitch.
To enable or disable Lesson Mode, press and hold the Function button and press
the key labeled “Lesson On/Off”.
To change the split point in Lesson Mode, press and hold the Split button, press a
key between C2 and C5, and then release the Split button. The default split point is
E3.
To change the octave of both zones in Lesson Mode, press and hold the Function
button and press the keys marked “Lesson Oct +” or “Lesson Oct -” to adjust the
octave value, or press both keys at the same time to restore the default octave
value.
Note: In Lesson Mode, the Layer and Split Modes will be automatically disabled.
(3.7) Demo Song Mode
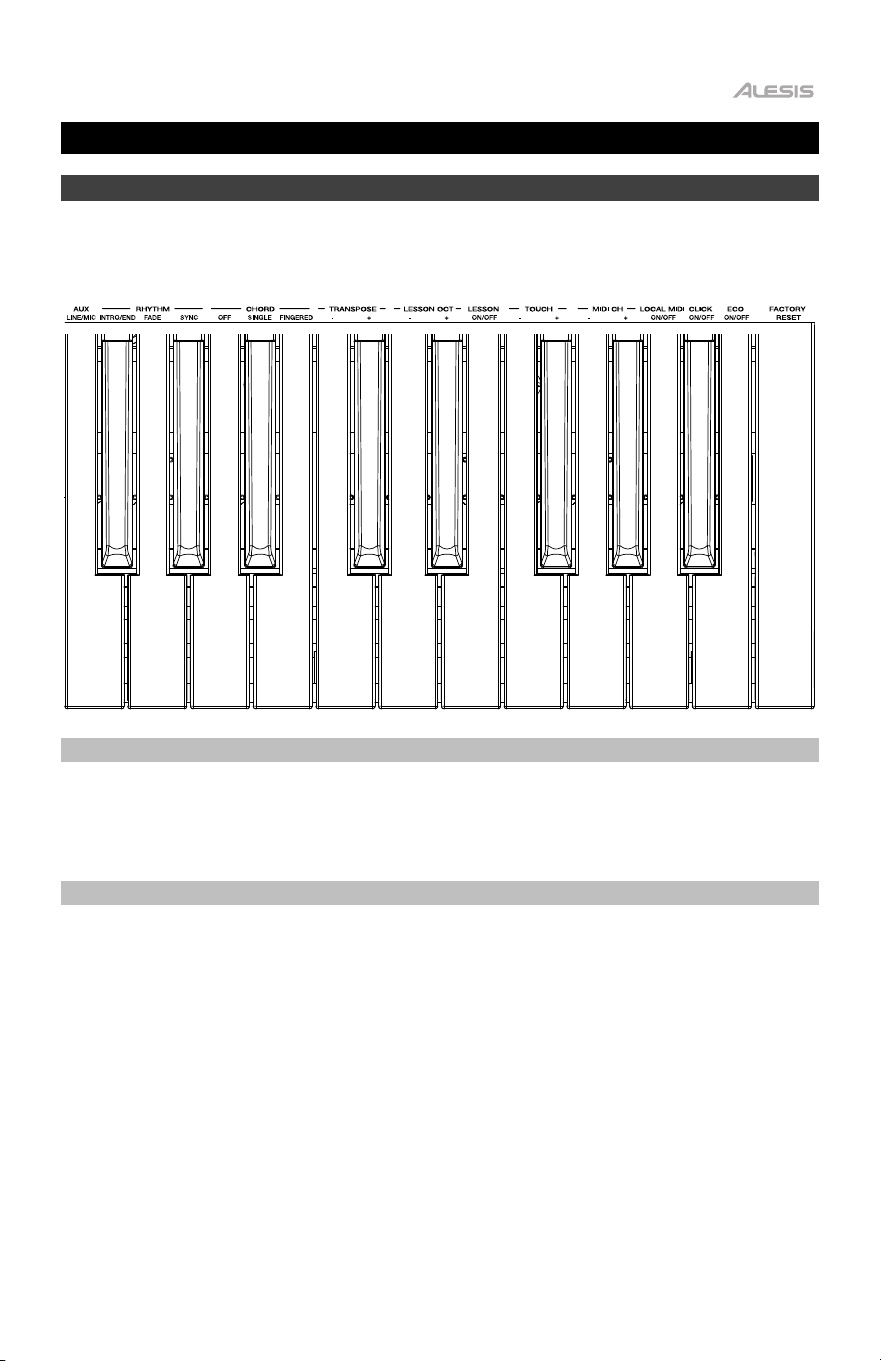
To play a demo song:
1. Press the Song button.
2. Turn the Encoder to select a demo song for playback.
3. Press and hold the Song button and then turn the
Encoder to adjust the volume level of the demo song.
PRESS
HOLD
+
TURN
TURN
16
(4.0) Advanced Operation
(4.1) Keybed Functions
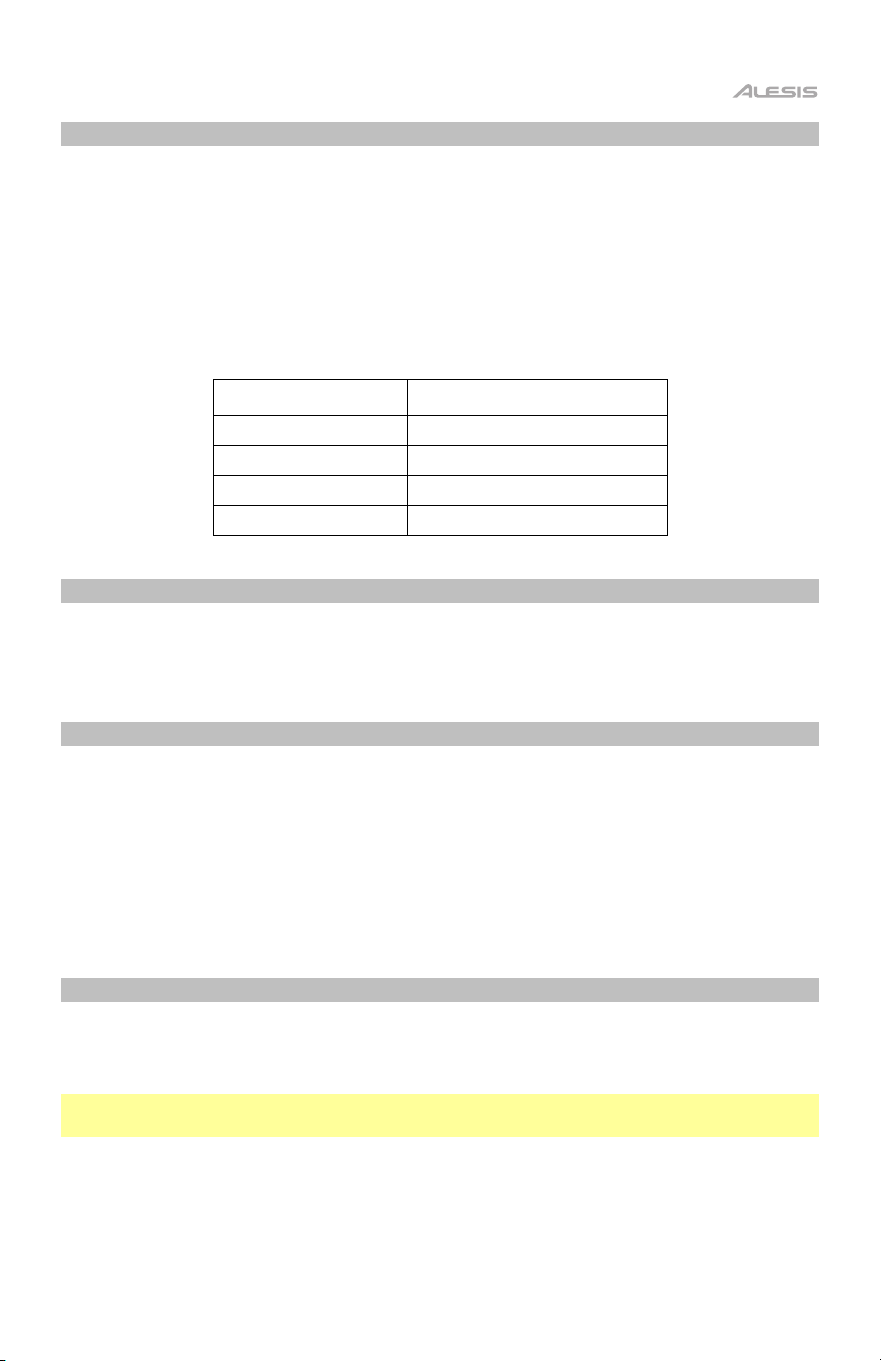
You can change more advanced settings by pressing and holding the Function
button and then press a key that correspond to the graphic below to change your
desired setting.
(4.1.1) Aux In
To change the input level of the Aux/Microphone Input, press and hold Function
and then press the key labeled “Aux Line/Mic” to cycle between “LNE” line-level
(phone, tablet, etc.) or “PHN” for microphone level. The default setting is “LNE”.
(4.1.2) Transpose
This function allows the overall pitch of the piano to be transposed up or down by a
maximum of one octave in semitone increments.
To lower/raise the keybed transposition by a semi-tone (-12 to 0 to +12), press
and hold the Function button and then press the “-” or “+” keys labeled
“Transpose,” respectively. To increase or decrease the by multiple steps, press and
hold the Function button and then press the “-” or “+” Transpose keys repeatedly.
17
(4.1.3) Touch
The Recital Play digital piano is equipped with touch response to control the level of
the voice with your playing strength—just as on an acoustic piano. That means the
harder you play the keys, the greater volume comes from the speakers. Turning this
function off results in a fixed touch response no matter how hard or how soft you
play the keys. There are 3 types of touch settings (Off, 1–3).
To change the touch response for the keybed, press and hold the Function button
and then press the “-” or “+” keys labeled “Touch” accordingly.
Parameters Description
OFF Fixed
1 Soft
2 Medium
3 Hard
(4.1.4) MIDI Channel
To change the MIDI channel (1-16) of the keybed for the USB-MIDI output, press
and hold the Function button and then press the “-” or “+” keys labeled “MIDI
Channel,” repeatedly if needed.
(4.1.5) Local MIDI
To turn Local MIDI on/off, press and hold Function, and then press the key labeled
“Local MIDI”. The display screen will display “ON” or “OFF” accordingly.
When local MIDI is on (default), sound will be generated and heard through the
speaker, and MIDI messages will be sent to the USB-MIDI output when keys are
played.
When local MIDI is off, sound will not be generated, however MIDI messages will still
be sent to the USB-MIDI output when keys are played.
(4.1.6) Click
To enable/disable the click sound that plays when the Function key settings are
changed, press and hold the Function button and then press the key labeled “Click”.
The display screen will display “ON” or “OFF” accordingly.
Note: The “click” sound will not play when pressing the Rhythm Intro/End or Fade
keys, regardless of this setting.

18
(4.1.7) Eco Mode
To adjust the Eco Mode feature (auto-power off), press and hold the Function
button and then press the key labeled “Eco” repeatedly to toggle between off
(“OFF”), 30 minutes (“030”) and 60 minutes (“060”).
(4.1.8) Factory Reset
To return the keyboard to factory default settings, press and hold the Function
button and then press the key labeled “Factory Reset”. When the keyboard is being
reset, the display screen will flash “888” five times to show that the reset action has
happened.
19
(5.0) Troubleshooting
Problem Possible Cause and Solution
The speakers
produce a pop
sound whenever the
power is turned
on/off.
This is normal and is no cause for alarm.
The speakers do not
produce sound
when the keys are
played.
Check if the master volume is set too low or if headphones
are plugged into the Phones / Output. The speakers will
be muted if there are headphones plugged into the Phones
/ Output.
The speakers are
producing noise or
interference.
Using a mobile phone in close proximity to the Recital Play
digital piano may produce interference. To prevent this,
turn off the mobile phone or keep it away from the piano.
Certain notes
produce the wrong
pitch.
Make sure that the transpose value is set to 0. If that does
not work, then hold the Function button and press the
Factory Reset key to restore the factory default settings.
20
(6.0) Appendix
(6.1) Voices
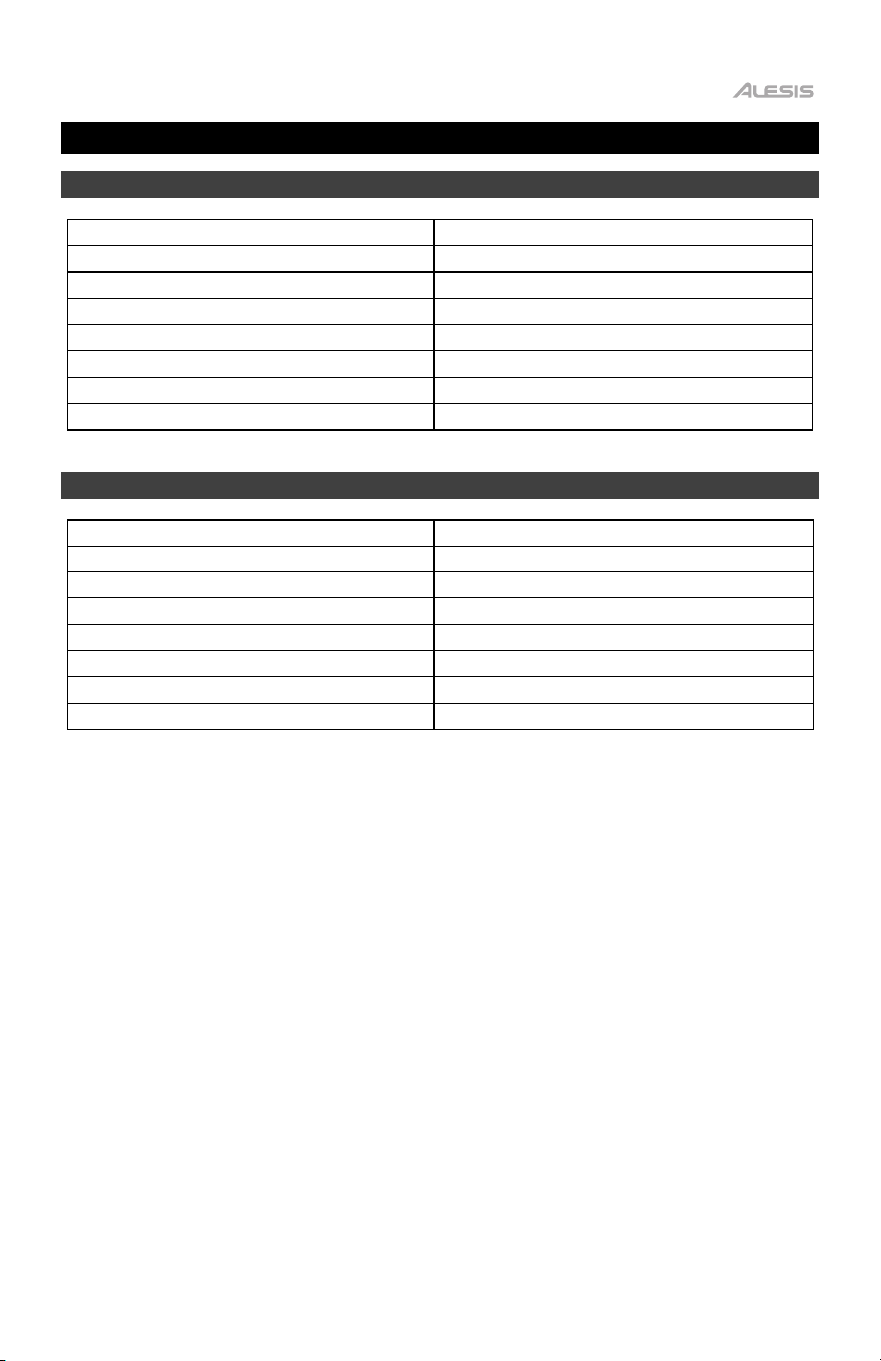
000–039 Piano
248–261 Pipe
040–069 Ch. Percussion 262–341 Synth Lead
070–095 Organ 342–400 Synth Pad
096–122 Guitar 401–441 Synth SFX
123–148 Bass 442–457 World
149–205 Strings 458–468 Percussive
206–230 Brass 469–477 SFX
231–247 Reed 478–480 Drums
(6.2) Rhythms
001–009 Latin 1
081–089 Latin 2
010–017 Dance 1
090–097 Dance 2
018–027 Pop 1 098–107 Pop 2
028–037 Rock 1 108–117 Rock 2
038–045 Soul 1 118–125 Soul 2
046–053 Jazz 1 126–133 Jazz 2
054–072 Traditional 1 134–152 Traditional 2
074–080 Pianist 1 153–160 Pianist 2
21
(6.3) Technical Specifications
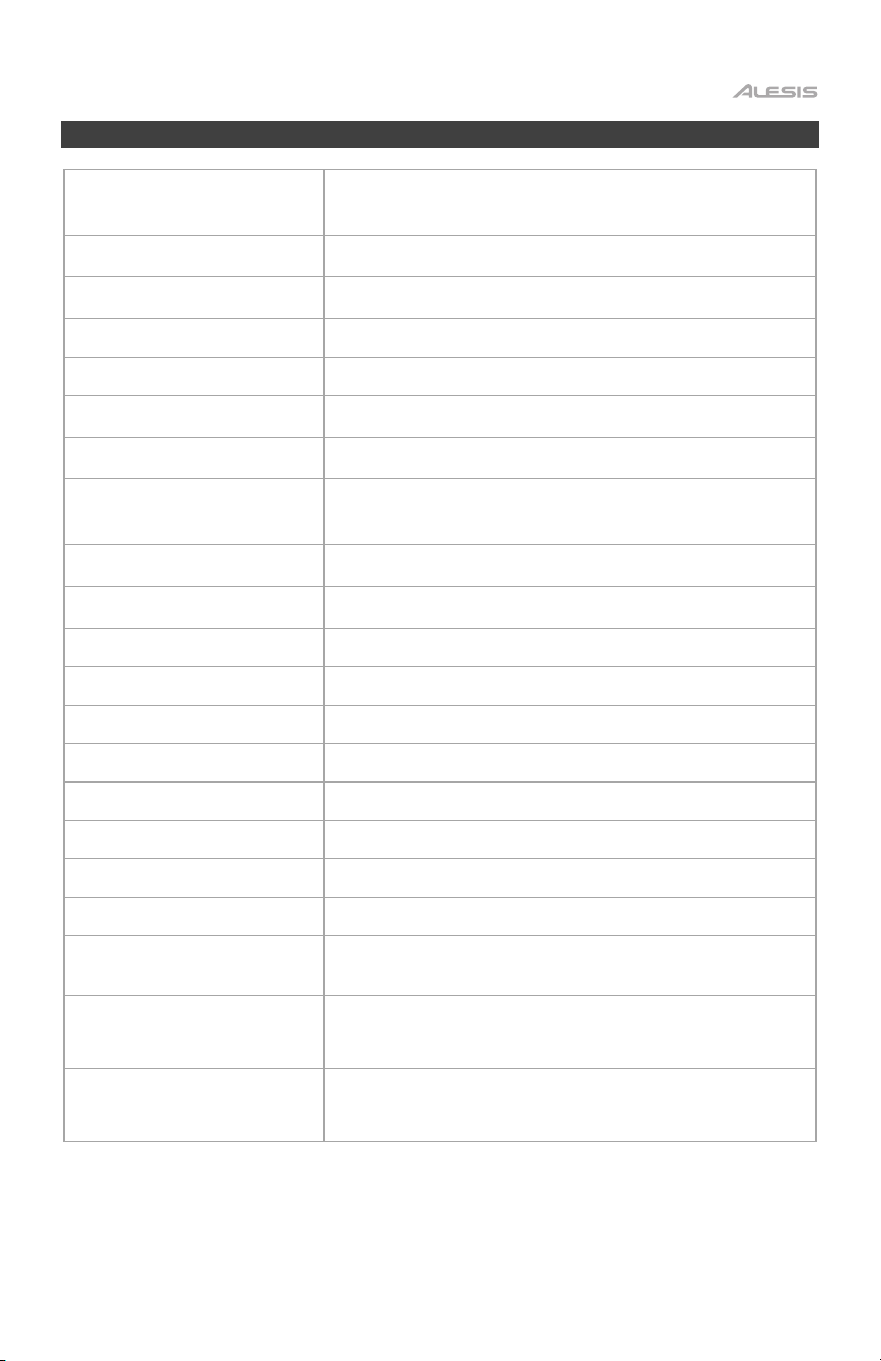
Key Type 88 full-size non-weighted keys with adjustable touch
response
Display LED
Max Polyphony 64
Voices (Sounds) 480
Rhythms 160
Demos 140
User Song 1
Keyboard Modes Record Mode, Demo Song Mode, Split Mode, Layer
Mode, Rhythm Mode, Lesson Mode, Eco Mode
Transpose Feature -12 to +12
Effects Reverb
Metronome Tempo Range 5–280 BPM
Speakers 5W (2 x 2.5W)
Phones / Aux Output 1/8” (3.5 mm) stereo output
Aux / Mic In 1/8” (3.5 mm) stereo input
Sustain Input 1/4” (6.35 mm) input
USB-MIDI Port USB-B port
Power Input 12V DC, 500 mA, center positive (adaptor included)
Battery Power (optional) 6 AA batteries (not included)
Included Accessories Stand, Carry Bag, Music Rest, Sustain Pedal,
Headphones, Power Adaptor
Dimensions
(width x depth x height)
49.92" x 10.08" x 2.88"
126.8 x 25.6 x 7.1 cm
Weight 11.68 lbs.
5.3 kg
Specifications are subject to change without notice.

22
(6.4) Trademarks & Licenses
Alesis is a trademark of inMusic Brands, Inc., registered in the U.S. and other countries. All other
product names, company names, trademarks, or trade names are those of their respective
owners.