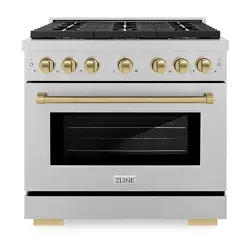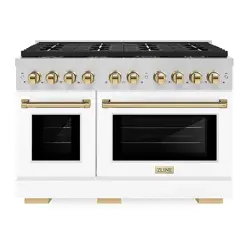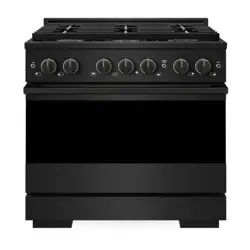

User Manual
zlinekitchen.com
DUAL FUEL RANGES
CDR, MDR, PCDR, PMDR,
PSDR, & SDR MODELS

ZLINE Kitchen and Bath provides Attainable Luxury, where the kitchen and bath of your dreams
is never out of reach. Through our unique designs and unparalleled quality, we’re dedicated to
providing you an elevated experience in the heart of your home. With an endless selection of
features and finishes, our inspiration is your reality.
ZLINE is fueled by a passion for innovation—a relentless pursuit of bringing the
highest end luxury designs and professional features into everyone’s homes.
Because we continually strive to improve our products, we may change
specifications and designs without prior notice.
Scan the QR code to view the most up-to-date version of the Installation
Manual and User Manual.
WARNING: This product can expose you to chemicals including nickel, which is known to the
State of California to cause cancer. For more information, go to www.P65Warnings.ca.gov.

IMPORTANT SAFETY INSTRUCTIONS . . . . . . . . . . . . . . . . . . . 1
Gas Safety . . . . . . . . . . . . . . . . . . . . . . . . . . . . . . . . . . . . . 1
Electric and Gas Safety . . . . . . . . . . . . . . . . . . . . . . . . . . . . . . 6
Cooktop Safety . . . . . . . . . . . . . . . . . . . . . . . . . . . . . . . . . . 7
Tipping Safety . . . . . . . . . . . . . . . . . . . . . . . . . . . . . . . . . . . 9
Cooking Safety . . . . . . . . . . . . . . . . . . . . . . . . . . . . . . . . . 11
OPERATION . . . . . . . . . . . . . . . . . . . . . . . . . . . . . . . . . . . . . . . 14
Surface Burner Operation . . . . . . . . . . . . . . . . . . . . . . . . . . . 15
Oven Operation . . . . . . . . . . . . . . . . . . . . . . . . . . . . . . . . . 20
CARE AND MAINTENANCE . . . . . . . . . . . . . . . . . . . . . . . . . . 25
Replacing the Oven Lights . . . . . . . . . . . . . . . . . . . . . . . . . . . 25
Cleaning Your Range . . . . . . . . . . . . . . . . . . . . . . . . . . . . . . 26
TROUBLESHOOTING . . . . . . . . . . . . . . . . . . . . . . . . . . . . . . . . 29
WARRANTY . . . . . . . . . . . . . . . . . . . . . . . . . . . . . . . . . . . . . . . . 32
TABLE OF CONTENTS

1
GAS SAFETY
WARNING
WARNING: If the information in these
instructions is not followed exactly, a fire
or explosion may result causing property
damage, personal injury or death.
• Do not store or use gasoline or other flammable vapors and liquids in the vicinity
of this or any other appliance.
• WHAT TO DO IF YOU SMELL GAS
• Do not try to light any appliance.
• Do not touch any electrical switch.
• Do not use any phone in your building.
• Immediately call your gas supplier from a neighbor’s phone. Follow the gas
supplier’s instructions.
• If you cannot reach your gas supplier, call the fire department.
• Installation and service must be performed by a qualified installer, service agency
or the gas supplier.
IMPORTANT SAFETY INSTRUCTIONS
Gas Safety

2
Gas Safety
IMPORTANT SAFETY INSTRUCTIONS
AVERTISSEMENT
AVERTISSEMENT : Le non-respect à
la lettre de ces instructions peut causer
un incendie ou une explosion, qui
pourrait entraîner des dommages
matériels, desblessures ou la mort
• Ne pas entreposer ou utiliser d’essence ou tout autre liquide ou gaz
inflammable à proximité de cet appareil ou de tout autre appareil.
• EN PRÉSENCE D’UNE ODEUR DE GAZ :
• Ne tenter d’allumer aucun appareil ;
• Ne toucher à aucun commutateur électrique ;
• N’utiliser aucun téléphone dans l’immeuble ;
• Appeler immédiatement le fournisseur de gaz à partir d’un téléphone situé
à l’extérieur de l’immeuble ; Suivre les instructions du fournisseur de gaz ;
• S’il est impossible de joindre le fournisseur de gaz, appeler le service
des incendies.
• L’installation et la réparation doivent être effectuées par un installateur
ou une agence de réparation ayant les qualifications requises ou par le
fournisseur de gaz.
3
IMPORTANT SAFETY INSTRUCTIONS
WARNING
WARNING:
Never Operate the Top Surface Cooking Section of this Appliance Unattended.
• Failure to follow this warning statement could result in fire, explosion, or burn
hazard that could cause property damage, personal injury, or death.
• If a fire should occur, keep away from the appliance and immediately call
your fire department. DO NOT ATTEMPT TO EXTINGUISH AN OIL/GREASE
FIRE WITH WATER.
ATTENTION
ATTENTION :
Ne faites jamais fonctionner la surface de cuisson, sur le dessus de cet appareil, sans
surveillance.
• Le non-respect de cette mise en garde pourrait entraîner un incendie, une
explosion ou un risque de brûlure et ainsi causer des dommages matériels, des
blessures ou la mort.
• Si l’appareil prend feu, tenez-vous à l’écart et appelez immédiatement votre
service des incendies. NE TENTEZ JAMAIS D’ÉTEINDRE UN FEU DE GRAISSE
OU D’HUILE EN L’ASPERGEANT D’EAU.
Gas Safety
4
Gas Safety
WARNING
WARNING: Never use this appliance as a space heater to heat or
warm the room. Doing so may result in carbon monoxide poisoning
and overheating. Never use the top of the range or the interior of the
oven as storage areas, as items could melt or ignite, increasing the risk
of fire, damage, and/or serious injury.
AVERTISSEMENT
AVERTISSEMENT: Ne JAMAIS utiliser cet appareil électroménager en
guise de chaufferette. Le fait de chauffer une pièce ainsi peut entraîner un
empoisonnement au monoxyde de carbone ou une surchauffe du four.
WARNING
WARNING: NEVER cover any slots, holes or passages in the oven
bottom or cover an entire rack with materials such as aluminum foil.
Doing so blocks airflow through the oven and may cause carbon
monoxide poisoning. Aluminum foil linings may also trap heat, causing
a fire hazard.
AVERTISSEMENT
AVERTISSEMENT: Ne JAMAIS recouvrir une fente, un trou ou une
conduite dans le fond du four ni recouvrir entièrement une grille d’un
matériau comme du papier d’aluminium. Un tel revêtement bloque la
circulation d’air dans le four, ce qui peut entraîner un empoisonnement
au monoxyde de carbone. De plus, le papier d’aluminium peut
emprisonner la chaleur, ce qui risque de provoquer un incendie.
IMPORTANT SAFETY INSTRUCTIONS

5
IMPORTANT SAFETY INSTRUCTIONS
• The manufacturer will not be responsible for any damage to property or to persons
caused by incorrect installation, improper use of the appliance, or failure to heed the
warnings listed.
• This appliance has been designed for non-commercial, domestic use only.
• The plug should always be accessible.
• This manual does not cover all possible conditions that may occur during installation
and/or operation. Always contact a qualified service technician or the manufacturer
about problems you may not understand.
WARNING
Installation and service on this product must only be conducted by a qualified
installer, service agency, or gas supplier.
IMPORTANT SAFETY ALERTS
DANGER
DANGER: When you see this symbol in the instructions, it indicates a hazardous
situation which, if not avoided, could result in death or serious injury.
WARNING
WARNING: When you see this symbol in the instructions, it indicates a hazardous
situation which, if not avoided, could result in minor or moderate injury.
• Please ensure that the altitude of your home is conducive for the use of gas cooking
products. If the product is installed at higher altitudes above sea level, you may experience
issues with gas pressure that will affect product performance. Please consult your local
gas company for recommendations before purchasing or installing.
Gas Safety

6
Electric & Gas Safety
IMPORTANT SAFETY INSTRUCTIONS
ELECTRIC AND GAS SAFETY
WARNING
• Be sure your appliance is properly installed and grounded by a qualified technician in
accordance with all governing codes and ordinances and with the National Fuel Gas
Code ANSI Z223.1—latest edition and the National Electrical Code ANSI/NFPA No.
70—latest edition in United States, or CAN/CGA B149.1, B149.2, and the Canadian
Electrical Code, Part 1, in Canada. Check your local building codes, as they may vary
from the general rules outlined in this manual.
• Gas leaks cannot always be detected by smell. As such, gas suppliers recommend that
you use a gas detector approved by UL or CSA. For more information, contact your
gas supplier.
• If a gas leak is detected, refer to the “WHAT TO DO IF YOU SMELL GAS”
alert on page 1.
• Know how to shut off gas supply at the meter and disconnect the electrical power to the
appliance at the circuit breaker or fuse box in case of an emergency. Installers should
also show appliance owners the location of the appliance gas shut-off valve and how
to shut it off if necessary.
• Do not repair or replace any part of the appliance unless specifically recommended in
this manual. All other servicing should be done only by a qualified technician. This may
reduce the risk of personal injury and damage to the appliance.
DANGER
Always disconnect gas and power when servicing this product, especially for
larger-scale repairs impacting important appliance functionality; failure to do
so increases the risk of fire, explosion, injury, or death.

7
IMPORTANT SAFETY INSTRUCTIONS
WARNING
STATE OF CALIFORNIA PROPOSITION 65 WARNINGS
• The California Safe Drinking Water and Toxic Enforcement Act requires the Governor of
California to publish a list of substances known to the state to cause birth defects or other
reproductive harm and requires businesses to warn customers of potential exposure to
such substances.
• Gas appliances can cause minor exposure to at least four main substances — benzene,
carbon monoxide, formaldehyde, and soot — caused primarily by the incomplete
combustion of natural gas or liquid propane fuels.
• Properly adjusted burners, indicated by a bluish rather than yellow flame, will minimize
incomplete combustion. Exposure to these substances can also be minimized by venting
with an open window or by using a ventilation fan or range hood.
COOKTOP SAFETY
DANGER
• Areas near surface burners or throughout the appliance may become hot enough to
cause burns. During and after use, do not touch, or let clothing or other flammable
materials touch, these areas until they have had sufficient time to cool.
• If a grease fire occurs, never touch a flaming pan. Immediately turn the controls off.
Smother a flaming pan on a surface burner by covering the pan completely with a well-
fitting lid, cookie sheet or flat tray.
• A grease fire can also be put out by covering it with baking soda or, if available, by using
a multi-purpose dry chemical or foam-type fire extinguisher. Use an extinguisher ONLY if:
• You have a Class A, B, or C extinguisher and you know how to operate it.
• The fire is small and contained in the area where it is started.
• The fire department is being/has been called.
• You can fight the fire with your back to an exit.
• Flames inside the oven can be smothered completely by closing the oven door and
turning controls to OFF, or by using a fire extinguisher.
• When heating fat or grease, watch it closely. Fat or grease may catch fire if allowed to
become too hot.
Cooktop Safety

8
Cooktop Safety
IMPORTANT SAFETY INSTRUCTIONS
• Use only dry potholders and oven mitts. Moist or damp potholders on hot surfaces may
result in burns from steam. Do not let potholders touch hot heating elements, flames, or
burners. Do not use a towel or other bulky cloth instead of a potholder.
• Know which knob controls which surface burner. Visually check that the burner has lit.
Then adjust the flame so it does not extend beyond the edge of the pot/pan.
• Pot/pan handles should be turned inward and not extend over surface burners. To
reduce the risk of burns, ignition of flammable materials, and spillage due to unintentional
contact with the pot/pan, the handle of the utensil should be positioned so that it is
turned inward, and does not extend over adjacent surface burners.
• Always use a proper flame size. Adjust the flame size so it does not extend beyond
the edge of the pot/pan. The use of undersized pots/pans will expose a portion of the
burner flame to direct contact and may result in ignition of clothing. Adjusting the flame
size to appropriate levels will also improve efficiency.
• Always use proper pot/pan and cookware sizes. This appliance is equipped with
surface units of different sizes. Select cookware with flat bottoms large enough to cover
the surface unit.
• Only certain types of glass, ceramic, earthenware, or other glazed cookware are
suitable for use without breaking due to sudden changes in temperature. Check the
manufacturer’s recommendations for appliance use.
DANGER
Never leave burners unattended. Boilovers cause smoke and greasy spillovers
that may ignite, or a pan that has boiled dry may melt. DO NOT ATTEMPT TO
EXTINGUISH AN OIL/GREASE FIRE WITH WATER.
• Do not use decorative surface burner covers.
• If a burner is accidentally turned on, the cover may become extremely hot or melt.
Because the flame is concealed, it may not be apparent that the burner is operating.
Contact with a hot cover may result in burns.
• Decorative burner covers may also restrict airflow to the burner, causing improper
combustion and overheating, which can damage the appliance or burner components.
9
IMPORTANT SAFETY INSTRUCTIONS
TIPPING SAFETY
DANGER
— 7 —
Important Safety Information
DANGER
equipped with surface units of different sizes. Select
surface unit. The use of undersized utensils will expose a
portion of the surface heating unit to direct contact and
may result in ignition of clothing. Proper relationship of
use a stove top grill on a sealed gas burner, it will cause
incomplete combustion and can result in exposure
to carbon monoxide levels above allowable current
standards. This can be hazardous to your health.
before operating it. These materials can ignite, causing
TIPPING DANGER
SECURED WITH A PROPERLY INSTALLED ANTI-TIP DEVICE.
THE DEATH OF A CHILD OR ADULT.
or wall then slide range back so rear range foot is under anti-tip bracket.
the wall. If it tips forward more than 4 inches, the anti-tip device has not been installed correctly.
by the anti-tip bracket.
much force or weight is applied to the open door.
Do not operate the range without the anti-tip bracket in place.
Before removing label, ensure anti-tip bracket is properly installed.
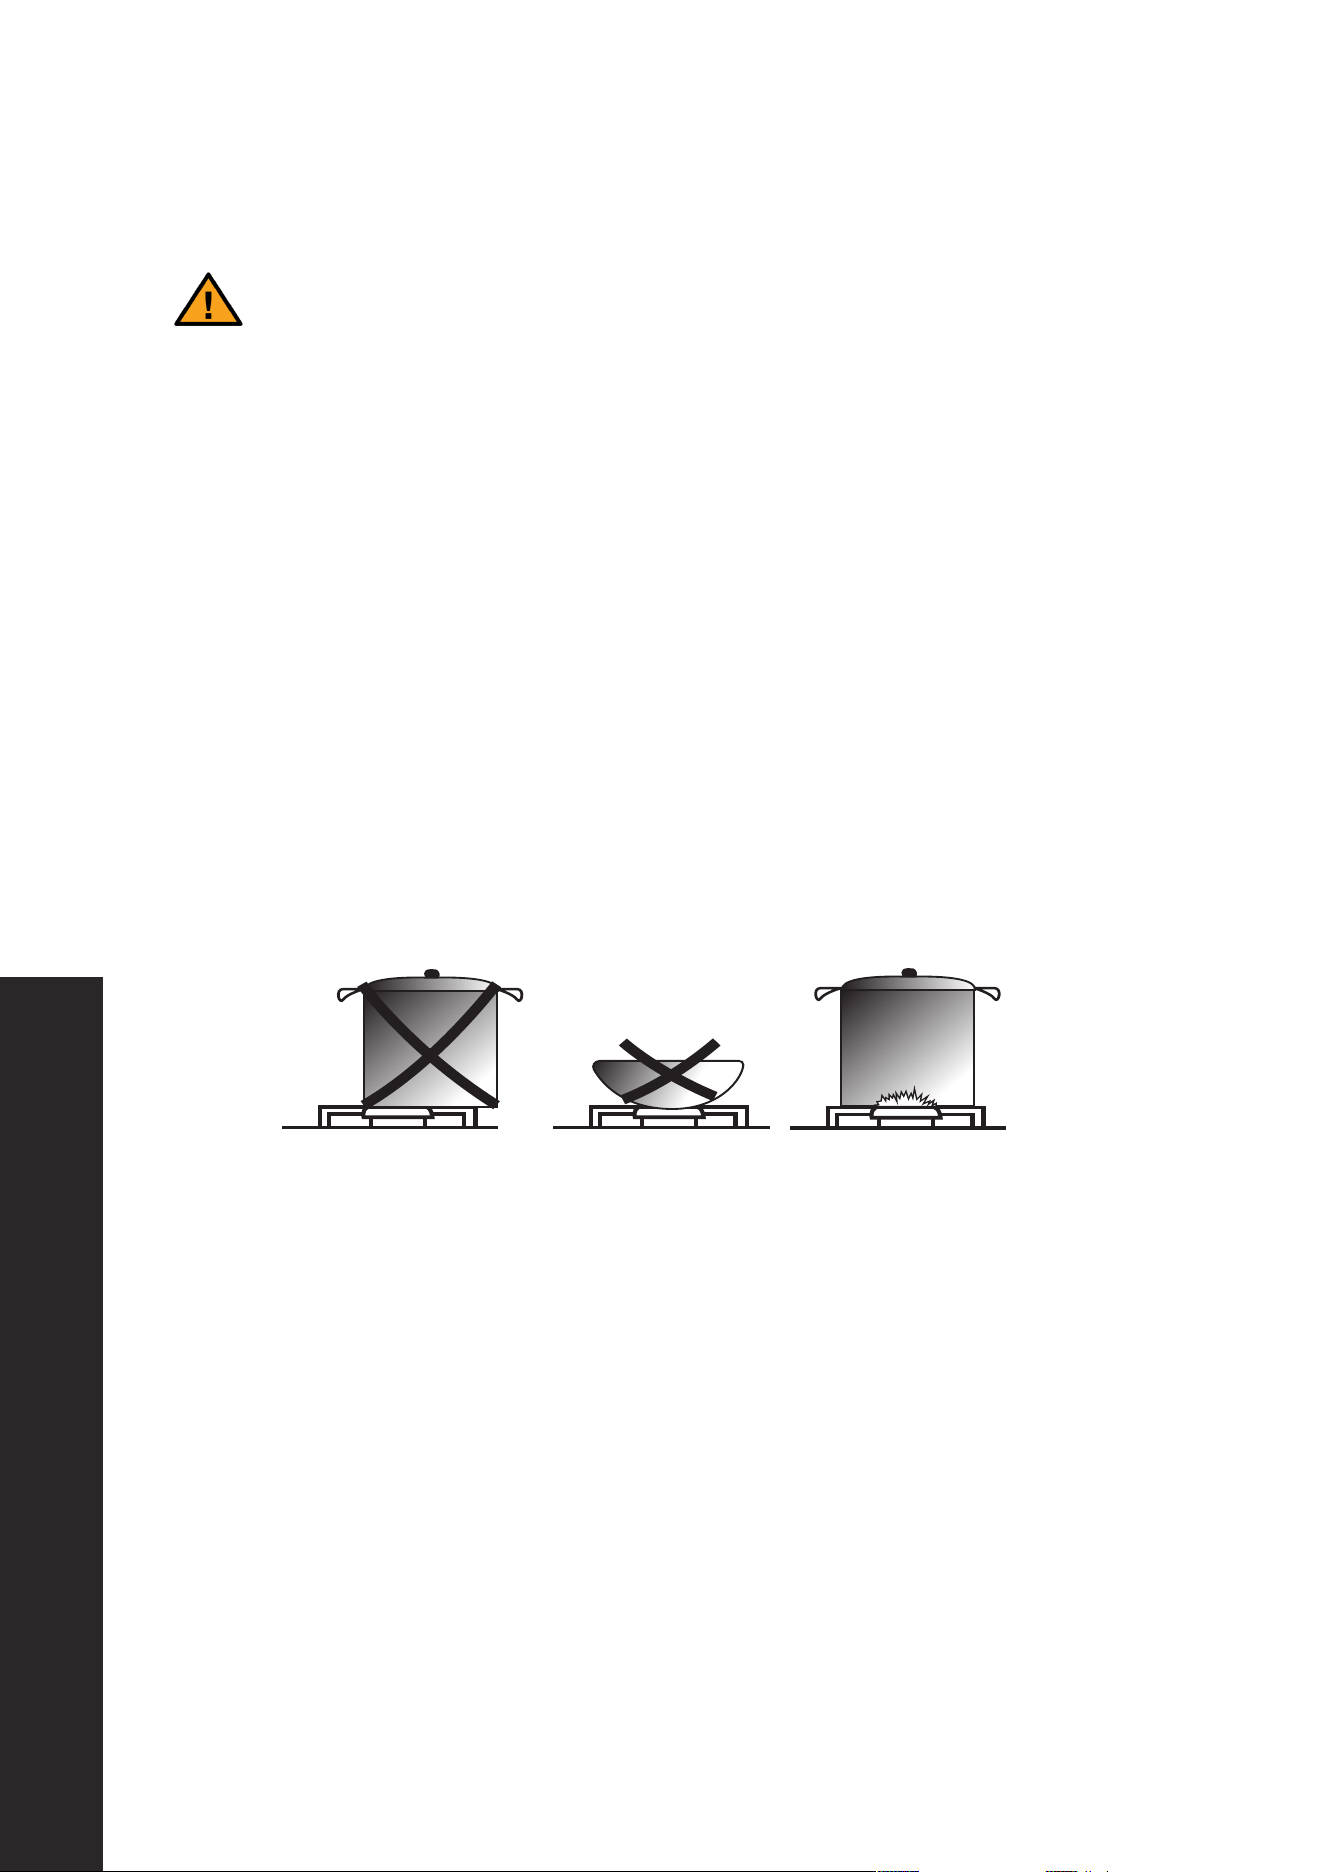
• TIPPING RANGES CAN CAUSE SERIOUS PERSONAL INJURY OR DEATH.
• TO REDUCE THE RISK OF TIPPING OF THE RANGE, THE RANGE MUST BE SECURED
WITH A PROPERLY INSTALLED ANTI-TIP DEVICE.
• FAILURE TO PROPERLY INSTALL THE ANTI-TIP DEVICE INTO THE WALL COULD
RESULT IN THE DEATH OF A CHILD OR ADULT.
ENGLISH FRANÇAIS
Install the anti-tip device to the structure
and/or the range. Verify the anti-tip
device has been properly installed and
engaged by sliding the range back
toward the wall where both brackets
have been secured, as outlined in the
directions on "Installing the Anti-Tip
Device" on page 29 of the installation
instructions.
Installez le dispositif antibasculement sur la
structure et/ou la cuisinière. Vérifiez que le
dispositif antibasculement est correctement
installé et enclenché en faisant glisser la
cuisinière vers le mur, là où les deux supports
ont été fixés, comme indiqué dans la section
«Installation du dispositif antibasculement» à la
page 29 des instructions d'installation.
Engage the range to the anti-tip device
by safely tilting the front of the range
upward slightly and moving it back to
its final resting place, making sure the
mounting pins slide under both brackets.
Engagez la cuisinière dans le dispositif anti-
basculement en inclinant légèrement l’avant de
la cuisinière vers le haut et en la ramenant à son
emplacement de repos final, en vous assurant
que les broches de montage glissent sous les
deux supports.
Re-engage the anti-tip device if the
range is moved. Do not operate the
range without the anti-tip device in
place and engaged.
Engager de nouveau le dispositif
antibasculement si la cuisinière est déplacée.
Ne pas utiliser la cuisinière lorsque le dispositif
antibasculement n’est pas installé et engagé.
See installation instructions for details.
Voir les directives d’installation pour obtenir de
plus amples renseignements
Failure to do so can result in death or
serious burns to children or adults.
Toute omission de le faire expose les enfants
et les adultes à un risque de décès ou de
brûlures graves.
Tipping Safety
10
Storage & Fire Safety
IMPORTANT SAFETY INSTRUCTIONS
DANGER
DO NOT TIP THE RANGE MORE THAN 4" (102 mm) FROM THE WALL AS IT
COULD TIP OVER AND CAUSE INJURY.
• Never completely remove the leveling legs or the range may not be secured to the anti-
tip device properly. NEVER step or sit on the door.
• The range will not tip during normal use. However, without a properly fastened anti-tip
bracket, the range can tip if too much force or weight is applied to the open door.
BURNER GRATES
• The grates must be properly positioned before cooking. Improper installation of the
grates may result in scratching of the cooktop and poor combustion.
• Do not operate burners without appropriate pot/pans or cookware on the grates.
• Be sure to place cookware directly on the center of each grate in order to maximize
cooking efficiency; see below for more.
— 28 —
Operation
Simmer and Boil
keeping food warm, melting chocolate or butter, and for slow-cooking over low heat.
loads such as water boiling and pasta cooking.
Flame Size
Power Failure
Repeat the lighting procedure.
If the power fails, the surface burners can be lighted manually. Hold a lighted match near a burner and turn knob
Cooktop
To prevent the appliance from discoloring or staining, clean cooktop after each use, and wipe up acidic or sugary spills
as soon as the appliance has cooled.
The sealed burners of your appliance are not secured to the cooktop and are designed to be removed. Boil overs or
spills will not seep underneath the cooktop. The burners should be cleaned after each use.
WARNINGS:
FOOD SAFETY
According to the United States Department of Agriculture: DO NOT hold foods at temperatures between 40°F to 140°F
more than 2 hours. Cooking raw foods below 275°F is not recommended.
Burner Grates
The grates must be properly positioned before cooking.
Improper installation of the grates may result in
scratching of the cooktop and / or poor combustion.
Do not operate the burners without a pan or utensil on
the grates.
WARNING:
Gas appliances can cause minor exposure to four of these substances, namely benzene, carbon monoxide,
formaldehyde and soot, caused primarily by the incomplete combustion of natural gas fuel. When operating your
appliance on natural gas, the flames from the burners should be blue in color. In addition, the flames should be
stable, free of yellow tipping, excessive noise and lifting. However, this yellow tipping should be restricted to the
primary flame kernels only. Properly adjusted burners, indicated by a bluish rather than a yellow flame, will minimize
incomplete combustion. Exposure to those substances can be minimized by venting with an open window or use of a
ventilation fan or hood.
Approximately
1” - 1 1/2” flame height
STORAGE AND FIRE SAFETY
• Items of interest to children should not be placed in cabinets above the appliance or on
the steel back splash vent at the back of the range. Children climbing on the appliance
to reach items could be seriously injured.
• DO NOT leave children alone or unattended when the appliance is hot or in operation,
even if the burners and oven have been off for several minutes. The unit’s door, knobs,
and cooktop may still have residual heat, and children could be seriously burned.
• DO NOT let anyone climb, play, sit, or stand on or around any part of the appliance.
They could damage the range or cause it to tip over which could result in serious burns
or other severe personal injury.
• NEVER wear loose fitting or hanging garments while using the range. Be careful when
reaching for items placed in cabinets over the appliance.

11
Cooking Safety
IMPORTANT SAFETY INSTRUCTIONS
• Flammable materials, liquids, and vapors should not be stored on, in, or near the
appliance. They can be ignited if it contacts flames or hot oven surfaces and may cause
severe burns. This includes cooking grease, gasoline, aerosol cans, paper, plastic,
and cloth items, as well as cookbooks, plastic ware, and towels. Plastic items may
melt if left too close to the vent. Flammable materials may explode and result in fire or
property damage.
• Allow the burner grates and other surfaces to completely cool before touching them.
• Gas leak testing of the appliance must be conducted according to the manufacturer’s
instructions; always consult a qualified technician.
• Make sure your appliance is properly installed and grounded by a qualified installer,
according to instructions explained in the Installation Manual. Any adjustment and
service should be performed only by qualified gas range installers or service technicians.
COOKING SAFETY
WARNING
Initial Oven Burn-Off
• Before using your range for cooking, perform the following initial burn-off procedure:
• Set the oven to BAKE at 400 °F (200 °C) and operate for 1 hour.
• After completion, set the oven to BROIL and operate for an additional 1 hour.
• For 48" (1219 mm) models, perform this procedure on the large oven. Operating the
small oven on BAKE for 1 hour is sufficient.
• During initial operation, odor, smoke, and noise may occur. This is normal as manufacturing
residues burn off and internal components expand and settle.
• Ensure the room is well ventilated by keeping air inlets open and/or operating a range
hood above the appliance.
• After the oven has completely cooled, wipe the interior with hot water and a kitchen-safe
cleaner. Clean all oven racks and shelves before use.

12
Cooking Safety
IMPORTANT SAFETY INSTRUCTIONS
Safe Cooking Practices
• Closely monitor foods being fried at high flame settings, and always heat fats slowly.
• When frying with a combination of oils or fats, mix them before heating. Use a deep-fat
thermometer, if available, to prevent overheating beyond the smoke point.
• Use the minimum amount of fat necessary for shallow or deep-fat frying. Overfilling
cookware with fat may cause spillovers when food is added.
• Ensure foods are as dry as possible before frying. Frost or moisture can cause hot fat to
bubble and spill over the sides of the pan.
• Never move a pan of hot fat, including a deep-fat fryer. Allow it to cool completely
before handling.
• Never cook food directly on an open flame without cookware. Always use appropriate
pots or pans. Operating burners without cookware may damage the grate finish.
• DO NOT use a wok on the surface burners if the wok has a round metal ring that is
placed over the burner grate to support the wok. This ring acts as a heat trap, which
may damage the burner grate and burner ring. It also may cause abnormal carbon
monoxide levels, potentially resulting in a health hazard.
• To prevent burns, always be sure burner knobs are in the OFF position and all grates are
cool before attempting to remove them.
DANGER
If you smell gas, immediately turn off the gas to the appliance and call a qualified
service technician. Never use an open flame to locate a leak.
• DO NOT lift the cooktop. Lifting the cooktop can cause damage and improper operation
of the appliance.
• When cooking, adjust the burner controls so the flame heats only the bottom of the pot,
pan, or cookware and does not overlap at the sides.
• Cookware, pots, and pans that conduct heat slowly, i.e. glass pots, should be used in
conjunction with burner flames at a low or medium setting.
• Use the appliance only for cooking tasks as outlined in this manual.

13
Cooktop Maintenance
IMPORTANT SAFETY INSTRUCTIONS
COOKTOP MAINTENANCE
• For reasons of hygiene and safety, this appliance must always be kept clean. Food
residue may clog the igniter and notches of the burner spread, stopping the burner
from functioning correctly. To prevent unpleasant smoke, the possibility of fire, and the
appliance from discoloring or staining, clean cooktop after each use, and wipe up acidic
or sugary spills as soon as the appliance has cooled. See the "Care and Maintenance"
section for more information.
• The sealed burner spreads of your appliance are not secured to the cooktop and are
designed to be removed. Boil overs or spills will not seep underneath the cooktop. The
burners should be cleaned after each use.
• Before maintenance and cleaning, disconnect the appliance and allow cooling down.
WARNING
According to the U.S. Department of Agriculture: DO NOT hold foods at
temperatures between 40 °F to 140 °F (4 °C to 60 °C) more than 2 hours.
Cooking raw foods below 275 °F (135 °C) is not recommended.
WARNING
COMBUSTION SAFETY
• Gas appliances can cause minor exposure to several substances, namely benzene,
carbon monoxide, formaldehyde, and soot, caused primarily by the incomplete
combustion of natural gas fuel.
• If gas does not ignite within four seconds, turn off the knob and allow at least five minutes
for any gas to dissipate. Repeat the lighting procedure outlined on page 15.
WARNING
When using the cooktop for the first time, burners may not ignite right away.
Time is required for gas to fully fill the operating system. In this instance, do not
keep burner knobs pushed in for longer than a few seconds.
POWER FAILURE
• If electricity or power fails in your home, surface burners can still be lighted manually
if necessary. Simply hold a lighted match near a burner and turn the knob counter-
clockwise to the “HI” setting. After the burner lights, remove the lit match and turn the
knob to the preferred setting.
• In case of electric power failure, reset oven/broiler controls to the OFF position and do
not attempt to use oven/ broiler until the power has been restored.

14
Surface Burner Operation
OPERATION
GUIDELINES FOR USING SURFACE BURNERS
• These ranges use electric ignition and are equipped with an automatic re-ignition feature
on all surface burners. If a burner flame is extinguished unexpectedly (for example, due
to a draft), the system will automatically detect the loss of flame and re-ignite the burner,
provided gas flow is still present.
• On most models, when a surface burner control knob is pressed, sparking will occur at
all surface burners. However, only the selected burner will receive gas and ignite. This is
normal operation and is a standard characteristic of gas range ignition systems.
• Only the selected burner will spark, receive gas, and ignite. These models use a single-
point ignition system, rather than a multi-point ignition system.
SURFACE BURNER FLAME SIZE
• When adjusting surface burner control knobs, turn them slowly until the desired flame
size is achieved.
• When operating the appliance on natural gas, the flame should be steady and blue.
Occasional yellow or orange flickers are acceptable.
• If the flame appears yellow or orange and remains that way, check the surrounding
environment. Candles, cleaning products, airborne dust, or other atmospheric conditions
may affect flame color.
• If abnormal flame conditions persist and the appliance has been converted for liquid
propane gas (LPG) by a qualified technician, the conversion may not have been
performed correctly. Verify that all orifices are properly installed. If necessary, contact
the installer.
• If the appliance is operating on natural gas and flame issues continue, contact your local
gas utility to check for supply-related conditions.
Scan to follow along with a video.
15
Surface Burner Operation
OPERATION
SURFACE BURNER OPERATION
1. Push in the control knob for the surface burner you wish to use.
2. While pushing in, turn the control knob counterclockwise to the HI position. Sparking will
occur at the burner and ignition should occur within 0.5 to 2 seconds.
3. Once the burner is lit, turn the control knob to adjust the flame to the desired heat setting.
• If the burner does not ignite or the flame goes out, turn the control knob to the OFF
position and repeat the procedure.
— 27 —
Operation
setting (SIM) for gentle simmering (620 BTU/hr). Use the
SIM setting for melting chocolate and butter, cooking rice
and delicate sauces, simmering soups and stews, and
keeping cooked food hot.
Never leave the appliance unattended when in use.
Boil over causes smoking and greasy spills that may
ignite.
its sides. This could discolor and damage the utensil and
you may get burned touching a hot handle.
burner that is on.
quickly, particularly on a high setting.
Incorrectly or incompletely assembled burners may
over, make sure you clean the affected burners before
using them again. Food residue may clog the igniter and
instructions.
advice.
Guidelines for Using Cooktop Burners
Surface Burner Ignition
u
To light the top burners, push the appropriate
control knob to release gas.
v position. You will hear a clicking noise, the sound of
the electric spark igniting the burner.
w
Once bur ner ignition has been achieved, then turn
the burner control knob to adjust the desired heat
setting.
NOTE: When one burner is turned to the “Hi” position, all
the burners will spark. Do not attempt to disassemble or
clean around any burner while another burner is on. Do
not touch any burner cap, burner base, or igniter while
the igniters are sparking.
Heat Settings
HI Ignites the burners.
Simmer
Melting small quantities, steaming rice, warming food,
melting chocolate or butter.
Low Melting large quantities.
Low – Medium
Low-temperature frying, simmering large quantities, heating
milk, cream sauces, gravies.
Medium
Sautéing and browning, braising, pan-frying, maintaining
slow boil on large quantities.
Medium – Hi
High-temperature frying, pan boiling, maintaining slow boil
on large quantities.
Hi Boiling liquid quickly, deep frying.
— 27 —
Operation
setting (SIM) for gentle simmering (620 BTU/hr). Use the
SIM setting for melting chocolate and butter, cooking rice
and delicate sauces, simmering soups and stews, and
keeping cooked food hot.
Never leave the appliance unattended when in use.
Boil over causes smoking and greasy spills that may
ignite.
its sides. This could discolor and damage the utensil and
you may get burned touching a hot handle.
burner that is on.
quickly, particularly on a high setting.
Incorrectly or incompletely assembled burners may
over, make sure you clean the affected burners before
using them again. Food residue may clog the igniter and
instructions.
advice.
Guidelines for Using Cooktop Burners
Surface Burner Ignition
u
To light the top burners, push the appropriate
control knob to release gas.
v position. You will hear a clicking noise, the sound of
the electric spark igniting the burner.
w
Once bur ner ignition has been achieved, then turn
the burner control knob to adjust the desired heat
setting.
NOTE: When one burner is turned to the “Hi” position, all
the burners will spark. Do not attempt to disassemble or
clean around any burner while another burner is on. Do
not touch any burner cap, burner base, or igniter while
the igniters are sparking.
Heat Settings
HI Ignites the burners.
Simmer
Melting small quantities, steaming rice, warming food,
melting chocolate or butter.
Low Melting large quantities.
Low – Medium
Low-temperature frying, simmering large quantities, heating
milk, cream sauces, gravies.
Medium
Sautéing and browning, braising, pan-frying, maintaining
slow boil on large quantities.
Medium – Hi
High-temperature frying, pan boiling, maintaining slow boil
on large quantities.
Hi Boiling liquid quickly, deep frying.
WARNING
Use care when utilizing the knobs on your range top. Turning knobs too far
beyond their highest setting — or turning too hard — may permanently
damage knobs.
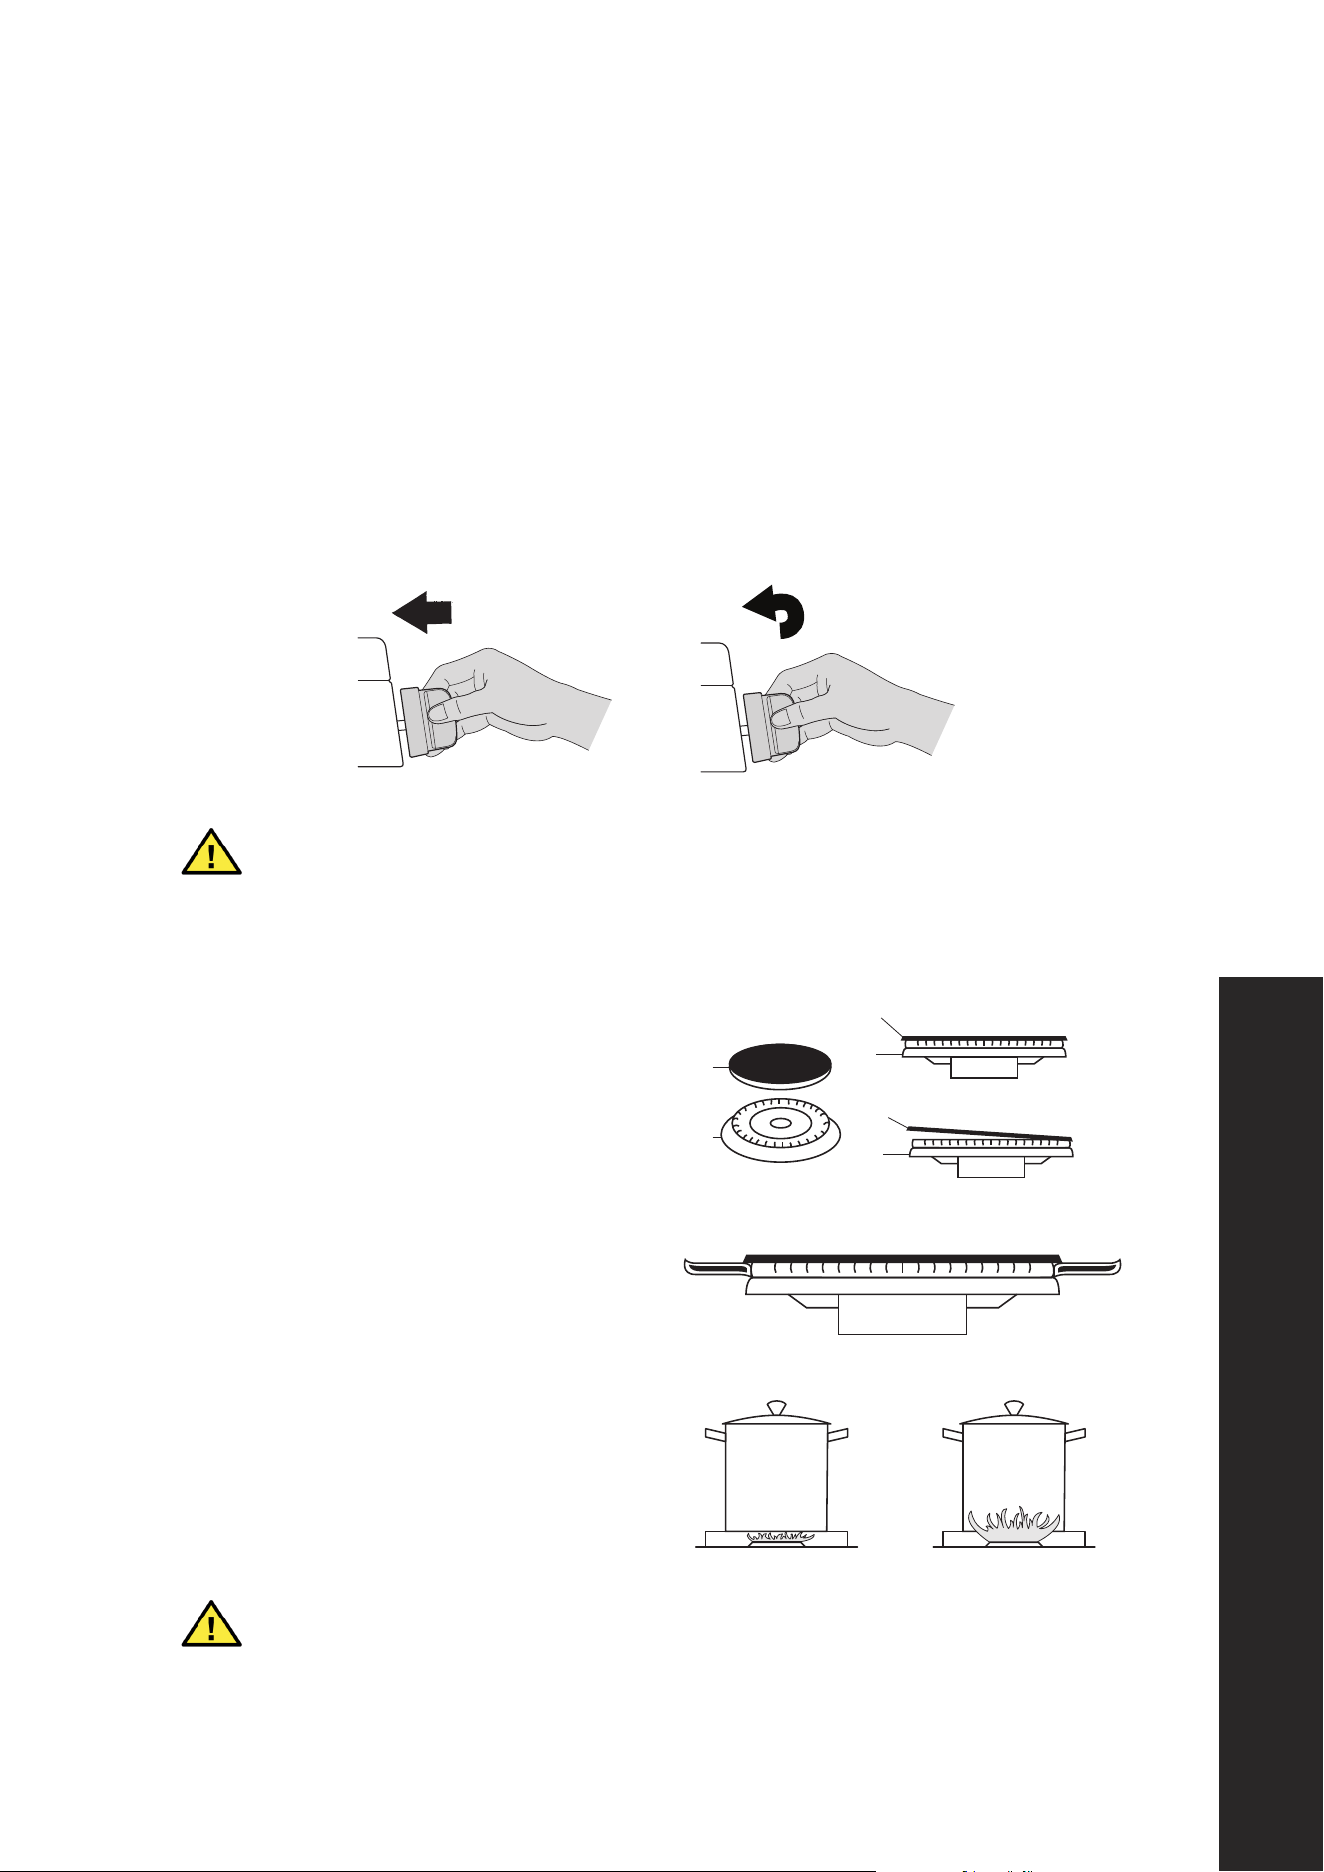
USING THE BURNERS CORRECTLY
1. Always check that the burner caps are
properly installed before operation:
2. Verify that the flame of the range top burners
is completely blue and with a regular aspect
as shown at right:
3. Never let flames wrap around cookware;
this creates a safety hazard and can also
damage your cookware:
WARNING
DO NOT ignite burners if the black burner cap is not installed or not centered
on the burner spread; the flame will be irregular and may increase injury risk.
A
B
A
B
Correct
Incorrect
Correct Incorrect
A
B
A
B
A
B
Correct
Incorrect
Correct Incorrect
A
B
A
B
A
B
Correct
Incorrect
Correct Incorrect
A
B

16
OPERATION
GRIDDLE OPERATION (48" - 1219 mm MODELS)
• 48" (1219 mm) models are equipped with an enameled, reversible cast iron griddle. The
griddle may also be purchased separately for compatible models.
• Use care when placing or flipping the griddle to avoid damage to the griddle surface or
the cast iron grates beneath it.
• Before first use, clean the cast iron griddle thoroughly with warm, soapy water to remove
dust or any protective coating. Rinse with clean water and dry using a soft, clean,
lint-free cloth.
• Place the griddle vertically (front to back) over a single set of burner grates until it seats
securely. Do not place the griddle horizontally (left to right) across multiple burner grates.
• For even heating, operate the front and rear burners beneath the griddle.
WARNING
The surface of the griddle may be hot for several minutes after use. Please
allow sufficient time for the griddle to cool prior to moving and cleaning.
• Do not use stovetop grills on this gas appliance.
• Using a stovetop grill on a sealed gas burner can restrict proper combustion and may
result in elevated carbon monoxide levels, which can be hazardous to your health.
• Use only ZLINE-approved griddles designed for this appliance.
Surface Burner Operation
17
OPERATION
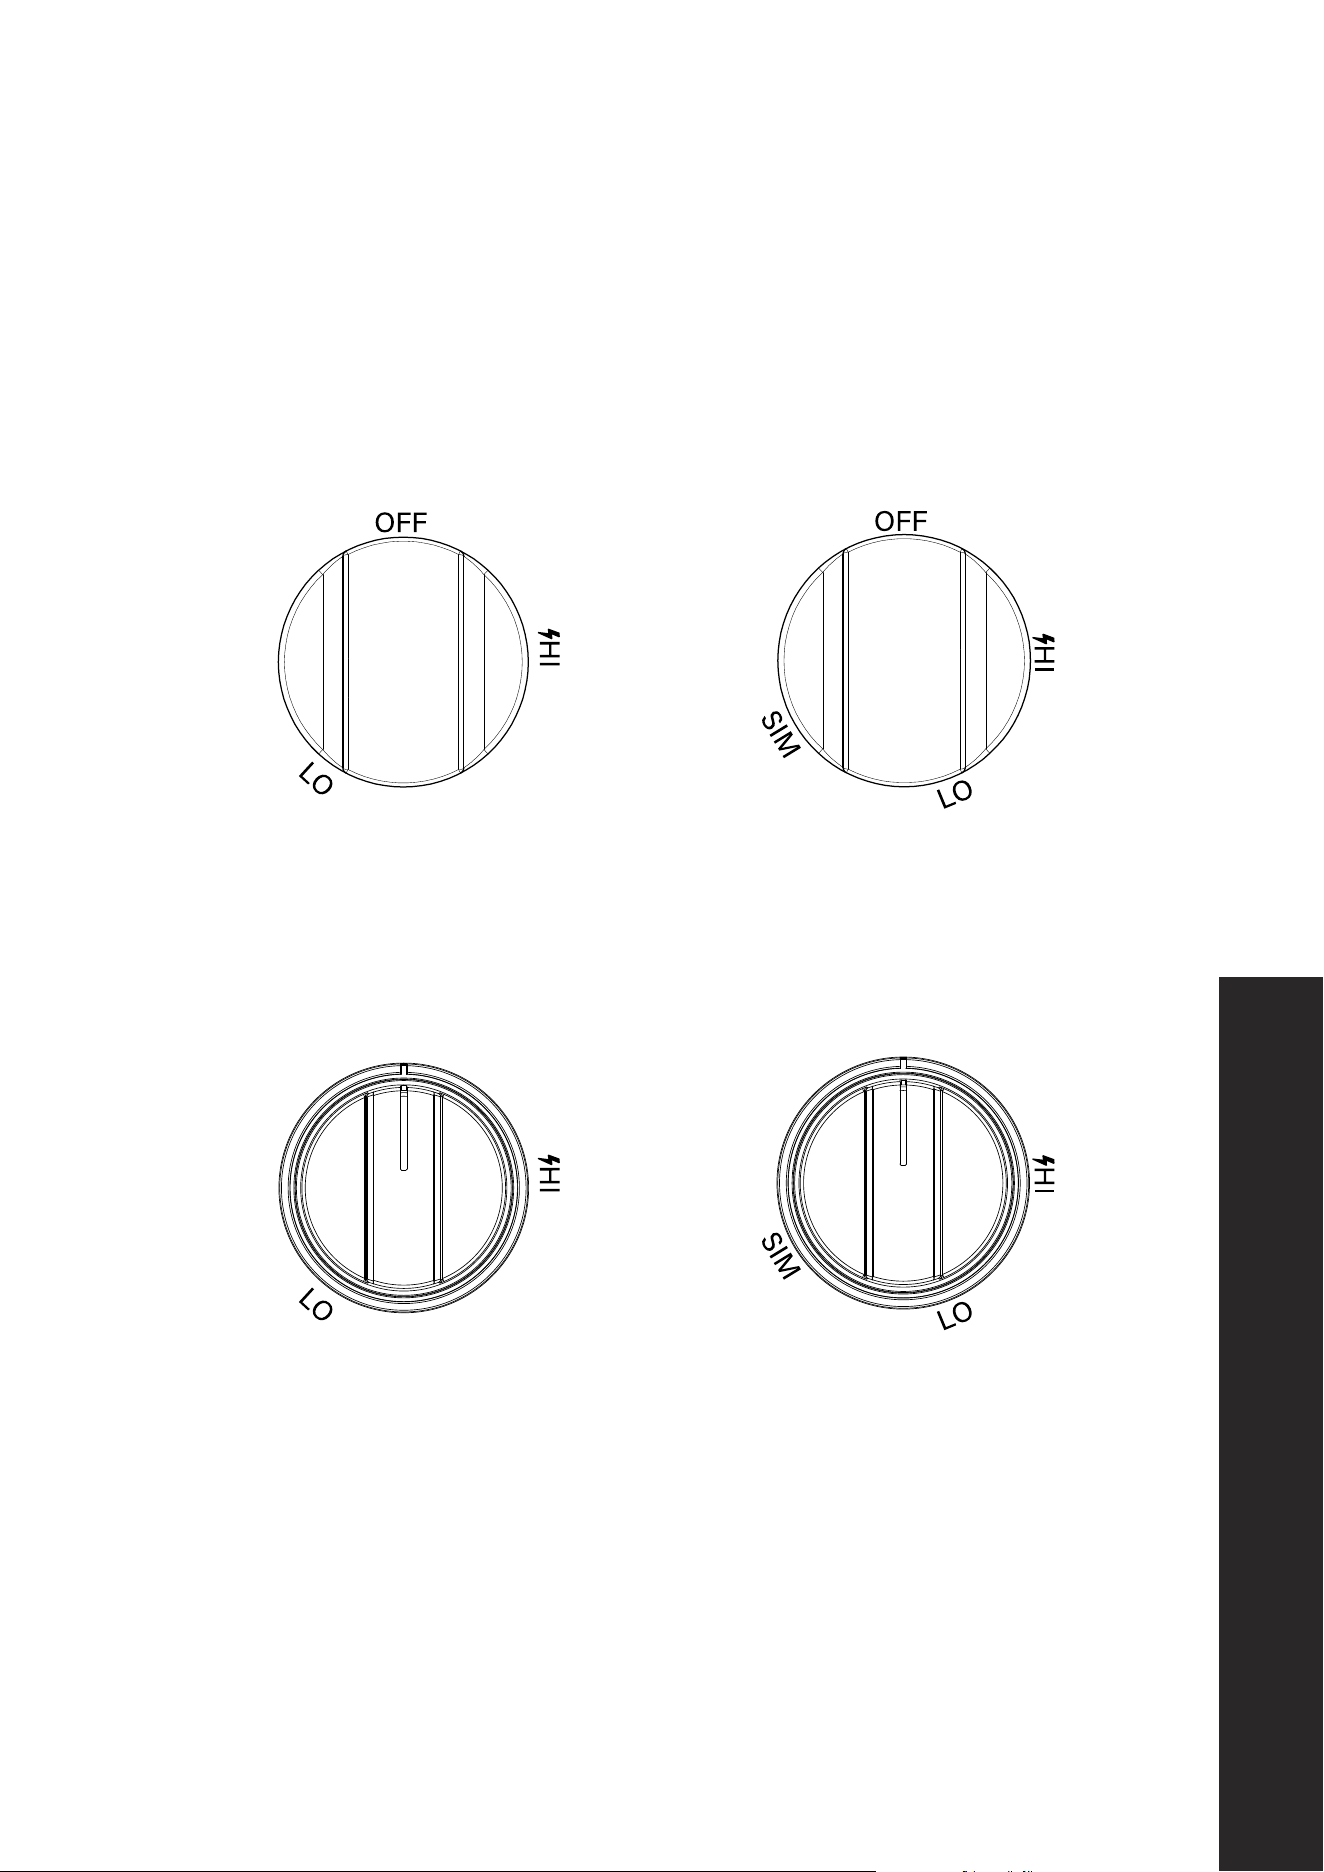
KNOB FUNCTIONS
CDR/SDR SERIES MODELS
SURFACE BURNER KNOB FUNCTION DUAL BURNER KNOB FUNCTION
MDR SERIES MODELS
SURFACE BURNER KNOB FUNCTION DUAL BURNER KNOB FUNCTION
• HI: Maximum Flame Height
• LO: Minimum Flame Height
• SIM: Simmer Mode
Surface Burner Operation

18
Surface Burner Operation
OPERATION
• These ranges are equipped with dual-function surface burners that include a SIM
(simmer) setting. Use the simmer setting for low-heat cooking tasks such as melting
chocolate or butter, cooking rice and delicate sauces, simmering soups and stews, or
keeping cooked food warm.
• NOTE: For MDR series models, ensure the burner is in the OFF position by rotating the
control knob until the indicator line aligns with the cutout on the knob ring. For additional
information, refer to "Accent Lights" on page 19.
HEAT SETTINGS AND SIMPLE COOKING GUIDE
SIM
(Dual Burners Only)
Steaming rice, warming food, melting chocolate or butter.
LO Melting large quantities.
Low-medium
Low-temperature frying, simmering large quantities, heating milk, cream
sauces, gravies.
Medium
Sautéing and browning, braising, pan-frying, maintaining slow boil on
large quantities.
Medium-HI High-temperature frying, pan boiling, maintaining slow boil on large quantities.
HI Boiling liquid quickly, deep frying. This also ignites the burners.

19
Accent Lights
OPERATION
ACCENT LIGHTS
MDR & PMDR SERIES RANGES
What the accent light button does
• OFF (button not illuminated): All LED knob rings are OFF, even if a burner or the oven is on.
• ON (button illuminated):
• All knob rings glow DIM as ambient/accent lighting.
• Any active control (burner ON or oven ON) switches its ring to BRIGHT.
• Non-active controls remain DIM.
How to use
1. To turn accent lighting ON/OFF:
• Press accent light once to enable ambient lighting (DIM rings).
• Press again to disable ambient lighting (all rings OFF).
2. To operate a burner or the oven:
• When accent lighting is ON, the ring for any engaged knob (burner ON/oven ON)
turns BRIGHT; others stay DIM.
• When accent lighting is OFF, rings do not illuminate, regardless of knob position.
Indicator behavior summary
• Accent Light OFF + Burner/Oven OFF: All LED rings OFF
• Accent Light OFF + Burner/Oven ON: All LED rings OFF
• Accent Light ON + Burner/Oven OFF: All LED rings DIM
• Accent Light ON + Burner/Oven ON: The corresponding LED ring is BRIGHT; others not
in use are DIM.
NOTE:
• The accent light feature is decorative and not a safety indicator. Always verify burner/
oven status by knob position and display/markings.
• If rings do not illuminate when expected, confirm the accent light button is ON.
• Brightness levels are fixed (DIM/BRIGHT) and not user-adjustable.
20
OPERATION
OVEN OPERATION
30" & 36" (762 mm & 914 mm)
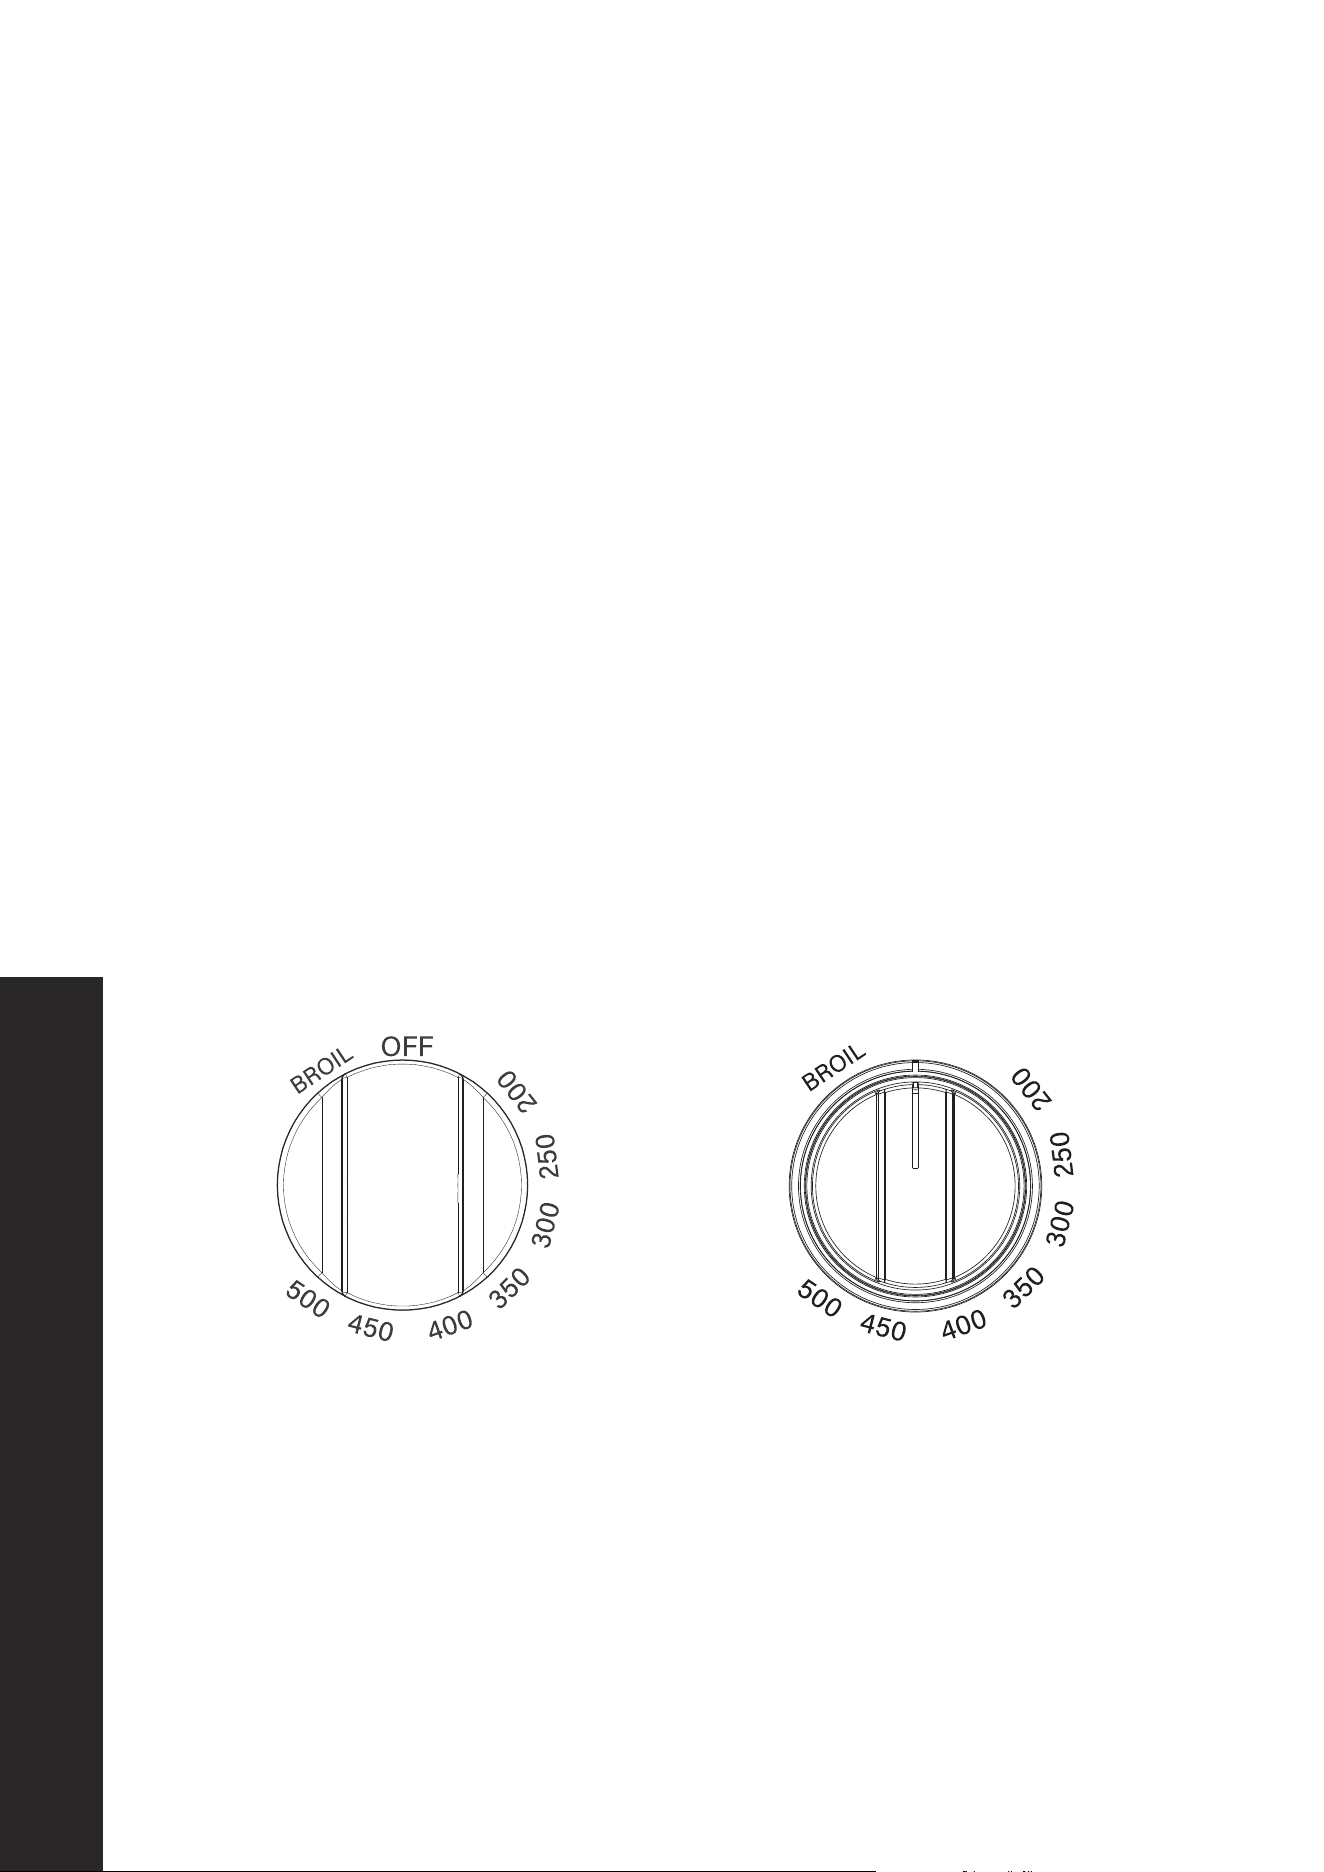
• To turn on the oven, push in the control knob and turn it counterclockwise to the desired
BAKE temperature.
• The white indicator light (preheat light) next to the knob will remain illuminated during
preheating and will turn off once the oven has reached the set temperature.
• To operate the BROIL function, push in the control knob and turn it
counterclockwise to BROIL.
• The white indicator light will illuminate when broil is activated.
• 30" and 36" (762 mm and 914 mm) models are equipped with one oven control knob,
with BAKE temperature settings ranging from 200 °F to 500 °F (93 °C to 260 °C), in
addition to the BROIL function.
• NOTE: For MDR series models, ensure the burner is in the OFF position by rotating the
control knob until the indicator line aligns with the cutout on the knob ring.
CDR/SDR SERIES MODELS MDR SERIES RANGES
Oven Operation
21
OPERATION
48" (1219 mm)
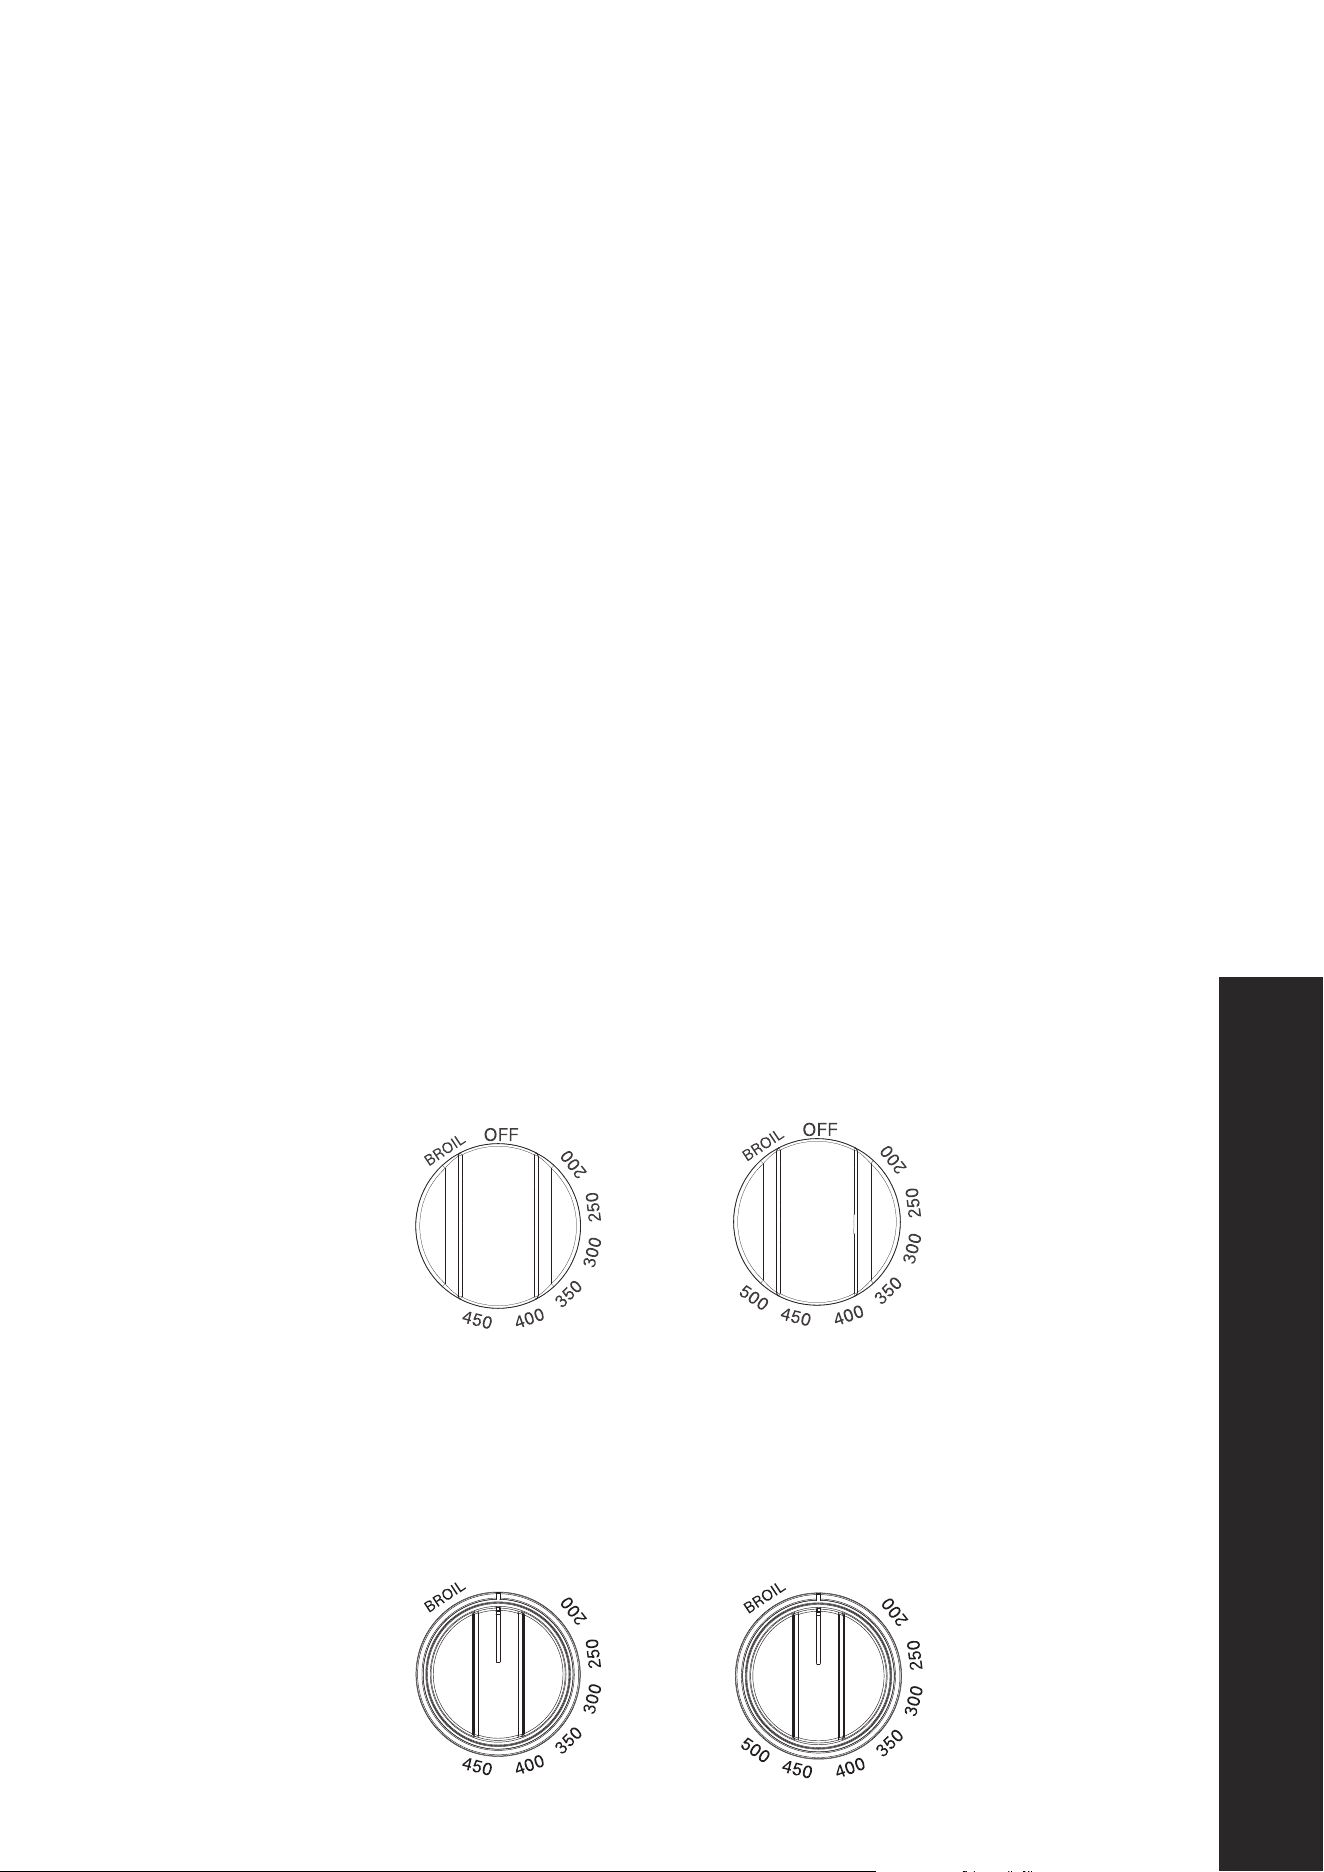
• 48" (1219 mm) models are equipped with two oven control knobs, one for the small
oven and one for the large oven.
• The maximum BAKE temperature for the small oven is 450 °F (230 °C), in addition
to BROIL. The maximum BAKE temperature for the large oven is 500 °F (260 °C), in
addition to BROIL.
• To turn on either oven, push in the control knob and turn it counterclockwise to the desired
BAKE temperature.
• The white indicator light (preheat light) next to the knob will remain illuminated during
preheating and will turn off once the oven has reached the set temperature.
• To operate the BROIL function on either oven, push in the control knob and turn it
counterclockwise to BROIL.
• The white indicator light will illuminate when broil is activated.
• NOTE: For MDR series models, ensure the burner is in the OFF position by rotating the
control knob until the indicator line aligns with the cutout on the knob ring.
CDR/SDR SERIES MODELS
SMALL OVEN KNOB
LARGE OVEN KNOB
MDR SERIES MODELS
SMALL OVEN KNOB
LARGE OVEN KNOB
Oven Operation

22
OPERATION
OVEN VENTS
• The oven vent is located under the back splash on the back of the oven. Do not block the
ducts in the oven vent when cooking in the oven.
• Avoid touching the vent opening or nearby surfaces while the oven is on — they may
become hot, which increases the risk of injury.
• NOTE: It is normal for steam or moisture to dispel from the oven vent and collect on the
cooktop. This happens more often when baking foods that contain a lot of moisture.
Condensation is more common in colder months due to the cooktop being colder than
normal. Condensate water is a natural occurrence and is non-corrosive.
OVEN FUNCTIONS AND FEATURES
BAKE
• Natural airflow baking occurs when heat is generated by the bake burners located at
the bottom of the oven cavity, beneath the drip pan. Heat is distributed throughout the
oven by natural convection. This is a traditional bake mode.
• To operate this mode, turn the oven on and select a temperature between 200 °F and
500 °F (93 °C to 260 °C).
• For 48" (1219 mm) models, the maximum BAKE temperature for the small oven is
450 °F (230 °C).
• NOTE: Preheating typically requires 15–25 minutes, depending on the selected
temperature and installation conditions.
• For optimal baking results, allow the oven to fully preheat before placing food inside.
• For best baking results, place food on the center oven rack position. Adjust the rack
position as needed based on food size and desired browning.
Oven Operation

23
OPERATION
CONVECTION BAKE
• Heat is generated by the bake burners located at the bottom of the oven cavity. A
convection fan at the rear of the oven circulates the heated air to promote more even
heat distribution around the food. Convection cooking typically allows for faster
cooking, operation at lower temperatures, and more uniform results compared to
traditional baking.
• To operate this mode, turn the oven on, select the desired temperature, then press the fan
button on the front of the oven.
• For best results, place food on the center oven rack position. When cooking on multiple
racks, stagger cookware to allow proper air circulation.
• When using convection bake, you may reduce the recipe temperature by approximately
25 °F (15 °C) or shorten the cooking time, as needed.
• NOTE: The 48" (1219 mm) model small oven is not equipped with a convection fan.
• For optimal convection baking results, allow the oven to fully preheat before placing
food inside.
BROIL
• During broiling, heat radiates downward from the broil burner to provide even coverage
and fast cooking.
• The broil temperature is 500 °F (260 °C).
• For best broiling results, place food on an upper oven rack position.
• Adjust the rack position as needed to achieve the desired level of browning while
preventing excessive charring.
• NOTE: The oven door must remain closed during broiling.
WARNING
Carefully monitor food being cooked under the broiler, as this function works
quickly and can burn food within only a few minutes.
Oven Operation

24
OPERATION
OVEN COOKING
• Use care when opening the oven door. Let hot air or steam escape before removing or
placing food.
• DO NOT heat unopened food containers. Pressure build-up may cause containers to
burst and result in injury.
OVEN RACK PLACEMENT
• Insert the oven racks between the upper and lower rack guides at any of the available
rack positions.
• To remove a rack, pull it out to the fully extended position, then lift the front of the rack
slightly and pull it out of the sliding mechanism.
• CAUTION: Use care when installing or removing racks. The rack guides and sliding
mechanisms may have sharp edges.
• Oven racks for 30", 36", and 48" (614 mm, 762 mm, and 1219 mm) large ovens are
designed to support up to 25.0 lb (11.0 kg).
• Oven racks for the 48" (1219 mm) small oven are designed to support up to
15.0 lb (7.0 kg).
WARNING
Users should use caution with heavier food loads than those outlined above to
limit risk of injury and/or damage to your range.
Take care to reset all cooktop/oven/broiler burner controls to the OFF position after use of
the appliance.
Oven Operation
25
CARE AND MAINTENANCE
REPLACING THE OVEN LIGHTS
WARNING
To prevent electrical shock or injury, make sure the oven and light bulbs are cool
and power to the oven has been turned off before replacing light bulbs.
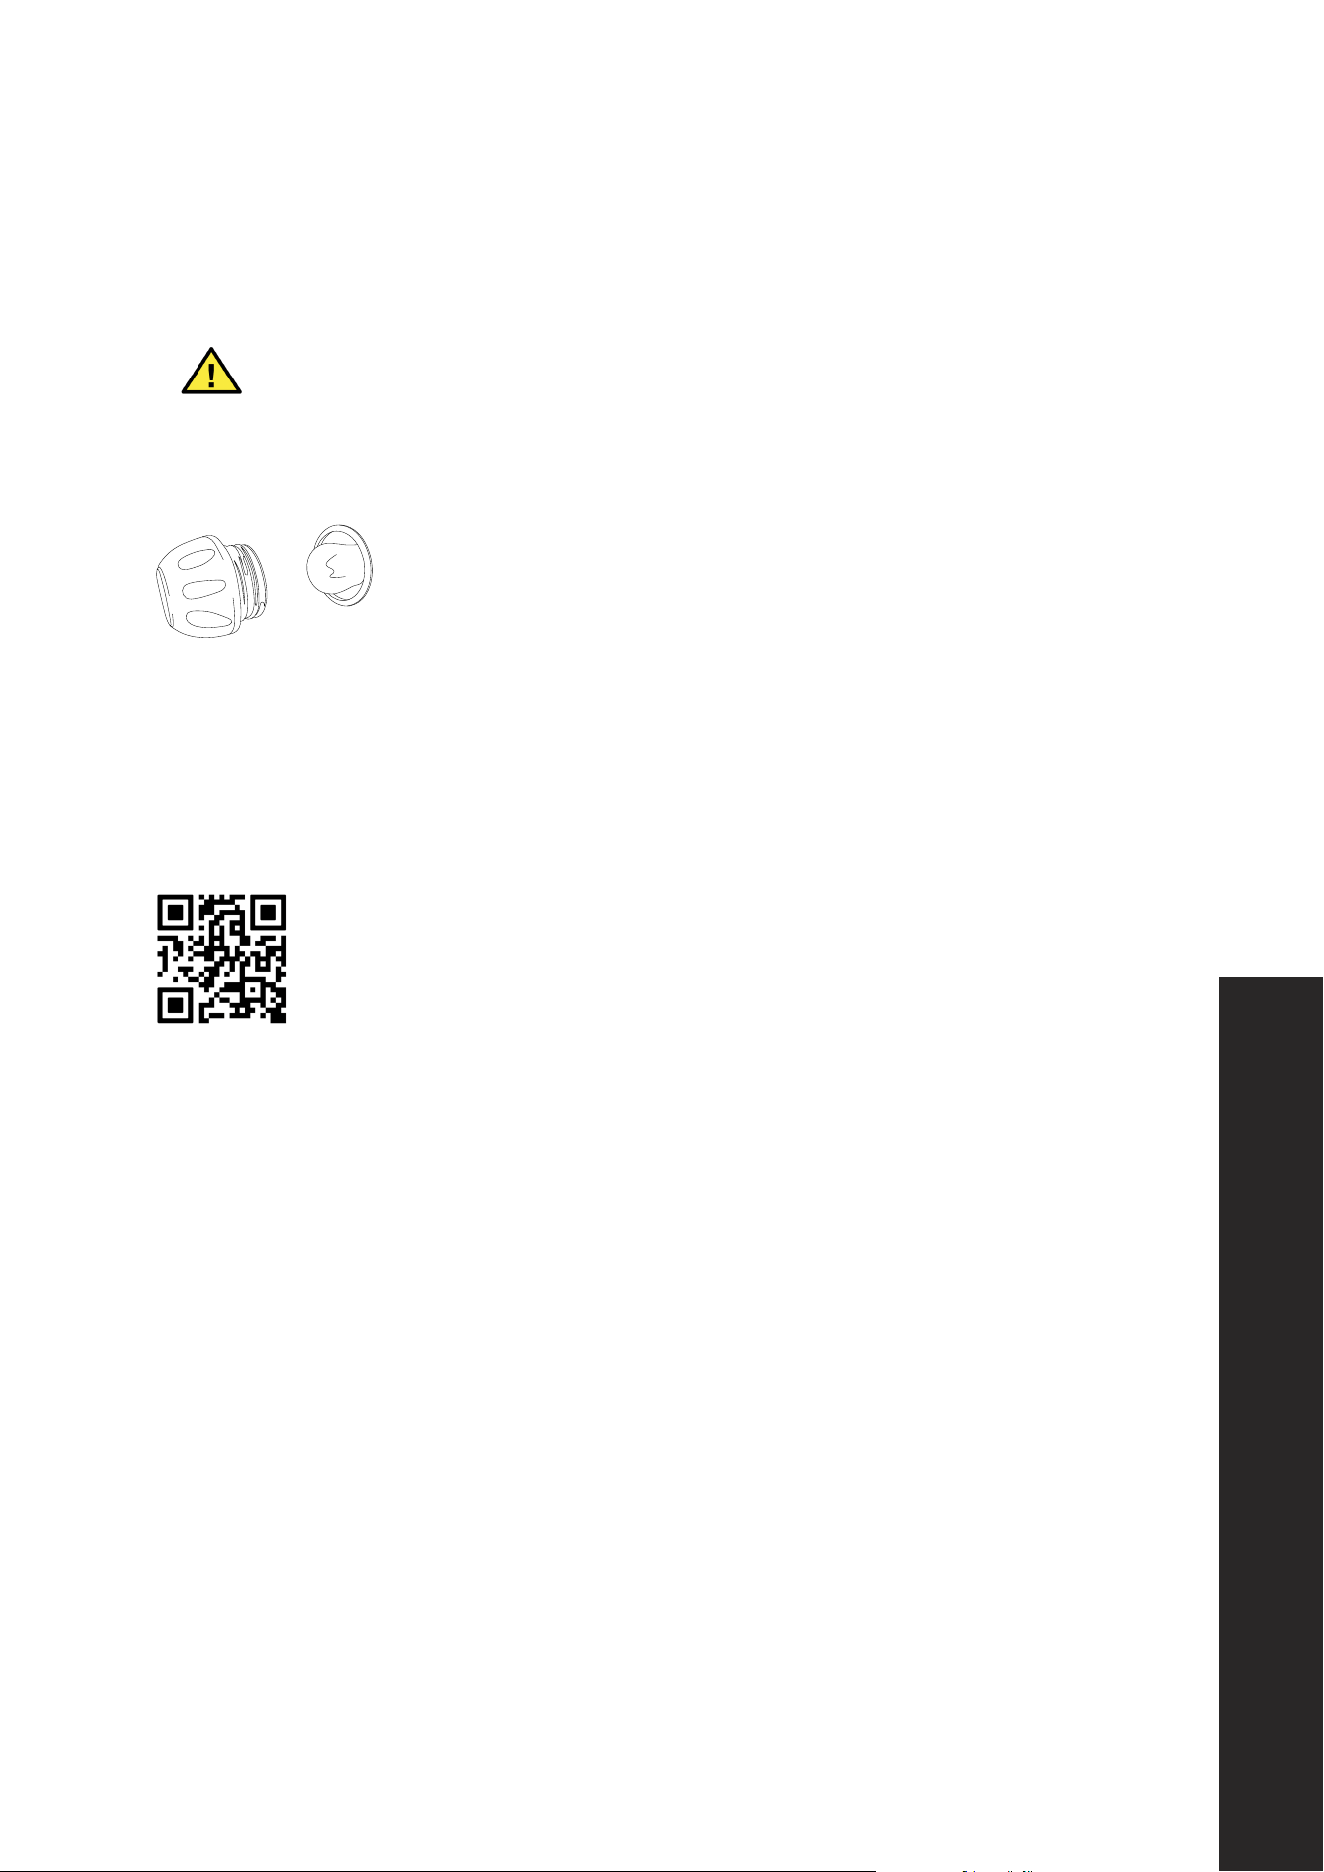
To replace the light bulbs (2) located at the upper left and bottom
right corners of the 30", 36", and 48" (762 mm, 914 mm, and
1219 mm) large oven, unscrew the protection cap that projects out
inside the oven. The 48" (1219 mm) model small oven has 1 bulb.
NOTE: The light bulbs screw in, rather than plug in.
NOTE: Touching bulbs with your fingers may cause them to burn out. We recommend using
protective gloves or a clean cloth for this process.
Visit www.zlineparts.com and search "SGP-108" to order a replacement.
Replacing the Oven Lights

26
CARE AND MAINTENANCE
CLEANING YOUR RANGE
• Do not attempt any of the following cleaning methods until all burners are off and the
oven is completely cool. We also recommend disconnecting power before cleaning the
unit to limit risk of electric shock.
• It is normal for moisture to form between the oven door’s two glass panels, especially
when cooking or baking foods with a lot of moisture. The range is designed with vents
between the panes of glass; any moisture should dissipate within 12–24 hours.
• Clean only the parts listed in the manual.
• DO NOT CLEAN DOOR GASKETS. The door gasket is essential for a good seal. Care
should be taken not to rub, damage, or move the gasket.
• Take care when using cleaning products in spray form: never direct the spray onto the
electrical wiring, thermostat, and bulb.
• Acidic fluids such as tomato sauce or lemon juice should not be left on the cooktop for
extended periods, as etching may occur. This type of damage is not covered under the
manufacturer’s warranty.
• IMPORTANT: During cleaning, never use abrasive cleaners. Scratches on the stainless
steel surfaces are permanent. DO NOT clean the range when hot. Do not use bleach or
alcohol wipes to clean stainless steel. Always follow label instructions on cleaning products.
STAINLESS STEEL
• To clean the stainless steel surface of the range, use warm sudsy water or a stainless steel
cleaner or polish. Always wipe the surface in the direction of the grain. Follow product
label instructions for cleaning stainless steel.
• DO NOT use a steel wool pad as it will scratch the surface. Do not use cleaners with
chlorides or chlorines. Do not use harsh scrubbing cleaners.
• Use a clean, hot, damp cloth to remove soap. Dry with a dry, clean cloth.
• Use care not to rotate the knobs when cleaning to avoid the release of gas.
• For hard-to-reach stains, you can remove knobs by gripping them and carefully pulling
them straight out. Clean and dry knobs completely before replacing, using care to put
knobs on the correct valves where they were removed.
Cleaning

27
CARE AND MAINTENANCE
ENAMELED CAST IRON GRIDDLE (48" - 1219 mm MODELS ONLY)
• To clean, make sure the griddle is completely cool, then clean with hot water or white
vinegar. DO NOT place in a dishwasher.
• Unlike traditional cast iron skillets or griddles, you do NOT need to regularly season
(for example, applying a thin layer of oil and then heating it at a high temperature for
roughly 1 hour) your enameled cast iron griddle.
BURNER GRATES, CAPS, AND SPREADS
• Lift off when fully cool. Wash burner caps in hot, soapy water and rinse with clean
water. To remove burned-on food particles, gently scrub with a plastic scouring pad.
Thoroughly dry before returning the caps to the appliance.
• Do not use cleaners for stainless steel surfaces, as these caps are not stainless steel.
• We recommend cleaning the burner slots routinely with a small gauge wire or needle
and especially after bad spillovers that could clog these holes.
• Burner spreads and burner caps are NOT dishwasher safe.
• Make sure grates are completely cool, then clean with hot water or white vinegar.
• When replacing grates, be sure they are positioned securely over the burners.
• Note that grates have rubber pads on the feet that come into contact with the appliance
to avoid scratches. After cleaning, verify the rubber pads are still there. Should they
come off, they can be reapplied using a heat-resistant adhesive.
DOOR HANDLE
• Clean with a warm soap and water solution; dry with a soft, lint-free cloth.
• Do not use abrasive cleaners or scrubbers; they will permanently damage the finish.
OVEN DOOR
• Use soap and water to thoroughly clean the top, sides, and front of the door. Rinse
well. Use a glass cleaner to clean the glass on the outside of the door. Do not use oven
cleaners, cleansing powders, or harsh abrasives on the outside of the door.
• Do not allow excess water to run into any holes or slots in the door. Any soap left on the
liner causes additional stains when the oven is heated.
Cleaning

28
CARE AND MAINTENANCE
OVEN GLASS
Clean all glass surfaces with a warm soap and water solution. Use a mild glass cleaner to
remove fingerprint or smears. DO NOT use a steel wool pad as it will scratch the surface.
Dry with a soft, lint-free cloth.
PORCELAIN SURFACES
• Clean the cooktop, drip pan, oven interior, and inner door liners with a warm soap and
water solution. Rinse and dry with a soft cloth.
• Before cleaning the oven, remove oven racks and clean separately.
• No commercial oven cleaner or liner protective coating of any kind should be used in or
around any part of the oven.
• Remove the drip pan by lifting up from each front corner and sliding out, using care to
not damage the lower burner spread in the process, and clean with a warm soap and
water solution.
• Do not leave acid or alkaline substances on the porcelain parts (such as vinegar, lemon
juice, salt, tomato sauce, etc). Use a rubber spatula to remove food and fat residues.
OVEN RACKS
Clean oven racks with a warm soap and water solution. To clean heavy soil, use a scouring
pad such as steel wool with plenty of water.
Cleaning
29
TROUBLESHOOTING
SYMPTOM POSSIBLE CAUSE POSSIBLE SOLUTION
Spark tip(s)
not igniting.
Ignition module has failed.
If there is still no spark ignition,
the appliance burners can still be
used if needed. To light them:
1. Holding a lit match to the
flame spreader, push in on the
control knob and turn counter-
clockwise to HI.
2. When the flame is burning all
the way round the burner, you
may adjust the heat.
Contact ZLINE customer service.
Unit is not plugged in. Plug in unit.
Igniters are wet or dirty. Dry or clean igniters.
Igniters spark
continuously after
flame ignition.
Power supply polarity
is reversed.
Contact ZLINE customer service.
Igniters are wet or dirty. Dry or clean igniters.
• Please review this list for common troubleshooting tips before calling for service, as this
may save you time and money.
• This list contains frequently encountered problems that are not results of faulty workmanship
or material use.
• Your product may not have some of the features described here.
If a problem cannot be resolved after following the instructions in the manuals,
please contact ZLINE customer service at 1-614-777-5004. Never attempt
to repair or disassemble gas lines, burner spreads, or the internal electrical
wiring of your range.
WARNING
Troubleshooting
30
TROUBLESHOOTING
SYMPTOM POSSIBLE CAUSE POSSIBLE SOLUTION
Burners will not light.
Burner parts or igniters may
be wet, dirty, or misaligned.
Check that the burner
parts are clean, dry, and
correctly assembled.
Spark tip igniters may be
damaged or dirty.
Check that the igniters are clean
and not damaged.
Igniters are sparking
but burners are
not igniting.
Caps or burners
are misaligned.
Realign caps to
burners and re-try.
Cooktop burners
will not stay lit and
auto reignition is
not working.
Gas is not flowing properly.
Contact ZLINE customer service.
Spark tip or spark module is
not working properly.
Burner flame goes out
at low setting.
Low gas pressure. Contact gas company.
Air intake holes around
burners are obstructed.
Remove obstruction from air
intake holes.
Low flame adjustment may
be set too low.
Readjust.
Burner flames are very
large and yellow.
Burner spread ports
are clogged.
Clean burner spread ports
with straightened paperclip,
needle, or wire.
Burner spreads or caps are
not positioned properly.
Remove and carefully re-install
burner spreads and caps.
Appliance is being operated
with the wrong type of gas.
Ensure that the type of appliance
matches the gas supply.
Regulator is not installed, is
faulty, or is set for the wrong
type of gas.
Have a qualified technician
replace regulator or set regulator
for proper gas.
The air quality of the room
may be affecting the
flame color.
Ensure that there are no candles,
cleaning products, air purifiers,
etc. in the room.
Troubleshooting
31
TROUBLESHOOTING
SYMPTOM POSSIBLE CAUSE POSSIBLE SOLUTION
Brass burner(s)
change color.
Brass burners naturally
oxidize over time and form
a patina that is a beautiful
deep brass hue. This process
ensures our brass burners
are corrosion resistant and is
not cause for a return.
This is a normal occurrence for
brass burners; no troubleshooting
is required.
“Cracking” or
“popping” sound
is heard coming
from appliance.
This is the sound of metal
heating and cooling.
This is normal for oven operation.
Steam/condensation
is coming from the
back splash oven vent.
Cooking foods high in
moisture or if the ambient
temperature is cold.
Condensate water is a natural
occurrence and is non-corrosive.
Nothing works.
Power supply is
not energized.
Have an electrician check
the power supply, including
the house circuit breaker,
wiring and fuses.
Oven will not heat.
Faulty igniter, thermostat, or
safety valve.
Contact ZLINE customer service.
Foods over-cooked or
under-cooked.
Incorrect cooking
temperature.
Adjust temperature, or
rack position.
Calibration of oven
temperature.
Contact ZLINE customer service.
Troubleshooting

WARRANTY
COVERAGE
ZLINE Kitchen and Bath (“ZLINE”) dual fuel ranges have a one year parts and service
warranty and a limited lifetime warranty on burners, which includes parts and labor for
spark tips.
ZLINE warranty periods begin from the original date of product delivery and solely cover
the original purchaser of the product, delivered new and in its original carton. The limited
warranty covers all parts and labor for necessary repairs if any part of the product, or
the product itself, proves to be defective in materials or workmanship. The product must
be deemed serviceable via troubleshooting with the ZLINE Customer Experience team. All
service on ZLINE products under warranty must be performed by ZLINE-approved and
ZLINE-certified service providers unless otherwise specified by ZLINE. Service will be
provided during normal business hours. Products must be unobstructed and accessible to
the service provider at the time of service. ZLINE’s liability is limited to the original purchase
price of the product. Additional injuries, losses, damages, or other inconveniences caused by
product malfunction or defects in materials are not covered under the terms of this warranty.
TERMS
ZLINE warranties apply only to the original purchaser of a ZLINE product installed for normal
residential use. This is defined as a single-family, residential dwelling in a non-commercial
setting. Any warranty claim stemming from installation, operation, or any other use within a
commercial setting is not covered under this limited warranty. Commercial settings include,
but are not limited to: schools, churches, hotels, restaurants, vacation rentals such as Airbnb,
daycare centers, private clubs, fire stations, common areas in multi-family dwellings, nursing
homes, food service locations, and institutional food service locations such as hospitals or
correctional facilities.

WARRANTY
This warranty is non-transferable and will not under any circumstance be extended based
on the date of installation — the warranty period takes effect from the date of delivery and
only covers the original purchaser. The warranty applies only to products installed in the
contiguous United States and the District of Columbia. Failure to secure certified warranty
service per these terms will result in a forfeiture of the remaining warranty. Out-of-pocket
payments will not be reimbursed unless prior approval is received from ZLINE and/or ZLINE-
certified service contract partners. Unapproved out-of-pocket payments for service will not
be reimbursed. All warranty procedures must be followed to maintain warranty coverage.
If a product qualifies within the service window provided under these warranty terms, and
ZLINE is unable to repair the product or a defective part of the product after a reasonable
number of attempts, ZLINE reserves the right to offer to replace the defective part or the
product or provide the original purchaser a full refund of the purchase price of the product
(not including installation, removal, or other charges that were not included in the original
purchase price). The original purchaser of the product must provide the original proof of
purchase, including the purchase date, when filing a claim to obtain replacement parts,
service, or refunds. Additionally, the original purchaser of the product must provide the serial
number of the product when filing a claim to obtain replacement parts, service, or refunds.
This warranty shall not apply to any ZLINE product in which the original factory serial
number has been removed, altered, or cannot be readily determined for any reason. Further,
ZLINE is not responsible for damage resulting from, but not limited to: shipment, delivery, or
improper installation; negligence or improper maintenance, misuse, or abuse of the product;
unauthorized alteration, modification, or tampering with the product; accident, fire, floods,
pest infestations, pandemics, natural disasters, or any other unpreventable or unexplained
acts of nature, commonly referred to as “acts of God”; flare-up fires or damages caused
by improper electric supply, electrical line current, voltage, or power surges; and service
to correct installation not in accordance with the instructions contained in ZLINE’s product
manuals and/or with local government codes.

This warranty does not apply to aesthetic damage, scratches, or natural wear caused by
normal use; second-hand, open box products, or products purchased from an unauthorized
retailer; improper liquid propane gas conversion or damage related to improper liquid
propane gas conversion; burner flame adjustments or related complaints; corrections
regarding normal adjustments or settings or local gas supply issues resulting in low pressure
or other issues; damages or issues stemming from alteration or tampering with the range,
including, but not limited to, painting any portion of the product’s interior or exterior and
cutting the supplied power cord to manually hardwire the product; and service for gas
pressure issues related to installation at high altitudes. A high-altitude pressure regulator
must be sourced by the customer.
In the event service is dispatched, and it is discovered that the reported issue is not covered
under warranty based on the disclaimers above, the customer will be responsible for all service
fees. Failure to pay these fees will result in the forfeiture of remaining warranty coverage.
Information contained within ZLINE’s installation and user manuals, in addition to product
information included on ZLINE’s website and all related digital listings, do not cover every
possible condition and situation that may occur during the installation or operation of
ZLINE products.
ZLINE reserves the right to make changes at any time to its products when considered safe,
necessary, and useful. Always check the ZLINE website for the most up-to-date version of its
product manuals: www.zlinekitchen.com/pages/manuals.
Do not install or operate any ZLINE product if it has missing or broken parts or if it arrives
damaged due to shipping. If ZLINE products arrive damaged, contact ZLINE Customer
Experience at 1-614-777-5004 for help. Failure to report a damaged appliance prior to
installation or operation may void the warranty.
ZLINE disclaims responsibility for damage or injury caused by improper installation or
use of any of its products. ZLINE is under no obligation, by law or otherwise, to provide
concessions, including repairs, prorates, rebates, discounts, or replacements, once the
warranty has expired.
WARRANTY
WARRANTY
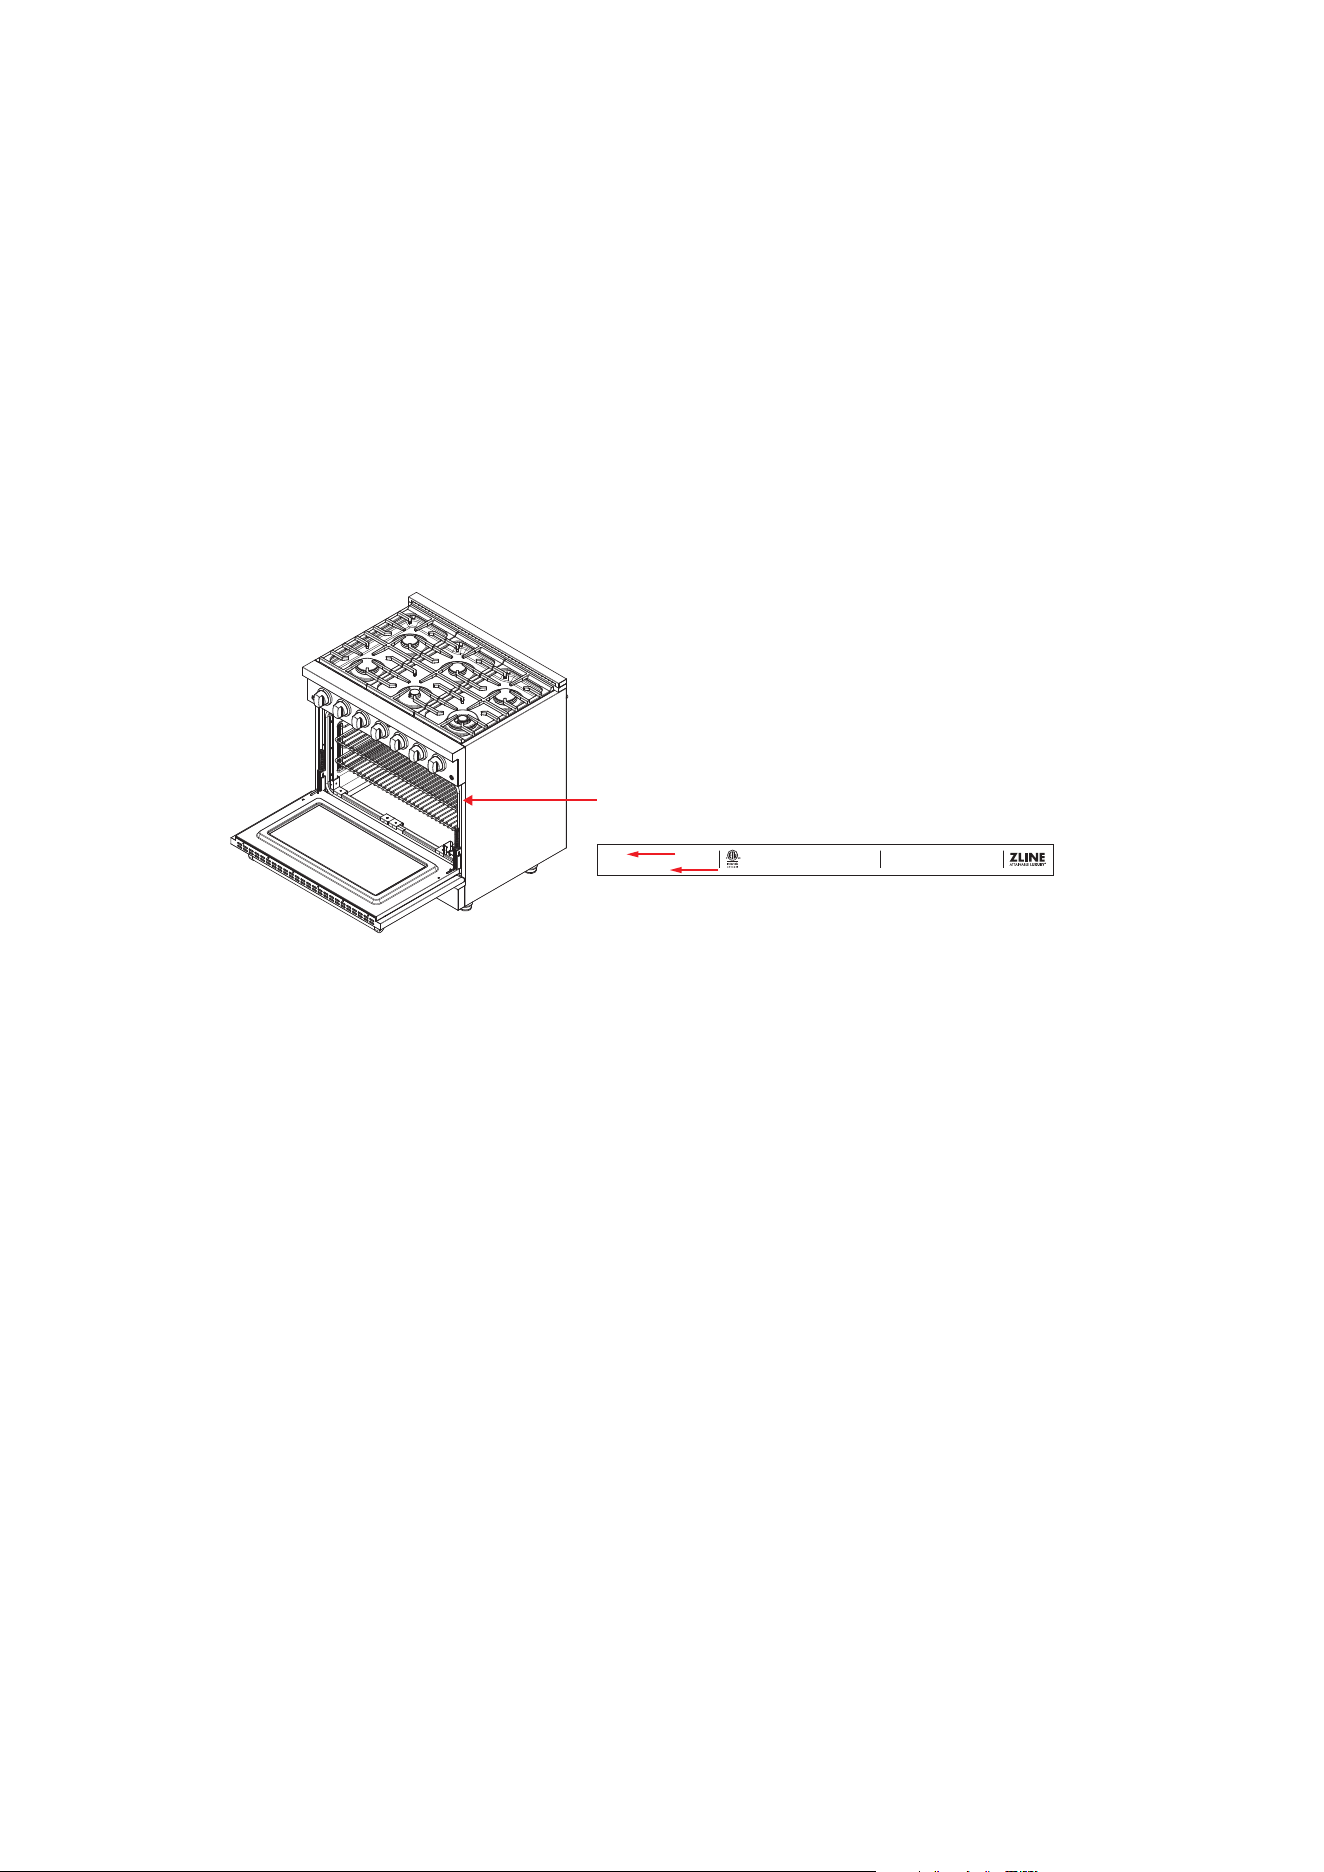
SERIAL NUMBER LOCATION
Please write down the model number (highlighted in the image below as the “SKU”) and
serial number of your appliance. Both numbers are located on the rating tag located on
the right front edge of your range. Do not remove permanently affixed labels, warnings, or
plates from the product. This will void the warranty. You may also consider attaching your
receipt or proof of purchase to this manual.
Appliance Tag
10 1/2" (267 mm)
11/16" (18 mm)
10 1/2" (267 mm)
11/16" (18 mm)
Voltage: Voltage
Frequency: Frequency
SKU: SKU
Model No.: MODEL NUMBER
Date: Month Year
Serial No.: SERIAL NUMBER
PRODUCT TITLE
This appliance can be used with Propane Gas and Natural Gas. It is shipped
from the factory adjusted for use with natural gas: Conversion orifices are
located in the conversion kit clam shell package. Follow the propane
conversion instructions located in the Installation Manual.
Conforms to:
Household Cooking Gas Appliances [CSA/ANSI Z21.1/CSA 1.1:2018 Ed.2+E2019]
Standard for Safety Household Electric Ranges [UL 858:2014 Ed. 16+R:02Aug2023]
Household Cooking Ranges (R2021) [CSA C22.2#61:2016 Ed.9+U1]
Voltage: 120/240 VAC
Frequency: 60 Hz
SKU: CDR30
Model No.: CDR30-A1
Date: May 2024
Serial No.: CDR30SE240500001CN-00
30" DUAL FUEL RANGE
This appliance can be used with Propane Gas and Natural Gas. It is shipped
from the factory adjusted for use with natural gas: Conversion orifices are
located in the conversion kit clam shell package. Follow the propane
conversion instructions located in the Installation Manual.
Conforms to:
Household Cooking Gas Appliances [CSA/ANSI Z21.1/CSA 1.1:2018 Ed.2+E2019]
Standard for Safety Household Electric Ranges [UL 858:2014 Ed. 16+R:02Aug2023]
Household Cooking Ranges (R2021) [CSA C22.2#61:2016 Ed.9+U1]
Project name: Rating Labels
Notes: Text presented in RED, with the exception of warning labels, should not be
printed. RED is to indicate information that needs to be filled out per product specifics.
This is a template. Once the artwork is approved for this sticker, please apply the template to all stickers
and send the artwork to the ZLINE Team for review. Thank you!
Date: October 1st, 2025Version: 1.0.0Page: 1/2
Manufacturer: Seng
Scale: 1:1
Product(s): Dual fuel models in all variants
Typeface: Futura PT (various weights)
Material(s): Vinyl sticker
Trim: Square
This is a template. Text presented in RED should not be printed.
RED is to indicate information that needs to be filled out per product specifics.
Example

WARRANTY
SERVICE
For warranty service, please contact our Customer Service team at
1-614-777-5004 or visit www.zlinekitchen.com/contact to utilize our
online Customer Experience Portal.
Scan the QR code to view the most up-to-date version of our Installation
Manual and User Manual.
Need to purchase a part or accessory for your ZLINE product?
Visit www.zlineparts.com, ZLINE’s official parts distribution partner.

This page left intentionally blank.

This page left intentionally blank.

This page left intentionally blank.