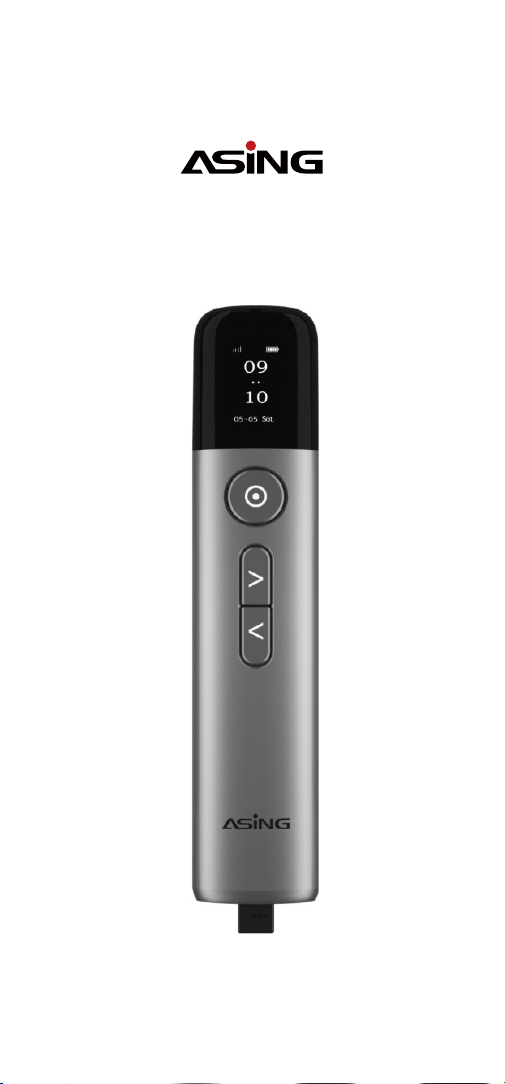
A9 User Manual
Support Email: service@asingshop.com
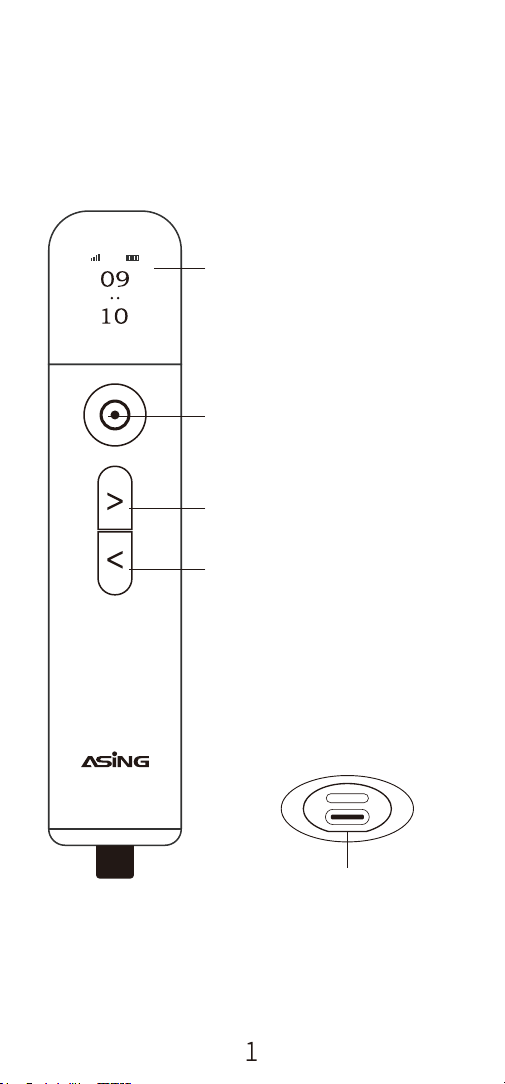
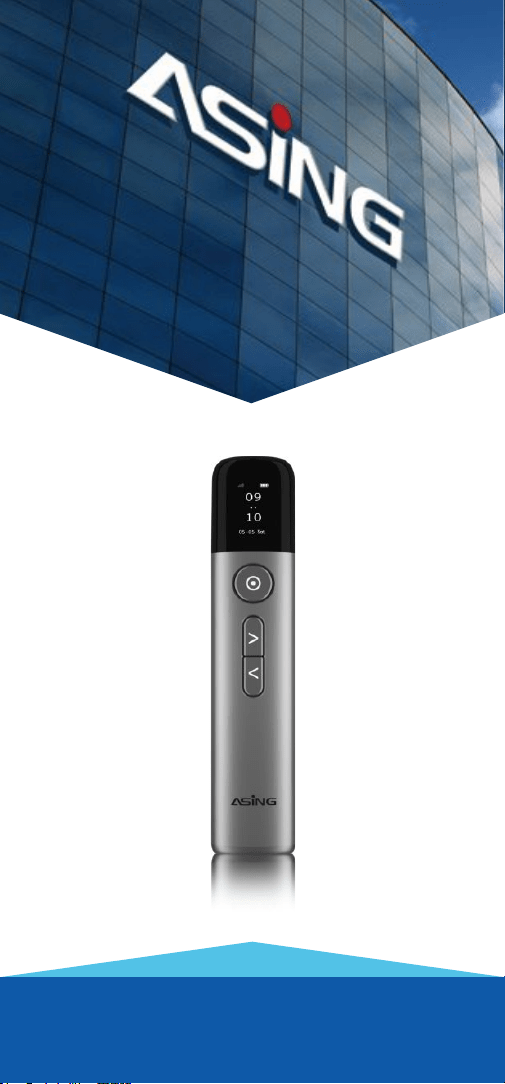
Showing date, time, signal, battery level,
timer, anti-lost prompt.
Touch Sensor button (touch/press)
Page Up Button
Type-C Charging Port
1. Button Overview
One touch: exit current function/confirm
to use air mouse function
Long touch: Magnifier/Spotlight/Digital
Laser, and move around
One click: switch Magnifier/Spotlight/
Digital Laser
Long press: Physical/Digital Laser
LED Display Screen
Click: navigate backward
Long Press: enter/exit full screen
Page Down Button
Click: Navigate forward
Long Press: enter/exit blackscreen
05 - 05 Sat.
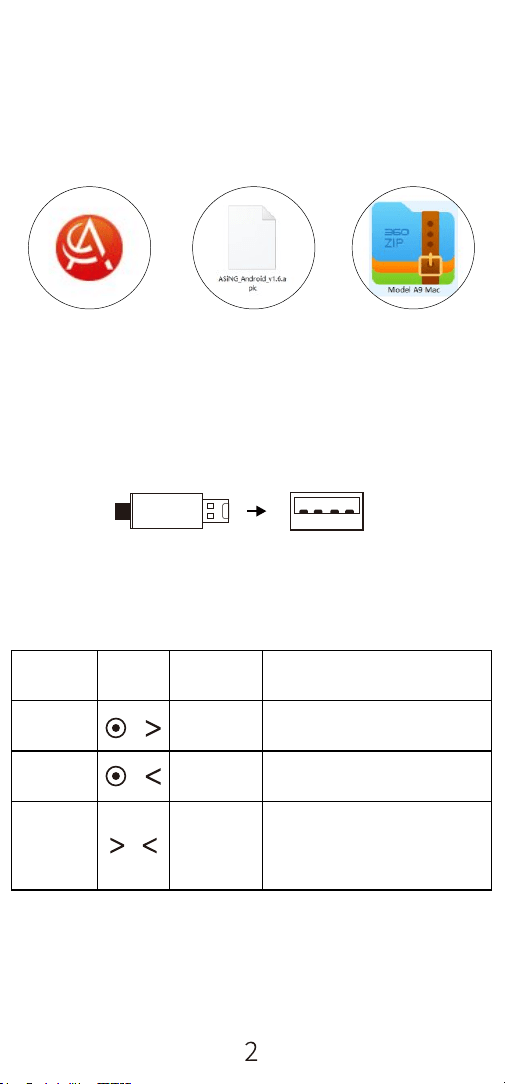
1) Unplug the USB receiver from the presenter to turn it on. Plug it
back to turn it off.
Currently, some versions of Windows 10 are supported for plug-and-play,
no need to open the program.
XP program for
Seewo & Windows
4) Now the ASiNG icon turns red and all functions can be used normally.
USB Receiver
Computer USB Port
3. Button Combination
+
Button
Timer prompt
(last set timer by default)
Switch three key values
cyclically: ← & →, ↑ & ↓, Page
Up & Page Down
Select the left mouse button in
the ASiNG program
Timer
Mouse
Left button
Function
2. Quick Setup
2) Plug the USB receiver into a computer.
3) Open the correct ASiNG program.
Mac program for
MAC OS
Android program
for Android
Key value
switch
Action
Description
Long press
One-click
Long press
Timer Prompt:
1) The time can be set via the ASiNG program and will be displayed on the LED
display screen.
2) The presenter will vibrate when the time ends. Specifically, it will vibrate
once every minute for the last 5 minutes, 3 times continuously when the time is
over.
+
+
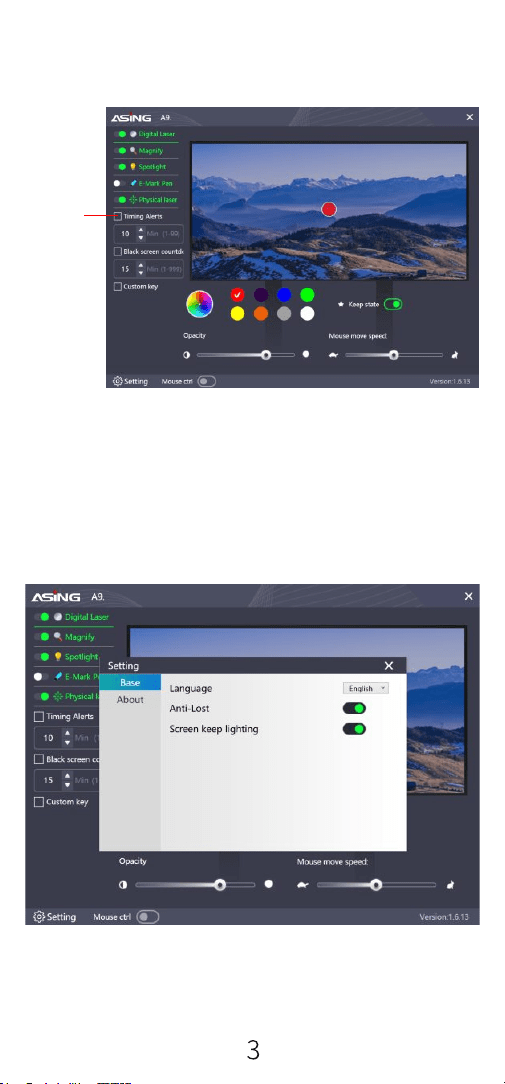
4. ASiNG Software Interface
1) The left side is the function selection area. If checked, functions
are enabled.
Check
When not operated for 5 minutes, the presenter will automatically
enter the anti-lost prompt. A USB receiver icon will be displayed on
the LED display and it will vibrate 5 times continuously.
Anti-lost Prompt
2) The bottom is the effect adjustment area, where you can adjust the
color, transparency, etc.
3) The middle is the effect preview area, where you can preview the
effects you set.
4) You can only select and use between a highlighter and a physical
laser at a time.
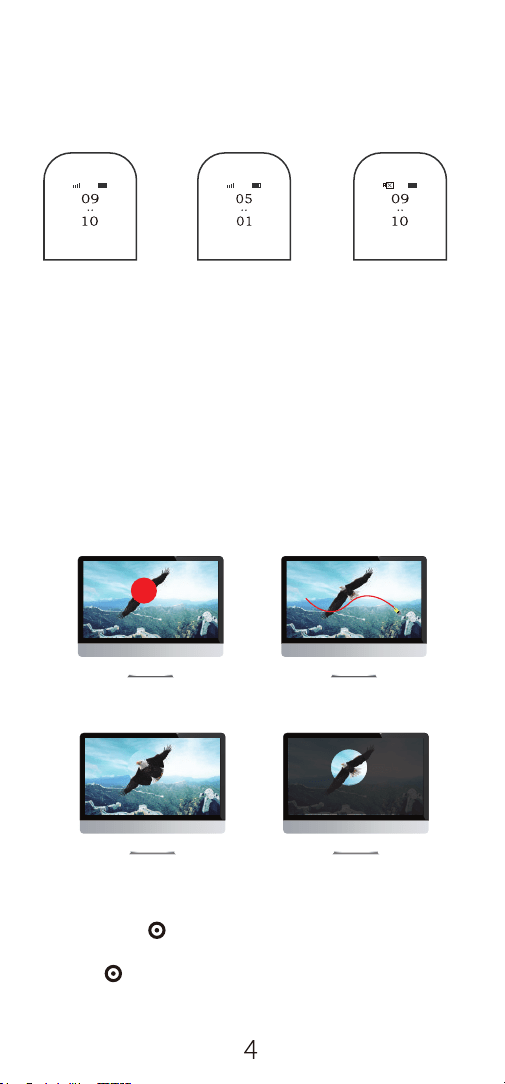
5. Functions Display
Real Time Display
May 5th - Sat.
09:10
(Normal Connection)
Timer Remaining Time
Display
May 5th - Sat.
5 min 1 s
(Normal Connection)
The USB receiver is
neither plugged into the
computer nor in the
presenter. A USB receiver
missing icon will appear.
a. When the presenter is turned on, the LED display will be on. When the USB receiver
is plugged into a computer, the presenter will automatically read the time and display
the real-time on the LED display. Two dots in the middle of the real-time will flash.
b. With a gravity sensor built-in, flip the presenter around to show the time and it will
last for 5 seconds.
2) Digital Laser / Full Scene Marking / Magnifier / Spotlight
Digital Laser
(Color, siz e & transparency are adj ustable.)
Magnifier
(Magnifica tion & size are adjustab le.)
Full Scene Marking
(Color & thic kness are adjustable .)
Spotlight
(Size, brig htness & blur are adjust able.)
Long touch the button to use those functions, and
the default function is the last used one. To switch, just double
-click the button.
05 - 05 Sat.
05 - 05 Sat.
05 - 05 Sat.
1) LED Display

6. Low Battery & Charging
7. Special Instruction
8. FAQs
1.Low battery: When it's less than 10%, the ASiNG software interface
will display the red battery icon and battery power. Also, the battery
icon will become red on the LED display screen.
2. Charging: When charging, the battery icon changes dynamically.
When fully charged, the battery icon will become red.
1) Pairing
Steps: a. turn off the presenter; b. Long-press the Up & Down
button, and meanwhile unplug the USB receiver. The software will
show "pairing". c. Plug the USB receiver into a computer, and the
presenter will automatically restart. The paring is successful.
2) Gyroscope Calibration
First, turn off the presenter, and then place it on a flat surface for 3
seconds(no shaking at all). It will automatically calibrate successfully.
Q1. The presenter cannot be turned on.
A1. Check whether the USB receiver is unplugged; Check if it's a dead
battery, and Try again after charging.
Q2. The presenter is turned on but doesn't work.
A2. Check if the USB receiver is plugged into the computer correctly or
try with another computer. If it's still not working, turn the presenter
off and on, and try again.
Warning:
1) When using this product's USB flash drive, please do make
copies as we do not provide data repair.
2) This product has a class 3R laser and DO NOT shine the laser in the
eyes of humans or animals!
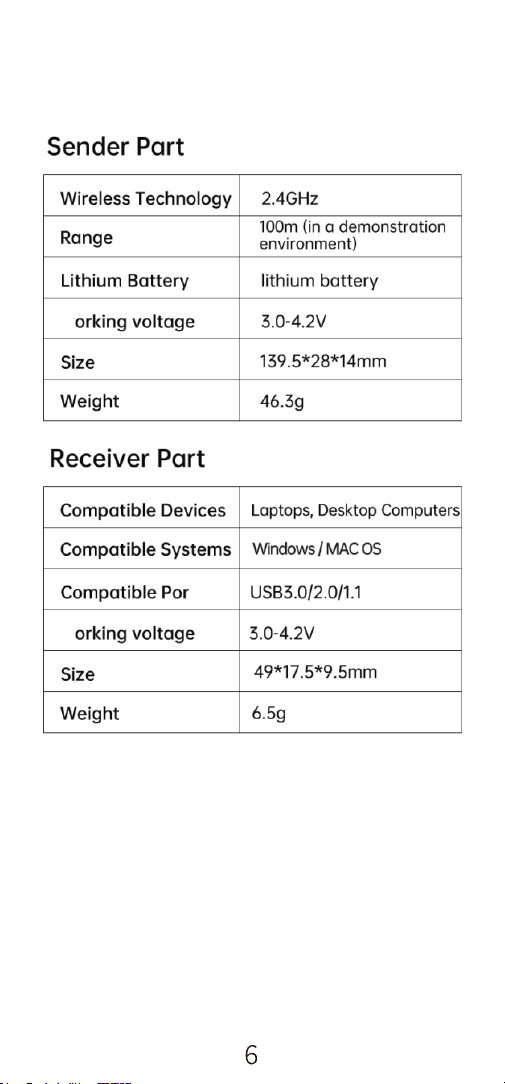
9. Product Specification
W
W
If any questions, please feel free to contact us.
Site: www.asingshop.com
Email: service@asingshop.com
YouTube: ASiNG Shop
Shenzhen Ruisicong Technology Co, Ltd., Shenzhen, China