
1
Welcome to
the breezy life.
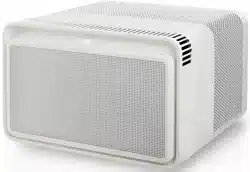
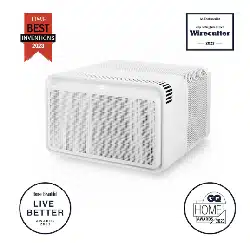
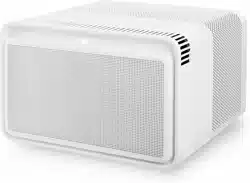
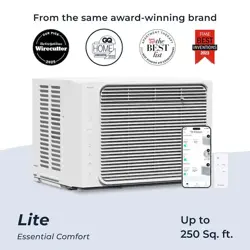
The Windmill AC
Lite Series: 5K BTU
User Manual & Install Guide

2
We take care of your air.
We started Windmill to help you feel more comfortable at home. We’re a family-
run small business based in New York, and your support means the world!
Any questions or issues? We’ll get you squared away.
windmillair.com/support
Thanks for trusting Windmill,
Mike & Team
Loving Windmill?
We make other high-design, high-performance home air products.
Go to windmillair.com to shop and learn more.
Follow us @windmillair on Instagram for exclusive discounts and announcements!

3
1
2
3
4
5
6
Table of contents
Safety first
Window requirements
What’s in the box?
Installation & assembly instructions
Using your air conditioner
Care and cleaning
4
10
11
12
20
23
4
Safety rst
IT’S REALLY IMPORTANT YOU READ THESE WARNINGS AND THIS ENTIRE GUIDE BEFORE
YOU GET STARTED. AND PLEASE FOLLOW EACH STEP EXACTLY AS IT’S OUTLINED.
SAVE THIS GUIDE FOR FUTURE REFERENCE.
This is a safety alert symbol. This symbol alerts you to potential hazards that can harm
you or others or even cause death. All safety messages will directly follow the safety alert
symbol and/or the words “DANGER” or “WARNING”.
DANGER
Failure to immediately follow these instructions may cause serious injury or even death.
WARNING
All safety messages alert you of potential hazards, how to reduce the chance of injury,
and what can happen if instructions are not followed correctly.
WARNING
To reduce the risk of fire, electrical shock or injury when using your air conditioner, follow
the basic precautions below:
• Plug into a grounded 3 prong outlet.
• Do not remove the ground prong.
• Do not use a plug adapter.
• Do not use an extension cord.
• Unplug the air conditioner before servicing.
• Use two or more people to move and install the air conditioner.
5
About R32 refrigerant
This air conditioner uses R32 refrigerant. Compared to traditional refrigerants, R32 has a minimal
impact on the ozone layer and a significantly lower greenhouse effect, making it a responsible
option for cooling your space.
R32 is both odorless and combustible, which means it requires careful handling. Under certain
conditions, it can pose a fire or explosion risk; however, when installed in an appropriately sized
room and used according to the guidelines provided, it is completely safe.
This appliance is not intended for use by individuals (including children) with reduced physical,
sensory, or mental capabilities, unless they are under supervision or have received instructions from
a person responsible for their safety. Children should be supervised to ensure they do not play with
the appliance.
• Please read the entire manual before installation, operation, and maintenance.
• Do not accelerate the defrosting process.
• Only clean the appliance as specified in this manual.
• The appliance should not be stored in a room with operating heat or fire sources (for example:
open flames, an operating ignition gas appliance, or an operating electric heater).
• This appliance must be maintained by a professional, at their own risk and liability.
Do not perform maintenance or try to fix this appliance yourself.
Contact the manufacturer for maintenance or troubleshooting.
• The handling, installation, storage, servicing, and disposal of this appliance must
comply with the provisions of gas-related national laws and regulations, in addition to national
wiring regulation. A leak test must be performed after completing installation.
• It is necessary to clear away the refrigerant in the system when maintaining or
scrapping an air conditioner. Be aware that refrigerants may not contain an odor.
This is to be done by a professional only.
• Unit operation limits: Outdoor side 61~110°F, 80% relative humidity; Indoor side 61~90°F, 80%
relative humidity.
• Site safety during installation, removal, and maintenance: open flames prohibited, ventilation
necessary, no static electricity, protective clothing and gloves worn, no mobile phone usage.
6
WARNING
Failure to follow these instructions can result in death, fire, or electrical shock.
• Only plug into a grounded 3 prong outlet. Do not remove the ground prong.
• Do not use an adapter.
• Do not use an extension cord.
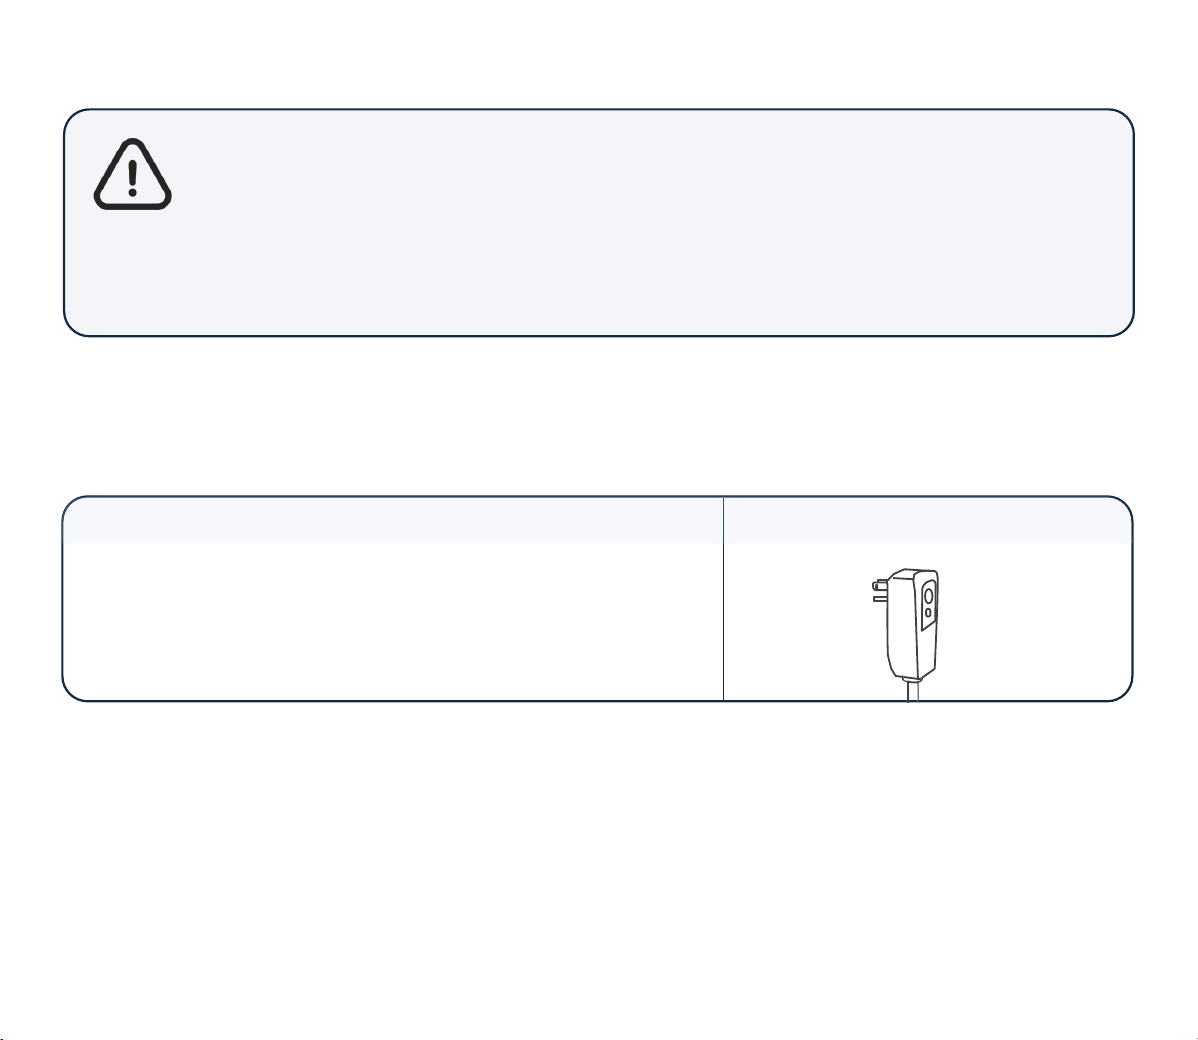
The electrical ratings for your AC are listed on the product. Please reference the chart below.
If you have any questions or need clarification, contact Windmill Support at
• 115 volt (103min–127max)
• 0-8 amps
• 10-amp time-delay fuse or circuit breaker
• Use on single outlet circuit only
Wiring Requirements
Power Supply Cord
Important information on grounding your air conditioner:
To minimize the possibility of electrical shock, the cord must be plugged into a 3 prong
outlet and grounded in accordance with all local codes and ordinances. If a 3 prong outlet
is not available or there is doubt on the installation environment, it is your responsibility to
contact a qualified electrician and to assure that the electrical installation is adequate and in
conformance with the National Electrical Code, ANSI/NFPA 70-latest edition, and all local codes
and ordinances.
Wiring requirements
7
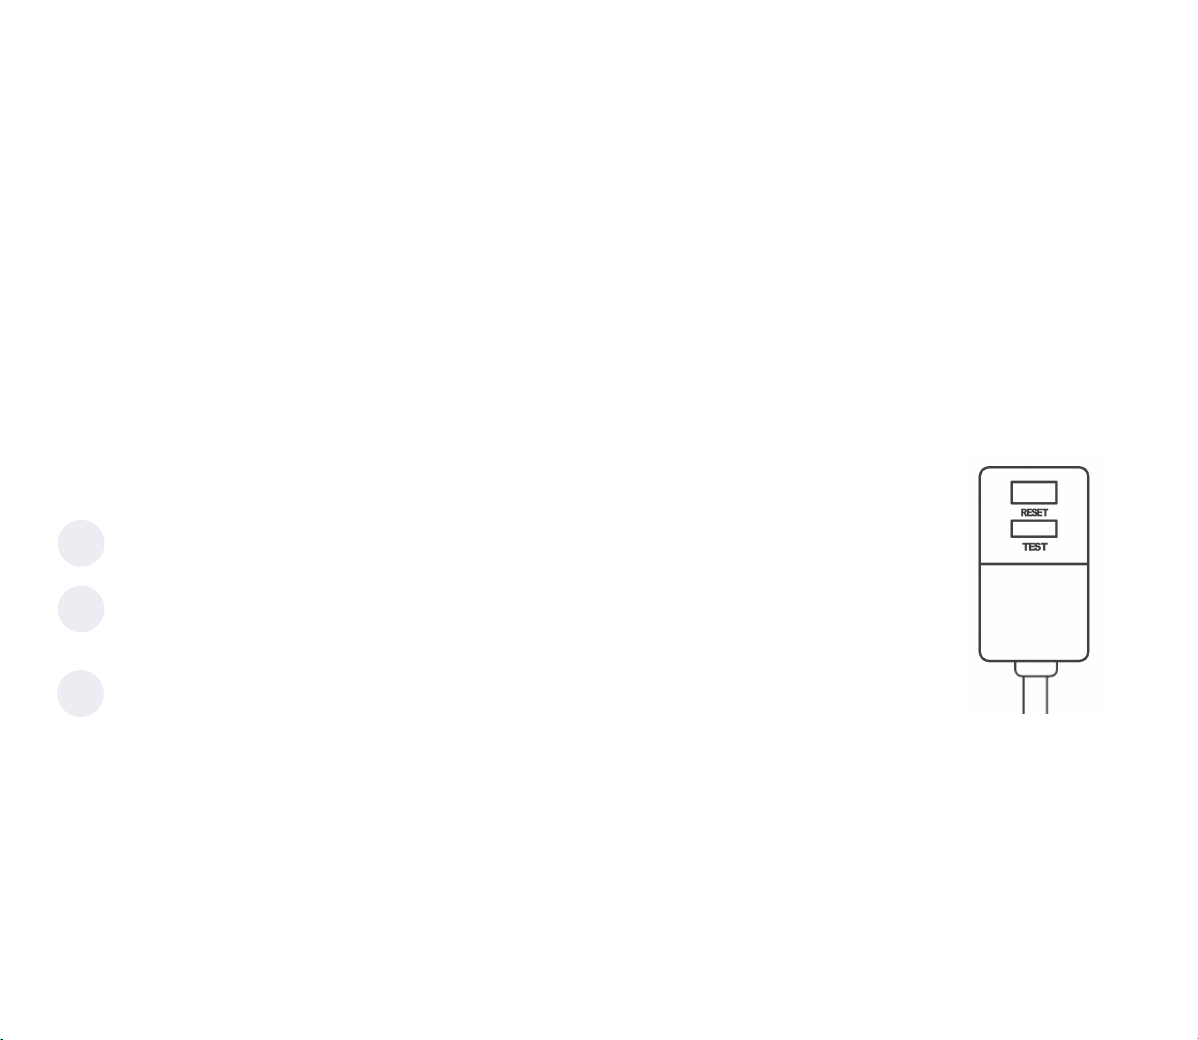
LCDI power cord and plug:
This air conditioner is equipped with an LCDI (Leakage Current Detection and Interruption)
power cord and plug, as required by US National Electric Code 440.65. This cord consists of a
length of shielded flexible cord with no termination on the load side and a LCDI attachment
plug on the line side. The LCDI power cord and plug will remove the supply source via electrical
disconnect (circuit trip) if the nominal current leakage between the cord shield and either
load conductor exceeds a predetermined value. The cord will remain deenergized until the
device has been manually reset. This is intended to reduce the risk of a fire in the power cord or
combustible materials nearby. The cord shields are not grounded and they must be considered
a shock hazard if exposed. The cord shield must not be connected to ground or to any exposed
metal. The test and reset buttons on the LCDI plug are used to check if the plug is functioning
properly.
To test the plug:
Plug the power cord into a grounded wall outlet.
Press the TEST button. The circuit should trip, cutting all power
to the air conditioner (on some units, a green light may turn off).
Press the RESET button to restore power (on some units, a green
light may turn on).
Follow the instructions of the plug. If a test fails, do not use the air conditioner
or attempt to reset the LCDI plug. Contact windmillair.com/support for help.
1
2
3

8
To avoid risk of personal injury, property damage, and product damage, pay close
attention to the following during installation:
• The AC could fall if it is not properly installed, which could result in death or serious
injury. Pay close attention to all steps to ensure you properly position and secure the
AC in the window.
• The AC is heavy. Two or more people are needed to move and install the unit.
We don’t want you hurting yourself, so please use proper carrying and lifting
techniques (as they say, lift with your legs, not your back!).
• Do not touch the metal fins or the front and rear coils - they’re sharp. Wear
protective gloves whenever lifting or carrying the unit and handle the AC with care.
• Carefully inspect the window where you are installing your AC unit. Make sure it is in
good condition and can support the weight of the unit over a long period of time.
• To make sure the AC doesn’t fall out of the window during installation, use a helper
to securely hold the back of the unit up while positioning it properly in the window.
Follow all warnings and safety instructions.
Use only the screws that are specified in this guide.
To avoid injury, wear closed toe shoes and do not wear loose clothing that could get
tangled in the unit during installation.
The installation site should be well ventilated and free from any fire, welding, smoke,
or any heat source that can produce an open fire. Make sure there is no electrical static
and wear anti-static clothes and gloves. Make sure nothing is blocking the front of the
AC (outlet and inlet areas).
Avoid placing the AC near power strips, electrical outlets, or other high-powered
appliances to prevent circuit overload, overheating, and electrical hazards. Make sure
there are no valuables directly under the area the AC will be installed.
1
2
3
4
5
6
General installation warnings and cautions:
9
Federal Communications Commission (FCC)
interference statement
This equipment has been tested and found to comply
with the limits for a Class B digital device, pursuant to
part 15 of the FCC Rules. These limits are designed to
provide reasonable protection against harmful inter-
ference in a residential environment. This equipment
generates, uses, and can radiate radio frequency energy
and, if not installed and used in accordance with the
instructions, may cause harmful interference to radio
communications. However, there is no guarantee that
interference will not occur in a particular installation.
If this equipment does cause harmful interference to
radio or television reception, which can be determined
by tuning the device off and on, the user is encouraged
to try to correct the interference by one or more of the
following measures:
• Reorient or relocate the receiving antenna.
• Increase the separation between the device and
receiver.
• Connect the equipment into an outlet other than
the one used for the receiver.
• Consult the dealer or an experienced radio/TV
technician for assistance.
This device complies with Part 15 of the FCC Rules.
Operation is subject to the following two conditions:
(1) This device may not cause harmful interference, and
(2) This device must accept any interference received,
including interference that may cause undesired
operation.
FCC caution:
Any changes or modifications not expressly
approved by the party responsible for compli-
ance could void the user’s authority to operate
the equipment.
Host device labeling:
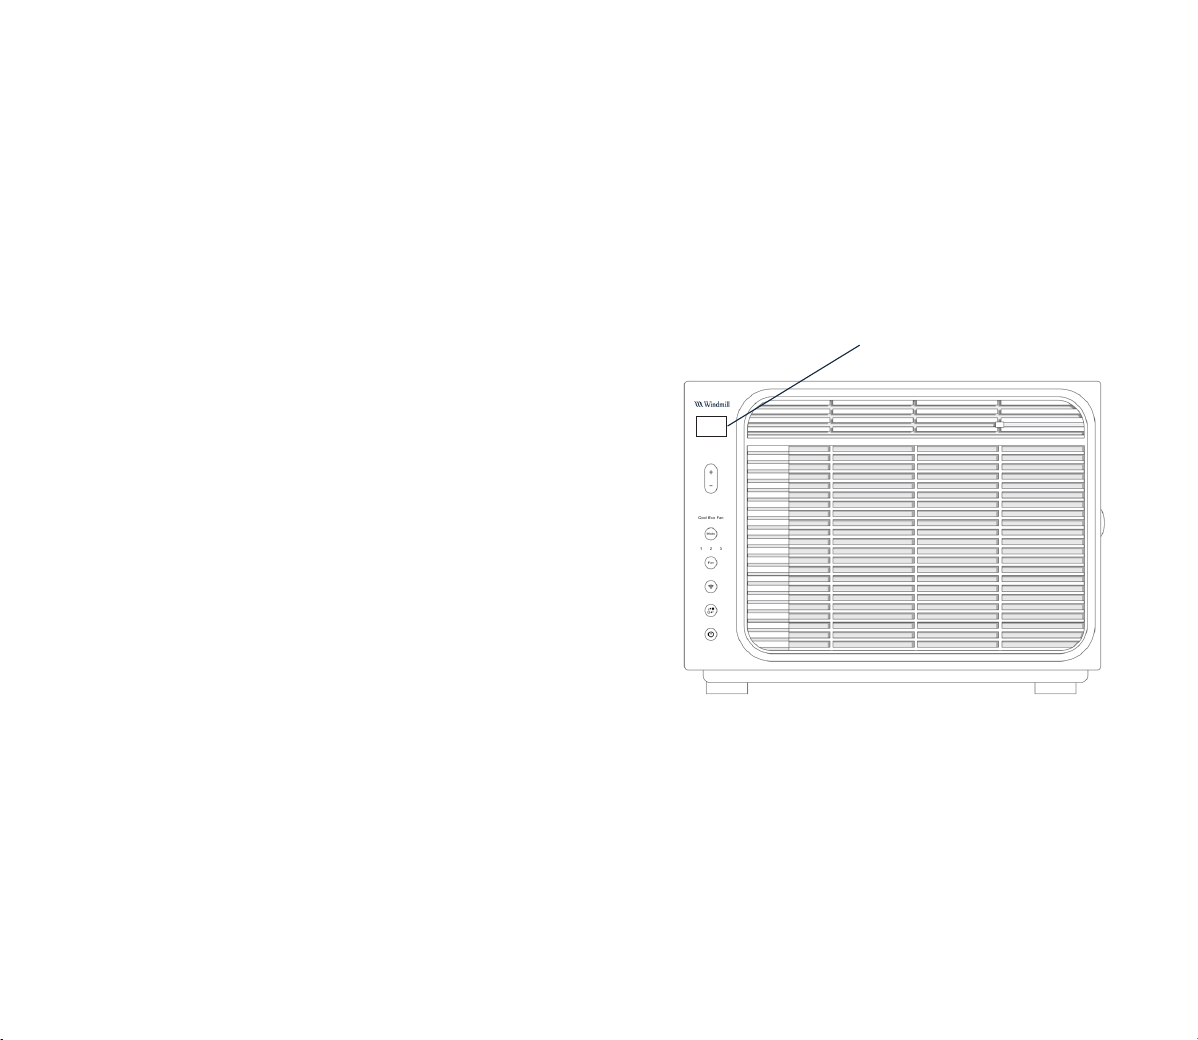
This device includes the following module.
Contains FCC ID: 2AC7Z-ESP32WROOM32E
RF exposure statement:
This equipment complies with FCC radiation
exposure limits set forth for an uncontrolled en-
vironment. This equipment should be installed
and operated with minimum 20 cm between
the radiator and your body. This transmitter
must not be co-located or operated in con-
junction with any other antenna or transmitter
unless authorized to do so by the FCC.
This is the location
of the module
10
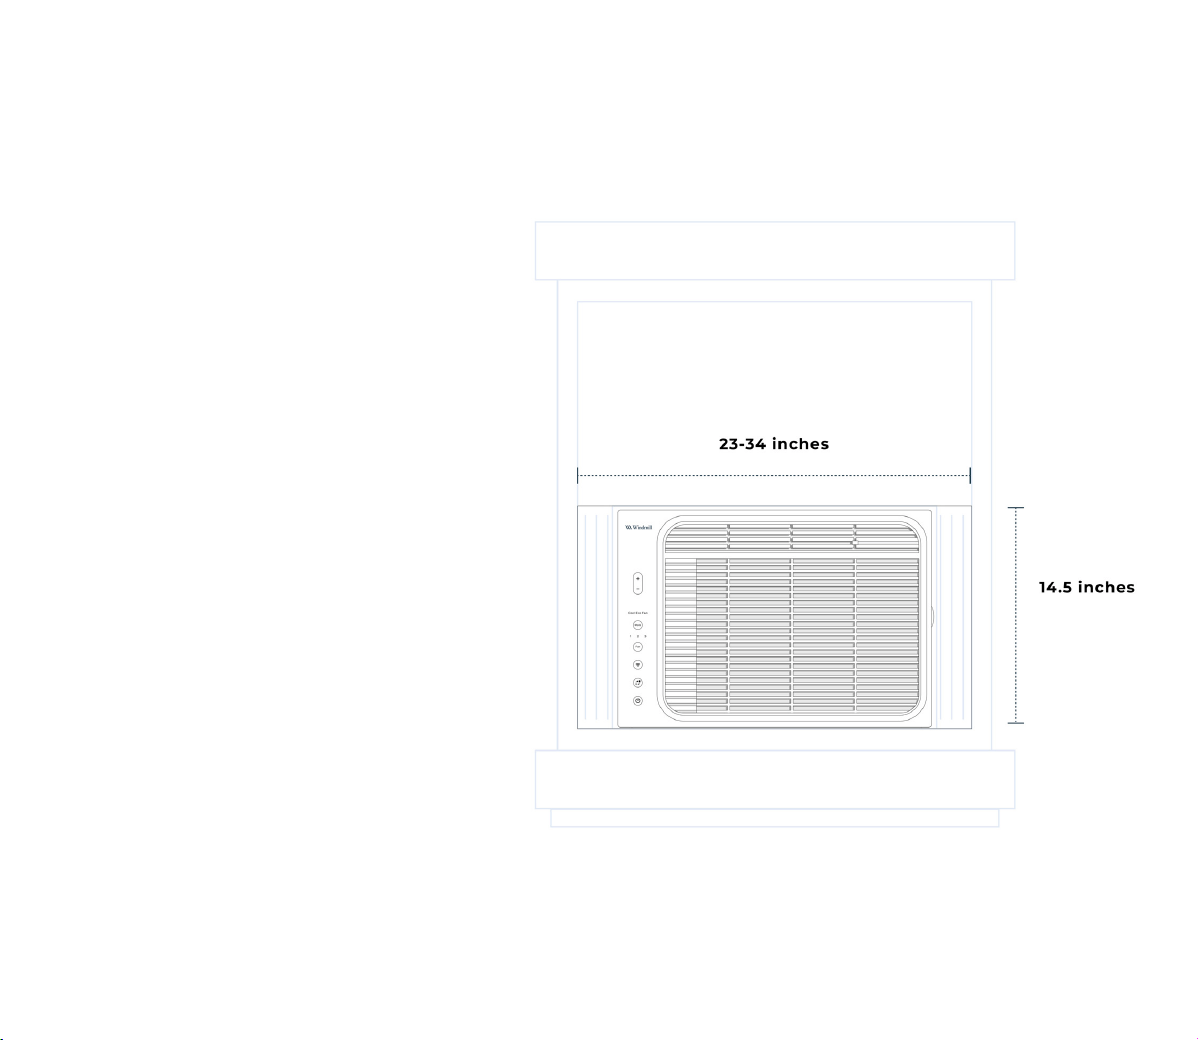
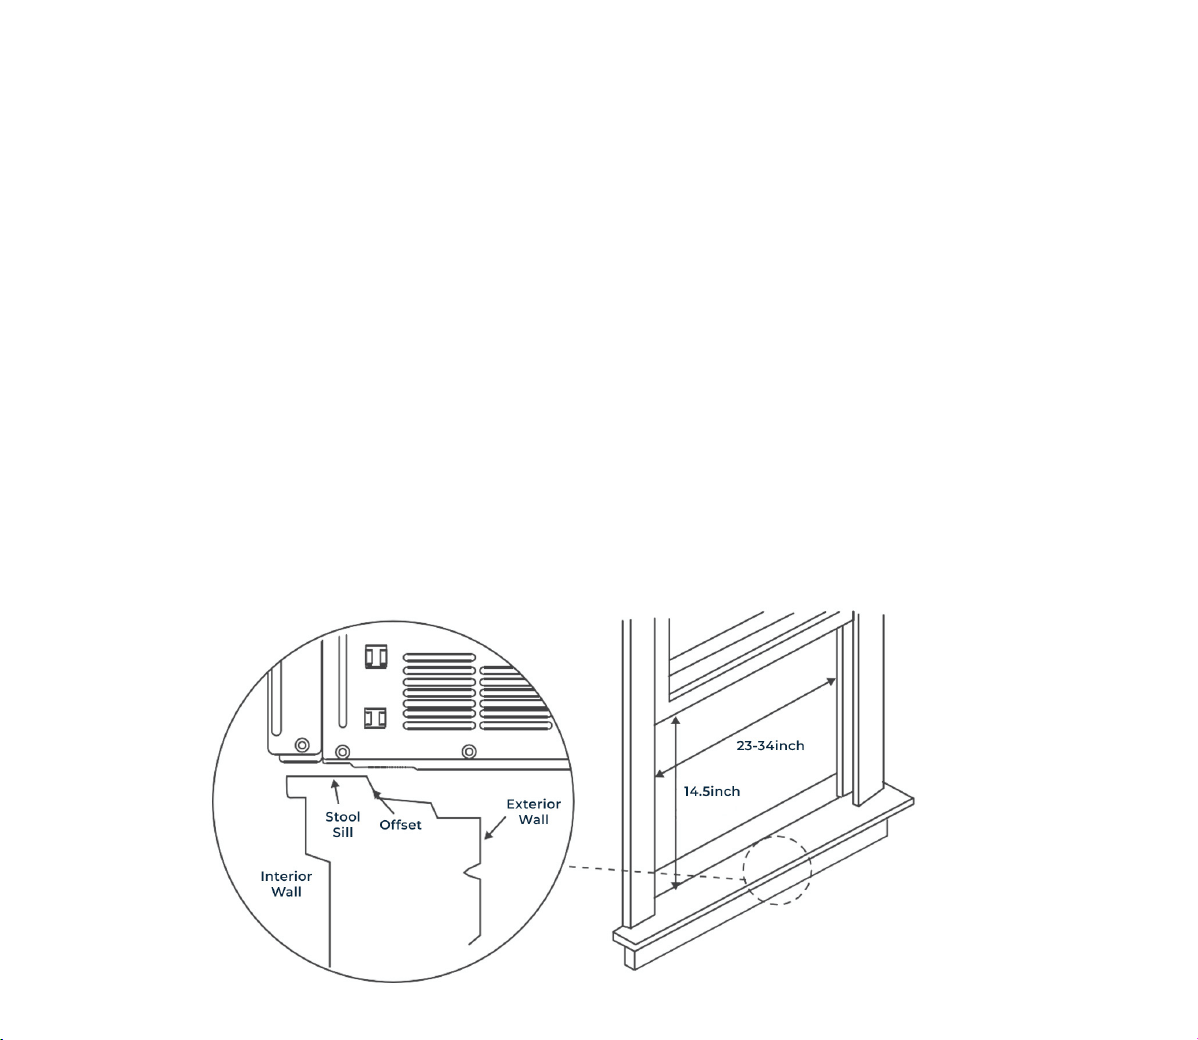
The 5K BTU Windmill AC (Lite Series)
is designed for windows that slide up
and down (double-hung and single-
hung windows) with a width of 23-34
inches and a vertical opening of at
least 14.5 inches.
Make sure your window is in good
shape and can handle the weight of
the AC for a long period of time. You’ll
also want to make sure there is at least
2 feet of clearance on all sides of your
AC (including the front and back).
This helps ensure walls and other
objects don’t block airflow.
Window requirements
11
What’s in the box?
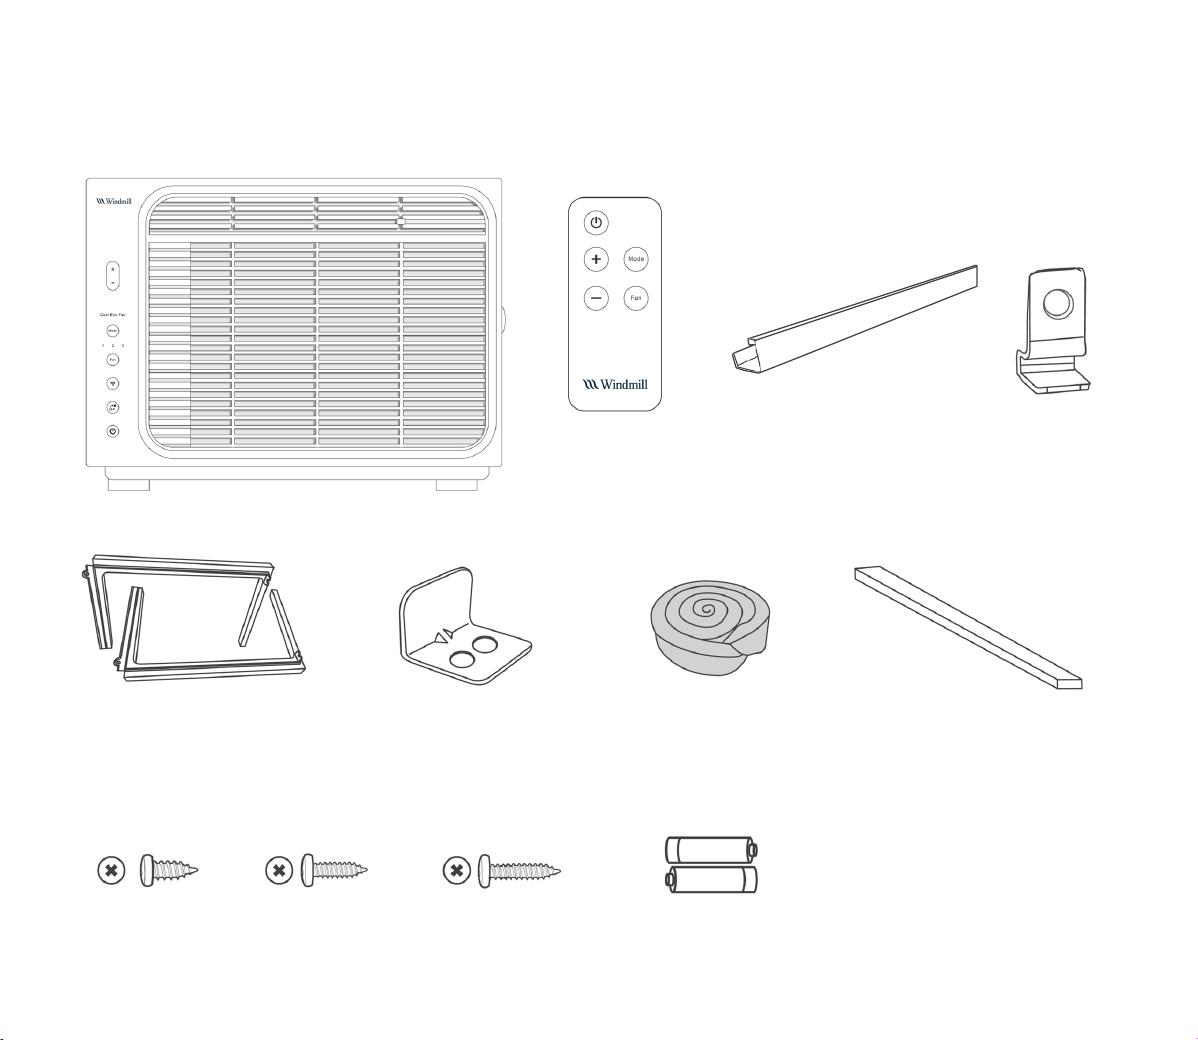
Window Air Conditioner *1
Filler Panels *2
(with “Left” and “Right” labeled)
3/8”Screws *4 1/2”Screws *3 3/4”Screws *4 Remote Control
Battery*2
Remote Control *1
Sash Lock
(Two holes) *1
Window Sash Seal
(Sponge) *1
Foam Top Window
Gasket *1
(Thin sponge, in case needed)
Top Rail
(With sponge) *1
Lock Frame *2
12
Installation & assembly
instructions
Some assembly is required for your new air conditioner. Please read this entire manual and the
following instructions carefully before you get started.
Some initial notes:
• All supporting parts must be secured to firm wood, masonry, or metal.
• The electrical outlet must be within reach of the power cord.
• The air conditioner should be tilted about 3° for better drainage of condensate and
rainwater.
• Save the product packaging and installation instructions for future reference.
• Store the air conditioner in the product box when not in use for an extended period of time.
13
Top rail assembly
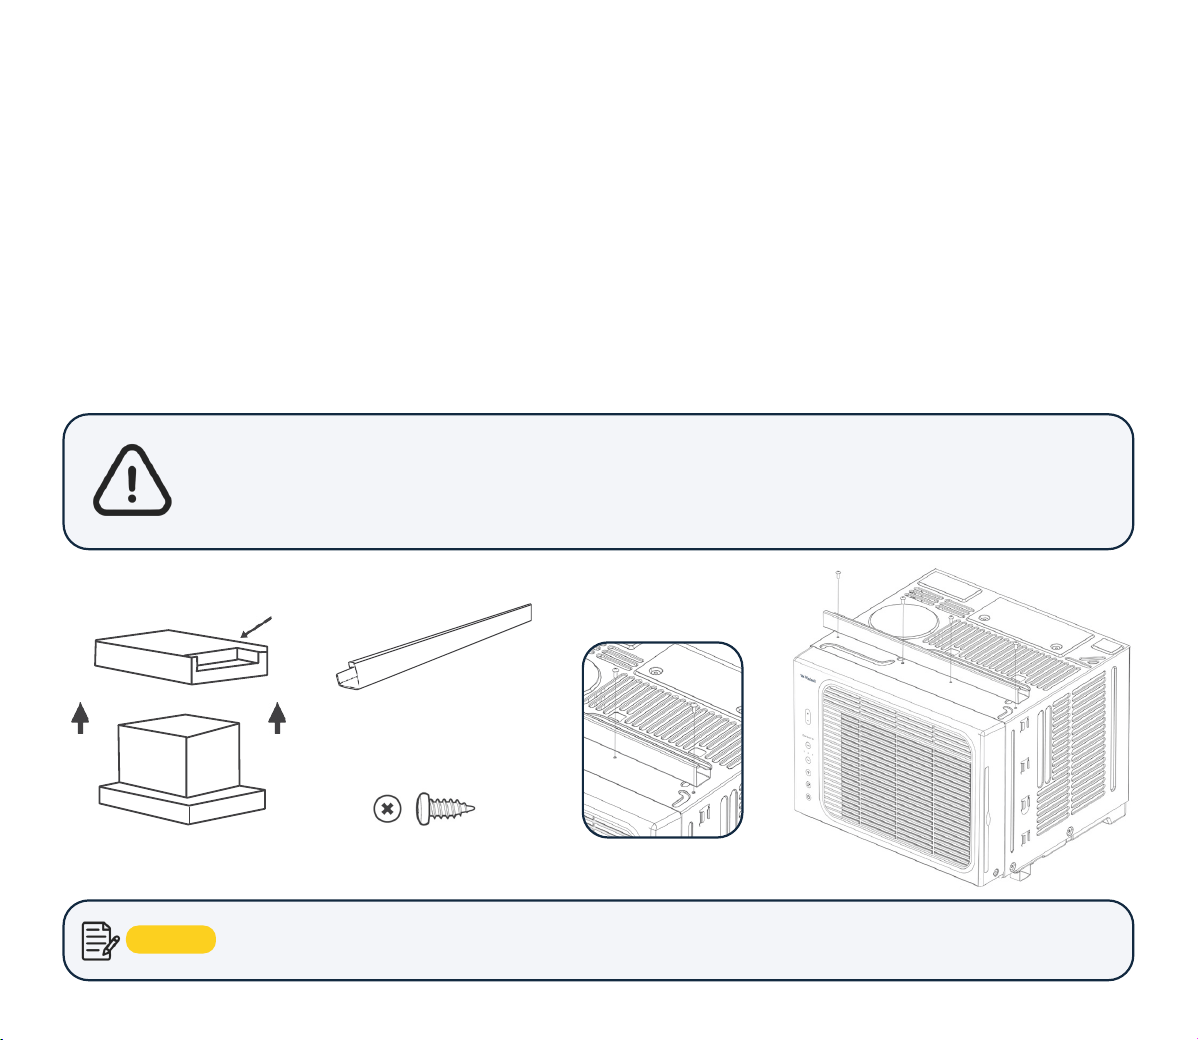
The top rail must be assembled prior to installing the air conditioner in the window.
Tools needed: Phillips head screwdriver
Attaching the top rail to the air conditioner
• Remove the air conditioner from the box and place on a hard and flat surface.
• Remove top rail from the top of the packaging material as shown in Fig.A.
• Align the holes in the top rail with those in the top of the unit as shown in Fig.B.
• Secure the top rail to the unit with the 3/8” screws as shown in Fig.C.
CAUTION
When handling the unit, be careful to avoid cuts from the sharp metal edges and
aluminum fins on the front and rear coils.
Top Rail
(With sponge) *1
Fig.A
Box
Top Rail
3/8”Screws *4
Fig.B
NOTE: For safety reasons, all 4 screws must be used to attach the top rail.
Fig.C
14
Fig.2
Fig.3 Fig.4
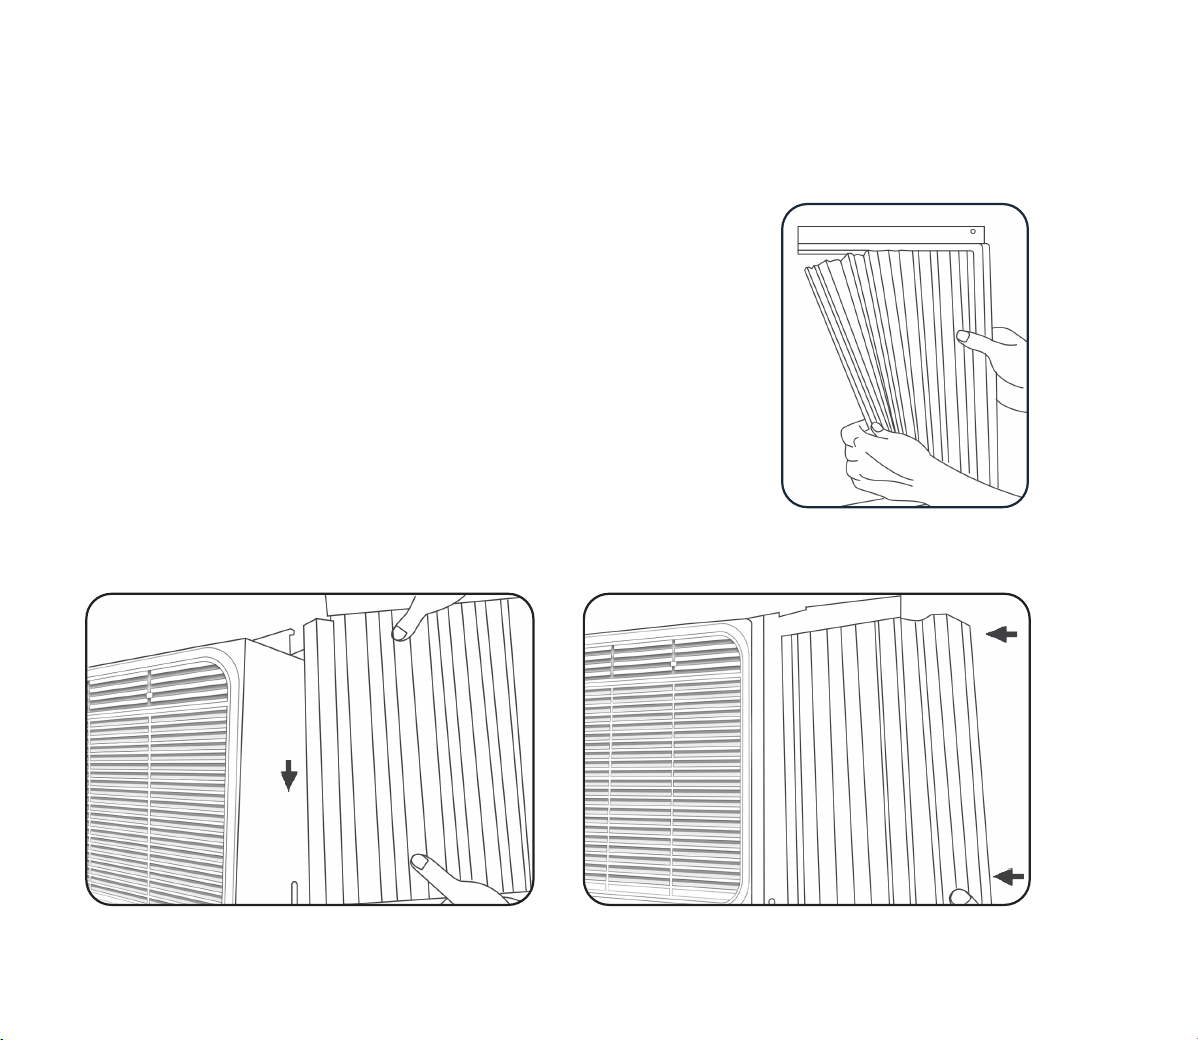
Accordion panel installation
Now that you have installed the top rail, you can install the accordion panels on each side.
• Place the air conditioner on a hard flat surface.
• Locate the accordion panels in the box.
• Gently pull the free end of the accordion panel
(See Fig.2).
• Slide the free end of the accordion panel down into
the side grooves on the air conditioner (See Fig.3).
• Do this for each side.
• Once the accordion panels are slid into place, push
the top and bottom rails of the accordion panels
into the top and bottom rails of the air conditioner
(See Fig.4).
15
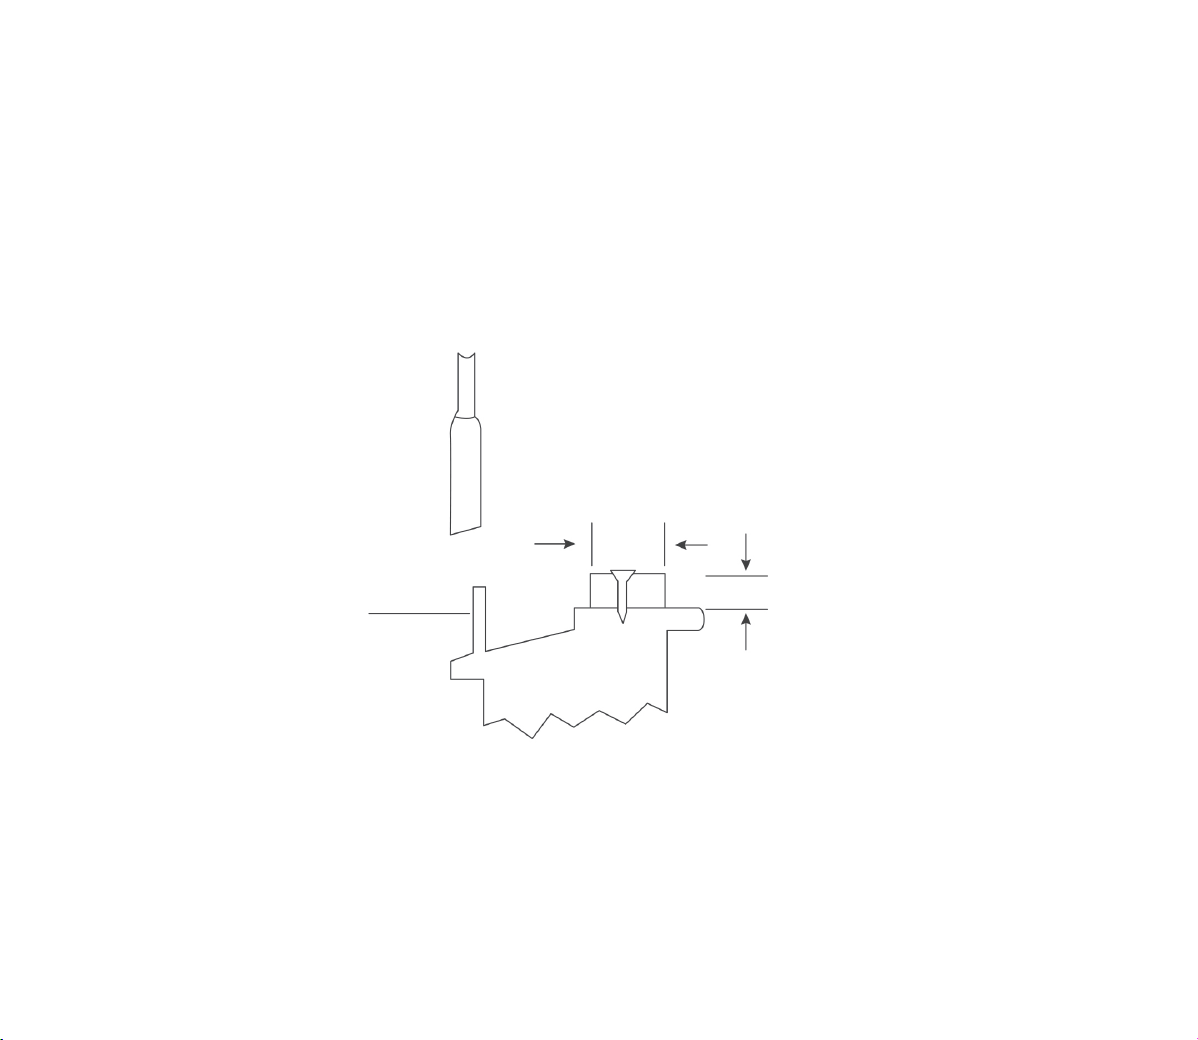
A storm window frame will not allow the air conditioner to tilt properly which in turn will keep it
from draining properly.
To adjust for this, attach a board or piece of wood to the sill. The board or wood piece should
have a depth of at least 1-1/2”. Make sure the board or piece of wood is approximately 1/2” higher
than the storm window frame. This will allow the air conditioner to tilt enough for proper
drainage (See Fig.5).
Storm
window
frame
OUTSIDE
SASH
INSIDE
1-1/2 min
(38 mm)
Board or wood piece must
be approximately 1/2” higher
than the storm window
frame for proper drainage
Fig.5
Storm window requirements
16
Fig.6
Fig.8
Fig.7
Bottom Rail
Window Sill
Outside
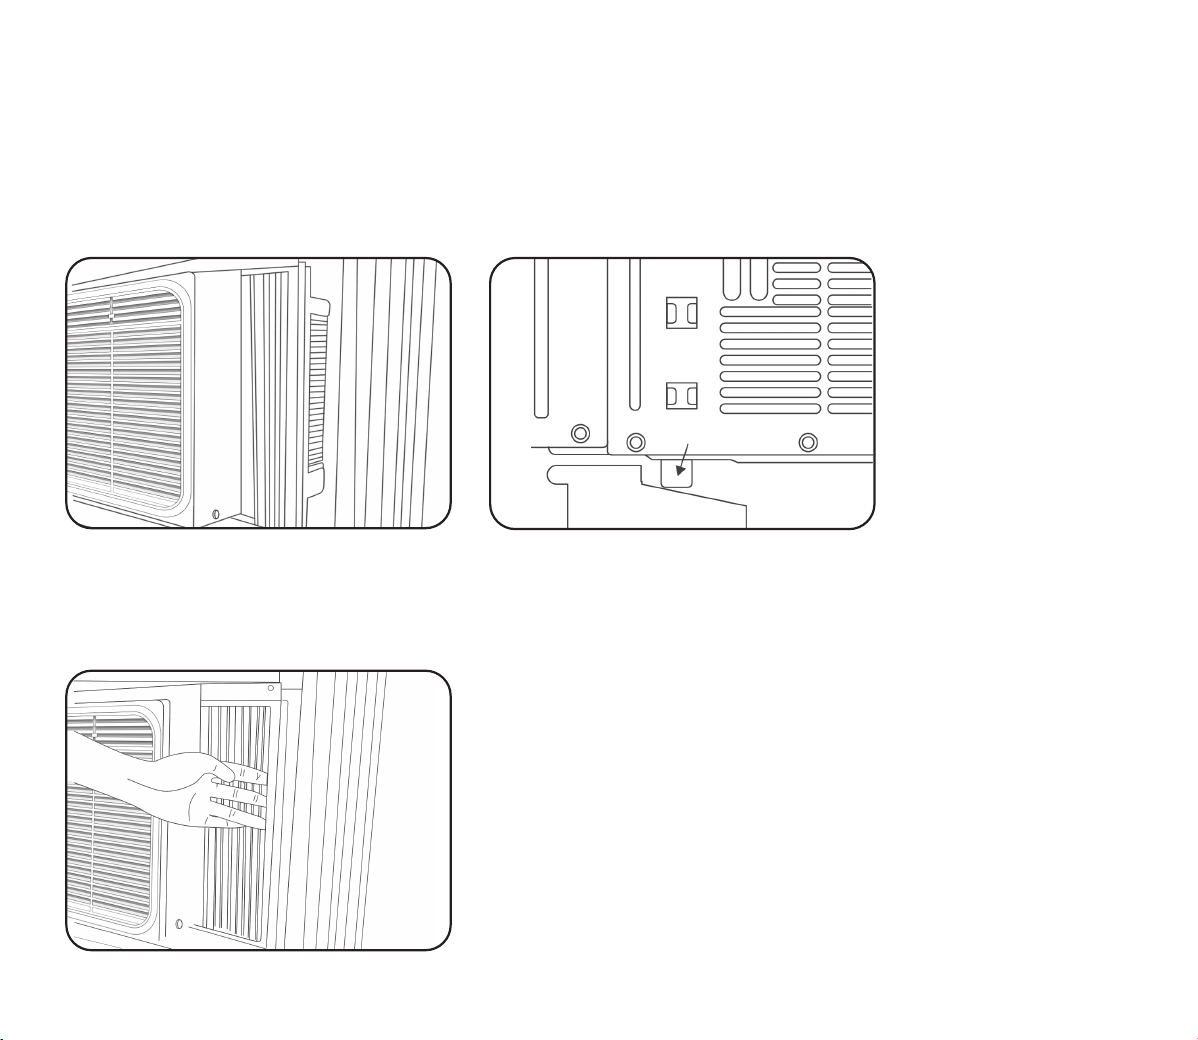
• Once the AC is placed properly, extend both the left and right accordion panels to the width
of the window (See Fig.8).
Place the air conditioner on the sill with the bottom mounting rail against its back edge.
Center the air conditioner and close the window securely behind the top mounting rail. The air
conditioner should be slightly tilted to the outside area. Use a level, about a 1/3 bubble will be the
correct case slant to the outside (See Fig.6 & Fig.7).
Placing the unit inside the window
17
Mounting hardware tools needed:
Phillips head screwdriver
Drill (if pilot holes needed)
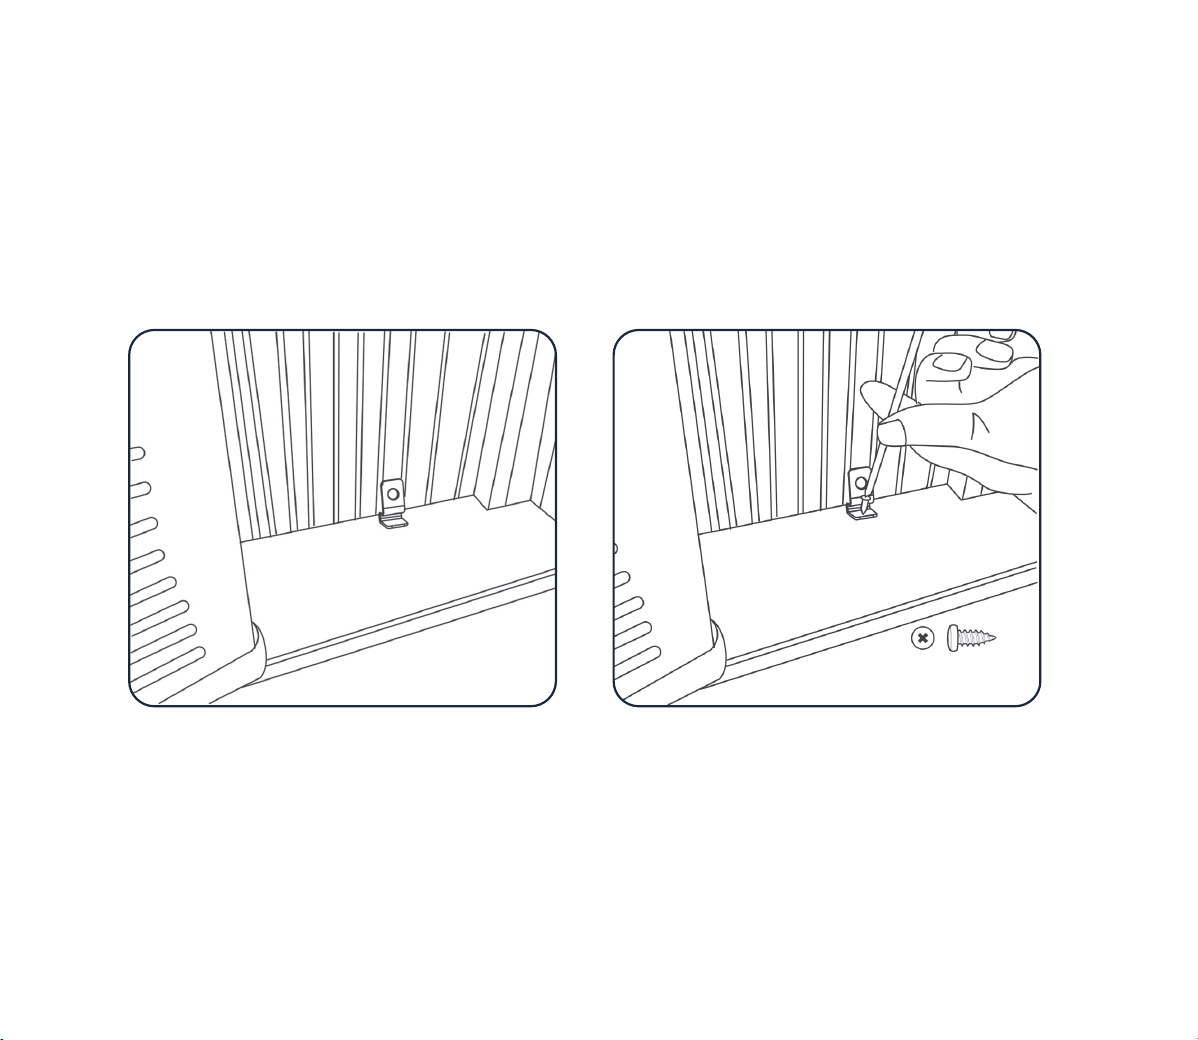
Frame lock, sash lock, and foam seal installation
• Place the frame lock between the extended accordion panels and the window sill as shown
in Fig.9. Screw a 3/4” locking screw through the frame lock and into the window sill (Fig.10).
• Drive 1/2” screws into the top of the accordion panel frame and the top rail to securely attach
the window air conditioner to the lower sash (See Fig.11 & Fig.12 on next page).
3/8” screws
Fig.9 Fig.10
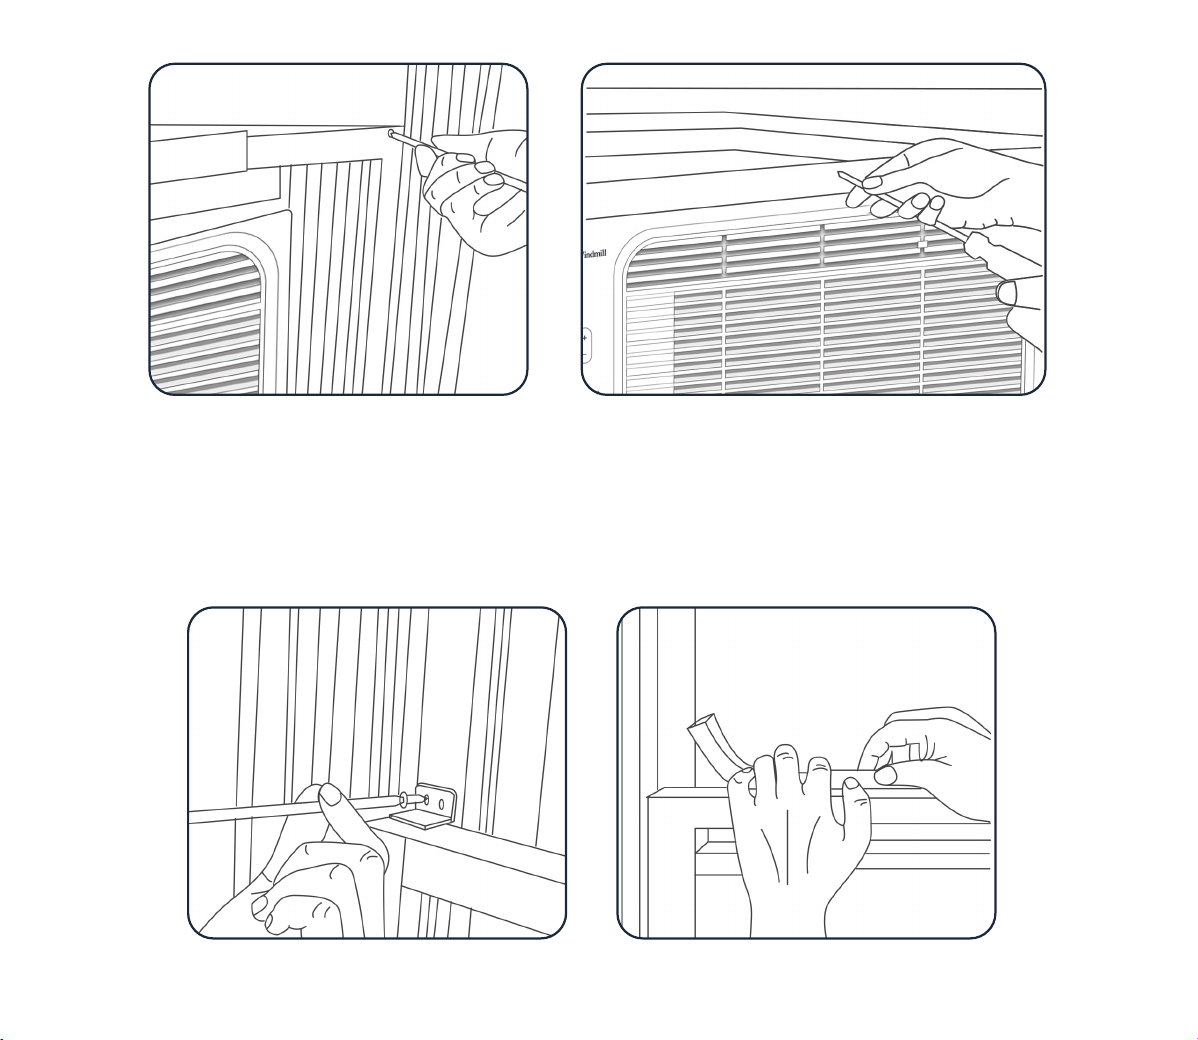
18
• To secure the lower sash into place, use the sash lock and 3/4” screws as shown below
(See Fig.13).
• For added insulation, cut the supplied insulation foam to the width of the window. Insert
the foam between the window sashes to prevent air and objects from getting into the room
(See Fig.14).
Fig.11 Fig.12
Fig.13 Fig.14

19
Removing the AC from the window
• Do not attempt this without a helper.
• Turn the AC off and unplug the power cord.
• Remove the sash seal from between windows, and unscrew sash lock. Remove the screws
installed through the frame and frame lock.
• Close (slide inward) the side panels with accordions into frame.
• Keeping a firm grip on the air conditioner, raise the sash and carefully tilt and “rock” the AC
backward to drain any condensate water. Be careful not to spill any remaining water while
lifting unit from window.
• Carefully, with a helper, bring the air conditioner into the room.
• Store parts with the air conditioner in the box. Store in a clean, dry environment.
20
Using your air conditioner
Temperature
up/down
72°
Display
Use the up and down arrows to set the room temperature. The min set temp is 61
degrees Fahrenheit and the max temp is 88 degrees Fahrenheit.
When you change the set temp, the display will flash with your set temp value,
then return to the room temp.
Displays room temp.
The display fades after 1 minute (except when first powered on - then the display
will remain on for 3 minutes). To wake up the display, press any button, then pro-
ceed with your selections. If you want to turn the power indicator light off, to run
your AC in the dark, hold down the Mode button for 3 seconds.
Mode
Cool: When powered on, the AC will enter cool mode (the most popular mode).
This is the most effective mode for cooling your space and controlling humidity.
In this mode, the compressor will kick on when needed and the fan will run
continuously.
Eco: This mode helps conserve energy (and your electric bill!). In this mode, the
unit will turn off when your desired temperature is reached. The fan will turn on
periodically to pull in room air and check the temperature. If the temperature is
above your desired level, the AC will kick on and cool again.
Fan: In this mode, the fan runs continuously and the compressor stays off. You
cannot set a room temperature in this mode (since it is not a cooling mode, like
Cool and Eco).
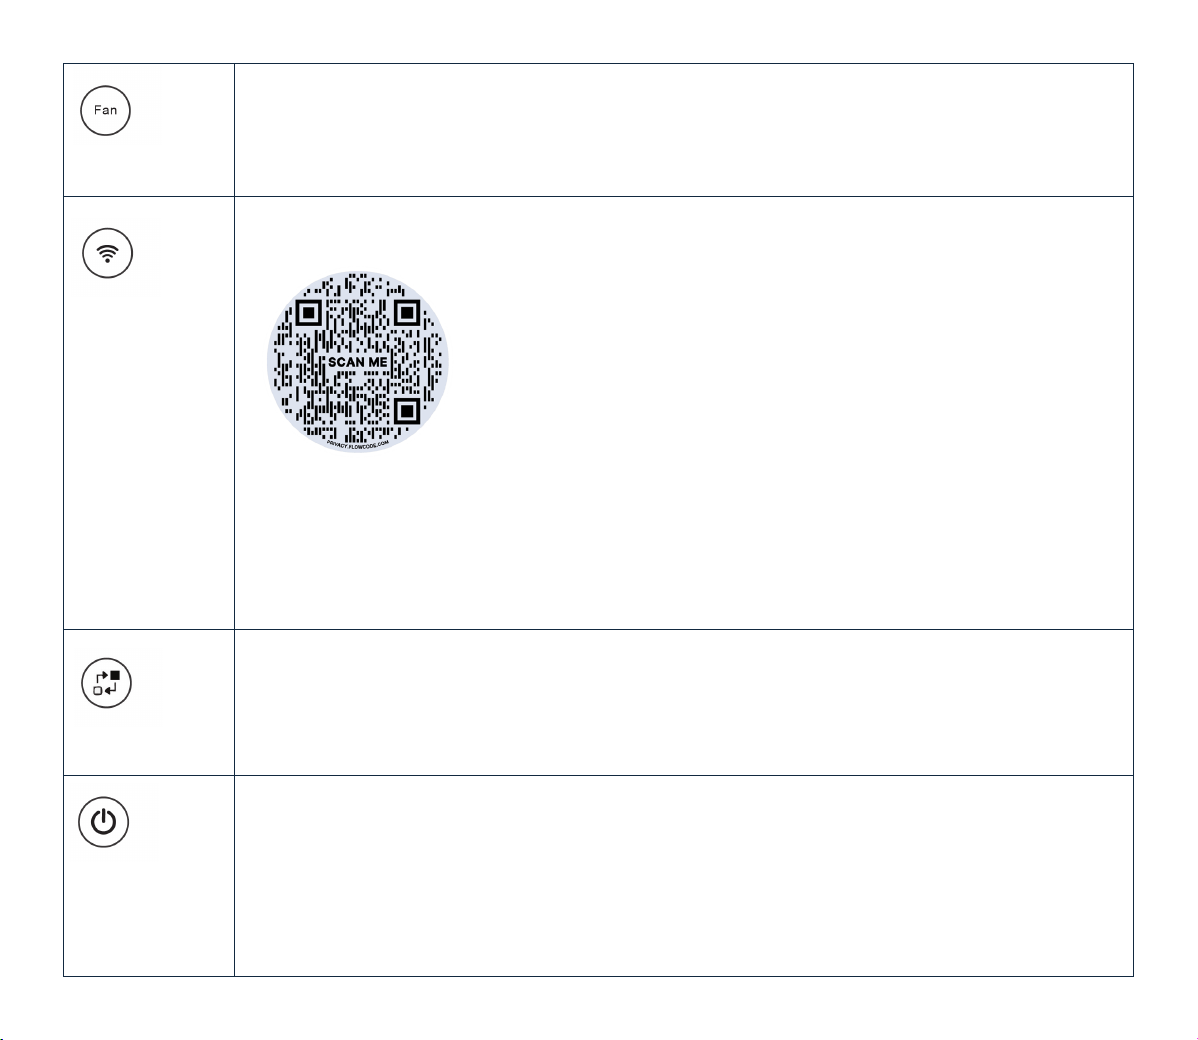
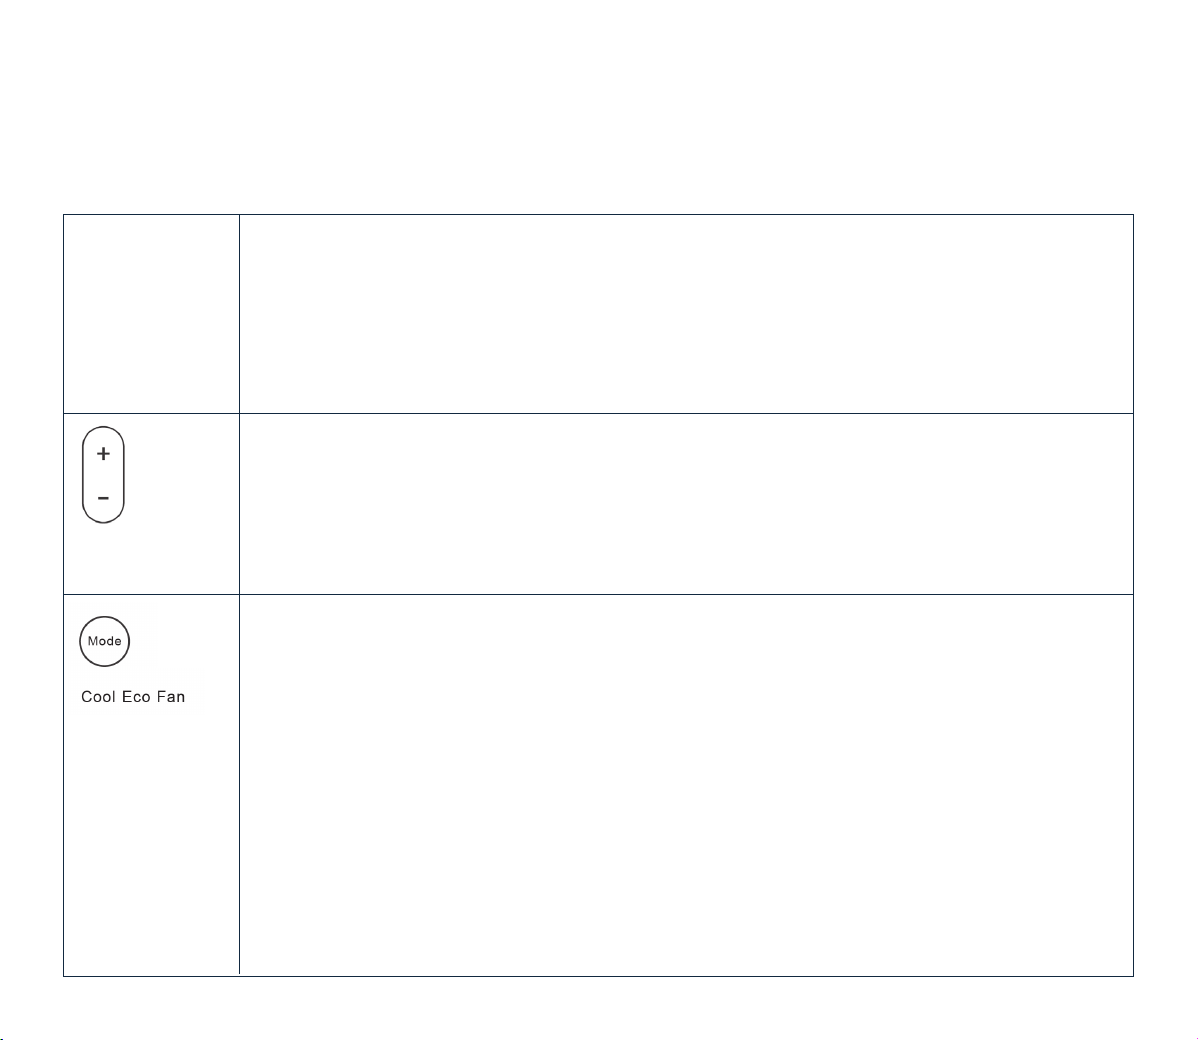
21
Download the Windmill Air app by scanning the QR code below:
The WiFi indicator light will blink slowly if not connected to the Windmill Air app. It
will blink quickly when in pairing mode. To enter (or exit) pairing mode, hold down
the WiFi button for 3 seconds. Follow the instructions in the app to pair your AC
with the app. When connected successfully, the WiFi indicator light will be steady
on the display (remember, the display fades after 60 seconds).
WiFi
Filter change
This light will be off until it is time to clean your filter. When the light comes on,
clean your filter, re-install it, and then hold the Filter button for 3 seconds to reset it.
Fan
Change the fan speed to your desired level - low, medium, or high.
Power
Turn the AC on and off.
When the AC is on, the power indicator light will be on. If you want the AC to run
in the dark, hold the Mode button for 3 seconds. Hold it again for 3 seconds to
turn it back on.

22
Tips and
Tricks!
Other
Notes
• The display fades after 1 minute (so the AC runs unintrusively in the
background). Press any button to wake the display. When initially
powered on, the display stays on for 3 minutes.
• Beeping is OFF by default. To turn beeping ON, hold down the Fan
button for 3 seconds. Hold it again for 3 seconds to turn beeping off
again.
• The AC can run completely in the dark (perfect for sleep!). Hold down
the Mode button for 3 seconds to turn off the power indicator light.
The rest of the lights on the display will fade after 1 minute.
• Use the included remote (AAA batteries), on-unit buttons, or Windmill
Air app to control the AC.
• The AC will remember its last setting after a power interruption.
• There is a 3 minute delay protection for the compressor (it will help
your AC work well and last longer!).
• Your AC comes with a remote control. The remote can control power,
mode, temperature (up/down), and fan speed. It uses AAA batteries.
Do not mix old and new batteries.
23
Care and cleaning
Air filter cleaning
It’s important to clean the filter monthly for cleaner, healthier air and to make sure your AC
works properly. If the filter is clogged, your AC will break and not cool the room.
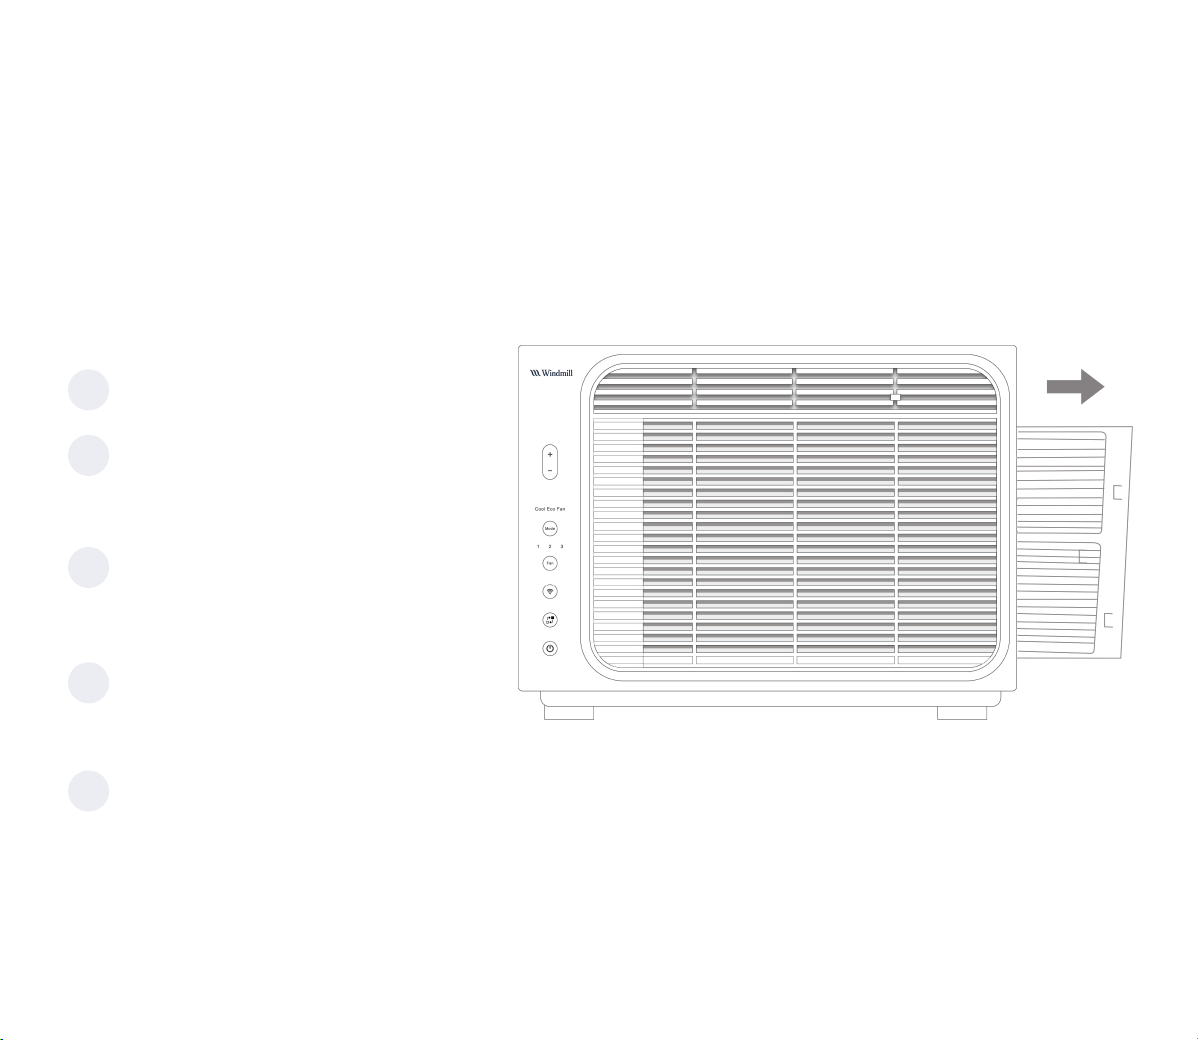
To clean your filter
Unplug your AC.
Remove your filter by sliding it
out from the front right of the
AC (see diagram).
Wash your filter in the sink
with warm water and mild
dish soap.
Shake it gently to remove
excess water and let it sit until
it’s completely dry.
Place it back into the AC.
1
2
3
4
5

24
Cabinet cleaning
Unplug your AC.
The outer cabinet and front panel can be cleaned with an oil-free cloth (dampened in
warm water and mild liquid soap, if desired). Never use harsh cleaners, wax, or polish.
Do not use a wet cloth around the buttons (excess water and moisture can get into the
controls and break the AC).
Use a dry cloth to completely dry the AC before plugging it back in.
Winter storage
To store the air conditioner when it is not in use for an extended period of time, remove it
carefully from the window according to the installation instructions and cover it with plastic or
place it in the original box. Store in a clean, dry location.
1
2
3

25
Thank you!
Thanks for reading and trusting Windmill to keep you cool!
If you have any questions, do not hesitate to reach out.
We’re here and happy to help!
windmillair.com
Loving Windmill?
We make other high-design, high-performance home air products.
Go to windmillair.com to shop and learn more.
Follow us @windmillair on Instagram for exclusive discounts and announcements!

26
windmillair.com @windmillair