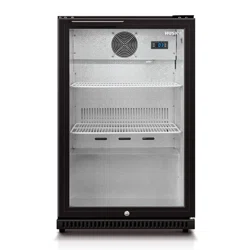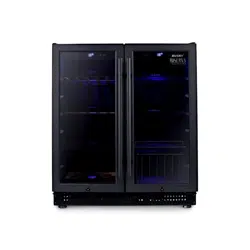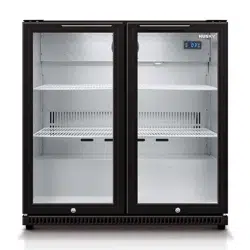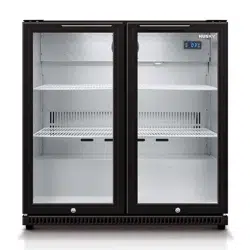
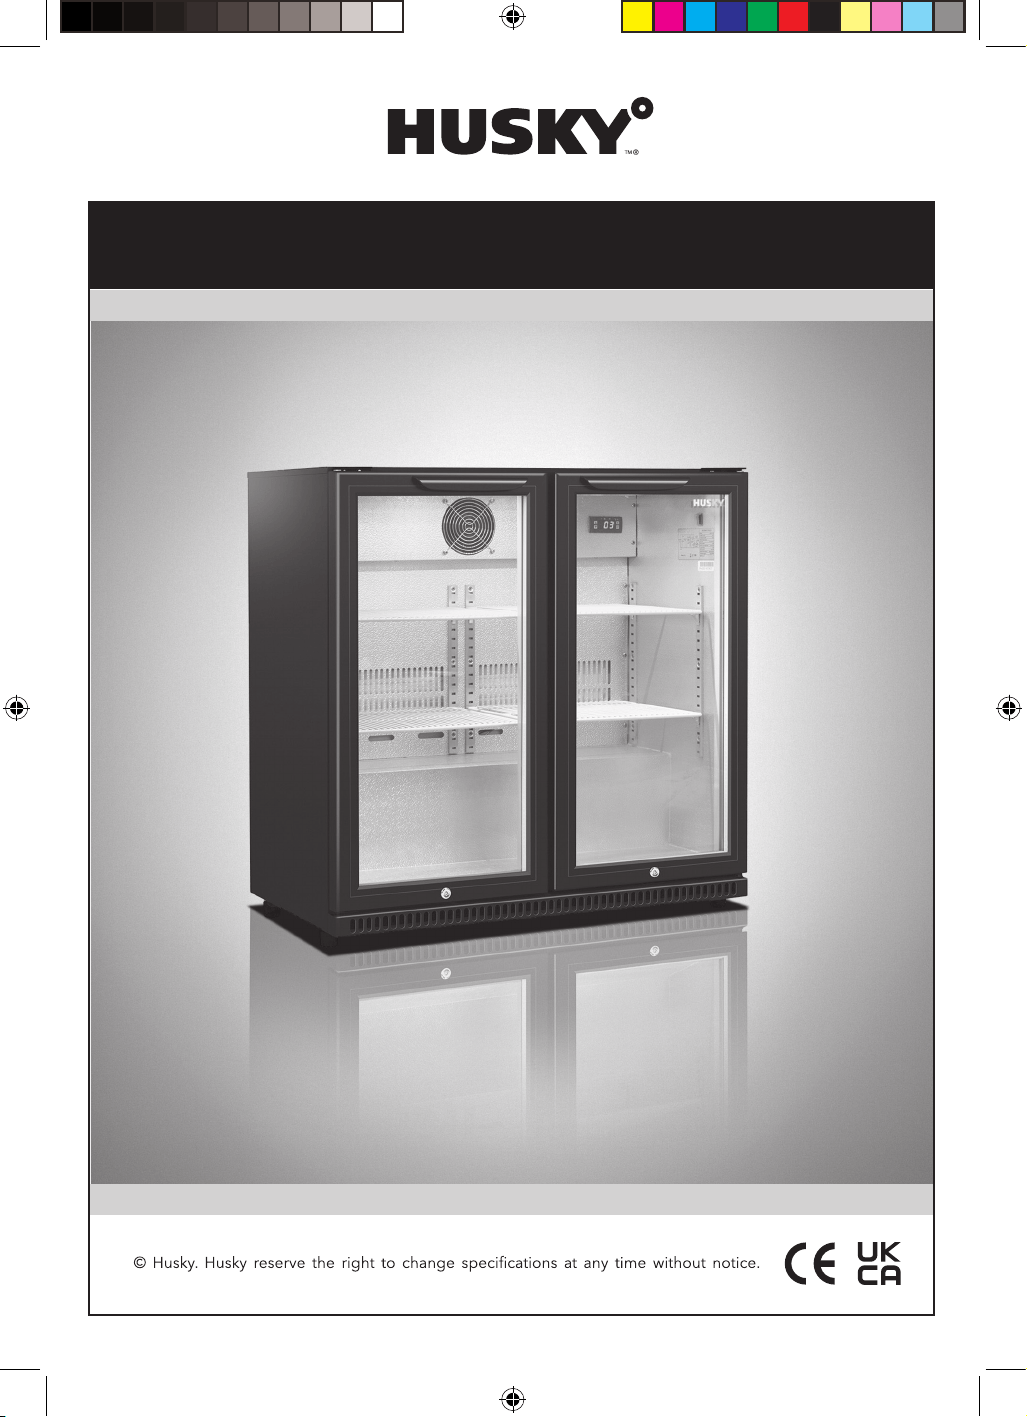
C1, C2, C3 Back Bar Chiller User Manual
To ensure safe operation, please read this user manual thoroughly before use.
Images used are for illustration only.
UK back bar manual 270726.indd 1 27/07/2026 14:24
2
Welcome To Your New Husky
Thank you for buying this Husky commercial appliance. It has been designed and manufactured for
many years of trouble-free service. Operation is very simple, but please take a few minutes to read
this user manual. It contains important safety information, and tips to ensure you receive the best
possible service from your Husky appliance.
Contents
Important Notes ............................................................................................................................................3
Safety Instructions & Warnings ...............................................................................................................3
How To Minimise The Energy Consumption Of Your Appliance .........................................................4
Before Using For The First Time ...............................................................................................................5
Troubleshooting ............................................................................................................................................6
Operating Instructions .................................................................................................................................7
To Operate The Electronic Thermostat ...................................................................................................7
Interior Light ...............................................................................................................................................7
Defrosting ...................................................................................................................................................7
Replacing Led Lights .................................................................................................................................9
Installing Shelves .......................................................................................................................................9
Easy Maintenance Access .........................................................................................................................9
Cleaning ......................................................................................................................................................9
Getting Service Assistance .......................................................................................................................9
Circuit Diagrams .........................................................................................................................................10
Light Remote Controller ............................................................................................................................11
UK back bar manual 270726.indd 3 27/07/2026 14:24
3
Important Notes
WARNING: RISK OF ELECTRICAL SHOCK HAZARD
DISPOSAL OF OLD APPLIANCE
WEEE COMPLIANCE
SAFETY INSTRUCTIONS & WARNINGS
DO NOT ATTEMPT TO SERVICE THE ITEM YOURSELF. Ensure that the appliance is properly
earthed. Stop using the appliance immediately if electric shock is felt when touching the cabinet.
BE SURE TO MAKE ANY LOCKS UNUSABLE. IF POSSIBLE, REMOVE THE
DOOR(S) AND DISCARD SEPARATELY.
WARNING – CHEMICAL HAZARD: DO NOT ALLOW CHILDREN TO PLAY
WITH OLD Appliance. CONTACT YOUR LOCAL AUTHORITY FOR PROPER
DISPOSAL PROCEDURES.
Before disposing of an old appliance, please make sure it is switched off and safe. Unplug the
appliance and break any locks in order to avoid children becoming trapped.
Please note: the appliance system contains gases and refrigerants which require specialist waste
disposal. The valuable materials contained in a appliance can be recycled.
Contact your local waste disposal depot for proper disposal of an old appliance and contact your
local authority or dealer if you have any questions.
Ensure the pipework of your appliance is not damaged prior to disposal. You can contribute to the
environmental awareness by insisting on an appropriate non-polluting method of disposal.
Husky appliances are authorised to carry the CE (Conformité
Européene) and WEEE (Waste Electrical and Electronic
Equipment Directive) symbols.
The WEEE symbol on this appliance indicates that the product must
not be disposed of with household waste. To help prevent possible harm to health and the
environment, the product must be disposed of by recycling methods authorised as environmentally
safe. For more information on how to dispose of this product
appropriately, contact your dealer or
the recycling department at your local authority. Husky appliances and their components undergo
strict product testing by independent companies to comply or exceed all applicable local and
international regulatory standards.
Before switching on your Husky appliance, read the information in this user manual carefully. The
user manual contains important observa tions relating to the assembly, operation and maintenance
of the appliance.
Please keep this user manual in a safe place for future reference. If you ever sell this appliance, hand
this user manual to the new owner. The manufacturer does not accept responsibility for any
damages that may arise due to non-observation of these instructions.
All models
UK back bar manual 270726.indd 4 27/07/2026 14:24
4
HOW TO MINIMISE THE ENERGY CONSUMPTION
OF YOUR APPLIANCE
• Do not use the appliance if it is damaged. If you are in any doubt, consult an engineer.
• Connection and installation of your Husky appliance are to be carried out in strict compliance
with the relative instructions in this user manual.
• Make sure there is a suitable power outlet (230 volts, 13 amps outlet) with proper grounding
to power the appliance.
•
• Always remember to unplug the appliance before cleaning. Never unplug this appliance
•
dangerous.
• Do not damage any parts of the appliance which carry refrigerant by piercing, perforating,
crushing, twisting or scraping. If refrigerant comes into contact with the eyes it may cause
serious eye injury.
• Do not obstruct or cover the ventilation grille.
• Do not allow children to play with the appliance, or to sit on it.
• This appliance is not intended for use by persons (including children) with reduced physical,
sensory or mental capabil ities, or lack of experience and knowledge, unless they have been
given supervision or instruction concerning use of the appliance by a person responsible for
their safety.
• Energy consumption will be lower if the appliance stands in a well-ventilated space and in
particular if the vents on the appliance are clear of obstruction.
• Do not place the appliance in direct sunlight or near a heat source such as ovens, radiators,
heaters, etc. as this will increase energy consumption.
• Keep the appliance doors closed as much as possible.
• Setting the thermostat colder means higher energy consumption, so set only as cold as you
really require.
•
the appliance which may slow the process of chilling/freezing the contents and make the
• Defrost the appliance if frost can be seen building up inside - frost will increase energy
consumption and make the chilling/freezing process slower (see section ‘Defrosting’).
• Turn the appliance off completely if it is not required for a period of days (or longer) to avoid
wasting energy.
•
appliance.
UK back bar manual 270726.indd 5 27/07/2026 14:24
5
BEFORE USING FOR THE FIRST TIME
• To ensure correct operation, it is important that the appliance is level. The appliance may be
levelled by turning either or both of the adjustable feet in the front corners. Use a spirit level
to check.
• Before operation, we recommend that the appliance is cleaned for reasons of hygiene and to
remove any residue left from manufacture.
• For good circulation, vents must not be blocked. Keep a minimum of 100mm of clear space
quieter operation.
• Do not expose the appliance to direct sunlight or a heat source such as ovens, radiators,
heaters, etc.
• Do not under any circumstances place heated food or beverages in your Husky appliance.
• Do not open the door more often than necessary to lessen the escape of cold air.
•
• Adjust the thermostat according to the amount of product and the ambient temperature.
• This appliance has been tested as a beverage cooler and is not suitable for the storage of
perishable food.
IMPORTANT: Before switching the appliance on, we recommend you allow it to stand
upright for 8 hours. Failure to do this may result in damage to the appliance.
IMPORTANT: This appliance is intended to operate in a climate where the
maximum temperature is 25 degrees Celsius and the humidity do not exceed 60%.
UK back bar manual 270726.indd 6 27/07/2026 14:24
6
Troubleshooting
Before calling Technical Support, please check the following points; you may be able to solve any
problem yourself.
Problem Possible Cause Action
The appliance has no power.
The appliance is not plugged
in.
Connect the plug to the power
supply.
The plug and/or the power
cable are faulty.
Call your supplier or a
The fuse has blown.
Replace the fuse with one of
the same rating.
The appliance’s internal
temperature is too high or
too low.
The wrong temperature is
selected.
Check the controller and
adjust the set temperature.
The factory default settings for
the controller are incorrect.
Contact Husky for advice.
The condenser is blocked by
an accumulation of dust.
Clean using a vacuum cleaner
and soft brush attachment
(see p9).
The doors are not fully closed.
Check the appliance is level
and the door seals are not
damaged or not seated
correctly.
The appliance is close to a
heat source or the ambient
temperature is too high.
Move the appliance to a better
location and check it is out of
direct sunlight.
The ventilation grille is
blocked.
Move the appliance to
improve free movement of air.
The appliance is noisy in
operation or makes unusual
noises.
• Note: It is normal to hear
some noises as refrigerant
compressor.
The appliance is not on a level,
may be touching other items.
Check location and position
using a spirit level.
The appliance is vibrating
against a neighbouring object.
Relocate the appliance or the
object.
Outer surfaces are wet
Appliance may be close to a
water source or leak.
Dry surfaces thoroughly and
move the appliance.
Inner surfaces are wet
The door may be opened too
often or kept open too long.
Door gasket may be unseated
or damaged.
Try to minimise the opening
of the doors for better cooling
performance. Ensure door
seals are seated correctly and
replace if worn or damaged.
UK back bar manual 270726.indd 7 27/07/2026 14:24
7
Operating Instructions
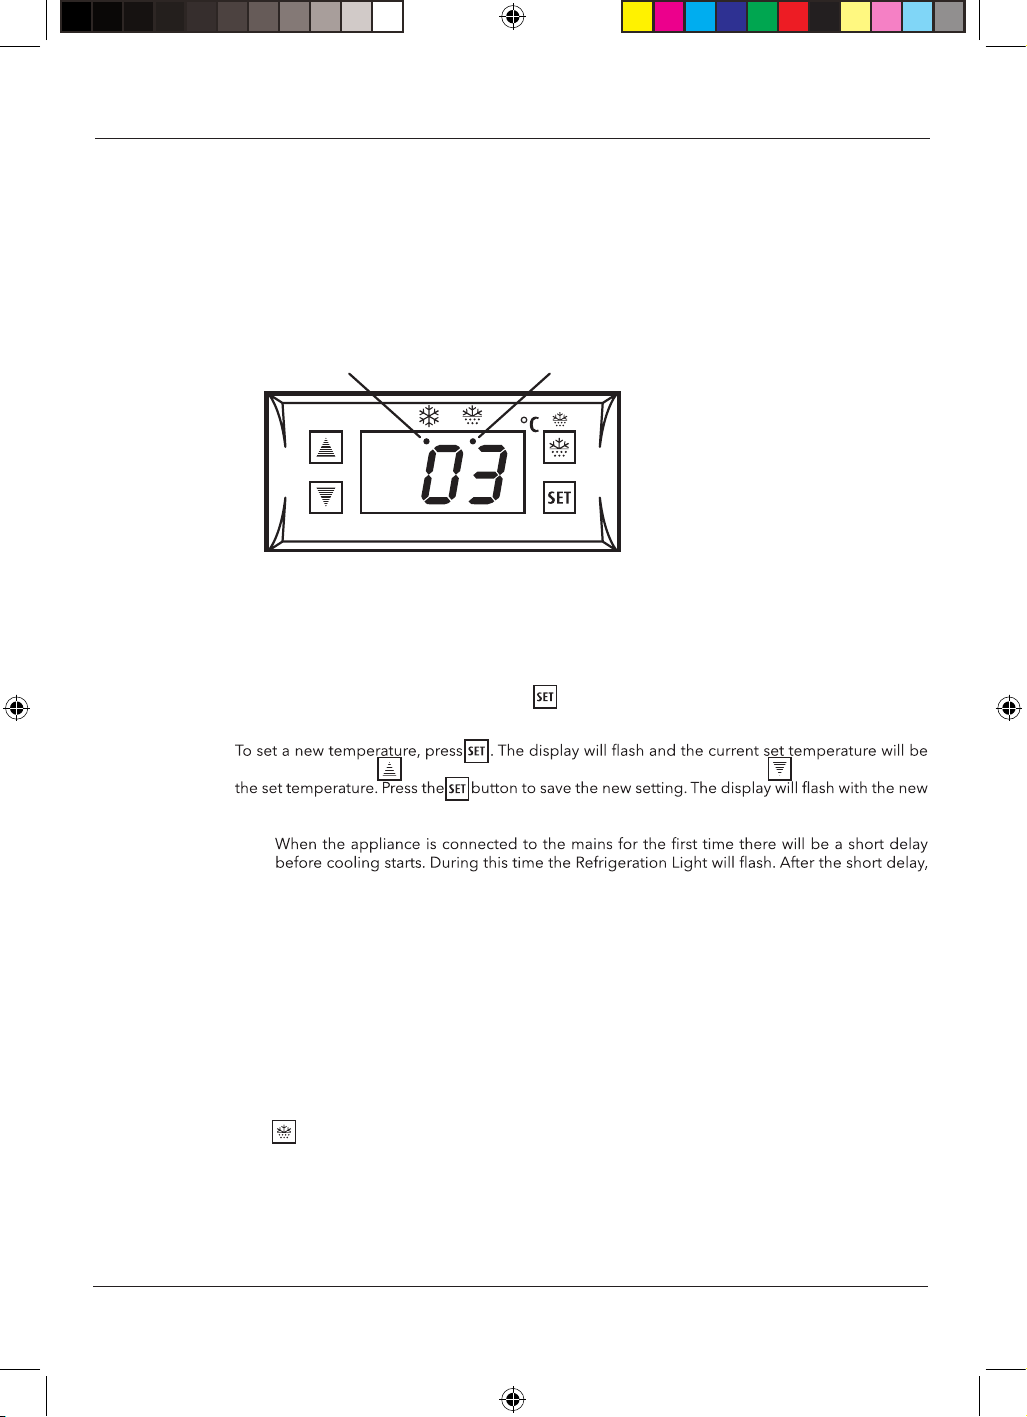
TO OPERATE THE ELECTRONIC THERMOSTAT
REFRIGERATION LIGHT DEFROSTING LIGHT
The thermostat has been pre-set, and in most cases it is not necessary to adjust the settings.
When the appliance is operating normally, the display will show the current temperature.
To display the set temperature press the button. Press the button again to return to normal
operation.
displayed. Press the button to increase the set temperature, or press the button to decrease
value and then revert to display the cabinet temperature.
Please note:
1.
cooling will begin and the Refrigeration Light will be illuminated. When the appliance reaches
the set temperature, the Refrigeration Light will be off.
2. If you do not press any button, after six seconds the thermostat will return to its normal display.
INTERIOR LIGHT
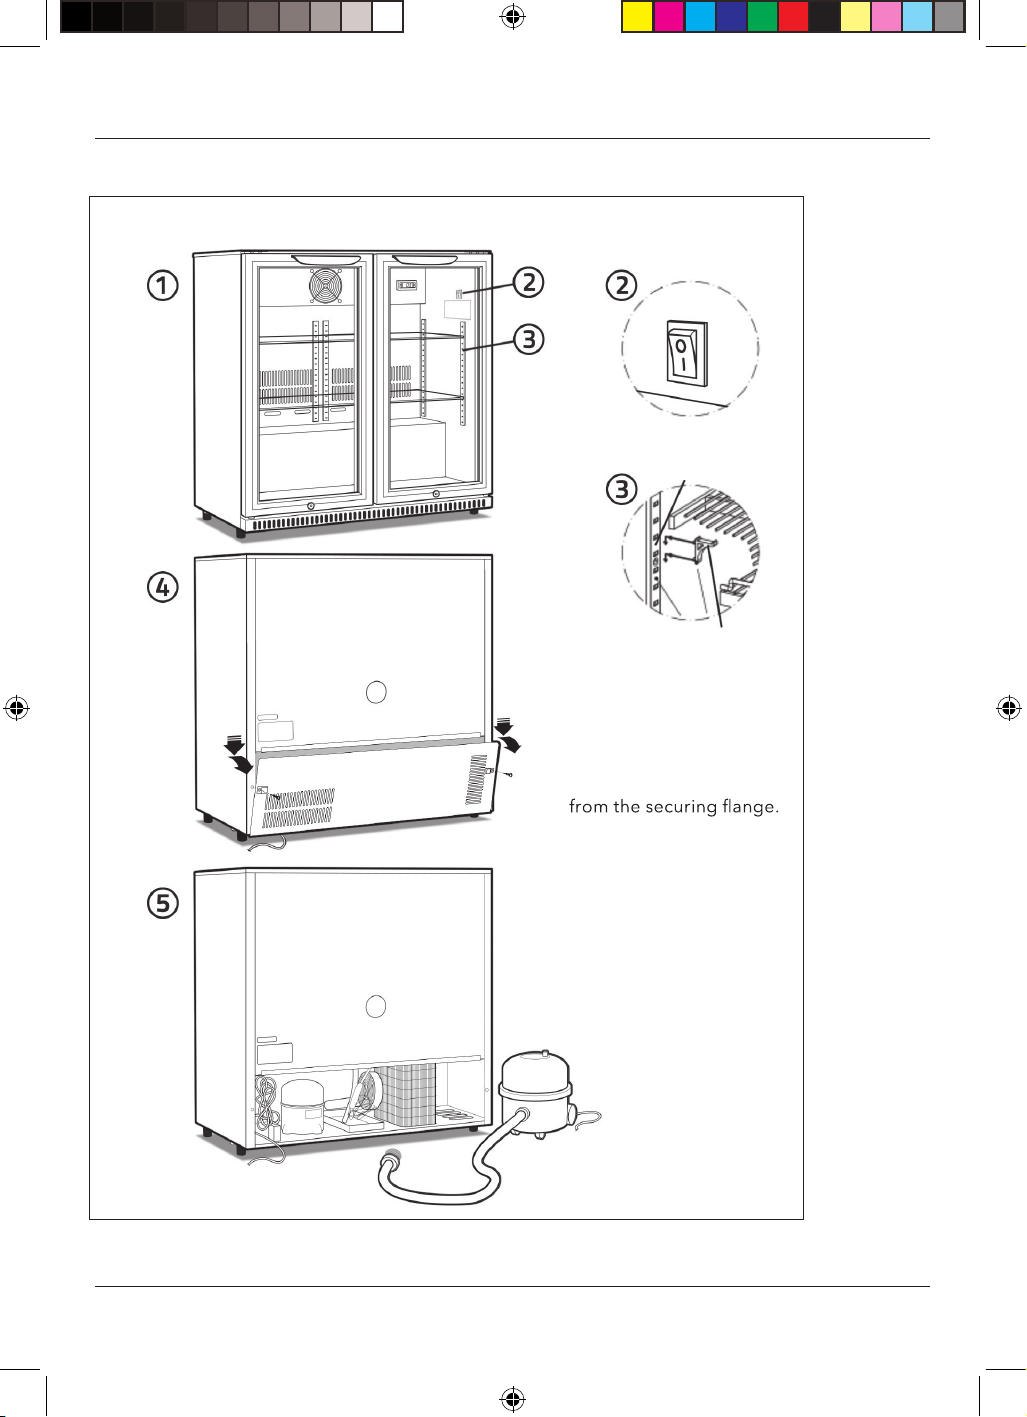
The interior light may be switched on or off using the rocker switch on the inside right-hand wall
of the cabinet (see Fig. 2 on page 9).
DEFROSTING
The appliance defrosts automatically at pre-set intervals. If however the door is opened too often,
or if the appliance if in a location with high humidity, or if the contents are changed more frequently,
it may be necessary to defrost the appliance manually. To start or stop manual defrosting, press
the button for six seconds. The Defrosting Light will be illuminated. Melt water runs to a
container placed in the compressor compartment and evaporates. After defrosting is complete, the
appliance will return to normal operation.
UK back bar manual 270726.indd 8 27/07/2026 14:24
8
To access the compressor
Shelf clip
Ladder rack
compar tment:
i. Remove the two screws.
ii. Push the removable panel
down slightl y to free it
iii. Angle the removable panel
forwards and down to
remove it.
i
ii
iii
UK back bar manual 270726.indd 9 27/07/2026 14:24
9
REPLACING LED LIGHTS
1. Disconnect the appliance from the power supply.
2. Pull the LED light out of the clips and disconnect the cable.
3.
4. Reconnect the appliance to the power supply.
INSTALLING SHELVES
.yllatnoziroh sevlehs eht llatsni dna )9 egap no 3 .giF ees( skcar reddal eht ot spilc flehs eht tiF
EASY MAINTENANCE ACCESS
Switch the appliance off and disconnect from the mains supply. To access the compressor
compartment, simply remove the screws securing the rear access panel – see Fig 4 on page 9.
Any repairs or maintenance, other than CLEANING (see below) must be carried out by QUALIFIED
ENGINEERS ONLY.
CLEANING
the mains supply. See ‘Easy Maintenance Access’ how to access the compressor compartment. Use
the components and grilles – see Fig 5 on page 9.
The external and internal surfaces of the appliance should be cleaned regularly. Switch the
appliance off and disconnect from the mains supply. Clean the external and internal surfaces of the
appliance with a mild soap solution, then wipe dry. Do NOT use cleansers containing chlorine or
other harsh cleansing agents, as these can damage the stainless steel surfaces and components.
Use mild soapy water to clean the gasket and seals.
GETTING SERVICE ASSISTANCE
The cooling system is a hermetically sealed circuit and does not require any maintenance other
than regular cleaning (see ‘Cleaning’).
failure, please contact your supplier, stating the model and serial number of the cabinet. You will
interior wall.
UK back bar manual 270726.indd 10 27/07/2026 14:24
10
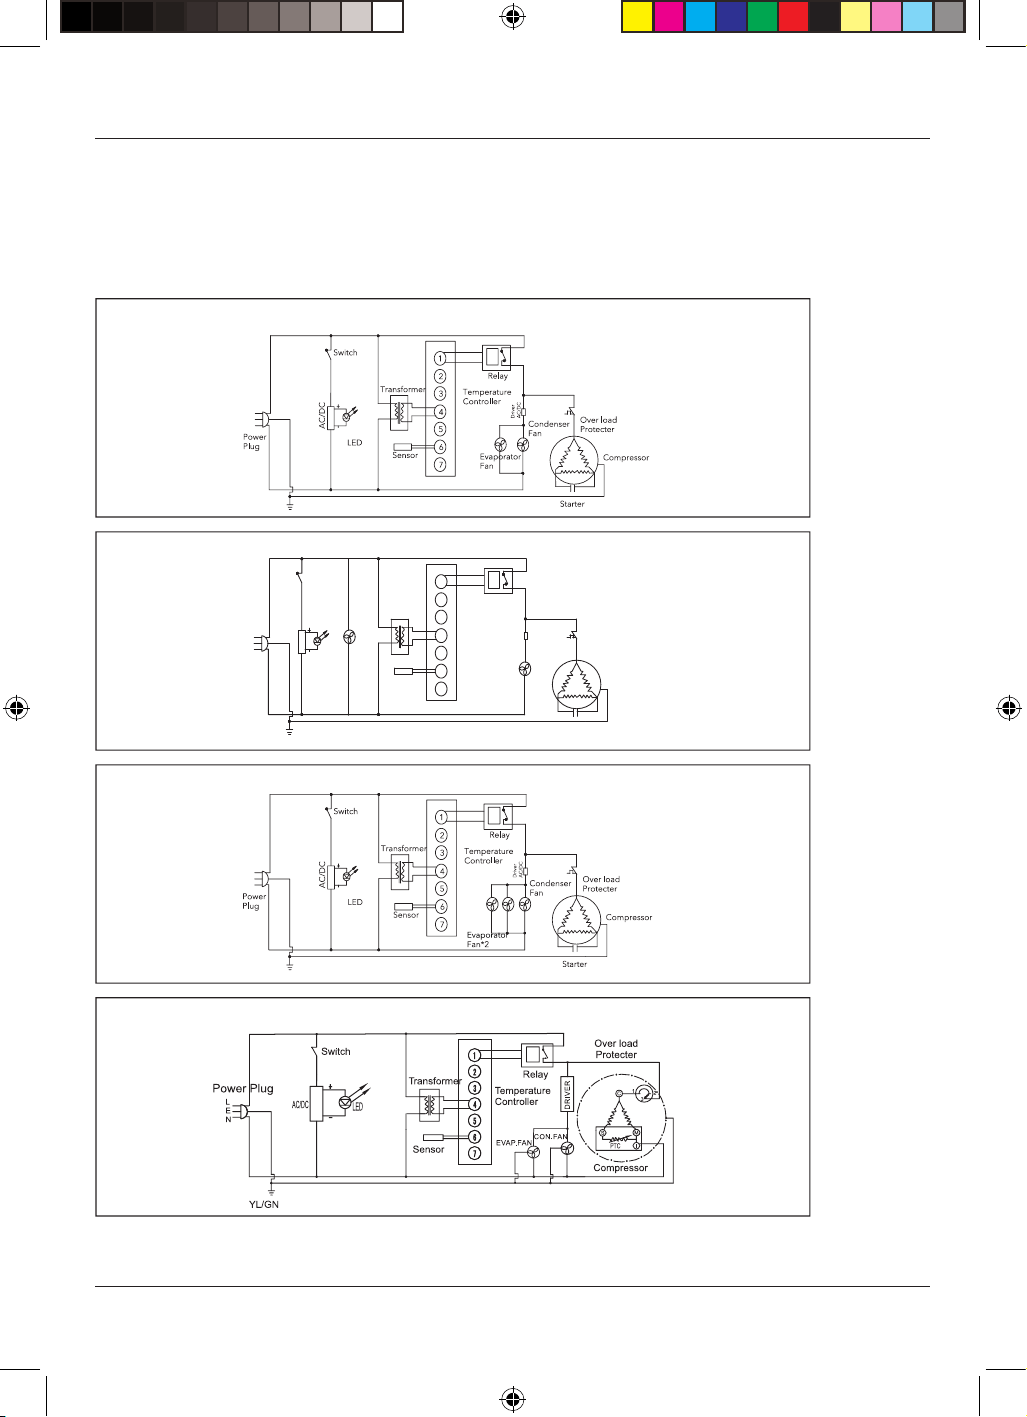
CIRCUIT DIAGRAMS
C1H-E-865 & C2H-E-865
C2S-E-865
C3H-E-865
C1H-ECO, C2H-ECO, C3H-ECO, ALFC1 & ALFC2
condenser
fan
Over load
Protecter
Compressor
Starter
Temperature
Controller
Evaporator
Fan
Relay
Transformer
Sensor
LED
AC/DC
Switch
Power
Plug
Driver
AC/DC
1
2
3
4
5
6
7
UK back bar manual 270726.indd 11 27/07/2026 14:24
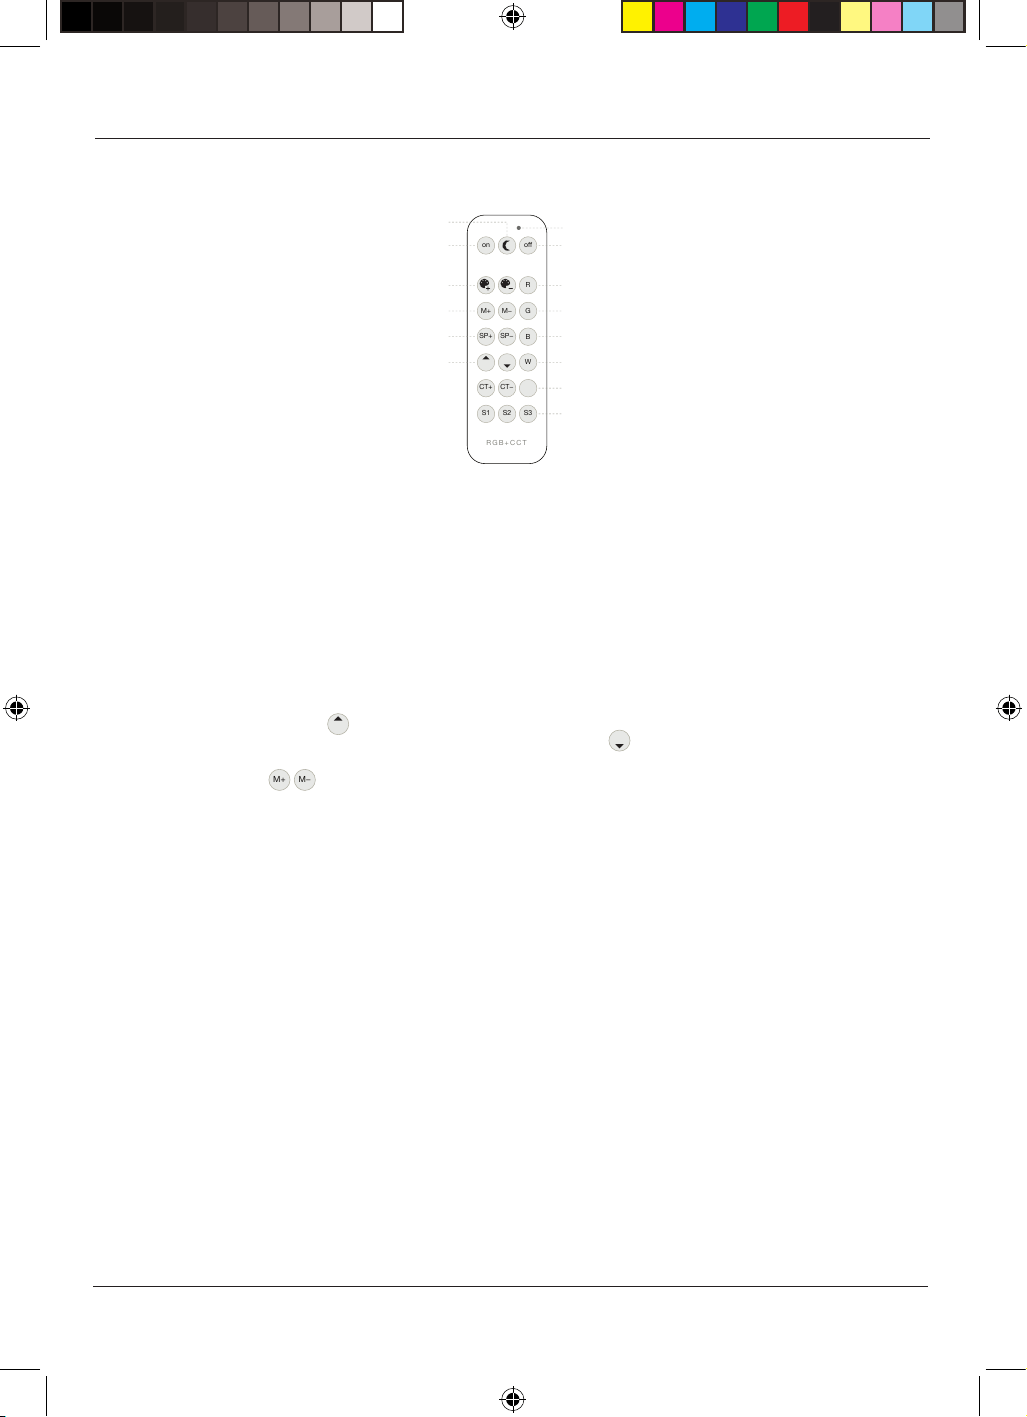
BEFORE USING THE REMOTE CONTROL
Insert 2 x LR03 (AAA), 1.5V alkaline batteries into the remote control before use. Batteries are not supplied.
SWITCH LIGHT ON/OFF
Use the keys ON and OFF to switch the lights on and off. (Note: this does not effect the cooling function!)
DEFAULT SETTING
The factory set up light color is red, use below instructions as required. When switching lighting off and later back
on again, the lighting setting will return to the last session set up.
LIGHT COLOR ADJUSTMENT
Press the relevant light color key (red, green, blue, white) to set your desired color.
DIM/INCREASE LIGHT INTENSITY
Press and hold the Dim key dim the lighting.
To increase the intensity of the lighting. Press and hold the Dim key to dim the lighting.
FLASHING MODE
Press the Mode keys to activate the flashing mode. Press them again to switch between different flashing modes.
To exit the flashing mode, press any static light mode key. In the flashing mode, press the speed adjustment key
to change the speed of the light flashing.
PRESET MEMORY BUTTONS S1 S2 S3
These three buttons are used to store light modes, with a variety of built-in modes available. When you are
satisfied with the current mode, press and hold one of these three buttons to save this mode. The next time you
press this button, the saved light effect will be activated immediately. To replace a stored mode, wait until the
desired mode is active, then press and hold the corresponding key to overwrite the previously saved lighting
mode. These preset keys function as shortcuts to stored lighting modes, supporting both flashing and static
lighting modes.
PAIRING NEW CONTROLLER
Turn off the power and wait for at least 5 seconds;
Turn on the power and press and hold the ON key min. 5 seconds. The Indicator light will flash slowly 3 times to
indicate successful pairing.
SAFETY INSTRUCTIONS AND WARNINGS
This remote controller uses 2 x LR03, (AAA), l.SV Alkaline batteries (not supplied)
There is explosion hazard if you replace the batteries in the remote with the wrong type of battery.
Store the accessories (batteries, etc.) in a safe location well out of the reach of children.
Do not dispose of batteries in a (n open) fire.
Do not short-circuit, disassemble or overheat the batteries.
Replace only with the same type or equivalent type of battery.
There might be environmental regulations that require you to dispose of batteries correctly.
Please contact your local authorities for disposal or recycling information.
11
UK back bar manual 270726.indd 10 27/07/2026 14:24
Light Remote Controller (Applicable Models)
on
off
R
M+
M−
G
SP+
SP−
B
W
CT+
CT−
S1
S2
S3
RGB+CCT
Night light
Turn on
Colour adjustment
Mode adjustment
Speed adjustment
Dimming
Indicator light
Turn off
Static red
Static green
Static blue
Static white
Colour temperature adjustment
Preset keys (save / activate)
☀
☀
☀
☀
M+
M−
www.husky.co.uk
HELPLINE/TECHNICAL SUPPORT
Tel: 01455 555340 (Monday to Friday 0900 – 1700).
Email: sales@husky.co.uk
SALES
Tel: 01455 555340 (Monday to Friday 0900 – 1700).
Email: sales@husky.co.uk
OUT-OF-WARRANTY SPARES
Email: sales@husky.co.uk
27.07.26
Welcome to Husky, the home of smart refrigeration. We are a leading global
refrigeration specialist with over 25 years experience in commercial
refrigeration for convenience and hospitality professionals. Whatever your
requirements, we’re sure to have a good looking energy-efficient model that’s
perfect for you.
UK back bar manual 270726.indd 12 27/07/2026 14:24