
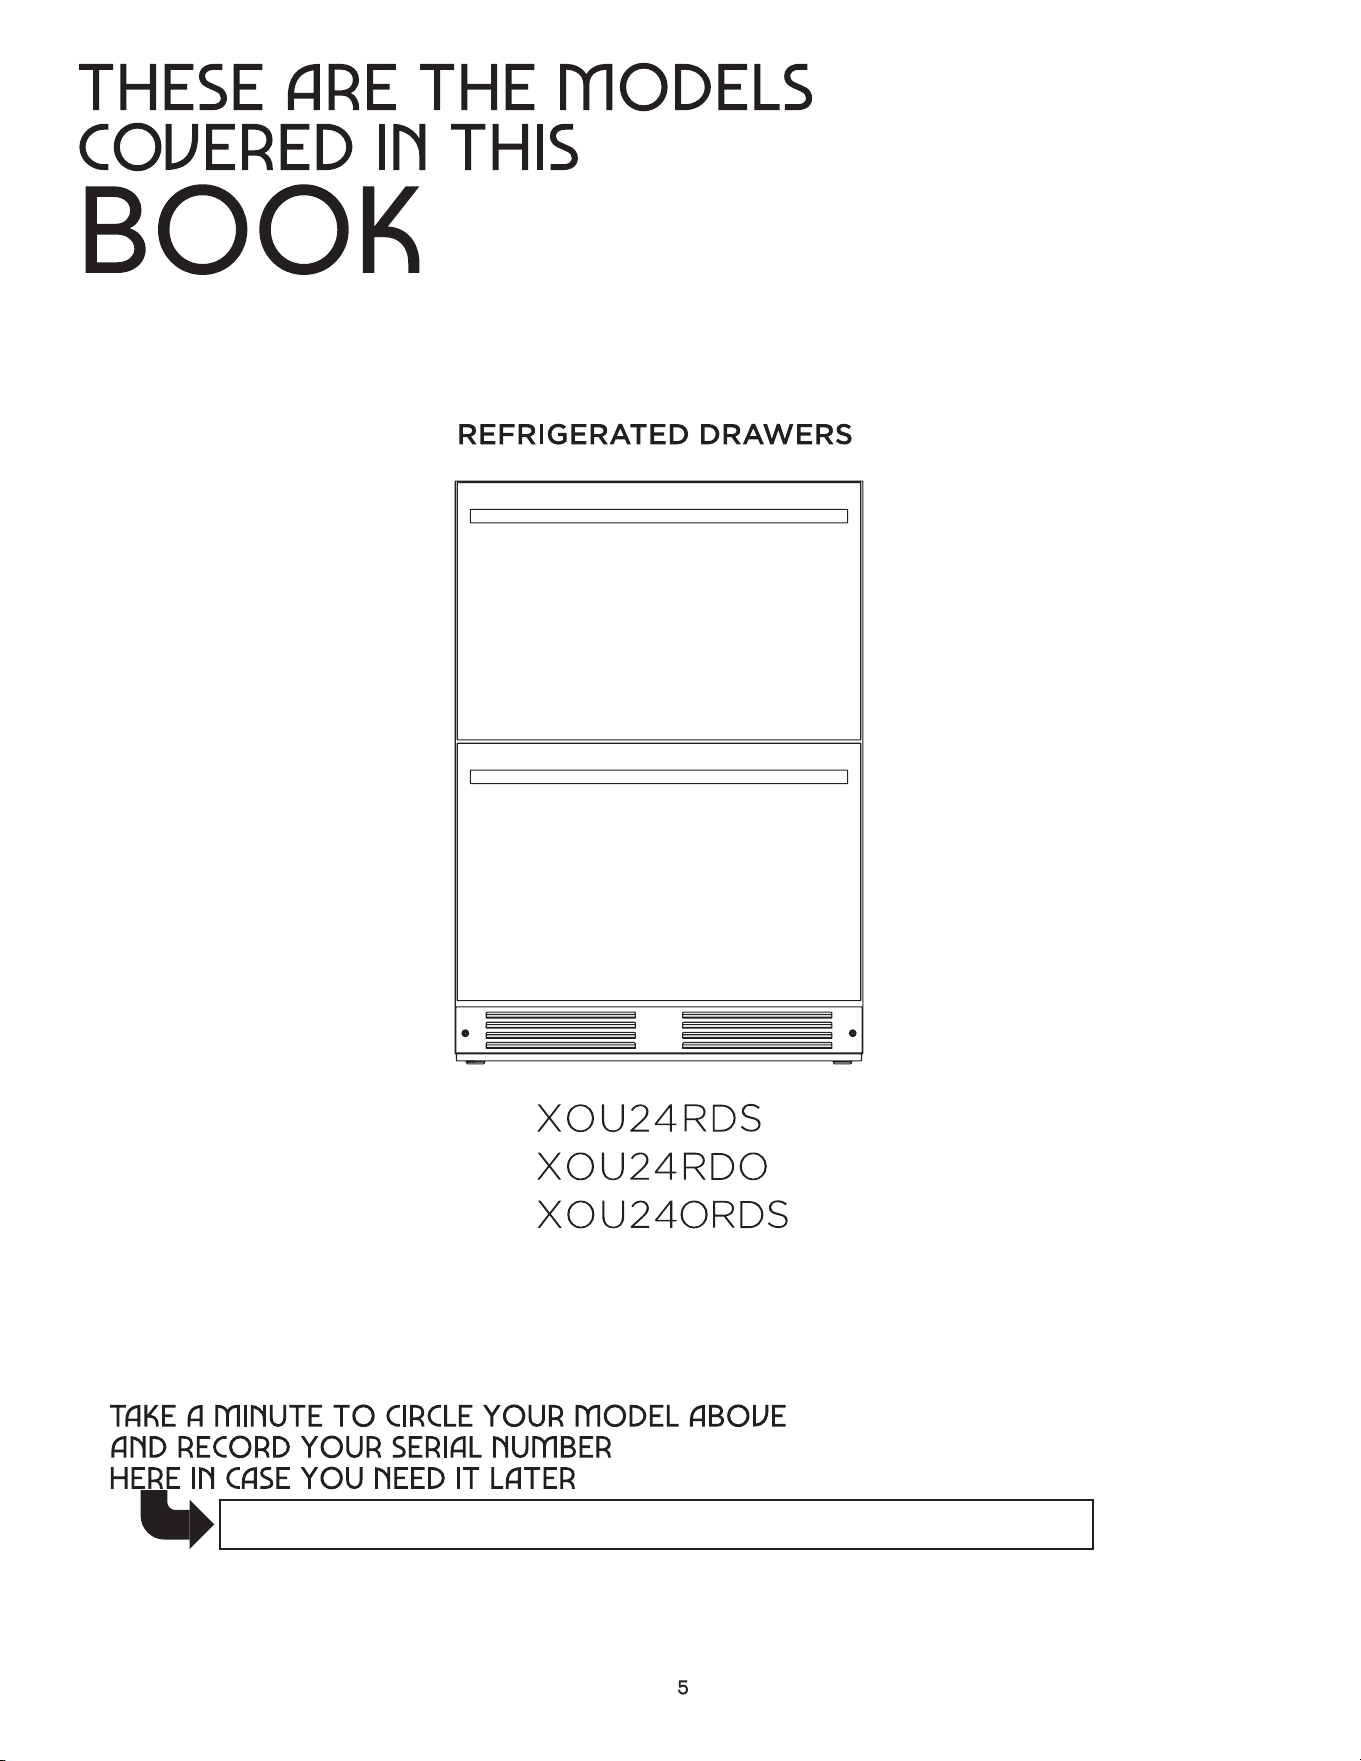
REFRIGERATED DRAWERS


8 - 15
16 - 20
21 - 22
23 - 24
4 - 7
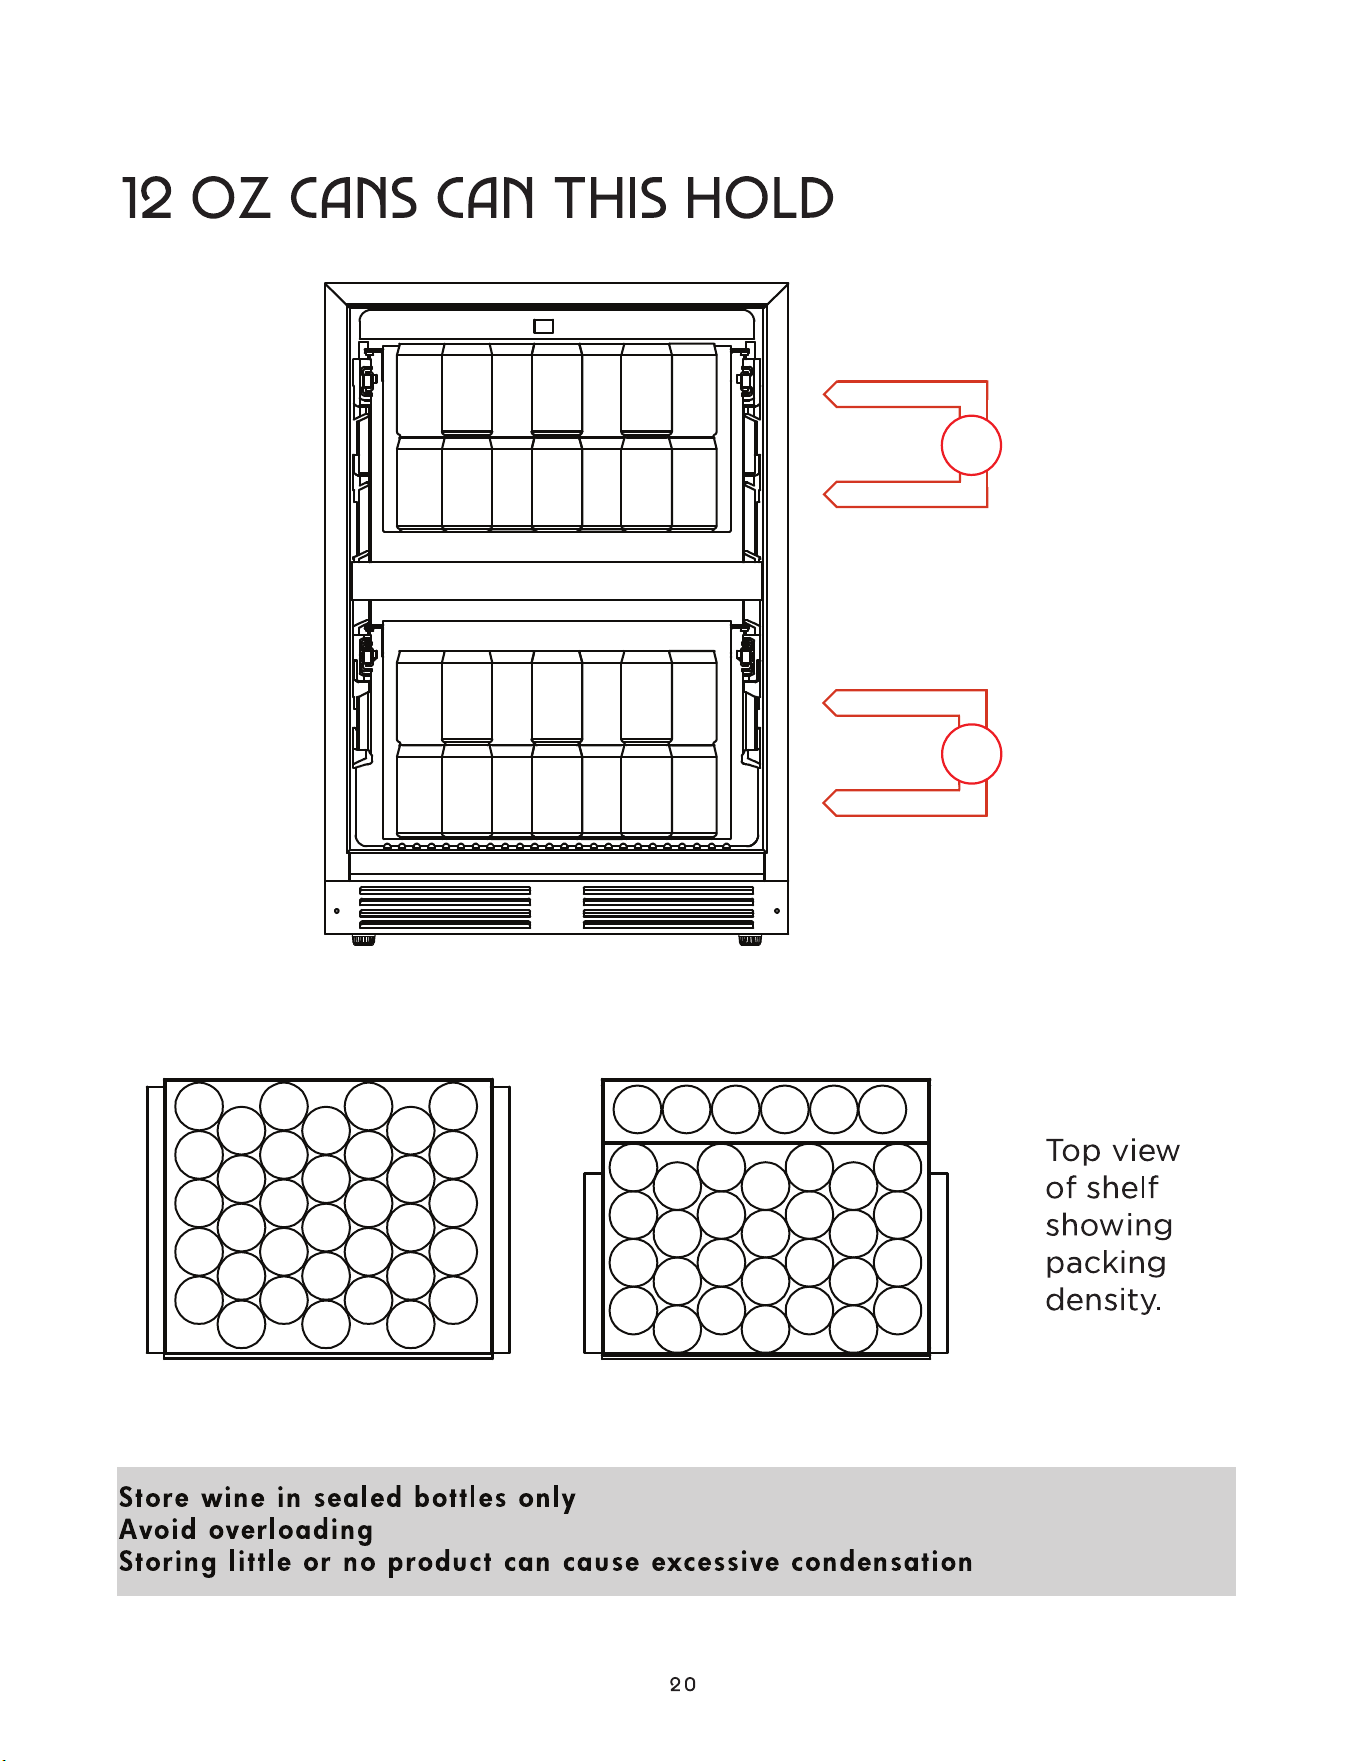
Capacity
where things are
your safety matters
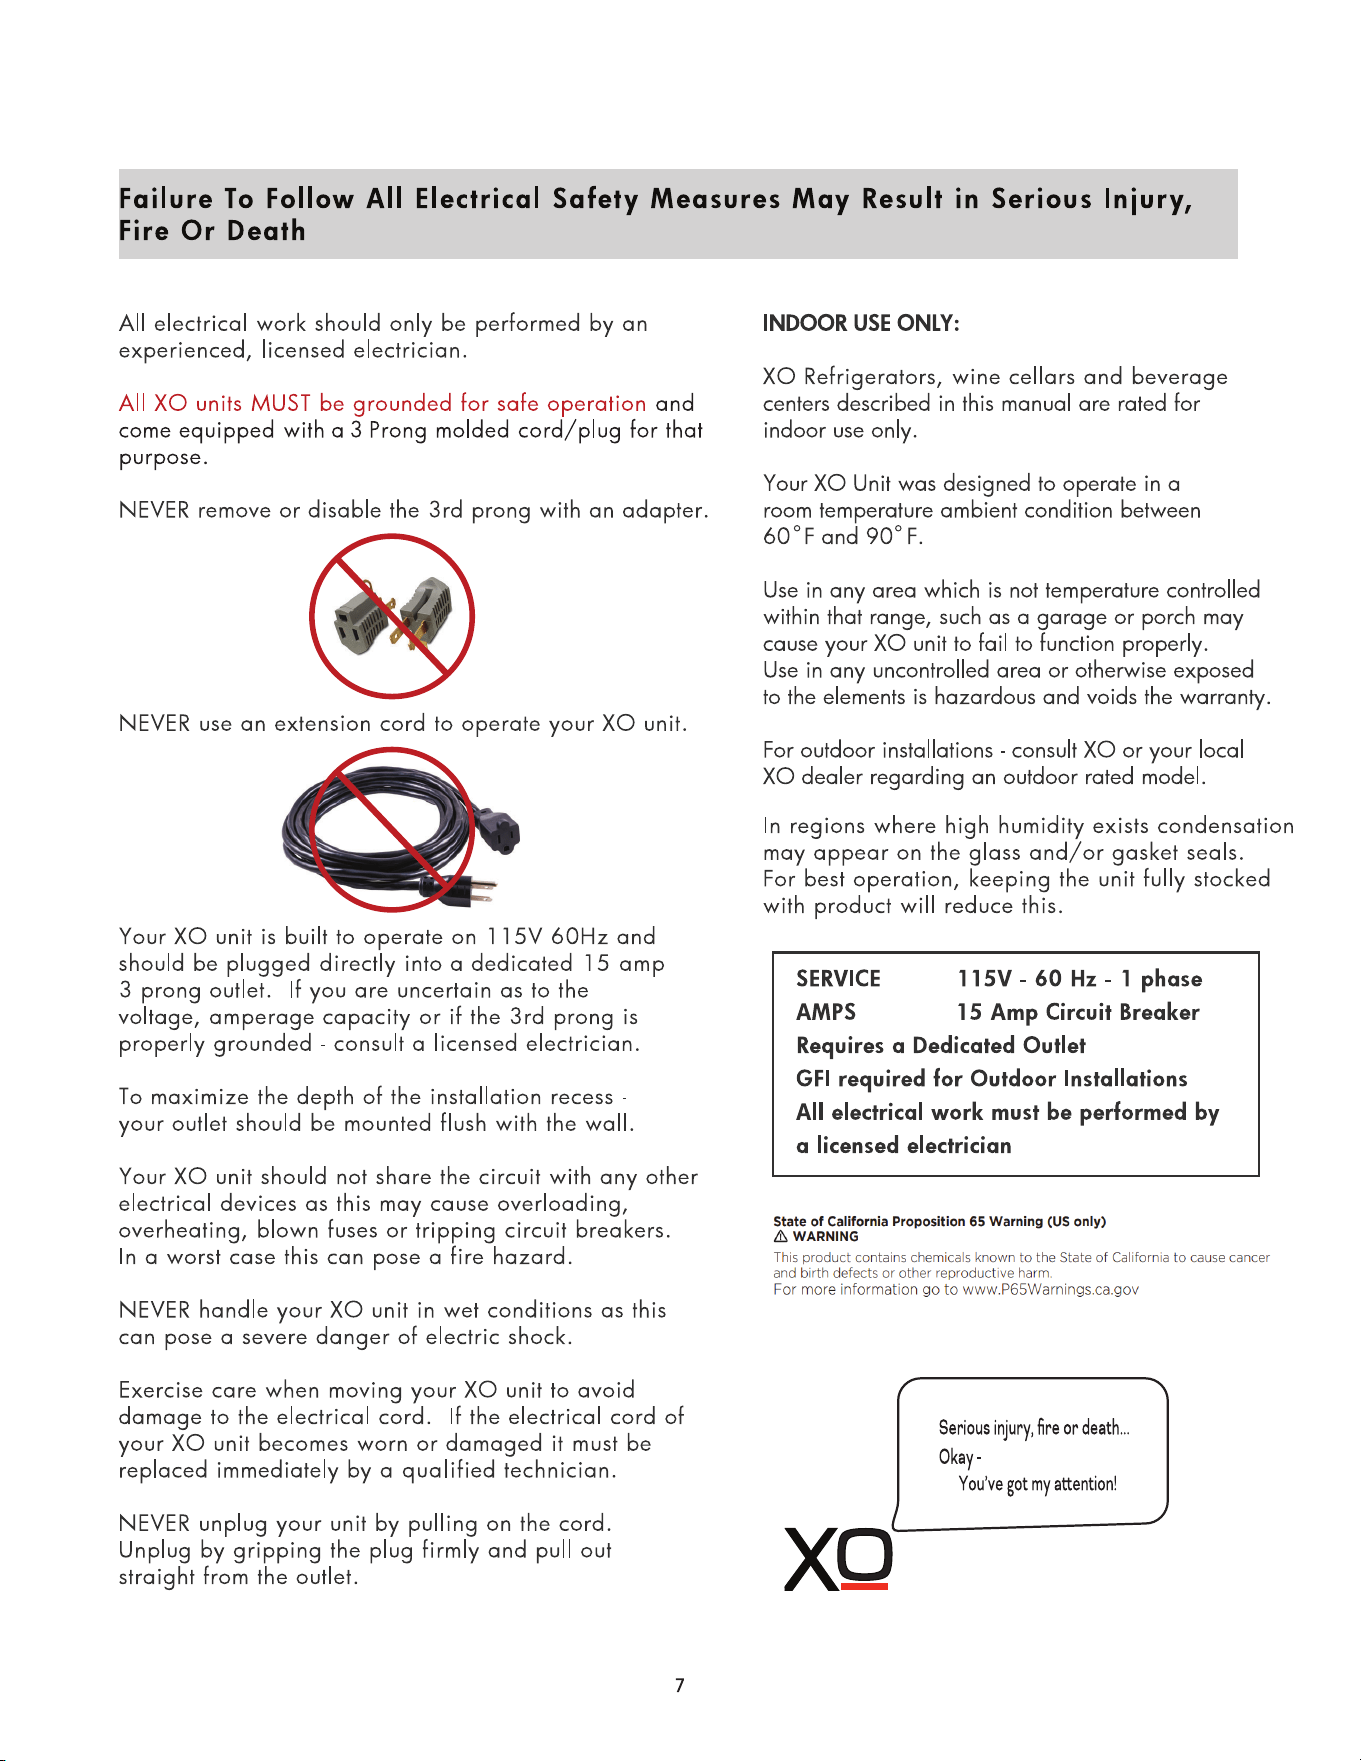
electricity - this is serious
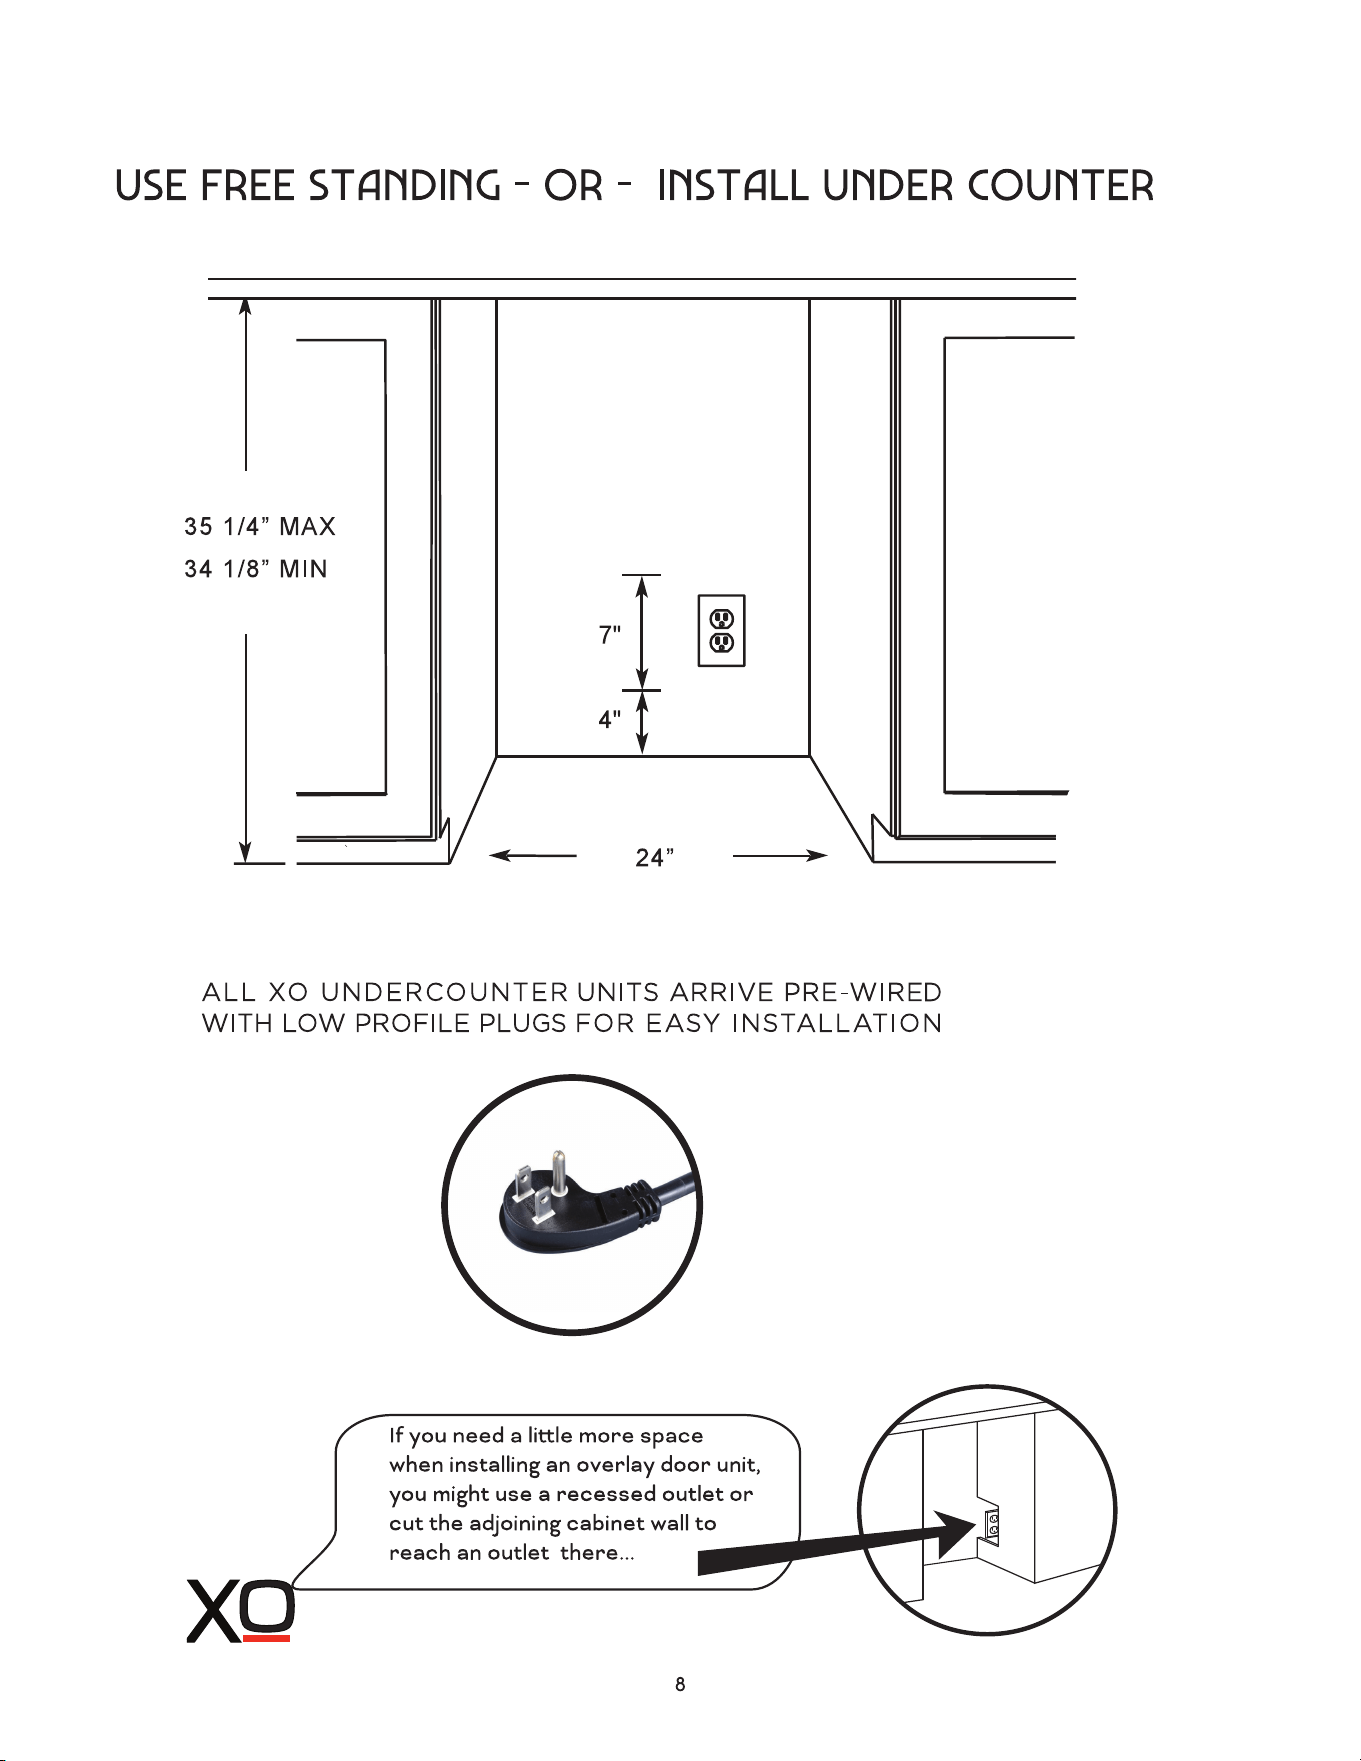
a perfect fit
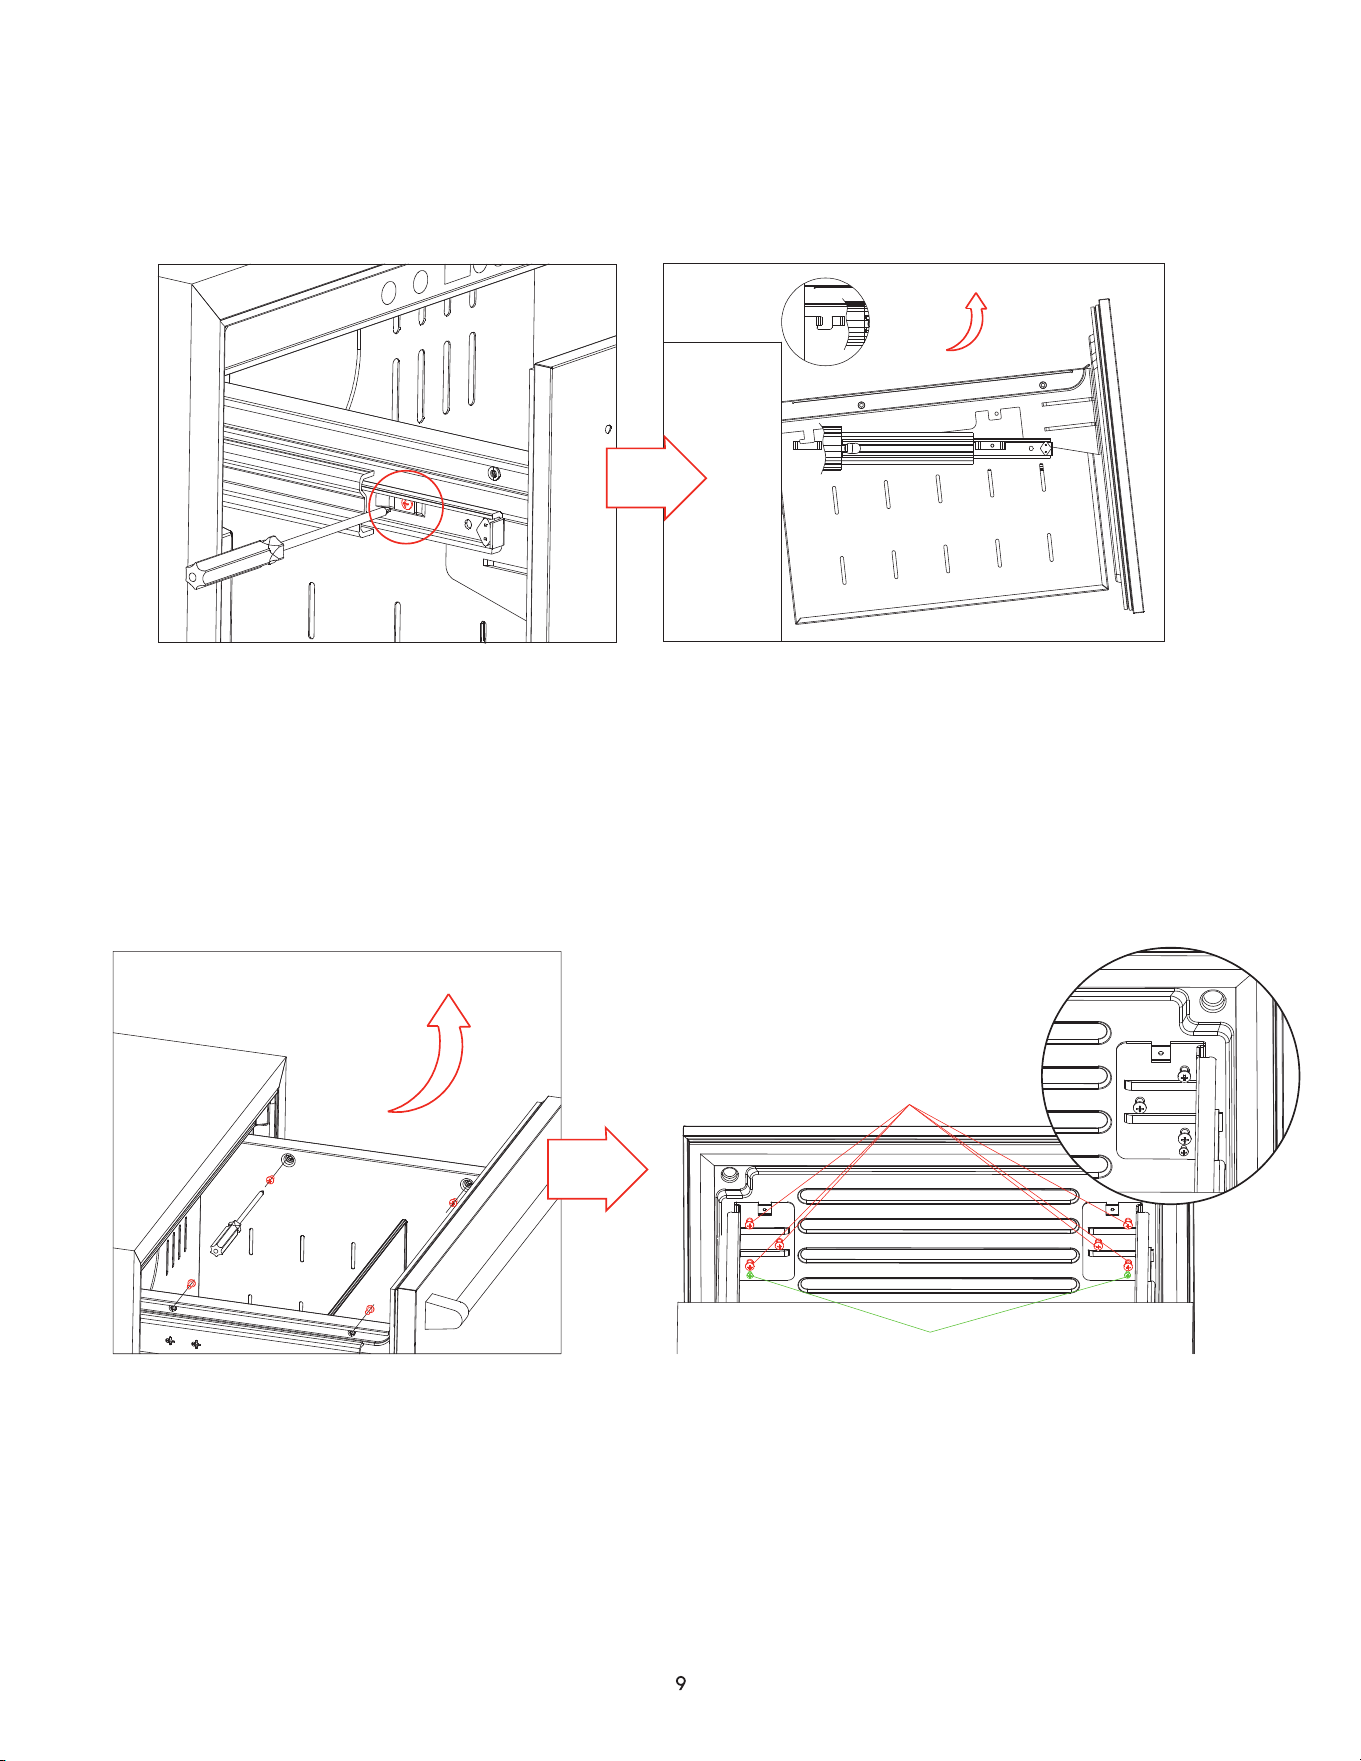
1. Remove the screw holding each slide rail and drawer bracket with a screwdriver
2. Lift the drawer front up and out of the slide rail buckle
3. Lift the drawer up and out to remove
To replace the drawer, reverse steps 1-3
If the two drawer faces are not even, follow these steps:
dealing with drawers
removing and replacing drawers
adjusting the upper and lower drawer faces
ATTACHMENT SCREWS
ADJUSTMENT SCREWS
1. Remove the drawer from the side rails by removing the four screws shown in Fig 1
2. Lift the drawer up and out of the unit
3. The drawer face is attached by 6 screws shown in Fig 2 - loosen these screws
4. Use the smaller adjustment screw below to move the face in or out as required
5. Re-tighten the 6 screws loosened in Step 3.
6. Replace the drawer and re-attach using the 4 screws removed in Step 1
Figure 1
Figure 2
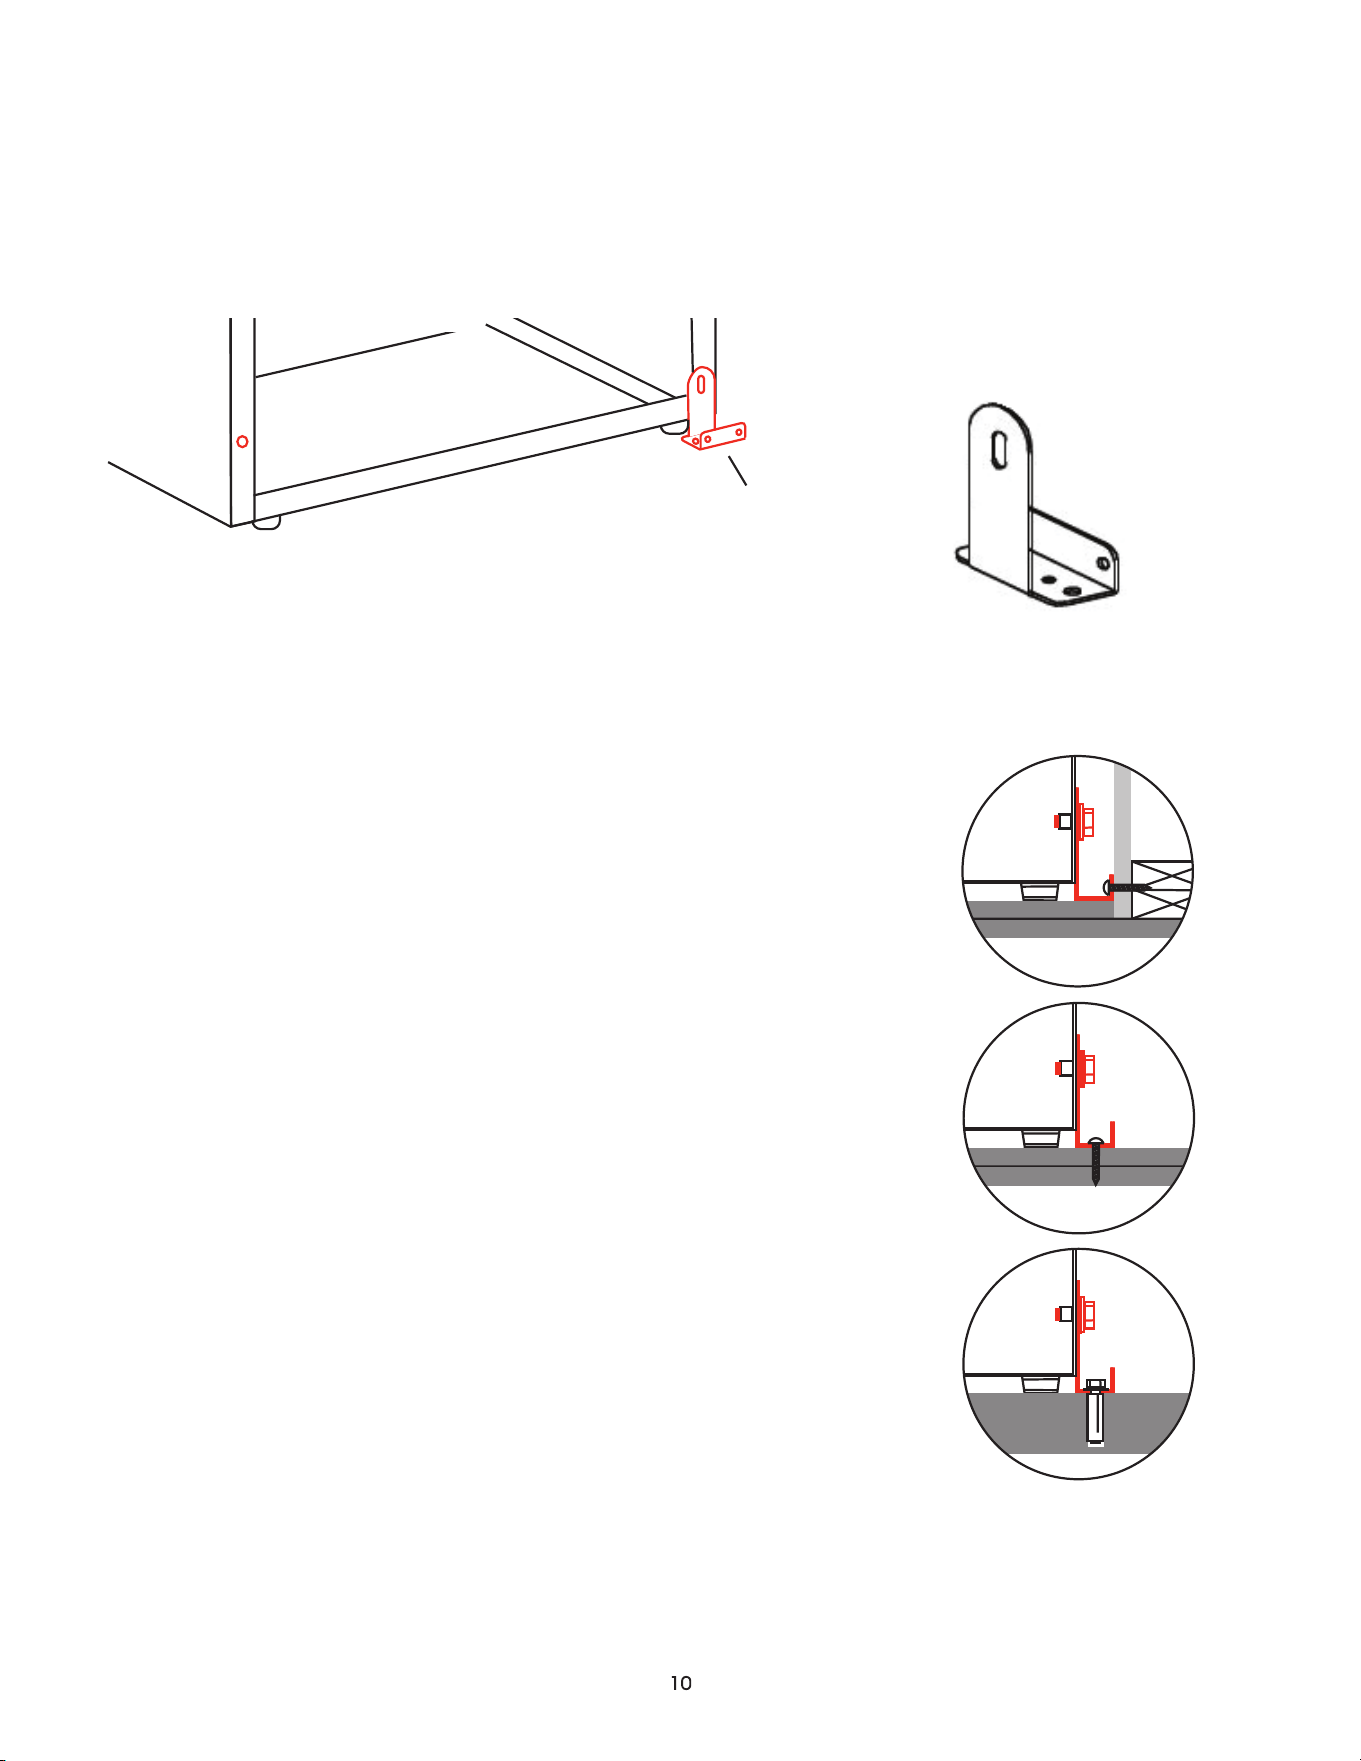
anti-tip bracket
for use in freestanding applications
When drawers, racks and shelves are extended while loaded, there is a danger of tipping the unit.
In these cases an Anti-Tip Bracket must be installed on the rear right or left side.
The Anti-Tip Bracket kit comes with a bolt and washers to mount to the rear of the refrigerator and
three different sets of fasteners to mount it to any of the following: Dry Wall Construction, Wooden
Flooring or Concrete Flooring.
DRYWALL CONSTRUCTION: (2 Screws) The bracket is screwed
to the wall and at least one of the screws must be into a stud
within the wall.
WOODEN FLOORING: (2 Screws) The bracket must be screwed
down into the flooring.
CONCRETE FLOORING: (Expansion Bolt) A 3/8” hole is bored
into the flooring 1 3/4” to 2” deep. The expansion sleeve is set
with a mallet into the hole and the bracket is bolted to the floor.
Make certain that the unit will not tip when finished.
FAILURE TO SECURE THE UNIT PROPERLY CAN CREATE A
DANGEROUS CONDITION.
ANTI-TIP BRACKET
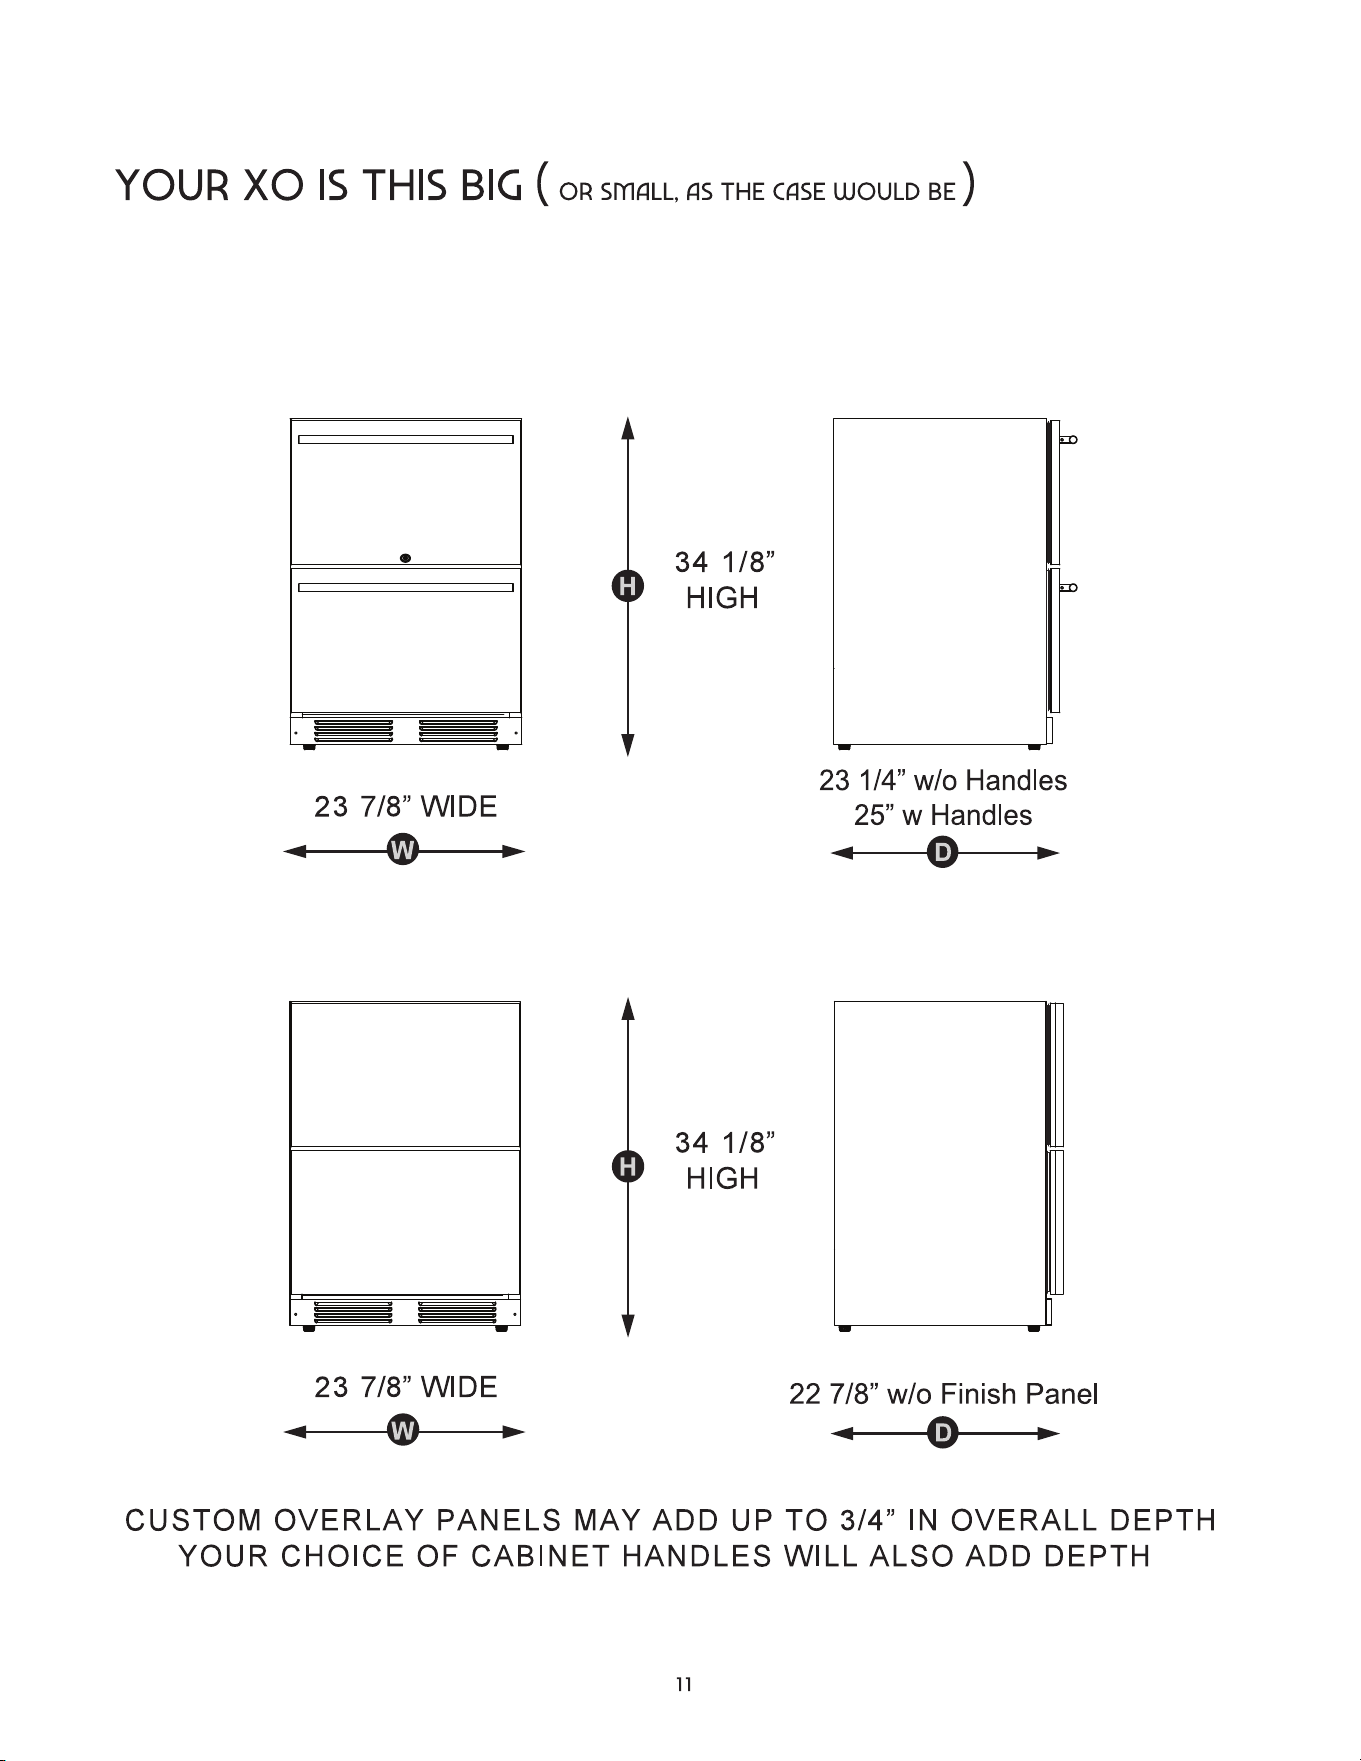
height | width | depth
XOU24RDS & XOU24ORDS - STAINLESS STEEL
XOU24RDO - INTEGRATED / OVERLAY PANEL
meet your xo
(XOU24ORDS add 1/8” to depth for lock)
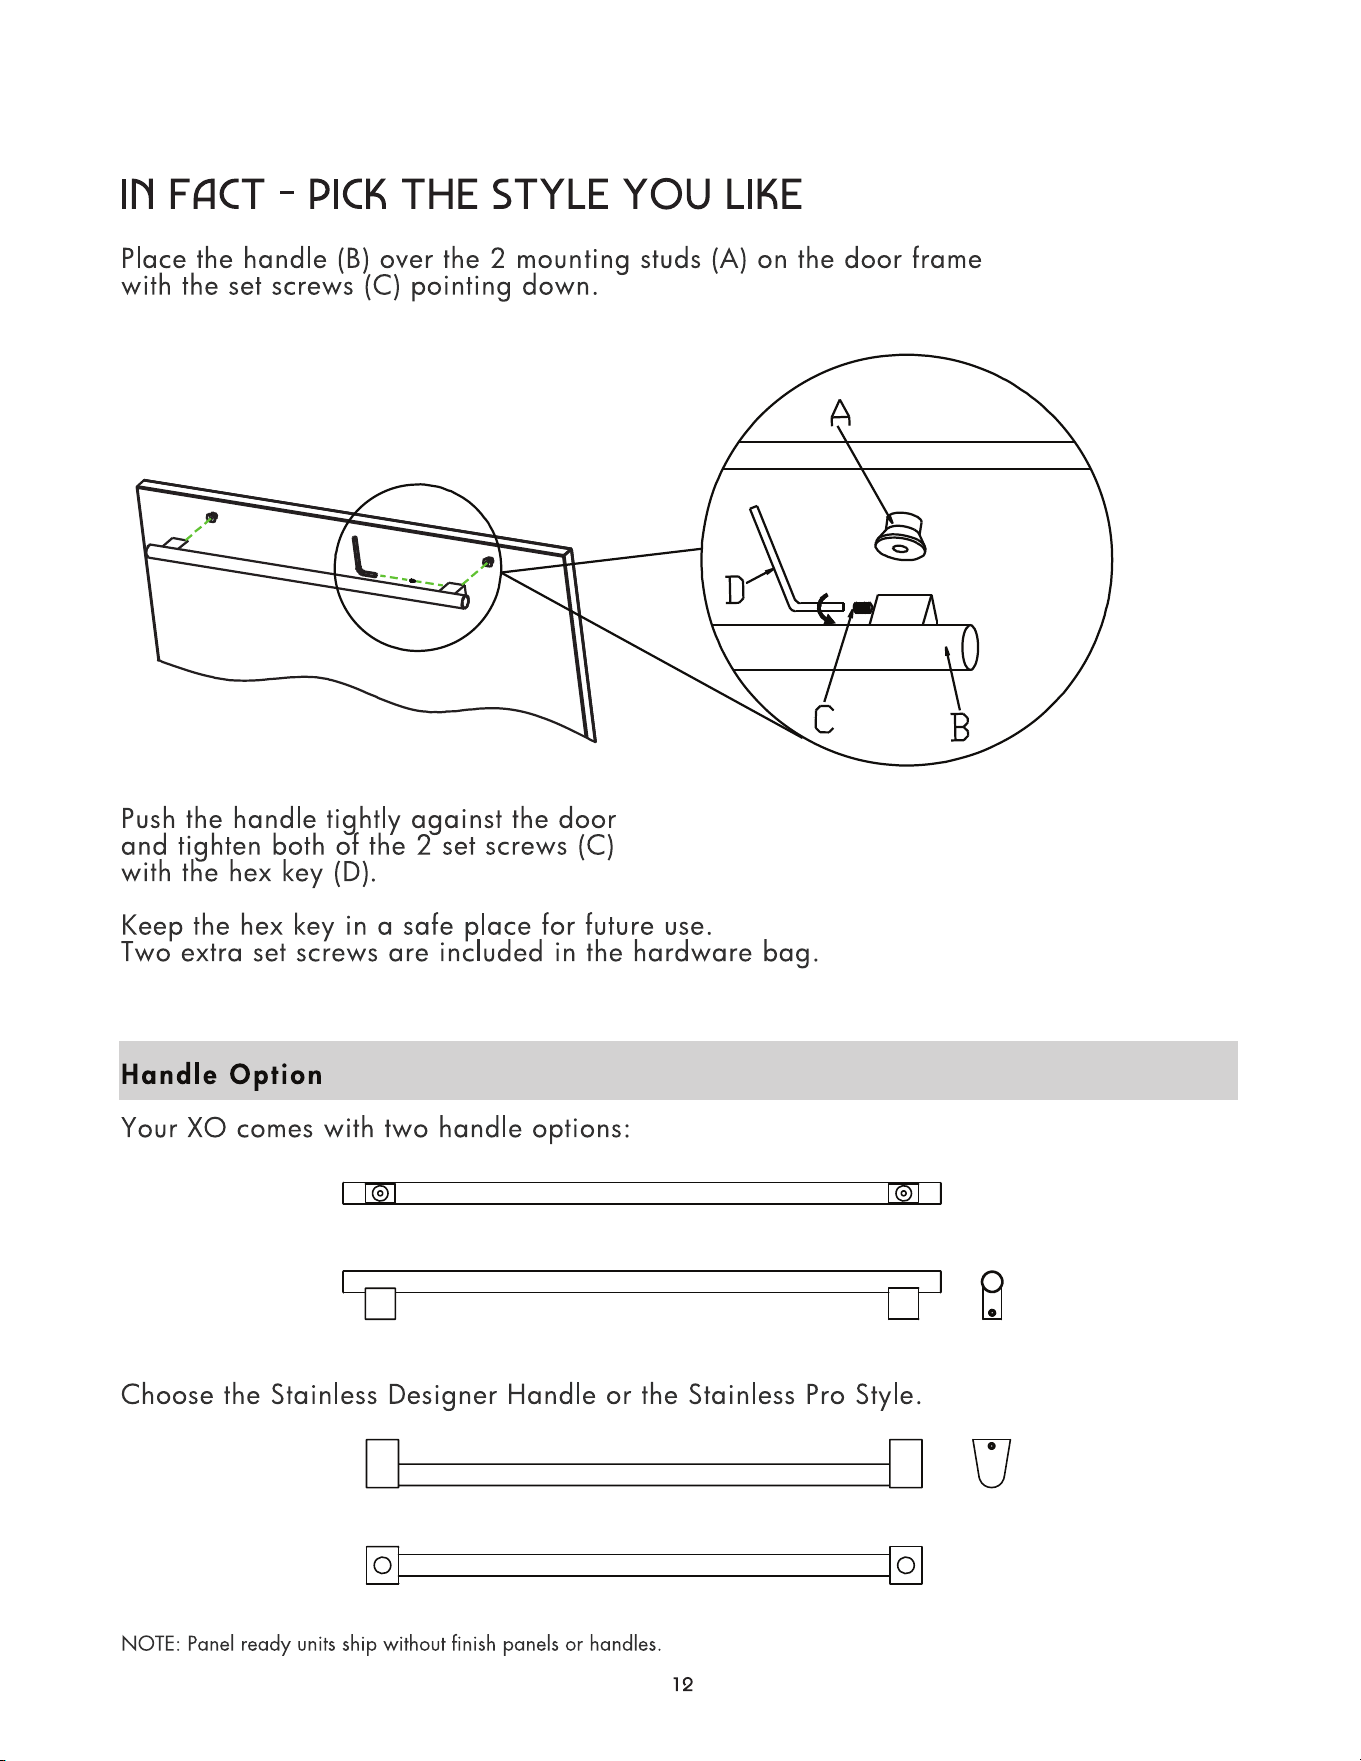
get a grip
Maximum Panel Weight: 10 lbs each
Maximum Panel Thickness: 3/4”
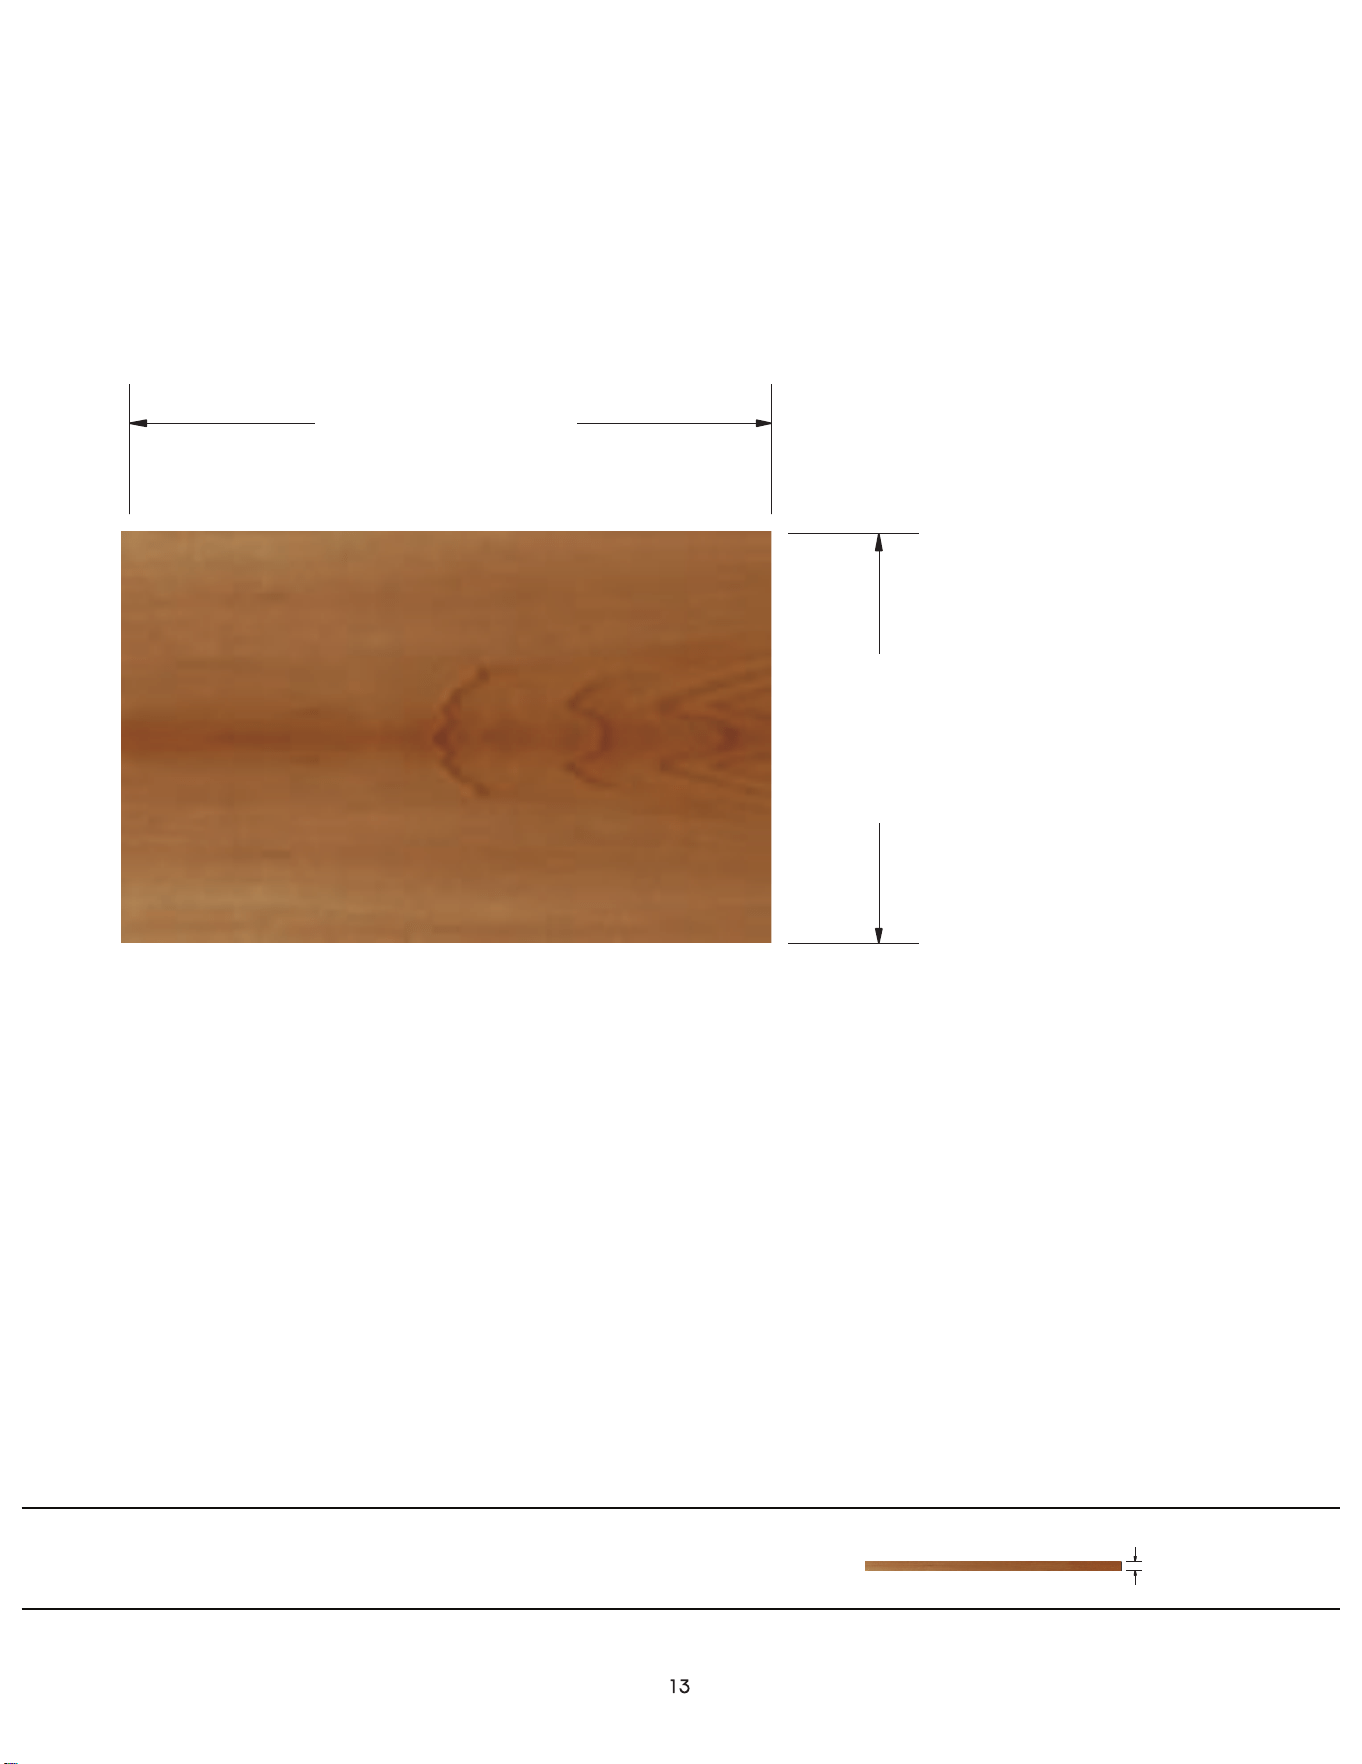
let’s face it
overlay panel dimensions
Two panels are required
23 9/16”
(594mm)
14 13/16”
(376mm)
1. Remove the four screws on both sides of the drawer and to remove it (see page 9)
Then remove the (6) M5 attachment screws to detach the drawer face.
6
6
6
six
for the overlay panel.
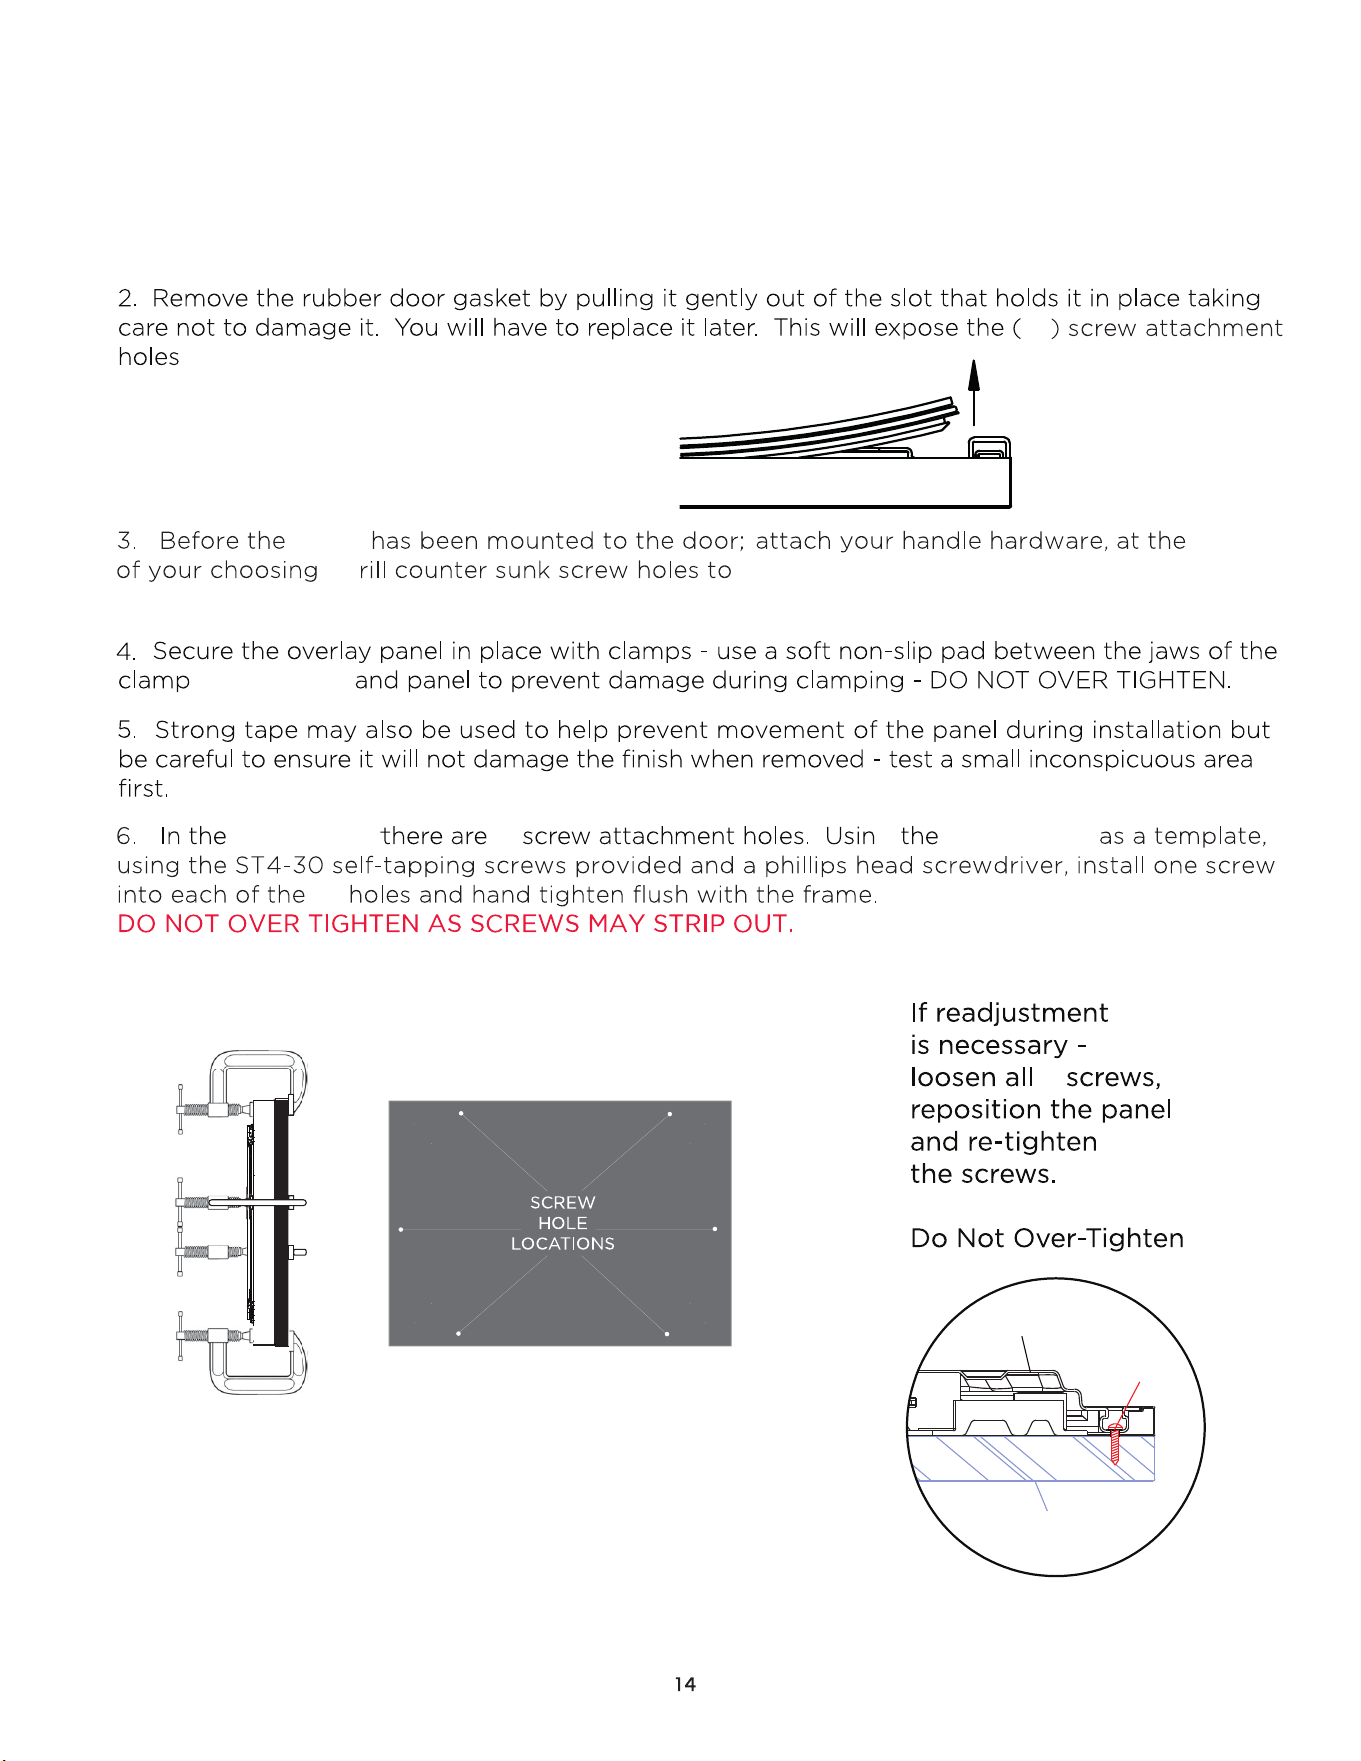
panel
location
. D recess the handle attachment screw heads.
, drawer face
drawer face
drawer face
g
DRAWER FACE
SCREW
OVERLAY
let’s face it
REMOVING THE DRAWER GASKET

it’s like zen - but cooler
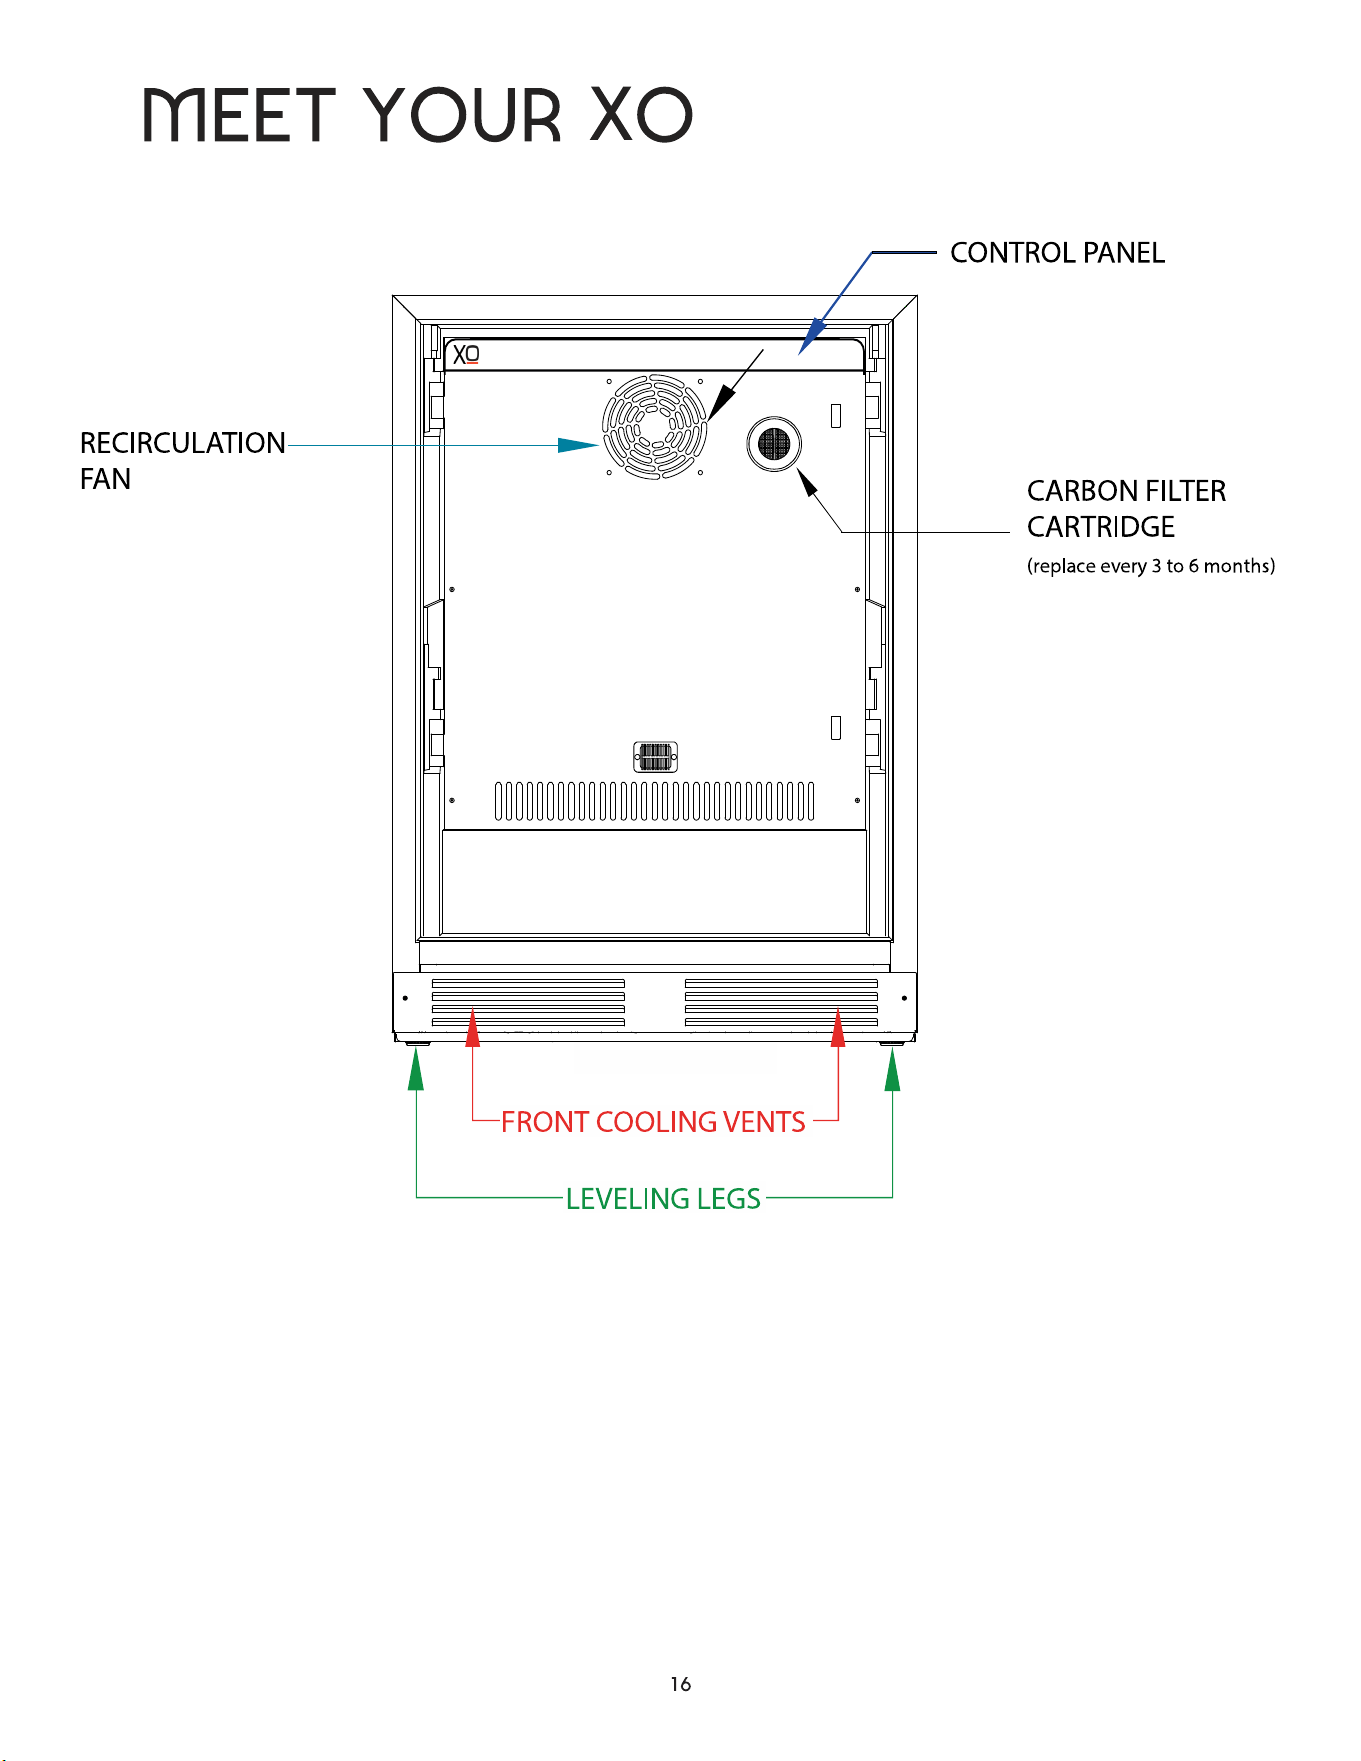
INTERIOR SHOWN WITH DRAWERS REMOVED
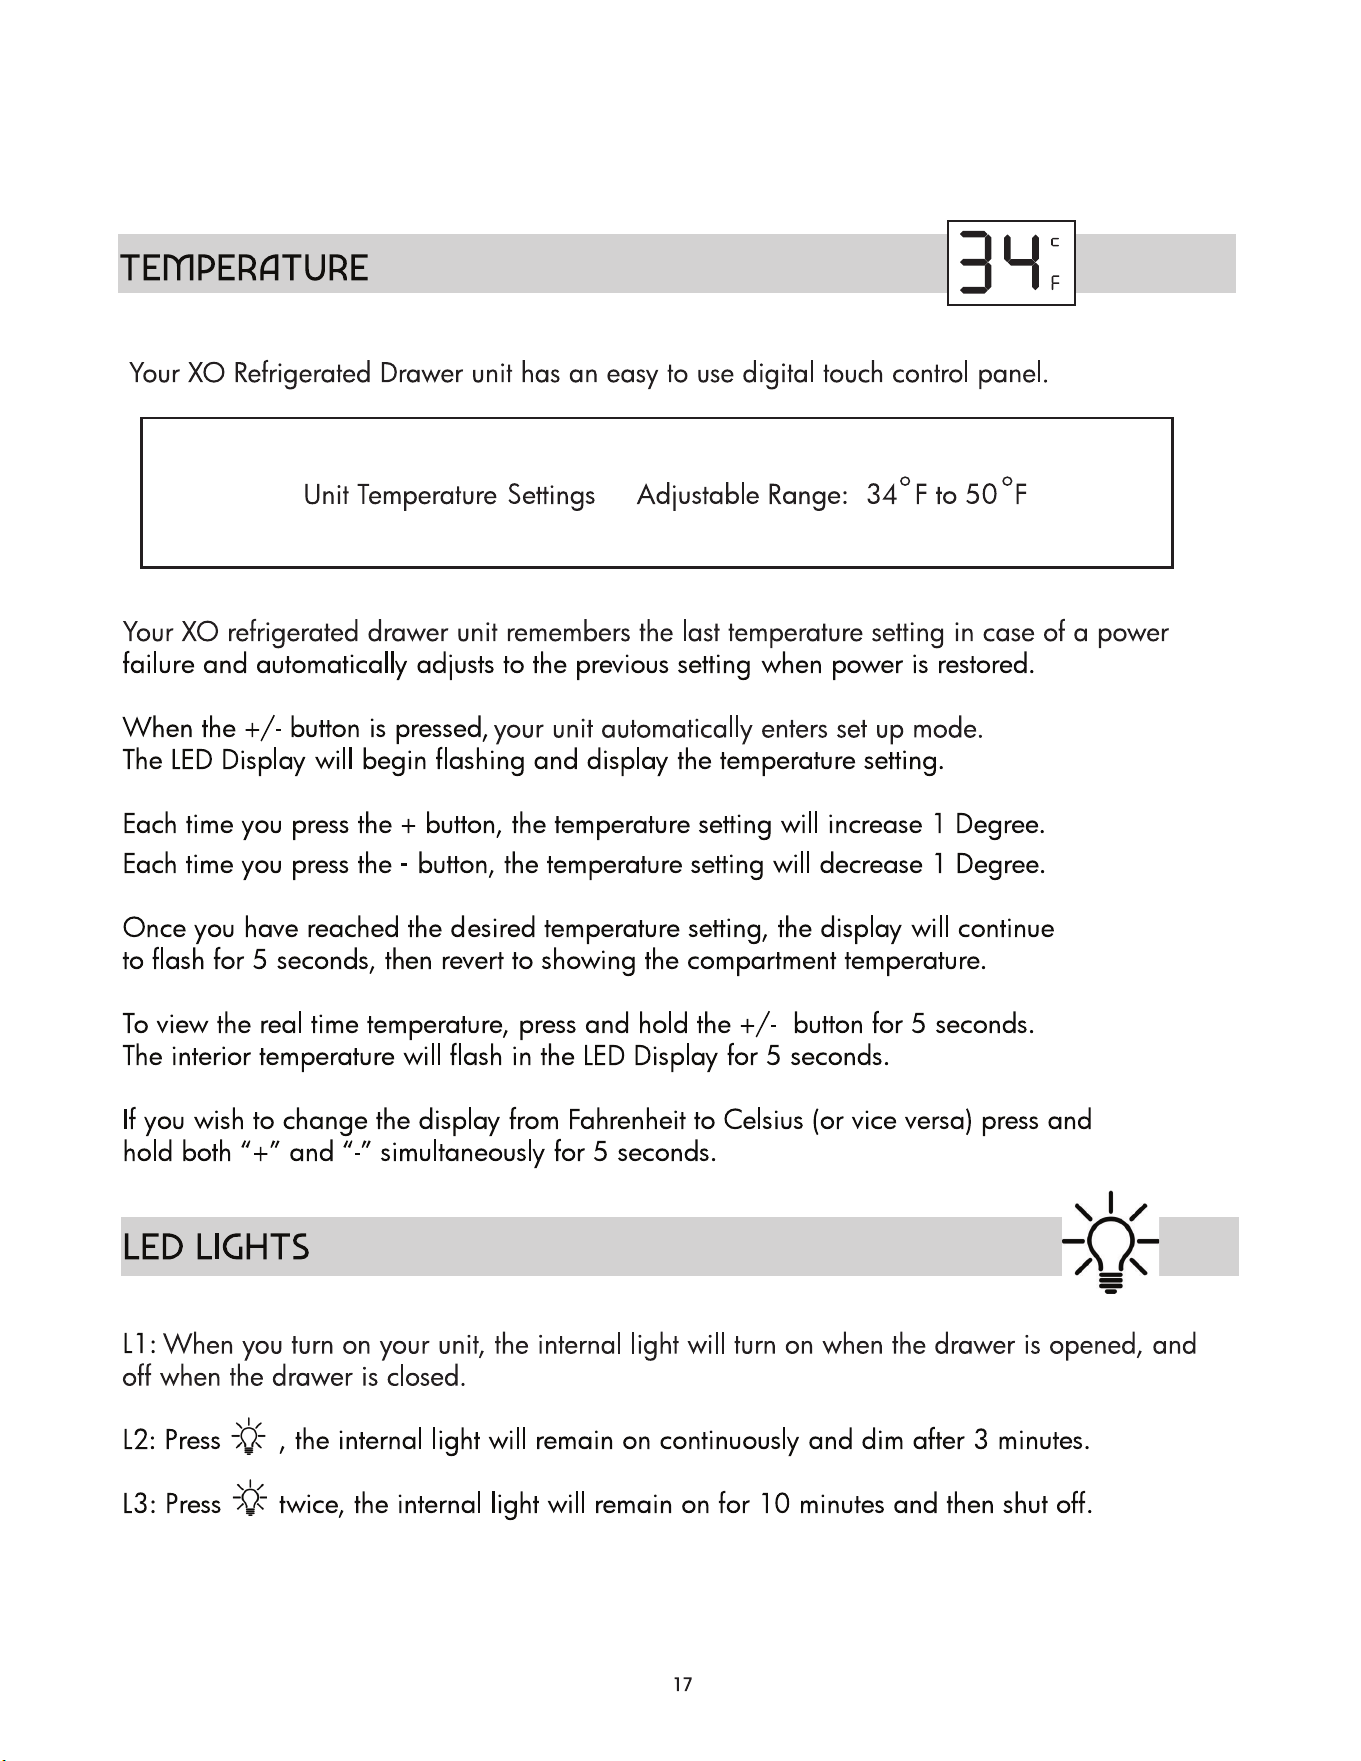
take control
take control
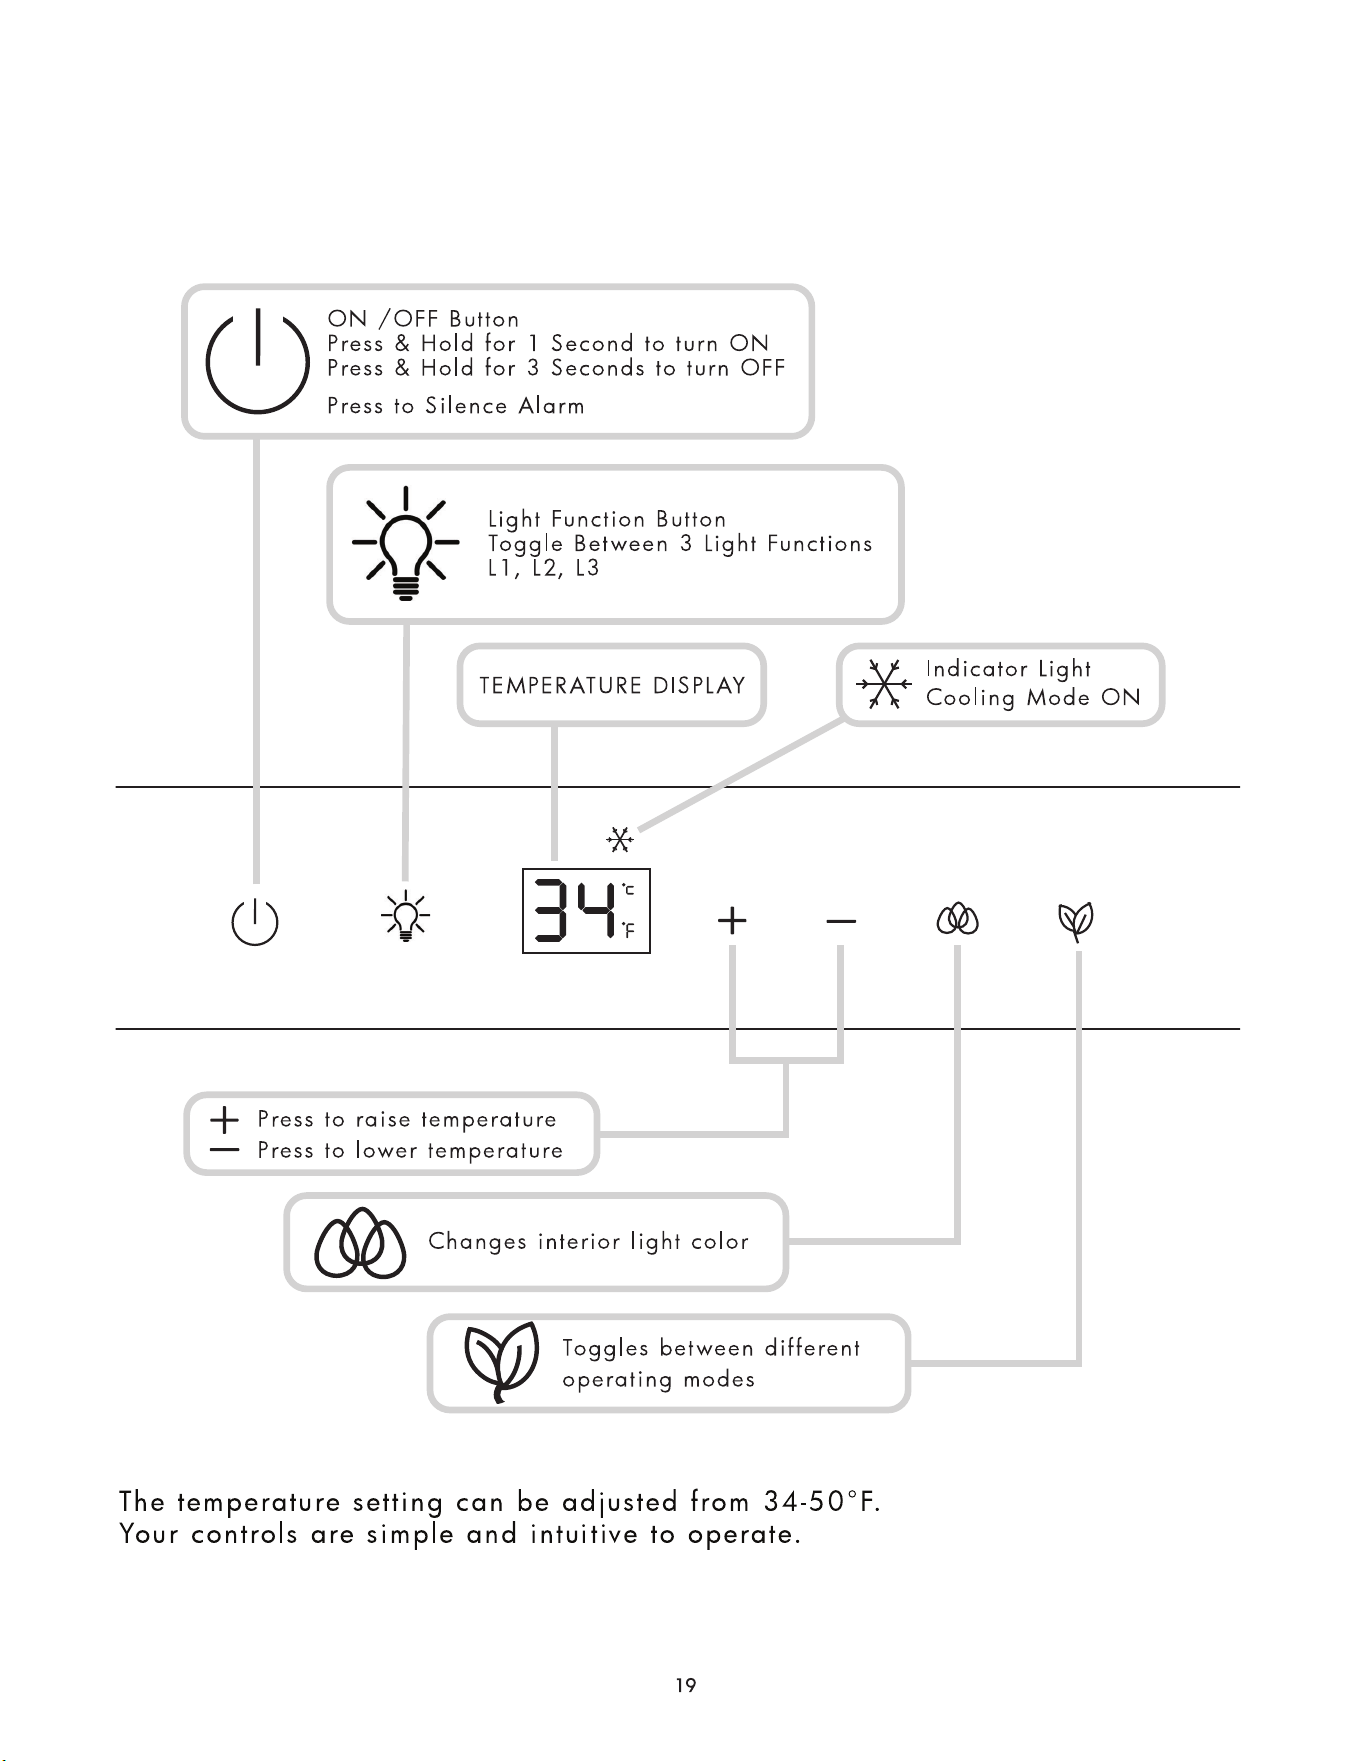
control panel
how many
70
62
your xo is very quiet but it isn’t silent - what are those sounds?
Today’s advanced refrigeration systems incorporate the latest technology like high efficiency compressors
and refrigerant evaporators which continually adjust their operation to maximize performance while saving
energy.
For that reason you may question the occasional hums, clicks or gurgling that accompany fans changing
speed, coils equalizing pressure, or valves and dampers resetting. That doesn’t mean something is wrong,
in fact it generally means your unit is functioning at peak efficiency. So expect to hear the recirculation fan
humming or the sounds change when you are opening and closing the system to add or remove bottles and
cans. When you do that, you change the internal temperature. The unit senses these changes and works to
compensate for it. So everything will stored at your desired temperature quickly and efficiently.
MORE QUESTIONS - contact us on-line at www.xoappliance.com