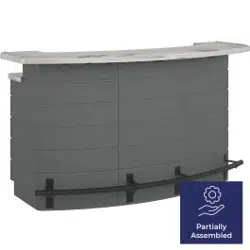

mi..tnigme
BMEB2500
Series
Backyard
Oasis
Entertaining
Bar
ASSEMBLY
INSTRUCTIONS
Tools
Required
*COLOR/STYLE
MAY
VERY
BY
MODEL
NUMBER.
Assistance
required
for
assembly
MADE
IN
U.
S.
A.
0
2026
Suncast
Corporation,
Batavia,
IL
USA
0660239C

Thank
you
for
purchasing
this
Suncast®
product.
Register
within
90
days
of
purchase
to
activate
warranty!
Registration
not
required
for
products
with
a
warranty
term
of
90 days
or
less.
1.
Verify
warranty
term
of
your
product
by
visiting
www.suncast.com/warranty
2.
Complete
registration:
fill
out
the
form
and
upload
a
copy
of
your
receipt
by
visiting
https://support.suncast.com
or
scanning
the
QR
code
Have
Questions?
For
product
questions,
assembly
assistance,
replacement
parts
and
more:
https://support.suncast.com
Suncast
Corporation
Customer
Care
701
N.
Kirk
Road,
Batavia,
IL
60510
1-800-846-2345
1-630-381-6309

A
Before
you
Begin...
•
Read
ALL
instructions
and
caution
statements
prior
to
assembly.
This
kit
contains
parts
that
are
used
in
different
orientations
to
construct the
product.
Failure
to
follow
instruction
could
prevent
correct
assembly
or
result
in
damage
to parts.
Suncast
is
not
responsible
for
replacing
parts
lost
or
damaged
due
to
incorrect
assembly.
•
Assistance
is
required
during
the
assembly.
•
Review
the
icons
used
within
this
manual
to
indicate
where
special
attention
is
required:
A
power
drill
may
be
used.
(A
screwdriver
may
also
be
used.)
Part
orientation
is
critical.
Only
a
screwdriver
should
be
used.
A
Caution
•
Power
drills
can
apply
excessive
torque
resulting
in
damage
to
the
product.
If
you
choose
to
use
a
power
drill,
use
a
variable
speed,
cordless
drill
with
a
variable
clutch
set
at
the
lowest
setting.
Damage
to
parts
due
to
over-
torque
is
not
covered
under
Suncast's
limited-
warranty.
•
The
finished
product
must
be
placed
on
a
flat
and
level
surface.
•
Do
not
use
product
without
sand
containers
filled
and
installed.
•
Do
not
exceed
the
following
weight
capacities:
•
Bar
Top (
150
lbs/68
Kg),
Countertop (
150
lbs/68
Kg),
Small
Drawers (
10
lbs/4.5
Kg),
Large
Drawers (
50
lbs/22.7
Kg),
Footrest (
150
lbs/68
Kg)
•
Devices
used,
installed
or
stored
in
or
with
product
must
be
plugged
into
GFCI
outlets
only.
•
If
water
is
present,
do
not
use
electrical
devices
installed
or
stored
in
the
product.
•
Do
not
stand
or
sit
on
the bar
surfaces
or
footrest.
•
Do
not
store
or
rest
hot
items
in
drawers
or
on
bar
surfaces.
•
Do
not
place
in
areas near
highly
reflective
surfaces. (
Note:
Low-
E
windows
are
more
reflective
than
standard
windows
and
may
affect
the
longevity
of
the
product.)
•
Product
not
intended
for
storage
of
flammable,
caustic
or
corrosive
materials.
•
Product
not
intended
for
use
by
children.
•
Suncast
is
not
responsible
for
damage
caused
by
weather
or
misuse.
•
Use
work
gloves
and
safety
glasses
when
handling
metal
parts
and
when
drilling.
Metal
parts
may
be
sharp.
•
Product
is
water
resistant
and
not
waterproof.
Locate
unit
away
from
gutter
and
down
spouts
for
optimal
performance.
•
Make
sure
you
have
assistance
nearby
to
lift
and
secure
parts
in
place.
3

A
Care
and
Maintenance
•
At
regular
intervals,
inspect
product
to
confirm
assembly
integrity
has
been
maintained.
Repair
or
replace
broken
parts
immediately.
•
To
maintain
the
look
of
your
product,
we
recommend
cleaning
it
at
regular
intervals
with
mild
soap and
water.
Do
not
use
caustic
cleaners,
or
stiff
bristle
brushes.
Failure
to
perform
cleaning
at
regular
intervals
could
result
in
permanent
staining
of
the
plastic.
This
type
of
damage
is
not
covered
under
warranty.
•
Should
you
need
to
move
the
product
after
assembly
is
complete,
reference
the
end
of
this
manual
for
guidelines.
4

Parts -
Panels
0- 1
0464921A
Right
Side
OB00803XX
Right Front
OB00802XX
Middle
Front
OB00817XX
Counter
Top
0464923A
Right
Divider
o
OB00811XX
Shelf
OB00801XX OB00806XX
OB00798XX
Left
Front Right
Toe
Kick
OB00805XX
Floor
Middle
Toe
Kick
OB00812XX
Door
OB00810XX
Door
Trim
OB00804XX
Left
Toe
Kick
0464920A
Left
Side
0464922A
Left
Divider
5

Pre-
Assembled
Panels
0464910
Bar
Top
0464913
Cabinet
Floor
Assembly
6

Parts -
Steel
F
Kit
F
#
0464703
=,
o
0
0
0
0
gi
Ei)
(
hi
Il
i (
fib
gb
0280665
0440985B
OMR004020
OMR002024
1MR005020
1MRG09022
Foot
Rail
Small
Drawer
Glide
39.9"
Side
Adapter
26.38"
Header
Beam
64"
Truss
Leg
27.25"
L-
Bracket
x4
x3
x2
x4
x2
7


Parts
Kit -
0464893
MASTER
HARDWARE
Bag
0470000
0671323-
Hardware
Bag
A
0632552
Hex
Bolt
x6
0631457
Carriage
Bolt
x4
0632526
Washer
x32
0632537
Carriage
Bolt
x28
(±)
0631732 0632449
Lock
Nut
Screw
x38 x40
0671310
-
Hardware
Bag
B
0511011
Grommet"
é
0240075
Footrest
End
Cap"
x2
0511015
Sand
Container
Cap"
x3
0464702
-
Kit
D
0102552
Cord
Slide"
010097610
Handle"
x5
0671324
-
Hardware
Bag
C
0630970
Phillips
Head
Cap
Screw
x180
1MPG00004
7.9"
Truss
Strap"
x6
OMP000044A
Corner
Brace"
x4
OMP000054
Lower
Rail
Bracket"
x4
OMP000055
Upper
Rail
Bracket"
x4
Hardware
shown
at
actual
size (*
Unless
otherwise
noted.)
Extra
hardware
provided.
Not
all
are
used.
9

IMPORTANT:
If
you
choose
to
use
a
power
drill
to
assemble
the
product,
refer
to
caution
statements
for
power
drill
guidelines.
Damage
to
parts
due
to
over-
torque
are
not
covered
under
Suncast's
limited-
warranty.
This
item
uses
self-
tapping
screws
in
some
areas.
There
are
no
pre-
drilled
holes.
Some
pressure
may
be
needed
when
starting
to
drive
the
screw.
Once
the
screw
pierces
the
plastic
it
will
drive
easier.
Pre-
Assembly -
Drawers
and
Door
Required
Hardware /
Steel
Kits
cg 0
o
(C1)
x4
Place
1
small
drawer (
S)
on
a
flat
surface
with
the
smooth
side
of
the
drawer
facing
up.
Fold
the
left
and
right
sides
up
and
then
fold
the
back
of
the
drawer
to
align
the
tabs
and
slots
as
shown.
Apply
pressure
until
the
tabs
have
completely
snapped
through
the
corner
slots.
TIP:
A
rubber
mallet
may
be
useful
to
assist
in
engaging
the
tabs
completely.
Repeat
to
assemble
remaining
small
drawer (
S)
and
2
large
drawers (
U).
Align
the
slots
on
1
small
drawer
front (
R) with
the
tabs
on
1
small
drawer (
S).
Slide
down
to
engage
until
the
drawer
front (
R)
snaps
into
place.
Carefully
flip
drawer
assembly
over
and
secure
the
drawer
front (
R)
to
the
drawer (
S)
with
2
screws
(
Cl)
as
shown.
Repeat
to
assemble
1
additional
small
drawer
assembly.
10

(D2)
x5
DV
(C1)
x6
Align
the
slots
on
1
large
drawer
front
(
T)
with
the
tabs
on
1
large
drawer
(U).
Slide
down
to
engage
until
the
drawer
front
(
T)
snaps
into
place.
2
IMPORTANT:
Once
fully
engaged,
large
drawer
front (
T)
will
extend
past
the
drawer
bottom.
Carefully,
flip
drawer
over,
and
secure
with
3
screws
(
Cl)
as
shown.
Repeat
to
assemble
1
additional large
drawer
assembly.
Insert
handle
(
02)
into
1
large
drawer
front
(
T)
at
an
angle
and
press
flat
until
handle
snaps
into
place.
o
Repeat
to
install
remaining
4
handles
(
02)
onto
1
additional large
drawer
front
(
T),
2
small
drawer
fronts
(
R),
and
1
door
(
M).
11

Pre-
Assembly -
Drawer
Gildes
and
Cord
Slide
Required
Hardware /
Steel
Kits
cd
:1
0'
A
113
Separate
1
drawer
glide
(
61)
into
2
parts,
the
wide base
and
the
narrow
glide:
1)
Extend
the
narrow
glide
fully.
2)
Lift
upward
on
the
glide
catch.
3)
With
glide
catch
in
the
raised
position,
slide
the
narrow
glide
out
from
the
wide
base.
Repeat
for
the
remaining
3
drawer
glides
(
61).
(A6)
x12
Using
6
screws
total
(
A6),
install
1
narrow
glide
onto
each
side
of
a
small
drawer
(
S)
as
shown
below.
IMPORTANT:
The
closed
end
of
the
narrow
glide
must
face
the
drawer
front (
R).
Repeat
the
process
to
install
2
additional
narrow
glides
onto
the
remaining
small
drawer
(
S).
12

(A6)
x6
j
Attach
1
wide
glide
to
the
right
divider
(
L)
with
3
screws
(
A6).
IMPORTANT:
The
rubber
bumper
should
be
facing
the
back
of
the
side
panel
as
indicated.
TIP:
It
may
be
necessary
to
slide
the
moving
part
of
the
glide
to
access
remaining
mounting
holes.
Repeat
for
the
left
divider
(
K).
I
Attach
1
wide
glide
to
the
right
side
(
C) with
3
screws
(
A6).
(A6)
x6
IMPORTANT:
The
rubber
bumper
should
be
facing
the
back
of
the
side
panel
as
shown.
TIP:
It
may
be
necessary
to
slide
the
moving
part of
the
glide
to
access
remaining
mounting
holes.
Repeat
for
the
left
side
(
B).
I
on
(C1)
x1
(A4)
x1
(D1)
x1
Attach
the
cord
slide
(
DI)
to
the
left
side
panel
(
B)
using
1
screw
(
Cl)
and
1
washer
(
A4).
NOTE:
Do
not
overtighten
the
screw
(
A4).
The
cord
slide
(
DI)
should
easily
slide
back and
forth
without
much
resistance.
X
13

Pre-
Assembly -
Cabinet
Floor
(C1)
x8
Required
Hardware /
Steel
Kits
wc)
Carefully
flip
the
cabinet
floor
assembly
(
J)
to
rest
on
the
drawer
glides.
NOTE: Do
not
remove
the
tape
from
the
cabinet
floor
assembly
at
this
time.
Using
4
screws each
(
Cl),
attach
2
header
beams
(
26.38",H1)
to
the
underside
of
the
cabinet
floor
(
J).
.2D
e
_Ik..2Weg2p°e±d25
,d \
.,
aids
.
.v15
,
..‘atD°e\7=esaue
:ÉFpÉP
.
elefD°
daiD
,
d8\
.
1`'effield
e
e.:Ép.
se
y
GPe.
‘e!.
(Cl)
x24
<16.
gr
i l
<76.
ece"
1
><6.`
Using
12
screws
each
(
Cl),
attach
2
truss
legs
(
64",H2)
to
the
cabinet
floor
as
indicated
(
J).
x24
‹.6=
IMPORTANT:
Orientation
is
critical.
Be
sure
to
orient
the
truss
legs (
64",H2)
with
the
ends
having
two
holes
positioned
on
the
correct
side
of
the
cabinet
floor (
J)
as
shown.
14

Assembly -
Floor,
Side
and
Front
Panels
Required
Hardware /
Steel
Kits
c
a@
A
cgc)
U p@
E
Align
the
bottom
tabs
of
the
left
side (
B) with
the
slots
on
the
left
side
of
floor (
A)
as
shown.
Slide
left
side
(
B)
towards
the
front
of
the
floor (
A)
until
it
locks
into
place.
(Cl)
IL
x30
IMPORTANT:
Orientation
is
critical.
Refer
to
image
for
correct
placement.
Repeat
the
process
to
assemble
the
right
side
(
C)
to
the
floor
(
A).
Using
10
screws
(
Cl),
attach
1
side
adapter
(
39.9",G2)
to
left
front
(
D).
Repeat
for
the
middle
front
(
E)
and
right
front
(
F) at
locations
indicated.
15

(A5)
x12
(A4)
x12
(E4)
x4
(E2)
x 4
Using
3
bolts
(
A3),
3
washers
(
A4),
and
3
nuts
(
A5)
attach
1
upper
rail
bracket
(
E4)
and
1
lower
rail
bracket
(
E2)
to
the
left
front
(
F)
as
shown.
Tighten
securely.
NOTE:
Hardware
locations
may
need
to
be
pierced
with
a
screwdriver
prior
to
installing
foot
rail
brackets (
pierce
holes
from
the
front
side
of
the
panels).
Repeat
to
install
the
remaining
brackets
(
E4,E2)
onto
the
middle
front
(
E)
and
right
front
(
F).
See
locations
below
for
reference.
Lkui:
1)
Align
the
slots
on
the
left
front
(
D)
with
the
tabs
on
the
left
side
(
B).
Slide
the
left
front
(
D)
down
to
engage.
2)
Align
the
bottom
tabs
of
the
left
front
(
D)
into
the
slots
on
the
floor
(
A).
Press
firmly
until
the
left
front
(
D)
snaps
into
place.
Repeat
process
to
assemble
right
front
(
F).
16

(Cl)
x14
Assembly -
Toe
Kicks
Place
the
middle
front (
E)
as
shown.
Align
the
bottom
tabs
on (
E)
with
the
slots
on
the
floor
(
A).
Firmly
press
downward
until
the
tabs
snap
into
place.
Using
14
screws
(
Cl),
secure
the
middle
front
(E)
to
the
left
and
right
front
(
DF)
as
shown.
Required
Hardware /
Steel
Kits
uc)
El
Slide
the
side
tab
of
the
right
toe
kick
(
I)
into
the
slot
on
the
inside of
the
right
side
(
C).
Press
down
firmly
to
engage
the
bottom
tabs
into
the
floor
(A)
until
it
snaps
into
place.
Repeat
the
process
to
assemble
the
left
toe
kick
(
G).
17

(B3)
x3
(C1)
x4
Using
4
screws
(
Cl),
secure
the
middle
toe
kick
as
shown.
Assembly -
Sand
Containers
and
Cabinet
Floor
Required
Hardware /
Steel
Kits
km*
IMPORTANT:
Be
sure
the
product
is
located
in
the
desired
location
for
use
prior
to
inserting
the
sand
containers.
DO
NOT
use
the
product
without
the
sand
containers
filled
and
installed
in
the
base.
Fill
3
sand
containers (
V) with
sand
or
pea
gravel (
not
included)
until
material
has
reached
the
indicated
fill
line.
Secure
contents by
installing
sand
container caps (
B3
x3).
CAUTION:
Do
not
fill
sand
containers past
fill
line.
Place
filled
sand
containers (
V
x3)
into
the
base
as
shown
with
the
handles
facing
the
straight
edge
of
the
floor (
A).
18

With
the
drawer
glides
facing
upwards,
Slide
the
cabinet
floor
(
J)
into
position
over
the toe
kicks
(
G,H,I)
until
the
curved
edge
rests
against
the
front
panels
(
D,E,F).
Once
in
position,
lower
the
straight
edge
of
the
cabinet
floor
(
J)
until
it
locks
into
the
side
panels
(
BC).
IMPORTANT:
Be
cautious
of
drawer
glides
(
Y)
while
moving
the
cabinet
floor (
J).
Remove
drawer
glide
tape
after
instal-
lation
of
the
cabinet
floor.
(C1)
x2
Using
1
screw
each
(
Cl),
secure
the
cabinet
floor
to
the
right
and
left
sides
(
BC)
as
shown.
c're
TIP:
The
additional
screw
locations
will
be
used
later
in this
assembly.
19

Assembly -
Bar
Top
(A6)
x12
(E3)
x4
Required
Hardware /
Steel
Kits
W
C)
A
cg 0 W
C)
E
>it
Using
3
screws
each (
A6),
secure
2
corner
braces (
E3)
to
the
right
side
(
C)
as
shown.
Repeat
to
secure
2
remaining
corner
braces (
E3)
to
the
left
side
(
B).
ea
With
the
help
of
another
person,
position
the bar top
(
P)
over
the
front
of
the
bar
(
FED)
and
previously
installed
corner
braces
(E3).
IMPORTANT:
be
sure
the bar top
supports (**)
align
with
the
front
panels
as
indicated.
TIP:
Bar
top
supports (**)
are
pre-
assembled
onto
the bar
top (
P).
20

(A5)
x3
(Al)
x3
Starting
with
the
right
front
(
F),
connect
bar top
to
base
by
inserting
1
bolt
(
Al)
through
side
adapter
(
G2)
and
bar top
support (**)
as
shown.
Secure
bolt
with
nut
(
A5).
Repeat
for
remaining
connections
on
the
middle
front
(
E)
and
left
front
(D).
Tighten
bolts
securely.
r
I.
.)
7/1
6"
IMPORTANT:
Orientation
is
critical.
Refer
to
image
for
proper
placement
of
truss
straps (
El).
1.
Starting
with
the
right
front
panel
(
F),
Install
one
truss strap
(El)
to
each
side
of
the
bar top
support (**)
using
1
bolt
(Al)
and
1
nut
(
A5).
Leave
the
nut
and
bolt
loose
so
that
the
truss
straps
(
El)
hang
freely.
2.
Secure
the
bottom
of
each
truss
strap
(
El)
to
the
side
adapter
(
G2)
using
2
screws
(
Cl).
Once
the
bottom
portion
of
the
truss
straps
(
MM)
have
been
secured,
tighten
the
bolt
(
Al)
holding
the top
portion
of
the
truss
straps
(
El).
Repeat
the
process
to
install
remaining
truss
straps
(
El)
on
the
middle
front
(
E)
and
left
front
(
D).
(Al)
x3
(A5)
x3
(C1)
x6
21

(C1)
x12
Using
6
screws each
(
Cl),
secure
bar
top (
P)
to
the
2
corner
braces (
E3
x2)
on
each
side
of
the
bar.
Using
6
screws
(
Cl),
secure
bar
top (
P)
to
front
as
shown.
22

Assembly -
Dividers
and
Door
Trim
1)
Align
the
tabs
of
the
left
divider
(
K)
with
the
slots
in
the
left
front
(
D)
and
cabinet
floor
(
J).
Slide
the
left
divider
(
K)
downward
to
engage
the
tabs
into
the
left
front
(
D).
2)
Continue
to
press
firmly
until
the
bottom
tabs
snap
into
the
cabinet
floor
(
J).
Repeat
the
process
to
install
the
right
divider
(
L) to
the
right
side
of
the
bar.
Install
the
door
trim
(
N) by
aligning
the
side
tabs
into
the
slots
on
the
left
and
right
dividers
(
K,L)
and
sliding
down
into
position.
IMPORTANT:
Be
sure
the top
of
the
door
trim (
N)
is
flush
with
the
tops
of
the
left
and
right
dividers (
K,L).
23

Assembly -
Counter
Top
Required
Hardware /
Steel
Kits
Place
2
truss
legs
(
64",H2)
into
the
top
slots
across
the
left
and
right
sides
(
BC)
and
dividers
(
K,L).
Be
sure
the
truss
legs
(
H2)
lay
flush
with
the
tops
of
the
left
and
right
sides
and
dividers.
IMPORTANT:
Orientation
is
critical.
Be
sure
to orient
the truss
legs (
H2)
with
the
ends
having
two
holes
(!!)
positioned
at
the
end
over
the
right
side (
C)
as
shown.
TIP:
When
installing
the
inner
truss
leg
(
H2):
1)
Insert
the
left
end
into
the
recess
of
the
left
side (
8).
)
Raise
and
pivot
the
right
end
into
the
recess
of
the
right
side (
C).
24

ED
With
the
help
of
another
person,
position
the
countertop
(
0)
over
the
bar.
Align
the
slots
on
the
underside
of
the
countertop
with
the
tabs
on
the
left
and
right
sides (
BC)
and
dividers
(
K,L).
Once
aligned,
lower
the
countertop
onto
the
tabs
and
push
forward
to
fully
engage.
MFE
tEFEIB
FMMAMMIEIMMI
MMIMIMM,
sIMIMEIMM
zaeàJimaroemtzisiatm
MI
MI
ffl
Mfflfflt.lfflMFMFIFIRIM
ursaa
s.
ale
acets
um.ias
a
as '
aa meK
tEIMMM
a
ea
IMPORTANT:
Check
the
sides
of
the
counter
top
to
confirm
that
no
gaps
are
present
before
proceeding
to
the
next
step.
M;
MI
FE/
OMeMM
I
FM
ft
MOM
r
1=6
H=.
6=6
011=b
15=B
1=6
%b
<eh
41.e
aP=1,
a=t
-)MI
MME1
JIMMIE/
MIME)
121
_ —1
CM MI FM
FEJIMMIIMMM
MI
FM)
MI
17J
1111
MR,
eFIffl
IK.KKIKK
seetesK
MaffleM
iMMIMME
atEfflIMM
1)
Secure
the
counter
top (
0)
to
the
truss
legs
(
H2)
using
24
screws
(
Cl).
2)
Secure
the
counter
top (
0)
to
the
front
of
the
bar
using
4
screws
(
Cl).
\_
(Cl)
x28
0=
16= =
9
6=
0=9
a=a
1=m
e=D
c=m
a=v
e=t
ah
P=0
P=19
PO
0=19
0l9
0= =
9
P=9 6=9
1=0,
1=1,--P=b
0=i9
PD
1=0
PD
6=,9
PI=B
[130=1
0=9 P79 6=0 07,
• , "
25

(82)
x2
(C1)
x 8
Using
8
screws
(
Cl)
secure
cabinet
floor
at
the
locations
indicated.
Assembly -
Foot
Rest
Required
Hardware /
Steel
Kits
c
g@
A
c
g@
E
Using
a
rubber
mallet,
install
1
foot
rail
cap
(
B2)
onto
each end
of
the
foot
rail
(
F1).
ea
Carefully
slide
the
foot
rail
(
F1)
through
the
large
openings
of
the
foot
rail
brackets
(
E4,E2)
as
indicated
below.
Once
the
foot
rail
(
F1)
is
through
all
the
brackets,
gently
pull
it
into
position
so
that
the
holes
of
the
foot
rail
(
F1)
align
with
the
holes
of
the
foot
rail
brackets
(
E4,E2).
;
dtS\
IMPORTANT:
Be
sure
to
slide
foot
rail (
F1)
through
the
largest
opening
of
the
brackets
to
avoid
scratching
it.
26

‹ie
(C1)
x8
(A2)
x4
(A5)
x4
(A4)
x4
Secure
foot
rail (
F1)
to
1
set
of
foot
rail
brackets (
E4,E2)
using
lbolt
(A2),
1
washer (
A4),
and
1
nut (
A5).
Tighten
the
foot
rail
bracket
connections
securely
before
proceeding
to
the
next
step.
Repeat
for
the
remaining
3
sets
of
brackets (
E4,E2).
é?
.
o
Assembly -
Shelf,
Door
and
Drawers
Required
Hardware /
Steel
Kits
cd3
C)
A
cg °
C)
cgc)'
Using
4
screws
each (
C1),
attach
2
L-
brackets (
27.25",H3)
to
the
bottom
of
the
shelf (
Q).
27

While
holding
the
shelf
(
0)
at
a
slight
angle,
insert
the
shelf
(
CI)
between
the
divider
panels
(
K,L).
Once
fully
inserted,
rotate
the
shelf
(
CI)
square
and
press
down
gently
until
it
snaps
into
place.
To
install
door
(
M),
position
the
left
post
into
the
glide
slot
on
the
left
divider
(
K)
as
shown.
Pivot
the
right
side
of
the
door
upwards
until
the
right
post
snaps
into
the
corresponding
glide
slot
on
the
right
divider
(
L).
Once
fully
engaged
with
divider
panels
(
K,L),
pivot
the
door
(
M)
downward
to
close.
Extend
the
pair
of
large
drawer
glides
(
Y)
installed
on
the
left
side
of
cabinet
floor
(
J).
Place
1
large
drawer (
U)
onto
glides
and
align
the
mounting
holes.
NOTE:
If
not
already
done,
pierce
the
6
holes
in
the
bottom
of
the
large
drawer (
U)
using
a
screwdriver.
28

(B1)x1
./
(A3)
x12 (
A5)
x12
(A4)
x12
Secure
1
large
drawer
(
U)
to
the
drawer
glides
(
Y)
using
6
bolts
(
A3),
washers
(
A4) and
nuts
(
A5).
Tighten
securely.
Repeat
steps
40 &
41
to
install
the
remaining
large
drawer
(
U)
on
the
right
side
of
the
bar.
Fully
extend
the
small
drawer
glides
on
the
left
side
(
B)
and
left
divider
(
K).
Align
the
narrow
glides
of
1
small
drawer
(
S)
to
the
previously
extended
glides
and
insert
the
small
drawer
(
S)
into
the
cabinet.
Pull
out
the
drawer
to
confirm
connection.
Repeat
to
install
the
remaining
small
drawer
(
S)
on
the
right
side
of
the
bar.
Insert
the
grommet
(
B1)
into
the
counter
top
(
0).
(De
29

Moving
the
Product
CAUTION:
The
finished
product
is
very
heavy.
Do
not
lift
with
the
footrest,
bar top
or
counter
top.
Moving
the
finished
product
should
be
done
with
two
or
more
people.
Excessive
stress
or
twisting
can
damage
to
the
product
and
can
void
the
warranty.
Remove
sand
containers
and
stored
items
prior
to
moving.
Replace
sand
containers
after
product
has
been
relocated.
To
remove
the
sand
containers,
remove
the the
middle
toe
kick.
Carefully
reach
into
the
base
to
pull
out
the
sand
containers.
If
moving
the
product
over
short
distances
on
a
smooth
surface,
the
product
can
be
carefully
slid
by pushing
on
the
bottom
corners
of
the
side
panels.
If
moving
the
product
over
long
distances
and/or
over
uneven
surfaces,
place
moving
dollys
under
each end
of
the
bar
before
moving.
30

Electric
Cord
Routing
Electrical
cords
can
be
routed
through
the
grommet
hole,
along
the
bar
corner
and
out
the
cord
slide.
Remove
the
grommet,
and
feed
the
electrical
cord
through
the
grommet
hole
down
along
the
bar
and
behind
the
drawers.
Feed
the
cord
plug
through
the
cord
slide
hole
on
the
right side.
TIP:
Removing
the
small
drawer
and
pulling
out
the
large
drawer
may
help
with
routing.
_
31

szinclest