*
Upon registering your product
at morphyrichards.co.uk
3 Year
Guarantee
*
Please read and keep these instructions for future use
User Manual
Model No.
822626
822751
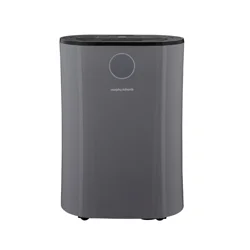
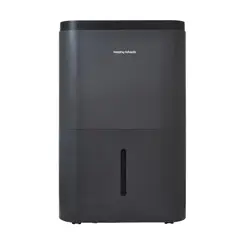
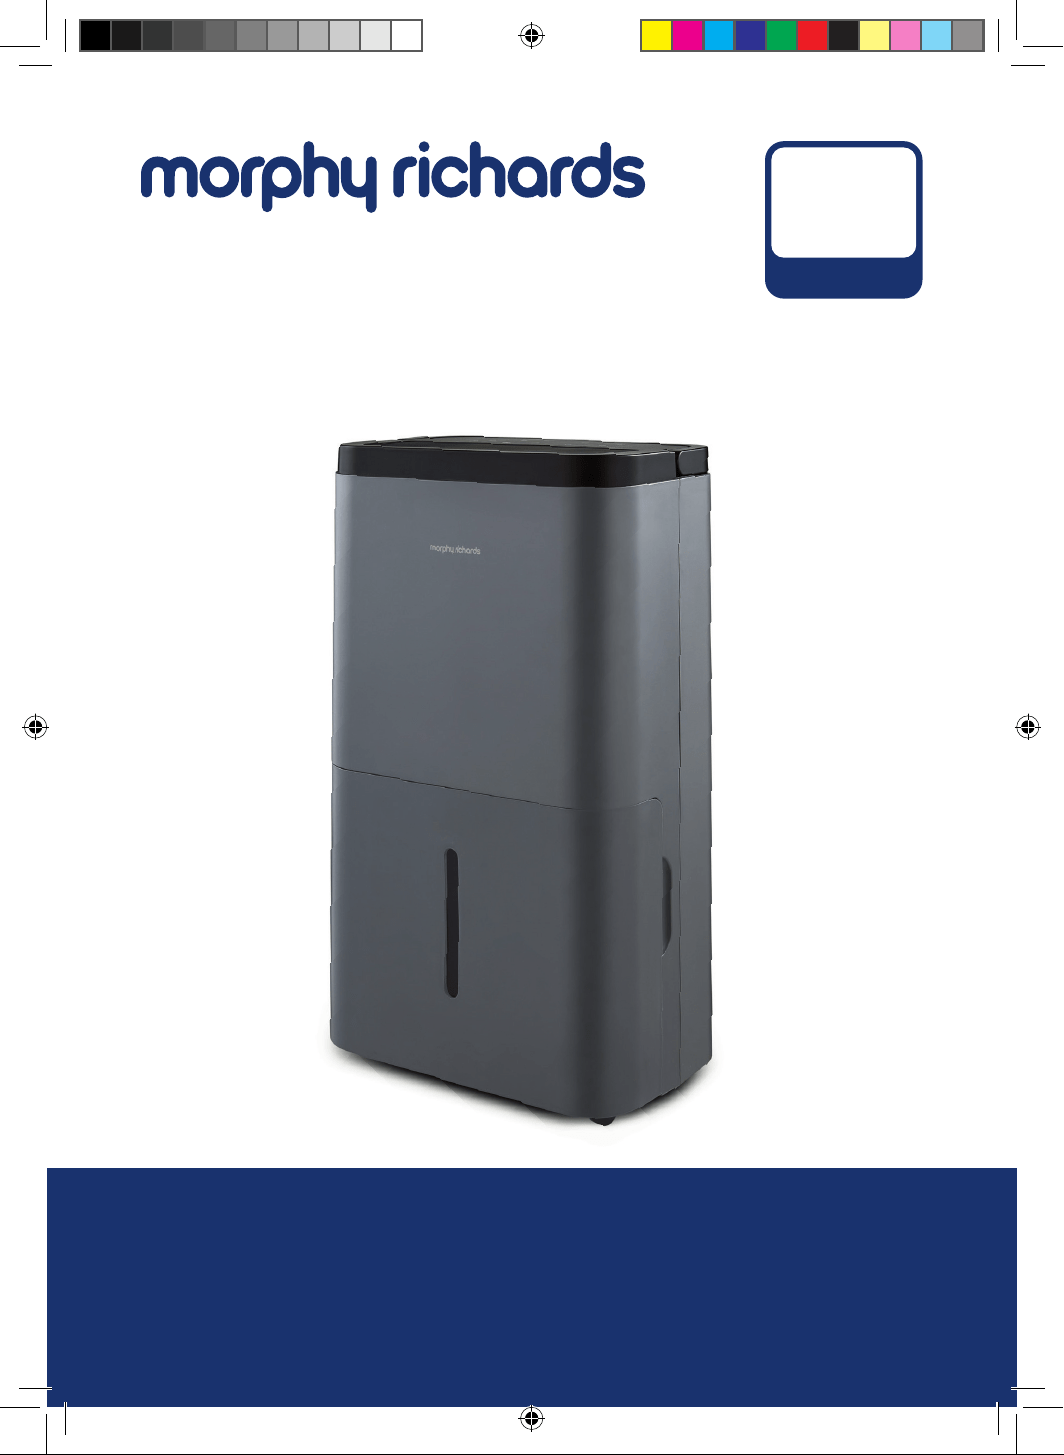
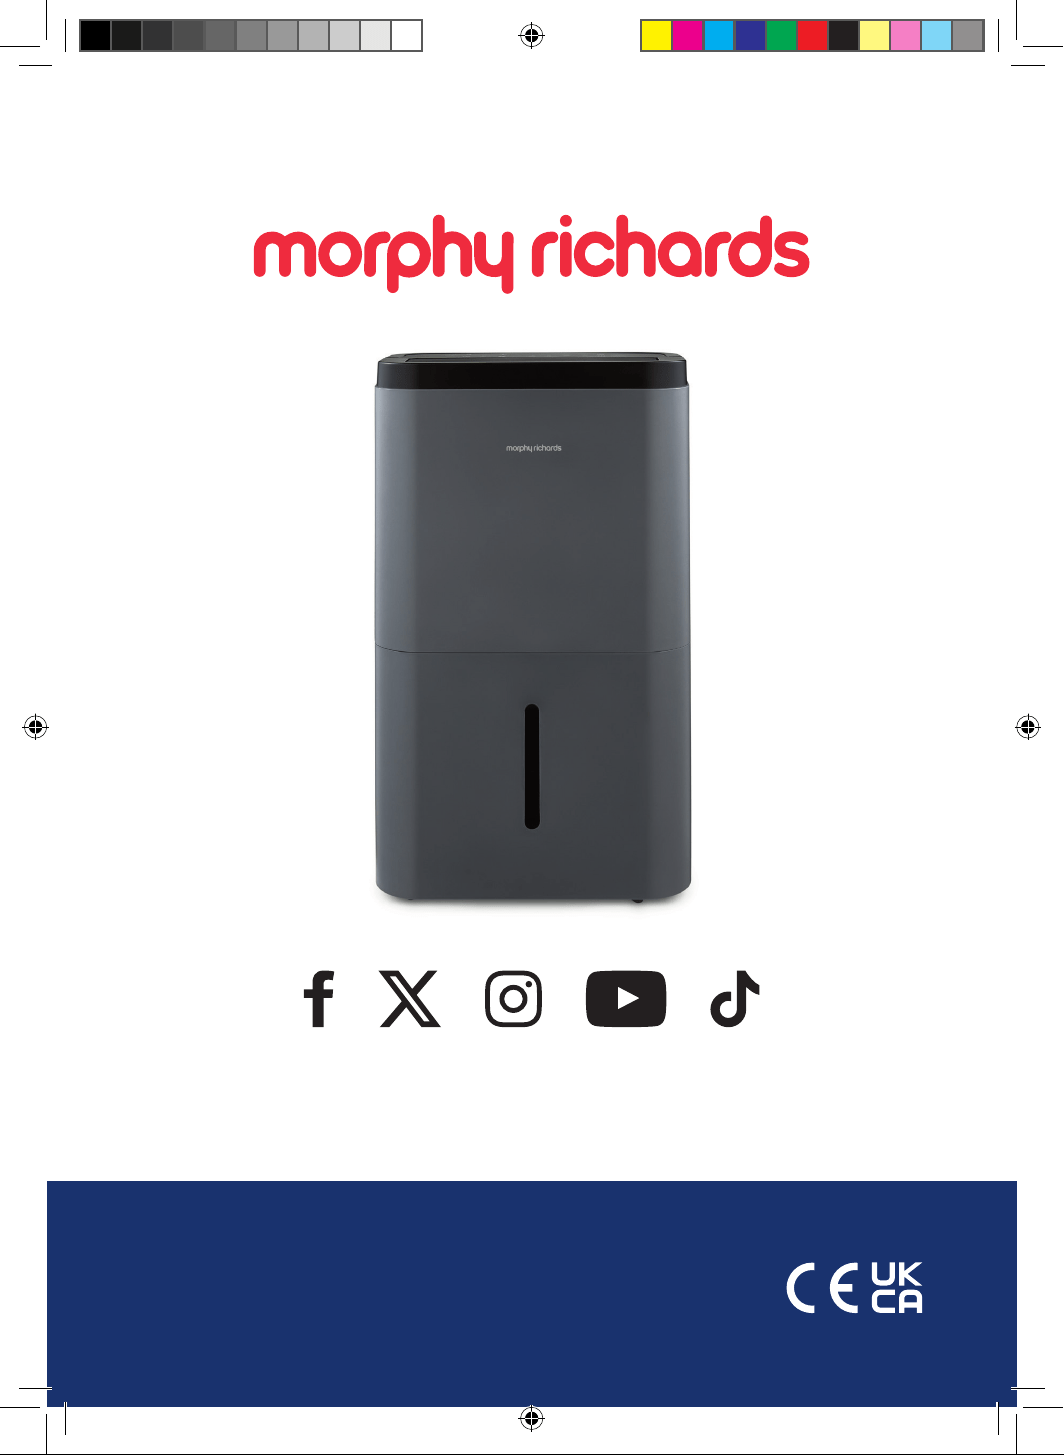
PUREFRESH
25 & 30 Litre Dehumidier
AT822626MUK Rev1 IM.indd 1AT822626MUK Rev1 IM.indd 1 31/07/2025 11:3731/07/2025 11:37
2
HEALTH AND SAFETY
The use of any electrical appliance requires
the following common sense safety rules.
Please read these instructions carefully
before using the product.
• WARNING: Disconnect from the mains
supply before carrying out any routine
maintenance.
• WARNING: Misuse of the appliance could
cause personal injury.
• This appliance can be used by children
aged from 8 years and above and persons
with reduced physical, sensory or mental
capabilities, or lack of experience and
knowledge, if they have been given
supervision or instruction concerning the
use of the appliance in a safe way and
understand the hazards involved.
• Children shall not play with the appliance.
• Cleaning and user maintenance shall not
be made by children unless they are older
than 8 years and supervised.
AT822626MUK Rev1 IM.indd 2AT822626MUK Rev1 IM.indd 2 31/07/2025 11:3731/07/2025 11:37
3
HEALTH AND SAFETY
• Keep the appliance and its cord out of
reach of children less than 8 years.
• Do not use in an inflammable or explosive
environment or which is above 35⁰C. Ideal
operating environment temperature is
15⁰C - 32⁰C. Low temperatures may reduce
dehumidication eciency.
• This appliance is not intended to be
operated on an extension cable or by
means of an external timer or separate
remote control system.
• This appliance is intended for indoor
household use only. It is not suitable for
use in sta kitchen areas in shops, oces
and other commercial environments.
AT822626MUK Rev1 IM.indd 3AT822626MUK Rev1 IM.indd 3 31/07/2025 11:3731/07/2025 11:37
4
HEALTH AND SAFETY
MAINS CABLE
• Do not place the mains cable
across an open space where it
can cause a trip hazard or in a
position where it can be pulled
by children or animals.
• The mains cable should
reach from the socket to the
product without straining the
connections.
OTHER SAFETY CONSIDERATIONS
• Only use for its intended purpose.
• Do not in any way obstruct the
air inlets and outlets of the
appliance.
• Do not attempt to repair or
adjust any electrical or
mechanical element of the
appliance. Doing so may be
unsafe and will void your
warranty.
PERSONAL SAFETY
• Do not allow water or other
liquids to run into the appliance
as it could create a re/electrical
hazard.
• Dispose of water collected from
the dehumidier. This water is not
drinkable.
• Do not touch the cable or plug
with wet hands.
• Do not pull the cable when
unplugging.
• Keep hands, hair and clothing
away from the appliance while
in operation, to prevent personal
injury and/or damage to the
appliance.
• Do not push any objects in to the
air inlet or outlet grilles as this
may cause electric shock, re or
damage the appliance.
• In the unlikely event technical
problems develop, stop using the
product immediately and seek
advice from the manufacturer.
• WARNING: Do not wrap the
adapter cable around the main
body of the appliance during or
after use.
LOCATION
• Ensure the appliance is used on a
rm, flat surface.
• The appliance MUST have a
minimum clearance of 20cm
around all sides.
• Do not cover or place any objects
on the dehumidier.
• Do not use this appliance near
water or in the immediate
surroundings of a bath, shower or
swimming pool.
• Do not use outdoors, this
appliance is intended for indoor
household use only.
• The appliance should not be
installed in laundry or wet rooms
where the humidity is higher than
85% RH.
AT822626MUK Rev1 IM.indd 4AT822626MUK Rev1 IM.indd 4 31/07/2025 11:3731/07/2025 11:37
5
HEALTH AND SAFETY
ELECTRICAL DETAILS
• Make sure that the power
voltage used is consistent with
the voltage specied on the
rating plate of the device.
• Should the fuse in the mains
plug require changing, replace it
with one of the same rating as
originally tted.
• WARNING: This appliance
must be earthed
SAFETY RELATING TO
REFRIGERANT R290 (PROPANE)
• Read the entire instruction
manual carefully before
attempting to use the appliance.
• This appliance contains the
refrigerant R290. R290 is a
refrigerant that complies with
the relevant European Directives.
Never perforate the refrigerant
circuit.
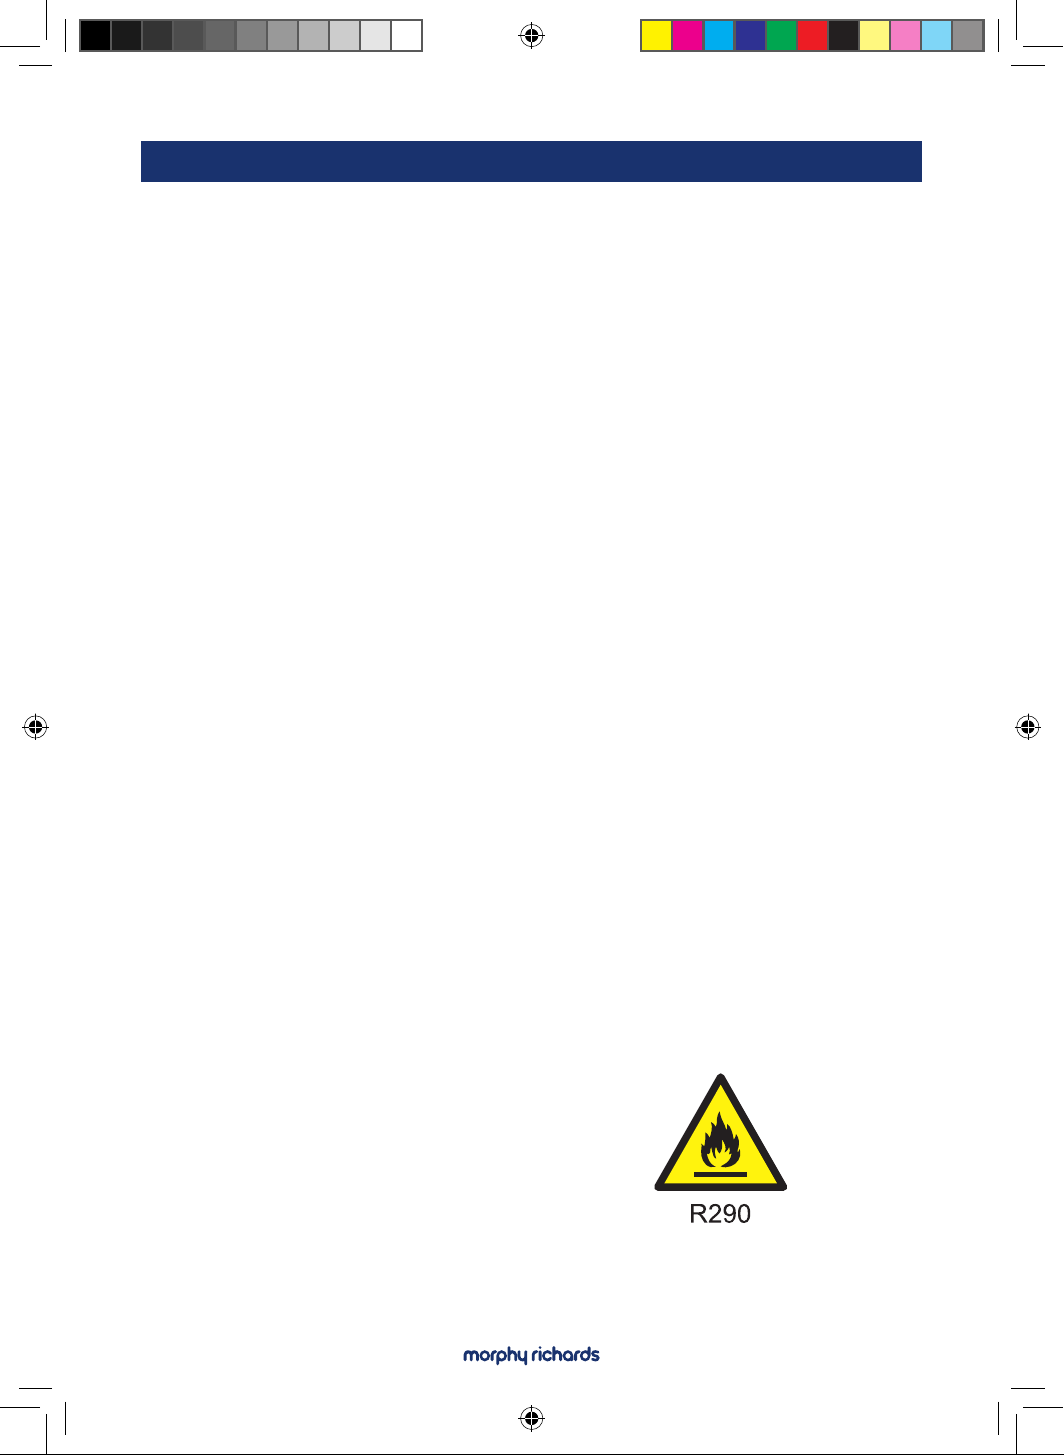
CAUTION: R290 (propane)
is flammable
• DO NOT store the appliance
in a room containing other
continuously operating ignition
sources (for example: open
flames, an operating gas
appliance or an operating
electric heater).
• DO NOT pierce or burn any of the
components of the cooling circuit
of the unit.
• DO NOT set the unit on re.
• Take care to store the appliance
in such a way as to prevent
mechanical faults or damage
from occurring.
• Be aware that the refrigerant
may be odourless, and that leaks
may not be detectable by smell.
• ALWAYS take care to comply with
national gas regulations.
• Keep ventilation openings clear
of obstruction.
• Store the appliance in a well-
ventilated area where the room
size corresponds to the room
area specied for operation.
• Any person who is involved with
working on or breaking into a
refrigerant circuit should hold a
current valid certicate from an
industry-accredited assessment
authority, which authorises
their competence to handle
refrigerants safely in accordance
with an industry recognised
assessment specication.
WARNING: Do not place the unit
on or near a hot gas or electric
burner.
AT822626MUK Rev1 IM.indd 5AT822626MUK Rev1 IM.indd 5 31/07/2025 11:3731/07/2025 11:37
6
WHERE OR WHEN NOT TO USE YOUR DEHUMIDIFIER
INSTALLATION
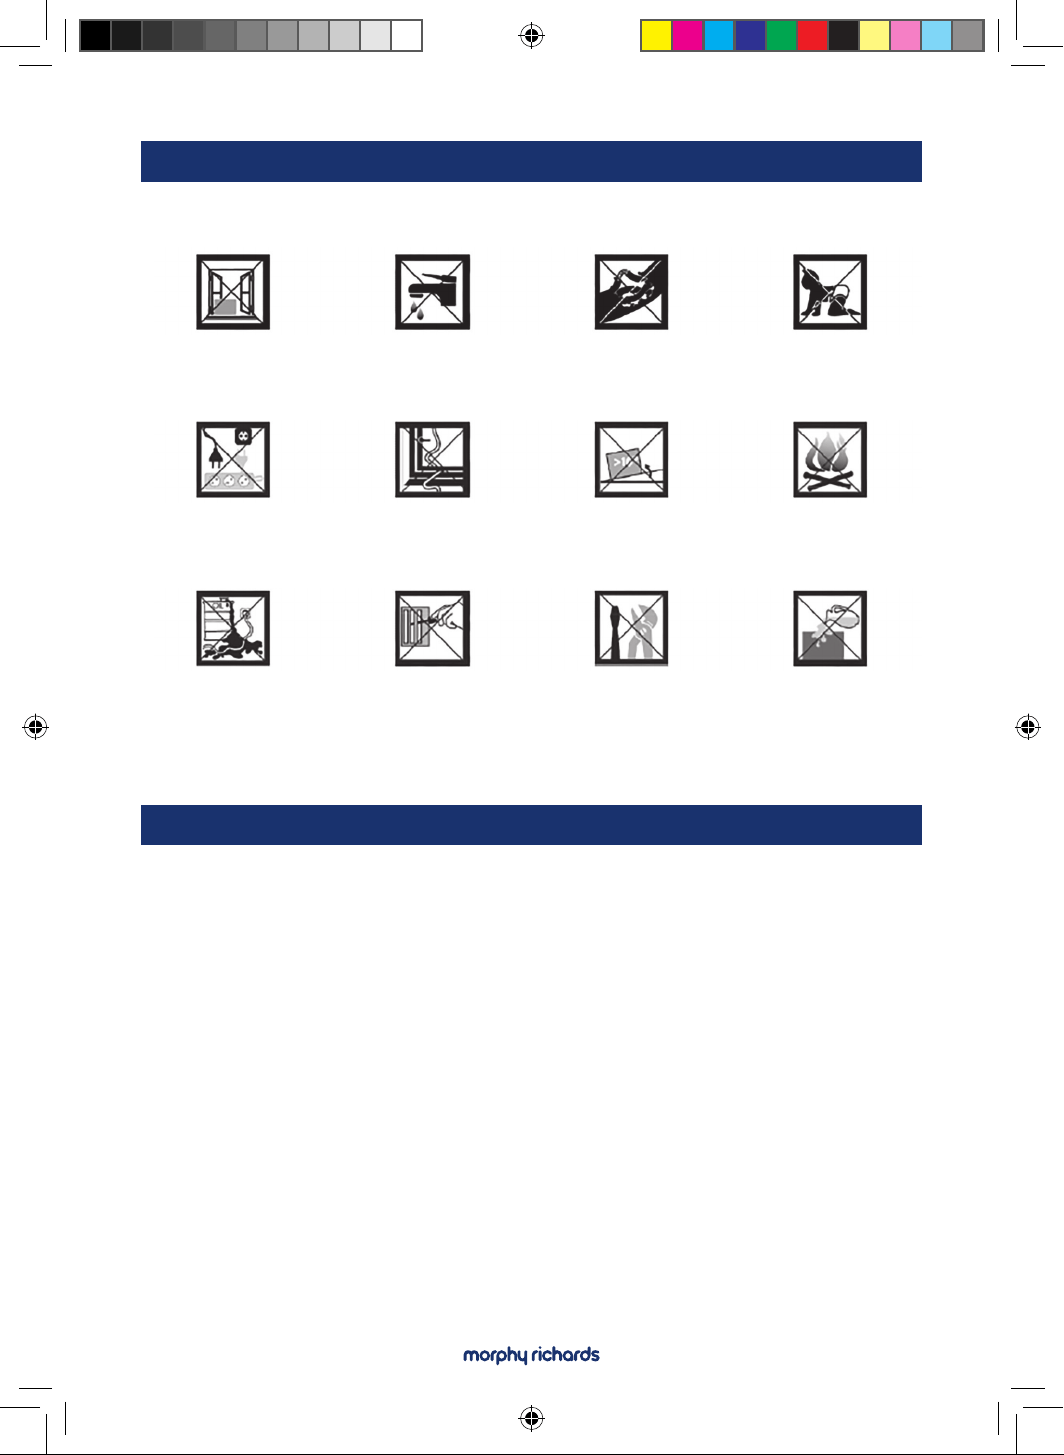
Exposed to the
weather outdoors
If an extension
lead may become
overloaded
Where it may be
damaged by
chemicals
Where there is a risk
of interference by
foreign objects
This product is not
made for DIY repair
If there is a risk of
water falling on
the unit
Near water
Where the power
cable may be
damaged
If the power cable
wires are frayed or
cut
On a slope or
uneven surface
Where small children
are maybe left
unattended
Where there is a risk
of re or close to a
naked flame
Remove any water from the water tank before starting the unit. In
order to save energy, do not open windows or doors while the unit is
running. Place the unit on a hard/flat surface. On rst use run the unit
continuously for 24hrs.
To reduce noise levels:
Place a rubber mat under the unit to reduce any vibrations while the unit
is running.
AT822626MUK Rev1 IM.indd 6AT822626MUK Rev1 IM.indd 6 31/07/2025 11:3731/07/2025 11:37
7
KNOW YOUR DEHUMIDIFIER
PRODUCT OVERVIEW
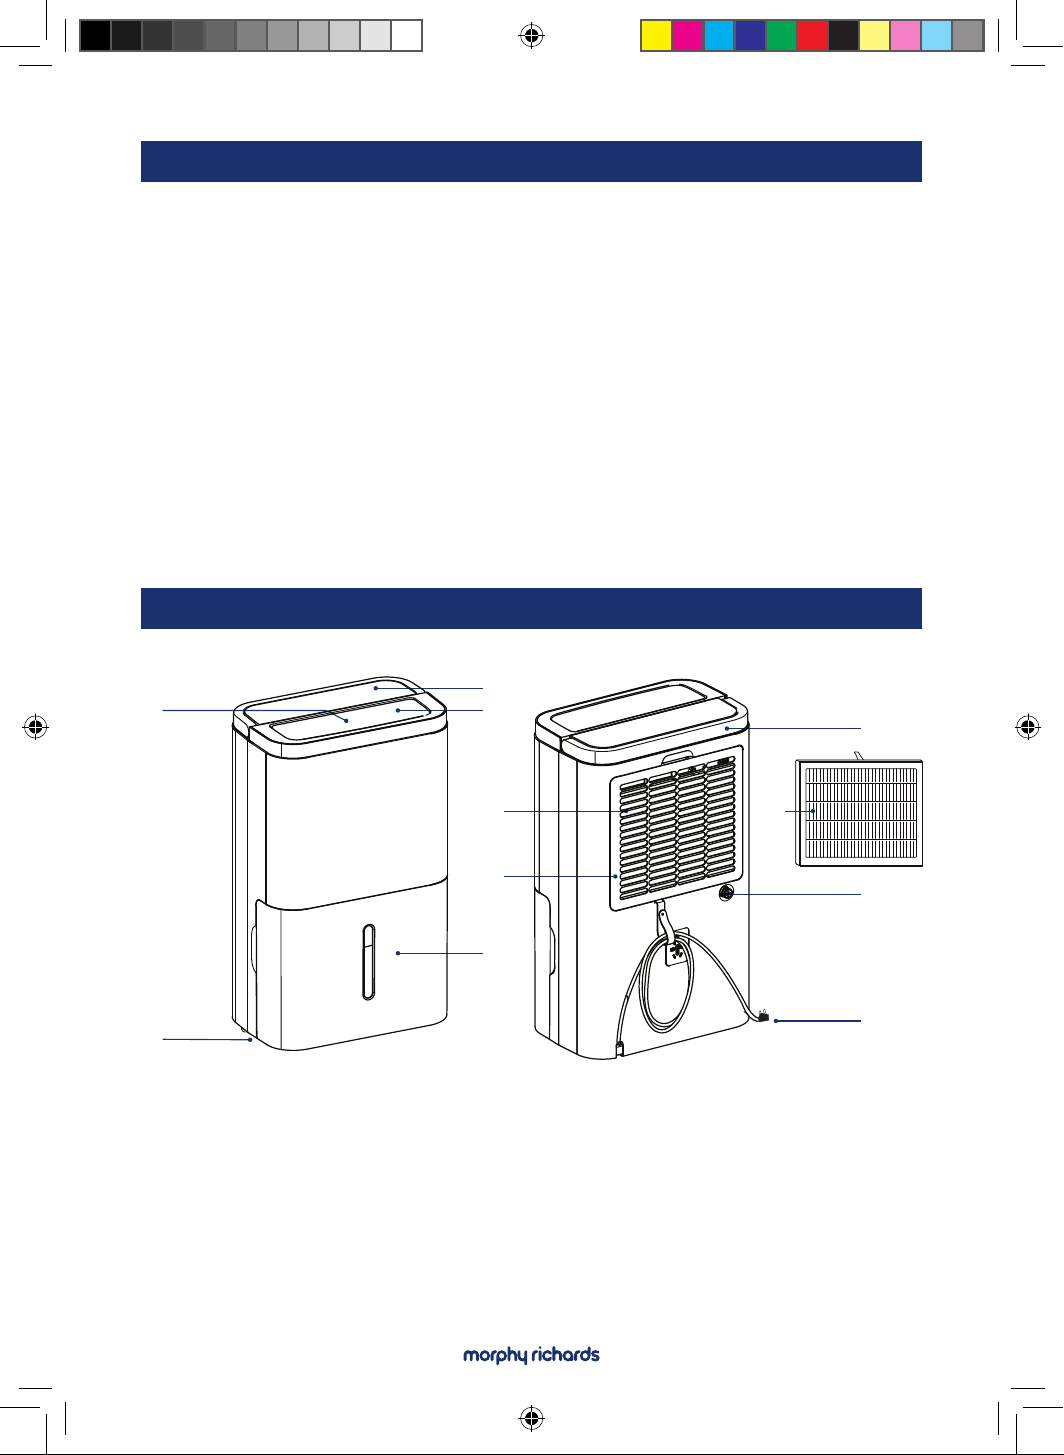
1. Air Outlet (underneath louvre)
2. Castors
3. Water Tank
4. Louvre
5. Control Panel
6. Air Inlet
7. Air Inlet (removable
cover with mesh lter
8. Power Cable
9. Continuous Drain Port
(and cap)
10. Handle
• This dehumidier uses compressor technology to extract water from
the environment.
• Compressor dehumidiers are ideal for normal domestic or oce
environments which are heated during the winter months with
temperatures above 12-15°C.
• It is easy to move around on castors.
• This intelligent dehumidier will extract unwanted humidity and
includes a humidistat which is adjustable in increments of 5% from
35-80% relative humidity (RH) ensuring your room does not become
too dry and power is not wasted.
1
2
6
7
3
8
9
10
4
5
6a. Hepa Filter
6a
AT822626MUK Rev1 IM.indd 7AT822626MUK Rev1 IM.indd 7 31/07/2025 11:3731/07/2025 11:37
8
The dehumidier is built to be compact. The castors on the bottom of
the unit make it easy to move from room to room.
• Your Morphy Richards 25L Dehumidier is ideal for use in a room
38m² to 50m².
• Your Morphy Richards 30L Dehumidier is ideal for use in a room
45m² to 60m².
This appliance is intended for indoor household use only.
PRODUCT OVERVIEW
INTENDED USE
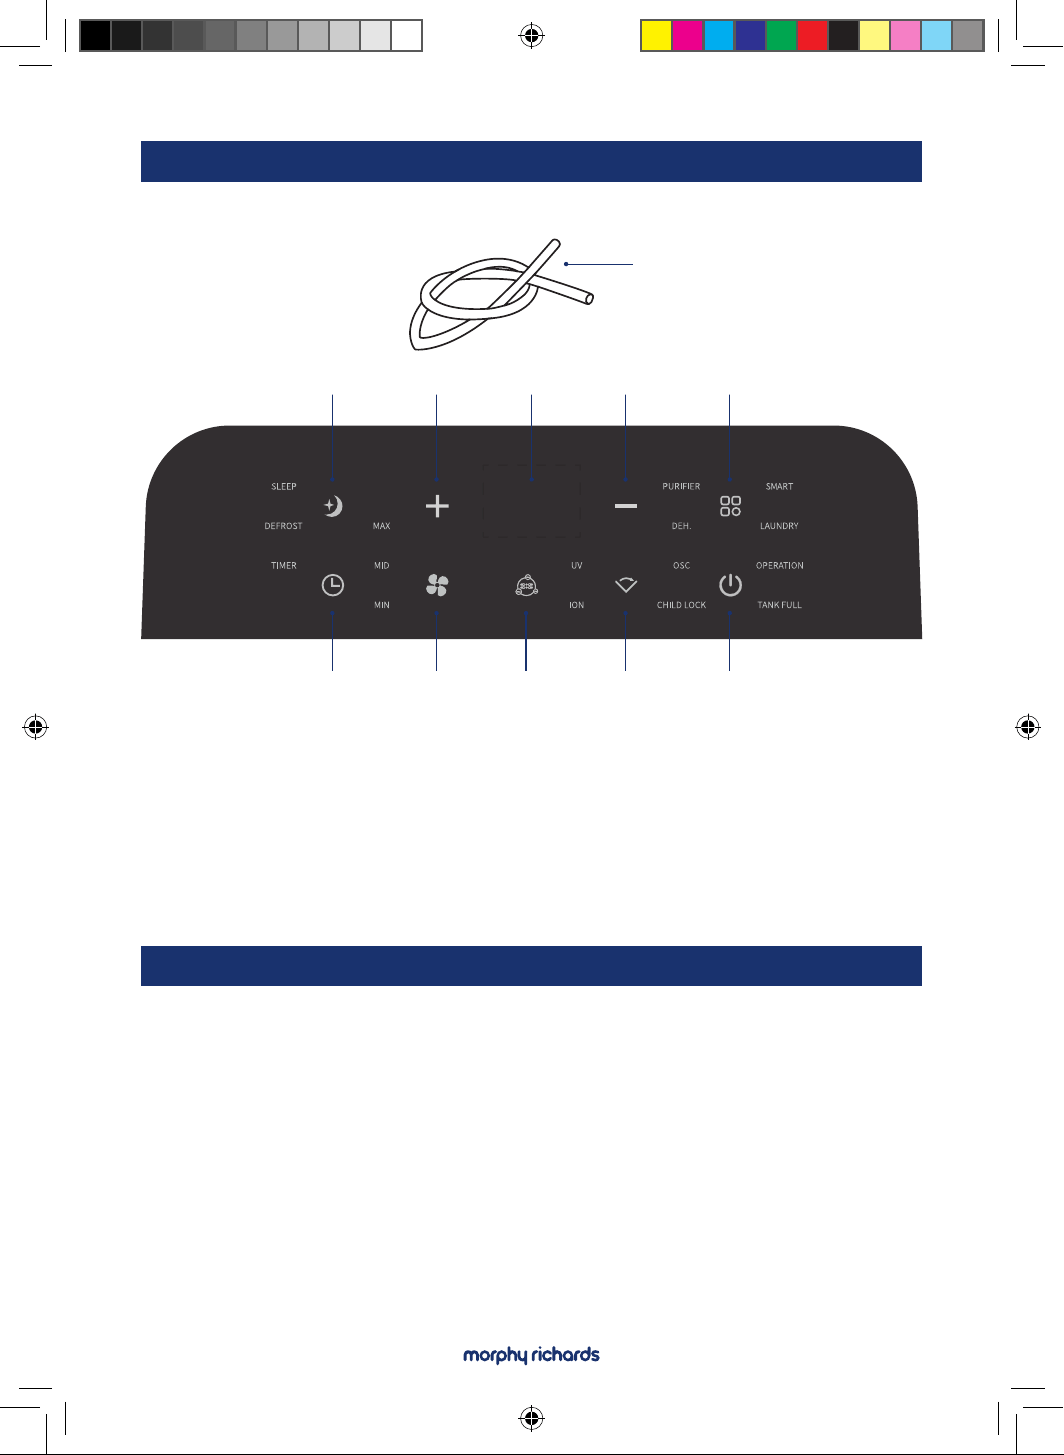
12
192021 1718
151413 16
11. Drainage Pipe
12. Sleep Button
13 Increase Button
14. LED Display
15. Decrease Button
16. Mode Button
17. Power ON/OFF Button
18. OSC/Child Lock Button
19. UV/ION Button
20. Fan Speed Button
21. Timer Button
11
AT822626MUK Rev1 IM.indd 8AT822626MUK Rev1 IM.indd 8 31/07/2025 11:3731/07/2025 11:37
9
BEFORE FIRST USE
POSITIONING THE DEHUMIDIFIER
• Remove all packaging and ensure that all parts are included and
undamaged prior to use.
• Ensure that the dehumidier is assembled correctly.
A badly positioned dehumidier will have little eect. Ensure circulation
of air is not restricted around the appliance.
• Place the dehumidier on a flat, rm, level surface.
• Allow at least 20cm clearance from walls/obstructions all around
the appliance.
• This dehumidier is designed for indoor residential use only.
Commercial or industrial use will invalidate the warranty.
• Use in an enclosed area for maximum eciency. Close all external
doors and windows to create an eective operating environment.
• Do not use outdoors.
• Excess moisture is dispersed throughout your home, therefore the
dehumidier should be positioned in a central and unobstructed
location so that it can draw the moist air towards it. A warm hallway
or landing is an excellent position for your dehumidier. If possible,
leave interior doors ajar to allow air circulation.
• Alternatively, if you have a serious problem in one area you can
begin by positioning the dehumidier there and move it to a more
central location at a later date.
Note: The dehumidier should not be placed directly against a radiator
or other heat source.
Note: When positioning your dehumidier, ensure that it is placed clear
of any obstacles that may limit the air circulation.
Note: Do not force the castors to move over carpet or uneven surfaces
or move the appliance with water in the tank as it may tip over and spill water.
AT822626MUK Rev1 IM.indd 9AT822626MUK Rev1 IM.indd 9 31/07/2025 11:3731/07/2025 11:37
10
FEATURES AND INDICATORS
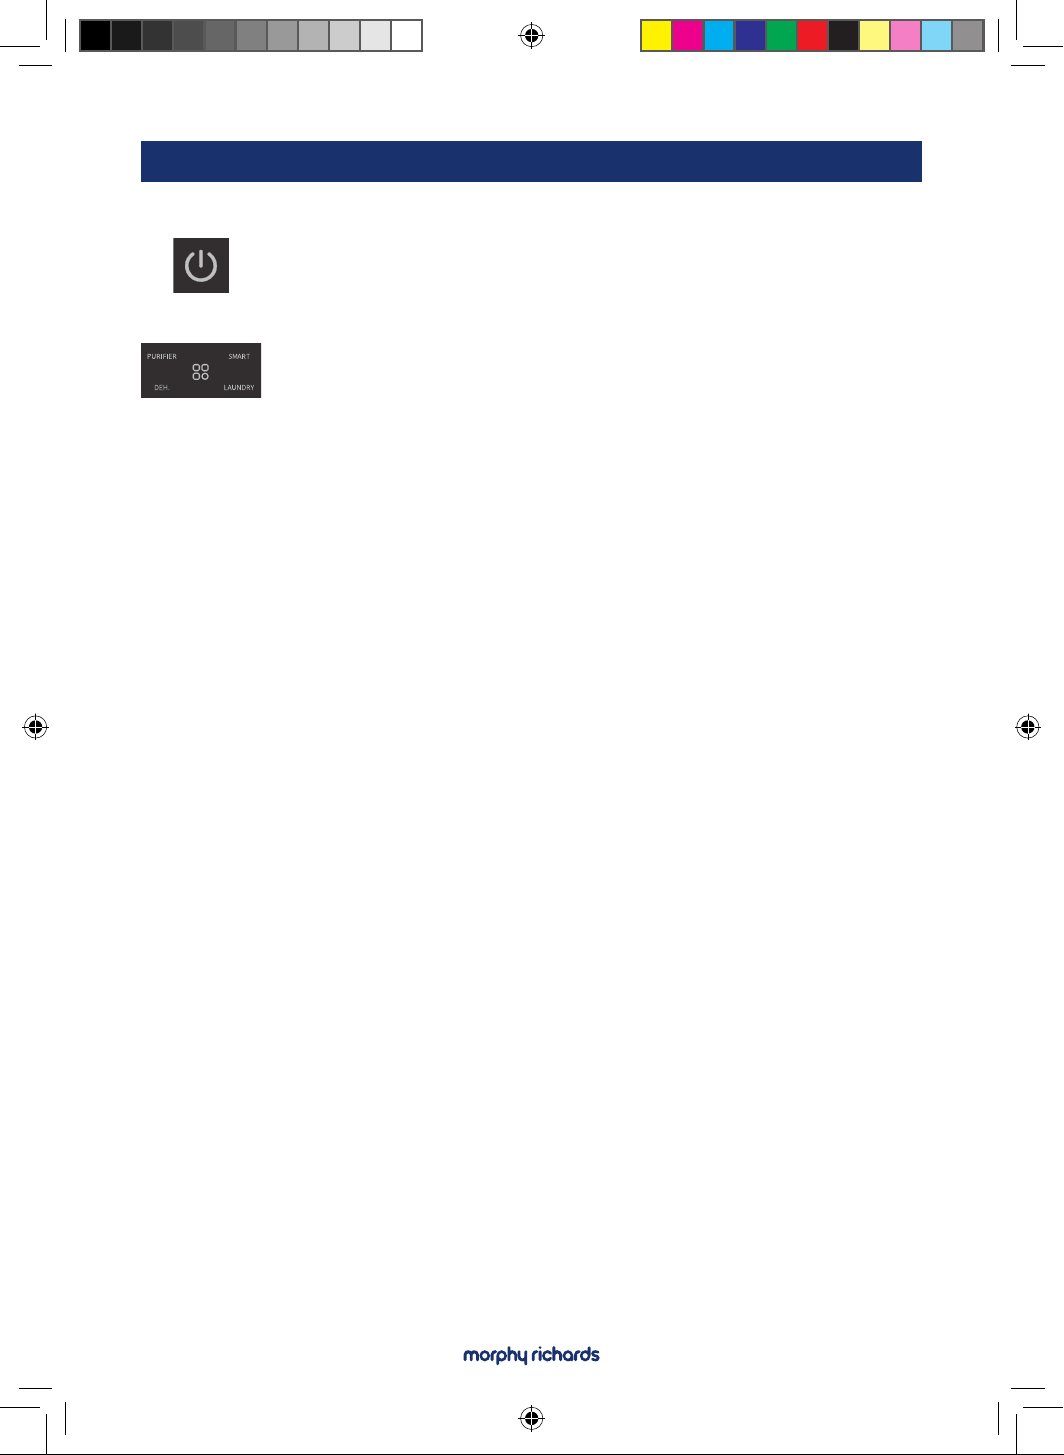
Power:
Turns the appliance On and O.
Mode:
Press the Mode button to select the appliance functions:
SMART, PURIFIER, DEH. or LAUNDRY. The corresponding
indicator will show which mode is selected.
SMART: If the appliance is set to a desired humidity of
55% relative humidity, the fan is automatically adjusted
depending on the environment’s current humidity and
temperature.
PURIFIER: The appliance displays the environment’s
current humidity. In this mode, the dehumidier is not in
operation. The fan speed can be adjusted to operate at
MAX, MID OR MIN. The air can also be puried with the
lters tted. UV and ION can also be used in this mode to
further improve the quality of air emitted.
DEH.: In DEH. mode the humidity can be adjusted within
the range of 35% - 80% and the fan speed can be adjusted
between MAX, MID, MIN.
LAUNDRY: Quick drying mode. Default humidity is 35% and is
not adjustable. The fan speed defaults to MAX. In this mode
the appliance does not stop until the water tank is full, the
Laundry mode is turned o or the appliance is turned o.
Note: Do not place clothes directly over any of the
dehumidier vents.
Note: For best results place the laundry within 1.5 meters
of the dehumidier.
Note: It is good for a quick drying boost, but it is not
recommended for normal operation in a domestic/ home
oce environment.
AT822626MUK Rev1 IM.indd 10AT822626MUK Rev1 IM.indd 10 31/07/2025 11:3731/07/2025 11:37
11
FEATURES AND INDICATORS
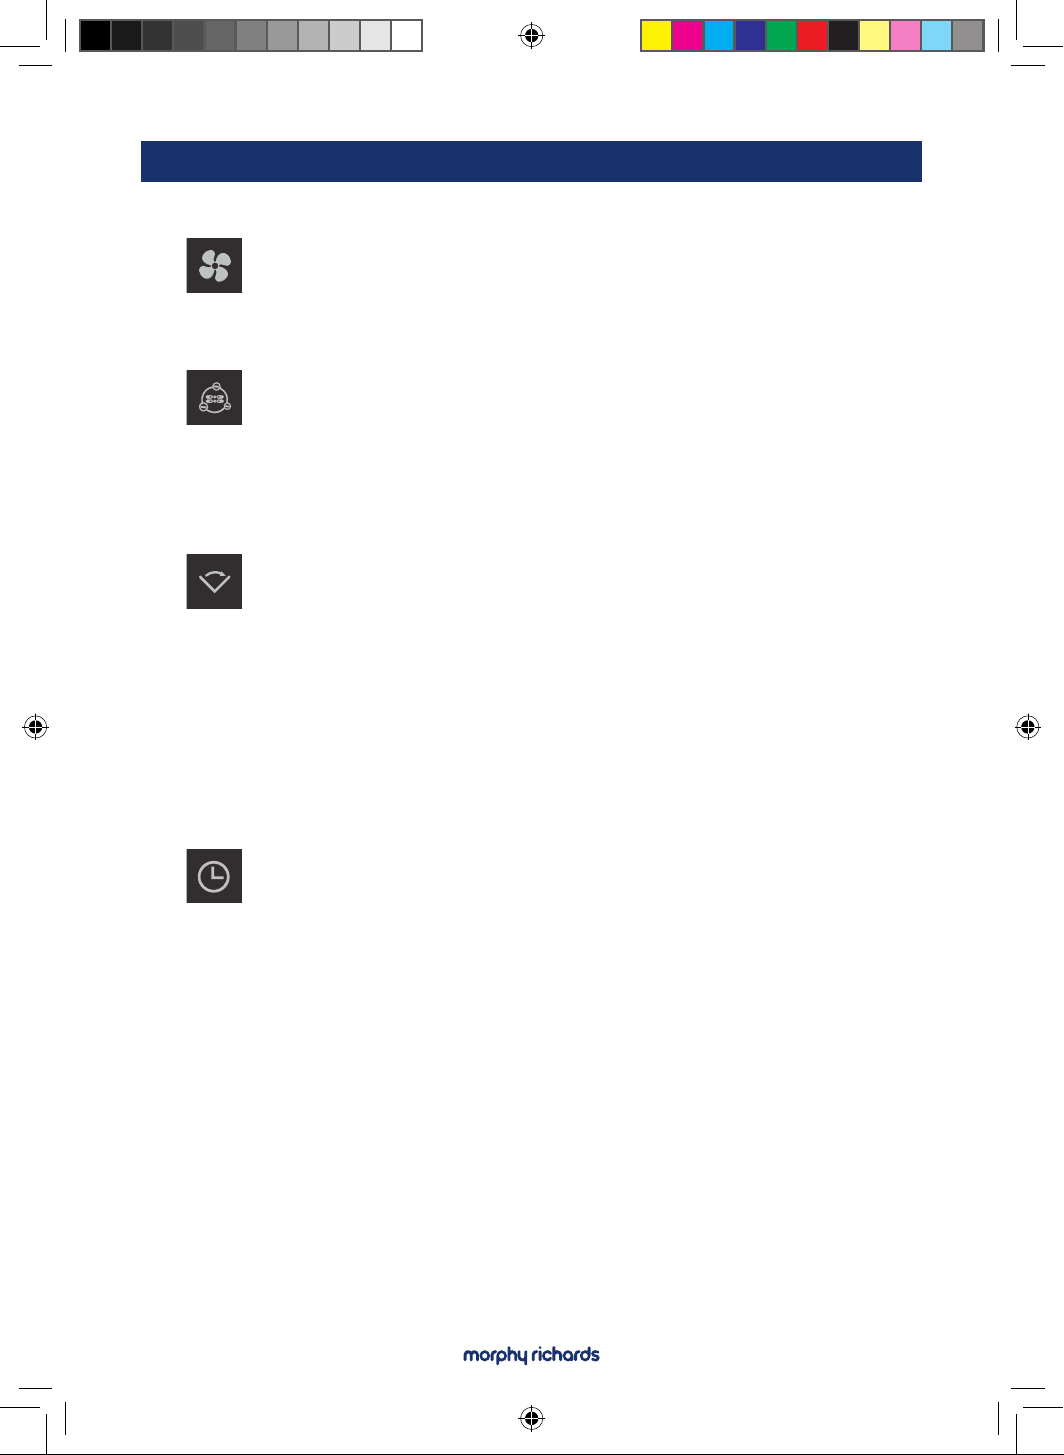
Speed:
In dehumidier or fan mode, the fan speed can be adjusted
between MAX, MID or MIN.
UV & ION:
The UV & ION functions are operated with the same
button, press the button to switch between the functions,
the corresponding indicator will illuminate when the
function is turned on.
OSC/Child Lock:
To operate the OSC function, press the OSC/Child Lock
function button the OSC indicator light will illuminate.
To enter Child Lock mode press and hold the OSC/
Child Lock function button for 3 seconds, the Child Lock
indicator will illuminate, and all other touch buttons are
invalid. Press and hold the button for 3 seconds to cancel
the Child Lock function.
Timer:
To set the timer, press the timer button. The TIMER light will
illuminate while it is being programmed.
The following timer programs are available:
1. Delayed power-on function (set while the appliance is
in stand-by status). Press the + and - buttons to set the
time period (1- 24 hours) the appliance will start once
time reaches the set value.
2. Delayed power-o function (set while the appliance is
running). The appliance will stop when the time reaches
the set value.
AT822626MUK Rev1 IM.indd 11AT822626MUK Rev1 IM.indd 11 31/07/2025 11:3731/07/2025 11:37
12
FEATURES AND INDICATORS
Sleep:
Press the SLEEP button to enter the sleep mode, the sleep
will illuminate.
In sleep mode, the sleep indicator is on, all other indicator
lights are o. The appliance will work at MIN fan speed and
low noise.
Press SLEEP button again to exit the sleep mode.
Hold SLEEP button for 3 seconds to turn on/o the
humidity indicator light.
Humidity Setting:
Press the + and - buttons to select the desired relative
humidity level, default relative humidity is 55%. Relative
humidity 35% is selected, the compressor will not stop until
the water tank is full. This button is also used to change
the duration of the timer.
Tank Full:
If the water tank is full, the indicator light comes on and
flashes.
Intelligent Defrost:
Indicates activation of the intelligent defrosting function.
The appliance is able to automatically eliminate frost
that forms inside it in the event of an excessively low
temperature.
AT822626MUK Rev1 IM.indd 12AT822626MUK Rev1 IM.indd 12 31/07/2025 11:3731/07/2025 11:37
13
FEATURES AND INDICATORS
Humidity Level & Timer 2-digit Display:
The display performs the following functions:
• When the unit is plugged in, it will indicate the room humidity level.
• When the humidity level is selected, it will indicate the set humidity.
• When the Timer is programmed it will show the set timer.
Note: When humidity level is outside the normal operational parameters
it will show LO/HI. If ambient humidity is lower than 20%, it will show LO.
If ambient humidity is higher than 90%, it will show HI.
AT822626MUK Rev1 IM.indd 13AT822626MUK Rev1 IM.indd 13 31/07/2025 11:3731/07/2025 11:37
14
QUICK REFERENCE GUIDE
Power Button:
• Use to turn the dehumidier on and o.
OSC Button:
• Press the OSC button to operate the louvres, they will oscillate
between a 45–90 degree angle. Press the button again to lock
at the desired angle.
IMPORTANT: Do not operate the unit if the self-opening louvres do
not open.
Timer:
• Press the timer button, then use the up/down buttons to adjust the
duration of the timer (1-24 hrs, start/ stop timer).
• When set while the appliance is running: the number represents how
many hours the unit will operate before turning o. This will not be
aected if the unit enters defrost mode or the tank is emptied and
retted.
• If set while the unit is in standby: the set number represents the
period in hours after which the appliance will start.
• To cancel the start/ stop mode press the timer button again.
Up and Down Buttons:
• During the DEH. mode when the unit is displaying the current
relative humidity, these buttons can be used to adjust the desired
humidity level.
• The desired relative humidity can be set between 35 and 80% in 5%
increments.
AT822626MUK Rev1 IM.indd 14AT822626MUK Rev1 IM.indd 14 31/07/2025 11:3731/07/2025 11:37
15
QUICK REFERENCE GUIDE
SMART Mode:
• This is designed for maximum convenience and maintains the ideal
domestic environment humidity level of 55% while saving electricity.
It is recommended for most users.
• When the humidity setting is nished, the appliance will operate
according to the target setting humidity. When it reaches the target
humidity (the selected humidity is 2% lower than the user selected
humidistat setting), the compressor stops running, the fan continues
running for ve minutes and then stops, and the louvre will close,
but the display remains.
• The appliance keeps this status for 30 minutes, the louvre
re-opens, and the fan starts running to test the current humidity.
If it has reached the setting value, the compressor starts running. If
the current humidity has not reached the setting value, the fan will
stop after 5 minutes, the louvre closes shuts and keeps this status
again for 30 minutes, before following the same cycle as above.
Note: If the DEH. mode is set at 35% humidity, and the appliance is
running in Laundry drying mode it will continue dehumidifying, even
if the ambient humidity is less than 35%, the compressor will not shut
down. This mode applies to drying clothes and other occasions if the
permanent drainage pipe is tted the unit will not stop running. Humidity
set to achieve room humidity of around 35% is good for a quick drying
boost on an initial run or for emergencies. It is not recommended for
normal operation in a domestic/ home oce environment.
• To allow more moisture in the air, press the humidity control key and
set to a higher percent value (e.g. 60-70%).
• Humidity set to 50-55% RH, recommended setting, great for
domestic operation and dry storage.
• Humidity set to 60% RH; great for personal comfort and applications
where 50% RH is considered too dry.
AT822626MUK Rev1 IM.indd 15AT822626MUK Rev1 IM.indd 15 31/07/2025 11:3731/07/2025 11:37
16
QUICK REFERENCE GUIDE
• Humidity set to 70% RH; ideal for unoccupied properties or where
economical run is needed without the need to go drier than 70% RH.
OTHER FEATURES AND INDICATORS
Tank Full Light:
The Tank Full light will illuminate, the appliance beeps and the water
level control switch shuts o the dehumidier when the tank needs
emptying, or when the tank is removed and/or is not replaced in the
proper position. Empty and replace to resume operation.
Auto Defrost:
Indicates activation of the intelligent defrosting function. The appliance
is able to automatically eliminate frost that forms inside it in the event
of an excessively low temperature.
• Wait for the appliance to defrost or move to a warmer area to
speed up defrosting.
• When the appliance has defrosted the Defrost Indicator will go out
and start operating again.
Humidistat Control and Fan / Compressor Operation:
• When the selected humidity is 2% lower than the user selected
humidistat setting; the dehumidier's compressor will be shut o
automatically.
• When the humidity is equal or higher than user selected humidity
the compressor will restart once the 3 minutes delay compressor
protection expires.
AT822626MUK Rev1 IM.indd 16AT822626MUK Rev1 IM.indd 16 31/07/2025 11:3731/07/2025 11:37
17
OTHER FEATURES AND INDICATORS
Humidity Indicator Light:
• The humidity indicator light of this dehumidier has three colours:
blue, green and red and is located underneath the louvre. It changes
according to the humidity conditions in the area which it is situated.
• The display colours represent the following humidity conditions:
Red – High humidity, Relative Humidity ≥ 80%
Green – Comfortable level, 80% > RH≥60%
Blue – Air is dry, Relative Humidity < 60%
Auto-Restart:
• If the unit stops o unexpectedly due to the power cut, it will
automatically restart with the previous function selected when the
power resumes.
Power:
• After the unit has stopped, it is not recommended to resume
operation for at least 10 minutes. This is to protect the compressor.
• Operation can resume after this period lapses. When the unit is
restarted there is a 3 minutes delay before the compressor will start.
Lightweight Portable Design on Castors:
The dehumidier is built to be compact and lightweight. The castors on
the bottom of the unit make it easy to move from room to room.
LED Display:
The LED display may also show error codes.
AT822626MUK Rev1 IM.indd 17AT822626MUK Rev1 IM.indd 17 31/07/2025 11:3731/07/2025 11:37
18
EMPTYING THE WATER TANK
CONTINUOUS DRAINAGE
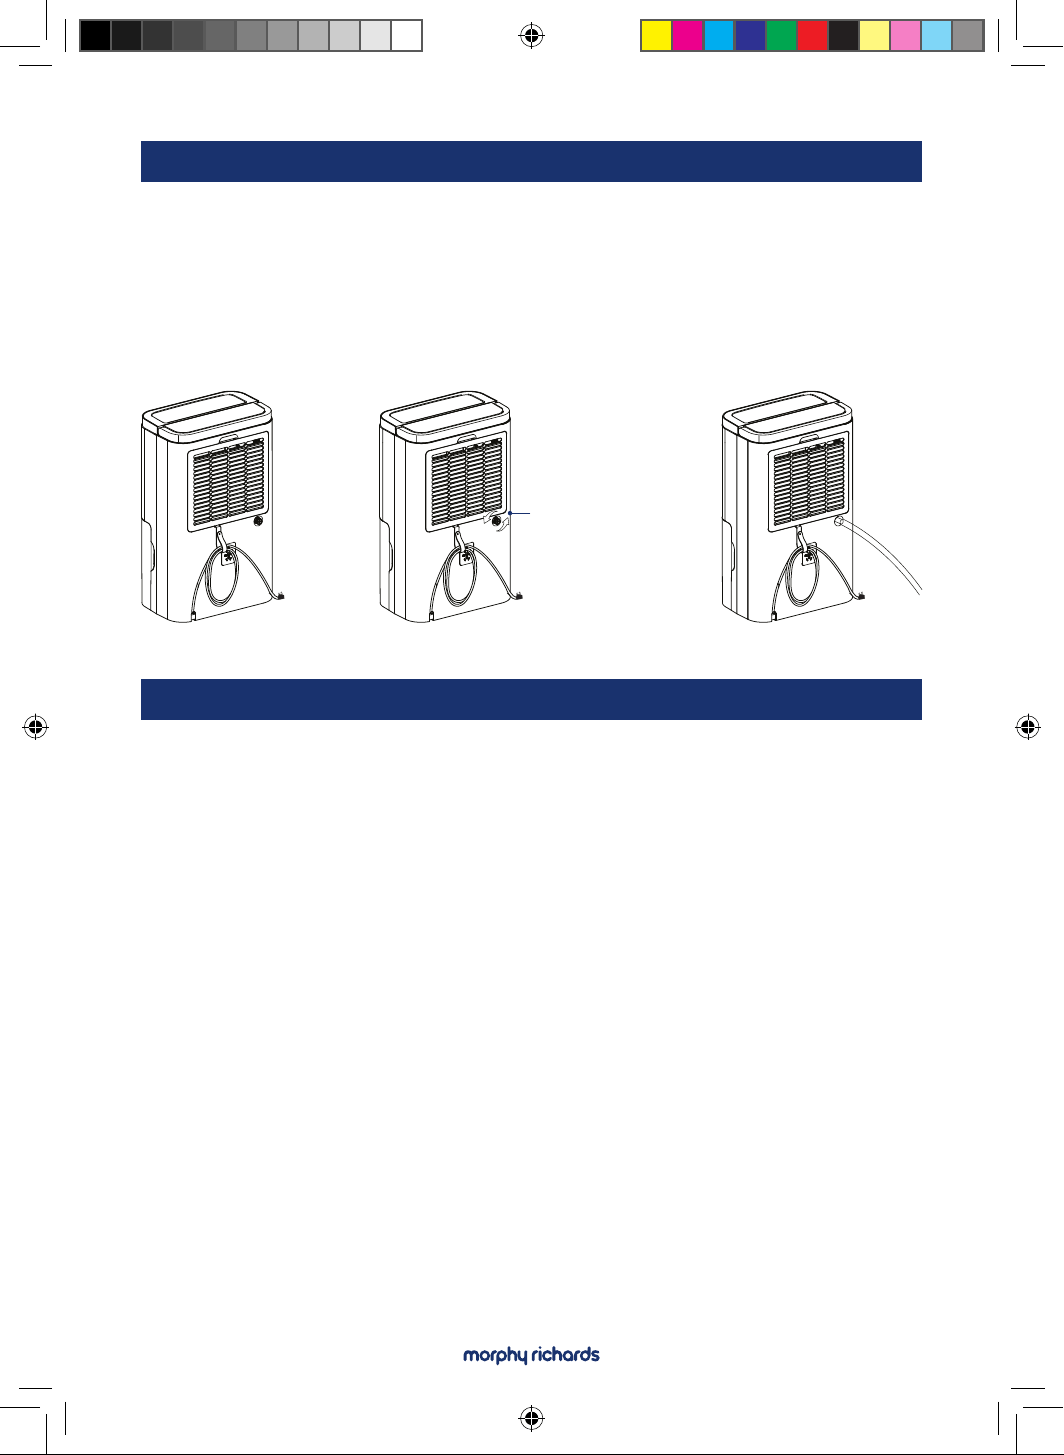
By connecting the water pipe to the back of the appliance water can
be drained continuously.
• Unscrew the cap on the Continuous Drain Port.
• Attach the pipe to the drainage outlet, ensuring that the pipe is
rmly connected (as shown on the next page).
• Water can be drained into a sink, a larger bucket or through the wall
into an outside drain by attaching the pipe to the unit (9mm internal
diameter pipe, included). Insert the pipe into the drain outlet at the
back of the unit as shown.
WARNING: The appliance MUST be unplugged from the mains outlet
before emptying the water tank.
• When the water tank is full, the Water Tank Full Indicator will flash
and the appliance will turn o automatically.
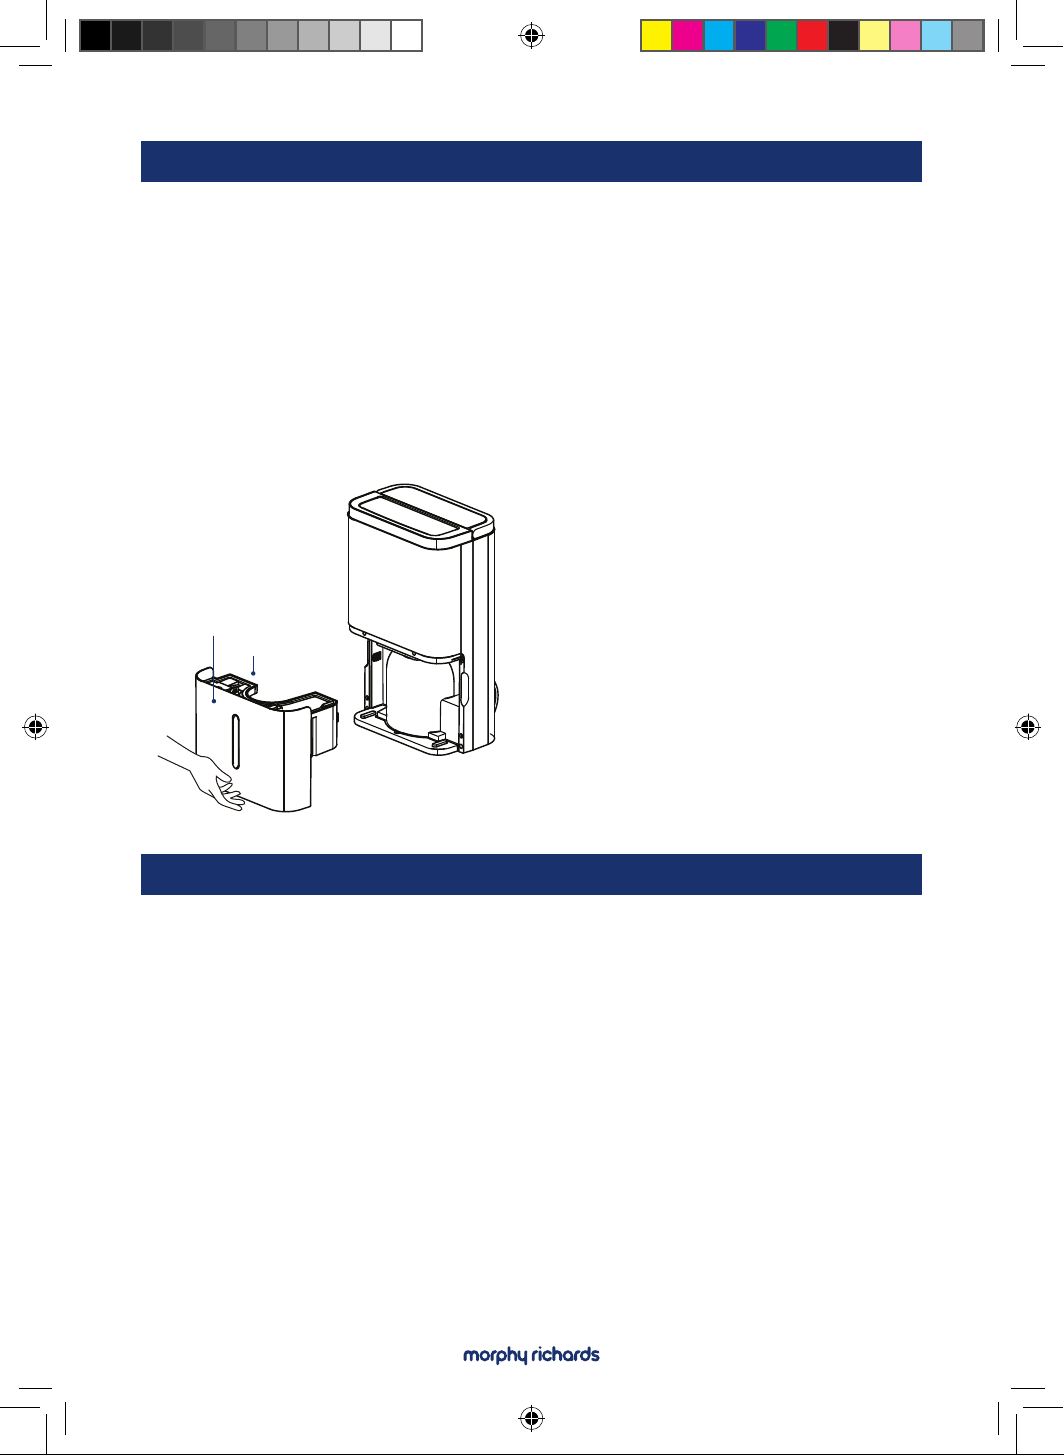
• Slowly pull the water tank out of the dehumidier, grip the water
tank handle to lift away.
Water Tank
Handle
• Empty the water tank, dry any
water that may have dripped
from the appliance while the
tank has been removed and
ret the tank securely into the
appliance.
• The dehumidier will re-start
when the water tank is
securely re-tted.
AT822626MUK Rev1 IM.indd 18AT822626MUK Rev1 IM.indd 18 31/07/2025 11:3731/07/2025 11:37
19
WARNING: The appliance MUST be unplugged from the mains outlet
before cleaning.
• Wipe the main unit with a soft, dry cloth to remove any light dust or
debris.
Cleaning the Air Inlet Cover with Mesh Filter
• Remove the Air Inlet Cover with Mesh Filter from the dehumidier,
using a soft brush remove any dust/debris that may have built up
on the cover.
• Using warm water and mild detergent wash the cover before rinsing
with clean water.
• Dry thoroughly before retting to the dehumidier.
CARE AND CLEANING
CONTINUOUS DRAINAGE
• This appliance uses gravity fall to dispose of the water hence the
drain should be lower than the appliance water outlet.
• Do not kink or bend the pipe.
Caution:
There is some
water in the
drainage port
after the unit after
the unit running a
period of time.
AT822626MUK Rev1 IM.indd 19AT822626MUK Rev1 IM.indd 19 31/07/2025 11:3731/07/2025 11:37
20
• IMPORTANT: DO NOT wet the Hepa lter or use cleaning agents.
Washing with water or other liquids may damage the structure of
the Hepa lter and reduce ltration eciency.
• Remove the Air Inlet cover and lift out the Hepa lter.
• Using a vacuum cleaner or soft bristled brush gently remove
surface dust. Avoid excessive friction which could cause damage to
the lter.
• Re-t the lter and replace the Air Inlet cover securely.
Note: To maintain optimum performance of your dehumidier, we
recommend the HEPA lter is replaced every 3-6 months; depending on
the frequency of use and environment conditions.
CLEANING THE HEPA FILTER
WARNING: Never leave water in the water tank when the appliance is
not in use.
The water tank should be cleaned every few weeks to prevent growth of
mould, mildew and bacteria. DO NOT use a dishwasher to clean the tank.
• Remove the tank from the dehumidier and partially ll it with clean
water and a little mild detergent. Swish the water around in the
tank, empty and rinse with clean water.
• Ensure the tank is dry before retting securely in the dehumidier.
CLEANING THE WATER TANK
AT822626MUK Rev1 IM.indd 20AT822626MUK Rev1 IM.indd 20 31/07/2025 11:3731/07/2025 11:37
21
Why doesn't the dehumidier seem to extract much water if the
temperature is low?
This is a compressor dehumidier which works best in temperatures
above 15°C. If the temperature is low and the air is dryer than the setting
on the humidistat the unit will not extract water. If you want to use a
dehumidier for outside buildings, unheated properties, boats or garages
please check our desiccant range.
Why doesn't the unit work/or stops suddenly?
The water tank may be full or displaced. To rectify: empty the tank and
carefully place the tank back in the unit. Also the unit maybe running in
dehumidifying mode with a low room temperature. Please check if the
room temperature is lower than 5°C. If so, the unit will stop working while in
dehumidifying mode (it may be defrosting).
The ambient operating range is between 5°C and 35°C with a relative
humidity ranging from 35% to 80%. For maximum eciency use the unit
between 15°C and 32°C.
FAQ'S
• Ensure the appliance and water tank are clean and dry before storing.
• To store your product out of season we recommend using the
original box or similar size box.
• Store in a safe, clean and dry place when not in use.
STORAGE
AT822626MUK Rev1 IM.indd 21AT822626MUK Rev1 IM.indd 21 31/07/2025 11:3731/07/2025 11:37
22
TROUBLESHOOTING
Problem
Front louvres
do not open.
Dehumidier does
not extract water.
Appliance does
not operate.
Louvre motor
is blocked.
Is the unit set to a
humidity level lower
than the one in the
room?
Is the temperature
too low for water
extraction to be
ecient?
Is any inlet or outlet
grille obstructed?
Is the appliance
too close to a wall/
obstruction.
Is the plug properly
inserted in the mains
outlet?
Does the fuse
need changing?
Is the mains
outlet faulty?
Is the tank full
indicator lit blue?
Check if anything is blocking the
louvre. Try to move the louvres
gently up and down while the
appliance is switched o.
Set the humidity level on the
humidistat below current humidity
reading.
Increase temperature in the room
or reposition the appliance.
Remove obstructions and restart
the appliance. Ensure a distance
of at least 20cm between the
appliance & walls.
Insert the plug into the socket
and turn the switch on.
Replace the fuse in the plug with a
fuse of the same rating as originally
tted.
Try a dierent appliance in
the socket.
Tank full, float displaced or tank
not properly inserted. Empty tank,
check float and make sure tank is
properly inserted in the appliance.
SolutionPossible Cause
AT822626MUK Rev1 IM.indd 22AT822626MUK Rev1 IM.indd 22 31/07/2025 11:3731/07/2025 11:37
23
TROUBLESHOOTING
Problem
Airflow seems weak.
E8.
Defrost light is on
and the appliance
stops regularly.
Water tank full light
is illuminated.
Unit is noisy
during operation.
E3 or E4.
E1 or E2.
E5 or E6.
Is lter dirty?
DC motor error.
Unit is defrosting.
Water tank full is
full or is not tted
correctly.
Is the appliance on
an uneven surface?
Humidity
sensor error.
Temperature
sensor error.
Abnormal coil sensor
temperature or
current.
Is the lter dirty?
Clean the lters regularly. Follow
instructions in the Care and
Cleaning section.
Switch o and unplug the
appliance. Allow it to stand for
30 minutes before using it again.
Switch o and unplug the
appliance. Allow it to stand for
30 minutes before using it again.
Empty the water tank and ret
to the appliance.
Place on rm, flat horizontal
surface.
Use the appliance within the
suggested humidity range.
Use the appliance within the
suggested temperature range.
Switch o and unplug the
appliance. Allow it to stand for
30 minutes before using it again.
Switch o and unplug the
appliance. Allow it to stand for
30 minutes before using it again.
Use the appliance within
the suggested humidity and
temperature range. Switch o
and unplug the appliance. Allow
it to stand for 30 minutes before
using it again.
Clean the lters regularly. Follow
instructions in the Care and
Cleaning section.
SolutionPossible Cause
AT822626MUK Rev1 IM.indd 23AT822626MUK Rev1 IM.indd 23 31/07/2025 11:3731/07/2025 11:37
24
SPARES
TECHNICAL DATA
Part Number Description Qty Per Product
Features Key
Number
33048
33049
33050
33052
33051
1
1
1
1
1
3
7
11
9
6a
Water Tank
with handle
Air Inlet Cover
with mesh lter
Continuous
Drainage Pipe
Continuous
Drainage Port Cap
Hepa Filter
Model No.: 822626 822751
25L/Day (30°C RH80%) 30L/Day (30°C RH80%)
14L/Day (26.7°C RH60%) 18L/Day (26.7°C RH60%)
Rated Voltage: AC 220-240V AC 220-240V
Rated Frequency: 50Hz 50Hz
Max power input: 400W 500W
Rated Input power: 295W 380W
Tank Capacity: 5L 5L
Air Volume: 210m³/h 210m³/h
Noise Level: 42dB(A) 43dB(A)
Refrigerant: R290/90g R290/95g
Net weight: 15.2kg 15.6kg
Suction pressure: 0.7MPa 0.7Mpa
Discharge pressure: 3.2MPa 3.2Mpa
Dehumidify
Capacity:
AT822626MUK Rev1 IM.indd 24AT822626MUK Rev1 IM.indd 24 31/07/2025 11:3731/07/2025 11:37
25
WARNING: The appliance should be stored in a well-ventilated room.
The area of the room should be equal to the room area required for
maintenance.
Warning: Appliances should be stored in rooms where there is no
continuous burning re (such as ignited gas appliances) and ignition
sources (such as electric heaters at work).
• All operators or refrigeration circuit maintenance personnel
should obtain a valid certicate issued by an industry-approved
assessment agency to determine their qualication for safe
disposal of refrigerants as required by the industry-approved
assessment specication.
• The maintenance and repair of the equipment can only be carried
out according to the method recommended by the equipment
manufacturer. If other professionals are required to assist in
the maintenance and repair of the equipment they should be
supervised by personnel qualied to use flammable refrigerants.
Inspection of the Site:
• Prior to servicing with flammable refrigerants, a safety inspection
must be performed to ensure that the risk of re is minimized. When
servicing the refrigeration system, the following precautions should
be observed before handling the system.
Operating Procedure:
• Work should be performed under controlled procedures to ensure
that the risk caused by combustible gases or vapors during
operations is lowest.
PRODUCT REPAIRS
AT822626MUK Rev1 IM.indd 25AT822626MUK Rev1 IM.indd 25 31/07/2025 11:3731/07/2025 11:37
26
General Working Area:
• All maintenance personnel and other personnel in the work area
should be aware of the nature of the work being performed and
should work within a conned space that should be avoided. The
work area should be properly segregated to ensure the safety
of working conditions in the work area by controlling combustible
materials.
• Check if the Refrigerant is Present:
• Pre-operation and during operation should be monitored in
the area using an appropriate refrigerant monitor to ensure
that the technicians are aware of the presence of potentially
flammable gases and that all leak detection equipment is suitable
for flammable refrigerants, such as: no spark, fully enclosed or
intrinsically safe.
Fire Extinguisher Placement:
• When performing heat-processing operations on the refrigeration
system or related components, the appropriate re extinguisher
should be located nearby and the refrigerant injection area should
be equipped with a dry powder or carbon dioxide re extinguisher.
Prohibition of Fire:
• When working in connection with exposed pipelines that contain
or have contained flammable refrigerants, all forms of ignition
sources that may cause re or danger to the station should not be
used. All sources of ignition, including smoking, are combustible. The
agent may be released into the surrounding environment. It must
be far away from the area where it is installed, repaired, relocated
or disposed. Before starting work, the surrounding environment of
the equipment must be inspected strictly to ensure that there is no
danger of flammability or re, should set up the mark of
"No Smoking".
PRODUCT REPAIRS
AT822626MUK Rev1 IM.indd 26AT822626MUK Rev1 IM.indd 26 31/07/2025 11:3731/07/2025 11:37
27
PRODUCT REPAIRS
Ventilated Area:
• Ensure that the work area is open or fully ventilated before opening
the system or performing hot work operations. Ventilation should be
maintained during operation. Ventilation will safely dilute the leaked
refrigerant and quickly release it into the atmosphere.
Inspection of Refrigeration Equipment:
If you replace electrical components, these electrical components
should be installed in accordance with the day-to-day and night-time
operating regulations. At all times, the manufacturer's maintenance and
repair guides should be followed. If in doubt consult the manufacturer's
technical department. The following inspection items apply to the
installation of flammable refrigerant appliances:
• The charge should be determined according to the size of the room
containing the refrigerant containing components.
• Ventilation equipment should operate normally and vents should be
free from obstructions.
• If an inter-refrigeration, refrigeration cycle is used, check the
presence of refrigerant in the secondary circuit.
• The logo on the appliance should be clearly visible. Marks and
symbols that are indelible.
• Refrigerating lines or electrical components should not be installed
in environments that contain possible housing contact elements,
unless the electrical components are made of corrosion-resistant
materials or suitable corrosion protection measures are taken.
AT822626MUK Rev1 IM.indd 27AT822626MUK Rev1 IM.indd 27 31/07/2025 11:3731/07/2025 11:37
28
Inspection of Electrical Installations:
• The repair and maintenance of electrical components should
include initial safety inspections and component inspection
procedures. If there is a defect that compromises safety, the
appliance power supply must be de-energised until the defect is
properly disposed of. If the defect cannot be completely eliminated
in the end, and must continue to operate, then appropriate
temporary solutions should be taken, report the situation to the
owner of the appliance, and warn all relevant personnel.
• The initial security check should include:
Capacitor discharge should be performed in a safe manner to
avoid sparks.
No exposed electrical components and wiring during lling,
recycling and cleaning of the system.
Continuity of grounding.
Maintenance of Sealing Elements:
When repairing close components, disconnect the power supply of the
device before opening the sealed cover. If there is power supply during
the maintenance process, uninterrupted leak detection should be
performed on the most dangerous parts to prevent potential dangerous
situations from occurring.
• In the following maintenance of electrical components, special care
shall be taken not to cause maintenance methods aecting the
degree of protection of the enclosure. Improper maintenance may
result in damage to the cables, excessive connection, improper
installation of the terminals, damage to the seals and sealing. Cover
installation errors and other hazards. Ensure the installation of the
equipment is safe and reliable.
• Ensure that the sealing or sealing material does not lose its eect
of preventing the entry of flammable gases due to aging, and
the replacement parts should comply with the manufacturer's
specications.
PRODUCT REPAIRS
AT822626MUK Rev1 IM.indd 28AT822626MUK Rev1 IM.indd 28 31/07/2025 11:3731/07/2025 11:37
29
PRODUCT REPAIRS
• Note: The use of silicon-containing sealants may reduce the
detection capabilities of leak detection equipment, intrinsically safe
components do not have to be isolated before operation.
Intrinsically Safe Component Maintenance:
• If it cannot be ensured that the appliance does not exceed the
limits of the allowable voltage and current during use, no permanent
inductance or capacitive load must be used in the circuit. The
essential Ankh-type element is the only element that can continue
to operate within the flammable gas. The test instrument should be
set in the correct gear.
• If the replacement component can only use components specied
by the manufacturer, other components may cause the refrigerant
that is leaking in the air to catch re.
Cable:
• Check the cable for wear, corrosion, overpressure, vibration, sharp
edges or other adverse environmental eects. This inspection
should also consider the impact of aging or the continuous vibration
of the compressor and fan on the cable manufacturing.
Inspection of Flammable Refrigerants:
• Inspection of refrigerant leakage should be done in an environment
where there is no potential source of ignition and should not be
detected using a halogen probe (or any other detector using an
open flame).
AT822626MUK Rev1 IM.indd 29AT822626MUK Rev1 IM.indd 29 31/07/2025 11:3731/07/2025 11:37
30
PRODUCT REPAIRS
Leak Detection Method:
For systems containing flammable refrigerants, the following methods
for detecting leaks are acceptable:
• Electronic leak detectors can be used for the detection of
flammable refrigerants, but the sensitivity may not be sucient
or may require recalibration (the instrument calibration should be
performed in a refrigerant-free environment) to ensure that the
leak detector does not become a potential ignition source, and
applies to the measured refrigerant the leak detector should be
set to the lowest flammable concentration of the refrigerant (in
percent), calibrated with the used refrigerant and adjusted to the
appropriate gas concentration test range (max.25%).
• The leak detection fluid is suitable for most refrigerants, but do not
use oxygenated solvents to prevent oxygen and refrigerant from
reacting and corroding the copper pipeline.
• If leakage is suspected, all open flames should be removed from the
site or extinguished.
• If a leak occurs where welding is required, all the refrigerant should
be recovered, or the refrigerant should be completely isolated away
from the leak (using shut-o valves). Before welding and during
welding, use oxygen-free. Nitrogen (OFN) puries the entire system.
AT822626MUK Rev1 IM.indd 30AT822626MUK Rev1 IM.indd 30 31/07/2025 11:3731/07/2025 11:37
31
PRODUCT REPAIRS
Remove and Vacuum:
• When performing maintenance or other operations on the
refrigeration circuit routine procedures should be followed, but the
flammability of the refrigerant should also be considered. Follow
these procedures:
- Clear refrigerant.
- Purge the line with inert gas.
- Vacuum.
- Purge the pipe again with inert gas.
- Cutting pipelines or welding.
• Refrigerant should be recycled to a suitable storage tank. The
system should be purged with oxygen-free nitrogen to ensure
safety. This process may need to be repeated several times. This
operation must not be performed with compressed air or oxygen.
• In the purging process, the system is lled with oxygen-free nitrogen
to reach the working pressure under the vacuum state, and then
the oxygen-free nitrogen is discharged to the atmosphere. Finally,
the system is evacuated to a vacuum, and the process is repeated
until the refrigerant in the system is completely removed. After
the last charge of anaerobic nitrogen, the gas is released to
atmospheric pressure and the system can then be welded. Such as
pipe welding operations, the above operation is very necessary.
• Make sure there are no ignition sources near the outlet of the
vacuum pump and that it is well ventilated.
AT822626MUK Rev1 IM.indd 31AT822626MUK Rev1 IM.indd 31 31/07/2025 11:3731/07/2025 11:37
32
PRODUCT REPAIRS
Charge the Refrigerant Program:
As a supplement to regular procedures, add the following requirements:
• Ensure that when using the refrigerant charging equipment, no
inter-contamination between dierent refrigerants will occur,
and the piping for charging the refrigerant should be as short as
possible to reduce the residual amount of refrigerant therein.
• Tanks should be kept vertically upward.
• Ensure that the cooling system has been grounded before lling the
refrigerant.
• Label the system after lling (or when it has not been completed).
• Must pay attention not to overcharge.
The pressure test was performed with oxygen-free nitrogen before
recharging the system. After the ling was completed, a leak test was
performed before the test operation. A leak test should be conducted
when leaving the area.
AT822626MUK Rev1 IM.indd 32AT822626MUK Rev1 IM.indd 32 31/07/2025 11:3731/07/2025 11:37
33
PRODUCT REPAIRS
Retired:
Before proceeding with this procedure, technicians should be fully
familiar with the equipment and all its features and recommend the
practice of safe recovery of refrigerants. To recycle the recovered
refrigerant, analyse the refrigerant and oil samples before performing
the work.
Before testing, ensure that you have the necessary power supply.
A. Familiar with the equipment and operation.
B. Disconnect the power.
C. Before proceeding with this procedure, ensure that:
- If necessary, mechanical operating equipment should facilitate the
operation of refrigerant storage tanks.
- All personal protective equipment is eective and can be used
correctly.
- The entire recycling process should be conducted under the
guidance of qualied personnel. Recycling equipment and storage
tanks should meet the appropriate standards.
D. lf possible, vacuum the cooling system.
E. lf the vacuum state is not reached, extraction should be performed
from multiple places to extract the refrigerant in each part of the
system.
F. Ensure that the volume of the tank is sucient before beginning
recovery.
G. Start and operate the recycling equipment according to the
manufacturer's operating instructions.
AT822626MUK Rev1 IM.indd 33AT822626MUK Rev1 IM.indd 33 31/07/2025 11:3731/07/2025 11:37
34
PRODUCT REPAIRS
H. Do not talk about tanks being overlled. (Liquid injection volume does
not exceed 80% of the tank volume.)
I. The maximum working pressure of the tank must not be exceeded
even for a short period of time.
J. After the tank lling is completed and the working process is
completed, ensure that the tank and equipment are quickly removed
and all shut o valves on the equipment are closed.
K. The recovered refrigerant must not be injected into another
refrigeration system until it has been puried and tested.
AT822626MUK Rev1 IM.indd 34AT822626MUK Rev1 IM.indd 34 31/07/2025 11:3731/07/2025 11:37
35
PRODUCT REPAIRS
Recycling:
The refrigerant in the system needs to be removed during maintenance
or scrap. It is recommended that the refrigerant be completely removed.
When loading the refrigerant into the tank, use only a dedicated
refrigerant tank. It is necessary to ensure that the capacity of the tank
is compatible with the amount of refrigeration injection in the entire
system. All are tanks intended to be used for refrigerant recovery and
are identied with this refrigerant (i.e. refrigerant recovery dedicated
tanks). Tanks should be tted with pressure relief and shut-o valves
and in good condition. If possible, empty storage tanks should be
evacuated and kept at room temperature before use.
The recovery equipment should maintain a good working condition,
and the equipment operation instructions should be provided for
easy reference. The equipment should be suitable for the recovery of
flammable refrigerants. In addition, there must be qualied weighing
instruments that can be used normally. The hose should be connected
using a leak free, releasable joint and keep it in good condition. Before
using the recycling equipment, check whether it is in good condition,
whether it is well maintained, and all the electrical components are
sealed to prevent the re from leaking once the refrigerant leaks. If
in doubt, consult the manufacturer. Recovered refrigerant should be
contained in the used storage tank, attached with shipping instructions
and returned to the chiller manufacturer. Do not mix the refrigerant in
the recovery equipment, especially the storage tank.
If you remove the compressor or remove the compressor oil make sure
that the compressor is evacuated to a suitable level to ensure that
there is no residual flammable refrigerant in the lubricant. Evacuation
is performed before the compressor returns to the supplier. Only use
electric heating to heat the compressor housing to speed up this
process. When the oil is discharged from the system, safety should be
ensured.
AT822626MUK Rev1 IM.indd 35AT822626MUK Rev1 IM.indd 35 31/07/2025 11:3731/07/2025 11:37
36
CONTACT US
If you are having a problem with your appliance, please contact our
Helpline, as we are more likely to be able to help than the store you
purchased the item from. Please have the product name, model number
and serial number to hand when you contact us to help us deal with
your enquiry quicker.
email: hello@morphyrichards.co.uk
www.morphyrichards.co.uk
For electrical products sold within the European
Community, at the end of the electrical products useful
life, it should not be disposed of with household waste.
Please recycle where facilities exist.
Check with your Local Authority or retailer for recycling
advice in your country.
PRODUCT RECYCLING
AT822626MUK Rev1 IM.indd 36AT822626MUK Rev1 IM.indd 36 31/07/2025 11:3731/07/2025 11:37
37
Your standard 2 year guarantee is extended for an additional 1 year
when you register the product within 28 days of purchase with Morphy
Richards. If you do not register the product with Morphy Richards within
28 days, your product is guaranteed for 2 years.
To validate your 3 year guarantee,
scan the QR code or register online
at www.morphyrichards.co.uk
N.B. Each qualifying product needs to be registered with Morphy
Richards individually. Please note that the 2 year guarantee is only
available in the UK. Please refer to the 2 year guarantee for more
information.
YOUR 2 YEAR GUARANTEE
It is important to retain the retailer’s receipt as proof of purchase.
Staple your receipt to the back cover for future reference.
Please quote the following information if the product develops a fault.
These numbers can be found on the base of the product.
Model no.
Serial no.
All Morphy Richards products are individually tested before leaving the
factory. In the unlikely event of any appliance proving to be faulty within
28 days of purchase, it should be returned to the place of purchase
for it to be replaced. If the fault develops after 28 days and within 24
months of original purchase, you should contact the Helpline quoting
Model number and Serial number on the product, or write to Morphy
Richards at the address shown. You may be asked to return a copy of
proof of purchase.
Subject to the exclusions set out on the next page (see Exclusions), the
faulty appliance will then be repaired or replaced as appropriate and
dispatched usually within 7 working days of receipt.
If, for any reason, this item is replaced or repaired during the 2 year
REGISTERING YOUR 3 YEAR GUARANTEE
AT822626MUK Rev1 IM.indd 37AT822626MUK Rev1 IM.indd 37 31/07/2025 11:3731/07/2025 11:37
38
guarantee period, the guarantee on the new item will be calculated
from the original purchase date. Therefore it is vital to retain your
original till receipt or invoice to indicate the date of initial purchase.
To qualify for the 2 year guarantee, the appliance must have been used
according to the instructions supplied.
The appliance is intended for domestic use only. Misuse or use for
commercial or any other purpose will render the guarantee invalid.
Exclusions
Morphy Richards shall not be liable to replace or repair the goods under
the terms of the guarantee where:
1. The fault has been caused or is attributable to accidental use,
misuse, negligent use or used contrary to the manufacturer’s
recommendations or where the fault has been caused by power
surges or damage caused in transit.
2. The appliance has been used on a voltage supply other than that
stamped on the products.
3. Repairs have been attempted by persons other than our service
sta (or authorised dealer).
4. The appliance has been used for hire purposes or non domestic use.
5. The appliance is second hand or refurbished.
6. Morphy Richards reserves the right not to carry out any type of
servicing under the guarantee at its discretion.
This guarantee does not confer any rights other than those expressly
set out above and does not cover any claims for consequential loss
or damage. This guarantee is oered as an additional benet and
does not aect your statutory rights as a consumer. Morphy Richards
products are intended for household use only. See usage limitations
within the location safety instructions.
Disclaimer
Morphy Richards has a policy of continuous improvement in product
quality and design. The company, therefore reserves the right to
change the specication of its models at any time.
REGISTERING YOUR 3 YEAR GUARANTEE
AT822626MUK Rev1 IM.indd 38AT822626MUK Rev1 IM.indd 38 31/07/2025 11:3731/07/2025 11:37
39
NOTES
AT822626MUK Rev1 IM.indd 39AT822626MUK Rev1 IM.indd 39 31/07/2025 11:3731/07/2025 11:37
morphyrichards.co.uk
AT822626MUK Rev1
@morphyrichardsuk #loveyourmorphy
Morphy Richards
9 Cabot Lane, Poole, Dorset, BH17 7BY, UK
AT822626MUK Rev1 IM.indd 40AT822626MUK Rev1 IM.indd 40 31/07/2025 11:3731/07/2025 11:37