INSTALLATION GUIDE
Venda
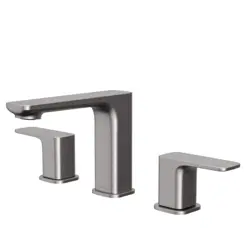
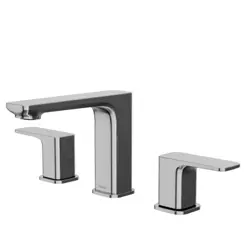
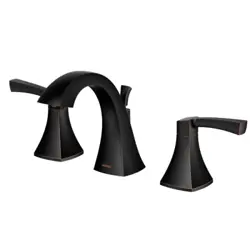
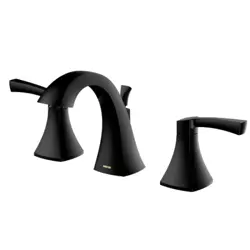
Models: KBF514C
KBF514SS
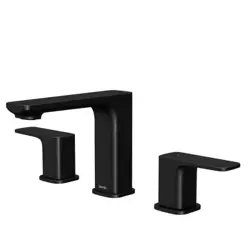
KBF514MB
Karran USA Tel: 866.452.7726 www.karran.com info@karran.com
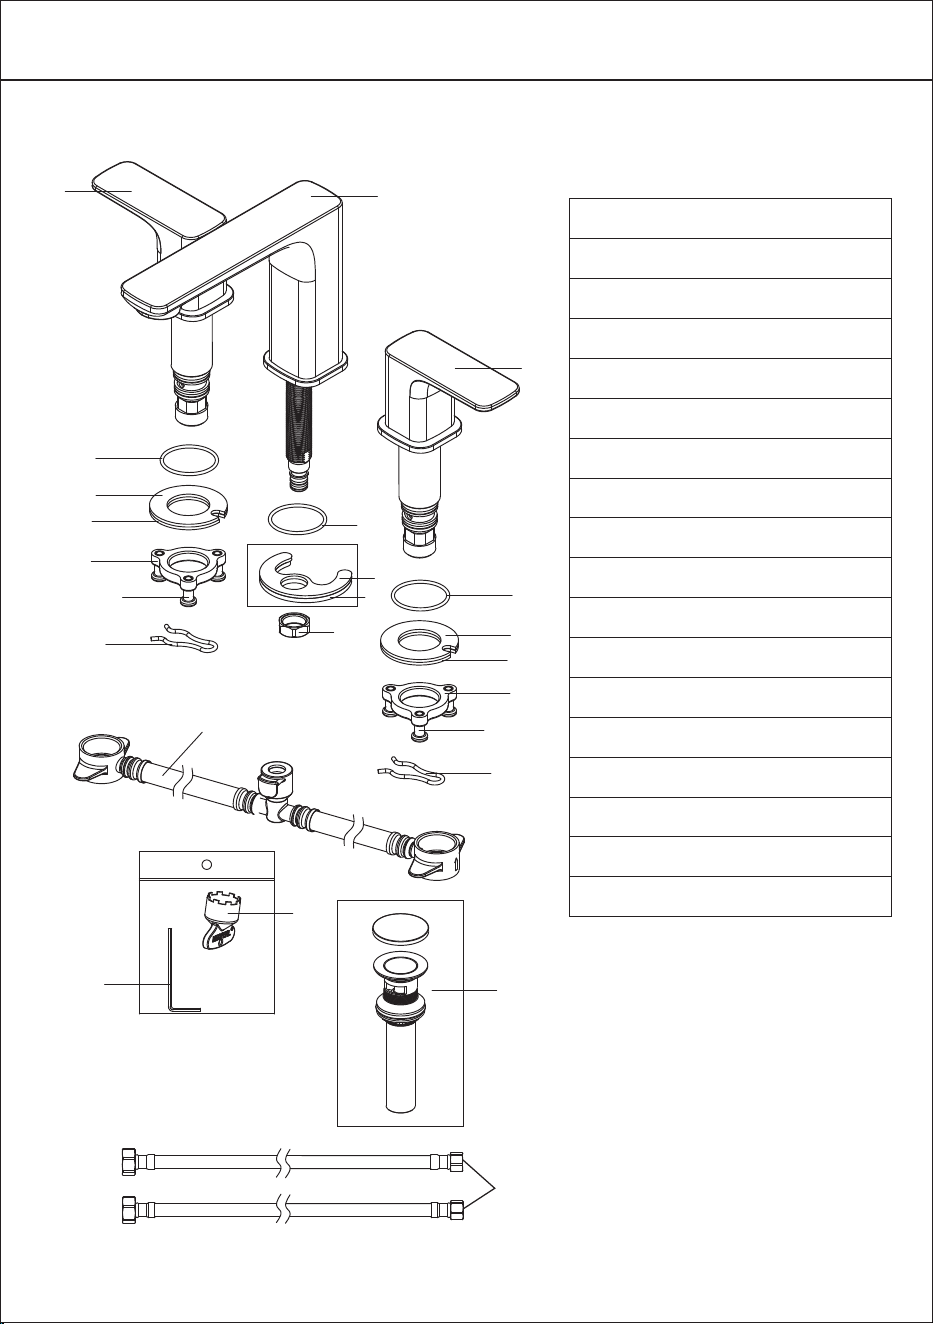
1. Handle
2. O-rings
3. Rubber Washers
4. Clamps
5. Mounting Nuts
6. Mounting Screws
7. Clamp springs
8. Faucet Body
9. O-ring
10. Rubber Washer
11. Clamp
12. Nut
13. Handle
14. Aerator Wrench
15. Allen Key
16. Quick Connect
17. Pop-up Drain
18. Supply Lines
PARTS SHEET KBF514**
1
14
15
1
2
3
4
5
6
7
8
9
10
11
12
13
2
3
4
5
6
7
16
17
18
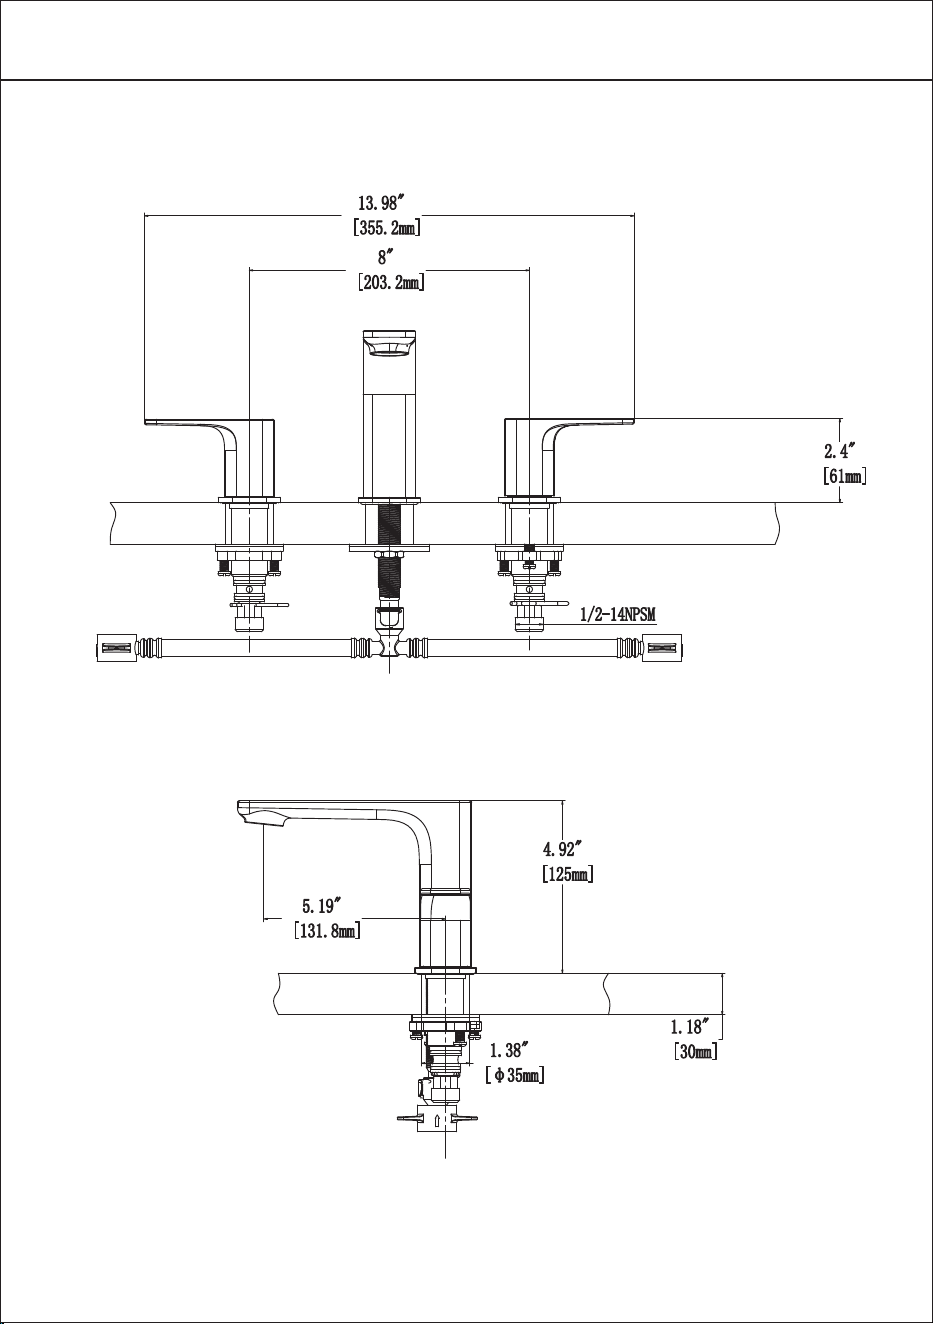
TECHNICAL DRAWING
2
Hot
1
2
3
4
5
6
13
2
3
4
5
6
Cold
INSTALLATION GUIDE
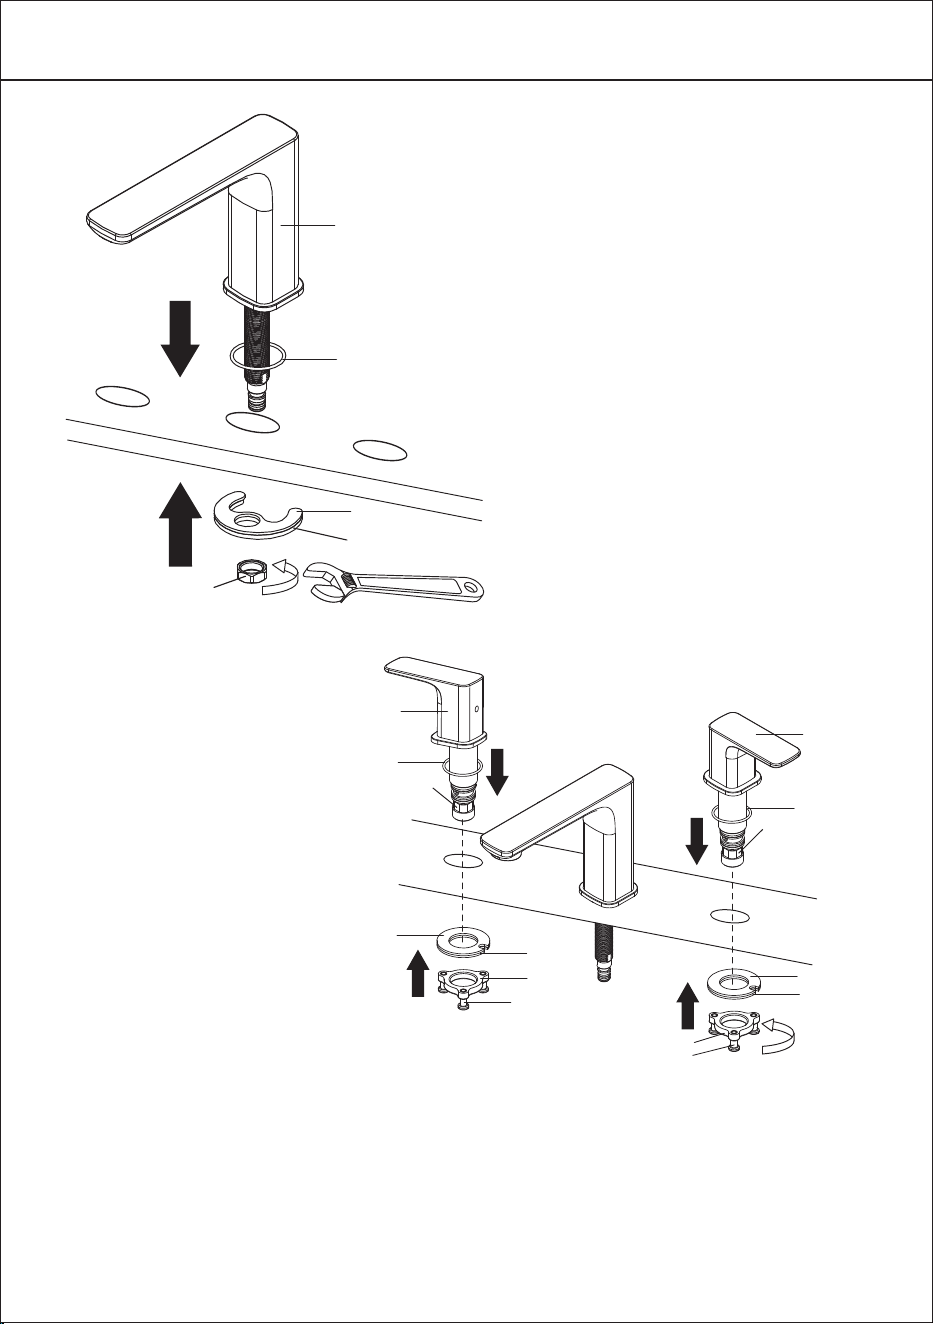
STEP 1
STEP 2
3
8
9
10
11
12
1. Position the o-ring and faucet
body in the installation surface
as shown and secure it with the
rubber washer
and tighten the nut with
adjustable wrench.
(#9)
(#8)
(#10) and clamp (#11)
(#12)
2.Position the o-ring (#2) and handle mounting (#1,#13) in
installation surface as shown and secure it with kit (#3,#4,#5,#6)
and tighten the screws with screwdriver. Repeat the above steps
for the other handle.
INSTALLATION GUIDE
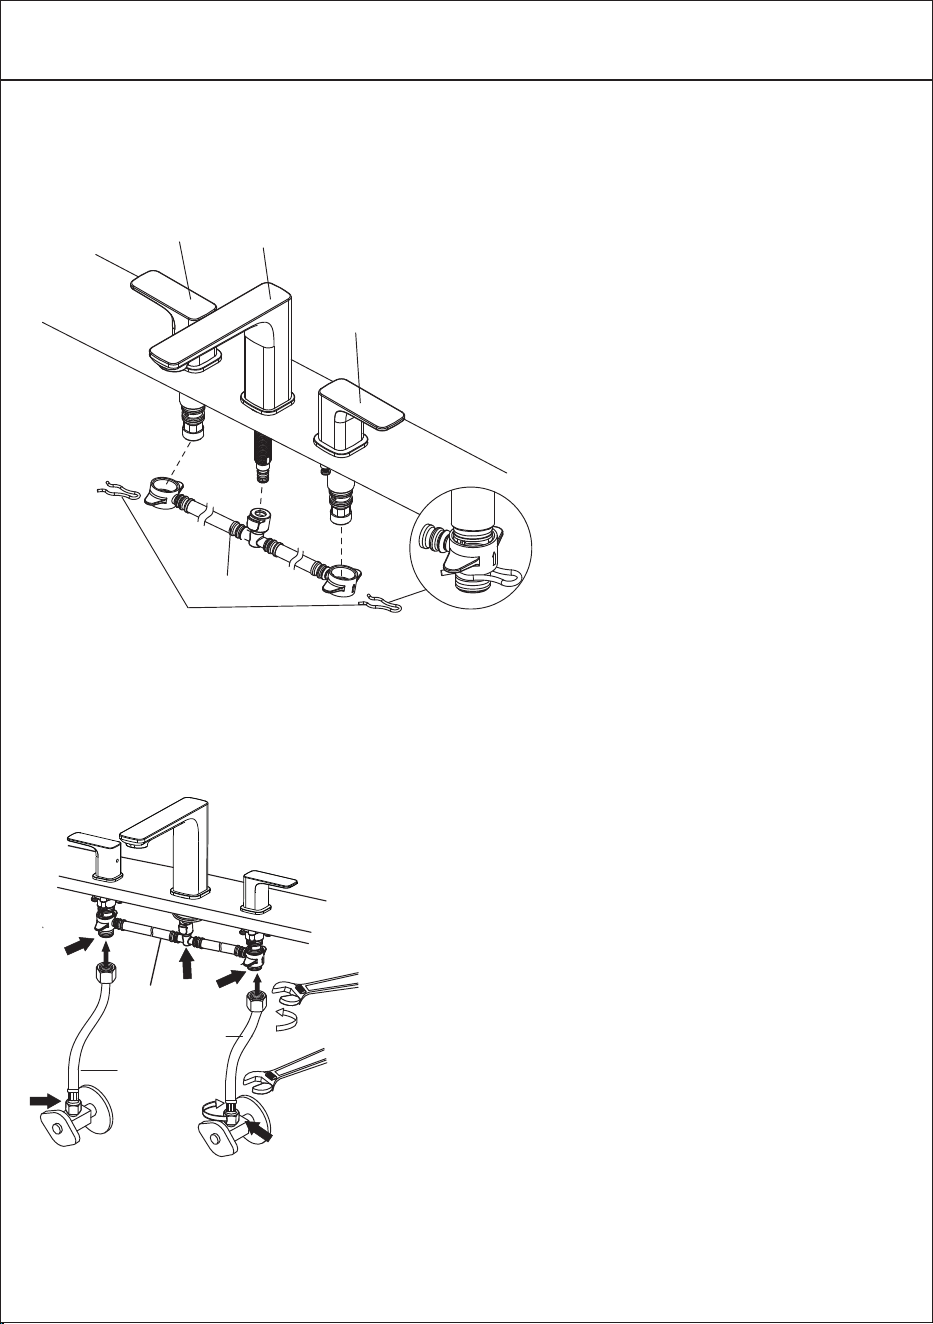
STEP 3
STEP 4
4
1
8
13
7
16
3. Connect the “quick connect” hose (# )
to the handle (#1 and #13) and faucet
body (#8). You will hear a “click” when
it has been successfully connected.
Use the provided clamps (#7) to secure
the ends of the “quick connect” hose.
16
HOT
COLD
7
4.Connect the water supply lines to
the bottom ends of the “quick connect”
hose (#7) and to the hot and cold water
supply valves. Secure and tighten with
an adjustable wrench.
Caution: Be careful not to mix up the
hot and cold supply lines.
Check all connections (shown with
arrows in the image) for leaks.
Re-tighten if necessary. Do not over
tighten!
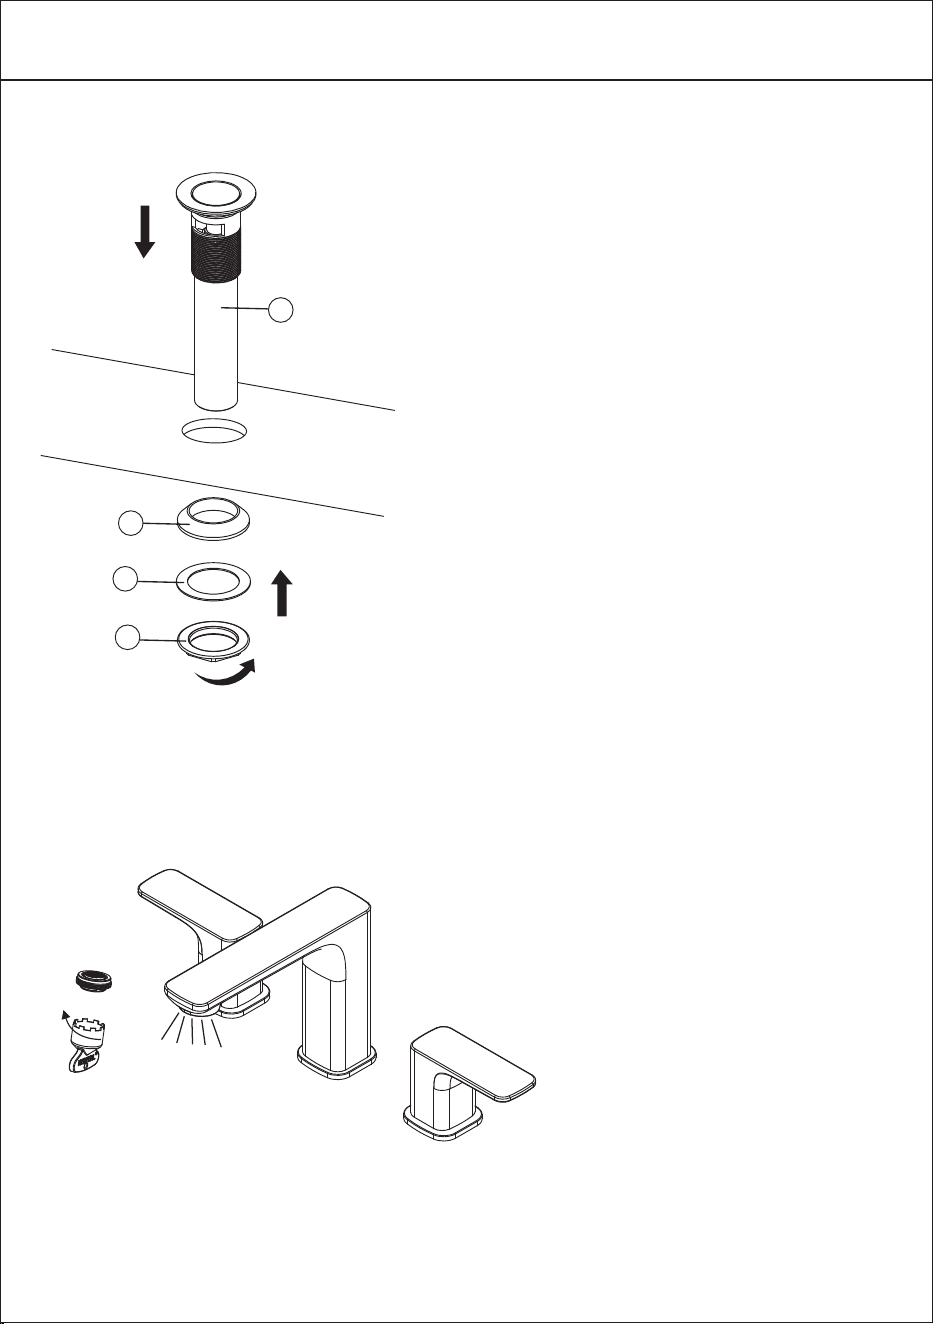
INSTALLATION GUIDE
5
STEP 6
6. Remove the aerator with an aerator
wrench (a quarter or flat surface tool
could also work). Turn the faucet
handle all the way on, turn on the hot
and cold water supply and flush water
lines for one minute. Reinstall the
aerator with an aerator wrench.
STEP 5
5. From the top of the drain hole,place
the drain ① through the installation
hole. From under the drain hole,
install the thick washer ②,washer ③
and nut ④ by hand twisting on to the
tail pipe of the drain. Then, install the
tail pipe to the wall plumbing.Use of
plumbers putty or silicone is
recommended to seal drain ① to top
side of bowl.
1
2
3
4
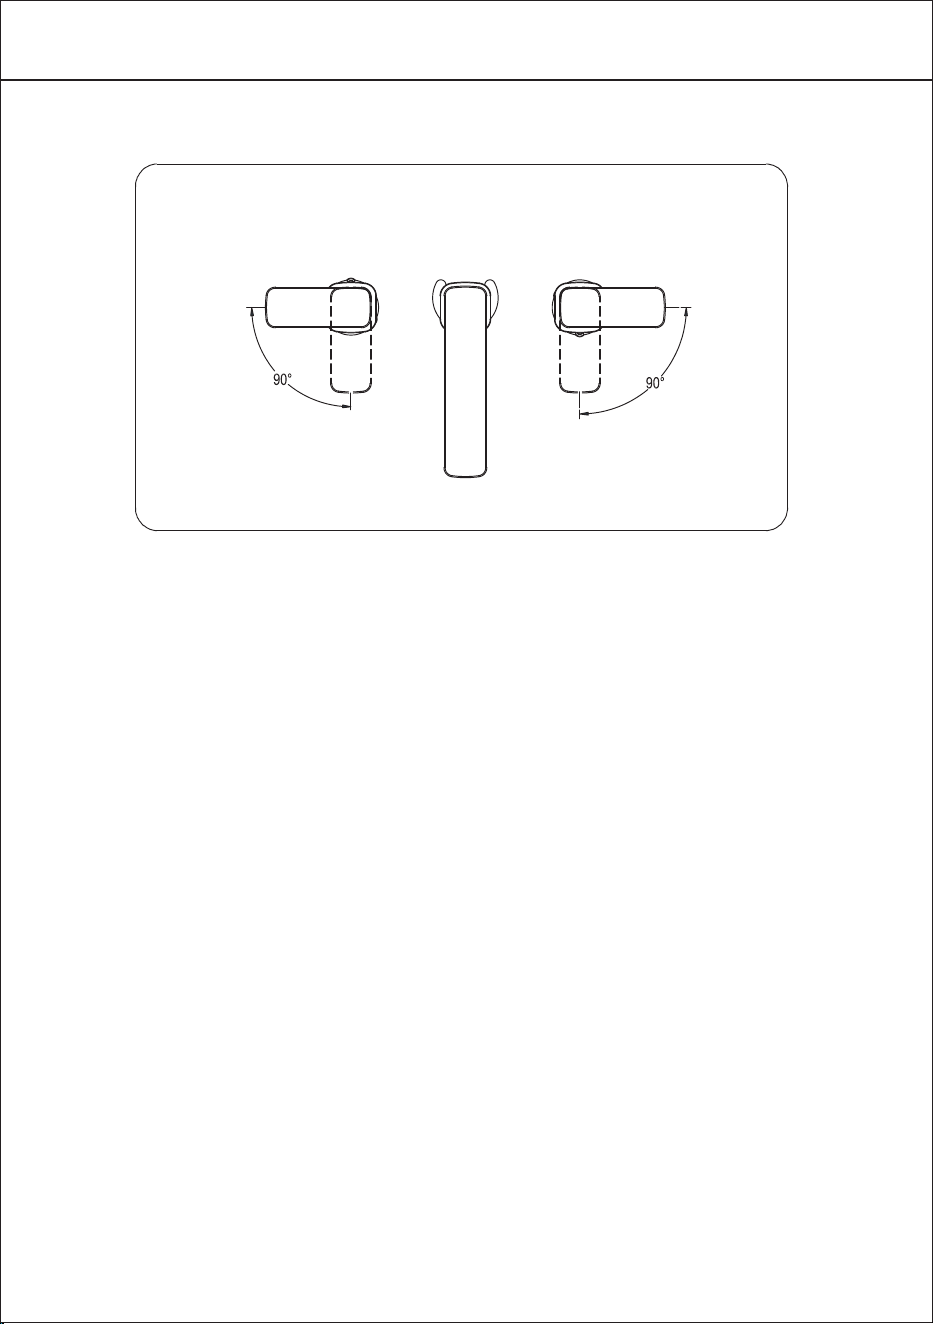
OPERATION
How to operate the handle:
6
Left
Hot water
Right
Cold water
Close Close
Open
Open
1
2
3
4
5
6
7
8
9
10
11
12
13
14
15
16
17
18
19
20
21
22
23
24
25
26
27
28
29
30
31
32
33
34
35
36
37
No. Description Finish/Color Item No.
80N85050
8EM5X8
50P24VV72
51P24VV72
8J29X2A
5YG1B398
8J40X2
81P24T72
K5B2320DQ
8JG94015
8J14X2A
50T94019DQ
8J23X2A
8J22X2A
81N94015
80N94015
8NM94015
8RM6X15
81T94015
50T1B39801DQ
80M24123NP17
8EM4X6
5DZ1B398
8J42X25
8J16X2A
8JG18U24DQ
8J11X2A
81N18U24
80N18U24
8SJ56226
GKJ390HM0
K5B232ZDQ
80P00013
8BS25
8NM16X15
Indexs
Screws
Handles
Handle Flanges
Lock Nuts
O-rings
Adapters
Cartridge
O-rings
O-rings
O-rings
O-rings
Clamps
Rubber Washers
Faucet Body
Base
O-ring
O-ring
O-rings
Clamp Springs
Plastic Lock Ring
Cartridge
Aerator Wrench
Allen Key
Pop-up Drain
Supply Lines
Nut
Clamp
Rubber Washer
Aerator
Screw
Mounting Nuts
Mounting Screws
C,SS,MB
C,SS,MB
C,SS,MB
C,SS,MB
7
REPLACEMENT PARTS
*Denotes faucet component color options:
C
SS - Stainless Steel
MB - Matte Black
- Chrome
Inlets
Underbodys
Inlet
34
35
3
4
5
6
7
8
9
10
11
12
13
14
15
16
17
18
19
1
2
21
20
22
23
24
25
26
27
28
29
30
33
31
32
36
37
Connection Hose
C21026
G08603SR